ECU MITSUBISHI MIRAGE G4 2018 (in English) Service Manual
[x] Cancel search | Manufacturer: MITSUBISHI, Model Year: 2018, Model line: MIRAGE G4, Model: MITSUBISHI MIRAGE G4 2018Pages: 263, PDF Size: 37.9 MB
Page 149 of 263
12 V power outlets 5-86 Features and controls
5
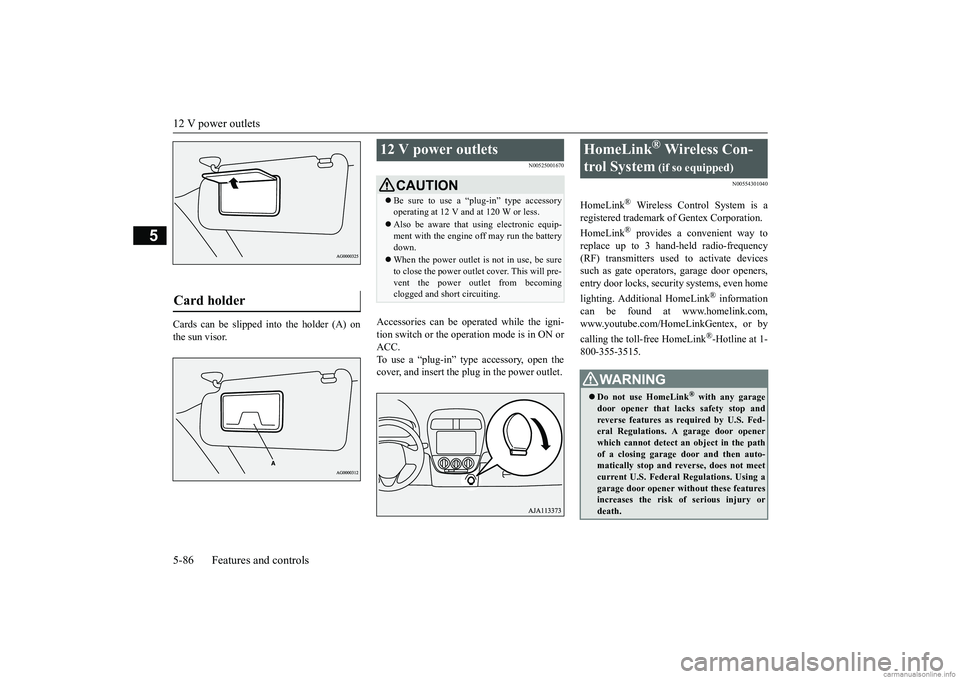
Cards can be slipped
into the holder (A) on
the sun visor.
N00525001670
Accessories can be operated while the igni-tion switch or the operation mode is in ON or ACC. To use a “plug-in” type accessory, open thecover, and insert the plug in the power outlet.
N00554301040
HomeLink
® Wireless Contro
l System is a
registered trademark of Gentex Corporation. HomeLink
® provides a convenient way to
replace up to 3 hand-held radio-frequency (RF) transmitters used to activate devicessuch as gate operators
, garage door openers,
entry door locks, security systems, even home lighting. Additional HomeLink
® information
can be found at www.homelink.com, www.youtube.com/HomeLinkGentex, or by calling the toll-free HomeLink
®-Hotline at 1-
800-355-3515.
Card holder
12 V power outlets
CAUTION Be sure to use a “plug-in” type accessory operating at 12 V and at 120 W or less. Also be aware that using electronic equip- ment with the engine
off may run the battery
down. When the power outlet is not in use, be sure to close the power outlet cover. This will pre- vent the power outlet from becoming clogged and short circuiting.
HomeLink
® Wireless Con-
trol System
(if so equipped)
WA R N I N G Do not use HomeLink
® with any garage
door opener that lacks safety stop and reverse features as required by U.S. Fed- eral Regulations.
A garage door opener
which cannot detect an object in the path of a closing garage d
oor and then auto-
matically stop and reverse, does not meetcurrent U.S. Federal Regulations. Using a garage door opener wi
thout these features
increases the risk of serious injury ordeath.
BK0249600US.book 86 ページ 2017年4月20日 木曜日 午後1時36分
Page 150 of 263
HomeLink® Wireless Control System (if so equipped)
Features and controls 5-87
5
N00584600029
Some garage door openers manufactured after 1995 have “rolling code protection”. To program a garage door openerequipped with “rolli
ng code protection”;
you will need to ac
cess the garage door
opener motor to press the motor’s “Learn”or “Smart” buttons.
For convenience, use
a ladder and another pe
rson to assist you.
It is recommended that a new battery be placed in the hand-held transmitter of the device being programmed to HomeLink
®
for quicker training and accurate trans- mission of the radio-frequency signal.
N00584700020
To program HomeLink
® to operate a garage
door, gate, or entry door opener, home oroffice lighting, you need to be at the same location as the device. 1. Press the HomeLink
® button that you
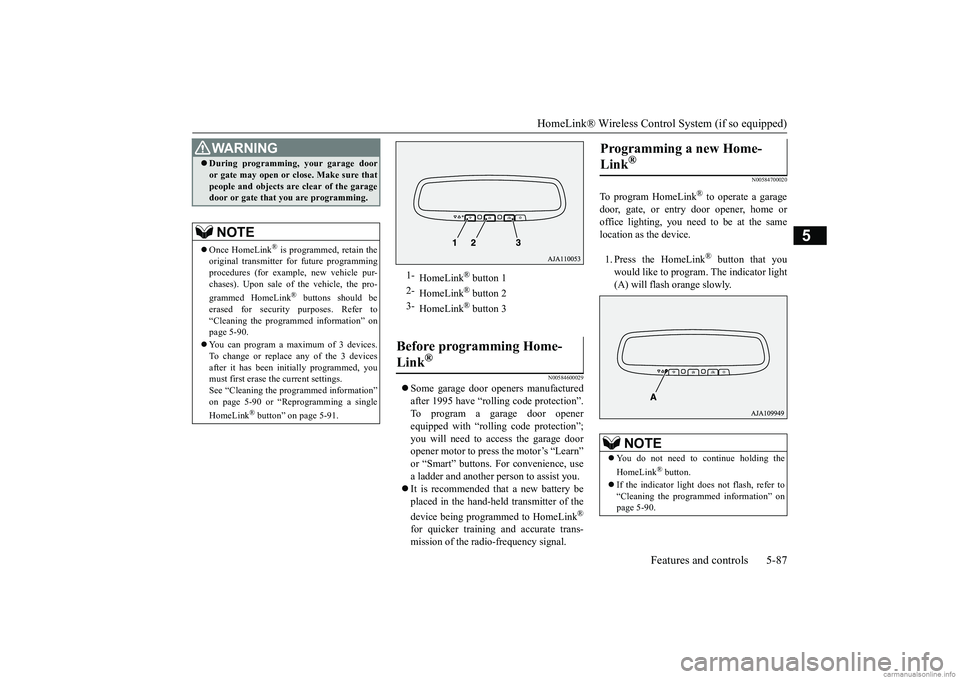
would like to program. The indicator light (A) will flash orange slowly.
During programming
, your garage door
or gate may open or close. Make sure thatpeople and objects are clear of the garagedoor or gate that you are programming.NOTE
Once HomeLink
® is programmed, retain the
original transmitter for future programming procedures (for example, new vehicle pur-chases). Upon sale of the vehicle, the pro- grammed HomeLink
® buttons should be
erased for security purposes. Refer to “Cleaning the programmed information” on page 5-90. You can program a ma
ximum of 3 devices.
To change or replace any of the 3 devicesafter it has been in
itially programmed, you
must first erase the current settings. See “Cleaning the programmed information”on page 5-90 or “Reprogramming a single HomeLink
® button” on page 5-91.
WA R N I N G
1-
HomeLink
® button 1
2-
HomeLink
® button 2
3-
HomeLink
® button 3
Before programming Home- Link
®
Programming a new Home- Link
®
NOTE
You do not need to continue holding the HomeLink
® button.
If the indicator light does not flash, refer to “Cleaning the programmed information” on page 5-90.
BK0249600US.book 87 ページ 2017年4月20日 木曜日 午後1時36分
Page 153 of 263
HomeLink® Wireless Control System (if so equipped) 5-90 Features and controls
5
3. Once the door has stopped, press and release the “Learn”
or “Smart” button on
the garage door opener (refer to your garage door opener owner’s manual for the location of the “Learn” button). Both the HomeLink
® garage door operation
indicators will fl
ash rapidly green upon
successful synchronization with the dooropener (within 5 seconds).
N00585000020
To operate, simply press and release the pro- grammed HomeLink
® button. Activation will
now occur for the trained device (i.e. garagedoor opener, gate operat
or, security system,
entry door lock, home/of
fice lighting, etc.).
For convenience, the hand-held transmitter ofthe device may also be
used at any time.
N00585200022
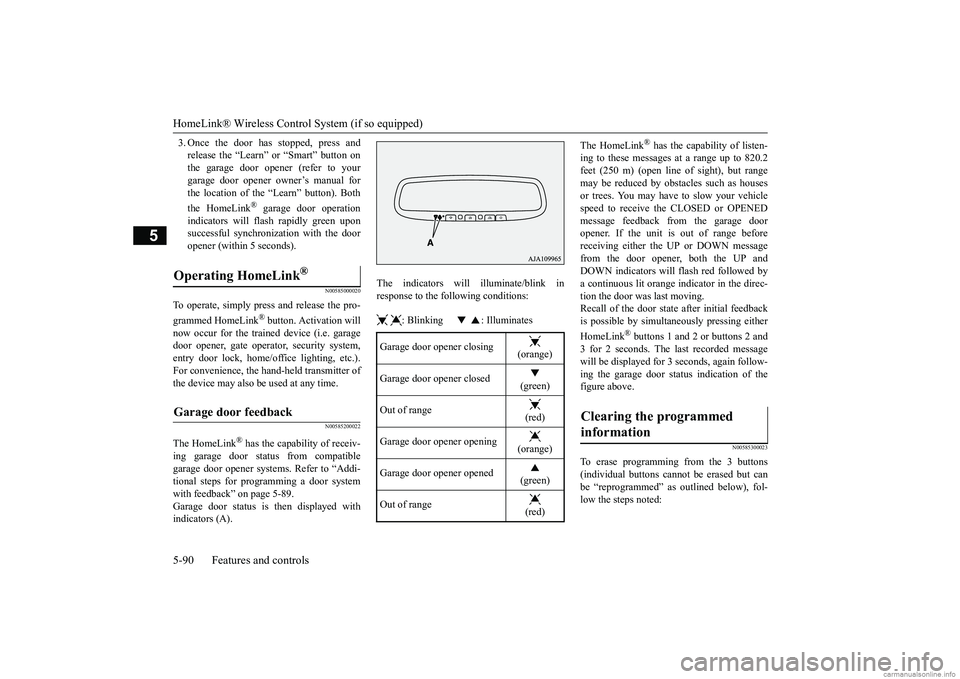
The HomeLink
® has the capability of receiv-
ing garage door status from compatible garage door opener systems. Refer to “Addi- tional steps for programming a door systemwith feedback” on page 5-89. Garage door status is then displayed with indicators (A).
The indicators will illuminate/blink in response to the following conditions: : Blinking : Illuminates
The HomeLink
® has the capability of listen-
ing to these messages at a range up to 820.2feet (250 m) (open line of sight), but range may be reduced by obst
acles such as houses
or trees. You may have to slow your vehiclespeed to receive the CLOSED or OPENED message feedback from the garage door opener. If the unit is out of range beforereceiving either the UP or DOWN message from the door opener, both the UP and DOWN indicators will
flash red followed by
a continuous lit orange indicator in the direc- tion the door was last moving.Recall of the door state after initial feedback is possible by simulta
neously pressing either
HomeLink
® buttons 1 and 2 or buttons 2 and
3 for 2 seconds. The la
st recorded message
will be displayed for 3 seconds, again follow- ing the garage door stat
us indication of the
figure above.
N00585300023
To erase programming from the 3 buttons (individual buttons cannot
be erased but can
be “reprogrammed” as
outlined below), fol-
low the steps noted:
Operating HomeLink
®
Garage door feedback
Garage door opener closing
(orange)
Garage door opener closed
(green)
Out of range
(red)
Garage door opener opening
(orange)
Garage door opener opened
(green)
Out of range
(red)
Clearing the programmed information
BK0249600US.book 90 ページ 2017年4月20日 木曜日 午後1時36分
Page 156 of 263
Cup holders
Features and controls 5-93
5
N00551501331
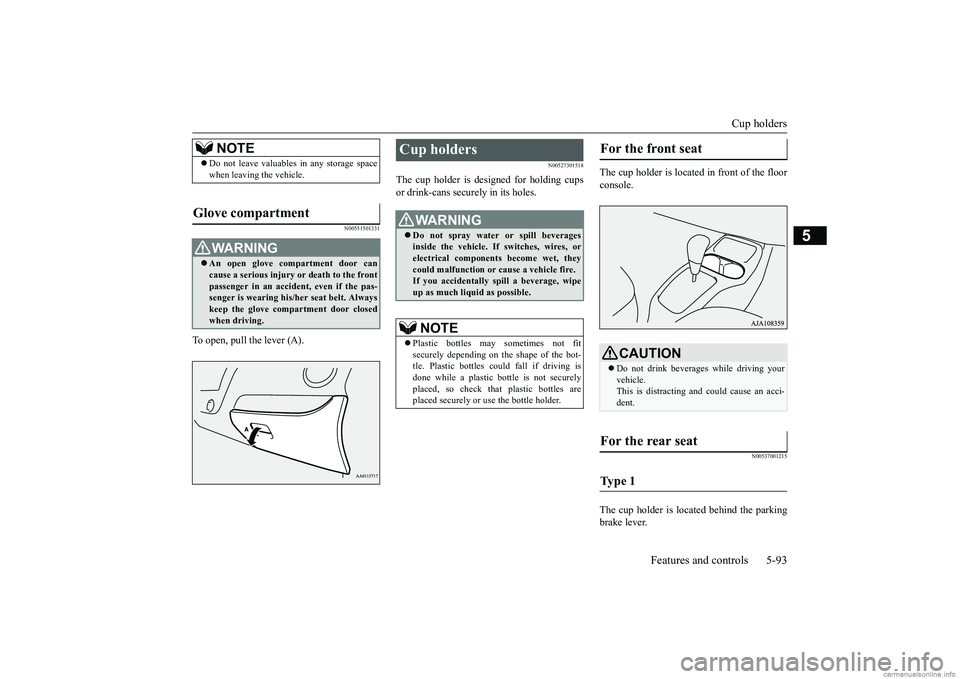
To open, pull the lever (A).
N00527301518
The cup holder is de
signed for holding cups
or drink-cans secu
rely in its holes.
The cup holder is located in front of the floor console.
N00537001215
The cup holder is located behind the parkingbrake lever.
NOTE
Do not leave valuables
in any storage space
when leaving the vehicle.
Glove compartment
WA R N I N G An open glove compartment door can cause a serious injury or death to the frontpassenger in an accident, even if the pas- senger is wearing his/her seat belt. Always keep the glove comp
artment door closed
when driving.
Cup holders
WA R N I N G Do not spray water
or spill beverages
inside the vehicle. If switches, wires, or electrical components become wet, theycould malfunction or cause a vehicle fire. If you accidentally
spill a beverage, wipe
up as much liquid as possible.NOTE
Plastic bottles may
sometimes not fit
securely depending on the shape of the bot- tle. Plastic bottles c
ould fall if driving is
done while a plastic bottle is not securelyplaced, so check that plastic bottles are placed securely or
use the bottle holder.
For the front seat
CAUTIONDo not drink beverages while driving your vehicle. This is distracting a
nd could cause an acci-
dent.
For the rear seat Ty p e 1
BK0249600US.book 93 ページ 2017年4月20日 木曜日 午後1時36分
Page 161 of 263
Fuel economy 6-2 Driving safety
6
N00628800178
Fuel economy is depe
ndent on many factors.
Your personal driving habits can have a sig- nificant effect on your
fuel consumption.
Several recommendations
for achieving the
greatest fuel economy are listed below. Whenever accelerating from a stop, always accelerate
slowly and smoothly.
When parked for even a short period, do not idle the engine. Shut it off. Plan your trips to avoid unnecessary stops. Keep your tires inflated to the recom- mended pressures. For freeway driving, maintain a speed of approximately 50 mph (80 km/h) whentraffic, roadway and weather conditions safely permit. Keep your air filter clean and your vehicle lubricated according
to the recommenda-
tions in this manual. Always keep your ve
hicle well main-
tained. A poorly maintained engine wastes fuel and costs money. Never overload your vehicle.
N00628900049
Drunk driving is one of the most frequent causes of accidents. Your driving ability can be seriously impairedeven with blood alcohol levels far below the legal minimum. If you have been drinking, don’t drive. Ride with a designated non-drinking driver, call a cab or a friend, or use public transportation. Drinking coffee or tak- ing a cold shower will not make you sober. Similarly, prescription and nonprescription drugs affect your alertness, perception andreaction time. Consu
lt with your doctor or
pharmacist before driving while under the influence of any of these medications.
N00628601069
The original equipment floor mat providedwith your vehicle was specifically designed for your vehicle. Al
ways properly position
the floor mat and assure it does not interferewith operation of the pedals. Always use the
retaining clip on the driver’s floorboard to secure the floor mat. When used, this clip willhelp prevent the floor mat from moving for- ward and possibly interfering with the opera- tion of the pedals. To prevent the floor matfrom moving forward and possibly interfering with the operation of the pedals, Mitsubishi Motors Genuine floor mats are recom-mended.
N00628701099
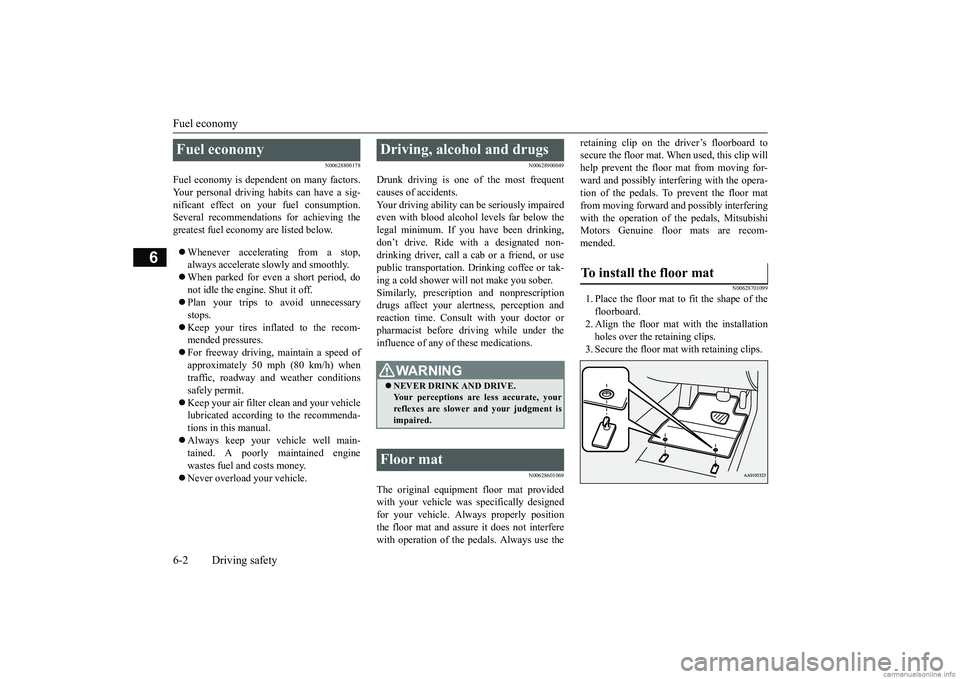
1. Place the floor mat to fit the shape of the floorboard. 2. Align the floor mat with the installationholes over the retaining clips. 3. Secure the floor mat with retaining clips.
Fuel economy
Driving, alcohol and drugs
WA R N I N G NEVER DRINK AND DRIVE. Your perceptions are
less accurate, your
reflexes are slower and your judgment isimpaired.
Floor mat
To install the floor mat
BK0249600US.book 2 ページ 2017年4月20日 木曜日 午後1時36分
Page 162 of 263
Vehicle preparatio
n before driving
Driving safety 6-3
6
N00629001770
For a safer and more enjoyable trip, always check for the following:
Before starting the ve
hicle, make certain
that you and all passengers are seated and wearing their seat belts properly (with children in the rear seat, in appropriaterestraints), and that all the doors are locked. Move the driver’s seat as far backward as possible, while keeping good visibility, and good control of the steering wheel, brakes, accelerator, and controls. Check the instrument panel indicators and multi- information display for any possible prob-lem. Similarly, the front
passenger seat should
also be moved as fa
r back as possible.
Make sure that infants and small children are properly restrained in accordance with all laws and regulations.
Check these by selectin
g the defroster mode,
and set the blower switch on high. You shouldbe able to feel the air blowing against the windshield. Refer to “Defrosti
ng or defogging (wind-
shield, door windows)” on page 7-6, 7-10, 7-17.
NOTE
The shape of the mat and the number of retaining clips may
vary depending on the
vehicle model.WA R N I N G If a floor mat is the
wrong size or is not
properly installed, it can interfere with the operation of the pedals. Interference with the pedals can cause unintended accelera-tion and/or increase
d stopping distances
resulting in a cras
h and injury. Always
make sure the floor mat does not interferewith the accelerator or brake pedal. Always use the retaining clip on the driver’s floorboard to secure the floor mat. Always install the mat with the correct side facing down. Never install a second mat over or under an existing floor mat. Do not use a floor mat designed for another model vehicle even if it is a Mitsubishi Motors Genuine floor mat. Before driving, be sure to check the fol- lowing:• Periodically check that the floor mat is properly secured with the retaining clips. If you remove the fl
oor mat while clean-
ing the inside of you
r vehicle or for any
other reason, always
check the condition
of the floor mat afte
r it has been rein-
stalled.
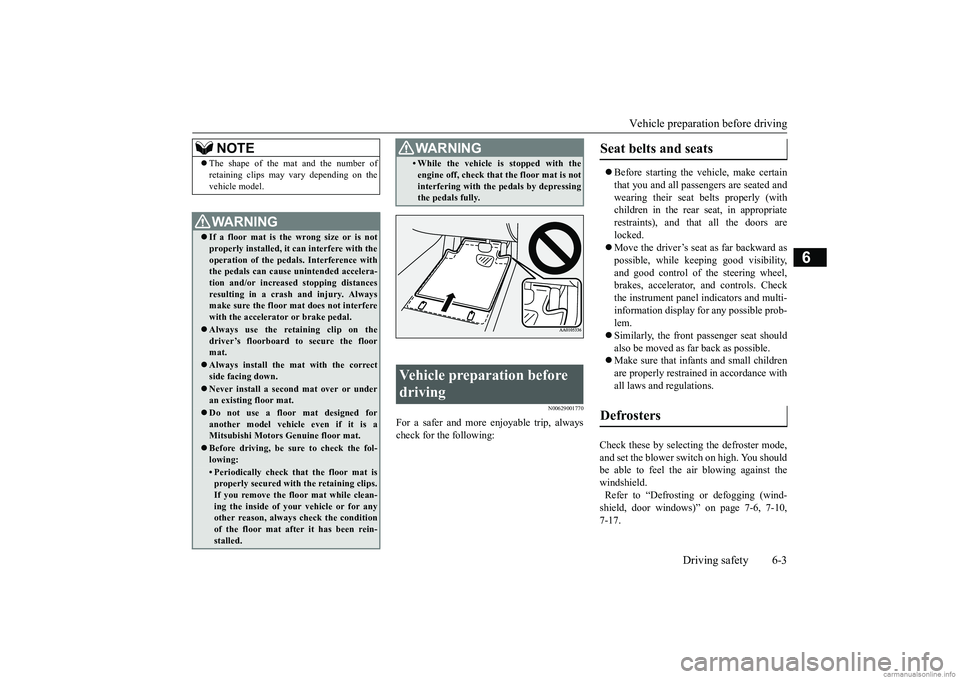
• While the vehicle is stopped with theengine off, check that the floor mat is notinterfering with the pedals by depressingthe pedals fully.
Vehicle preparation before driving
WA R N I N G
Seat belts and seats Defrosters
BK0249600US.book 3 ページ 2017年4月20日 木曜日 午後1時36分
Page 170 of 263
Trailer towing
Driving safety 6-11
6
N00629801358
Before driving and after traveling a short dis- tance, always check the load to make sure itis securely fastened to the roof carrier.Stop the vehicle periodi
cally and check that
the load remains secure. If the load is not secure, it could fall from the vehicle anddamage your vehicle,
another vehicle or cre-
ate a road hazard.NOTE
To prevent wind noise or reduction in gas mileage, remove the roof carrier when not in use. Before using an automatic car wash, check with the attendant to determine if the roofcarrier should be removed. Be sure that adequate clearance is main- tained for raising the trunk lid during loading luggage on the roof carrier.CAUTION
Trailer towing
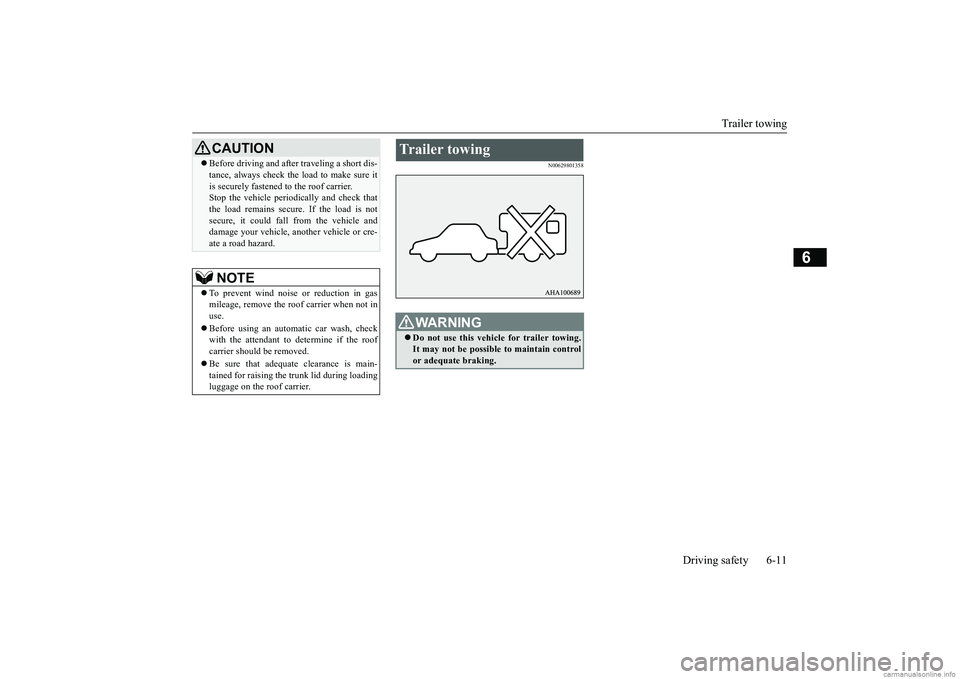
WA R N I N G Do not use this vehicle for trailer towing. It may not be possible to maintain control or adequate braking.
BK0249600US.book 11 ページ 2017年4月20日 木曜日 午後1時36分
Page 190 of 263
Air purifier (if so equipped) Comfort controls 7-19
7
The air conditioning should be operated for at least five minutes each week, even in cold weather. This includes the quick defrostingmode. Operating the
air condition system
weekly maintains lubrication of the compres- sor internal parts to keep the air conditioningin the best operating condition.
N00733800180
The air conditioning system is equipped withan air filter to re
move pollen
and dust.
The air filter’s ability to collect pollen and dirt is reduced as it be
comes dirty, so replace
it periodically. For the maintenance interval,refer to the “WARRANTY AND MAINTE- NANCE MANUAL”.
N00734201553
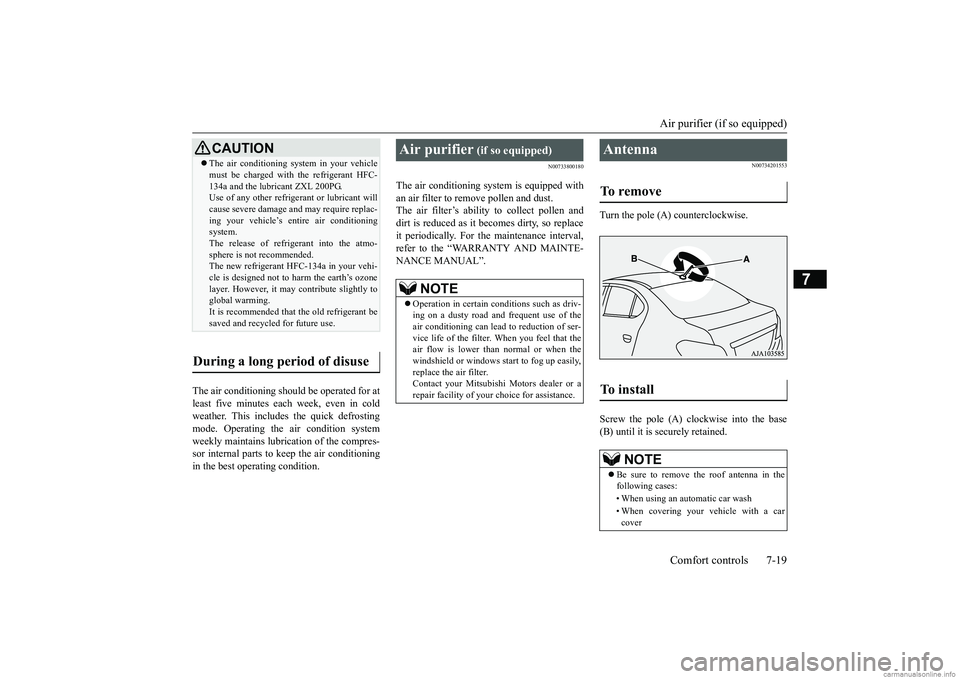
Turn the pole (A) counterclockwise. Screw the pole (A) clockwise into the base (B) until it is securely retained.
CAUTION The air conditioning system in your vehicle must be charged with the refrigerant HFC-134a and the lubricant ZXL 200PG.Use of any other refrigerant or lubricant will cause severe damage a
nd may require replac-
ing your vehicle’s en
tire air conditioning
system. The release of refrigerant into the atmo- sphere is not recommended.The new refrigerant HFC-134a in your vehi- cle is designed not to harm the earth’s ozone layer. However, it may contribute slightly toglobal warming. It is recommended that the old refrigerant be saved and recycled for future use.
During a long period of disuse
Air purifier
(if so equipped)
NOTE
Operation in certain conditions such as driv- ing on a dusty road and frequent use of the air conditioning ca
n lead to reduction of ser-
vice life of the filter. When you feel that the air flow is lower than normal or when the windshield or windows st
art to fog up easily,
replace the air filter. Contact your Mitsubishi
Motors dealer or a
repair facility of your
choice for assistance.
Antenna To remove To install
NOTE
Be sure to remove the roof antenna in the following cases: • When using an automatic car wash• When covering your ve
hicle with a car
cover
BK0249600US.book 19 ページ 2017年4月20日 木曜日 午後1時36分
Page 199 of 263
How to change a tire 8-6 For emergencies
8
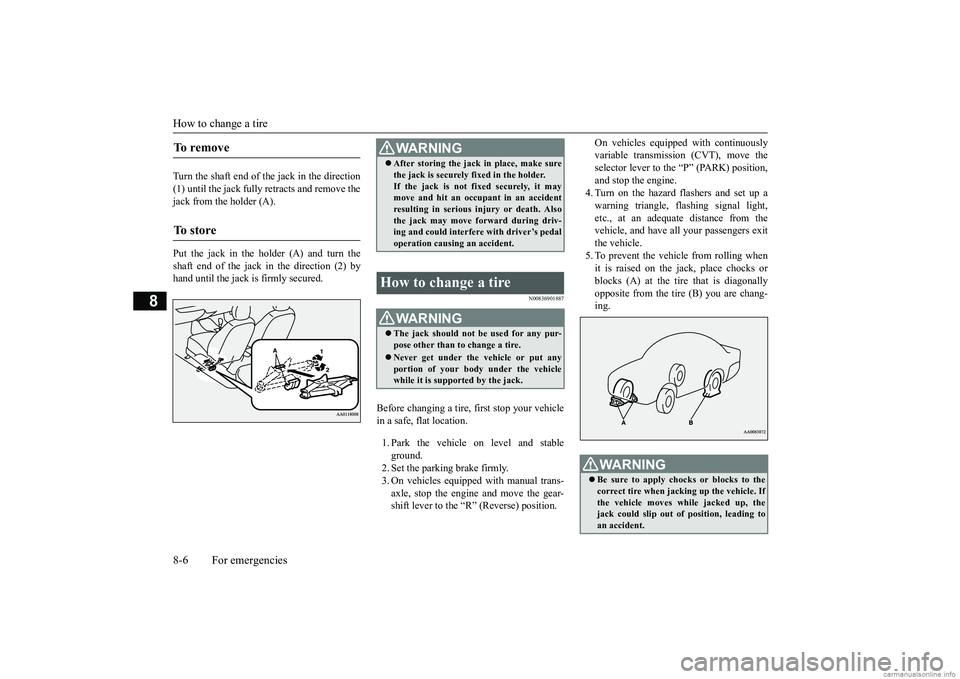
Turn the shaft end of the jack in the direction (1) until the jack fully retracts and remove the jack from the holder (A). Put the jack in the holder (A) and turn the shaft end of the jack in the direction (2) by hand until the jack is firmly secured.
N00836901887
Before changing a tire, first stop your vehiclein a safe, flat location. 1. Park the vehicle on level and stable ground. 2. Set the parking brake firmly.3. On vehicles equipped with manual trans- axle, stop the engine and move the gear- shift lever to the “R” (Reverse) position.
On vehicles equippe
d with continuously
variable transmission (CVT), move theselector lever to the “P” (PARK) position, and stop the engine. 4. Turn on the hazard flashers and set up awarning triangle, flashing signal light, etc., at an adequate distance from the vehicle, and have al
l your passengers exit
the vehicle. 5. To prevent the vehicle from rolling when it is raised on the jack, place chocks or blocks (A) at the ti
re that is diagonally
opposite from the tire (B) you are chang-ing.
To r e m o v e To s t o r e
WA R N I N G After storing the jack in place, make sure the jack is securely fixed in the holder.If the jack is not fixed securely, it maymove and hit an
occupant in an accident
resulting in serious injury or death. Also the jack may move forward during driv-ing and could interfere with driver’s pedal operation causing an accident.
How to change a tire
WA R N I N G The jack should not be used for any pur- pose other than to change a tire. Never get under the
vehicle or put any
portion of your body under the vehiclewhile it is supported by the jack.
WA R N I N G Be sure to apply choc
ks or blocks to the
correct tire when jacking up the vehicle. If the vehicle moves while jacked up, the jack could slip out of
position, leading to
an accident.
BK0249600US.book 6 ページ 2017年4月20日 木曜日 午後1時36分
Page 206 of 263
Operation under adverse driving conditions
For emergencies 8-13
8
Set the gearshift lever to the “N” (Neutral) position.Secure the steering wheel in a straight-ahead position with a rope or tie-down strap. Release the parking brake. Place the gearshift lever in the “N” (Neutral) position (manual transa
xle) or the selector
lever in the “N” (NEUTRAL) position (CVT).
N00837200750
If your vehicle becomes stuck in snow, sand, or mud, it can often be moved by a rockingmotion. Rock your vehicle back and forth to free it.
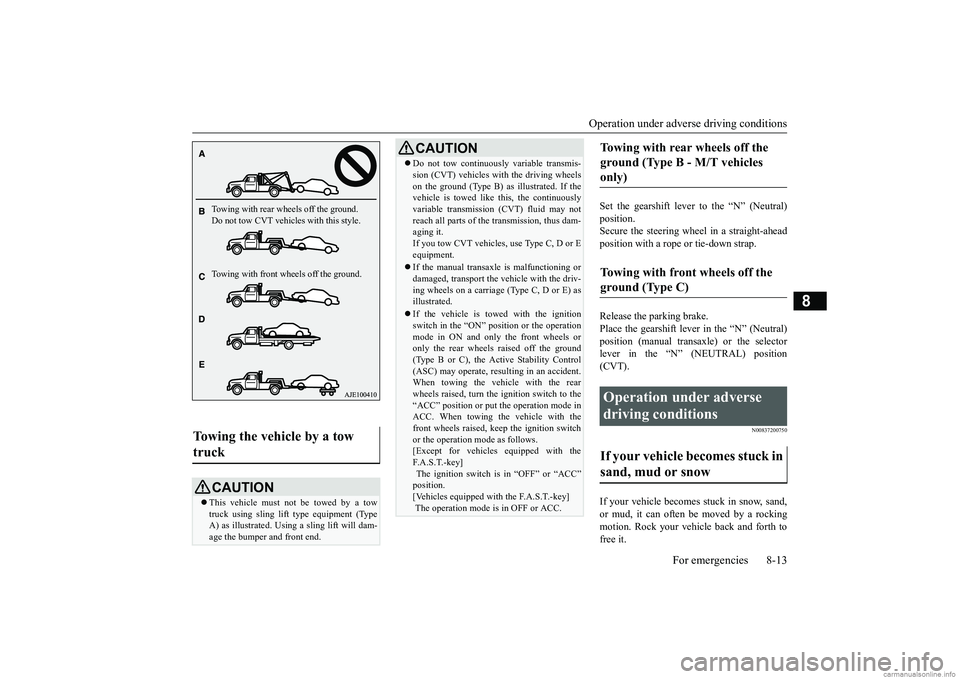
Towing the vehicle by a tow truck
CAUTION This vehicle must not be towed by a tow truck using sling lift
type equipment (Type
A) as illustrated. Using a sling lift will dam- age the bumper and front end.Towing with rear wheels off the ground. Do not tow CVT vehicles with this style. Towing with front wheels off the ground.
Do not tow continuously variable transmis- sion (CVT) vehicles with the driving wheelson the ground (Type B) as illustrated. If thevehicle is towed like
this, the continuously
variable transmission (CVT) fluid may not reach all parts of the transmission, thus dam-aging it. If you tow CVT vehicles, use Type C, D or E equipment. If the manual transaxl
e is malfunctioning or
damaged, transport the
vehicle with the driv-
ing wheels on a carriage (Type C, D or E) as illustrated. If the vehicle is towed with the ignition switch in the “ON” pos
ition or the operation
mode in ON and only the front wheels oronly the rear wheels raised off the ground (Type B or C), the Active Stability Control (ASC) may operate, result
ing in an accident.
When towing the vehicle with the rear wheels raised, turn the ignition switch to the “ACC” position or put
the operation mode in
ACC. When towing the vehicle with the front wheels raised, keep the ignition switch or the operation mode as follows.[Except for vehicles equipped with the F. A . S . T. - k e y ] The ignition switch is
in “OFF” or “ACC”
position. [Vehicles equipped with the F.A.S.T.-key] The operation mode is in OFF or ACC.CAUTION
Towing with rear wheels off the ground (Type B - M/T vehicles only) Towing with front wheels off the ground (Type C) Operation under adverse driving conditions If your vehicle becomes stuck in sand, mud or snow
BK0249600US.book 13 ページ 2017年4月20日 木曜日 午後1時36分