trunk MITSUBISHI MIRAGE G4 2020 (in English) User Guide
[x] Cancel search | Manufacturer: MITSUBISHI, Model Year: 2020, Model line: MIRAGE G4, Model: MITSUBISHI MIRAGE G4 2020Pages: 253, PDF Size: 36.39 MB
Page 76 of 253

Free-hand Advanced Securi
ty Transmitter (F.A.S.T.-key) (if so equipped)
Features and controls 5-11
5
N00503301093
The operating range is the interior of the vehicle.
N00503401430
While carrying the F.A.S.T.-key, press thedriver’s door lock/unlock switch (A) within the operating range to lock all the doors and trunk lid.The turn signal lights will blink once and the buzzer will sound once. Also refer to “Doors locks”, “Power door locks” and “Trunk lid” on pages 5-25, 5-27and 5-28 respectively.
*: Front of the vehicle : Operating rangeNOTE
Only the F.A.S.T.-key that is detectable by the doors and the trunk lid can lock and unlock the doors and open the trunk lid. The system may not operate if the F.A.S.T.- key is too close to th
e windshield, door win-
dows or trunk lid. Even if the F.A.S.T.-key is within about 2.3 feet (70 cm) of the driver’s door lock/unlockswitch or the trunk lid open switch, the sys- tem may not operate if the key is close to the ground or in a high position. If the F.A.S.T.-key is within the operating range, even a person not carrying theF.A.S.T.-key can lock and unlock the doors or open the trunk lid by pressing the driver’s door lock/unlock switch
or the trunk lid open
switch.
Operating range for starting the engine and changing the opera-tion mode
* : Front of the vehicle : Operating rangeNOTE
Even if the F.A.S.T.-key is within the operat- ing range, it may not be possible to start theengine and change the
operation mode if the
key is in a storage space such as the glove compartment, on top of the instrument panel,or in the door pocket or luggage compart- ment.
Even if the F.A.S.T.-key is inside the vehicle, it may not be possible to start the engine andchange the operation mode if the key is tooclose to a door or door window.
To operate using the F.A.S.T.- key
To l o c k
NOTE
BK0284300US.book 11 ページ 2019年5月23日 木曜日 午後12時22分
Page 78 of 253
Free-hand Advanced Securi
ty Transmitter (F.A.S.T.-key) (if so equipped)
Features and controls 5-13
5
N00590900043
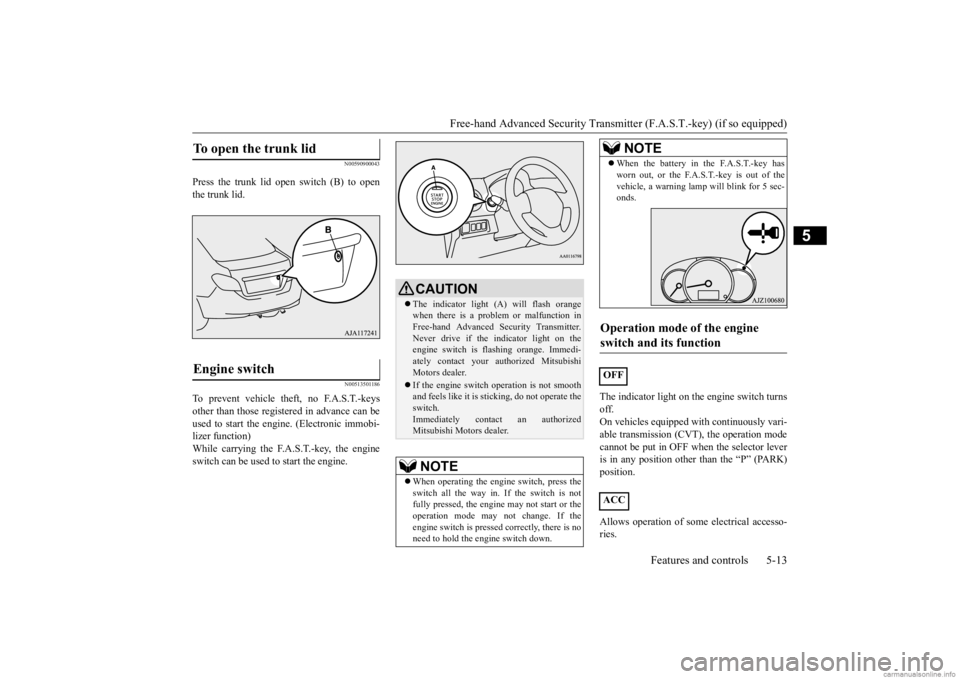
Press the trunk lid open switch (B) to open the trunk lid.
N00513501186
To prevent vehicle theft, no F.A.S.T.-keysother than those regist
ered in advance can be
used to start the engi
ne. (Electronic immobi-
lizer function)While carrying the F.A.S.T.-key, the engine switch can be used
to start the engine.
The indicator light on the engine switch turns off.On vehicles equipped w
ith continuously vari-
able transmission (CVT), the operation mode cannot be put in OFF when the selector leveris in any position other than the “P” (PARK) position. Allows operation of some
electrical accesso-
ries.
To open the trunk lid
Engine switch
CAUTION The indicator light (A) will flash orange when there is a problem or malfunction inFree-hand Advanced Se
curity Transmitter.
Never drive if the i
ndicator light on the
engine switch is fl
ashing orange. Immedi-
ately contact your authorized Mitsubishi Motors dealer. If the engine switch
operation is not smooth
and feels like it is stic
king, do not operate the
switch.Immediately contac
t an authorized
Mitsubishi Motors dealer.NOTE
When operating the engine switch, press the switch all the way in. If the switch is not fully pressed, the engine
may not start or the
operation mode may not change. If the engine switch is pressed correctly, there is no need to hold the engine switch down.
When the battery in the F.A.S.T.-key has worn out, or the F.A.S.T.-key is out of thevehicle, a warning lamp
will blink for 5 sec-
onds.
Operation mode of the engine switch and its function
OFF ACC
NOTE
BK0284300US.book 13 ページ 2019年5月23日 木曜日 午後12時22分
Page 87 of 253
Free-hand Advanced
Security Transmitter (F.A.S
.T.-key) (if so equipped)
5-22 Features and controls
5
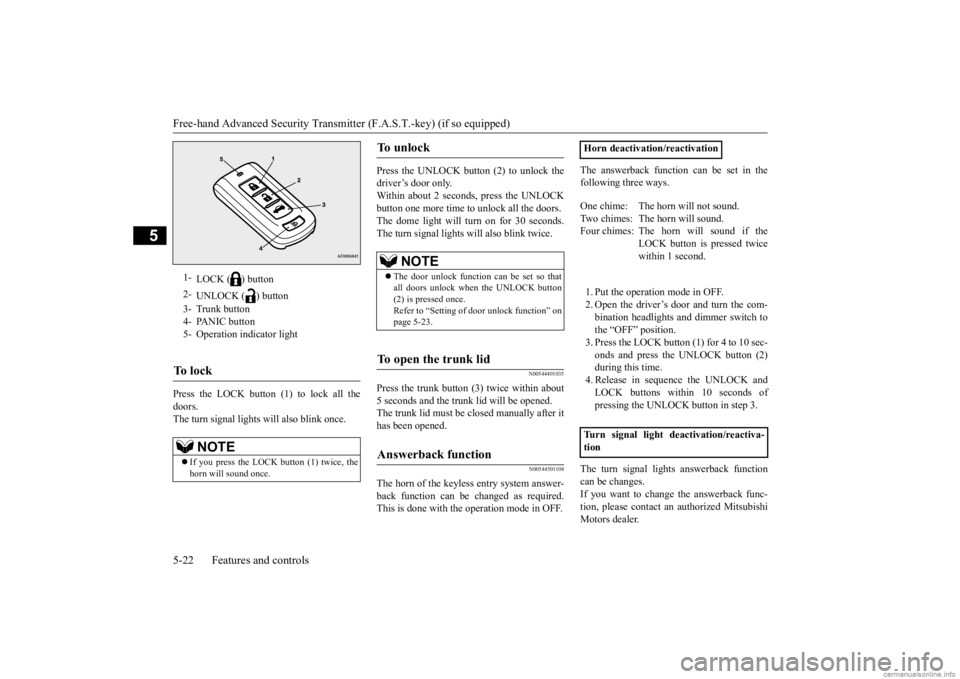
Press the LOCK button (1) to lock all the doors.The turn signal lights will also blink once.
Press the UNLOCK button (2) to unlock the driver’s door only. Within about 2 seconds, press the UNLOCK button one more time to
unlock all the doors.
The dome light will turn on for 30 seconds. The turn signal lights will also blink twice.
N00544401035
Press the trunk button (3) twice within about 5 seconds and the tru
nk lid will be opened.
The trunk lid must be closed manually after it has been opened.
N00544501108
The horn of the keyless entry system answer-back function can be
changed as required.
This is done with the operation mode in OFF.
The answerback function can be set in the following three ways. 1. Put the operation mode in OFF. 2. Open the driver’s door and turn the com- bination headlights a
nd dimmer switch to
the “OFF” position. 3. Press the LOCK button (1) for 4 to 10 sec- onds and press the UNLOCK button (2)during this time. 4. Release in sequence the UNLOCK and LOCK buttons within 10 seconds ofpressing the UNLOCK button in step 3.
The turn signal lights answerback function can be changes.If you want to change the answerback func- tion, please contact an
authorized Mitsubishi
Motors dealer.
1-
LOCK ( ) button
2-
UNLOCK ( ) button
3- Trunk button 4- PANIC button 5- Operation indicator lightTo l o c k
NOTE
If you press the LOCK button (1) twice, the horn will sound once.
To u n l o c k
NOTE
The door unlock function
can be set so that
all doors unlock when the UNLOCK button (2) is pressed once.Refer to “Setting of
door unlock function” on
page 5-23.
To open the trunk lid
Answerback function
Horn deactivation/reactivation One chime: The horn will not sound. Two chimes: The horn will sound.Four chimes: The hor
n will sound if the
LOCK button is pressed twice within 1 second.
Turn signal light
deactivation/reactiva-
tion
BK0284300US.book 22 ページ 2019年5月23日 木曜日 午後12時22分
Page 93 of 253
Child safety locks for rear door 5-28 Features and controls
5
N00509401315
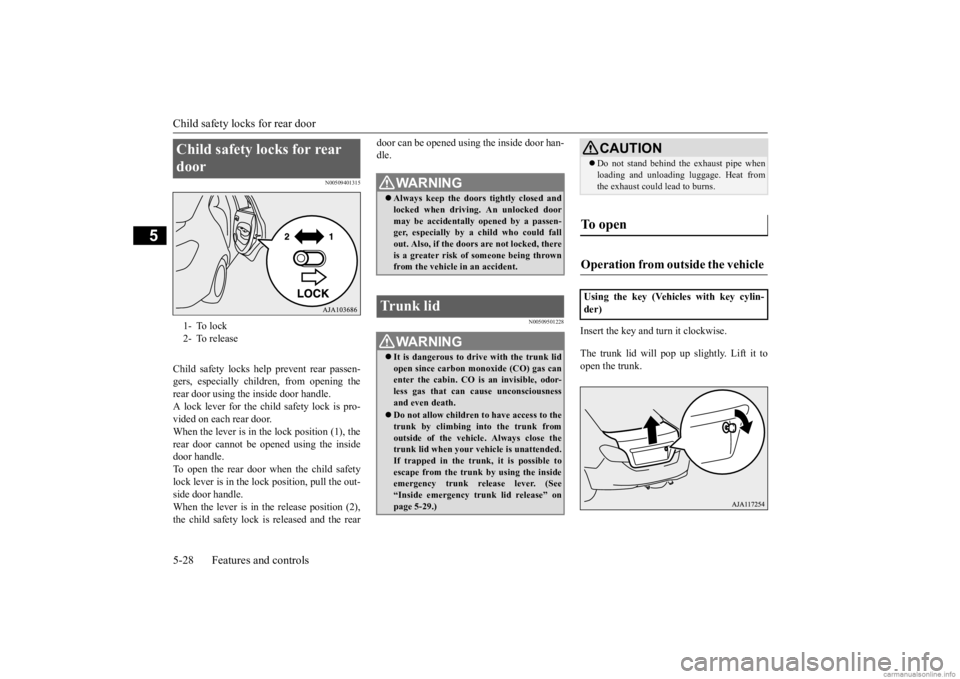
Child safety locks help prevent rear passen- gers, especially children, from opening therear door using the inside door handle. A lock lever for the child safety lock is pro- vided on each rear door.When the lever is in the lock position (1), the rear door cannot be opened using the inside door handle.To open the rear door when the child safety lock lever is in the lock position, pull the out- side door handle.When the lever is in the release position (2), the child safety lock is released and the rear
door can be opened using the inside door han- dle.
N00509501228
Insert the key and turn it clockwise. The trunk lid will pop up slightly. Lift it to open the trunk.
Child safety locks for rear door 1- To lock 2- To release
WA R N I N G Always keep the door
s tightly closed and
locked when driving. An unlocked door may be accidentally
opened by a passen-
ger, especially by
a child who could fall
out. Also, if the doors are not locked, there is a greater risk of
someone being thrown
from the vehicle in an accident.
Trunk lid
WA R N I N G It is dangerous to drive with the trunk lid open since carbon mo
noxide (CO) gas can
enter the cabin. CO is an invisible, odor- less gas that can cause unconsciousnessand even death. Do not allow children to have access to the trunk by climbing into the trunk from outside of the vehicl
e. Always close the
trunk lid when your vehicle is unattended.If trapped in the trunk, it is possible toescape from the trunk by using the inside emergency trunk re
lease lever. (See
“Inside emergency tr
unk lid release” on
page 5-29.)
CAUTION Do not stand behind the exhaust pipe when loading and unloading
luggage. Heat from
the exhaust could lead to burns.
To open Operation from outside the vehicle Using the key (Vehicles with key cylin- der)
BK0284300US.book 28 ページ 2019年5月23日 木曜日 午後12時22分
Page 94 of 253
Inside emergency trunk lid release
Features and controls 5-29
5
Press the trunk button (Vehicles with F.A.S.T.-key). (See “Free-hand Advanced Security Transmitter
(F.A.S.T.-key)” on page
5-9.) The trunk lid will pop up to slightly. Lift it to open the trunk. Pull the trunk lid release
lever, located to the
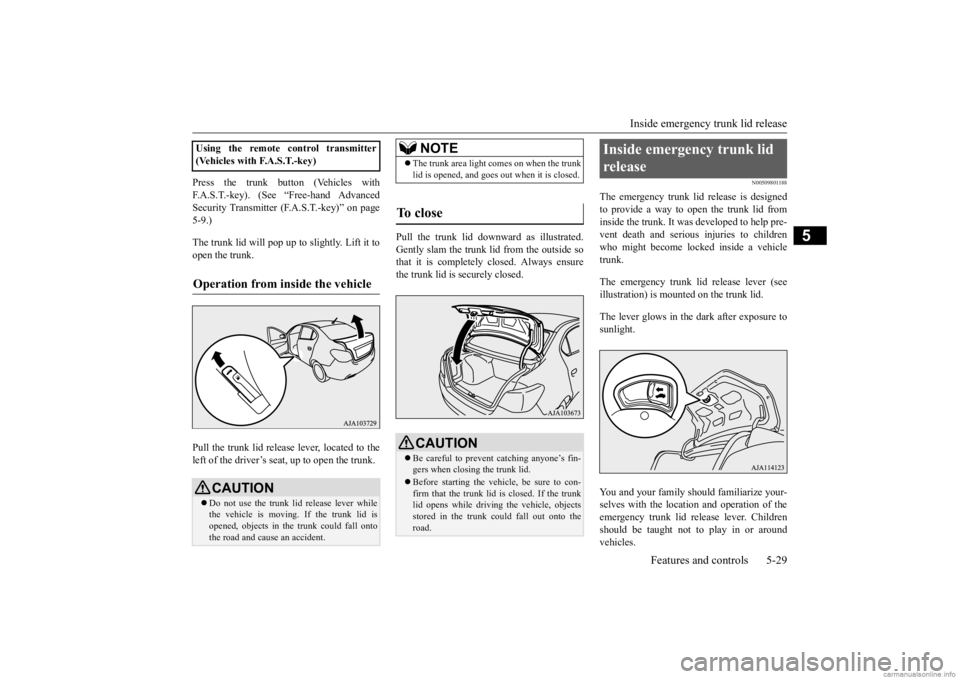
left of the driver’s seat, up to open the trunk.
Pull the trunk lid downward as illustrated. Gently slam the trunk lid from the outside so that it is completely closed. Always ensurethe trunk lid is securely closed.
N00509801188
The emergency trunk lid release is designed to provide a way to open the trunk lid from inside the trunk. It was developed to help pre-vent death and serious
injuries to children
who might become locked inside a vehicle trunk. The emergency trunk lid
release lever (see
illustration) is mounted on the trunk lid. The lever glows in the dark after exposure to sunlight. You and your family should familiarize your- selves with the location and operation of theemergency trunk lid release lever. Children should be taught not to play in or around vehicles.
Using the remote co
ntrol transmitter
(Vehicles with F.A.S.T.-key)Operation from inside the vehicle
CAUTION Do not use the trunk lid release lever while the vehicle is moving. If the trunk lid is opened, objects in th
e trunk could fall onto
the road and cause an accident.
NOTE
The trunk area light comes on when the trunk lid is opened, and goes out
when it is closed.
To close
CAUTIONBe careful to prevent
catching anyone’s fin-
gers when closing the trunk lid. Before starting the vehi
cle, be sure to con-
firm that the trunk lid is closed. If the trunk lid opens while driving the vehicle, objects stored in the trunk could fall out onto theroad.
Inside emergency trunk lid release
BK0284300US.book 29 ページ 2019年5月23日 木曜日 午後12時22分
Page 95 of 253
Power window control 5-30 Features and controls
5
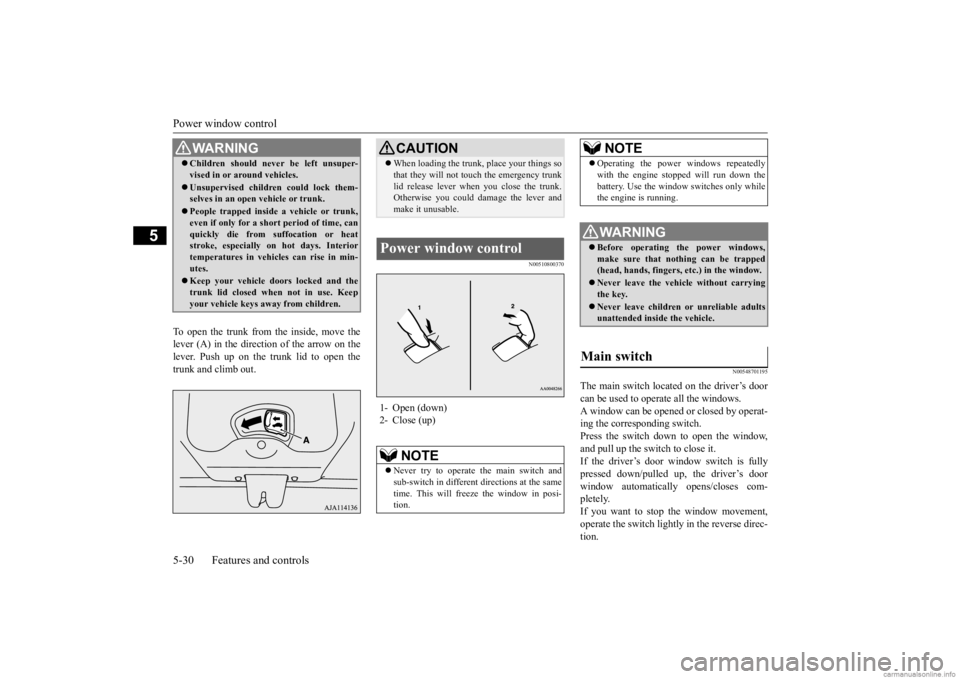
To open the trunk from the inside, move the lever (A) in the direction of the arrow on thelever. Push up on the trunk lid to open the trunk and climb out.
N00510800370
N00548701195
The main switch located on the driver’s door can be used to operate all the windows. A window can be opened or closed by operat- ing the corresponding switch.Press the switch down to open the window, and pull up the switch to close it. If the driver’s door window switch is fullypressed down/pulled up, the driver’s door window automatically opens/closes com- pletely.If you want to stop the window movement, operate the switch lightly in the reverse direc- tion.
WA R N I N G Children should never be left unsuper- vised in or ar
ound vehicles.
Unsupervised children could lock them- selves in an open vehicle or trunk. People trapped inside a vehicle or trunk, even if only for a short period of time, can quickly die from su
ffocation or heat
stroke, especially on
hot days. Interior
temperatures in vehicles can rise in min- utes. Keep your vehicle d
oors locked and the
trunk lid closed when not in use. Keepyour vehicle keys away from children.
CAUTION When loading the trunk, place your things so that they will not touch the emergency trunklid release lever when you close the trunk.Otherwise you could da
mage the lever and
make it unusable.
Power window control 1- Open (down) 2- Close (up)
NOTE
Never try to operate the main switch and sub-switch in different directions at the sametime. This will free
ze the window in posi-
tion.
Operating the power windows repeatedly with the engine stopped will run down thebattery. Use the window
switches only while
the engine is running.WA R N I N G Before operating the power windows, make sure that nothing can be trapped (head, hands, fingers, etc.) in the window. Never leave the vehi
cle without carrying
the key. Never leave children
or unreliable adults
unattended inside the vehicle.
Main switch
NOTE
BK0284300US.book 30 ページ 2019年5月23日 木曜日 午後12時22分
Page 127 of 253
Rear-view camera 5-62 Features and controls
5
N00533001275
Your TPMS operates
on a radio frequency
subject to Federal Communications Commis- sion (FCC) Rules. This device complies withpart 15 of FCC Rules. Operation is subject to the following two con- ditions. This device may not
cause harmful inter-
ference. This device must ac
cept any interference
received, including interference that may cause undesired operation.
N00546201385
When the gearshift lever or the selector lever is in the “R” position with the ignition switchor the operation mode is in ON, the rear-view image will be displayed on the screen of the DISPLAY AUDIO or the Smartphone LinkDisplay Audio.
When the gearshift lever or the selector lever is shifted out of the “R” position, the rear-view image will go off.
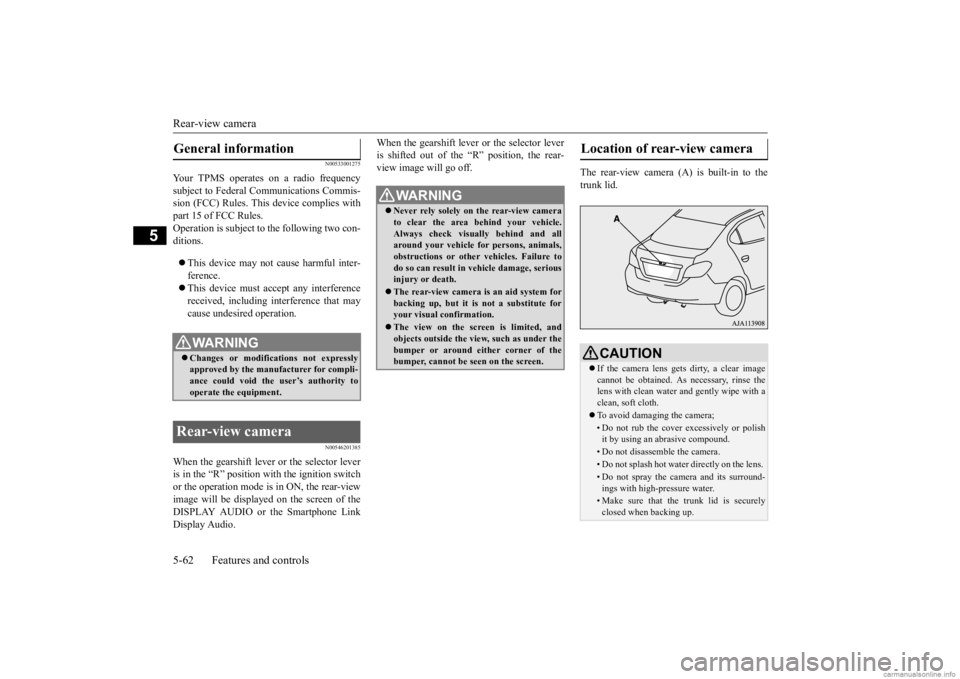
The rear-view camera (A) is built-in to the trunk lid.
General information
WA R N I N G Changes or modifications not expressly approved by the manufacturer for compli-ance could void the
user’s authority to
operate the equipment.
Rear-view camera
WA R N I N G Never rely solely on the rear-view camera to clear the area behind your vehicle.Always check visually behind and all around your vehicle fo
r persons, animals,
obstructions or other vehicles. Failure todo so can result in
vehicle damage, serious
injury or death. The rear-view camera is an aid system for backing up, but it is not a substitute for your visual confirmation. The view on the screen is limited, and objects outside the view, such as under thebumper or around either corner of the bumper, cannot be seen on the screen.
Location of rear-view camera
CAUTION If the camera lens gets
dirty, a clear image
cannot be obtained. As
necessary, rinse the
lens with clean water a
nd gently wipe with a
clean, soft cloth. To avoid damaging the camera;• Do not rub the cover excessively or polish it by using an abrasive compound. • Do not disassemble the camera.• Do not splash hot wate
r directly on the lens.
• Do not spray the camera and its surround- ings with high-pressure water.• Make sure that the trunk lid is securelyclosed when backing up.
BK0284300US.book 62 ページ 2019年5月23日 木曜日 午後12時22分
Page 167 of 253
Trailer towing 6-12 Driving safety
6
N00629801420
Make sure that the weight of luggage and the roof carrier do not exceed the maxi-mum roof load, 110 lb (50 kg). If the maxi-mum roof load is ex
ceeded, this could
cause damage to the ve
hicle or result in an
accident. The total weight of all occupants and lug- gage, including your r
oof load, must not
exceed the vehicle capacity weight. For more information, refer to “Tire and load- ing information placard” on page 11-3. Roof load is determined by adding the weight of the roof
carrier and the weight
of the luggage placed
on the roof carrier.
CAUTIONDo not load luggage directly onto the roof. Use a roof carrier that properly fits your vehicle. For installation, refer to the instruction man-ual provided with the roof carrier. Place the luggage on the carrier so that its weight is distri
buted evenly with the heaviest
items on the bottom. Do not load items that are wider than the roof carrier.WA R N I N G
Before driving and after traveling a short dis- tance, always check the load to make sure itis securely fastened to the roof carrier.Stop the vehicle periodi
cally and check that
the load remains secure. If the load is not secure, it could fall from the vehicle anddamage your vehicle,
another vehicle or cre-
ate a road hazard.NOTE
To prevent wind noise or reduction in gas mileage, remove the roof carrier when not in use. Before using an automatic car wash, check with the attendant to determine if the roofcarrier should be removed. Be sure that adequate clearance is main- tained for raising the trunk lid during loading luggage on the roof carrier.CAUTION
Trailer towing
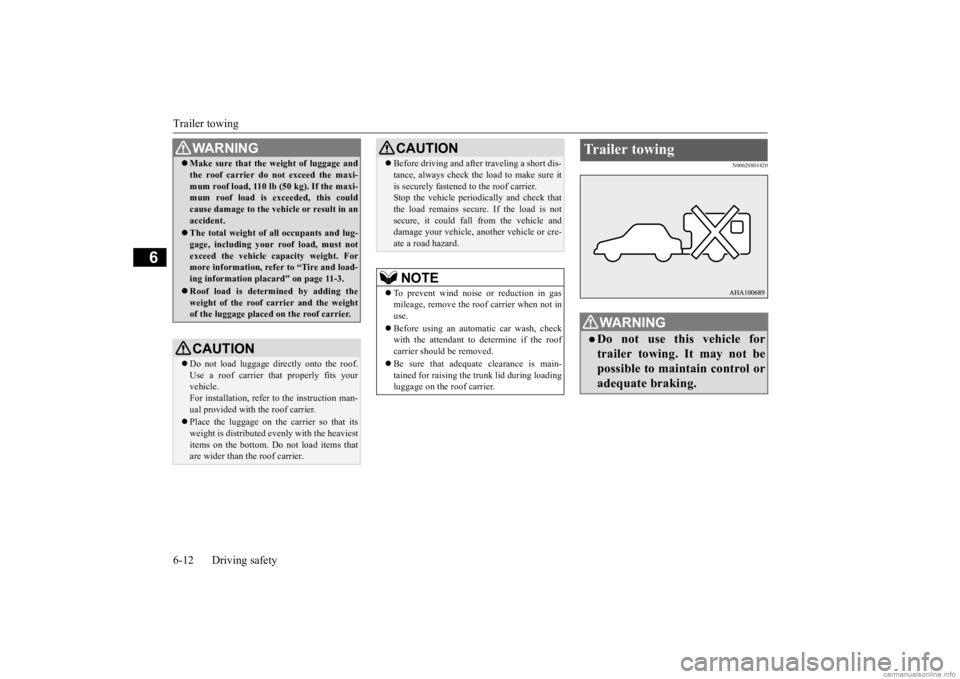
WA R N I N GDo not use this vehicle for trailer towing. It may not bepossible to maintain control or adequate braking.
BK0284300US.book 12 ページ 2019年5月23日 木曜日 午後12時22分
Page 227 of 253

Replacement of light bulbs 9-30 Vehicle care and maintenance
9
N00950401858
N00901801290
1. While pressing the tab (A), pull out the connector (B). 2. Remove the locking cap (C) by turning it counterclockwise, and then pull the bulb(D).
Item
Wattage
ANSI trade No. or bulb type
1
High-mounted stop light
——
2
License plate light
5 W W5W
3 Back-up light 21 W P21W4
Rear turn signal light
21 W PY21W
5
Tail and stop light
21/5 W P21/5W
6
Rear side-marker light
5 W W5W
NOTE
The high-mounted stop light uses an LED rather than the bulbs. For repair and replace-ment, contact an authorized Mitsubishi Motors dealer or a re
pair facility of your
choice.
Inside
Item
Wattage
1 Dome light 8 W 2 Trunk room light 5 W
Headlights *- Front of the vehicle
BK0284300US.book 30 ページ 2019年5月23日 木曜日 午後12時22分
Page 229 of 253

Replacement of light bulbs 9-32 Vehicle care and maintenance
9
2. Remove the 3 screws (B) and remove the light unit.
3. Depress the tab (D) on the harness con- nector and pull the harness connector (E)to remove it. 4. Turn the bulb (F) counterclockwise to remove it. 5. To install the bulb, perform the removal steps in reverse.
N00943701572
1. Open the trunk lid. 2. Remove the screws (A) that hold the light unit. 3. Move the light unit toward the rear of the vehicle to unfix the notch (B) and pin (C).
NOTE
When unfastening the sc
rew of the fog light,
be careful not to mistakenly move the beam position adjustment screw (C).
Rear combination lights
BK0284300US.book 32 ページ 2019年5月23日 木曜日 午後12時22分