VEHICLE IDENTIf~CATlON
VEHICLE IDENTIFICATION NUMBER PLATE LOCA-
TION
The vehicle identification number (V.I.N.) plate is located on
the left top side of 1 the instrument panel and it is visible
through the windshield.
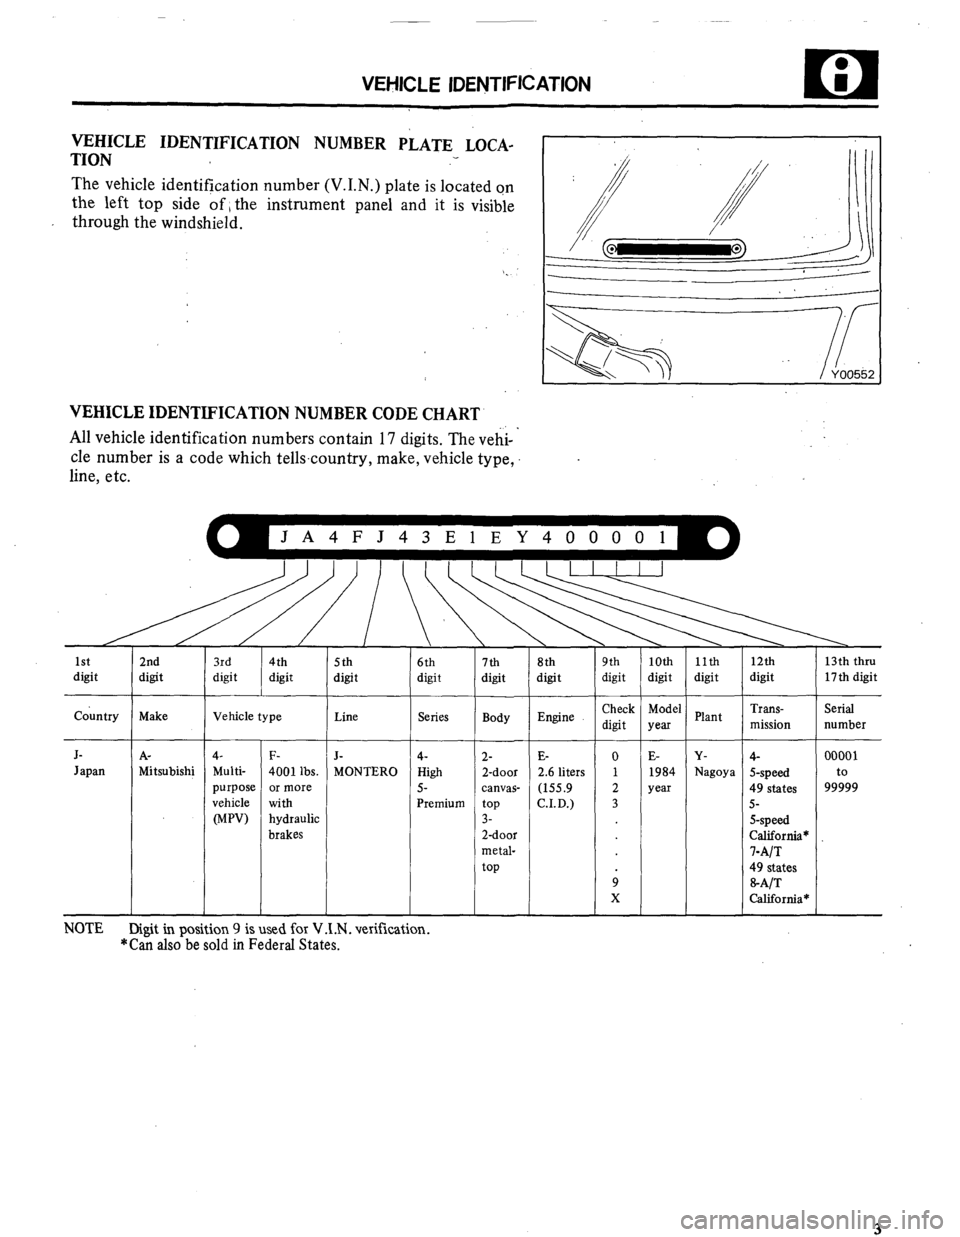
VEHICLE IDENTIFICATION NUMBER CODE CHART
All vehicle identification numbers contain 17 digits. The vehi- ’
cle number is a code which tellscountry, make, vehicle type,
line, etc.
JA4FJ43ElEY400001
I
5th
digit
I
1st
digit 2nd
digit
country Make
J- A-
Japan Mitsubishi 6th
digit 7th 8th
digit digit
Series
Body
4-
High
5-
Premium 2-
2-door
canvas-
top
3-
2-door
metal-
top 11th
digit 9th
digit
Check
digit Vehicle type : 10th
digit
Model
yea
E-
1984
year 12th
digit
Trans-
mission
4-
S-speed
49 states
5-
S-speed
California*
l-A/T
49 states
&A/T
California* 13th thru
17th digit
Serial
number
00001
to
99999 Plant
Y-
Nagoya Line Engine ,
J-
MONTERO E-
2.6 liters
(155.9
CID.) 4-
Multi-
purpose
vehicle
WV) F-
4001 lbs.
or more
with
hydraulic
brakes NOTE
Digit in position 9 is used for V .1 .N . verification. *Can also be sold in Federal States.
PRECAUTIONS BEFORE SERVICE
WIRING HARNESES
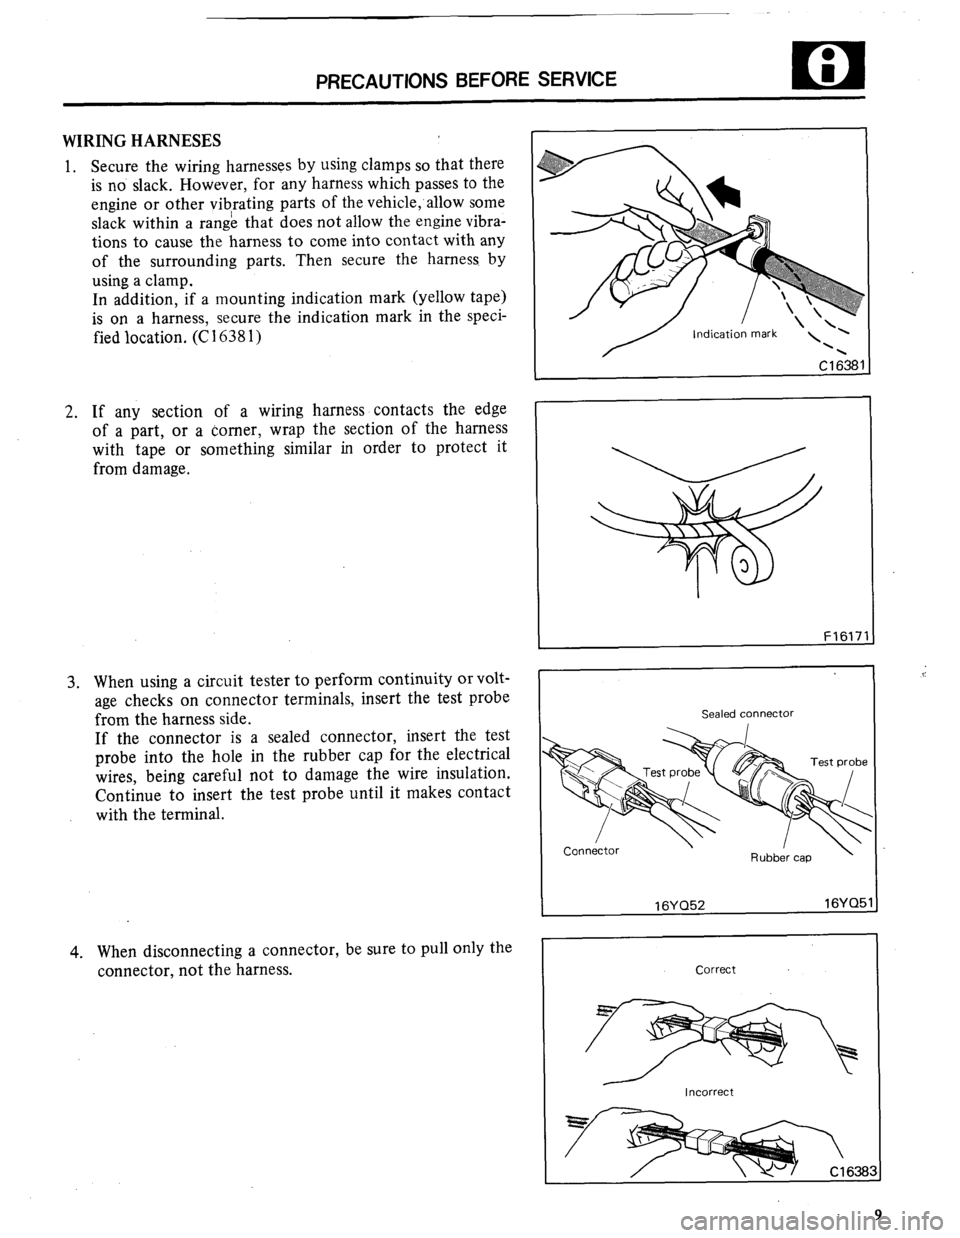
1. Secure the wiring harnesses by using clamps so that there
is no slack. However, for any harness which passes to the
engine or other vibrating parts of the vehicle;allow some
slack within a range that does not allow the engine vibra-
tions to cause the harness to come into contact with any
of the surrounding parts. Then secure the harness. by
using a clamp.
In addition, if a mounting indication mark (yellow tape)
is on a harness, secure the indication mark in the speci-
fied location. (C 1638 1)
2. If any section of a wiring harness contacts the edge
of a part, or a corner, wrap the section of the harness
with tape or something similar in order to protect it
from damage.
3. When using a circuit tester to perform continuity or volt-
age checks on connector terminals, insert the test probe
from the harness side.
If the connector is a sealed connector, insert the test
probe into the hole in the rubber cap for the electrical
wires, being careful not to damage the wire insulation.
Continue to insert the test probe until it makes contact
with the terminal.
4. When disconnecting a connector, be sure to pull only the
connector, not the harness.
F1617
Sealed connector
I 16YQ52 16YQ5
Correct
I Incorrect 1

