lever MITSUBISHI OUTLANDER 2015 3.G Owners Manual
[x] Cancel search | Manufacturer: MITSUBISHI, Model Year: 2015, Model line: OUTLANDER, Model: MITSUBISHI OUTLANDER 2015 3.GPages: 446, PDF Size: 59.52 MB
Page 3 of 446
Instruments and controls 1-1
1
Overview
N00100202599
Instruments and controls
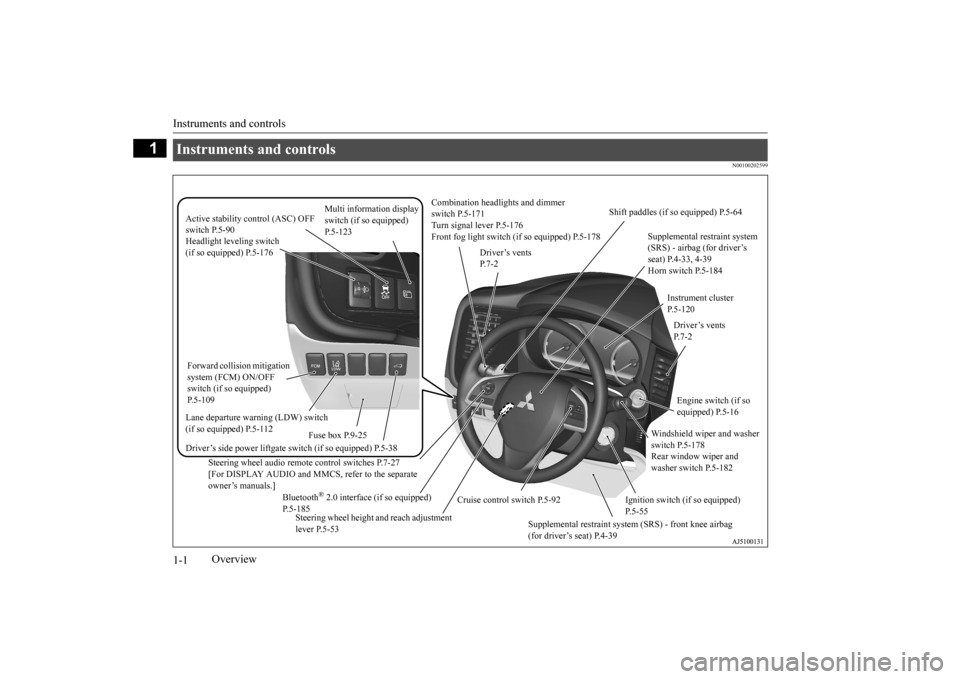
Combination headlights and dimmer switch P.5-171 Turn signal lever P.5-176 Front fog light switch (if so equipped) P.5-178
Steering wheel audio remote control switches P.7-27 [For DISPLAY AUDIO and MMCS, refer to the separateowner’s manuals.]
Active stability control (ASC) OFF switch P.5-90
Supplemental restraint system (SRS) - airbag (for driver’s seat) P.4-33, 4-39 Horn switch P.5-184
Instrument cluster P.5-120
Windshield wiper and washer switch P.5-178 Rear window wiper and washer switch P.5-182
Cruise control switch P.5-92
Steering wheel height and reach adjustment lever P.5-53
Engine switch (if so equipped) P.5-16
Bluetooth
® 2.0 interface (if so equipped)
P.5-185
Driver’s vents P. 7 - 2
Shift paddles (if so equipped) P.5-64
Driver’s vents P. 7 - 2
Multi information display switch (if so equipped) P.5-123
Headlight leveling switch (if so equipped) P.5-176 Driver’s side power liftgate switch (if so equipped) P.5-38
Fuse box P.9-25
Lane departure warning (LDW) switch (if so equipped) P.5-112 Forward collision mitigation system (FCM) ON/OFF switch (if so equipped) P.5-109
Supplemental restraint system (SRS) - front knee airbag (for driver’s seat) P.4-39
Ignition switch (if so equipped) P.5-55
BK0211800US.book 1 ページ 2014年3月12日 水曜日 午後2時42分
Page 4 of 446
Instruments and controls
Overview 1-2
1
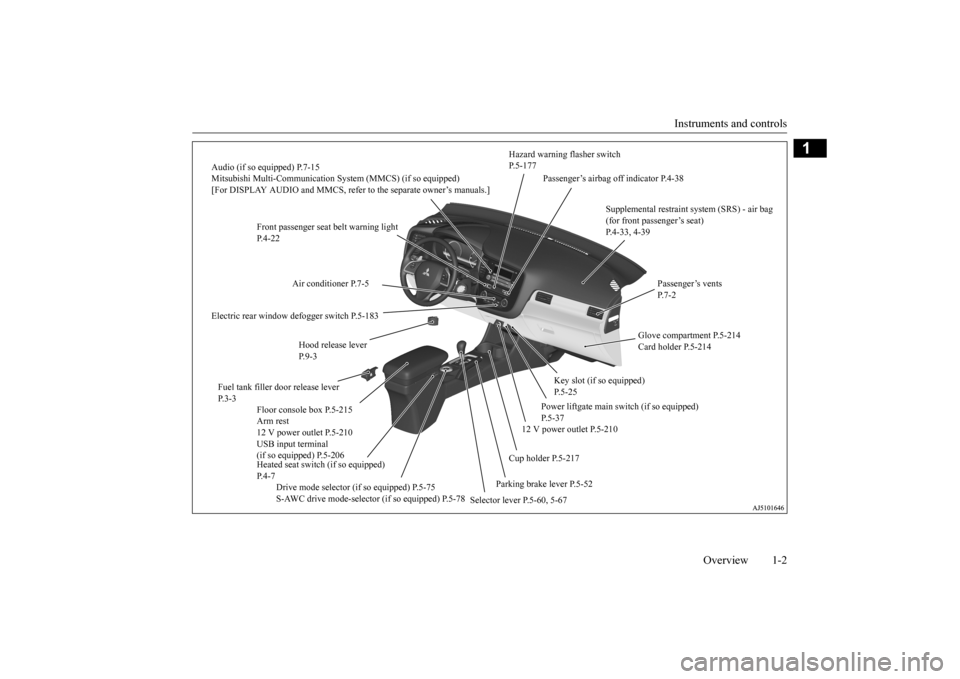
Audio (if so equipped) P.7-15 Mitsubishi Multi-Communication Syst
em (MMCS) (if so equipped)
[For DISPLAY AUDIO and MMCS, refer to the separate owner’s manuals.]
Hazard warning flasher switch P.5-177
Electric rear window defogger switch P.5-183 Fuel tank filler door release lever P. 3 - 3
Drive mode selector (if so equipped) P.5-75 S-AWC drive mode-selector (if so equipped) P.5-78
Selector lever P.5-60, 5-67
Parking brake lever P.5-52
Supplemental restraint system (SRS) - air bag (for front passenger’s seat) P.4-33, 4-39
Air conditioner P.7-5 Hood release lever P. 9 - 3
Floor console box P.5-215 Arm rest 12 V power outlet P.5-210 USB input terminal (if so equipped) P.5-206 Heated seat switch (if so equipped) P. 4 - 7
Cup holder P.5-217
12 V power outlet P.5-210
Power liftgate main sw
itch (if so equipped)
P.5-37
Key slot (if so equipped) P.5-25
Glove compartment P.5-214 Card holder P.5-214
Passenger’s vents P. 7 - 2
Passenger’s airbag off indicator P.4-38
Front passenger seat belt warning light P.4-22
BK0211800US.book 2 ページ 2014年3月12日 水曜日 午後2時42分
Page 11 of 446
If this warning light comes on or flashes while you’re driving... 2-2 Quick index
2
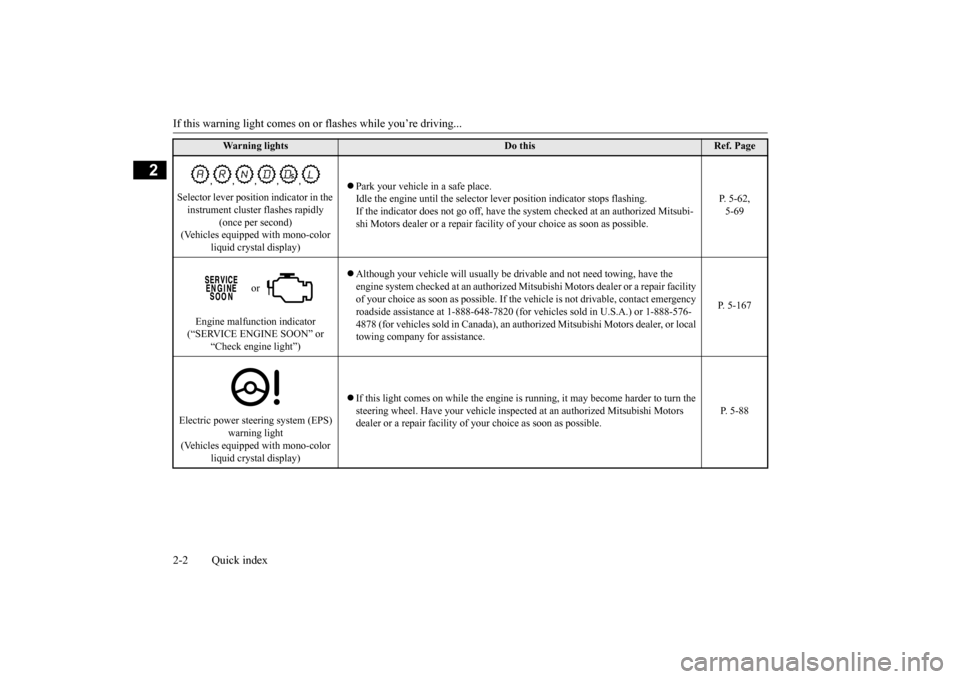
Selector lever position indicator in the instrument cluster flashes rapidly
(once per second)
(Vehicles equipped with mono-color
liquid crystal display)
Park your vehicle in a safe place. Idle the engine until the selector le
ver position indicato
r stops flashing.
If the indicator does not go off, have the
system checked at an
authorized Mitsubi-
shi Motors dealer or a repair facili
ty of your choice as soon as possible.
P. 5-62, 5-69
or
Engine malfunction indicator (“SERVICE ENGINE SOON” or
“Check engine light”)
Although your vehicle will usually be dr
ivable and not need towing, have the
engine system checked at an authorized Mi
tsubishi Motors dealer
or a repair facility
of your choice as soon as possible. If the
vehicle is not drivab
le, contact emergency
roadside assistance at 1-888-648-7820 (for
vehicles sold in U.S.A.) or 1-888-576-
4878 (for vehicles sold in Canada), an aut
horized Mitsubishi Moto
rs dealer, or local
towing company for assistance.
P. 5-167
Electric power stee
ring system (EPS)
warning light
(Vehicles equipped with mono-color
liquid crystal display)
If this light comes on while the engine is
running, it may become harder to turn the
steering wheel. Have your ve
hicle inspected at an aut
horized Mitsubishi Motors
dealer or a repair facility of
your choice as soon as possible.
P. 5-88
Warning lights
Do this
Ref. Page
BK0211800US.book 2 ページ 2014年3月12日 水曜日 午後2時42分
Page 12 of 446
If this warning light comes on or
flashes while you’re driving...
Quick index 2-3
2
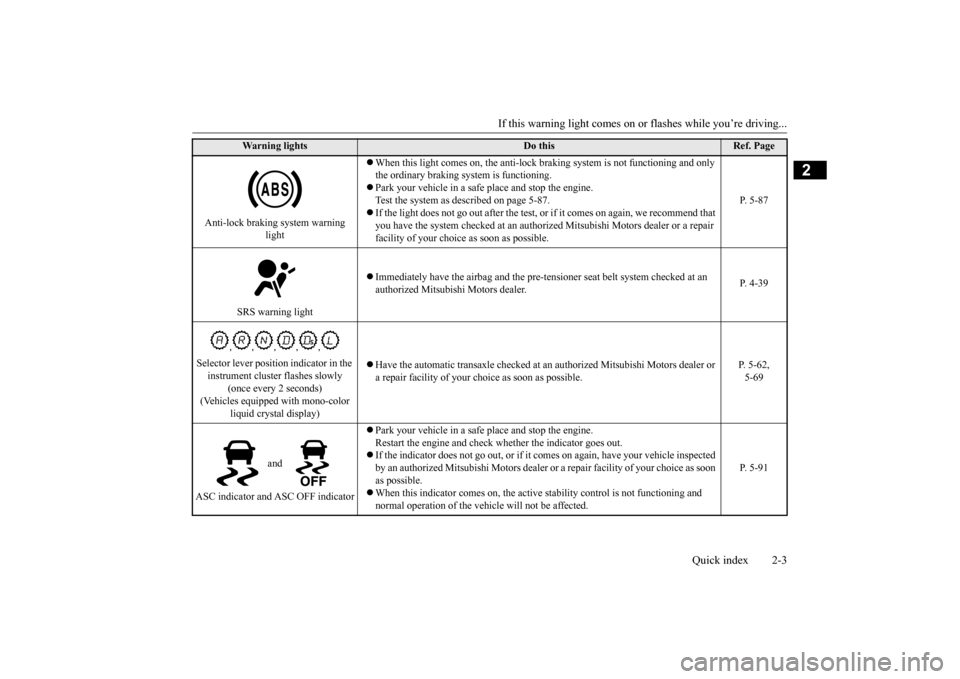
Anti-lock braking system warning
light
When this light comes on,
the anti-lock braking system
is not functioning and only
the ordinary braking system is functioning. Park your vehicle in a safe
place and stop the engine.
Test the system as described on page 5-87. If the light does not go out after the test, or
if it comes on again, we recommend that
you have the system checked at an authorized
Mitsubishi Motors dealer or a repair
facility of your choice
as soon as possible.
P. 5-87
SRS warning light
Immediately have the airbag and the pre-te
nsioner seat belt sy
stem checked at an
authorized Mitsubishi Motors dealer.
P. 4-39
Selector lever position indicator in the instrument cluste
r flashes slowly
(once every 2 seconds)
(Vehicles equipped with mono-color
liquid crystal display)
Have the automatic transaxle checked at an
authorized Mitsubishi Motors dealer or
a repair facility of your c
hoice as soon as possible.
P. 5-62, 5-69
and
ASC indicator and ASC OFF indicator
Park your vehicle in a safe
place and stop the engine.
Restart the engine and check
whether the indicator goes out.
If the indicator does not go out, or if it co
mes on again, have your vehicle inspected
by an authorized Mitsubishi Motors dealer or
a repair facility of your choice as soon
as possible. When this indicator comes on, the active
stability control is
not functioning and
normal operation of the vehicl
e will not be affected.
P. 5-91
Wa rn in g l ig h t s
Do this
Ref. Page
BK0211800US.book 3 ページ 2014年3月12日 水曜日 午後2時42分
Page 14 of 446
If this problem occurs...
Quick index 2-5
2
N00200901880
If this problem occurs...
Problem
Do this
Ref. Page
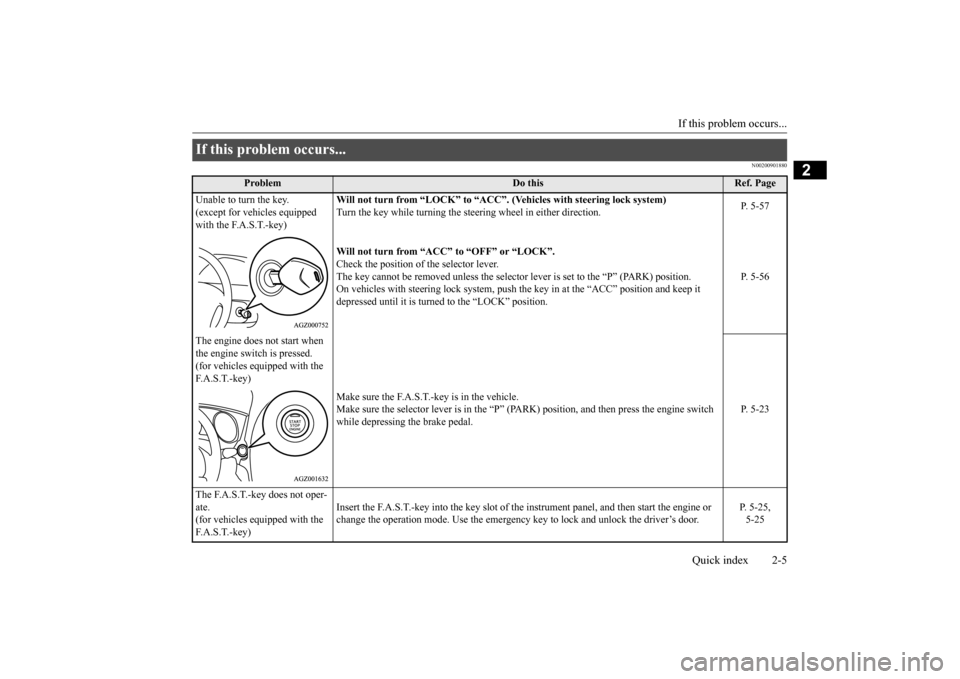
Unable to turn the key. (except for vehicles equipped with the F.A.S.T.-key)
Will not turn from “LOCK” to “ACC”.
(Vehicles with steering lock system)
Turn the key while turning the steering wheel in either direction.
P. 5-57
Will not turn from “ACC” to “OFF” or “LOCK”. Check the position of the selector lever. The key cannot be removed unless the selector
lever is set to the “P” (PARK) position.
On vehicles with stee
ring lock system, push the key in
at the “ACC” posi
tion and keep it
depressed until it is turned to the “LOCK” position.
P. 5-56
The engine does not start when the engine switch is pressed. (for vehicles equipped with the F. A . S . T. - k e y )
Make sure the F.A.S.T.-key is in the vehicle. Make sure the selector lever is in the “P” (P
ARK) position, and then press the engine switch
while depressing the brake pedal.
P. 5-23
The F.A.S.T.-key does not oper- ate. (for vehicles equipped with the F. A . S . T. - k e y )
Insert the F.A.S.T.-key into the key slot of the instrument panel, and then start the engine or change the operation mode. Use the emergency
key to lock and unlock the driver’s door.
P. 5-25, 5-25
BK0211800US.book 5 ページ 2014年3月12日 水曜日 午後2時42分
Page 15 of 446
If this problem occurs... 2-6 Quick index
2
Cannot shift the selector lever from the “P” (PARK) position.
Shift the selector lever while pressing the brake pedal. Check that the ignition switch
or the operation mode is in ON.
P. 5-60
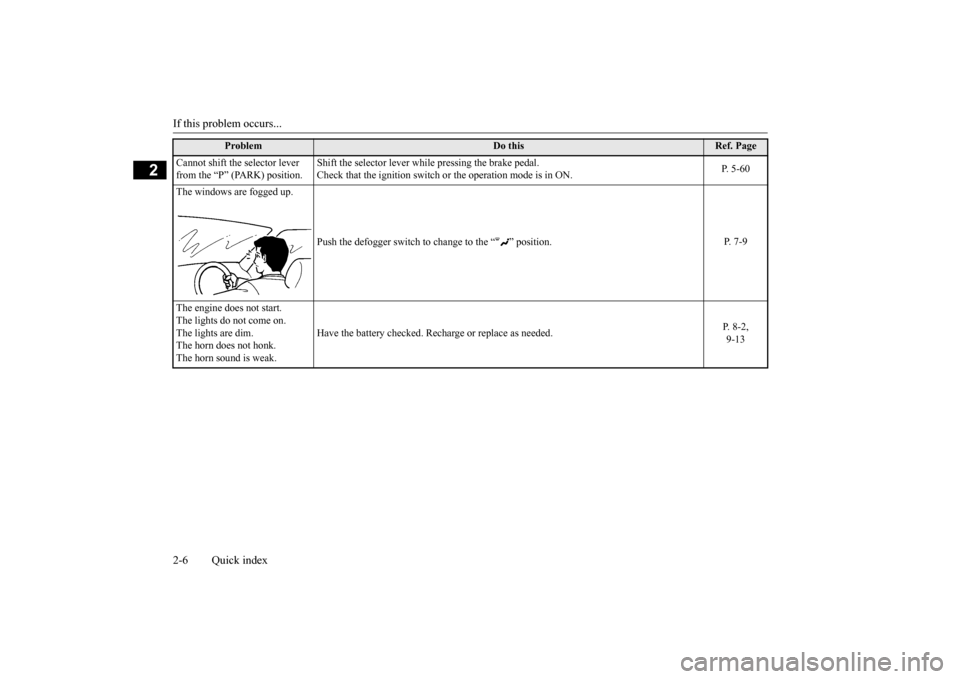
The windows are fogged up.
Push the defogger switch to
change to the “ ” position.
P. 7-9
The engine does not start. The lights do not come on. The lights are dim.The horn does not honk. The horn sound is weak.
Have the battery checked. Rech
arge or replace as needed.
P. 8-2, 9-13
Problem
Do this
Ref. Page
BK0211800US.book 6 ページ 2014年3月12日 水曜日 午後2時42分
Page 23 of 446
Filling the fuel tank 3-4 General information
3
All-wheel drive vehicles: 15.8 gal (60 L) Front-wheel drive vehi
cles: 16.6 gal (63 L)
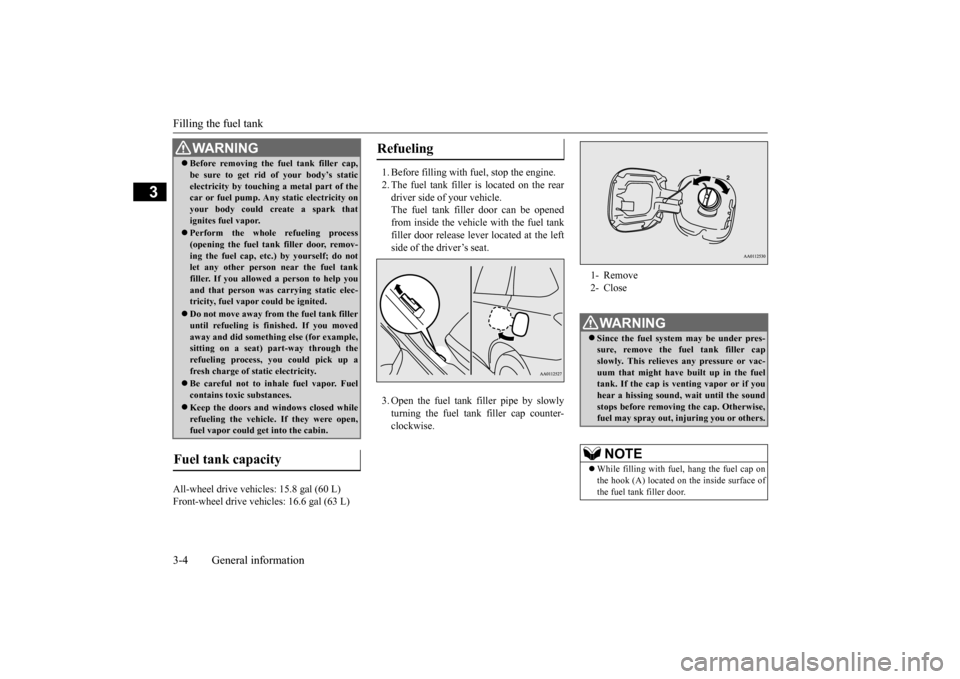
1. Before filling with fuel, stop the engine. 2. The fuel tank filler is located on the rear driver side of your vehicle. The fuel tank filler door can be openedfrom inside the vehicle with the fuel tank filler door release lever located at the left side of the driver’s seat. 3. Open the fuel tank filler pipe by slowly turning the fuel tank filler cap counter- clockwise.
Before removing the fuel tank filler cap, be sure to get rid of your body’s staticelectricity by touching a metal part of thecar or fuel pump. Any
static electricity on
your body could create a spark that ignites fuel vapor. Perform the whole
refueling process
(opening the fuel tank filler door, remov-ing the fuel cap, etc.) by yourself; do not let any other
person near the fuel tank
filler. If you allowed
a person to help you
and that person was ca
rrying static elec-
tricity, fuel vapor could be ignited. Do not move away from
the fuel tank filler
until refueling is fi
nished. If you moved
away and did somethin
g else (for example,
sitting on a seat) part-way through the refueling process, you could pick up a fresh charge of st
atic electricity.
Be careful not to inhale fuel vapor. Fuel contains toxic substances. Keep the doors and wi
ndows closed while
refueling the vehicle. If they were open,fuel vapor could ge
t into the cabin.
Fuel tank capacity
WA R N I N G
Refueling
1- Remove 2- CloseWA R N I N G Since the fuel system may be under pres- sure, remove the fuel tank filler capslowly. This relieves
any pressure or vac-
uum that might have built up in the fuel tank. If the cap is venting vapor or if youhear a hissing sound, wait until the sound stops before removing the cap. Otherwise, fuel may spray out, in
juring you or others.
NOTE
While filling with fuel
, hang the fuel cap on
the hook (A) located on the inside surface ofthe fuel tank filler door.
BK0211800US.book 4 ページ 2014年3月12日 水曜日 午後2時42分
Page 32 of 446
Front seats
Seat and restraint systems 4-5
4
N00401901326
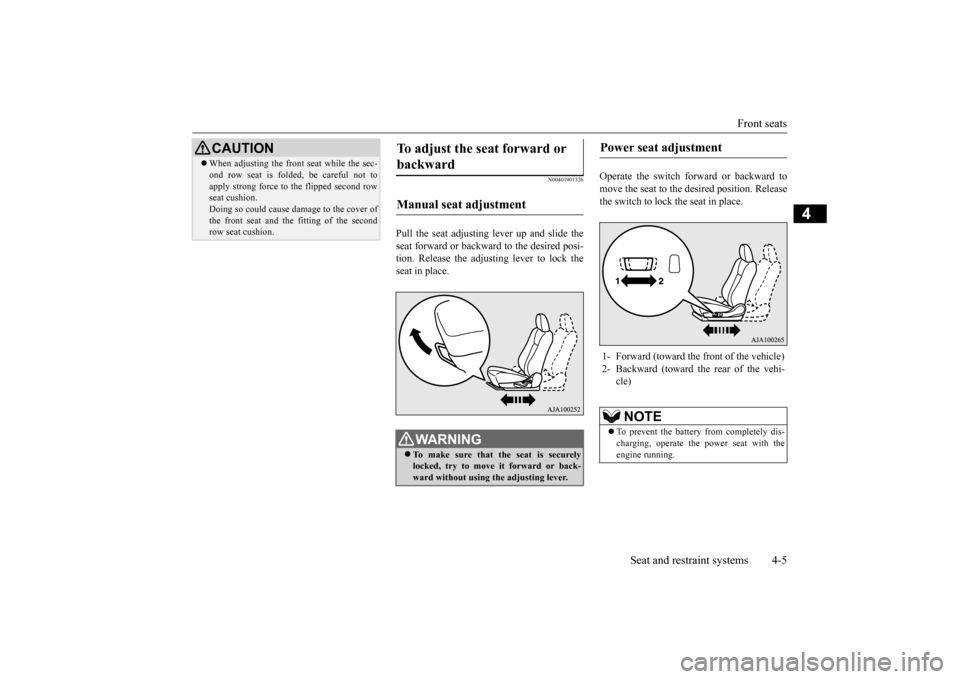
Pull the seat adjusting lever up and slide the seat forward or backward to the desired posi-tion. Release the adjusting lever to lock the seat in place.
Operate the switch forward or backward to move the seat to the de
sired position. Release
the switch to lock the seat in place.
When adjusting the front seat while the sec- ond row seat is folded, be careful not toapply strong force to the flipped second rowseat cushion. Doing so could cause da
mage to the cover of
the front seat and the
fitting of the second
row seat cushion.CAUTION
To adjust the seat forward or backward Manual seat adjustment
WA R N I N G To make sure that the seat is securely locked, try to move
it forward or back-
ward without using
the adjusting lever.
Power seat adjustment 1- Forward (toward the front of the vehicle) 2- Backward (toward the rear of the vehi-
cle)NOTE
To prevent the battery from completely dis- charging, operate the
power seat with the
engine running.
BK0211800US.book 5 ページ 2014年3月12日 水曜日 午後2時42分
Page 33 of 446
Front seats 4-6 Seat and restraint systems
4
N00402001379
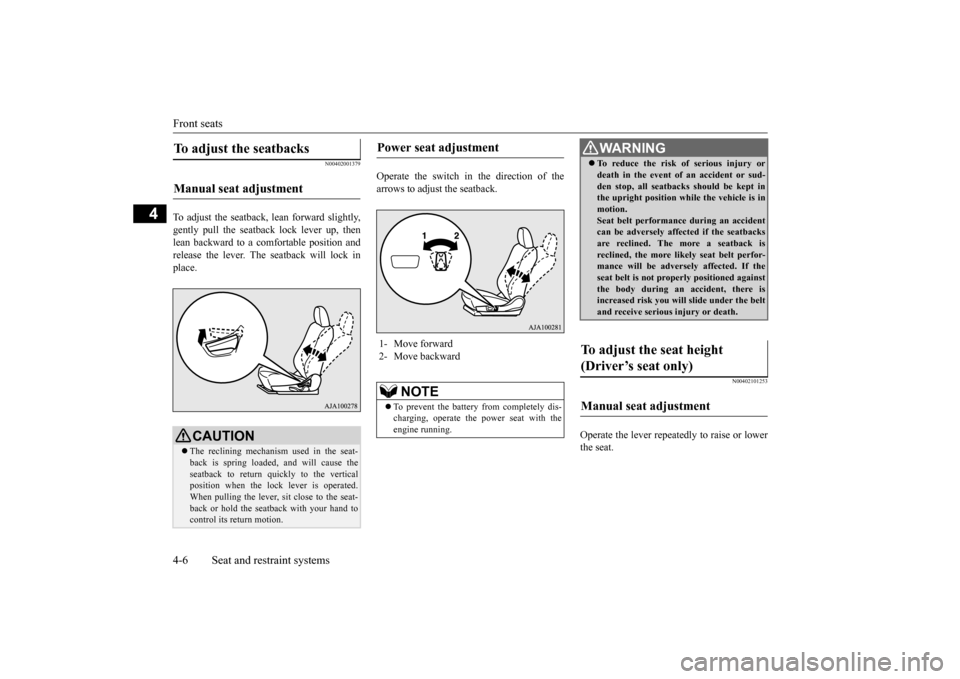
To adjust the seatback, lean forward slightly, gently pull the seatback lock lever up, then lean backward to a comfortable position andrelease the lever. The seatback will lock in place.
Operate the switch in the direction of the arrows to adjust the seatback.
N00402101253
Operate the lever repeatedly to raise or lower the seat.
To adjust the seatbacks Manual seat adjustment
CAUTION The reclining mechanism used in the seat- back is spring loaded, and will cause theseatback to return quickly to the vertical position when the lock lever is operated. When pulling the lever, sit close to the seat-back or hold the seatback with your hand to control its return motion.
Power seat adjustment 1- Move forward 2- Move backward
NOTE
To prevent the battery from completely dis- charging, operate the
power seat with the
engine running.
WA R N I N G To reduce the risk of serious injury or death in the event of
an accident or sud-
den stop, all seatbacks should be kept inthe upright position while the vehicle is in motion. Seat belt performance during an accidentcan be adversely affect
ed if the seatbacks
are reclined. The more a seatback is reclined, the more likely seat belt perfor-mance will be adversely affected. If the seat belt is not proper
ly positioned against
the body during an accident, there isincreased risk you will slide under the belt and receive serious
injury or death.
To adjust the seat height (Driver’s seat only) Manual seat adjustment
BK0211800US.book 6 ページ 2014年3月12日 水曜日 午後2時42分
Page 35 of 446
Second row seats 4-8 Seat and restraint systems
4
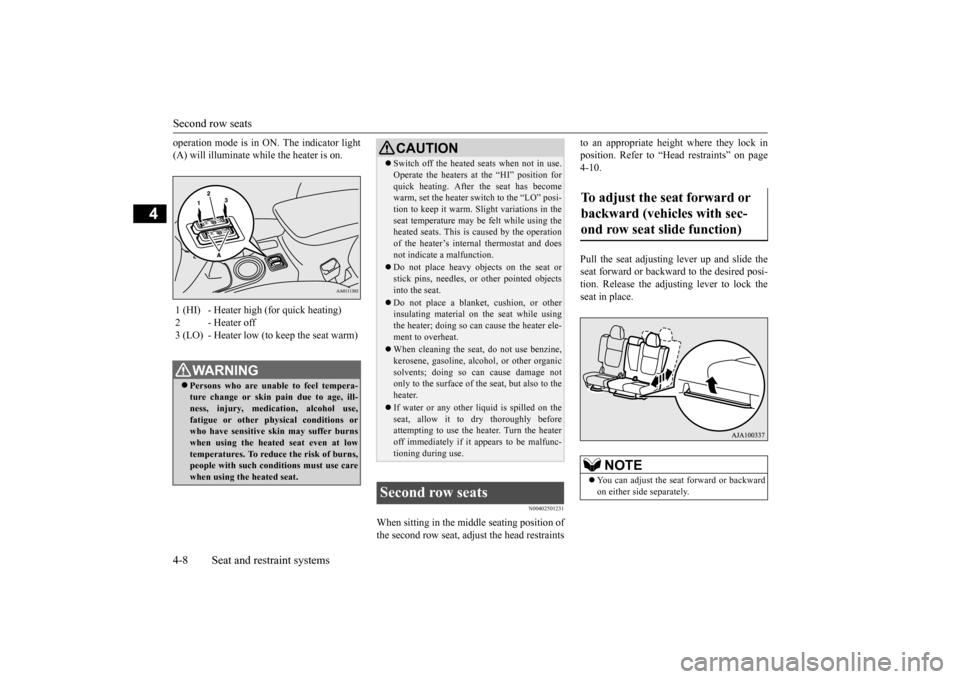
operation mode is in ON. The indicator light (A) will illuminate while the heater is on.
N00402501231
When sitting in the middle seating position of the second row seat, adju
st the head restraints
to an appropriate height where they lock in position. Refer to “Hea
d restraints” on page
4-10. Pull the seat adjusting lever up and slide the seat forward or backward to the desired posi- tion. Release the adjusting lever to lock the seat in place.
1 (HI) - Heater high (for quick heating) 2 - Heater off 3 (LO) - Heater low (to keep the seat warm)
WA R N I N G Persons who are unable
to feel tempera-
ture change or skin
pain due to age, ill-
ness, injury, medication, alcohol use, fatigue or other phys
ical conditions or
who have sensitive skin may suffer burns when using the heated seat even at low temperatures. To reduce the risk of burns,people with such conditions must use care when using the heated seat.
CAUTION Switch off the heated seats when not in use. Operate the heaters at the “HI” position forquick heating. After the seat has becomewarm, set the heater switch to the “LO” posi- tion to keep it warm. Sl
ight variations in the
seat temperature may be felt while using theheated seats. This is caused by the operation of the heater’s internal thermostat and does not indicate a malfunction. Do not place heavy obj
ects on the seat or
stick pins, needles, or
other pointed objects
into the seat. Do not place a blanket,
cushion, or other
insulating material on the seat while using the heater; doing so can
cause the heater ele-
ment to overheat. When cleaning the seat, do not use benzine, kerosene, gasoline, alc
ohol, or other organic
solvents; doing so can cause damage not only to the surface of the seat, but also to the heater. If water or any other liquid is spilled on the seat, allow it to dry thoroughly beforeattempting to use the heater. Turn the heater off immediately if it a
ppears to be malfunc-
tioning during use.
Second row seats
To adjust the seat forward or backward (vehicles with sec- ond row seat slide function)
NOTE
You can adjust the seat
forward or backward
on either side separately.
BK0211800US.book 8 ページ 2014年3月12日 水曜日 午後2時42分