Vehicle care MITSUBISHI OUTLANDER 2017 3.G Owners Manual
[x] Cancel search | Manufacturer: MITSUBISHI, Model Year: 2017, Model line: OUTLANDER, Model: MITSUBISHI OUTLANDER 2017 3.GPages: 521, PDF Size: 14.91 MB
Page 2 of 521
Table of contents
123456789101112
Overview Quick indexGeneral information Seat and restraint systems Features and controlsDriving safetyComfort controlsFor emergenciesVehicle care a
nd maintenance
Customer assistance/
Reporting Safety Defects
SpecificationsAlphabetical index
BK0239700US.book 1 ページ 2016年6月16日 木曜日 午前10時58分
Page 15 of 521
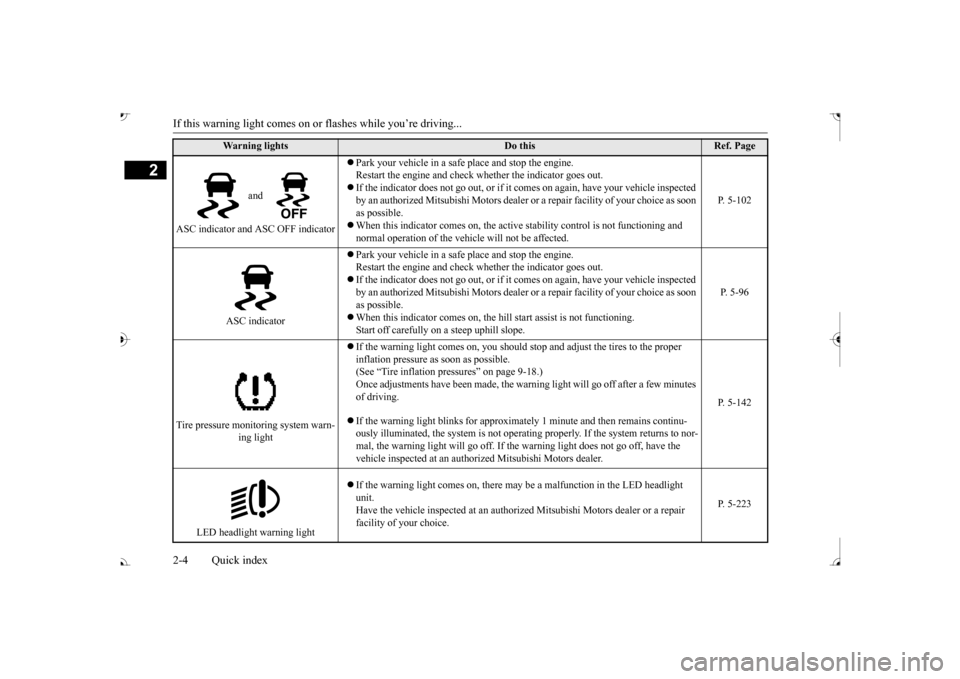
If this warning light comes on or flashes while you’re driving... 2-4 Quick index
2
and
ASC indicator and ASC OFF indicator
Park your vehicle in a safe
place and stop the engine.
Restart the engine and check wh
ether the indicator goes out.
If the indicator does not go out, or if it
comes on again, have your vehicle inspected
by an authorized Mitsubishi Motors dealer or
a repair facility of
your choice as soon
as possible. When this indicator comes on, the active
stability control is
not functioning and
normal operation of the vehi
cle will not be affected.
P. 5-102
ASC indicator
Park your vehicle in a safe
place and stop the engine.
Restart the engine and check wh
ether the indicator goes out.
If the indicator does not go out, or if it
comes on again, have your vehicle inspected
by an authorized Mitsubishi Motors dealer or
a repair facility of
your choice as soon
as possible. When this indicator comes on, the hi
ll start assist
is not functioning.
Start off carefully on a steep uphill slope.
P. 5-96
Tire pressure monito
ring system warn-
ing light
If the warning light comes
on, you should stop and adju
st the tires to the proper
inflation pressure as
soon as possible.
(See
Page 18 of 521
If this problem occurs...
Quick index 2-7
2
Problem
Do this
Ref. Page
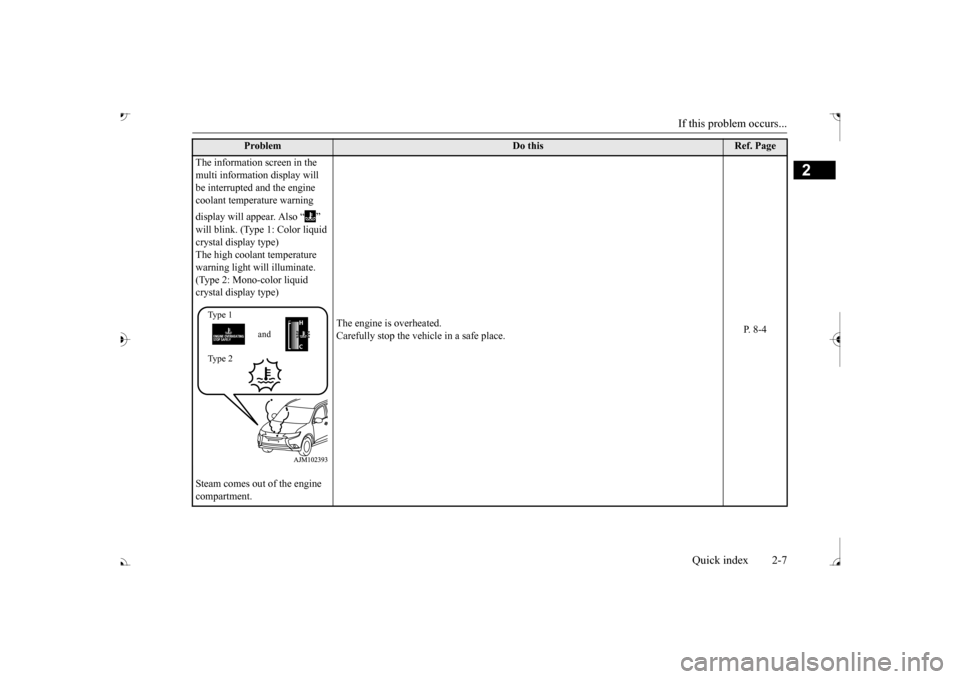
The information screen in the multi information display will be interrupted and the engine coolant temperature warning display will appear. Also “ ” will blink. (Type 1: Color liquid crystal display type) The high coolant temperature warning light will illuminate. (Type 2: Mono-color liquid crystal display type) Steam comes out of the engine compartment.
The engine is overheated. Carefully stop the vehicle in a safe place.
P. 8 - 4
Ty p e 1 Ty p e 2
and
BK0239700US.book 7 ページ 2016年6月16日 木曜日 午前10時58分
Page 25 of 521
Filling the fuel tank 3-4 General information
3
All-wheel drive vehicles: 15.8 gal (60 L) Front-wheel drive vehi
cles: 16.6 gal (63 L)
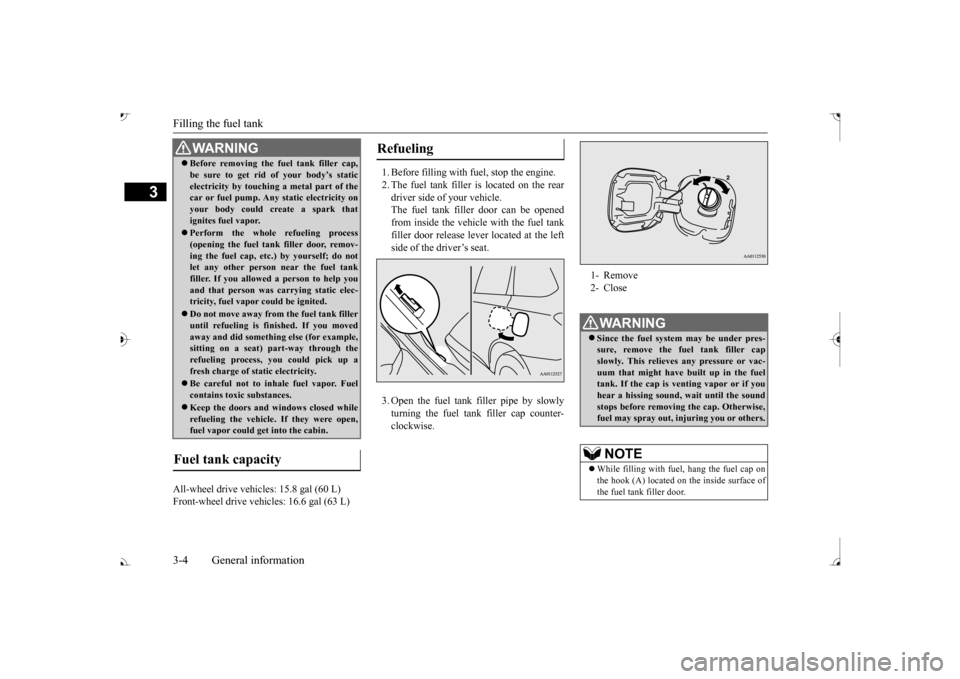
1. Before filling with fuel, stop the engine. 2. The fuel tank filler is located on the rear driver side of your vehicle. The fuel tank filler door can be openedfrom inside the vehicle with the fuel tank filler door release lever located at the left side of the driver’s seat. 3. Open the fuel tank filler pipe by slowly turning the fuel tank filler cap counter- clockwise.
Before removing the fuel tank filler cap, be sure to get rid of your body’s staticelectricity by touching a metal part of thecar or fuel pump. Any
static electricity on
your body could create a spark that ignites fuel vapor. Perform the whole
refueling process
(opening the fuel tank filler door, remov-ing the fuel cap, etc.) by yourself; do not let any other
person near the fuel tank
filler. If you allowed
a person to help you
and that person was ca
rrying static elec-
tricity, fuel vapor could be ignited. Do not move away from
the fuel tank filler
until refueling is fi
nished. If you moved
away and did somethin
g else (for example,
sitting on a seat) part-way through the refueling process, you could pick up a fresh charge of st
atic electricity.
Be careful not to inhale fuel vapor. Fuel contains toxic substances. Keep the doors and wi
ndows closed while
refueling the vehicle. If they were open,fuel vapor could ge
t into the cabin.
Fuel tank capacity
WA R N I N G
Refueling
1- Remove 2- CloseWA R N I N G Since the fuel system may be under pres- sure, remove the fuel tank filler capslowly. This relieves
any pressure or vac-
uum that might have built up in the fuel tank. If the cap is venting vapor or if youhear a hissing sound, wait until the sound stops before removing the cap. Otherwise, fuel may spray out, in
juring you or others.
NOTE
While filling with fuel
, hang the fuel cap on
the hook (A) located on the inside surface ofthe fuel tank filler door.
BK0239700US.book 4 ページ 2016年6月16日 木曜日 午前10時58分
Page 33 of 521
Seats and restraint systems 4-4 Seat and restraint systems
4
N00401601251
Your vehicle has seat
belts and other safety
features that help protect you and your pas- sengers in an accident.Seat belts are the most important safety device. When worn properly, seat belts can reduce the chance of serious injury or deathin various types of crashes. For added protec- tion during a severe fr
ontal collision, your
vehicle has a Supplemental Restraint System (SRS) with airbags for the driver and passen- gers. The seats, head restraints, and doorlocks also are safety equipment, which must be used correctly. Always check the following before you drive: That everyone in your vehicle is properly wearing their seat belt. That infants and small children are prop- erly secured in an appropriate child restraint system in the rear seat. That all doors are fully closed and locked. That seatbacks are upright, with head restraints properly adjusted.
Safety equipment cannot prevent injury or death in all motor ve
hicle accidents. How-
ever, you can help reduce the risk of injury or death, by following the instructions in thismanual.
N00401801426
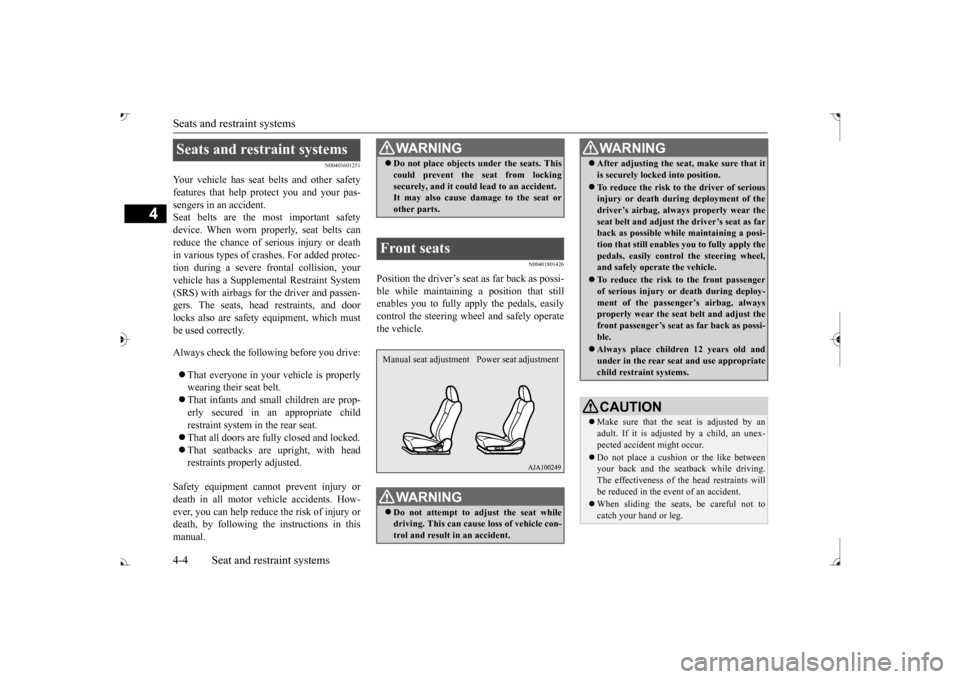
Position the driver’s seat
as far back as possi-
ble while maintaining a position that stillenables you to fully apply the pedals, easily control the steering wh
eel and safely operate
the vehicle.
Seats and restraint systems
WA R N I N G Do not place objects under the seats. This could prevent the seat from lockingsecurely, and it could
lead to an accident.
It may also cause damage to the seat or other parts.
Front seats
WA R N I N G Do not attempt to adjust the seat while driving. This can cause loss of vehicle con- trol and result
in an accident.
Manual seat adjustment Power seat adjustment
After adjusting the seat, make sure that it is securely locked into position. To reduce the risk to the driver of serious injury or death duri
ng deployment of the
driver’s airbag, always
properly wear the
seat belt and adjust th
e driver’s seat as far
back as possible while maintaining a posi- tion that still enables
you to fully apply the
pedals, easily control the steering wheel, and safely operate the vehicle. To reduce the risk to the front passenger of serious injury or
death during deploy-
ment of the passeng
er’s airbag, always
properly wear the seat
belt and adjust the
front passenger’s seat as far back as possi- ble. Always place childr
en 12 years old and
under in the rear seat
and use appropriate
child restraint systems.CAUTION Make sure that the seat is adjusted by an adult. If it is adjusted by a child, an unex- pected accident might occur. Do not place a cushion
or the like between
your back and the seatback while driving. The effectiveness of the head restraints will be reduced in the event of an accident. When sliding the seat
s, be careful not to
catch your hand or leg.WA R N I N G
BK0239700US.book 4 ページ 2016年6月16日 木曜日 午前10時58分
Page 34 of 521
Front seats
Seat and restraint systems 4-5
4
N00401901326
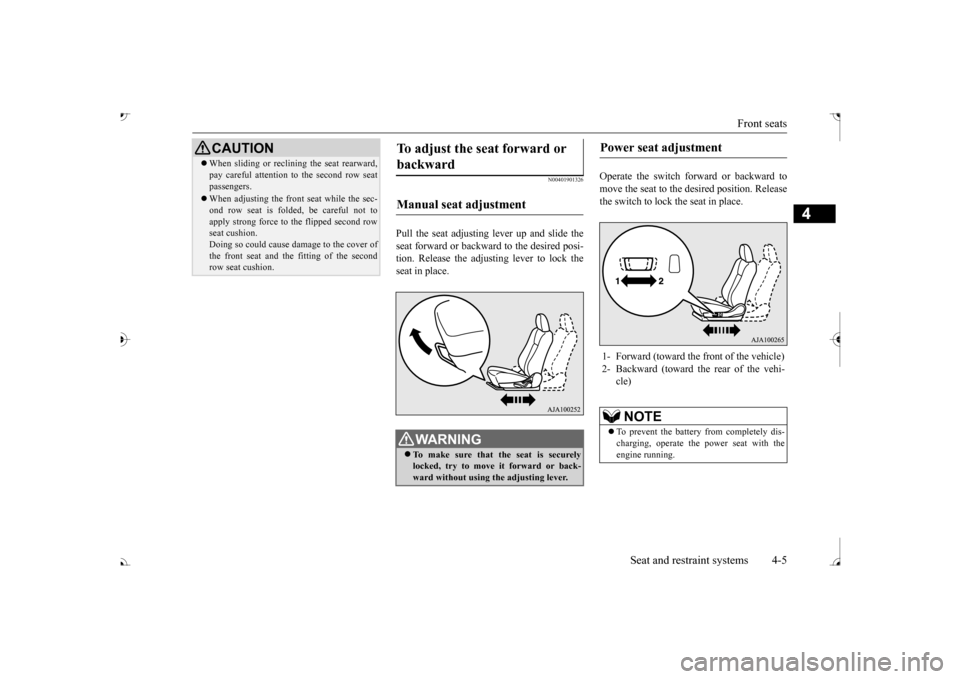
Pull the seat adjusting lever up and slide the seat forward or backward to the desired posi-tion. Release the adjusting lever to lock the seat in place.
Operate the switch forward or backward to move the seat to the de
sired position. Release
the switch to lock the seat in place.
When sliding or reclin
ing the seat rearward,
pay careful attention
to the second row seat
passengers. When adjusting the front seat while the sec- ond row seat is folded, be careful not toapply strong force to the flipped second row seat cushion. Doing so could cause da
mage to the cover of
the front seat and the
fitting of the second
row seat cushion.CAUTION
To adjust the seat forward or backward Manual seat adjustment
WA R N I N G To make sure that the seat is securely locked, try to move
it forward or back-
ward without using
the adjusting lever.
Power seat adjustment 1- Forward (toward the front of the vehicle) 2- Backward (toward the rear of the vehi-
cle)NOTE
To prevent the battery from completely dis- charging, operate the
power seat with the
engine running.
BK0239700US.book 5 ページ 2016年6月16日 木曜日 午前10時58分
Page 37 of 521
Second row seats 4-8 Seat and restraint systems
4
N00435601463
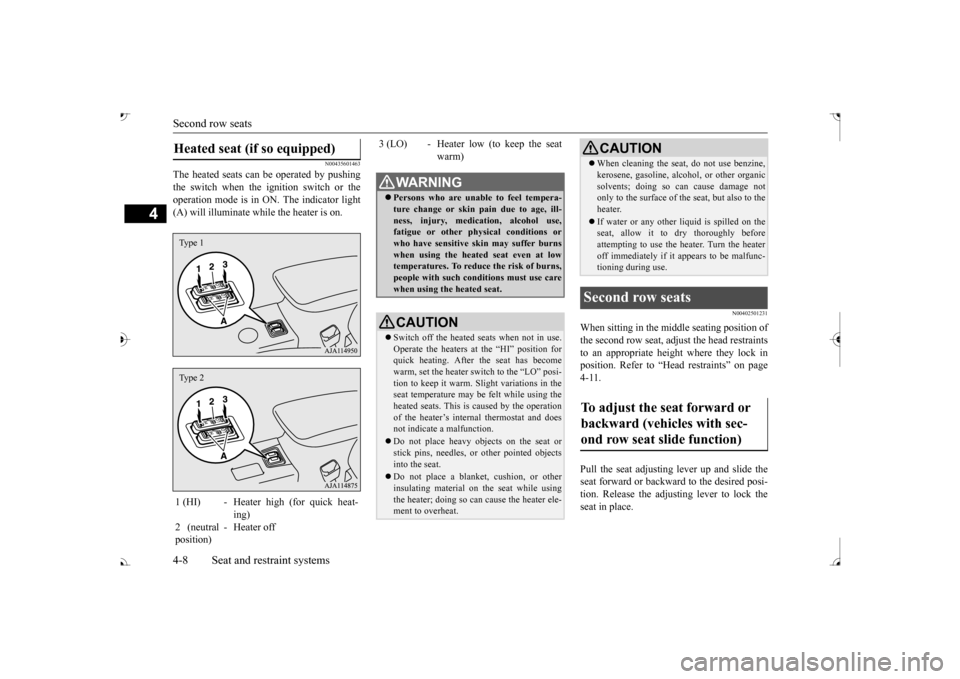
The heated seats can
be operated by pushing
the switch when the ignition switch or the operation mode is in ON. The indicator light(A) will illuminate while the heater is on.
N00402501231
When sitting in the mi
ddle seating position of
the second row seat, adjust the head restraints to an appropriate height where they lock inposition. Refer to “Hea
d restraints” on page
4-11. Pull the seat adjusting lever up and slide the seat forward or backward to the desired posi- tion. Release the adjusting lever to lock the seat in place.
Heated seat (if so equipped) 1 (HI) - Heater high (for quick heat-
ing)
2 (neutral position)
- Heater off
Type 1Type 2
3 (LO) - Heater low (to keep the seat
warm)
WA R N I N G Persons who are unable to feel tempera- ture change or skin
pain due to age, ill-
ness, injury, medication, alcohol use,fatigue or other phys
ical conditions or
who have sensitive sk
in may suffer burns
when using the heated seat even at lowtemperatures. To reduce the risk of burns, people with such conditions must use care when using the heated seat.CAUTION Switch off the heated seats when not in use. Operate the heaters at the “HI” position for quick heating. After the seat has becomewarm, set the heater switch to the “LO” posi- tion to keep it warm. Sl
ight variations in the
seat temperature may be felt while using theheated seats. This is caused by the operation of the heater’s internal thermostat and does not indicate a malfunction. Do not place heavy obj
ects on the seat or
stick pins, needles, or
other pointed objects
into the seat. Do not place a blanket,
cushion, or other
insulating material on the seat while usingthe heater; doing so can
cause the heater ele-
ment to overheat.
When cleaning the seat, do not use benzine, kerosene, gasoline, alc
ohol, or other organic
solvents; doing so can cause damage notonly to the surface of the seat, but also to the heater. If water or any other li
quid is spilled on the
seat, allow it to dry thoroughly before attempting to use the heater. Turn the heateroff immediately if it
appears to be malfunc-
tioning during use.
Second row seats To adjust the seat forward or backward (vehicles with sec-ond row seat slide function)
CAUTION
BK0239700US.book 8 ページ 2016年6月16日 木曜日 午前10時58分
Page 38 of 521
Second row seats
Seat and restraint systems 4-9
4
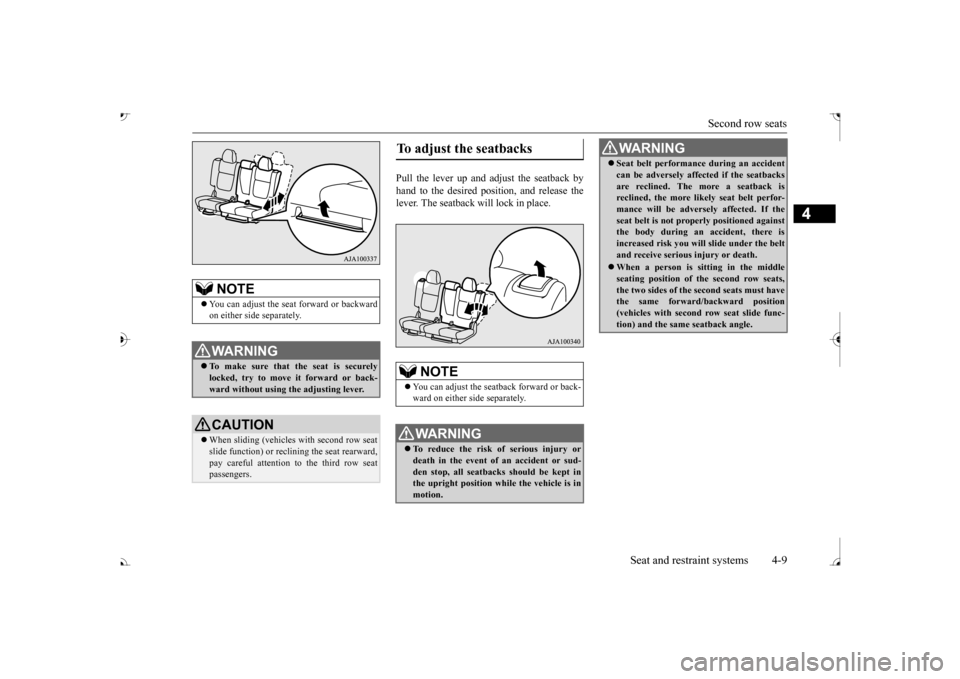
Pull the lever up and adjust the seatback by hand to the desired position, and release the lever. The seatback will lock in place.
NOTE
You can adjust the seat forward or backward on either side separately.WA R N I N G To make sure that the seat is securely locked, try to move
it forward or back-
ward without using
the adjusting lever.
CAUTIONWhen sliding (vehicles with second row seat slide function) or reclin
ing the seat rearward,
pay careful attention to the third row seatpassengers.
To adjust the seatbacks
NOTE
You can adjust the seat
back forward or back-
ward on either side separately.WA R N I N G To reduce the risk of serious injury or death in the event of
an accident or sud-
den stop, all seatbacks should be kept inthe upright position while the vehicle is in motion.
Seat belt performance during an accident can be adversely affect
ed if the seatbacks
are reclined. The more a seatback isreclined, the more likely seat belt perfor- mance will be advers
ely affected. If the
seat belt is not prop
erly positioned against
the body during an accident, there is increased risk you will slide under the belt and receive serious
injury or death.
When a person is sitting in the middle seating position of the second row seats,the two sides of the second seats must have the same forward/backward position (vehicles with second row seat slide func-tion) and the same seatback angle.WA R N I N G
BK0239700US.book 9 ページ 2016年6月16日 木曜日 午前10時58分
Page 42 of 521
Making a cargo area
Seat and restraint systems 4-13
4
N00405501115
N00405701146
The second row seat can be folded to create an additional cargo area.
1. When folding the left side second row seat, store the seat belt for the middle seating position of the second row seat.Refer to “Detachable
center seat belt for
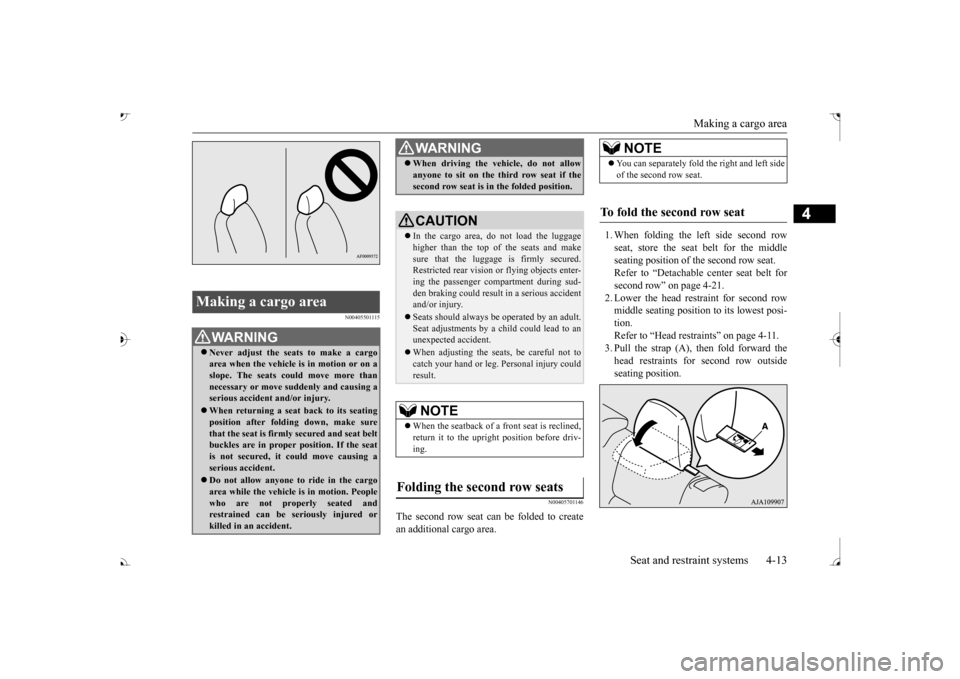
second row” on page 4-21. 2. Lower the head restraint for second rowmiddle seating position to its lowest posi- tion. Refer to “Head restraints” on page 4-11.3. Pull the strap (A), then fold forward the head restraints for second row outside seating position.
Making a cargo area
WA R N I N G Never adjust the seats to make a cargo area when the vehicle is in motion or on a slope. The seats co
uld move more than
necessary or move su
ddenly and causing a
serious accident
and/or injury.
When returning a seat back to its seating position after fold
ing down, make sure
that the seat is firmly secured and seat beltbuckles are in proper position. If the seat is not secured, it could move causing a serious accident. Do not allow anyone to ride in the cargo area while the vehicle
is in motion. People
who are not properly seated and restrained can be seriously injured or killed in an accident.
When driving the vehicle, do not allow anyone to sit on the third row seat if thesecond row seat is in the folded position.CAUTION In the cargo area, do not load the luggage higher than the top of the seats and makesure that the luggage is firmly secured. Restricted rear vision or
flying objects enter-
ing the passenger compartment during sud-den braking could result
in a serious accident
and/or injury. Seats should always be
operated by an adult.
Seat adjustments by a child could lead to an unexpected accident. When adjusting the seats, be careful not to catch your hand or leg.
Personal injury could
result.NOTE
When the seatback of a front seat is reclined, return it to the upright
position before driv-
ing.
Folding the second row seats
WA R N I N G
NOTE
You can separately fold
the right and left side
of the second row seat.
To fold the second row seat
BK0239700US.book 13 ページ 2016年6月16日 木曜日 午前10時58分
Page 45 of 521
Making a flat seat 4-16 Seat and restraint systems
4
N00409800021
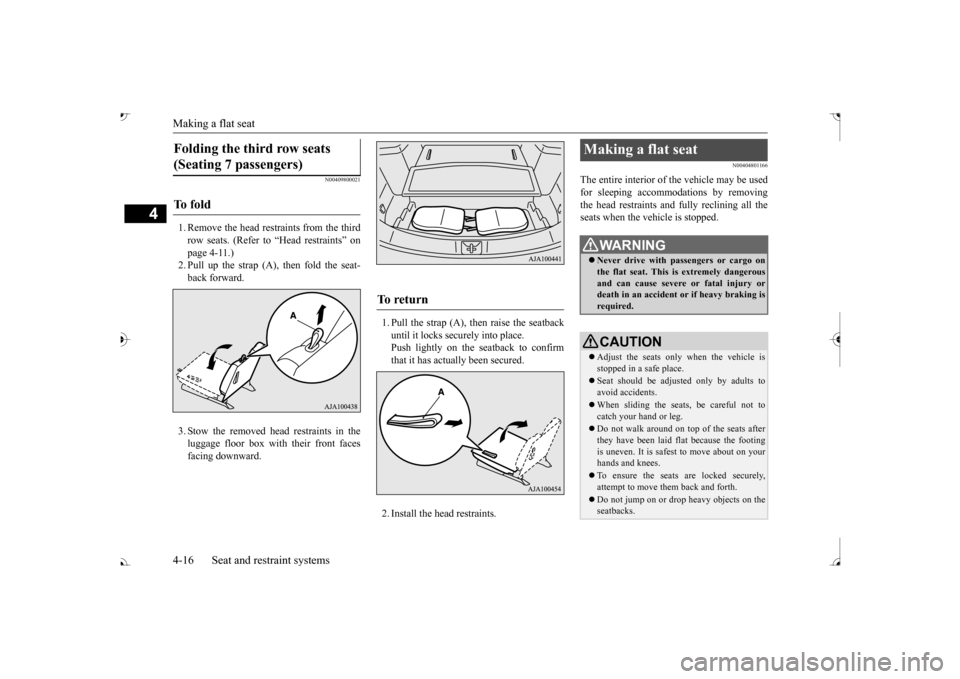
1. Remove the head restraints from the third row seats. (Refer to “Head restraints” on page 4-11.)2. Pull up the strap (A), then fold the seat- back forward. 3. Stow the removed head restraints in the luggage floor box with their front faces facing downward.
1. Pull the strap (A), then raise the seatback until it locks securely into place.Push lightly on the seatback to confirm that it has actually been secured. 2. Install the head restraints.
N00404801166
The entire interior of the vehicle may be used for sleeping accommoda
tions by removing
the head restraints and fully reclining all theseats when the vehicle is stopped.
Folding the third row seats (Seating 7 passengers) To f o l d
To r e t u r n
Making a flat seat
WA R N I N G Never drive with passengers or cargo on the flat seat. This is extremely dangerousand can cause severe or fatal injury or death in an accident
or if heavy braking is
required.CAUTION Adjust the seats only when the vehicle is stopped in a safe place. Seat should be adjusted only by adults to avoid accidents. When sliding the seat
s, be careful not to
catch your hand or leg. Do not walk around on top of the seats after they have been laid flat because the footingis uneven. It is safest to move about on your hands and knees. To ensure the seats are locked securely, attempt to move them back and forth. Do not jump on or drop heavy objects on the seatbacks.
BK0239700US.book 16 ページ 2016年6月16日 木曜日 午前10時58分