brake fluid MITSUBISHI OUTLANDER 2019 Owner's Manual (in English)
[x] Cancel search | Manufacturer: MITSUBISHI, Model Year: 2019, Model line: OUTLANDER, Model: MITSUBISHI OUTLANDER 2019Pages: 451, PDF Size: 58.02 MB
Page 13 of 451
2-1
2
If this warning light comes on or
flashes while you’re driving...
Quick index
N00200702289
If this warning light comes on
or flashes while you’re driving...
NOTE
For information regarding warning
displays in the multi-information display (Color
liquid crystal display
type), refer to “Mult
i-information display” on
page 5-156. These warning lights will co
me on for a few seconds for a bulb check when the i
gnition switch is
first turned to “ON” or the op
eration mode is put in ON.
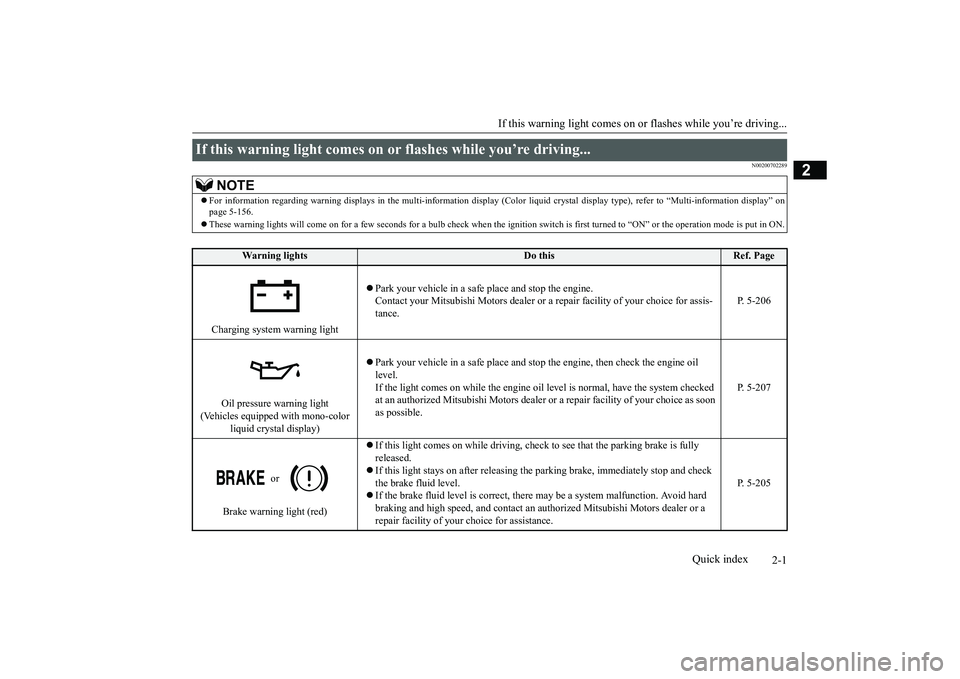
Wa rn in g l ig h t s
Do this
Ref. Page
Charging system warning light
Park your vehicle in a safe
place and stop the engine.
Contact your Mitsubishi Motors dealer or a re
pair facility of your choice for assis-
tance.
P. 5-206
Oil pressure warning light
(Vehicles equipped with mono-color
liquid crystal display)
Park your vehicle in a safe
place and stop the engine, then check the engine oil
level. If the light comes on while the engine oil le
vel is normal, have the system checked
at an authorized Mitsubishi
Motors dealer or a repair fa
cility of your choice as soon
as possible.
P. 5-207
or
Brake warning light (red)
If this light comes on while driving, check to see that the parking brake is fully released. If this light stays on after
releasing the parking brake,
immediately stop and check
the brake fluid level. If the brake fluid level is correct, there
may be a system malfunction. Avoid hard
braking and high speed, and contact an au
thorized Mitsubishi Mo
tors dealer or a
repair facility of your
choice for assistance.
P. 5-205
BK0264300US.book 1 ページ 2018年2月28日 水曜日 午後5時16分
Page 151 of 451
Automatic transaxle (if so equipped)
Features and controls 5-69
5
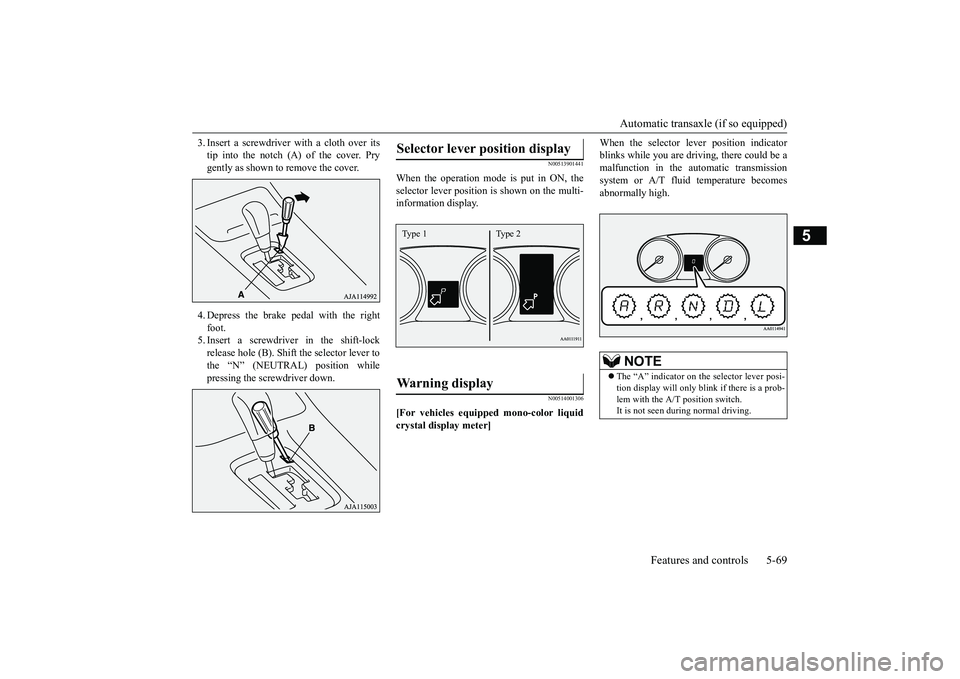
3. Insert a screwdrive
r with a cloth over its
tip into the notch (A) of the cover. Prygently as shown to remove the cover. 4. Depress the brake pe
dal with the right
foot. 5. Insert a screwdriver in the shift-lockrelease hole (B). Shift the selector lever to the “N” (NEUTRAL) position while pressing the screwdriver down.
N00513901441
When the operation mode is put in ON, the selector lever position
is shown on the multi-
information display.
N00514001306
[For vehicles equipped mono-color liquid crystal display meter]
When the selector le
ver position indicator
blinks while you are driv
ing, there could be a
malfunction in the automatic transmission system or A/T fluid temperature becomes abnormally high.
Selector lever position display
Warning display
Type 1 Type 2
NOTE
The “A” indicator on the selector lever posi- tion display will only blink if there is a prob- lem with the A/T position switch.It is not seen during normal driving.
BK0264300US.book 69 ページ 2018年2月28日 水曜日 午後5時16分
Page 155 of 451
Automatic transaxle (if so equipped)
Features and controls 5-73
5
N00514501372
To gain extra acceleration in “D” (DRIVE) position (when passing another vehicle) push the accelerator to the floor. The automatictransaxle will automatically downshift.
NOTE
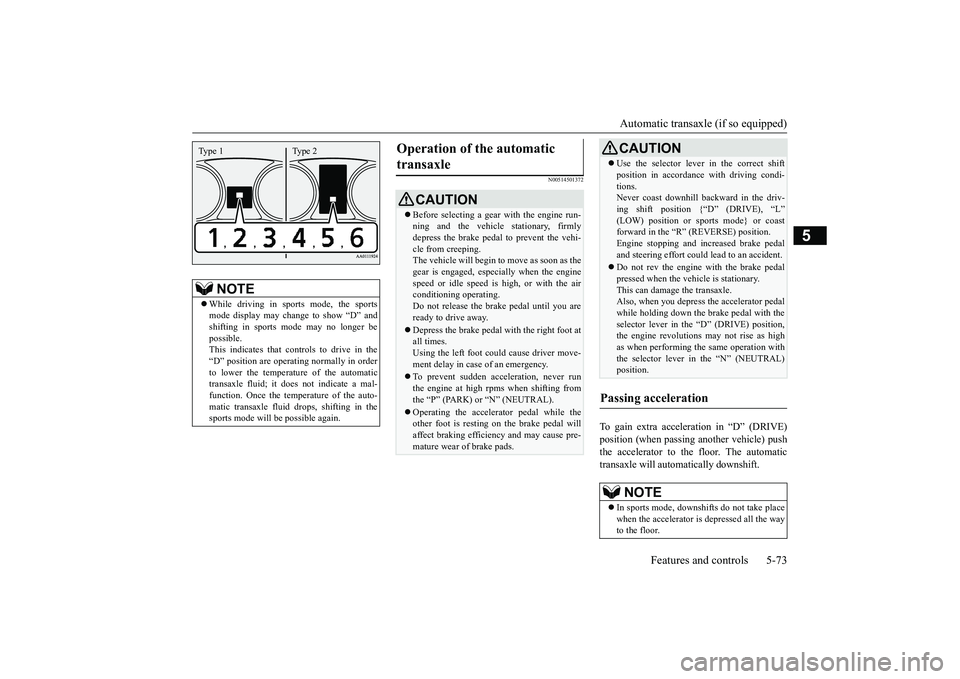
While driving in sports mode, the sports mode display may change to show “D” andshifting in sports mode may no longer be possible. This indicates that controls to drive in the“D” position are operati
ng normally in order
to lower the temperature of the automatic transaxle fluid; it doe
s not indicate a mal-
function. Once the temperature of the auto- matic transaxle fluid drops, shifting in the sports mode will be possible again.Type 1 Type 2
Operation of the automatic transaxle
CAUTION Before selecting a gear
with the engine run-
ning and the vehicle
stationary, firmly
depress the brake pedal to prevent the vehi-cle from creeping. The vehicle will begin to
move as soon as the
gear is engaged, espe
cially when the engine
speed or idle speed is
high, or with the air
conditioning operating. Do not release the brake pedal until you areready to drive away. Depress the brake pedal with the right foot at all times. Using the left foot c
ould cause driver move-
ment delay in case of an emergency. To prevent sudden acceleration, never run the engine at high rpms when shifting fromthe “P” (PARK) or “N” (NEUTRAL). Operating the accelerator pedal while the other foot is resting
on the brake pedal will
affect braking efficien
cy and may cause pre-
mature wear of brake pads.
Use the selector lever in the correct shift position in accordance
with driving condi-
tions.Never coast downhill backward in the driv- ing shift position {“D” (DRIVE), “L” (LOW) position or sports mode} or coastforward in the “R” (REVERSE) position. Engine stopping and increased brake pedal and steering effort could
lead to an accident.
Do not rev the engine
with the brake pedal
pressed when the vehicle is stationary.This can damage the transaxle. Also, when you depress
the accelerator pedal
while holding down the brake pedal with theselector lever in th
e “D” (DRIVE) position,
the engine revolutions
may not rise as high
as when performing the same operation withthe selector lever in the “N” (NEUTRAL) position.
Passing acceleration
NOTE
In sports mode, downshi
fts do not take place
when the accelerator is depressed all the wayto the floor.CAUTION
BK0264300US.book 73 ページ 2018年2月28日 水曜日 午後5時16分
Page 159 of 451
Continuously variable transmission (CVT) (if so equipped)
Features and controls 5-77
5
If the ambient temperature is low, the selector lever position display on the multi informa-tion display may blink when the selector lever is placed in the “D” (DRIVE), “Ds” (DOWNSHIFT & SPORTY DRIVING), “L”(LOW) or “R” (REVER
SE) position immedi-
ately after the engine has been started. This indicates that the tran
smission requires warm-
ing up. While the display is blinking, the vehicle will not move,
because the transmis-
sion keeps disengaging until the warm up is completed even if the selector lever is placed in the “D”, “Ds”, “L” or “R” position. When the selector lever position display is blinking, perform th
e following procedure:
1. Depress the brake pedal with your right foot and place the se
lector lever in the
“N” (NEUTRAL) position for severalseconds. 2. Keep depressing the brake pedal and then place the selector lever in the “D”(DRIVE), “Ds” (DOWNSHIFT & SPORTY DRIVING), “L” (LOW) or “R” (REVERSE) position. If the selector leverposition display stops
blinking, the warm
up is completed and the transmission will function normally.3. If the display is still
blinking, repeat steps
1 and 2 above.
N00560501092
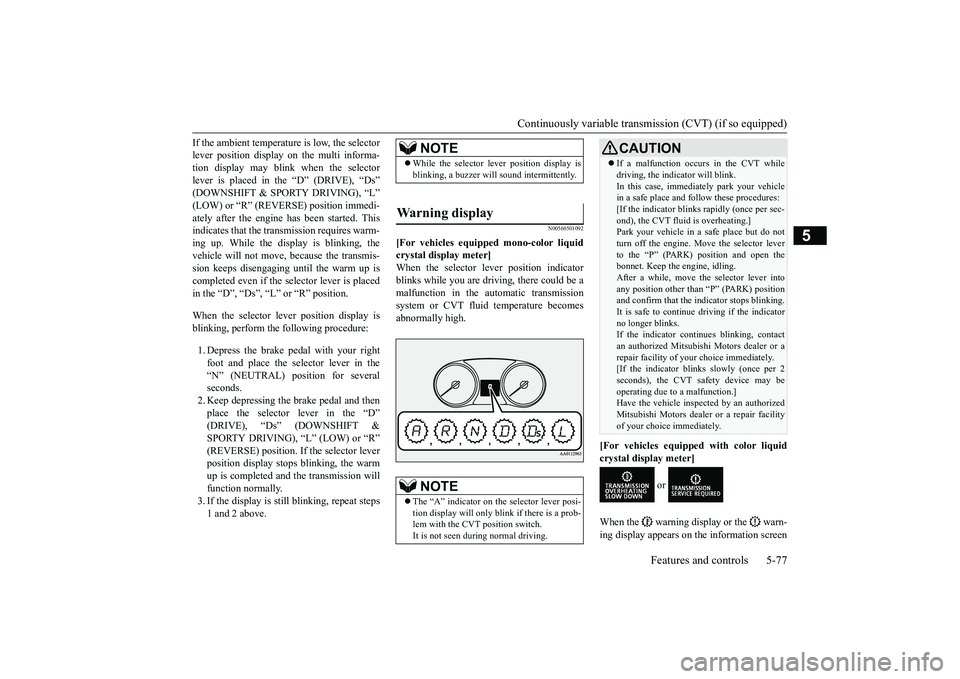
[For vehicles equipped mono-color liquid crystal display meter]When the selector lever position indicator blinks while you are driving, there could be a malfunction in the automatic transmissionsystem or CVT fluid temperature becomes abnormally high.
[For vehicles equipped with color liquid crystal display meter]
or
When the warning display or the warn- ing display appears on
the information screen
NOTE
While the selector lever position display is blinking, a buzzer will
sound intermittently.
Warning display
NOTE
The “A” indicator on th
e selector lever posi-
tion display will only blink if there is a prob-lem with the CVT position switch. It is not seen during normal driving.
CAUTION If a malfunction occurs in the CVT while driving, the indicator will blink.In this case, immediat
ely park your vehicle
in a safe place and follow these procedures: [If the indicator blinks
rapidly (once per sec-
ond), the CVT fluid is overheating.]Park your vehicle in
a safe place but do not
turn off the engine. M
ove the selector lever
to the “P” (PARK) position and open thebonnet. Keep the engine, idling. After a while, move the selector lever into any position other than
“P” (PARK) position
and confirm that the in
dicator stops blinking.
It is safe to continue driving if the indicator no longer blinks.If the indicator conti
nues blinking, contact
an authorized Mitsubish
i Motors dealer or a
repair facility of your
choice immediately.
[If the indicator blinks slowly (once per 2 seconds), the CVT sa
fety device may be
operating due to a malfunction.]Have the vehicle insp
ected by an authorized
Mitsubishi Motors dealer or a repair facility of your choice immediately.
BK0264300US.book 77 ページ 2018年2月28日 水曜日 午後5時16分
Page 272 of 451
Indicator light, warning light, and information screen display list (multi information display - Type 1) 5-190 Features and controls
5
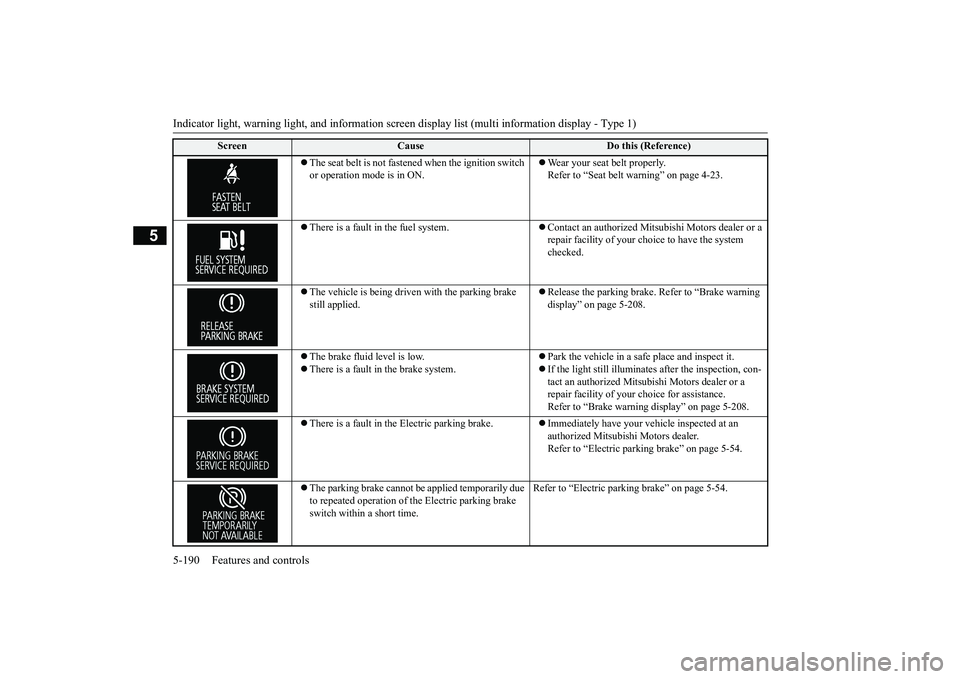
The seat belt is not fasten
ed when the ignition switch
or operation mode is in ON.
Wear your seat belt properly. Refer to “Seat belt
warning” on page 4-23.
There is a fault in the fuel system.
Contact an authorized Mits
ubishi Motors dealer or a
repair facility of your c
hoice to have the system
checked.
The vehicle is being driven with the parking brake still applied.
Release the parking brake. Refer to “Brake warning display” on page 5-208.
The brake fluid level is low. There is a fault in the brake system.
Park the vehicle in a safe place and inspect it. If the light still illuminates after the inspection, con- tact an authorized Mitsub
ishi Motors dealer or a
repair facility of your
choice for assistance.
Refer to “Brake warning
display” on page 5-208.
There is a fault in the Electric parking brake.
Immediately have your ve
hicle inspected at an
authorized Mitsubishi Motors dealer. Refer to “Electric parking brake” on page 5-54.
The parking brake cannot be
applied temporarily due
to repeated operation of the Electric parking brake switch within a short time.
Refer to “Electric parkin
g brake” on page 5-54.
Screen
Cause
Do this (Reference)
BK0264300US.book 190 ページ 2018年2月28日 水曜日 午後5時16分
Page 287 of 451
Warning lights
Features and controls 5-205
5
N00520300147 N00520401552
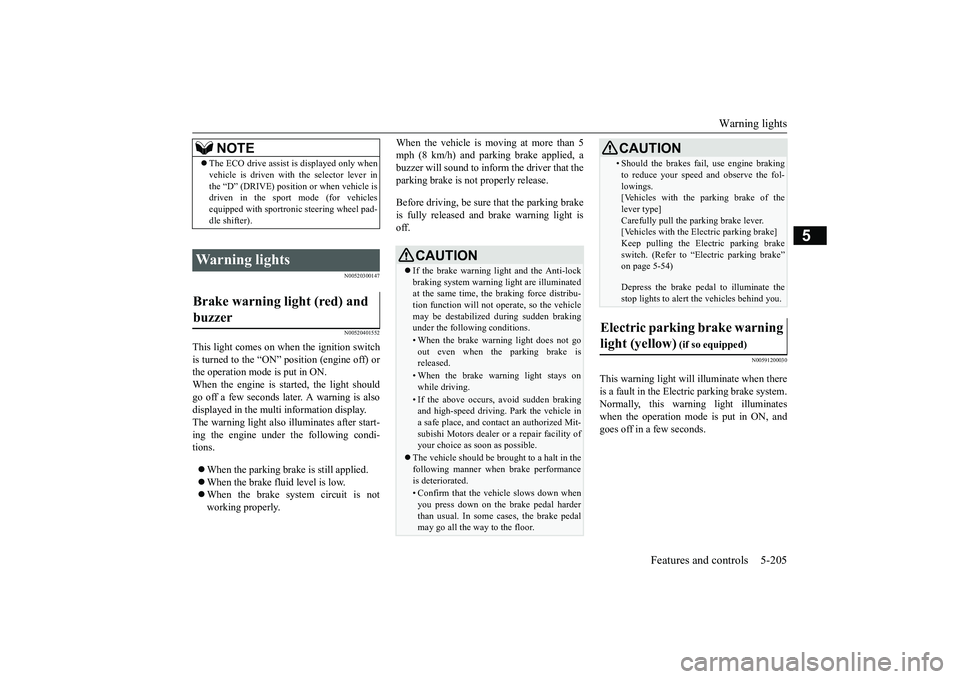
This light comes on when the ignition switch is turned to the “ON” position (engine off) orthe operation mode is put in ON. When the engine is started, the light should go off a few seconds later. A warning is alsodisplayed in the multi information display. The warning light also illuminates after start- ing the engine under the following condi-tions. When the parking brake is still applied. When the brake fluid level is low. When the brake system circuit is not working properly.
When the vehicle is moving at more than 5 mph (8 km/h) and parking brake applied, abuzzer will sound to inform the driver that the parking brake is not properly release. Before driving, be sure that the parking brake is fully released and brake warning light isoff.
N00591200030
This warning light will illuminate when there is a fault in the Electr
ic parking brake system.
Normally, this warning light illuminateswhen the operation mode is put in ON, and goes off in a few seconds.
NOTE
The ECO drive assist is displayed only when vehicle is driven with the selector lever inthe “D” (DRIVE) position or when vehicle isdriven in the sport mode (for vehicles equipped with sportroni
c steering wheel pad-
dle shifter).
Warning lights Brake warning light (red) and buzzer
CAUTION If the brake warning light and the Anti-lock braking system warning
light are illuminated
at the same time, the braking force distribu- tion function will not ope
rate, so the vehicle
may be destabilized during sudden brakingunder the following conditions.• When the brake warning light does not goout even when the parking brake is released.• When the brake warning light stays onwhile driving.• If the above occurs, avoid sudden brakingand high-speed driving. Park the vehicle in a safe place, and contact an authorized Mit-subishi Motors dealer or a repair facility of your choice as soon as possible.
The vehicle should be brought to a halt in the following manner when brake performance is deteriorated.• Confirm that the vehicle slows down whenyou press down on the brake pedal harderthan usual. In some cases, the brake pedal may go all the way to the floor.
• Should the brakes fail, use engine braking to reduce your speed and observe the fol-lowings.[Vehicles with the parking brake of the lever type] Carefully pull the pa
rking brake lever.
[Vehicles with the Electric parking brake] Keep pulling the Elec
tric parking brake
switch. (Refer to “Electric parking brake”on page 5-54) Depress the brake pedal to illuminate the stop lights to alert th
e vehicles behind you.
Electric parking brake warning light (yellow)
(if so equipped)
CAUTION
BK0264300US.book 205 ページ 2018年2月28日 水曜日 午後5時16分
Page 290 of 451
Information screen display (Vehicle equipped with the multi information display - Type 1) 5-208 Features and controls
5
N00590300034
This light comes on when the washer fluid is running low.If the light comes on, replenish the container with washer fluid. Refer to “Washer fl
uid” on page 9-13.
Refer to “Capacity” on page 11-7.
N00558301064 N00558401179
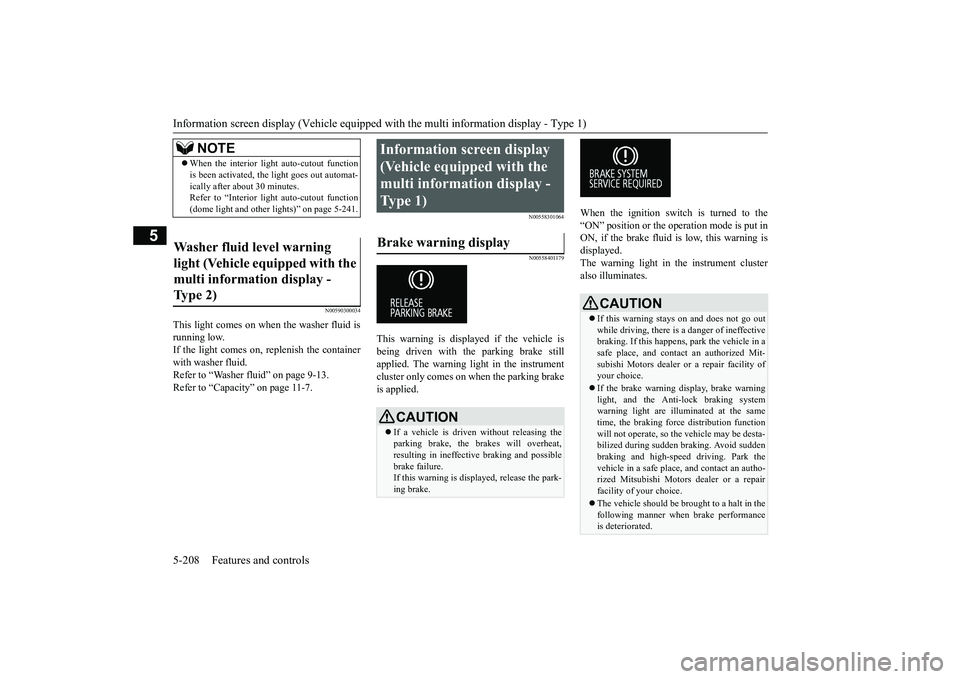
This warning is displayed if the vehicle is being driven with the parking brake stillapplied. The warning light in the instrument cluster only comes on when the parking brake is applied.
When the ignition switch is turned to the “ON” position or the ope
ration mode is put in
ON, if the brake fluid is
low, this warning is
displayed. The warning light in the instrument cluster also illuminates.
NOTE
When the interior light auto-cutout function is been activated, the light goes out automat-ically after about 30 minutes.Refer to “Interior light
auto-cutout function
(dome light and other
lights)” on page 5-241.
Washer fluid level warning light (Vehicle e
quipped with the
multi information display - Type 2)
Information screen display (Vehicle equipped with the multi information display - Type 1) Brake warning display
CAUTION If a vehicle is driven without releasing the parking brake, the brakes will overheat, resulting in ineffective braking and possiblebrake failure. If this warning is displayed, release the park- ing brake.
CAUTION If this warning stays on and does not go out while driving, there is
a danger of ineffective
braking. If this happens
, park the vehicle in a
safe place, and contac
t an authorized Mit-
subishi Motors dealer or a repair facility ofyour choice. If the brake warning display, brake warning light, and the Anti-lock braking system warning light are illu
minated at the same
time, the braking forc
e distribution function
will not operate, so th
e vehicle may be desta-
bilized during sudden br
aking. Avoid sudden
braking and high-speed driving. Park thevehicle in a safe place,
and contact an autho-
rized Mitsubishi Motors
dealer or a repair
facility of your choice. The vehicle should be brought to a halt in the following manner when
brake performance
is deteriorated.
BK0264300US.book 208 ページ 2018年2月28日 水曜日 午後5時16分
Page 336 of 451
Vehicle preparation before driving 6-4 Driving safety
6
N00629001709
For a safer and more enjoyable trip, always check for the following: Before starting the vehicle, make certain that you and all passengers are seated andwearing their seat
belts properly (with
children in the rear seat, in appropriate restraints), and that all the doors and theliftgate are locked.
Move the driver’s seat as far backward as possible, while keeping good visibility,and good control of the steering wheel, brakes, accelerator, and controls. Check the instrument panel indicators and multi-information display
for any possible prob-
lem. Similarly, the front
passenger seat should
also be moved as fa
r back as possible.
Make sure that infants and small children are properly restrained in accordance with all laws and
regulations.
Check these by selecting the defroster mode, and set the blower swit
ch on high. You should
be able to feel the air blowing against thewindshield. Refer to “Defrosti
ng or defogging (wind-
shield, door windows)” on page 7-12 Check all the tires for heavy tread wear or uneven wear patterns. Look for stones, nails,glass, or other objects
stuck in the tread. Look
for any tread cuts or
sidewall cracks. Check
the wheel nuts for tightness, and the tires(including spare tire) for proper pressure.
Replace your tires before they are heavily worn out.As your vehicle is equi
pped with a tire pres-
sure monitoring system, there is a risk of damage to the tire inflation pressure sensorswhen the tire is replaced on the rim. Tire replacement should, onl
y, be performed by an
authorized Mitsubishi Motors dealer. Have someone watch wh
ile you turn all the
exterior lights on and off. Also check the turn signal indicators and hi
gh-beam indicators on
the instrument panel. Check the ground under the vehicle after parking overnight, for
fuel, water, oil, or
other leaks. Make sure
all the fluid levels are
correct. Also, if you
can smell fuel, you need
to find out why imme
diately and have it
fixed.
N00629201134
Even this vehicle’s sa
fety equipment, and
your safest driving, ca
nnot guarantee that you
can avoid an accident or injury. However, if
Vehicle preparation before driving Seat belts and seats
Defrosters Tires
Lights Fluid leaks Safe driving techniques
BK0264300US.book 4 ページ 2018年2月28日 水曜日 午後5時16分
Page 345 of 451
Trailer towing
Driving safety 6-13
6
Tongue loads can be adjusted by proper dis- tribution of the load in the trailer. This can bechecked by separately
weighing the loaded
trailer and then the tongue. The GAWRs are printed on the certification label which is riveted on the door sill on the driver’s side. Refer to “Vehicle labeling” on page 11-2. Choose a proper hitch and ball, and make sure it is installed at a height that is compati- ble with the trailer.Use a good equalizing hitch which uniformly distributes the trailer tongue load throughout the frame.
A safety chain must al
ways be used between
the towing vehicle and the trailer. Leave suf-ficient slack in the chain for turns. The chain should cross under the trailer tongue to pre- vent the tongue from dropping to the groundin case it becomes damaged or separated. For correct safety chai
n procedures, consult
your authorized Mitsub
ishi Motors dealer.
Your vehicle will need service more often when you’re towing a trailer. Refer to “WAR-RANTY AND MAINTENANCE MAN- UAL”. Especially important in trailer operation are automatic transaxle fluid,engine oil, rear axle
oil, belt, c
ooling system
and brake system. Each
of these is covered in
this manual. For details, please refer to the “Vehicle care and maintenance” section.Check periodically to see that all hitch nuts and bolts are tight. Mitsubishi Motors recommends that any trailer having a total we
ight of 1,250 lbs (567
kg) or more (2400 models), 1,400 lbs (635kg) or more (3000 mode
ls) be equipped with
its own electric or surge-type brakes. If you choose electric br
akes, be sure they are
electrically actuated. Do not attempt to tapinto your vehicle’s hydraulic system. No mat- ter how successful it
may seem, any attempt
to attach trailer brakes to your vehicle’shydraulic system will lower braking effec- tiveness and create a potential hazard.
Gross axle weight rating (GAWR) Trailer hitches
WA R N I N G If you make any holes in the body of your vehicle for installing
a trailer hitch, be
sure to seal the holes later when youremove the hitch. If
you don’t seal them,
deadly carbon monoxide (CO) from your exhaust can enter your vehicle. Refer to“Exhaust system” on page 9-25.
NOTE
Mitsubishi Motors recommends that sway control be used whenever you are towing, toimprove towing stability.For further informati
on, please contact your
authorized Mitsubishi Motors dealer.
Safety chains
CAUTION Never tow a trailer wi
thout using a safety
chain securely attached to both the trailer and the vehicle. If the
coupling unit or hitch
ball experiences a probl
em, the trailer may
separate from
your vehicle.
Maintenance when trailer tow- ing Trailer brakes
BK0264300US.book 13 ページ 2018年2月28日 水曜日 午後5時16分
Page 385 of 451
9
Vehicle care and maintenanceService precautions ..........................................................................9-2 Catalytic converter ...........................................................................9-2 Engine hood .........
...........
...........
............
...........
.........
........
.........
.....9-3
View of the engine compartment .....................................................9-6 Engine oil and oil filter ....................................................................9-7 Engine coolant .................................................................................9-9Air cleaner filter .............................................................................9-10 Automatic transaxle fluid (if so equipped) .....................................9-12 Continuously variable transmission
(CVT) fluid (if so equipped) .9-12
Transfer oil (All-wheel drive models) ...........................................9-13 Rear axle oil (All-wheel drive models) .........................................9-13 Washer fluid ...................................................................................9-13Brake fluid .....................................................................................9-14 Battery ............................................................................................9-14 Tires ...............................................................................................9-16Brake pedal free play .....................................................................9-23 Parking brake lever stroke (if so equipped) ....................................9-23 Wiper blades ..................................................................................9-23Emission-control system maintenance ..........................................9-24 General maintenance .....................................................................9-25 For cold and snowy weather ..........................................................9-26Fusible links ...................................................................................9-26 Fuses ..............................................................................................9-27 Replacement of light bulbs ............................................................9-32Vehicle care precautions ................................................................9-41 Cleaning the inside of your vehicle .......
...........
...........
...........
.......9-41
Cleaning the outside of your vehicle .....
...........
...........
...........
.......9-42
BK0264300US.book 1 ページ 2018年2月28日 水曜日 午後5時16分