battery save MITSUBISHI OUTLANDER 2020 Owner's Manual (in English)
[x] Cancel search | Manufacturer: MITSUBISHI, Model Year: 2020, Model line: OUTLANDER, Model: MITSUBISHI OUTLANDER 2020Pages: 443, PDF Size: 60.03 MB
Page 131 of 443

Theft-alarm system 5-50 Features and controls
5
N00510401230
The alarm will be activated if any of the fol- lowing occur while the vehicle is parked andthe system is armed. One of the doors and the liftgate is opened without using the keyless entry system or the F.A.S.T.-key operation. The engine hood is opened.
N00582500040
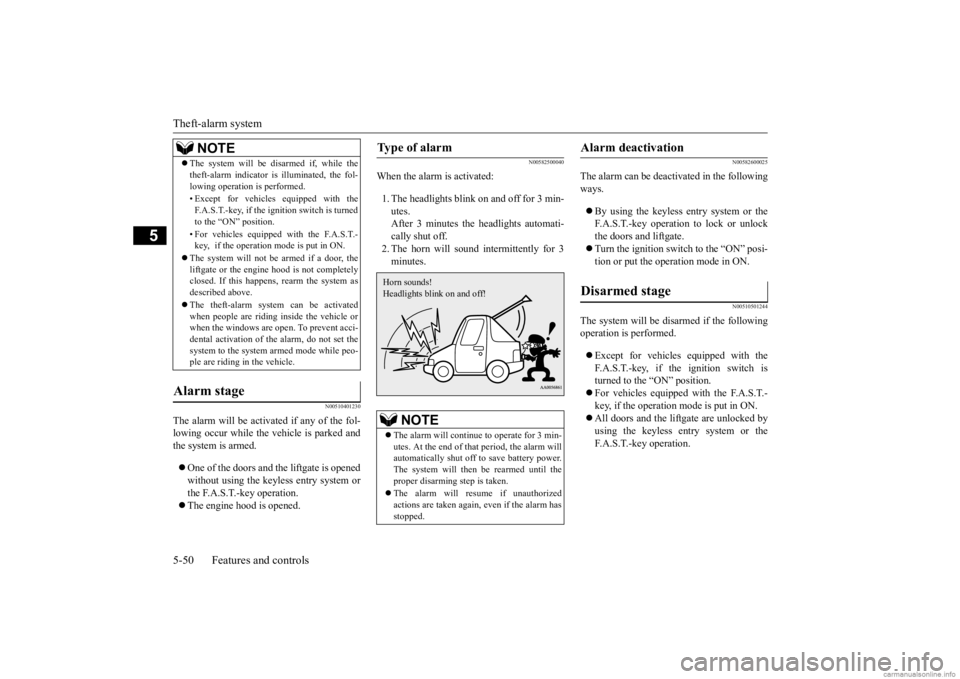
When the alarm is activated: 1. The headlights blink on and off for 3 min- utes. After 3 minutes the headlights automati-cally shut off. 2. The horn will sound intermittently for 3 minutes.
N00582600025
The alarm can be deactivated in the following ways. By using the keyless entry system or the F.A.S.T.-key operation to lock or unlockthe doors and liftgate. Turn the ignition switch to the “ON” posi- tion or put the operation mode in ON.
N00510501244
The system will be disarmed if the followingoperation is performed. Except for vehicles
equipped with the
F.A.S.T.-key, if the ignition switch is turned to the “ON” position. For vehicles equipped with the F.A.S.T.- key, if the operation mode is put in ON. All doors and the lift
gate are unlocked by
using the keyless entry system or the F.A.S.T.-key operation.
The system will be disarmed if, while the theft-alarm indicator is illuminated, the fol-lowing operation is performed. • Except for vehicles equipped with the F.A.S.T.-key, if the ignition switch is turnedto the “ON” position. • For vehicles equippe
d with the F.A.S.T.-
key, if the operation mode is put in ON.
The system will not be armed if a door, the liftgate or the engine
hood is not completely
closed. If this happens, rearm the system as described above. The theft-alarm system can be activated when people are riding inside the vehicle orwhen the windows are open. To prevent acci- dental activation of the alarm, do not set the system to the system armed mode while peo-ple are riding in the vehicle.
Alarm stage
NOTE
Type of alarm
NOTE
The alarm will continue to operate for 3 min- utes. At the end of that
period, the alarm will
automatically shut off
to save battery power.
The system will then
be rearmed until the
proper disarming step is taken. The alarm will resu
me if unauthorized
actions are taken again, even if the alarm has stopped.Horn sounds! Headlights blink on and off!
Alarm deactivation Disarmed stage
BK0278200US.book 50 ページ 2019年4月10日 水曜日 午前10時59分
Page 297 of 443

Electric rear window defogger switch 5-216 Features and controls
5
When the front wipers have frozen to the windshield at the parked
positions, turning on
this switch will heat the windshield to make the wipers operable. Press the electric rear window defogger switch and the deicer willoperate.
N00523701530
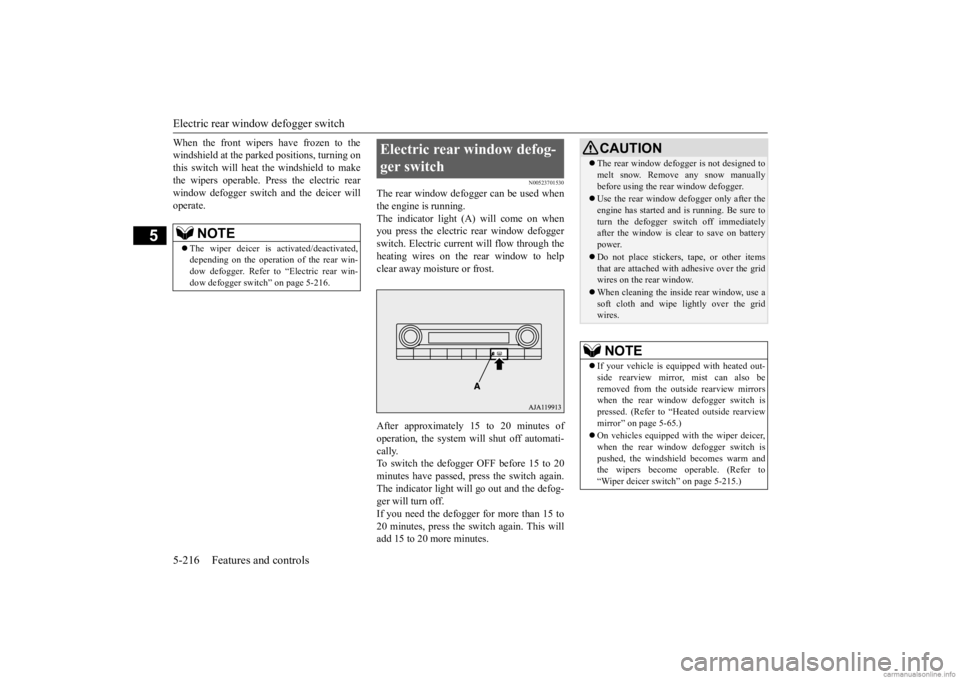
The rear window defogger can be used when the engine is running. The indicator light (A) will come on whenyou press the electric rear window defogger switch. Electric current will flow through the heating wires on the rear window to helpclear away moisture or frost. After approximately 15 to 20 minutes of operation, the system will shut off automati- cally. To switch the defogger OFF before 15 to 20minutes have passed, pr
ess the switch again.
The indicator light will go out and the defog- ger will turn off.If you need the defogger for more than 15 to 20 minutes, press the switch again. This will add 15 to 20 more minutes.
NOTE
The wiper deicer is
activated/de
activated,
depending on the operation of the rear win-dow defogger. Refer to
“Electric rear win-
dow defogger switch” on page 5-216.
Electric rear window defog- ger switch
CAUTION The rear window defogge
r is not designed to
melt snow. Remove any snow manuallybefore using the rear window defogger. Use the rear window defogger only after the engine has started and
is running. Be sure to
turn the defogger switch off immediately after the window is clea
r to save on battery
power. Do not place stickers
, tape, or other items
that are attached with
adhesive over the grid
wires on the rear window. When cleaning the insi
de rear window, use a
soft cloth and wipe
lightly over the grid
wires.NOTE
If your vehicle is equi
pped with heated out-
side rearview mirror
, mist can also be
removed from the outsi
de rearview mirrors
when the rear window
defogger switch is
pressed. (Refer to “H
eated outside rearview
mirror” on page 5-65.) On vehicles equipped wi
th the wiper deicer,
when the rear window
defogger switch is
pushed, the windshiel
d becomes warm and
the wipers become operable. (Refer to “Wiper deicer switc
h” on page 5-215.)
BK0278200US.book 216 ページ 2019年4月10日 水曜日 午前10時59分
Page 356 of 443

Jump-starting the engine For emergencies 8-3
8
4. Set the parking brake firmly on the other vehicle. Put the automatic transaxle in “P”(PARK) or the manual transaxle in “N” (Neutral). 5. Turn the ignition switch (the engineswitch) on each vehicle to the “LOCK” or “OFF” position. 6. Make sure your batt
ery electrolyte is at
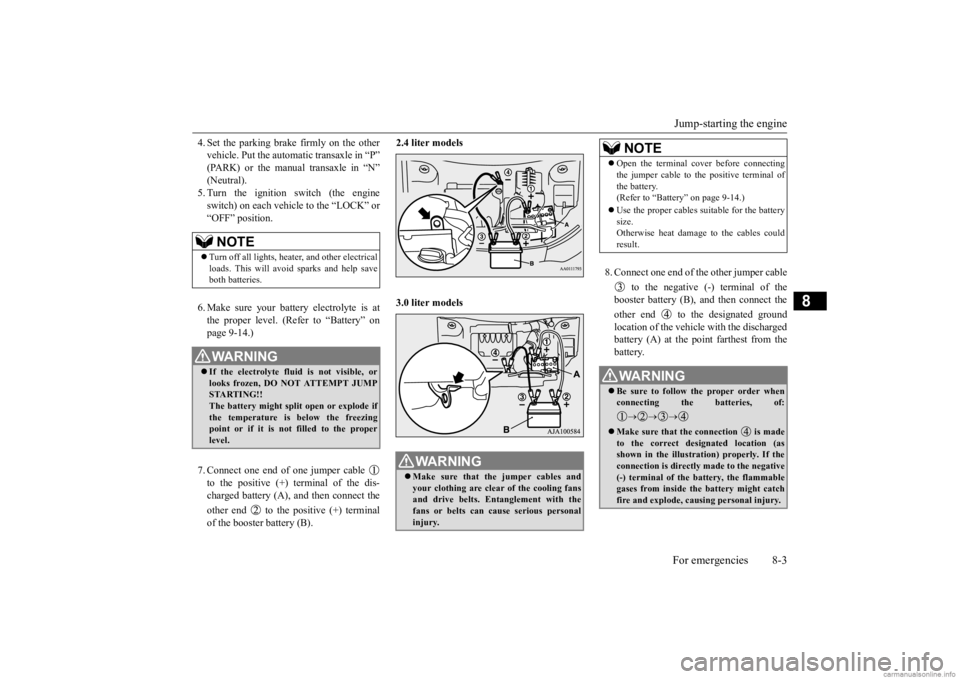
the proper level. (Refer to “Battery” onpage 9-14.) 7. Connect one end of one jumper cable to the positive (+) terminal of the dis-charged battery (A),
and then connect the
other end to the positive (+) terminal of the booster battery (B).
2.4 liter models 3.0 liter models
8. Connect one end of the other jumper cable
to the negative (-) terminal of the booster battery (B), a
nd then connect the
other end to the designated ground location of the vehicl
e with the discharged
battery (A) at the point farthest from thebattery.
NOTE
Turn off all lights, heat
er, and other electrical
loads. This will avoid sparks and help saveboth batteries.WA R N I N G If the electrolyte flui
d is not visible, or
looks frozen, DO NOT ATTEMPT JUMP STARTING!!The battery might split open or explode if the temperature is below the freezing point or if it is not filled to the properlevel.
WA R N I N G Make sure that the jumper cables and your clothing are clear of the cooling fans and drive belts. Entanglement with the fans or belts can ca
use serious personal
injury.
NOTE
Open the terminal co
ver before connecting
the jumper cable to the positive terminal ofthe battery.(Refer to “Battery” on page 9-14.) Use the proper cables suitable for the battery size. Otherwise heat damage
to the cables could
result.WA R N I N G Be sure to follow the proper order when connecting the batteries, of:
Make sure that the connection is made to the correct designated location (as shown in the illustration) properly. If the connection is directly made to the negative(-) terminal of the battery, the flammable gases from inside the battery might catch fire and explode, caus
ing personal injury.
BK0278200US.book 3 ページ 2019年4月10日 水曜日 午前10時59分