wheel nut MITSUBISHI OUTLANDER III 2016 User Guide
[x] Cancel search | Manufacturer: MITSUBISHI, Model Year: 2016, Model line: OUTLANDER III, Model: MITSUBISHI OUTLANDER III 2016Pages: 464, PDF Size: 60.77 MB
Page 390 of 464
How to change a tire 8-8 For emergencies
8
N00849701296
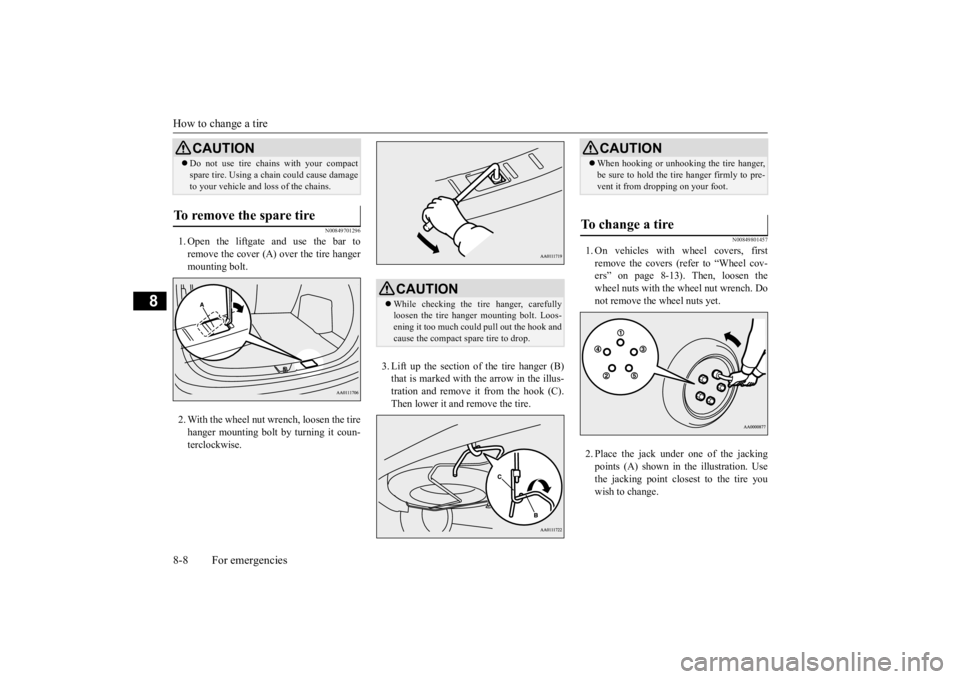
1. Open the liftgate and use the bar to remove the cover (A)
over the tire hanger
mounting bolt. 2. With the wheel nut wrench, loosen the tire hanger mounting bolt by turning it coun- terclockwise.
3. Lift up the section of the tire hanger (B) that is marked with the arrow in the illus-tration and remove it from the hook (C). Then lower it and remove the tire.
N00849801457
1. On vehicles with
wheel covers, first
remove the covers (re
fer to “Wheel cov-
ers” on page 8-13). Then, loosen thewheel nuts with the wheel nut wrench. Do not remove the wheel nuts yet. 2. Place the jack under one of the jacking points (A) shown in the illustration. Use the jacking point closest to the tire you wish to change.
Do not use tire chains with your compact spare tire. Using a ch
ain could cause damage
to your vehicle and loss of the chains.
To remove the spare tire
CAUTION
CAUTION While checking the tir
e hanger, carefully
loosen the tire hanger mounting bolt. Loos-ening it too much could pull out the hook and cause the compact spare tire to drop.
CAUTION When hooking or unhooking the tire hanger, be sure to hold the tire hanger firmly to pre-vent it from dropping on your foot.
To change a tire
BK0223400US.book 8 ページ 2015年2月13日 金曜日 午後12時15分
Page 391 of 464
How to change a tire
For emergencies 8-9
8
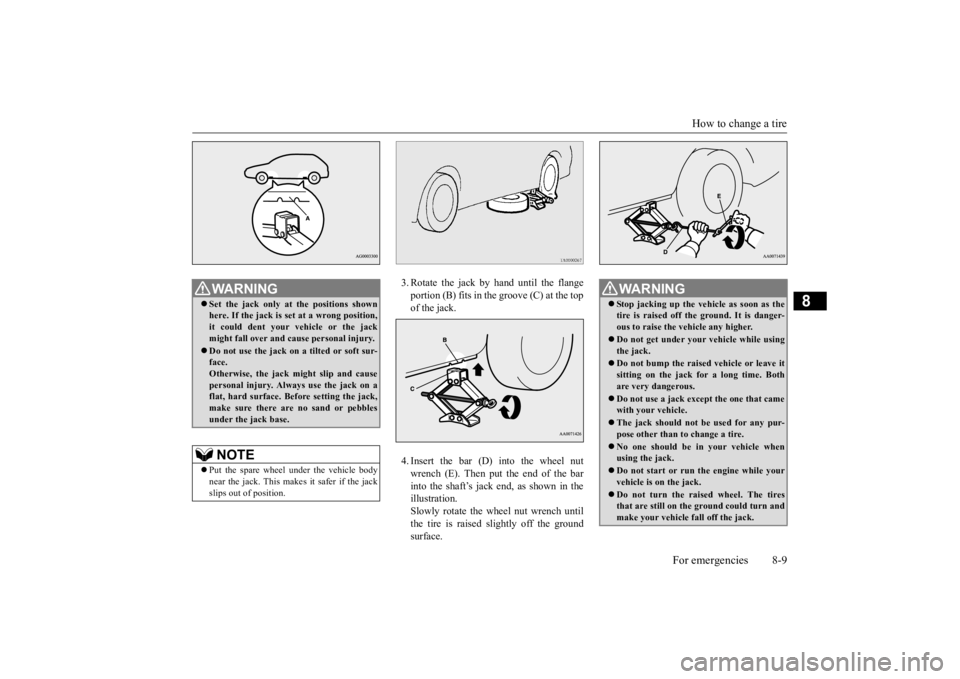
3. Rotate the jack by hand until the flange portion (B) fits in the groove (C) at the top of the jack. 4. Insert the bar (D) into the wheel nut wrench (E). Then put the end of the bar into the shaft’s jack end, as shown in the illustration.Slowly rotate the wheel nut wrench until the tire is raised slightly off the ground surface.
WA R N I N G Set the jack only at
the positions shown
here. If the jack is se
t at a wrong position,
it could dent your vehicle or the jack might fall over and ca
use personal injury.
Do not use the jack on a tilted or soft sur- face. Otherwise, the jack might slip and causepersonal injury. Always
use the jack on a
flat, hard surface. Before setting the jack, make sure there are no sand or pebblesunder the jack base.NOTE
Put the spare wheel under the vehicle body near the jack. This makes it safer if the jack slips out of position.
WA R N I N G Stop jacking up the ve
hicle as soon as the
tire is raised off the ground. It is danger-ous to raise the ve
hicle any higher.
Do not get under your vehicle while using the jack. Do not bump the raised
vehicle or leave it
sitting on the jack for a long time. Both are very dangerous. Do not use a jack except the one that came with your vehicle. The jack should not
be used for any pur-
pose other than to change a tire. No one should be
in your vehicle when
using the jack. Do not start or run
the engine while your
vehicle is on the jack. Do not turn the raised wheel. The tires that are still on the ground could turn and make your vehicle fall off the jack.
BK0223400US.book 9 ページ 2015年2月13日 金曜日 午後12時15分
Page 392 of 464
How to change a tire 8-10 For emergencies
8
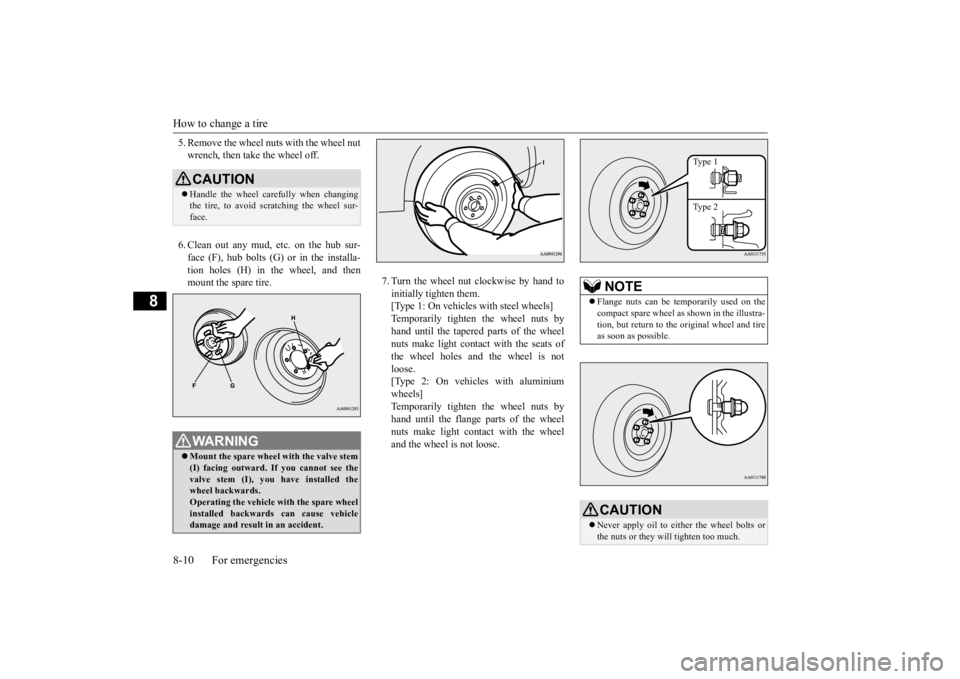
5. Remove the wheel nuts with the wheel nut wrench, then take the wheel off. 6. Clean out any mud, etc. on the hub sur- face (F), hub bolts (G)
or in the installa-
tion holes (H) in the wheel, and then mount the spare tire.
7. Turn the wheel nut clockwise by hand to initially tighten them. [Type 1: On vehicles
with steel wheels]
Temporarily tighten the wheel nuts by hand until the tapered parts of the wheel nuts make light contac
t with the seats of
the wheel holes and the wheel is not loose. [Type 2: On vehicles with aluminiumwheels] Temporarily tighten the wheel nuts by hand until the flange parts of the wheelnuts make light cont
act with the wheel
and the wheel is not loose.
CAUTION Handle the wheel carefully when changing the tire, to avoid scratching the wheel sur- face.WA R N I N G Mount the spare wheel with the valve stem (I) facing outward. If
you cannot see the
valve stem (I), you
have installed the
wheel backwards.Operating the vehicle with the spare wheel installed backwards can cause vehicle damage and result
in an ac
cident.
NOTE
Flange nuts can be te
mporarily used on the
compact spare wheel as shown in the illustra- tion, but return to the original wheel and tire as soon as possible.CAUTION Never apply oil to either the wheel bolts or the nuts or they will tighten too much.
Type 1 Type 2
BK0223400US.book 10 ページ 2015年2月13日 金曜日 午後12時15分
Page 393 of 464
How to change a tire
For emergencies 8-11
8
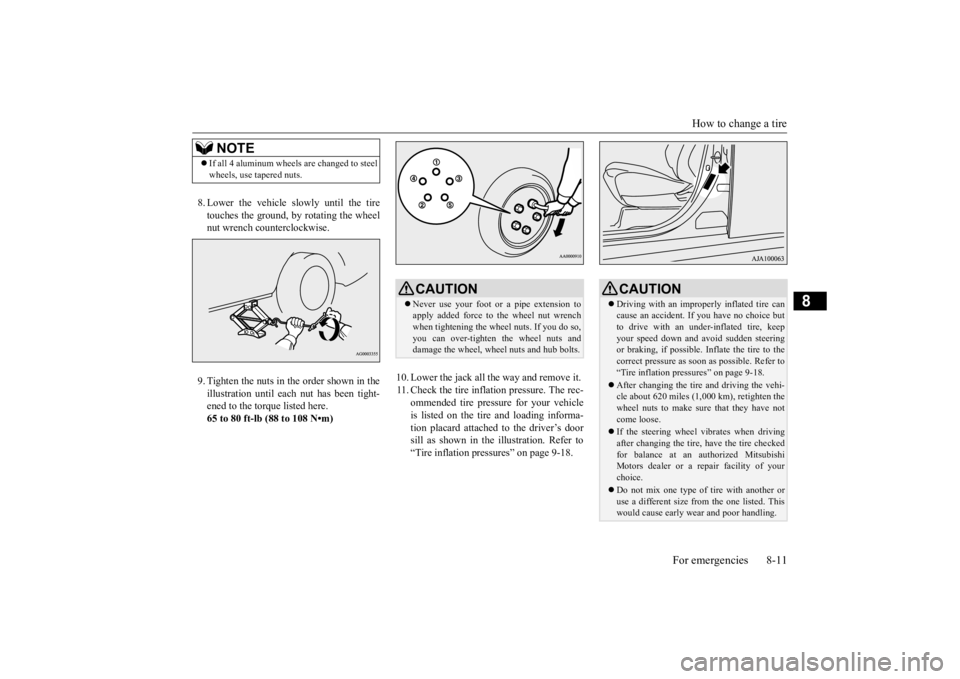
8. Lower the vehicle slowly until the tire touches the ground, by rotating the wheel nut wrench counterclockwise. 9. Tighten the nuts in the order shown in the illustration until each
nut has been tight-
ened to the torque listed here.65 to 80 ft-lb (88 to 108 N•m)
10. Lower the jack all the way and remove it. 11. Check the tire inflation pressure. The rec-
ommended tire pressure for your vehicleis listed on the tire
and loading informa-
tion placard attached to the driver’s door sill as shown in the illustration. Refer to“Tire inflation pressures” on page 9-18.
NOTE
If all 4 aluminum wheels are changed to steel wheels, use tapered nuts.
CAUTION Never use your foot or a pipe extension to apply added force to the wheel nut wrenchwhen tightening the wheel nuts. If you do so, you can over-tighten the wheel nuts and damage the wheel, wheel nuts and hub bolts.
CAUTION Driving with an imprope
rly inflated tire can
cause an accident. If
you have no choice but
to drive with an under-inflated tire, keep your speed down and avoid sudden steering or braking, if possible. Inflate the tire to thecorrect pressure as s
oon as possible. Refer to
“Tire inflation pressures” on page 9-18. After changing the tire
and driving the vehi-
cle about 620 miles (1,000 km), retighten the wheel nuts to make sure
that they have not
come loose. If the steering wheel vibrates when driving after changing the tire, have the tire checked for balance at an authorized Mitsubishi Motors dealer or a repair facility of yourchoice. Do not mix one type of tire with another or use a different size from the one listed. This would cause ea
rly wear and poor handling.
BK0223400US.book 11 ページ 2015年2月13日 金曜日 午後12時15分
Page 394 of 464
How to change a tire 8-12 For emergencies
8
N00832300020
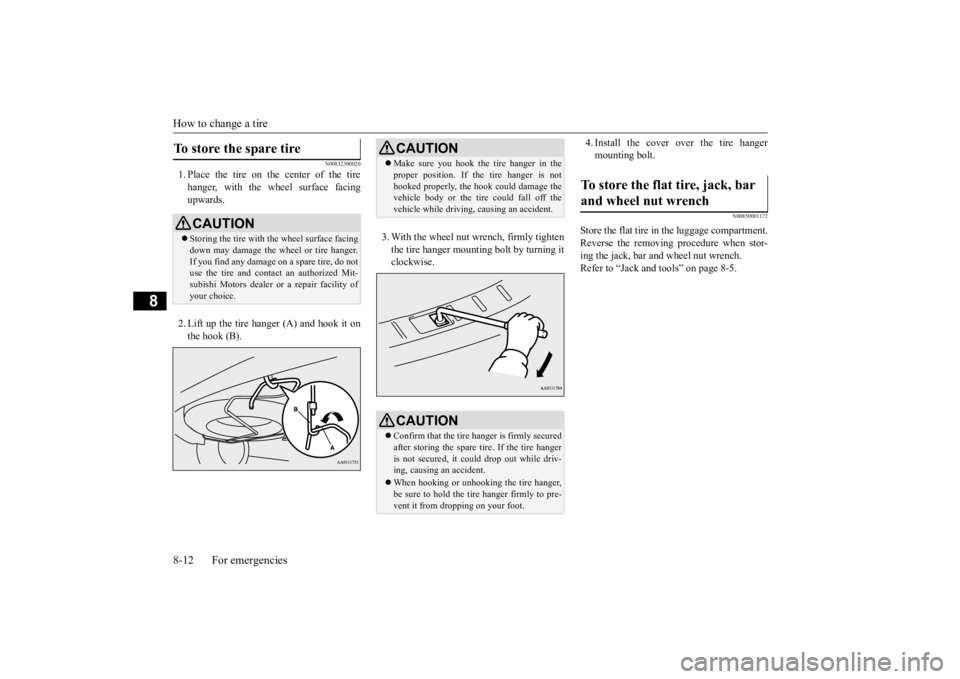
1. Place the tire on the center of the tire hanger, with the wheel surface facing upwards. 2. Lift up the tire hanger (A) and hook it on the hook (B).
3. With the wheel nut wrench, firmly tighten the tire hanger mounti
ng bolt by turning it
clockwise.
4. Install the cover over the tire hanger mounting bolt.
N00850001172
Store the flat tire in the luggage compartment.Reverse the removing procedure when stor- ing the jack, bar and wheel nut wrench. Refer to “Jack and t
ools” on page 8-5.
To store the spare tire
CAUTIONStoring the tire with the wheel surface facing down may damage the wheel or tire hanger. If you find any damage
on a spare tire, do not
use the tire and contact an authorized Mit- subishi Motors dealer or a repair facility of your choice.
CAUTION Make sure you hook the tire hanger in the proper position. If the tire hanger is nothooked properly, the hook
could damage the
vehicle body or the tire
could fall off the
vehicle while driving,
causing an accident.
CAUTIONConfirm that the tire hanger is firmly secured after storing the spare
tire. If the tire hanger
is not secured, it c
ould drop out while driv-
ing, causing
an accident.
When hooking or unhooking the tire hanger, be sure to hold the tire hanger firmly to pre-vent it from dropping on your foot.
To store the flat tire, jack, bar and wheel nut wrench
BK0223400US.book 12 ページ 2015年2月13日 金曜日 午後12時15分
Page 397 of 464
Operation under adverse driving conditions
For emergencies 8-15
8
Release the parking brake. Set the selector lever to the “N” (NEUTRAL) position.
N00837201760
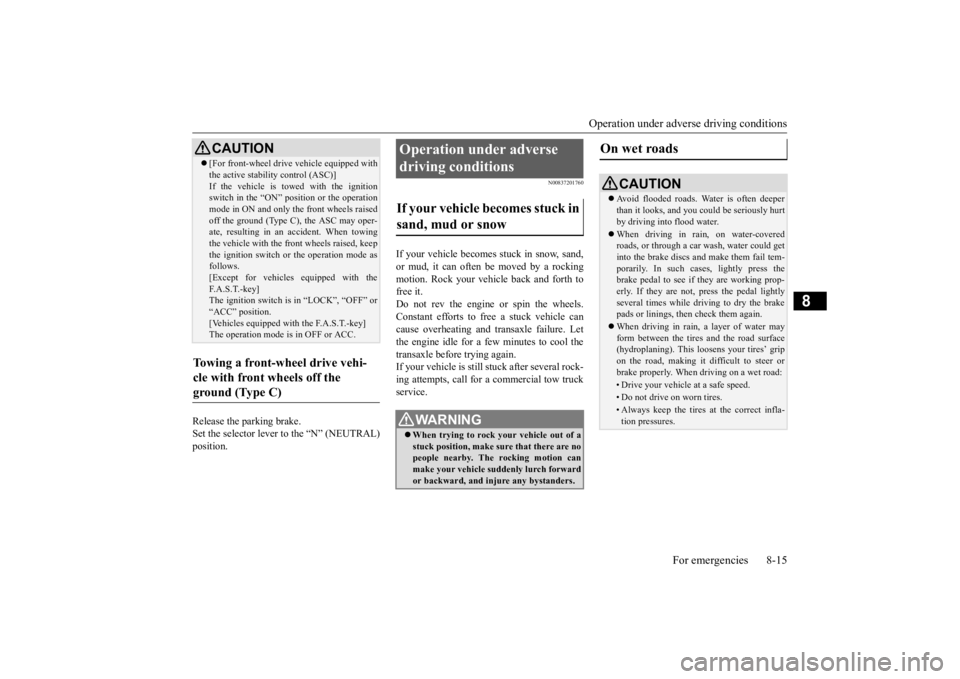
If your vehicle becomes
stuck in snow, sand,
or mud, it can often be moved by a rocking motion. Rock your vehicle back and forth to free it.Do not rev the engine or spin the wheels. Constant efforts to free a stuck vehicle can cause overheating and tr
ansaxle failure. Let
the engine idle for a few minutes to cool the transaxle before trying again. If your vehicle is still
stuck after several rock-
ing attempts, call for a commercial tow truck service.
[For front-wheel driv
e vehicle equipped with
the active stability control (ASC)]If the vehicle is towed with the ignitionswitch in the “ON” pos
ition or the operation
mode in ON and only the front wheels raised off the ground (Type C), the ASC may oper-ate, resulting in an accident. When towing the vehicle with the front wheels raised, keep the ignition switch or
the operation mode as
follows. [Except for vehicles equipped with the F. A . S . T. - k e y ]The ignition switch is in “LOCK”, “OFF” or “ACC” position. [Vehicles equipped with the F.A.S.T.-key]The operation mode is in OFF or ACC.
Towing a front-wheel drive vehi- cle with front wheels off the ground (Type C)
CAUTION
Operation under adverse driving conditions If your vehicle becomes stuck in sand, mud or snow
WA R N I N G When trying to rock
your vehicle out of a
stuck position, make sure that there are nopeople nearby. The
rocking motion can
make your vehicle suddenly lurch forward or backward, and inju
re any bystanders.
On wet roads
CAUTIONAvoid flooded roads. Water is often deeper than it looks, and you could be seriously hurtby driving into flood water. When driving in rain, on water-covered roads, or through a car
wash, water could get
into the brake discs and make them fail tem- porarily. In such cases, lightly press thebrake pedal to see if they are working prop- erly. If they are not, press the pedal lightly several times while driving to dry the brakepads or linings, then check them again. When driving in rain, a layer of water may form between the tires and the road surface (hydroplaning). This loosens your tires’ grip on the road, making it difficult to steer orbrake properly. When driving on a wet road:• Drive your vehicle at a safe speed.• Do not drive on worn tires.• Always keep the tires at the correct infla- tion pressures.
BK0223400US.book 15 ページ 2015年2月13日 金曜日 午後12時15分