Bluetooth MITSUBISHI OUTLANDER PHEV 2016 Owner's Manual (in English)
[x] Cancel search | Manufacturer: MITSUBISHI, Model Year: 2016, Model line: OUTLANDER PHEV, Model: MITSUBISHI OUTLANDER PHEV 2016Pages: 490, PDF Size: 22.02 MB
Page 57 of 490
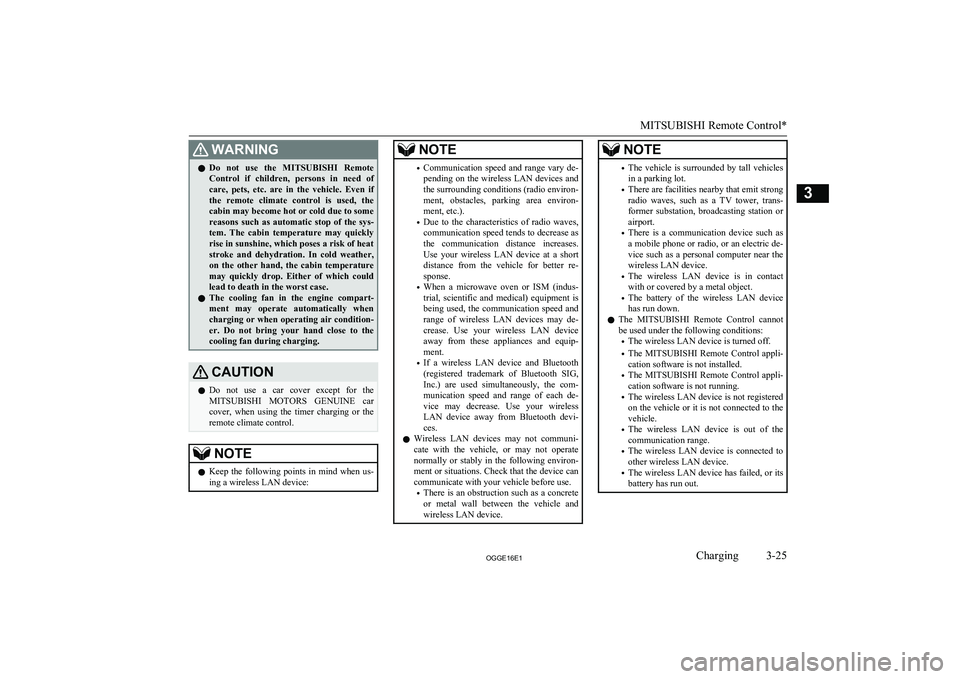
WARNINGlDo not use the
MITSUBISHI Remote
Control if children, persons in need of care, pets, etc. are in the vehicle. Even if the remote climate control is used, thecabin may become hot or cold due to somereasons such as automatic stop of the sys-
tem. The cabin temperature may quickly
rise in sunshine, which poses a risk of heat
stroke and dehydration. In cold weather, on the other hand, the cabin temperature
may quickly drop. Either of which could lead to death in the worst case.
l The cooling fan in the engine compart-
ment may operate automatically when
charging or when operating air condition- er. Do not bring your hand close to the
cooling fan during charging.CAUTIONl Do not use a car cover except for the
MITSUBISHI MOTORS GENUINE car
cover, when using the timer charging or the remote climate control.NOTEl Keep the following points in mind when us-
ing a wireless LAN device:NOTE• Communication speed and range vary de-
pending on the wireless LAN devices and the surrounding conditions (radio environ-
ment, obstacles, parking area environ- ment, etc.).
• Due to the characteristics of radio waves,
communication speed tends to decrease as the communication distance increases.
Use your wireless LAN device at a short
distance from the vehicle for better re-
sponse.
• When a microwave oven or ISM (indus-
trial, scientific and medical) equipment is being used, the communication speed and
range of wireless LAN devices may de- crease. Use your wireless LAN device
away from these appliances and equip-
ment.
• If a wireless LAN device and Bluetooth
(registered trademark of Bluetooth SIG, Inc.) are used simultaneously, the com-
munication speed and range of each de- vice may decrease. Use your wireless
LAN device away from Bluetooth devi- ces.
l Wireless LAN devices may not communi-
cate with the vehicle, or may not operate
normally or stably in the following environ- ment or situations. Check that the device cancommunicate with your vehicle before use.
• There is an obstruction such as a concrete
or metal wall between the vehicle and
wireless LAN device.NOTE• The vehicle is surrounded by tall vehicles
in a parking lot.
• There are facilities nearby that emit strong
radio waves, such as a TV tower, trans-
former substation, broadcasting station or
airport.
• There is a communication device such as
a mobile phone or radio, or an electric de- vice such as a personal computer near the
wireless LAN device.
• The wireless LAN device is in contact
with or covered by a metal object.
• The battery of the wireless LAN device
has run down.
l The
MITSUBISHI Remote Control cannot
be used under the following conditions:
• The wireless LAN device is turned off.
• The
MITSUBISHI Remote Control appli-
cation software is not installed.
• The
MITSUBISHI Remote Control appli-
cation software is not running.
• The wireless LAN device is not registered
on the vehicle or it is not connected to the
vehicle.
• The wireless LAN device is out of the
communication range.
• The wireless LAN device is connected to
other wireless LAN device.
• The wireless LAN device has failed, or its
battery has run out.
MITSUBISHI Remote Control*
3-25OGGE16E1Charging3
Page 155 of 490
1.Press and hold the multi information dis-
play switch for about 2 seconds or more to switch from the setting mode screen
to the menu screen.
Refer to “Changing the function set-
tings” on page 6-16.
2. Lightly press the multi information dis-
play switch to select “
” (temperature
unit setting).
3. Press and hold the multi information dis-
play switch for about 2 seconds or more
to switch in from °C to °F, or from °F to °C. The setting is changed to the selec-
ted temperature unit.
NOTEl The temperature value on air conditioner
panel is switched in conjunction with outside
temperature display unit of the multi infor-
mation display.
However, “°C” or “°F” are not shown to
temperature display of an air conditioner.
l On vehicles equipped with
MITSUBISHI
Multi-Communication System (MMCS), the
temperature value of the air conditioner
screen of MITSUBISHI Multi-Communica-
tion System (MMCS) is switched in con- junction with outside temperature display
unit of the multi information display.
However, “°C” or “°F” are not shown to the air conditioner screen.Changing the display language
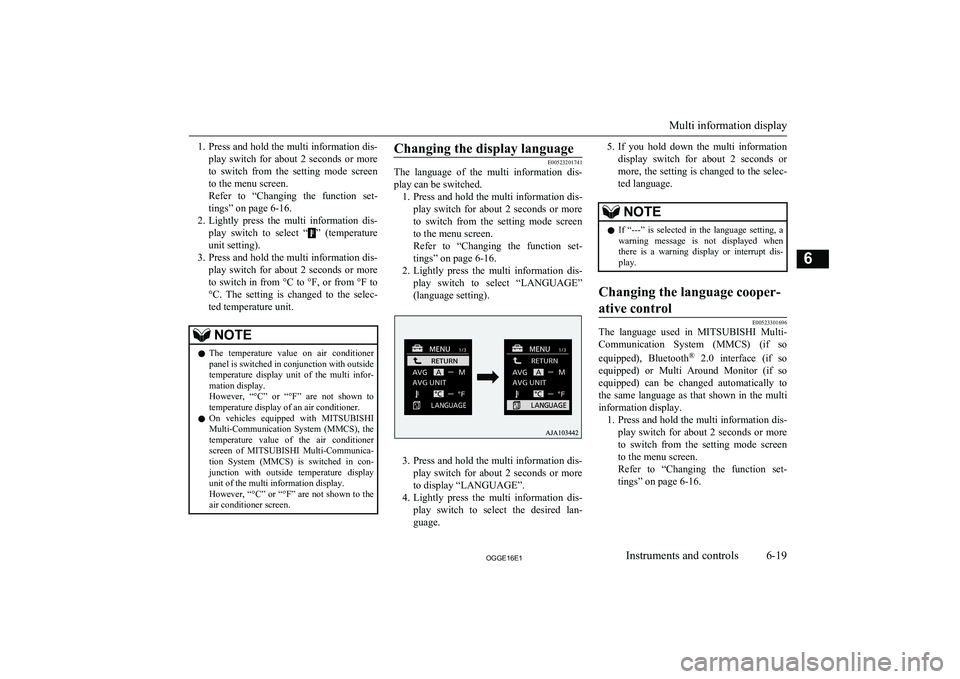
E00523201741
The language of the multi information dis-
play can be switched. 1. Press and hold the multi information dis-
play switch for about 2 seconds or more to switch from the setting mode screen
to the menu screen.
Refer to “Changing the function set-
tings” on page 6-16.
2. Lightly press the multi information dis-
play switch to select “LANGUAGE”
(language setting).
3. Press and hold the multi information dis-
play switch for about 2 seconds or more to display “LANGUAGE”.
4. Lightly press the multi information dis-
play switch to select the desired lan-guage.
5. If you hold down the multi information
display switch for about 2 seconds or
more, the setting is changed to the selec- ted language.NOTEl If “---” is selected in the language setting, a
warning message is not displayed whenthere is a warning display or interrupt dis-
play.Changing the language cooper-
ative control
E00523301696
The language used in MITSUBISHI Multi-
Communication System (MMCS) (if so
equipped), Bluetooth ®
2.0 interface (if so
equipped) or Multi Around Monitor (if so equipped) can be changed automatically to
the same language as that shown in the multi
information display. 1. Press and hold the multi information dis-
play switch for about 2 seconds or more to switch from the setting mode screen to the menu screen.
Refer to “Changing the function set-
tings” on page 6-16.
Multi information display
6-19OGGE16E1Instruments and controls6
Page 156 of 490
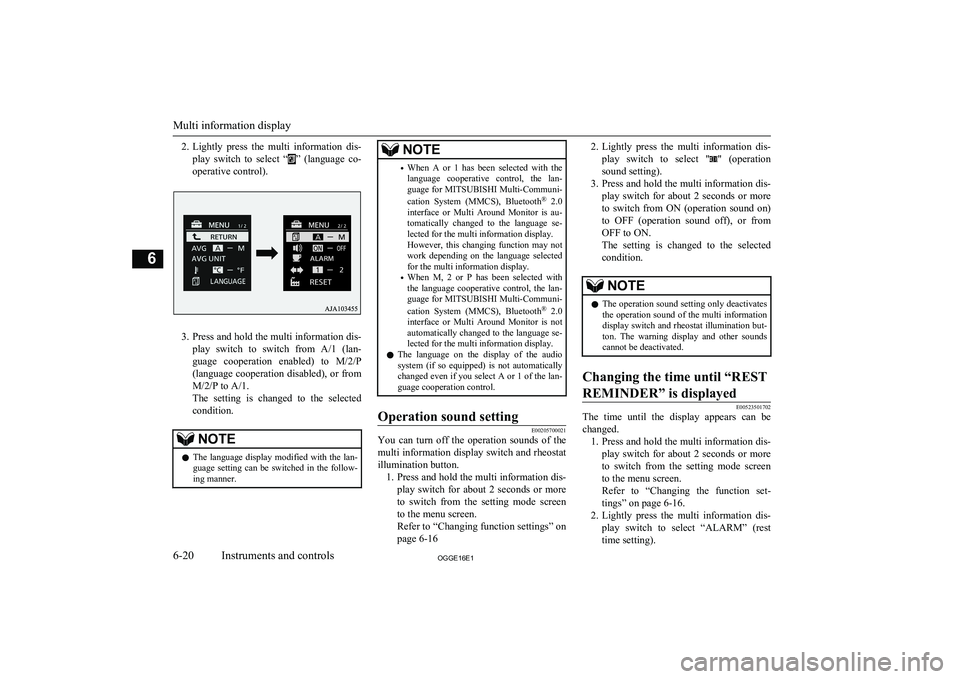
2.Lightly press the multi information dis-
play switch to select “
” (language co-
operative control).
3. Press and hold the multi information dis-
play switch to switch from A/1 (lan- guage cooperation enabled) to M/2/P
(language cooperation disabled), or from
M/2/P to A/1.
The setting is changed to the selected condition.
NOTEl The language display modified with the lan-
guage setting can be switched in the follow-ing manner.NOTE• When A or 1 has been selected with the
language cooperative control, the lan- guage for MITSUBISHI Multi-Communi-
cation System (MMCS), Bluetooth ®
2.0
interface or Multi Around Monitor is au- tomatically changed to the language se-lected for the multi information display.
However, this changing function may not
work depending on the language selected for the multi information display.
• When M, 2 or P has been selected with
the language cooperative control, the lan-
guage for MITSUBISHI Multi-Communi-
cation System (MMCS), Bluetooth ®
2.0
interface or Multi Around Monitor is not automatically changed to the language se-
lected for the multi information display.
l The language on the display of the audio
system (if so equipped) is not automatically changed even if you select A or 1 of the lan-
guage cooperation control.Operation sound setting
E00205700021
You can turn off the operation sounds of the
multi information display switch and rheostat illumination button. 1. Press and hold the multi information dis-
play switch for about 2 seconds or more to switch from the setting mode screen
to the menu screen.
Refer to “Changing function settings” on
page 6-16
2. Lightly press the multi information dis-
play switch to select "
" (operation
sound setting).
3. Press and hold the multi information dis-
play switch for about 2 seconds or moreto switch from ON (operation sound on)
to OFF (operation sound off), or from OFF to ON.
The setting is changed to the selected
condition.NOTEl The operation sound setting only deactivates
the operation sound of the multi information
display switch and rheostat illumination but- ton. The warning display and other soundscannot be deactivated.Changing the time until “REST
REMINDER” is displayed
E00523501702
The time until the display appears can be changed. 1. Press and hold the multi information dis-
play switch for about 2 seconds or more to switch from the setting mode screen
to the menu screen.
Refer to “Changing the function set-
tings” on page 6-16.
2. Lightly press the multi information dis-
play switch to select “ALARM” (rest time setting).
Multi information display
6-20OGGE16E1Instruments and controls6
Page 301 of 490
Ventilators........................................................................................... 8-02
Automatic climate control air conditioner.......................................... 8-04
Important operation tips for the air conditioner.................................. 8-13
Air purifier.......................................................................................... 8-13 Remote Climate Control*................................................................... 8-13
Heating................................................................................................ 8-14 LW/MW/FM radio/CD player*.......................................................... 8-14
Handling of Discs................................................................................8-18 Audio Files (MP3/WMA/AAC)..........................................................8-19
Important Points on Safety for the Customer......................................8-23
Operation Keys................................................................................... 8-23
Listen to Radio.................................................................................... 8-26 Listen to DAB*................................................................................... 8-27
Listen to Traffic Messages.................................................................. 8-29
Listen to CDs...................................................................................... 8-29
Listen to MP3s.................................................................................... 8-30
Listen to an iPod................................................................................. 8-31 Listen to Audio Files on a USB Device.............................................. 8-33To play iPod/USB memory device tracks via voice opera-
tion (vehicles with Bluetooth ®
2.0 interface)................................. 8-36
Listen to Bluetooth Audio*................................................................. 8-38
Display Indicator................................................................................. 8-41
Audio Quality and Volume Balance Adjustment............................... 8-42
System Settings................................................................................... 8-43
Troubleshooting.................................................................................. 8-47
Link System*...................................................................................... 8-50
Bluetooth ®
2.0 interface*....................................................................8-50
USB input terminal*........................................................................... 8-70
Sun visors............................................................................................ 8-73Ashtray*.............................................................................................. 8-74
Cigarette lighter*.................................................................................8-74
Accessory socket................................................................................. 8-75
Interior lamps...................................................................................... 8-76
Storage spaces..................................................................................... 8-78
Cup holder........................................................................................... 8-80
Bottle holder........................................................................................8-81
Cargo area cover................................................................................. 8-81Assist grips.......................................................................................... 8-82
Coat hook............................................................................................ 8-83
Luggage hooks.................................................................................... 8-83For pleasant driving
OGGE16E18
Page 315 of 490
“Made for iPod”, “Made for iPhone”
mean that an electronic accessory has
been designed to connect specifically to iPod or iPhone, respectively, and has
been certified by the developer to meet Apple performance standards.
iPhone, iPod, iPod classic, iPod nano,
and iPod touch are trademarks of Apple
Inc., registered in the U.S. and other
countries.
Apple is not responsible for the opera- tion of this device or its compliance with
safety and regulatory standards.NOTEl iPod and iTunes licensing allows individual
users to privately reproduce and play back
non- copyrighted material as well as material
that may be legally copied and reproduced.
Infringement of copyright is prohibited.NOTEl For vehicles with a Bluetooth ®
2.0 interface,
the types of devices that can be connected
may vary.
For details, access the MITSUBISHI
MOTORS website.
Please read and agree to the “Warning about
Links to the Web Sites of Other Compa- nies”. The websites mentioned above may
connect you to websites other than the MITSUBISHI MOTORS website.
http://www.mitsubishi-motors.com/en/prod-
ucts/index.html
LW/MW/FM radio/CD player*
8-15OGGE16E1For pleasant driving8
Page 325 of 490
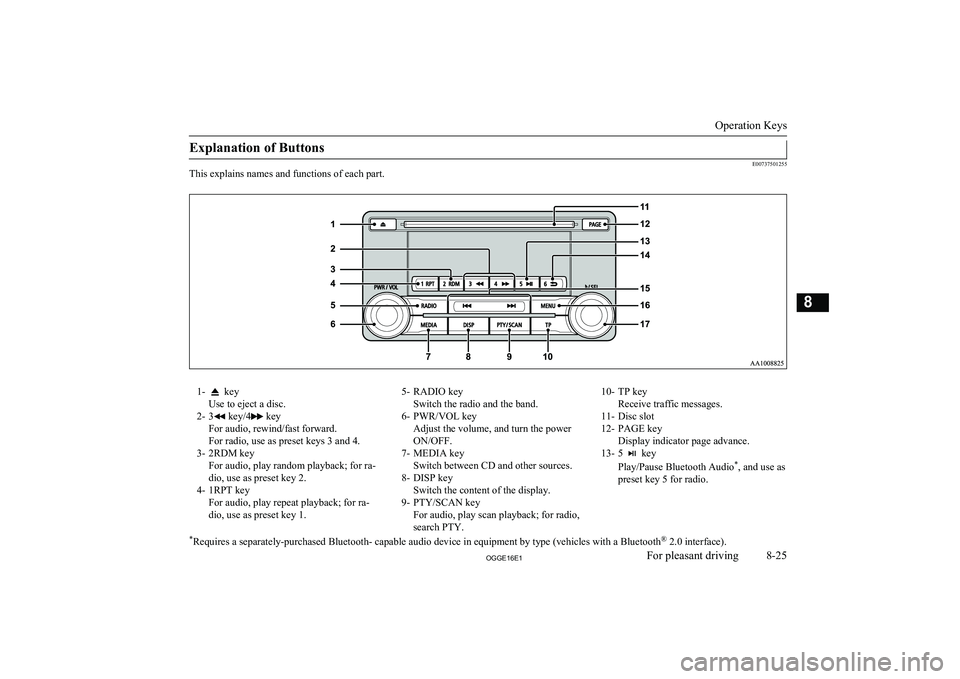
Explanation of Buttons
E00737501255
This explains names and functions of each part.
1- key
Use to eject a disc.
2- 3
key/4 key
For audio, rewind/fast forward.
For radio, use as preset keys 3 and 4.
3- 2RDM key For audio, play random playback; for ra-
dio, use as preset key 2.
4- 1RPT key For audio, play repeat playback; for ra-dio, use as preset key 1.
5- RADIO key Switch the radio and the band.
6- PWR/VOL key Adjust the volume, and turn the power
ON/OFF.
7- MEDIA key Switch between CD and other sources.
8- DISP key Switch the content of the display.
9- PTY/SCAN key For audio, play scan playback; for radio,
search PTY.10- TP key Receive traffic messages.
11- Disc slot
12- PAGE key Display indicator page advance.
13- 5
key
Play/Pause Bluetooth Audio *
, and use as
preset key 5 for radio.
* Requires a separately-purchased Bluetooth- capable audio device in equipment by type (vehicles with a Bluetooth ®
2.0 interface).
Operation Keys
8-25OGGE16E1For pleasant driving8
Page 326 of 490
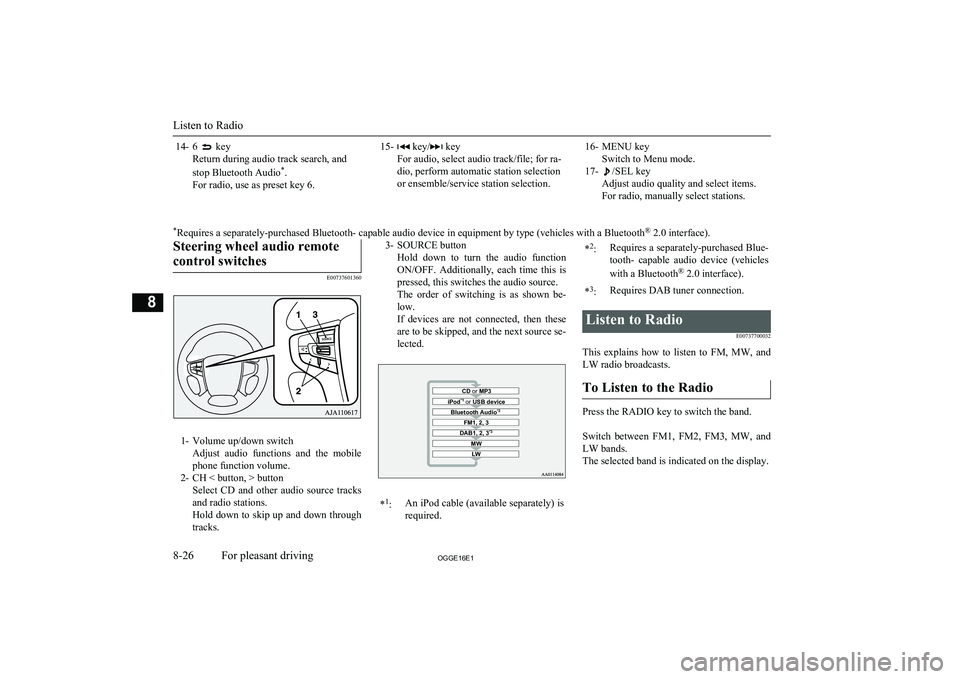
14- 6 key
Return during audio track search, and
stop Bluetooth Audio *
.
For radio, use as preset key 6.15- key/ key
For audio, select audio track/file; for ra-
dio, perform automatic station selection
or ensemble/service station selection.16- MENU key Switch to Menu mode.
17-
/SEL key
Adjust audio quality and select items.
For radio, manually select stations.
* Requires a separately-purchased Bluetooth- capable audio device in equipment by type (vehicles with a Bluetooth ®
2.0 interface).Steering wheel audio remote
control switches
E00737601360
1- Volume up/down switch Adjust audio functions and the mobile
phone function volume.
2- CH < button, > button Select CD and other audio source tracks
and radio stations.
Hold down to skip up and down through tracks.
3- SOURCE button
Hold down to turn the audio functionON/OFF. Additionally, each time this is pressed, this switches the audio source.
The order of switching is as shown be-
low.
If devices are not connected, then these are to be skipped, and the next source se-lected.CD or MP3MWLWDAB1, 2, 3 *3FM1, 2, 3Bluetooth Audio *2iPod*1
or USB device*1
:An iPod cable (available separately) is
required.* 2
:Requires a separately-purchased Blue-
tooth- capable audio device (vehicles
with a Bluetooth ®
2.0 interface).*3
:Requires DAB tuner connection.Listen to Radio
E00737700032
This explains how to listen to FM, MW, and
LW radio broadcasts.
To Listen to the Radio
Press the RADIO key to switch the band.
Switch between FM1, FM2, FM3, MW, and LW bands.
The selected band is indicated on the display.
Listen to Radio
8-26OGGE16E1For pleasant driving8
Page 332 of 490
CAUTIONlDepending on how the devices are handled,
audio files being damaged or lost, therefore
it is recommended that data be backed up.NOTEl Depending on the generation, model, or soft-
ware version of the iPod/iPhone, playback
on this product may not be possible. (→8-14 ) Additionally, playback as ex-
plained in this document may not be possi- ble.
l For vehicles with a Bluetooth ®
2.0 interface,
the types of devices that can be connected
may vary.
For details, access the MITSUBISHI
MOTORS website.
Please read and agree to the “Warning about
Links to the Web Sites of Other Compa- nies”. The websites mentioned above may
connect you to websites other than the MITSUBISHI MOTORS website.
http://www.mitsubishi-motors.com/en/prod-
ucts/index.html
l Usage of iPod/iPhone hardware with the lat-
est software version is recommended.
l Regarding how to connect the iPod/iPhone,
refer to “How to connect an iPod” on page
8-71.
l When connecting the iPod/iPhone, use a
commercially available iPod connection ca- ble.NOTEl Set up the device in order that no unsafe ac-
tions, such as plugging in the connection ca-ble are taken while driving.
l When inserting and removing the iPod/
iPhone, for safety’s sake first stop the vehi- cle.
l Depending on the status of the iPod/iPhone,
it may take some time until the device is rec- ognized, or playback starts.
l Depending on the iPod/iPhone, the button
functions on the product may not operatewhile the iPod/iPhone is connected.
l iPod/iPhone specifications and settings may
mean that connection is not possible, or re- sult in differences in operation or display.
l Depending on audio data in the iPod/iPhone,
track information may not be displayed cor- rectly.
l Depending on the status of the vehicle and
device, the iPod/iPhone may not play back after starting the Plug-in Hybrid EV system.
l Data containing copyright information may
not play back.
l It is recommended that the iPod/iPhone
equaliser settings be set to flat.
l Operate the iPod/iPhone while connected to
this product.
l If the iPod/iPhone is connected via Blue-
tooth as a Bluetooth- capable audio device,
then do not connect the iPod/iPhone using
an iPod cable. Connection using both meth- ods will result in erroneous operation.NOTEl If an iPod/iPhone does not operate correctly,
then remove the iPod/iPhone from the prod- uct, reset, then reconnect.
Play iPod
Press the MEDIA key to set the iPod as the
source.
The selected source is indicated on the dis-
play.
Select the Track (File)
Press the key or key to select the
track.
This enables selection of the next or previous
track.
Fast Forward or Rewind
Hold down the 3 key or the 4 key.
Fast forward/rewind is possible.
Switch Playback Mode
Repeat playback and shuffle playback are
possible.
Listen to an iPod
8-32OGGE16E1For pleasant driving8
Page 334 of 490
CAUTIONlDepending on how the devices are handled,
audio files being damaged or lost, therefore
it is recommended that data be backed up.NOTEl Digital audio players that support the mass
storage class specifications can be connec- ted.
l For details regarding the types of USB devi-
ces that can be connected and the types of files that can be played back in vehicles with
a Bluetooth ®
2.0 interface, refer to “Types
of connectable devices and supported file specifications” on page 8-72.
l Regarding how to connect USB devices, re-
fer to “How to connect a USB memory de-vice” on page 8-70.
l When connecting a USB device, use a con-
nection cable. Failure to use a connection ca-
ble when connecting may place undue load on, or damage the USB connector.
l Set up the device in order that no unsafe ac-
tions, such as plugging in the connection ca-ble are taken while driving.
l When inserting and removing the USB de-
vice, for safety’s sake first stop the vehicle.
l Do not insert other than audio devices into
the USB port. Damage to the device or equipment may result.
l Depending on the status of the USB device,
it may take some time until the device is rec-
ognized, or playback starts.NOTEl Depending on the USB device, the button
functions on the product may not operatewhile the USB device is connected.
l USB device specifications and settings may
mean that connection is not possible, or re-
sult in differences in operation or display.
l Depending on audio data in the USB device,
track information may not be displayed cor- rectly.
l Depending on the status of the vehicle and
device, the iPod/iPhone may not play back after starting the Plug-in Hybrid EV system.
l Data containing copyright information may
not play back.
l This product can play back MP3, WMA, and
AAC format audio files.
l Depending on the type of USB device, usage
may not be possible, or functions that can beused may be restricted.
l The recommended file system for USB
memory is FAT32.
l The maximum supported capacity for USB
memory is 32GB.
l Operate the USB device containing recorded
audio files while connected to this product.
Play Back of Audio Files on a
USB Device
Press the MEDIA key to set
USB as the source. The selected source is in- dicated on the display.
Select the Track (File)
Press the key or key to select the
track.
This enables selection of the next or previous
track.
Fast Forward or Rewind
Hold down the 3 key or the 4 key.
Fast forward/rewind is possible.
Switch Playback Mode
Repeat playback, random playback, and scan
playback are possible.
Repeat Playback (RPT)
Press the 1RPT key.
Repeat playback of the track currently being
played.
NOTEl Pressing again will cancel.
l Selecting a file will cancel this.
Folder Repeat Playback
Hold down the 1RPT key.
Listen to Audio Files on a USB Device
8-34OGGE16E1For pleasant driving8
Page 336 of 490
To play iPod/USB memorydevice tracks via voice
operation (vehicles with
Bluetooth ®
2.0 interface)
E00748700029
Desired tracks on the iPod/USB memory de-
vice which is connected to the USB input ter-
minal can be selected and played via voice operation.
For information concerning the voice recog- nition function or speaker registration func-
tion, refer to “Bluetooth®
2.0 interface” on
page 8-50.
The following explains how to prepare for voice operation and play the tracks.Preparation for voice operation
E00748800059
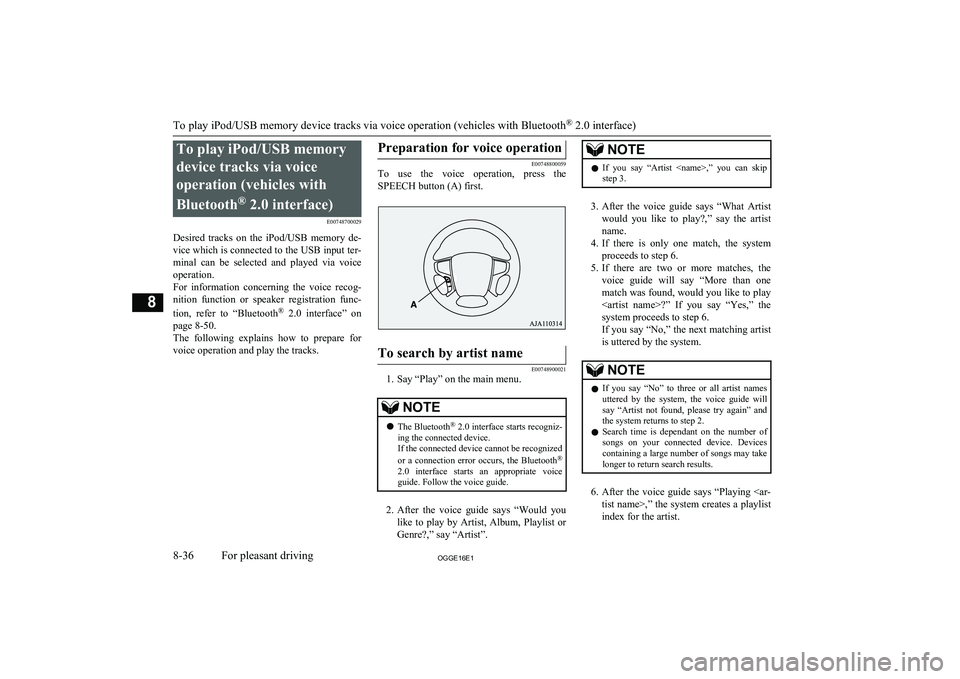
To use the voice operation, press the
SPEECH button (A) first.
To search by artist name
E00748900021
1. Say “Play” on the main menu.
NOTEl The Bluetooth ®
2.0 interface starts recogniz-
ing the connected device.
If the connected device cannot be recognized
or a connection error occurs, the Bluetooth ®
2.0 interface starts an appropriate voice
guide. Follow the voice guide.
2. After the voice guide says “Would you
like to play by Artist, Album, Playlist or Genre?,” say “Artist”.
NOTEl If you say “Artist
step 3.
3. After the voice guide says “What Artist
would you like to play?,” say the artist name.
4. If there is only one match, the system
proceeds to step 6.
5. If there are two or more matches, the
voice guide will say “More than one
match was found, would you like to play
system proceeds to step 6.
If you say “No,” the next matching artist
is uttered by the system.
NOTEl If you say “No” to three or all artist names
uttered by the system, the voice guide will say “Artist not found, please try again” and
the system returns to step 2.
l Search time is dependant on the number of
songs on your connected device. Devices containing a large number of songs may take
longer to return search results.
6. After the voice guide says “Playing
index for the artist.
To play iPod/USB memory device tracks via voice operation (vehicles with Bluetooth ®
2.0 interface)
8-36OGGE16E1For pleasant driving8