ignition MITSUBISHI OUTLANDER PHEV 2016 Owner's Manual (in English)
[x] Cancel search | Manufacturer: MITSUBISHI, Model Year: 2016, Model line: OUTLANDER PHEV, Model: MITSUBISHI OUTLANDER PHEV 2016Pages: 490, PDF Size: 22.02 MB
Page 75 of 490
Setting the system
E00305201239
1. Put the operation mode in OFF.
2. Get out of the vehicle. Close all of the
doors and the tailgate.
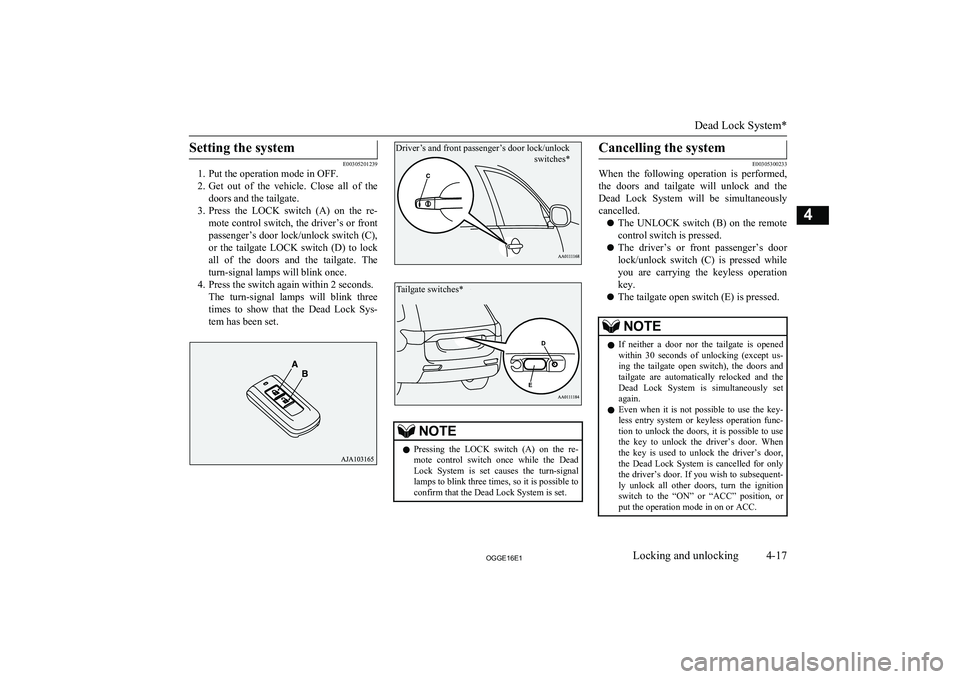
3. Press the LOCK switch (A) on the re-
mote control switch, the driver’s or front passenger’s door lock/unlock switch (C),
or the tailgate LOCK switch (D) to lock
all of the doors and the tailgate. The turn-signal lamps will blink once.
4. Press the switch again within 2 seconds. The turn-signal lamps will blink three
times to show that the Dead Lock Sys- tem has been set.
NOTEl Pressing the LOCK switch (A) on the re-
mote control switch once while the DeadLock System is set causes the turn-signal
lamps to blink three times, so it is possible to
confirm that the Dead Lock System is set.Cancelling the system
E00305300233
When the following operation is performed,
the doors and tailgate will unlock and the Dead Lock System will be simultaneously cancelled.
l The UNLOCK switch (B) on the remote
control switch is pressed.
l The driver’s or front passenger’s door
lock/unlock switch (C) is pressed while
you are carrying the keyless operation key.
l The tailgate open switch (E) is pressed.
NOTElIf neither a door nor the tailgate is opened
within 30 seconds of unlocking (except us-ing the tailgate open switch), the doors andtailgate are automatically relocked and the
Dead Lock System is simultaneously set again.
l Even when it is not possible to use the key-
less entry system or keyless operation func- tion to unlock the doors, it is possible to use
the key to unlock the driver’s door. When the key is used to unlock the driver’s door,
the Dead Lock System is cancelled for only the driver’s door. If you wish to subsequent-
ly unlock all other doors, turn the ignition switch to the “ON” or “ACC” position, orput the operation mode in on or ACC.
Dead Lock System*
4-17OGGE16E1Locking and unlocking4 Driver’s and front passenger’s door lock/unlock
switches* Tailgate switches*
Page 148 of 490
It is possible to measure two currently
travelled distances, from home using
tripmeter
and from a particular point
on the way using tripmeter
.
To reset the tripmeter
To return the display to 0, hold down the
multi-information display switch for about 2
seconds or more. Only the currently dis-
played value will be reset.
Example
If tripmeter
is displayed, only tripmeter
will be reset.
NOTEl When disconnecting the auxiliary battery
terminal, the memory of tripmeter and
are cleared, and the display returns to
“0”.
Service reminder
E00522502021
Displays the approximate time until the next
periodic inspection recommended by MITSUBISHI MOTORS . “---” is displayed
when the inspection time has arrived.
NOTEl Depending on the vehicle specifications, the
displayed time may differ from the next pe-
riodic inspection time recommended by
MITSUBISHI MOTORS.
In addition, the display settings for the next periodic inspection time can be modified.
To modify the display settings, have it adjus-
ted at a MITSUBISHI MOTORS Authorized Service Point.
For more details, consult a MITSUBISHI
MOTORS Authorized Service Point.
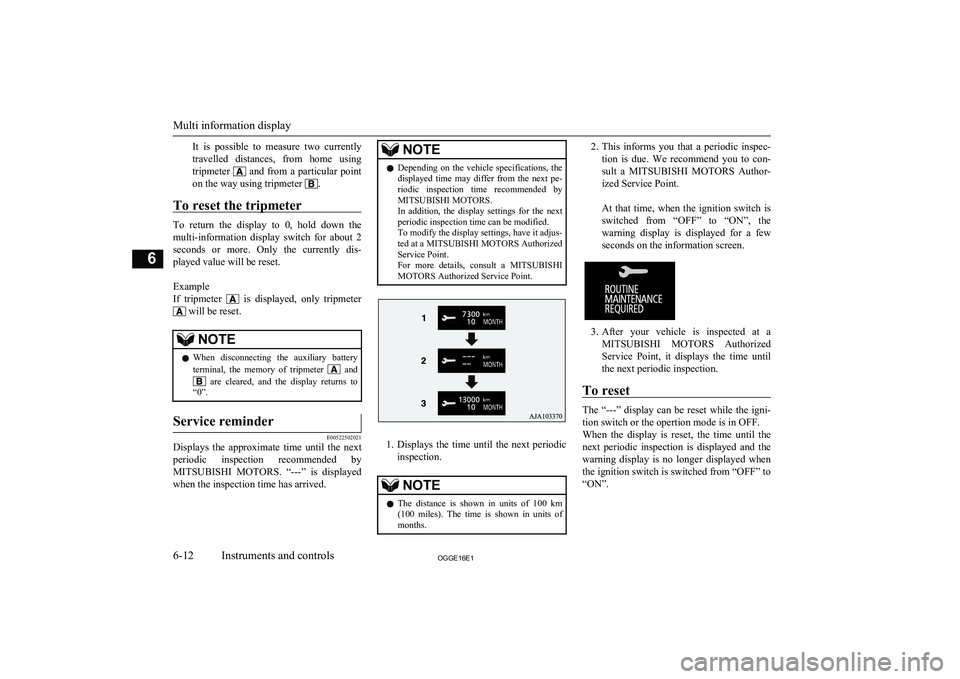
1. Displays the time until the next periodic
inspection.
NOTEl The distance is shown in units of 100 km
(100 miles). The time is shown in units of months.2. This informs you that a periodic inspec-
tion is due. We recommend you to con-
sult a MITSUBISHI MOTORS Author-
ized Service Point.
At that time, when the ignition switch is switched from “OFF” to “ON”, the
warning display is displayed for a few seconds on the information screen.
3. After your vehicle is inspected at a
MITSUBISHI MOTORS Authorized
Service Point, it displays the time until
the next periodic inspection.
To reset
The “---” display can be reset while the igni-
tion switch or the opertion mode is in OFF.
When the display is reset, the time until the
next periodic inspection is displayed and the warning display is no longer displayed when
the ignition switch is switched from “OFF” to
“ON”.
Multi information display
6-12OGGE16E1Instruments and controls6
Page 206 of 490
To adjust the vertical mirrorposition
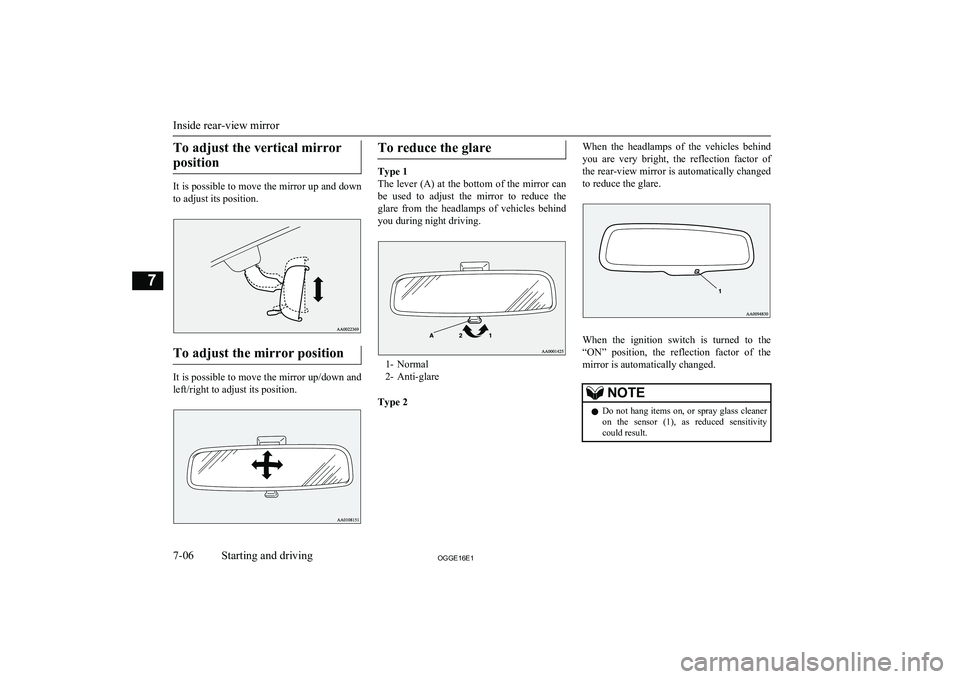
It is possible to move the mirror up and down to adjust its position.
To adjust the mirror position
It is possible to move the mirror up/down and left/right to adjust its position.
To reduce the glare
Type 1
The lever (A) at the bottom of the mirror can be used to adjust the mirror to reduce the
glare from the headlamps of vehicles behind
you during night driving.
1- Normal
2- Anti-glare
Type 2
When the headlamps of the vehicles behind you are very bright, the reflection factor ofthe rear-view mirror is automatically changed
to reduce the glare.
When the ignition switch is turned to the
“ON” position, the reflection factor of the mirror is automatically changed.
NOTEl Do not hang items on, or spray glass cleaner
on the sensor (1), as reduced sensitivitycould result.
Inside rear-view mirror
7-06OGGE16E1Starting and driving7
Page 434 of 490
No.Sym-bolElectrical system
Ca-
paci- tyF5Front fog lamps15 AF6Heated steering wheel15 AF7Headlamp washer20 AF8Security horn20 AF9Horn10 AF10ETV15 AF11Charging lid lock15 AF12Engine7.5 AF13ENG/POWER20 AF14Fuel pump15 AF15Ignition coil10 AF16———F17Headlamp high-beam (left)10 AF18Headlamp high-beam(right)10 A*: Fusible link
No.Sym-
bolElectrical system
Ca-
paci- ty
F19
Headlamplow beam (left)
LED20 AF20
Headlamplow beam (right)
LED20 AF21
Headlamplow beam (left)
Halogen10 AF22
Headlamplow beam (right)
Halogen10 A
F23———#1—Spare fuse10 A#2—Spare fuse15 A#3—Spare fuse20 A*: Fusible link
l Some fuses may not be installed on your
vehicle, depending on the vehicle model
or specifications.
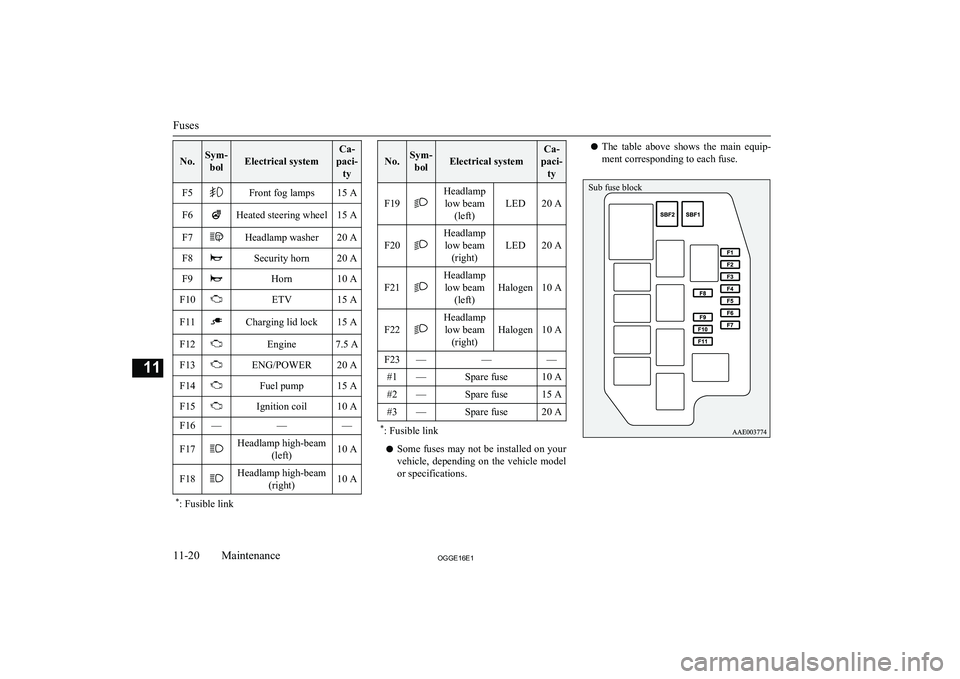
l The table above shows the main equip-
ment corresponding to each fuse.
Fuses
11-20OGGE16E1Maintenance11 Sub fuse block
Page 435 of 490
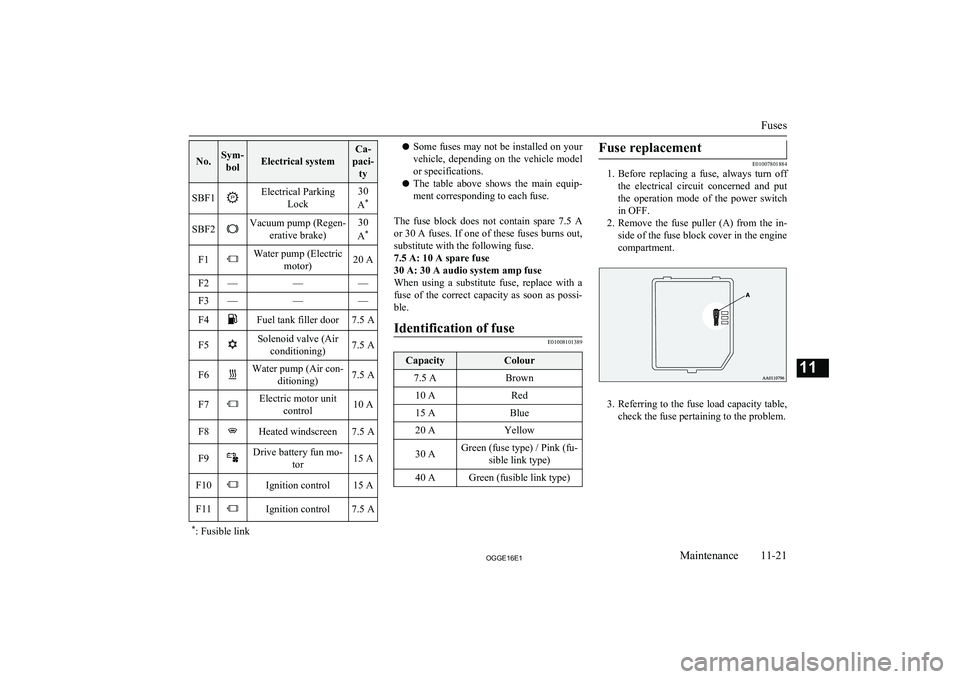
No.Sym-bolElectrical system
Ca-
paci- tySBF1Electrical Parking Lock30
A *SBF2Vacuum pump (Regen-
erative brake)30
A *F1Water pump (Electric
motor)20 AF2———F3———F4Fuel tank filler door7.5 AF5Solenoid valve (Airconditioning)7.5 AF6Water pump (Air con- ditioning)7.5 AF7Electric motor unitcontrol10 AF8Heated windscreen7.5 AF9Drive battery fun mo- tor15 AF10Ignition control15 AF11Ignition control7.5 A*: Fusible linkl Some fuses may not be installed on your
vehicle, depending on the vehicle model
or specifications.
l The table above shows the main equip-
ment corresponding to each fuse.
The fuse block does not contain spare 7.5 A or 30 A fuses. If one of these fuses burns out,
substitute with the following fuse.
7.5 A: 10 A spare fuse
30 A: 30 A audio system amp fuse
When using a substitute fuse, replace with a fuse of the correct capacity as soon as possi-
ble.Identification of fuse
E01008101389
CapacityColour7.5 ABrown10 ARed15 ABlue20 AYellow30 AGreen (fuse type) / Pink (fu-
sible link type)40 AGreen (fusible link type)Fuse replacement
E01007801884
1. Before replacing a fuse, always turn off
the electrical circuit concerned and put
the operation mode of the power switch
in OFF.
2. Remove the fuse puller (A) from the in-
side of the fuse block cover in the engine
compartment.
3. Referring to the fuse load capacity table,
check the fuse pertaining to the problem.
Fuses
11-21OGGE16E1Maintenance11