ECO mode MITSUBISHI OUTLANDER PHEV 2018 Owner's Manual (in English)
[x] Cancel search | Manufacturer: MITSUBISHI, Model Year: 2018, Model line: OUTLANDER PHEV, Model: MITSUBISHI OUTLANDER PHEV 2018Pages: 538, PDF Size: 25.01 MB
Page 394 of 538
5.If only one telephone number is regis-
tered under the name you just said, the
voice guide proceeds to Step 6.
If two or more telephone numbers are registered that match the name you just
said, the voice guide will say “Would you like to call
location to call.NOTEl If the name you selected has matching data
in the vehicle phone book but no telephone
number is registered under the selected loca- tion, the voice guide will say “{home/work/
mobile/other} not found for
Say “Add location” and you can register an
additional telephone number under the selec-
ted location.
l If the name you selected has matching data
in the mobile phone book but no telephone
number is registered under the selected loca- tion, the voice guide will say “{home/work/
mobile/other} not found for
Answer “Yes,” and the system will return to Step 3.
Answer “No,” and the call will be cancelled. Start over again from Step 1.6. The voice guide will say “Calling
tem will dial the telephone number.NOTEl When the confirmation function is on, the
system will ask if the name and location of the receiver are correct. If the name is cor-
rect, answer “Yes.”
To change the name or location to call, an- swer “No.” The system will return to Step 3.
Redialing
You can redial the last number called, based
on the history of dialed calls in the paired cel-
lular phone.
Use the following procedure to redial. 1. Press the SPEECH button.
2. Say “Redial.”
SEND function
E00761300035
During a call, press the SPEECH button to
enter voice recognition mode, then say “
For example, if during a call you need to sim- ulate the press of a phone button as a re-
sponse to an automated system, press the SPEECH button and speak “1 2 3 4 pound SEND” and the 1234# will be sent on your
cellular phone.
Receiving calls
E00761601064
If an incoming phone call is received while
the operation mode is in ON or ACC, the au-dio system will be automatically turned on
and switched to the incoming call, even when the audio system was originally off.
The voice guide announcement for the in- coming call will be output from the front pas- senger’s seat speaker.
If the CD player or radio was playing when
the incoming call was received, the audio
system will mute the sound from the CD player or radio and output only the incomingcall.
To receive the call, press the PICK-UP but- ton on the steering wheel control switch.
When the call is over, the audio system will
return to its previous state.
MUTE function
E00760300041
At any time during a call, you can mute the vehicle microphone.
Pressing the SPEECH button and then saying
“Mute” during a call will turn ON the MUTE
function and mute the microphone.
Saying “Mute off” in the same way will turn off the MUTE function and cancel the muteon the microphone.
Bluetooth ®
2.0 interface*
8-62OGGE18E1For pleasant driving8
Page 395 of 538
Switching between hands-freemode and private mode
E00761400036
The Bluetooth ®
2.0 interface can switch be-
tween Hands-free mode (Hands-free calls) and private mode (calls using cellular phone).
If you press the SPEECH button and say “Transfer call” during a Hands-free call, you
can stop the Hands-free mode and talk in pri- vate mode.
To return to Hands-free mode, press the
SPEECH button again and say “Transfer
call”.
Phone book function
E00763700017
The Bluetooth ®
2.0 interface has 2 types of
unique phone books that are different from
the phone book stored in the cellular phone. They are the vehicle phone book and the mo-
bile phone book.
These phone books are used to register tele- phone numbers and to make calls to desired
numbers via the voice recognition function.
NOTEl Disconnecting the battery cable will not de-
lete information registered in the phone
book.Vehicle phone book
E00763801262
This phone book is used when making calls
with the voice recognition function.
Up to 32 names can be registered in the vehi-
cle phone book per language.
Also, each entry has 4 locations associated with: home, work, mobile and other. You can
register one telephone number for each loca- tion.
You can register a desired name as a name
for any phone book entry registered in the ve- hicle phone book.
Names and telephone numbers can be
changed later on.
The vehicle phone book can be used with all paired cellular phones.
To register a telephone number in the ve- hicle phone book
You can register a telephone number in thevehicle phone book in the following 2 ways:
Reading out a telephone number, and select- ing and transferring 1 phone book entry fromthe phone book of the cellular phone.
To register by reading out a telephone
number
1. Press the SPEECH button.
2. Say “Phone book.”
3. The voice guide will say “Select one of
the following: new entry, edit number,
edit name, list names, delete, erase all, or
import contact.” Say “New entry.”
4. The voice guide will say “Name please.”
Say your preferred name to register it.NOTEl If the maximum number of entries are al-
ready registered, the voice guide will say“The phone book is full. Would you like to
delete a name?” Say “Yes” if you want to
delete a registered name.
Say “No,” to return to the main menu.
5. When the name has been registered, the
voice guide will say “home, work, mo- bile, or other?” Say the location forwhich you want to register a telephone
number.
NOTEl When the confirmation function is on, the
voice guide will say “
If a telephone number has been registered for the selected location, the voice guide will say “The current number is
If you do not want to change the telephone number, say “cancel” or the original number to keep it registered.
Bluetooth ®
2.0 interface*
8-63OGGE18E1For pleasant driving8
Page 403 of 538
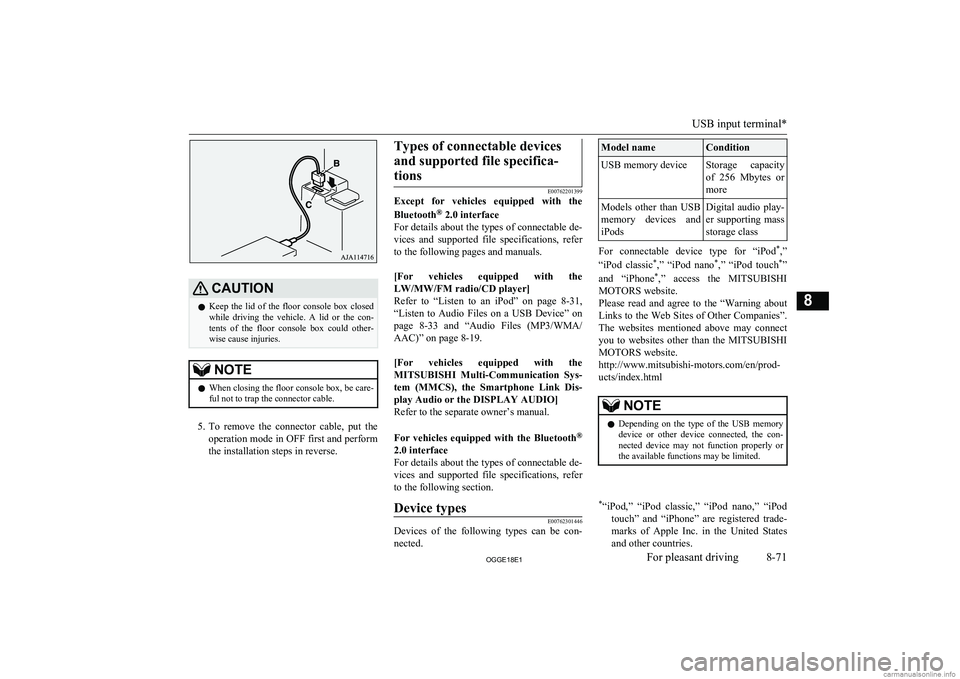
CAUTIONlKeep the lid of the floor console box closed
while driving the vehicle. A lid or the con- tents of the floor console box could other-
wise cause injuries.NOTEl When closing the floor console box, be care-
ful not to trap the connector cable.
5. To remove the connector cable, put the
operation mode in OFF first and perform the installation steps in reverse.
Types of connectable devices
and supported file specifica-tions
E00762201399
Except for vehicles equipped with the
Bluetooth ®
2.0 interface
For details about the types of connectable de- vices and supported file specifications, referto the following pages and manuals.
[For vehicles equipped with the
LW/MW/FM radio/CD player]
Refer to “Listen to an iPod” on page 8-31,
“Listen to Audio Files on a USB Device” on page 8-33 and “Audio Files (MP3/WMA/
AAC)” on page 8-19.
[For vehicles equipped with the MITSUBISHI Multi-Communication Sys-
tem (MMCS), the Smartphone Link Dis-
play Audio or the DISPLAY AUDIO]
Refer to the separate owner’s manual.
For vehicles equipped with the Bluetooth ®
2.0 interface For details about the types of connectable de- vices and supported file specifications, referto the following section.
Device typesE00762301446
Devices of the following types can be con- nected.
Model nameConditionUSB memory deviceStorage capacity
of 256 Mbytes or
moreModels other than USB memory devices andiPodsDigital audio play-
er supporting mass
storage class
For connectable device type for “iPod *
,”
“iPod classic *
,” “iPod nano *
,” “iPod touch *
”
and “iPhone *
,” access the MITSUBISHI
MOTORS website.
Please read and agree to the “Warning about Links to the Web Sites of Other Companies”.
The websites mentioned above may connect you to websites other than the MITSUBISHI
MOTORS website.
http://www.mitsubishi-motors.com/en/prod-
ucts/index.html
NOTEl Depending on the type of the USB memory
device or other device connected, the con-
nected device may not function properly or the available functions may be limited.* “iPod,” “iPod classic,” “iPod nano,” “iPod
touch” and “iPhone” are registered trade-marks of Apple Inc. in the United States and other countries.
USB input terminal*
8-71OGGE18E1For pleasant driving8
Page 404 of 538
NOTElIt is recommended to use an iPod with firm-
ware updated to the latest version.
l You can charge your iPod by connecting it
to the USB input terminal when the opera-tion mode is in ON or ACC.
l Do not keep your USB memory device or
iPod in your vehicle.
l It is recommended that you back up files in
case of data damage.
l Do not connect to the USB input terminal
any device (hard disk, card reader, memory reader, etc.) other than the connectable devi- ces specified in the previous section. The de- vice and/or data may be damaged. If any of
these devices was connected by mistake, re- move it after putting the operation mode inOFF.File specifications
E00762401056
You can play music files of the following
specifications that are saved in a USB memo-ry device or other device supporting mass
storage class. When you connect your iPod, playable file specifications depend on the connected iPod.
ItemConditionFile formatMP3, WMA, AAC,
WAVItemConditionMaximum number of levels
(including the root)
Level 8
Number of folders700Number of files65,535Sun visors
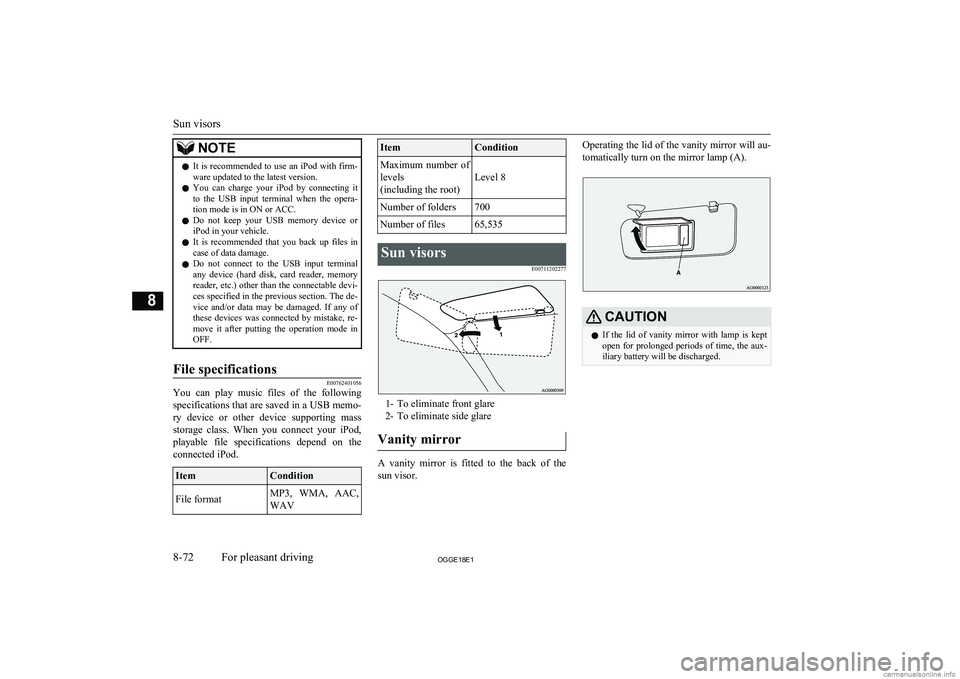
E00711202277
1- To eliminate front glare2- To eliminate side glare
Vanity mirror
A vanity mirror is fitted to the back of the sun visor.
Operating the lid of the vanity mirror will au-
tomatically turn on the mirror lamp (A).CAUTIONl If the lid of vanity mirror with lamp is kept
open for prolonged periods of time, the aux-
iliary battery will be discharged.
Sun visors
8-72OGGE18E1For pleasant driving8
Page 406 of 538
CAUTIONlDo not touch the heating element or the cig-
arette lighter housing, hold the knob only to prevent burns.
l Do not allow children to operate or play with
the cigarette lighter as burns may occur.
l Something is wrong with the cigarette light-
er if it does not pop back out within approxi-
mately 30 seconds of being pushed in.
Pull it out and have the problem corrected at MITSUBISHI MOTORS Authorized Serv-
ice Point.
l Do not use any electric appliance that is not
approved by MITSUBISHI MOTORS . Do-
ing so could damage the socket. If you used
the cigarette lighter after damaging the sock- et, the cigarette lighter might pop out or fail
to come out after being pushed in.
l When the cigarette lighter socket is used as a
power source for an electric appliance, be sure that the electric appliance operates at
12 V and has an electric capacity of 120 W or less. In addition, long use of the electricappliance when the ready indicator is not il-
luminated may run down the auxiliary bat- tery.Accessory socket
E00711602864CAUTIONlBe sure to use a “plug-in” type accessory op-
erating at 12 V and at 120 W or less.
When using more than one socket at the same time, make sure that the electrical ac-
cessories are 12 V accessories and that the total power consumption does not exceed
120 W.
l Long use of the electric appliance when the
ready indicator is not illuminated may run
down the auxiliary battery.
l When the accessory socket is not in use, be
sure to close the lid or install the cap, be-
cause the socket might become clogged by foreign material and be short-circuited.
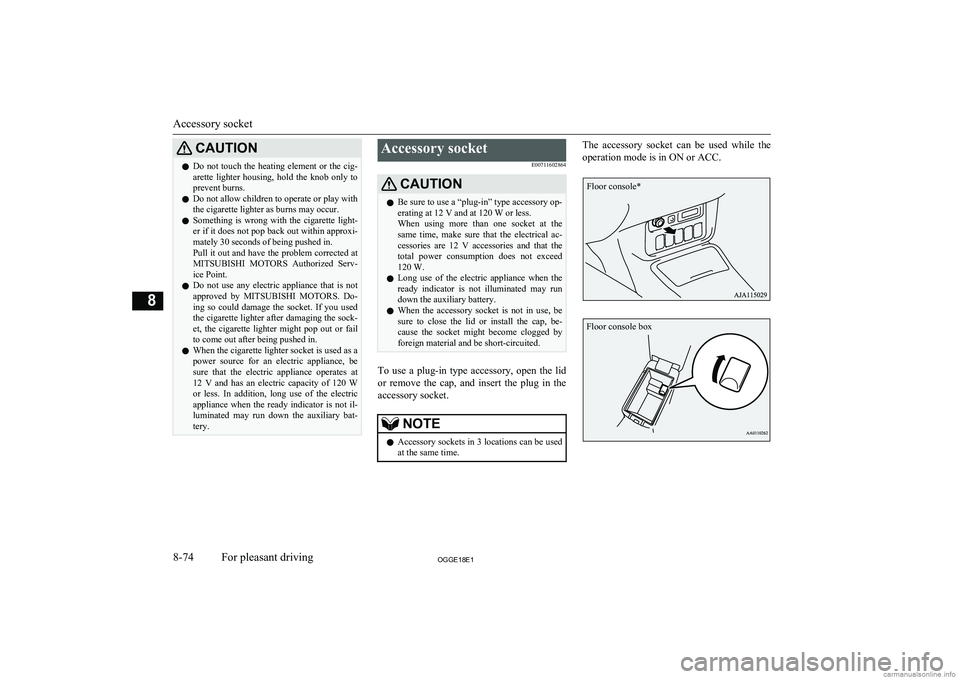
To use a plug-in type accessory, open the lid
or remove the cap, and insert the plug in the accessory socket.
NOTEl Accessory sockets in 3 locations can be used
at the same time.The accessory socket can be used while the
operation mode is in ON or ACC.
Accessory socket
8-74OGGE18E1For pleasant driving8 Floor console* Floor console box
Page 409 of 538
CAUTIONlWhen the 220-240 V AC power supply is
not in use, be sure to cancel power supply by pressing the 220-240 V AC power supply
switch, disconnect the plug and close the lid.
This will prevent the 220-240 V AC power
supply from becoming clogged and short cir-
cuiting.
l Do not stand behind the exhaust pipe as the
engine may automatically start depending on the condition. Heat from the exhaust could
lead to burns.
l Make sure that the plug is inserted all the
way into the 220-240 V AC power supplybefore using an electrical appliance.
l Do not use an electrical appliance in the ve-
hicle which emits heat such as a heater. Heat
damage to interior parts could result.
l Do not connect a malfunctioning electrical
appliance to the 220-240 V AC power sup- ply. Doing so could damage the 220-240 VAC power supply.NOTEl The accessory socket and 220-240 V AC
power supplies can be used simultaneously.
Refer to “Accessory socket” on page 8-74.
l If the plug of the electrical appliance was
loose or wobbled when inserted in the outlet, have the 220-240 V AC power supply re-
placed at a MITSUBISHI MOTORS Au-
thorized Service Point.NOTEl Never leave the vehicle, perform refueling
or washing the vehicle while using the
220-240 V AC power supply.
l You may hear operating sounds such as
sounds from the cooling fan near the lug-
gage area when using the 220-240 V AC power supply. This is normal.
l Never use electrical appliance that is vulner-
able to vibration or heat in the cabin. When
exposed to strong direct sunlight, the cabin will become extremely hot. It could cause
product failure.
l Do not use the 220-240 V AC power supply
with the vehicle covered by a car cover.
l When closing the window, door or tailgate,
be careful not to trap the power supply cord.
l 220-240 V AC power supply cannot be used
in the following cases.
• When the Plug-in Hybrid EV System
warning lamp is illuminated.
• When the drive battery level display indi-
cates 0.
• When the “PROPULSION POWER IS
REDUCED” warning display appears.
l Electrical appliance may not operate normal-
ly or electricity supply stops under the fol- lowing conditions. You may hear an opera- tion noise. This is normal.
• When the power consumption of the elec-
trical appliance exceeds 1500 W.
• When the vehicle interior temperature is
too hot or too cold.
l When the 220-240 V AC power supply can-
not be used or is not returned to operationNOTEautomatically after stopping electricity sup-
ply, follow the procedures below.
1
. Disconnect the plug of electrical ap-
pliance.
2 . Confirm the remaining quantity of
the drive battery. When it is low,
charge the drive battery by using the battery charge mode switch, etc.
Battery charge mode switch ® p. 7-28
Normal charging (charging method
with rated AC 220-240V outlet)
® p. 3-10
Quick charging (charging method with quick charger) ® p. 3-17
3 . Confirm that the ready indicator illu-
minates. If not, start the Plug-in Hy-
brid EV System.
4 . When the vehicle interior tempera-
ture is too hot or too cold, adjust it
appropriately by the using air condi-
tioner.
5 . Press the 220-240 V AC power sup-
ply switch to turn it on.
6 . Confirm that the indication lamp on
the 220-240 V AC power supply
switch comes on and insert the plug in the power outlet.
l The following electrical appliance may not
operate normally even if the power con-
220-240 V AC power supplies*
8-77OGGE18E1For pleasant driving8
Page 411 of 538
Positionof lamp switchOn/off control1-ON
(
)
The lamp illuminates regardless
of whether a door or the tailgate
is open or closed.2-DOOR (•)The lamp illuminates when a
door or the tailgate is opened. It
goes off approximately 15 sec-
onds after all doors and the tail-
gate are closed.
However, the lamp goes off im-
mediately with all doors and the
tailgate closed in the following
cases:l When the operation mode is
put in ON.l When the central door lock
function is used to lock thevehicle.l When the keyless operation
key is used to lock the vehi-cle.l When the keyless operation
function is used to lock thevehicle.3-OFF
(
)
The lamp goes off regardless of
whether a door or the tailgate is
open or closed.NOTEl When the operation mode is put in OFF
while the doors and tailgate are closed, the
lamp illuminates and after approximately 15 seconds it goes off.
l The time until the lamp goes off can be ad-
justed. For details, please consult a
MITSUBISHI MOTORS Authorized Serv-
ice Point. On vehicles equipped with the Smartphone Link Display Audio or the MITSUBISHI Multi-Communication Sys-
tem (MMCS), screen operations can be used to make the adjustment. Refer to the separate
owner’s manual for details.Map lamps
E00712400168
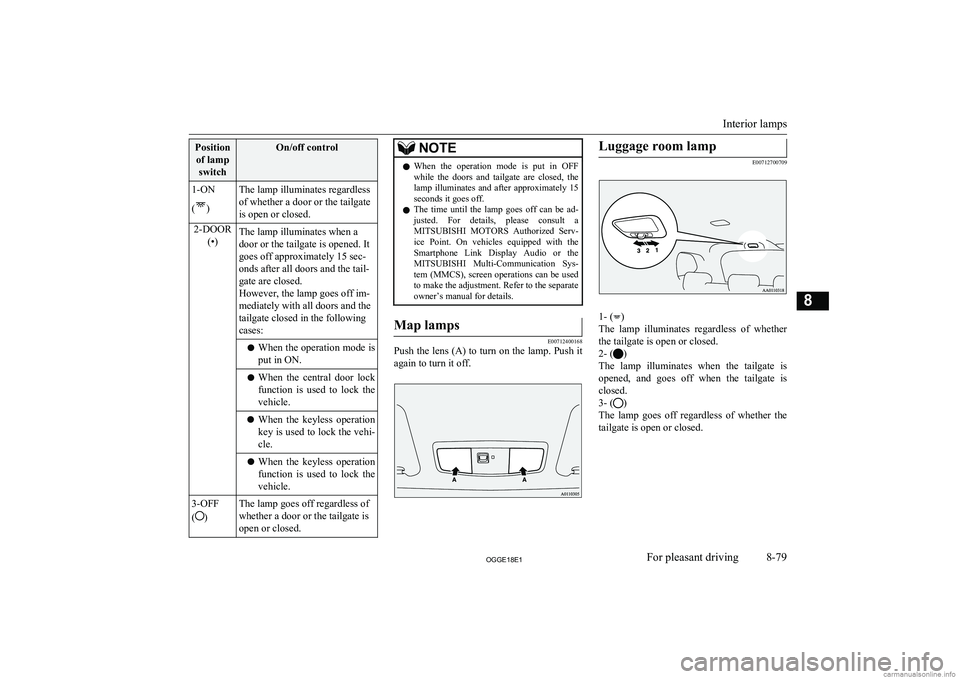
Push the lens (A) to turn on the lamp. Push it
again to turn it off.
Luggage room lamp
E00712700709
1- ()
The lamp illuminates regardless of whether the tailgate is open or closed.
2- (
)
The lamp illuminates when the tailgate is opened, and goes off when the tailgate is
closed.
3- (
)
The lamp goes off regardless of whether the tailgate is open or closed.
Interior lamps
8-79OGGE18E1For pleasant driving8
Page 412 of 538
Front foot lamps
E00776100073
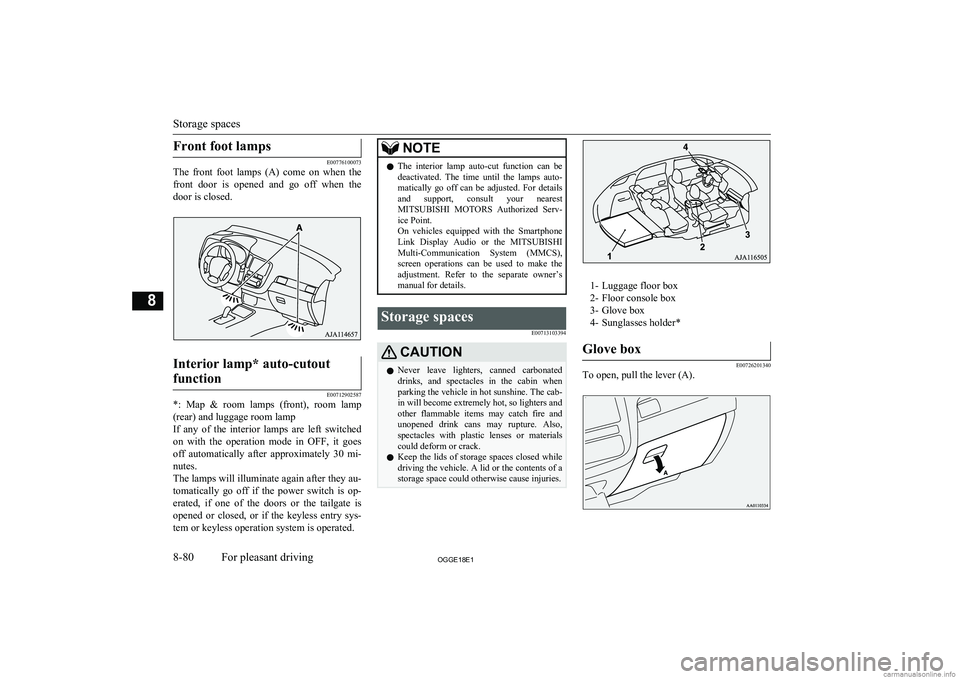
The front foot lamps (A) come on when the
front door is opened and go off when the
door is closed.
Interior lamp* auto-cutout
function
E00712902587
*: Map & room lamps (front), room lamp (rear) and luggage room lamp
If any of the interior lamps are left switched
on with the operation mode in OFF, it goes off automatically after approximately 30 mi- nutes.
The lamps will illuminate again after they au- tomatically go off if the power switch is op-
erated, if one of the doors or the tailgate is opened or closed, or if the keyless entry sys-
tem or keyless operation system is operated.
NOTEl The interior lamp auto-cut function can be
deactivated. The time until the lamps auto- matically go off can be adjusted. For details
and support, consult your nearest
MITSUBISHI MOTORS Authorized Serv-
ice Point.
On vehicles equipped with the Smartphone
Link Display Audio or the MITSUBISHI
Multi-Communication System (MMCS), screen operations can be used to make theadjustment. Refer to the separate owner’s
manual for details.Storage spaces
E00713103394CAUTIONlNever leave lighters, canned carbonated
drinks, and spectacles in the cabin when
parking the vehicle in hot sunshine. The cab- in will become extremely hot, so lighters and
other flammable items may catch fire and
unopened drink cans may rupture. Also, spectacles with plastic lenses or materials could deform or crack.
l Keep the lids of storage spaces closed while
driving the vehicle. A lid or the contents of a storage space could otherwise cause injuries.
1- Luggage floor box
2- Floor console box
3- Glove box
4- Sunglasses holder*
Glove box
E00726201340
To open, pull the lever (A).
Storage spaces
8-80OGGE18E1For pleasant driving8
Page 420 of 538
If the vehicle breaks downE00800102408
If the vehicle breaks down on the road, move it to the shoulder and use the hazard warning
flashers and/or the warning triangle etc.
Refer to “Hazard warning flasher switch” on page 6-60.
If you need to push your vehicle, put the op-
eration mode of the power switch in ON and put the select position in “N” (NEUTRAL) position.WARNINGl If you are unable to safely assess the vehi-
cle due to vehicle damage, do not touch
the vehicle. Leave the vehicle and contact emergency services. Advise emergency
responders that this is a Plug-in Hybrid Electric vehicle.
If the ready indicator goes out
while driving
Vehicle operation and control are affected if
the ready indicator goes out while driving.
Before moving the vehicle to a safe area, be aware of the following:
l The brake booster may becomes inoper-
ative and the pedal effort will increase.
Press down the brake pedal harder than usual.
l The power steering system may not op-
erate, the steering wheel feels heavy when turning it.Emergency starting
E00800504204
If the Plug-in Hybrid EV system cannot be
started because the auxiliary battery is weak or dead, the battery from another vehicle can
be used with jumper cables to start the Plug-
in Hybrid EV system.
WARNINGl To start the Plug-in Hybrid EV system us-
ing jumper cables from another vehicle
and perform the correct procedures ac-
cording to the instruction below. Incor-
rect procedures could result in a fire, ex- plosion, electric shock or damage to the
vehicles.
l Keep sparks, cigarettes and flames away
from the battery because the battery may
produce an explosion.CAUTIONl The Plug-in Hybrid EV system cannot be
started by pulling or pushing the vehicle.
l Check the other vehicle. It must have a 12-
volt battery. If the other system isn’t 12-volt, shorting can damage both vehicles.
l Use the proper cables suitable for the battery
size to prevent overheating of the cables.CAUTIONl Check the jumper cables for damage and
corrosion before use.
l Always wear protective eye goggles when
working near the battery.
l Keep the battery out of the reach of children.
l Do not attempt jump starting the auxiliary
battery while the drive battery is being charged. Doing so could damage the charg-
ing equipment or the vehicle.NOTEl If the auxiliary battery is disconnected, the
operation mode of the power switch is mem-
orized. When a booster battery is connected
by jumper cables, the operation mode re- turns to the state it had before the auxiliary
battery ran down.
Pay due attention if you do not know the op- eration mode before the auxiliary battery
was fully discharged.
l If the auxiliary battery is fully discharged
with the select position in the “P” (PARK)
position, the select position cannot be changed to other position from the “P”
(PARK) position in some cases. In such a case, the front wheels have been locked.
Therefore, the vehicle cannot be moved.
1. Get the vehicles close enough so the
jumper cables can reach, but be sure the vehicles aren’t touching each other.
If the vehicle breaks down
9-02OGGE18E1For emergencies9
Page 429 of 538
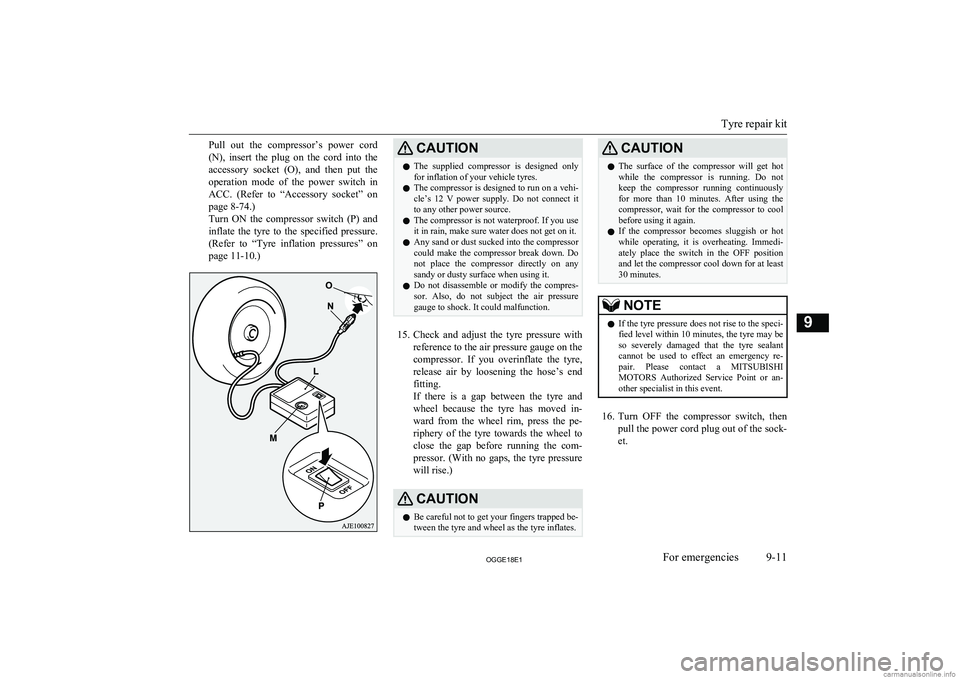
Pull out the compressor’s power cord
(N), insert the plug on the cord into the
accessory socket (O), and then put the operation mode of the power switch in ACC. (Refer to “Accessory socket” on
page 8-74.)
Turn ON the compressor switch (P) and
inflate the tyre to the specified pressure. (Refer to “Tyre inflation pressures” on
page 11-10.)CAUTIONl The supplied compressor is designed only
for inflation of your vehicle tyres.
l The compressor is designed to run on a vehi-
cle’s 12 V power supply. Do not connect itto any other power source.
l The compressor is not waterproof. If you use
it in rain, make sure water does not get on it.
l Any sand or dust sucked into the compressor
could make the compressor break down. Do not place the compressor directly on anysandy or dusty surface when using it.
l Do not disassemble or modify the compres-
sor. Also, do not subject the air pressure
gauge to shock. It could malfunction.
15. Check and adjust the tyre pressure with
reference to the air pressure gauge on the
compressor. If you overinflate the tyre, release air by loosening the hose’s end
fitting.
If there is a gap between the tyre and
wheel because the tyre has moved in-
ward from the wheel rim, press the pe- riphery of the tyre towards the wheel to
close the gap before running the com- pressor. (With no gaps, the tyre pressure
will rise.)
CAUTIONl Be careful not to get your fingers trapped be-
tween the tyre and wheel as the tyre inflates.CAUTIONl The surface of the compressor will get hot
while the compressor is running. Do not
keep the compressor running continuously for more than 10 minutes. After using the compressor, wait for the compressor to cool
before using it again.
l If the compressor becomes sluggish or hot
while operating, it is overheating. Immedi- ately place the switch in the OFF positionand let the compressor cool down for at least30 minutes.NOTEl If the tyre pressure does not rise to the speci-
fied level within 10 minutes, the tyre may be
so severely damaged that the tyre sealant
cannot be used to effect an emergency re- pair. Please contact a MITSUBISHI
MOTORS Authorized Service Point or an-
other specialist in this event.
16. Turn OFF the compressor switch, then
pull the power cord plug out of the sock- et.
Tyre repair kit
9-11OGGE18E1For emergencies9