service MITSUBISHI OUTLANDER PHEV 2018 Owner's Manual (in English)
[x] Cancel search | Manufacturer: MITSUBISHI, Model Year: 2018, Model line: OUTLANDER PHEV, Model: MITSUBISHI OUTLANDER PHEV 2018Pages: 538, PDF Size: 25.01 MB
Page 422 of 538
CAUTIONlTake care not to get the jumper cable caught
in the cooling fan or other rotating part in
the engine compartment.NOTEl If the jumper cable is connected to any posi-
tion other than the appointed one, it may
cause damage to the vehicle.
7. Start the engine in the vehicle which has
the booster battery, let the engine idle a
few minutes, then start the Plug-in Hy- brid EV system in your vehicle.
8. Check if the ready indicator illuminates.
If the ready indicator does not illumi- nate, contact a MITSUBISHI MOTORS
Authorized Service Point.
9. When the ready indicator illuminates,
disconnect the jumper cables in the re-
verse order of connection.
10. Check if the select position can be shif-
ted to all positions other than the “P” (PARK) position.
11. Have the auxiliary battery inspected by
your nearest MITSUBISHI MOTORS
Authorized Service Point.
CAUTIONl Your vehicle is equipped with an exclusive
auxiliary battery. Even if the battery type is the same, the battery may not be correctly
installed in your vehicle. When replacing the auxiliary battery, request a MITSUBISHI
MOTORS Authorized Service Point to do
so.Engine overheating
E00800604221
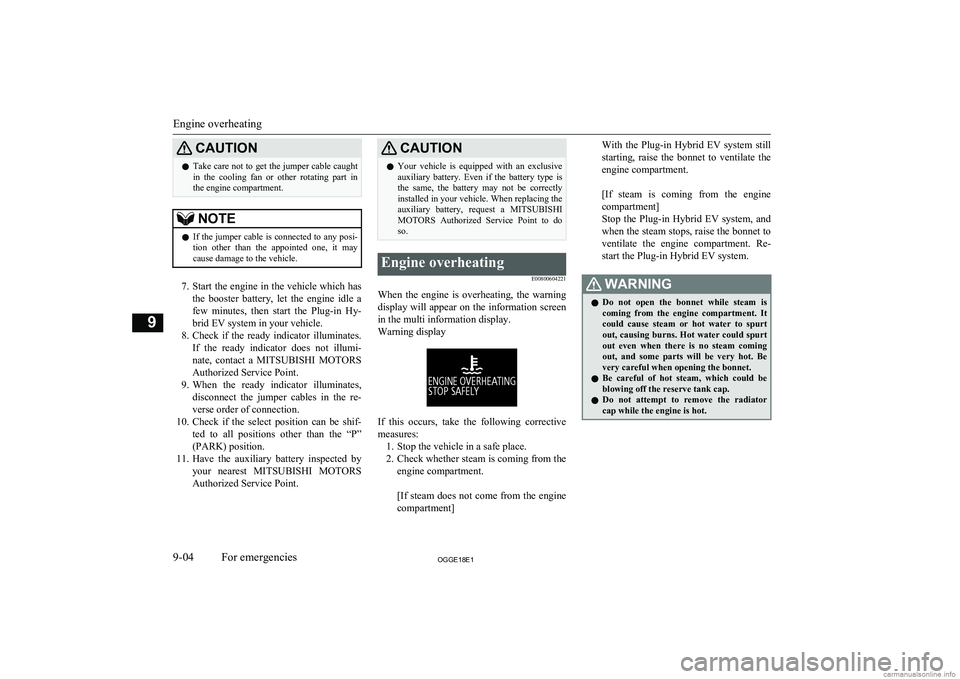
When the engine is overheating, the warningdisplay will appear on the information screen in the multi information display.
Warning display
If this occurs, take the following corrective measures: 1. Stop the vehicle in a safe place.
2. Check whether steam is coming from the
engine compartment.
[If steam does not come from the engine
compartment]
With the Plug-in Hybrid EV system still
starting, raise the bonnet to ventilate the
engine compartment.
[If steam is coming from the engine
compartment]
Stop the Plug-in Hybrid EV system, and when the steam stops, raise the bonnet to
ventilate the engine compartment. Re- start the Plug-in Hybrid EV system.WARNINGl Do not open the bonnet while steam is
coming from the engine compartment. It could cause steam or hot water to spurt
out, causing burns. Hot water could spurt out even when there is no steam coming
out, and some parts will be very hot. Be
very careful when opening the bonnet.
l Be careful of hot steam, which could be
blowing off the reserve tank cap.
l Do not attempt to remove the radiator
cap while the engine is hot.
Engine overheating
9-04OGGE18E1For emergencies9
Page 423 of 538
![MITSUBISHI OUTLANDER PHEV 2018 Owners Manual (in English) 3.Confirm that the cooling fans (A) are
turning.
[If the cooling fans are turning]
After the high coolant temperature warn- ing has gone off, stop the Plug-in Hybrid
EV system.
[If the cooling f MITSUBISHI OUTLANDER PHEV 2018 Owners Manual (in English) 3.Confirm that the cooling fans (A) are
turning.
[If the cooling fans are turning]
After the high coolant temperature warn- ing has gone off, stop the Plug-in Hybrid
EV system.
[If the cooling f](/img/19/34890/w960_34890-422.png)
3.Confirm that the cooling fans (A) are
turning.
[If the cooling fans are turning]
After the high coolant temperature warn- ing has gone off, stop the Plug-in Hybrid
EV system.
[If the cooling fans are not turning]
Stop the Plug-in Hybrid EV system im-
mediately and contact a MITSUBISHI
MOTORS Authorized Service Point for
assistance.
*: Front of the vehicle
WARNINGl Be careful not to get your hands or clothes
caught in the cooling fan.4. Check the coolant level in the reserve
tank (B and C).
B: Reserve tank for engine cooling
C: Reserve tank for EV cooling system
5. Add coolant to the radiator and/or re-
serve tank if necessary. (Refer to the
“Maintenance” section.)
Engine overheating
9-05OGGE18E1For emergencies9 FullFull
Low Low
Page 426 of 538
5- Valve remover
6- Valve insert (spare)
7- Speed restriction stickerHow to use the tyre repair kit
E00804601130
WARNINGl Using the tyre repair kit may damage the
wheel and/or the tyre inflation pressure
sensor for the tyre.
The vehicle must promptly be inspected and repaired by a MITSUBISHI
MOTORS Authorized Service Point after
using the tyre repair kit.CAUTIONl The tyre sealant can cause health damage if
swallowed. If you accidentally swallow it,
drink as much water as possible and imme-
diately consult a doctor.
l If the tyre sealant gets in your eyes or on
your skin, rinse with lots of water. If you still sense an abnormality, consult a doctor.
l Consult a doctor immediately if any allergic
reactions occur.
l Do not allow children to touch the tyre seal-
ant.
l Do not breathe in the vapours of tyre sealant.
l Be sure to use a
MITSUBISHI MOTORS
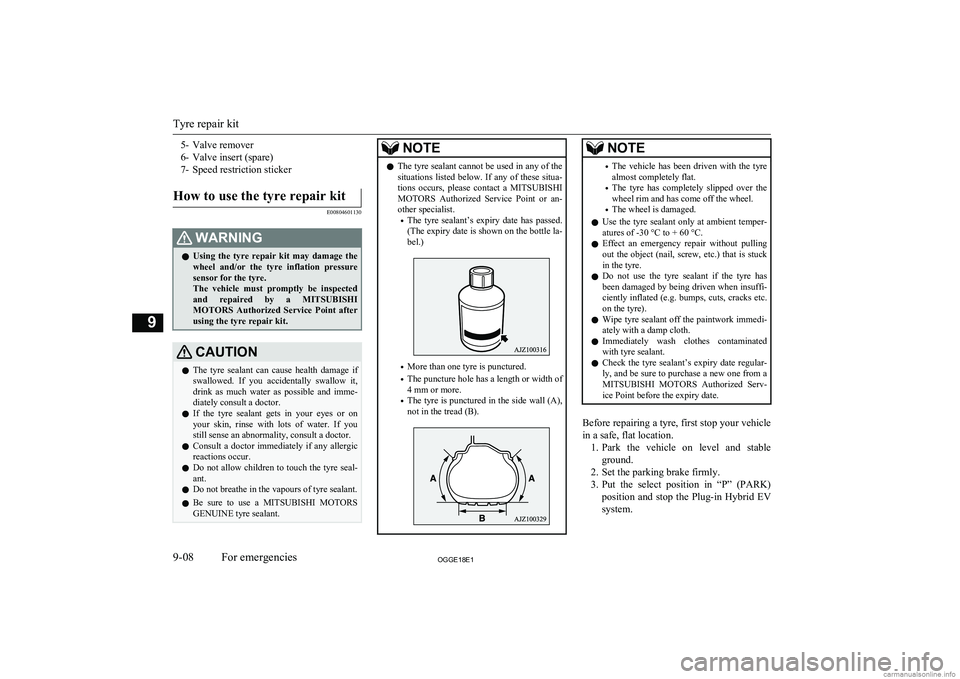
GENUINE tyre sealant.NOTEl The tyre sealant cannot be used in any of the
situations listed below. If any of these situa-
tions occurs, please contact a MITSUBISHI
MOTORS Authorized Service Point or an-
other specialist.
• The tyre sealant’s expiry date has passed.
(The expiry date is shown on the bottle la- bel.)
• More than one tyre is punctured.
• The puncture hole has a length or width of
4 mm or more.
• The tyre is punctured in the side wall (A),
not in the tread (B).
NOTE• The vehicle has been driven with the tyre
almost completely flat.
• The tyre has completely slipped over the
wheel rim and has come off the wheel.
• The wheel is damaged.
l Use the tyre sealant only at ambient temper-
atures of -30 °C to + 60 °C.
l Effect an emergency repair without pulling
out the object (nail, screw, etc.) that is stuck
in the tyre.
l Do not use the tyre sealant if the tyre has
been damaged by being driven when insuffi- ciently inflated (e.g. bumps, cuts, cracks etc.
on the tyre).
l Wipe tyre sealant off the paintwork immedi-
ately with a damp cloth.
l Immediately wash clothes contaminated
with tyre sealant.
l Check the tyre sealant’s expiry date regular-
ly, and be sure to purchase a new one from a
MITSUBISHI MOTORS Authorized Serv-
ice Point before the expiry date.
Before repairing a tyre, first stop your vehicle
in a safe, flat location. 1. Park the vehicle on level and stable
ground.
2. Set the parking brake firmly.
3. Put the select position in “P” (PARK)
position and stop the Plug-in Hybrid EV
system.
Tyre repair kit
9-08OGGE18E1For emergencies9
Page 429 of 538
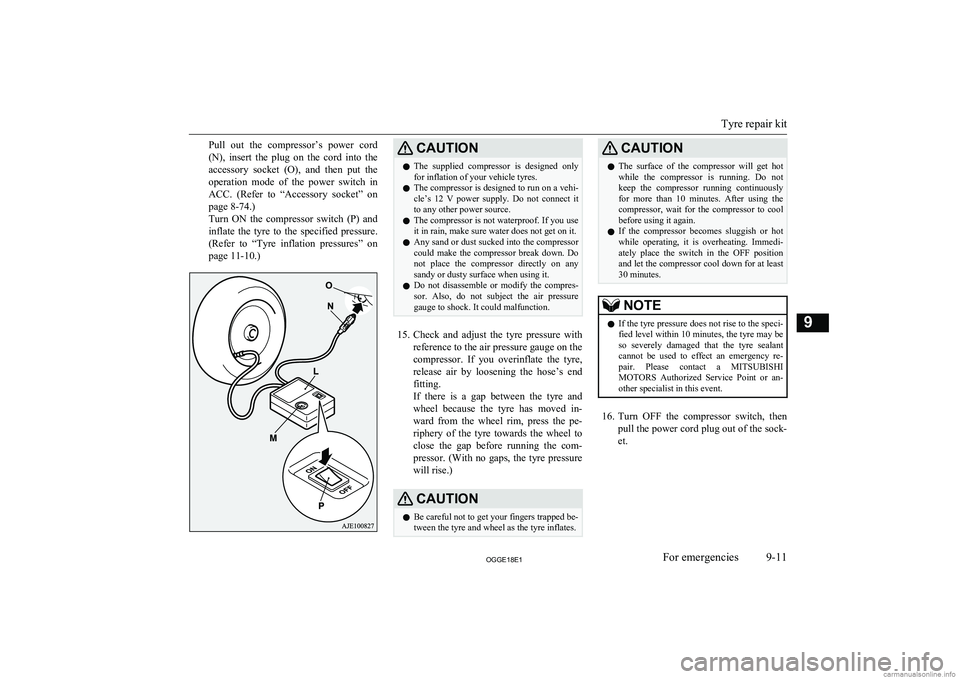
Pull out the compressor’s power cord
(N), insert the plug on the cord into the
accessory socket (O), and then put the operation mode of the power switch in ACC. (Refer to “Accessory socket” on
page 8-74.)
Turn ON the compressor switch (P) and
inflate the tyre to the specified pressure. (Refer to “Tyre inflation pressures” on
page 11-10.)CAUTIONl The supplied compressor is designed only
for inflation of your vehicle tyres.
l The compressor is designed to run on a vehi-
cle’s 12 V power supply. Do not connect itto any other power source.
l The compressor is not waterproof. If you use
it in rain, make sure water does not get on it.
l Any sand or dust sucked into the compressor
could make the compressor break down. Do not place the compressor directly on anysandy or dusty surface when using it.
l Do not disassemble or modify the compres-
sor. Also, do not subject the air pressure
gauge to shock. It could malfunction.
15. Check and adjust the tyre pressure with
reference to the air pressure gauge on the
compressor. If you overinflate the tyre, release air by loosening the hose’s end
fitting.
If there is a gap between the tyre and
wheel because the tyre has moved in-
ward from the wheel rim, press the pe- riphery of the tyre towards the wheel to
close the gap before running the com- pressor. (With no gaps, the tyre pressure
will rise.)
CAUTIONl Be careful not to get your fingers trapped be-
tween the tyre and wheel as the tyre inflates.CAUTIONl The surface of the compressor will get hot
while the compressor is running. Do not
keep the compressor running continuously for more than 10 minutes. After using the compressor, wait for the compressor to cool
before using it again.
l If the compressor becomes sluggish or hot
while operating, it is overheating. Immedi- ately place the switch in the OFF positionand let the compressor cool down for at least30 minutes.NOTEl If the tyre pressure does not rise to the speci-
fied level within 10 minutes, the tyre may be
so severely damaged that the tyre sealant
cannot be used to effect an emergency re- pair. Please contact a MITSUBISHI
MOTORS Authorized Service Point or an-
other specialist in this event.
16. Turn OFF the compressor switch, then
pull the power cord plug out of the sock- et.
Tyre repair kit
9-11OGGE18E1For emergencies9
Page 430 of 538
NOTElSimply putting sealant and air into the tyre
using the tyre repair kit does not seal the
puncture hole. Air will leak through the puncture hole until the emergency repair procedure is completed (through step 19 or
step 20 of these instructions).
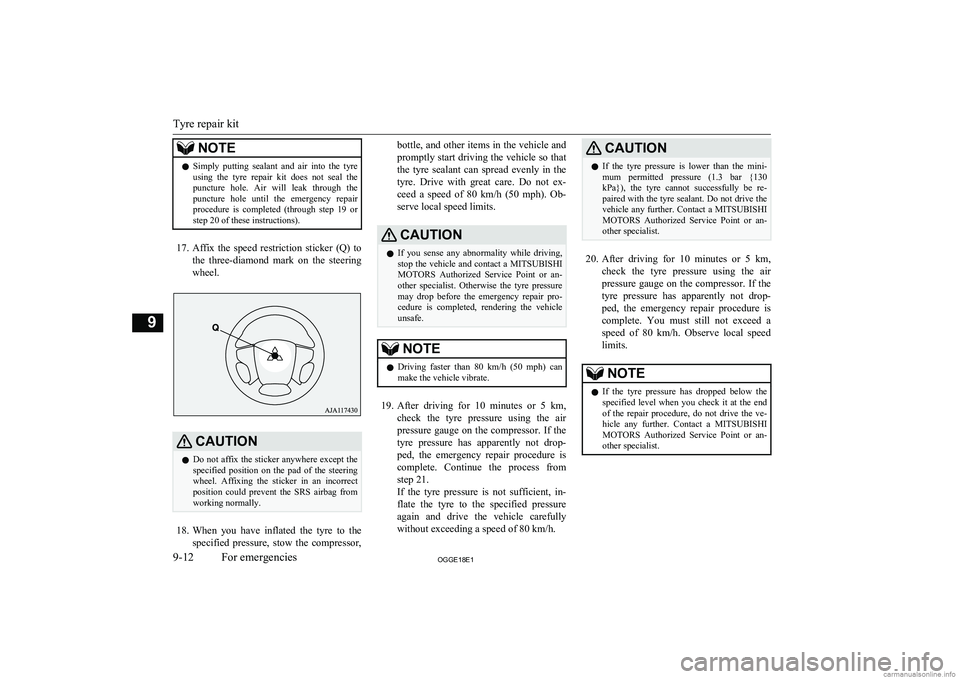
17. Affix the speed restriction sticker (Q) to
the three-diamond mark on the steering wheel.
CAUTIONl Do not affix the sticker anywhere except the
specified position on the pad of the steeringwheel. Affixing the sticker in an incorrect
position could prevent the SRS airbag from working normally.
18. When you have inflated the tyre to the
specified pressure, stow the compressor,
bottle, and other items in the vehicle and
promptly start driving the vehicle so that the tyre sealant can spread evenly in the
tyre. Drive with great care. Do not ex- ceed a speed of 80 km/h (50 mph). Ob-
serve local speed limits.CAUTIONl If you sense any abnormality while driving,
stop the vehicle and contact a MITSUBISHI
MOTORS Authorized Service Point or an-
other specialist. Otherwise the tyre pressure
may drop before the emergency repair pro- cedure is completed, rendering the vehicle
unsafe.NOTEl Driving faster than 80 km/h (50 mph)
can
make the vehicle vibrate.
19. After driving for 10 minutes or 5 km ,
check the tyre pressure using the air
pressure gauge on the compressor. If the
tyre pressure has apparently not drop- ped, the emergency repair procedure iscomplete. Continue the process from
step 21.
If the tyre pressure is not sufficient, in- flate the tyre to the specified pressure
again and drive the vehicle carefully
without exceeding a speed of 80 km/h.
CAUTIONl If the tyre pressure is lower than the mini-
mum permitted pressure (1.3 bar {130 kPa}), the tyre cannot successfully be re-
paired with the tyre sealant. Do not drive the vehicle any further. Contact a MITSUBISHI
MOTORS Authorized Service Point or an-
other specialist.
20. After driving for 10 minutes or 5 km ,
check the tyre pressure using the air
pressure gauge on the compressor. If the
tyre pressure has apparently not drop- ped, the emergency repair procedure iscomplete. You must still not exceed a speed of 80 km/h. Observe local speed
limits.
NOTEl If the tyre pressure has dropped below the
specified level when you check it at the end
of the repair procedure, do not drive the ve- hicle any further. Contact a MITSUBISHI
MOTORS Authorized Service Point or an-
other specialist.
Tyre repair kit
9-12OGGE18E1For emergencies9
Page 431 of 538
NOTElIn cold conditions (when the ambient tem-
perature is 0 °C or lower), the time and driv-ing distance necessary until completion of
the repair can be longer than in warmer con- ditions, meaning that the tyre pressure candrop below the specified level even when
you have inflated the tyre a second time and
subsequently driven the vehicle. If this hap- pens, inflate the tyre to the specified pres-
sure once more, drive for about 10 minutes or 5 km, then check the tyre pressure again.
If the tyre pressure has again dropped below
the specified level, stop driving the vehicle and contact a MITSUBISHI MOTORS Au-
thorized Service Point or another specialist.
21. Immediately drive with great care to a
MITSUBISHI MOTORS Authorized
Service Point and have tyre repair/
replacement performed.
CAUTIONl Be sure to check the tyre pressure for confir-
mation that the emergency repair procedureis complete.NOTEl Please give the empty sealant bottle to your
MITSUBISHI MOTORS Authorized Serv-
ice Point when you purchase new sealant or dispose of the sealant bottle according to na-
tional regulations for the disposal of chemi- cal waste.
l A tyre in which puncture sealant has been
used should ideally be replaced with a newone. If you wish to have such a tyre properly
repaired for reuse, please contact a MITSUBISHI MOTORS Authorized Serv-
ice Point or another specialist. Note that a
proper repair is impossible following an emergency repair if the puncture hole cannot
be located.
l The manufacturer is unable to guarantee that
all tyre punctures can be repaired with the
tyre repair kit, in particular cuts or perfora- tions with a diameter of more than 4 mm or
away from the tyre’s tread. The manufactur- er is not liable for damage sustained throughimproper use of the tyre repair kit.
l The manufacturer is not liable for damage
sustained through re-use of any tyre in which tyre sealant has been used.How to change a tyre
E00801203924
Before changing a tyre, first stop your vehi-cle in a safe, flat location. 1. Park the vehicle on level and stable
ground, free of loose pebbles, etc.
2. Set the parking brake firmly.
3. Put the select position in “P” (PARK)
position and stop the Plug-in Hybrid EV
system.
4. Have all your passengers get out of the
vehicle.
5. To prevent the vehicle from rolling
when jacking up the vehicle, place chocks or blocks (A) at the tyre that is diagonally opposite from the tyre (B)
you are changing.WARNINGl Be sure to apply chocks or blocks to the
correct tyre when jacking up the vehicle.If the vehicle moves while jacked up, the
jack could slip out of position, leading to
an accident.
How to change a tyre
9-13OGGE18E1For emergencies9
Page 435 of 538
CAUTIONlAfter changing the tyre and driving the vehi-
cle about 1,000 km (620 miles), retighten the
wheel nuts to make sure that they have not come loose.
l If the steering wheel vibrates when driving
after changing the tyre, we recommend you to have the tyres checked for balance.
l Do not mix one type of tyre with another or
use a different size from the one listed. This
would cause early wear and poor handling.To store the tools and jack
E00803800037
Reverse the removing procedure when stor-
ing the jack, jack bar and wheel nut wrench.
Refer to “Tools and jack” on page 9-06.
Towing
E00801504953
If your vehicle needs to be tow-
ed
If you need to tow your vehicle, we recom- mend that you contact a MITSUBISHI
MOTORS Authorized Service Point or a
commercial tow truck service.
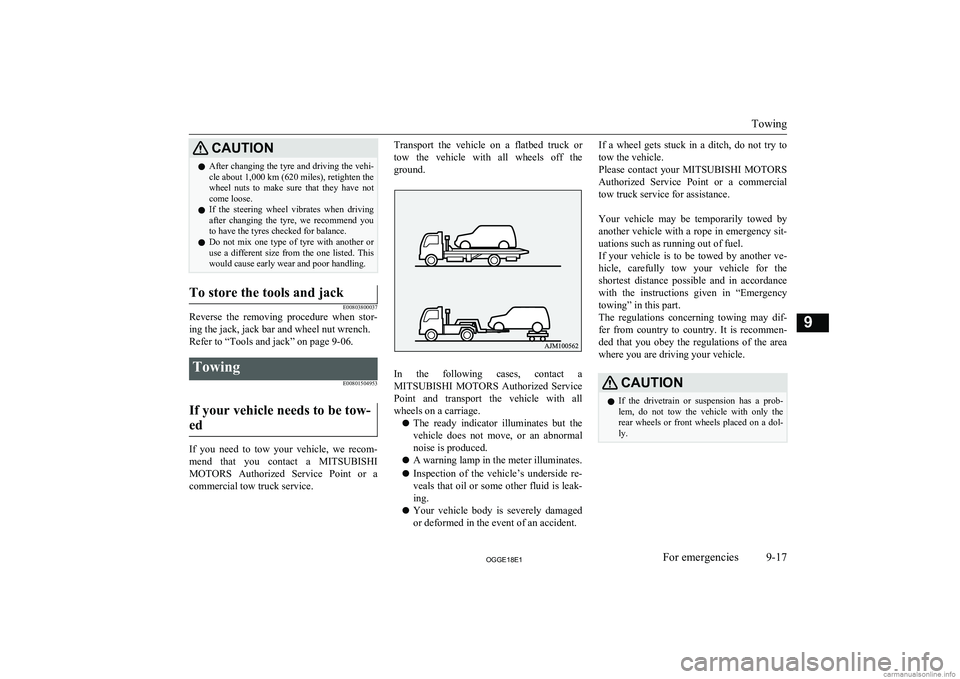
Transport the vehicle on a flatbed truck or
tow the vehicle with all wheels off the
ground.
In the following cases, contact a MITSUBISHI MOTORS Authorized Service
Point and transport the vehicle with all wheels on a carriage.
l The ready indicator illuminates but the
vehicle does not move, or an abnormal
noise is produced.
l A warning lamp in the meter illuminates.
l Inspection of the vehicle’s underside re-
veals that oil or some other fluid is leak- ing.
l Your vehicle body is severely damaged
or deformed in the event of an accident.
If a wheel gets stuck in a ditch, do not try to
tow the vehicle.
Please contact your MITSUBISHI MOTORS
Authorized Service Point or a commercial tow truck service for assistance.
Your vehicle may be temporarily towed by
another vehicle with a rope in emergency sit- uations such as running out of fuel.
If your vehicle is to be towed by another ve-
hicle, carefully tow your vehicle for the shortest distance possible and in accordance
with the instructions given in “Emergency
towing” in this part.
The regulations concerning towing may dif-
fer from country to country. It is recommen-
ded that you obey the regulations of the area where you are driving your vehicle.CAUTIONl If the drivetrain or suspension has a prob-
lem, do not tow the vehicle with only the
rear wheels or front wheels placed on a dol- ly.
Towing
9-17OGGE18E1For emergencies9
Page 438 of 538
CAUTIONlThe person in the vehicle being towed must
pay attention to the brake lamps of the tow- ing vehicle and make sure the rope never be-
comes slack.
l When the vehicle is to be towed by another
vehicle with all the wheels on the ground, make sure that the towing speed and dis- tance given below are never exceeded,
avoiding damage to the transaxle.
Towing speed: 30 km/h (19 mph)
Towing distance: 30 km
For the towing speed and the towing dis- tance, follow the local driving laws and reg- ulations.
If your vehicle tows another ve-
hicle
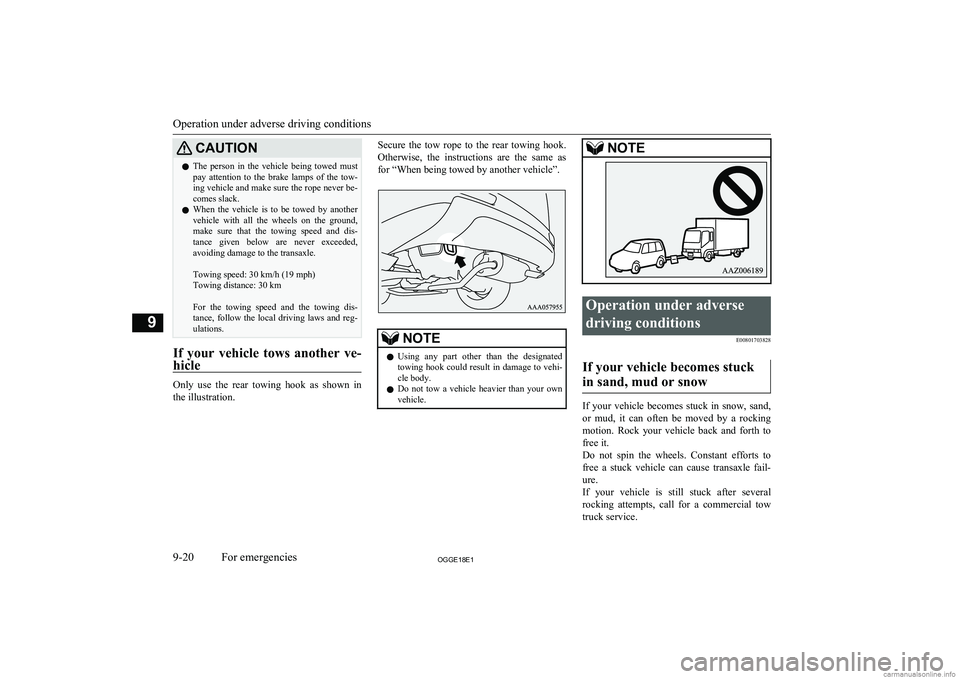
Only use the rear towing hook as shown in
the illustration.
Secure the tow rope to the rear towing hook.
Otherwise, the instructions are the same as
for “When being towed by another vehicle”.NOTEl Using any part other than the designated
towing hook could result in damage to vehi-cle body.
l Do not tow a vehicle heavier than your own
vehicle.NOTEOperation under adverse
driving conditions E00801703828
If your vehicle becomes stuck
in sand, mud or snow
If your vehicle becomes stuck in snow, sand,
or mud, it can often be moved by a rocking
motion. Rock your vehicle back and forth to
free it.
Do not spin the wheels. Constant efforts to
free a stuck vehicle can cause transaxle fail-
ure.
If your vehicle is still stuck after several rocking attempts, call for a commercial tow
truck service.
Operation under adverse driving conditions
9-20OGGE18E1For emergencies9
Page 439 of 538
WARNINGlWhen trying to rock your vehicle out of a
stuck position, make sure that there are
no people nearby. The rocking motion can make your vehicle suddenly lurch for-
ward or backward, and injure any by- standers.
On a flooded road
l Do not drive on a flooded road. If you
drive on a flooded road, not only does the Plugin Hybrid EV System stop but
there may be a failure like electric leak- age or short circuit.
If you inevitably had to run on a flooded
road and the vehicle was exposed to wa- ter, be sure to have your vehicle inspec-
ted by a MITSUBISHI MOTORS Au-
thorized Service Point.
l If there is water on the brakes after driv-
ing through puddles or washing the vehi- cle, resulting in temporarily ineffective
brakes. In such cases, lightly depress the brake pedal to see if the brakes operate
properly. If they do not, lightly depress the pedal several times while driving in
order to dry the brake pads.
l When driving in rain or on a road with
many puddles a layer of water may form
between the tyres and the road surface.
This reduces a tyre’s frictional resistance
on the road, resulting in loss of steering stability and braking capability.
To cope with this, observe the following
items: A- Drive your vehicle at slow speed.B- Do not drive on worn tyres.
C- Always maintain the specified tyre
inflation pressures.
On a snow-covered or frozen road
l When driving on a snow-covered or fro-
zen road, it is recommended that you use snow tyres or snow traction device (tyre chains).
Refer to the “Snow tyres” and “Snow
traction device (tyre chains)” sections.
l Avoid high-speed operation, sudden ac-
celeration, abrupt brake application and
sharp cornering.
l Depressing the brake pedal during travel
on snowy or icy roads may cause tyre
slippage and skidding. When traction be-
tween the tyres and the road is reduced the wheels may skid and the vehicle can-
not readily be brought to a stop by con- ventional braking techniques. Brakingwill differ, depending upon whether you
have anti-lock brake system (ABS). As your vehicle is equipped with ABS,brake by pressing the brake pedal hard,
and keeping it pressed.
l Allow extra distance between your vehi-
cle and the vehicle in front of you, and avoid sudden braking.
l Accumulation of ice on the braking sys-
tem can cause the wheels to lock. Pullaway from a standstill slowly after con-
firming safety around the vehicle.CAUTIONl Do not press the accelerator pedal rapidly. If
the wheels break free of the ice, the vehicle
could suddenly start moving and possibly cause an accident.
On a bumpy or rutted road
Drive as slow as possible when driving on
bumpy or rutted roads.
Operation under adverse driving conditions
9-21OGGE18E1For emergencies9
Page 447 of 538
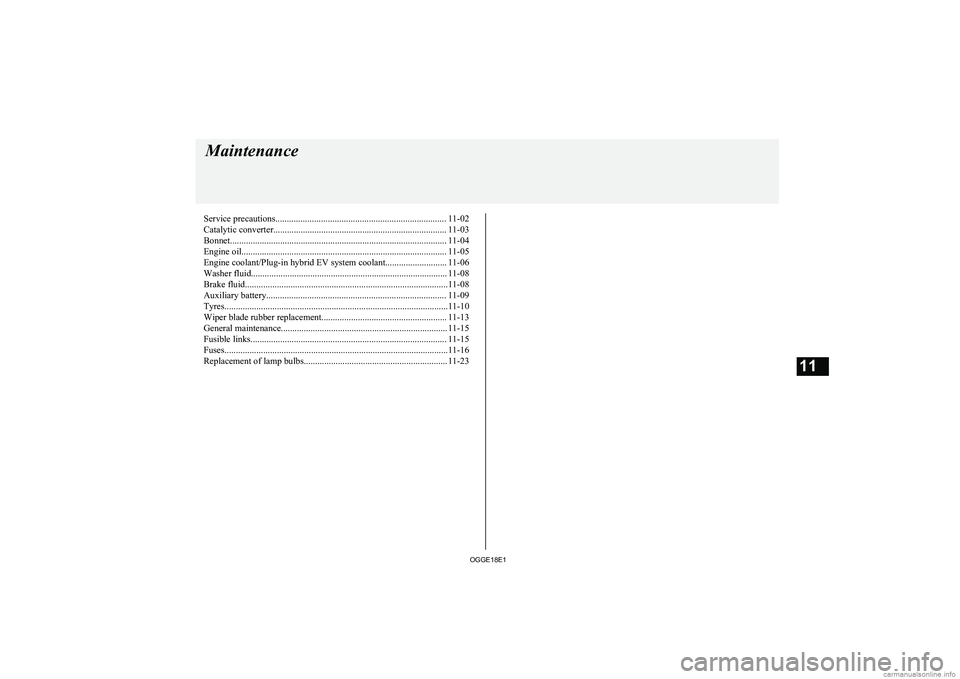
Service precautions........................................................................... 11-02
Catalytic converter............................................................................ 11-03
Bonnet............................................................................................... 11-04
Engine oil.......................................................................................... 11-05 Engine coolant/Plug-in hybrid EV system coolant........................... 11-06
Washer fluid...................................................................................... 11-08
Brake fluid.........................................................................................11-08
Auxiliary battery............................................................................... 11-09
Tyres..................................................................................................11-10 Wiper blade rubber replacement....................................................... 11-13
General maintenance......................................................................... 11-15
Fusible links...................................................................................... 11-15
Fuses..................................................................................................11-16
Replacement of lamp bulbs............................................................... 11-23Maintenance
OGGE18E111