clock MITSUBISHI OUTLANDER SPORT 2017 3.G Owners Manual
[x] Cancel search | Manufacturer: MITSUBISHI, Model Year: 2017, Model line: OUTLANDER SPORT, Model: MITSUBISHI OUTLANDER SPORT 2017 3.GPages: 399, PDF Size: 14.61 MB
Page 19 of 399
Filling the fuel tank 3-4 General information
3
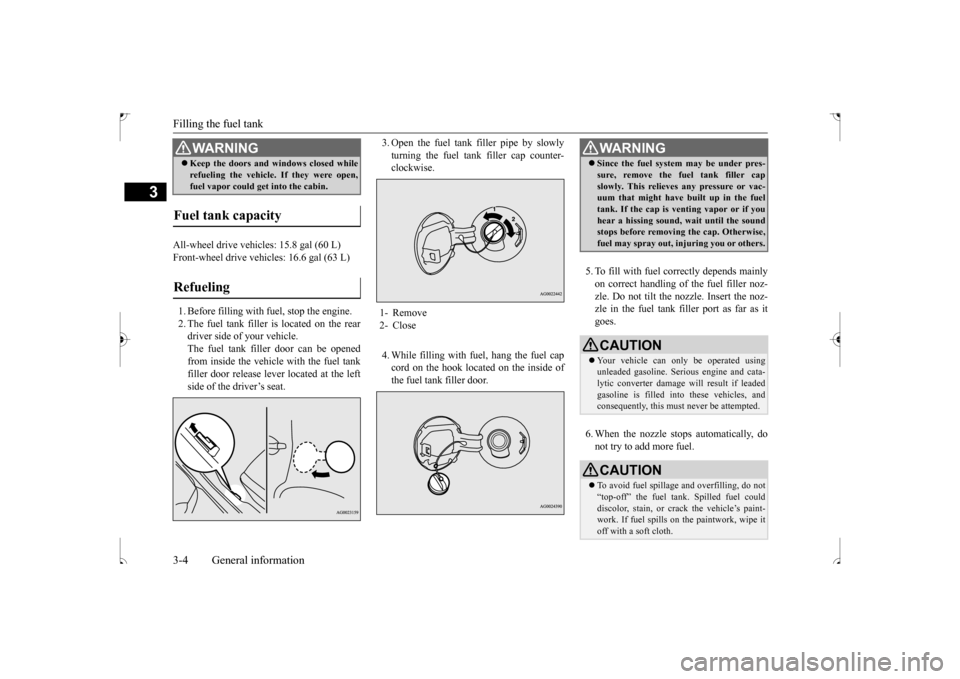
All-wheel drive vehicles: 15.8 gal (60 L) Front-wheel drive vehicles: 16.6 gal (63 L) 1. Before filling with fuel, stop the engine. 2. The fuel tank filler is located on the rear driver side of your vehicle. The fuel tank filler door can be openedfrom inside the vehicle with the fuel tank filler door release le
ver located at the left
side of the driver’s seat.
3. Open the fuel tank filler pipe by slowly turning the fuel tank filler cap counter- clockwise. 4. While filling with fuel, hang the fuel cap cord on the hook located on the inside of the fuel tank filler door.
5. To fill with fuel correctly depends mainly on correct handling of the fuel filler noz-zle. Do not tilt the nozzle. Insert the noz- zle in the fuel tank filler port as far as it goes. 6. When the nozzle stops automatically, do not try to add more fuel.
Keep the doors and windows closed while refueling the vehicle. If they were open, fuel vapor could get into the cabin.
Fuel tank capacity Refueling
WA R N I N G
1- Remove 2- Close
WA R N I N G Since the fuel system may be under pres- sure, remove the fuel tank filler cap slowly. This relieves any pressure or vac- uum that might have built up in the fuel tank. If the cap is venting vapor or if youhear a hissing sound, wait until the sound stops before removing the cap. Otherwise, fuel may spray out, injuring you or others.CAUTION Your vehicle can only be operated using unleaded gasoline. Serious engine and cata-lytic converter damage will result if leaded gasoline is filled into these vehicles, and consequently, this must never be attempted.CAUTION To avoid fuel spillage
and overfilling, do not
“top-off” the fuel tank. Spilled fuel could discolor, stain, or crack the vehicle’s paint- work. If fuel spills on the paintwork, wipe itoff with a soft cloth.
BK0239500US.bo
ok 4 ページ 2016年5月13日 金曜日 午前8時53分
Page 20 of 399
Modifications to and racing of your vehicle
General information 3-5
3
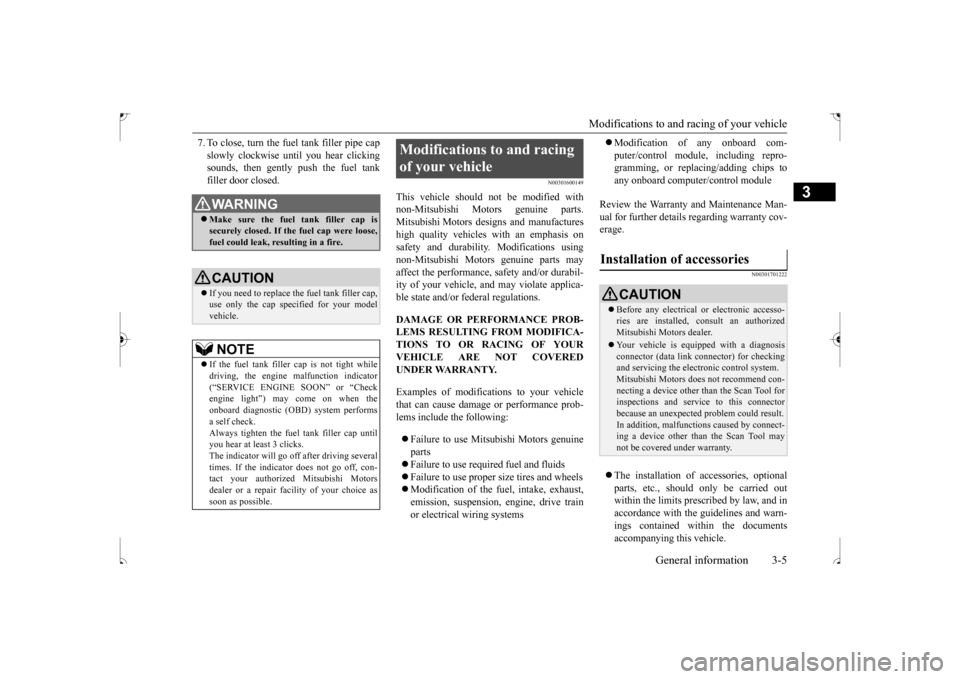
7. To close, turn the fuel tank filler pipe cap slowly clockwise until you hear clicking sounds, then gently push the fuel tank filler door closed.
N00301600149
This vehicle should not be modified withnon-Mitsubishi Motors genuine parts.Mitsubishi Motors designs and manufactures high quality vehicles
with an emphasis on
safety and durability. Modifications usingnon-Mitsubishi Motors genuine parts may affect the performance, safety and/or durabil- ity of your vehicle, and may violate applica-ble state and/or federal regulations. DAMAGE OR PERFORMANCE PROB- LEMS RESULTING FROM MODIFICA- TIONS TO OR RACING OF YOUR VEHICLE ARE NOT COVEREDUNDER WARRANTY. Examples of modifications to your vehicle that can cause damage or performance prob- lems include the following: Failure to use Mitsubishi Motors genuine parts Failure to use required fuel and fluids Failure to use proper size tires and wheels Modification of the fuel, intake, exhaust, emission, suspension, engine, drive train or electrical wiring systems
Modification of any onboard com- puter/control module, including repro- gramming, or replacing/adding chips to any onboard computer/control module
Review the Warranty and Maintenance Man- ual for further details regarding warranty cov- erage.
N00301701222
The installation of accessories, optional parts, etc., should only be carried out within the limits prescribed by law, and in accordance with the guidelines and warn-ings contained within the documents accompanying this vehicle.
WA R N I N G Make sure the fuel tank filler cap is securely closed. If the fuel cap were loose, fuel could leak, resulting in a fire.CAUTION If you need to replace the fuel tank filler cap, use only the cap specified for your model vehicle.NOTE
If the fuel tank filler cap
is not tight while
driving, the engine malfunction indicator (“SERVICE ENGINE SOON” or “Checkengine light”) may come on when the onboard diagnostic (OBD) system performs a self check. Always tighten the fuel tank filler cap until you hear at least 3 clicks.The indicator will go off after driving several times. If the indicator does not go off, con- tact your authorized Mitsubishi Motorsdealer or a repair f
acility of your choice as
soon as possible.
Modifications to and racing of your vehicle
Installation of accessories
CAUTION Before any electrical or electronic accesso- ries are installed, consult an authorized Mitsubishi Motors dealer. Your vehicle is equipped with a diagnosis connector (data link connector) for checkingand servicing the electronic control system. Mitsubishi Motors does not recommend con- necting a device other than the Scan Tool forinspections and service to this connector because an unexpected problem could result. In addition, malfunctions caused by connect-ing a device other than the Scan Tool may not be covered under warranty.
BK0239500US.bo
ok 5 ページ 2016年5月13日 金曜日 午前8時53分
Page 184 of 399
Information screen display
Features and controls 5-121
5
system. If a problem is detected in one of these systems, this indicator illuminates or flashes. When the igniti
on switch is turned to
the “ON” position or the operation mode isput in ON, this indicator normally comes on and goes off after the engine has started. This indicator will come on if the fuel tank filler cap is not properly tightened. If thisindicator comes on and stays on after refuel- ing, stop the engine and check that the cap is properly tightened. (Turn the cap clockwiseuntil you hear clicking sounds.)If this indicator does not go off after several seconds or lights up while driving, have the system checked as soon as possible at anauthorized Mitsubishi Motors dealer or a repair facility of your choice.
N00520600300
This light comes on in the event of a malfunc-tion in the charging system or when the igni-
tion switch is turned to the “ON” position (engine off) or the operation mode is put in ON. A warning is also displayed in the multi- information display. When the engine isstarted, the light should go out. Check to make sure that the light has gone out before driving.
N00558300038 N00558400143
Type 1
CAUTION Driving for a long time with the engine mal- function indicator on may cause more dam-age to the emission control system. This could also affect fuel economy and drivabil- ity. If this indicator does not come on when the ignition switch is turned to the “ON” posi- tion or the operation mode is put in ON, have the system checked at an authorizedMitsubishi Motors dealer or a repair facility of your choice.
If the engine malfunction indicator comes on while the engine is running, avoid driving at high speeds. During vehicle operation with the indicator on, the vehicle may not accelerate when youdepress the accelerator pedal. When the vehicle is stationary with the indi- cator on, you must depress the brake pedalmore firmly than usual since the engine idling speed is higher than usual and a vehi- cle with a CVT has a stronger tendency tocreep forward.NOTE
Do not disconnect the battery cable when the engine malfunction indicator (“SERVICE ENGINE SOON” or “Check engine light”) ison. The engine electronic control module stores critical OBD information (especially exhaustemission data), which may be lost if the bat- tery cable is disconnected while the engine malfunction indicator is on. This will make itdifficult to diagnose the cause of future prob- lems.
Charging system warning light
CAUTION
CAUTION If the warning light stays on while the engine is running, park your vehicle in a safe placeas soon as possible and contact an authorized Mitsubishi Motors dealer or a repair facility of your choice to have the system checked.
Information screen display Brake warning display
BK0239500US.book
121 ページ 2016年5月13日 金曜日 午前8時53分
Page 258 of 399
7
Comfort controlsVents .........................................
.......................................................7-2
Manual air conditioning-Type 1
(if so equipped) ............................7-4
Manual air conditioning-Type 2
(if so equipped) ............................7-9
Automatic air conditioning-Type1 (if so equipped) ......................7-14Automatic air conditioning-Type2 (if so equipped) ......................7-19 Important air conditioning op
erating tips ......................................7-24
Air purifier ......................
...............................................................7-25
AM/FM radio/CD player (if so equipped) .....................................7-25 Handling of Discs .
.................................................
........................7-29
Audio Files (MP3/WMA/
AAC) ....................................................7-31
Important Points on Safety fo
r the Customer ................................7-35
Operation Keys ...............
...............................................................7-35
Listen to Radio ......
.................................................
........................7-38
Listen to Satellite Radio (if so equipped) .......................................7-40 Listen to CDs ..................
...............................................................7-42
Listen to MP3s ......
.................................................
........................7-43
Listen to an iPod ...
.................................................
........................7-44
Listen to Audio Files on
a USB Device .........................................7-46
To play iPod/USB memory device tracks via voice operation (vehicles with Bluetooth
® 2.0 interface)
...................................7-49
Listen to Bluetooth Audio (i
f so equipped) ....................................7-52
Display Indicator ..
.................................................
........................7-54
Audio Quality and Volume Balance Adjustment ...........................7-55System Settings .....
.................................................
........................7-56
Troubleshooting ..............
...............................................................7-60
Clock (if so equipped)
............................................
........................7-62
General information about
your radio ...........................................7-63
BK0239500US.bo
ok 1 ページ 2016年5月13日 金曜日 午前8時53分
Page 261 of 399
Manual air conditioning-T
ype 1 (if so equipped)
7-4 Comfort controls
7
N00730301370
N00730500258 N00736500175
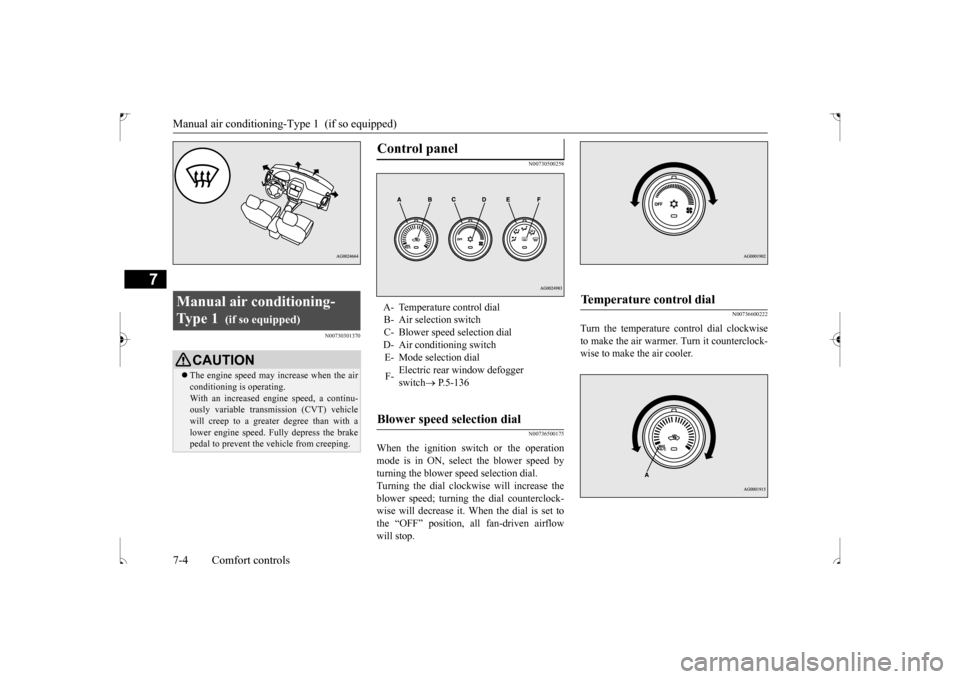
When the ignition switch or the operation mode is in ON, select the blower speed by turning the blower speed selection dial.Turning the dial clockwise will increase the blower speed; turning the dial counterclock- wise will decrease it. When the dial is set tothe “OFF” position, all fan-driven airflow will stop.
N00736600222
Turn the temperature control dial clockwise to make the air warmer. Turn it counterclock-wise to make the air cooler.
Manual air conditioning- Ty p e 1
(if so equipped)
CAUTION The engine speed may increase when the air conditioning is operating.With an increased engine speed, a continu- ously variable transmission (CVT) vehicle will creep to a greater degree than with alower engine speed. Fully depress the brake pedal to prevent the vehicle from creeping.
Control panel
A- Temperature control dial B- Air selection switch C- Blower speed selection dialD- Air conditioning switch E- Mode selection dial F-
Electric rear window defogger switch
P.5-136
Blower speed selection dial
Temperature control dial
BK0239500US.bo
ok 4 ページ 2016年5月13日 金曜日 午前8時53分
Page 264 of 399
Manual air conditioning-Type 1 (if so equipped)
Comfort controls 7-7
7
N00731101287
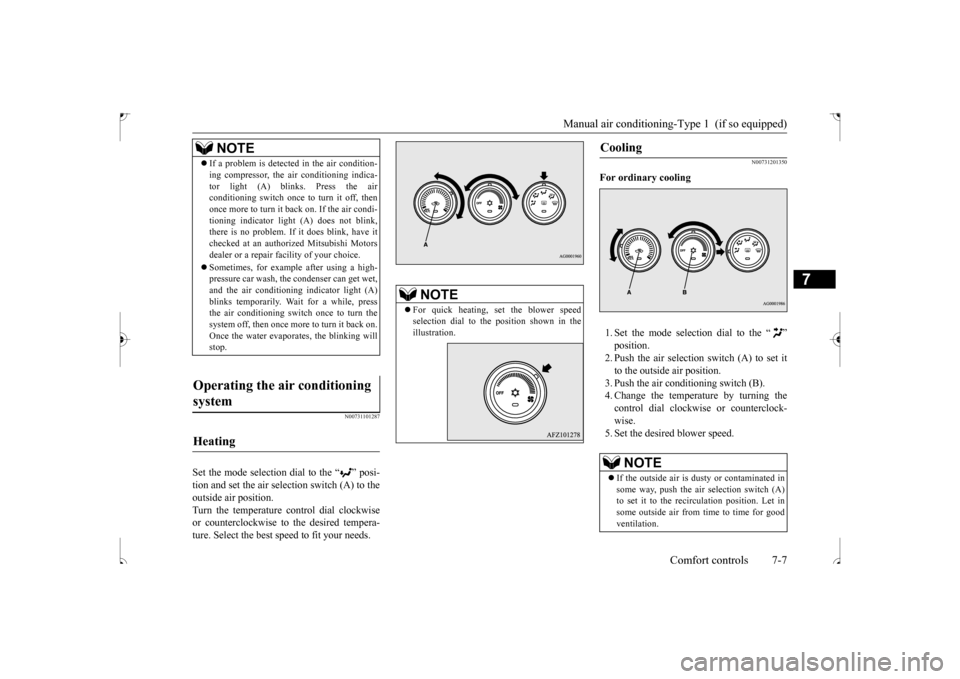
Set the mode selection dial to the “ ” posi- tion and set the air sel
ection switch (A) to the
outside air position. Turn the temperature control dial clockwise or counterclockwise to the desired tempera-ture. Select the best speed to fit your needs.
N00731201350
For ordinary cooling 1. Set the mode selection dial to the “ ” position.2. Push the air selection switch (A) to set itto the outside air position. 3. Push the air conditioning switch (B). 4. Change the temperature by turning thecontrol dial clockwise or counterclock- wise. 5. Set the desired blower speed.
NOTE
If a problem is detected in the air condition- ing compressor, the air conditioning indica- tor light (A) blinks. Press the air conditioning switch once to turn it off, then once more to turn it back on. If the air condi-tioning indicator light (A) does not blink, there is no problem. If it does blink, have it checked at an authorized Mitsubishi Motorsdealer or a repair facility of your choice. Sometimes, for example after using a high- pressure car wash, the condenser can get wet, and the air conditioning indicator light (A) blinks temporarily. Wait for a while, pressthe air conditioning switch once to turn the system off, then once more to turn it back on. Once the water evaporates, the blinking willstop.
Operating the air conditioning system
Heating
NOTE
For quick heating, set the blower speed selection dial to the position shown in the illustration.
Cooling
NOTE
If the outside air is dusty or contaminated in some way, push the air selection switch (A) to set it to the recirculation position. Let insome outside air from time to time for good ventilation.
BK0239500US.bo
ok 7 ページ 2016年5月13日 金曜日 午前8時53分
Page 267 of 399
Manual air conditioning-T
ype 2 (if so equipped)
7-10 Comfort controls
7
N00736500188
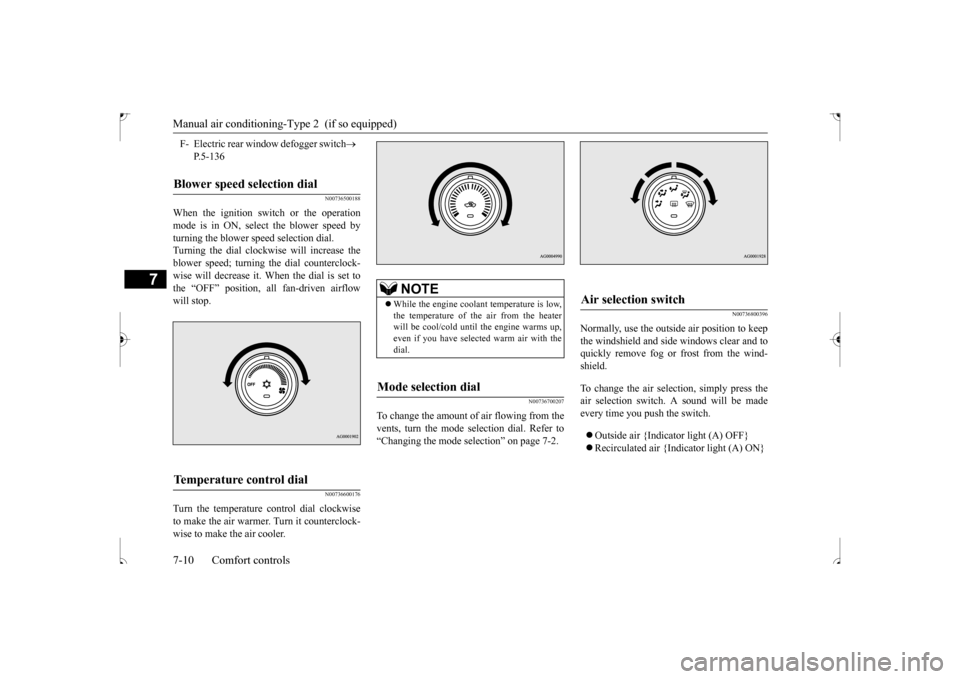
When the ignition switch or the operation mode is in ON, select the blower speed by turning the blower speed selection dial. Turning the dial clockwise will increase theblower speed; turning the dial counterclock-wise will decrease it. When the dial is set to the “OFF” position, all fan-driven airflow will stop.
N00736600176
Turn the temperature control dial clockwiseto make the air warmer. Turn it counterclock-wise to make the air cooler.
N00736700207
To change the amount of
air flowing from the
vents, turn the mode selection dial. Refer to “Changing the mode selection” on page 7-2.
N00736800396
Normally, use the outside air position to keepthe windshield and side windows clear and toquickly remove fog or frost from the wind- shield. To change the air selection, simply press the air selection switch. A sound will be made every time you push the switch. Outside air {Indicator light (A) OFF} Recirculated air {Indicator light (A) ON}
F- Electric rear window defogger switch
P.5-136
Blower speed selection dial
Temperature control dial
NOTE
While the engine coolant temperature is low, the temperature of the air from the heater will be cool/cold until the engine warms up,even if you have selected warm air with the dial.
Mode selection dial
Air selection switch
BK0239500US.bo
ok 10 ページ 2016年5月13日 金曜日 午前8時53分
Page 269 of 399
Manual air conditioning-T
ype 2 (if so equipped)
7-12 Comfort controls
7
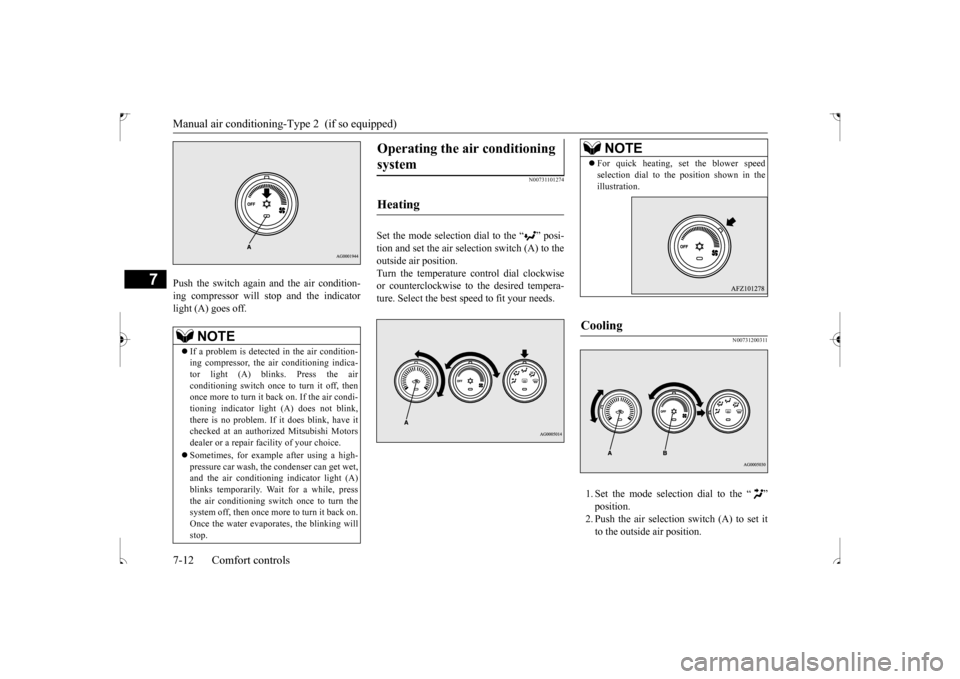
Push the switch again and the air condition- ing compressor will stop and the indicator light (A) goes off.
N00731101274
Set the mode selection dial to the “ ” posi-tion and set the air selection switch (A) to theoutside air position.Turn the temperature control dial clockwise or counterclockwise to the desired tempera- ture. Select the best speed to fit your needs.
N00731200311
1. Set the mode selection dial to the “ ”position.2. Push the air selection switch (A) to set it to the outside air position.
NOTE
If a problem is detected in the air condition- ing compressor, the air conditioning indica-tor light (A) blinks. Press the air conditioning switch once to turn it off, then once more to turn it back on. If the air condi-tioning indicator light (A) does not blink, there is no problem. If it does blink, have it checked at an authorized Mitsubishi Motorsdealer or a repair facility of your choice. Sometimes, for example after using a high- pressure car wash, the condenser can get wet, and the air conditioning indicator light (A) blinks temporarily. Wait for a while, pressthe air conditioning switch once to turn the system off, then once more to turn it back on. Once the water evaporates, the blinking willstop.
Operating the air conditioning system
Heating
NOTE
For quick heating, set the blower speed selection dial to the position shown in the illustration.
Cooling
BK0239500US.bo
ok 12 ページ 2016年5月13日 金曜日 午前8時53分
Page 270 of 399
Manual air conditioning-Type 2 (if so equipped)
Comfort controls 7-13
7
3. Push the air conditioning switch (B). 4. Change the temperature by turning the control dial clockwise or counterclock- wise.5. Set the desired blower speed.
N00731300266
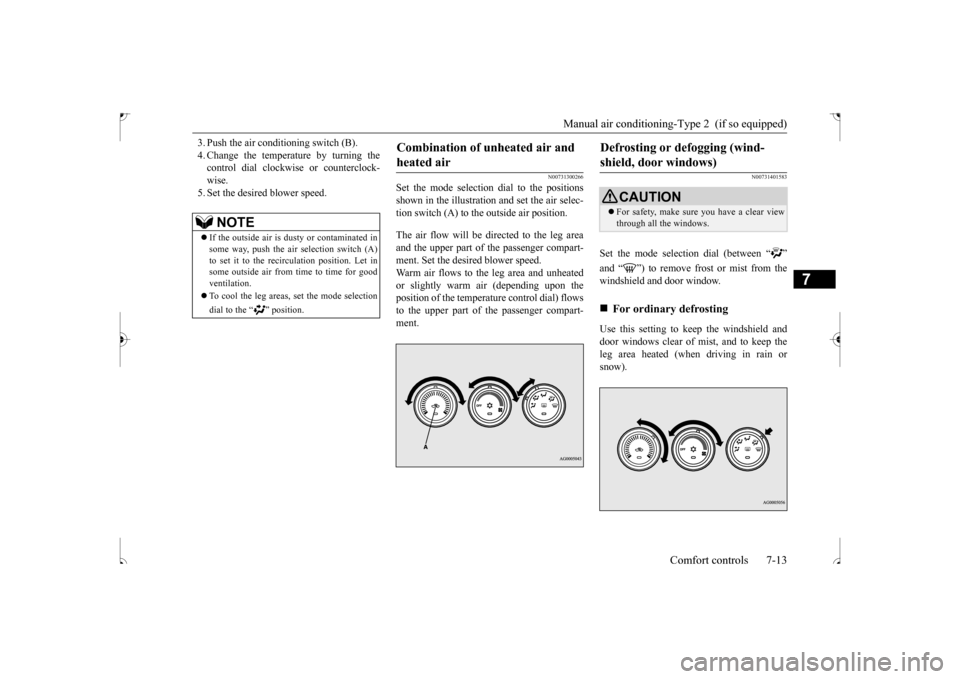
Set the mode selection dial to the positions shown in the illustration and set the air selec- tion switch (A) to the outside air position. The air flow will be directed to the leg area and the upper part of the passenger compart- ment. Set the desired blower speed. Warm air flows to the leg area and unheatedor slightly warm air (depending upon theposition of the temperature control dial) flows to the upper part of the passenger compart- ment.
N00731401583
Set the mode selection dial (between “ ” and “ ”) to remove frost or mist from the windshield and door window. Use this setting to keep the windshield and door windows clear of mist, and to keep the leg area heated (when driving in rain or snow).
NOTE
If the outside air is dusty or contaminated in some way, push the air selection switch (A) to set it to the recirculation position. Let insome outside air from time to time for good ventilation. To cool the leg areas, set the mode selection dial to the “ ” position.
Combination of unheated air and heated air
Defrosting or defogging (wind-shield, door windows)
CAUTION For safety, make sure you have a clear view through all the windows.
For ordinary defrosting
BK0239500US.bo
ok 13 ページ 2016年5月13日 金曜日 午前8時53分
Page 272 of 399
Automatic air conditioning-Type1 (if so equipped)
Comfort controls 7-15
7
N00736900153
When the ignition switch or the operation mode is in ON, select the blower speed by turning the blower speed selection dial.Turning the dial clockwise will increase the blower speed; turning the dial counterclock- wise will decrease it. When the dial is set tothe “OFF” position, all fan-driven airflow will stop.
N00737001347
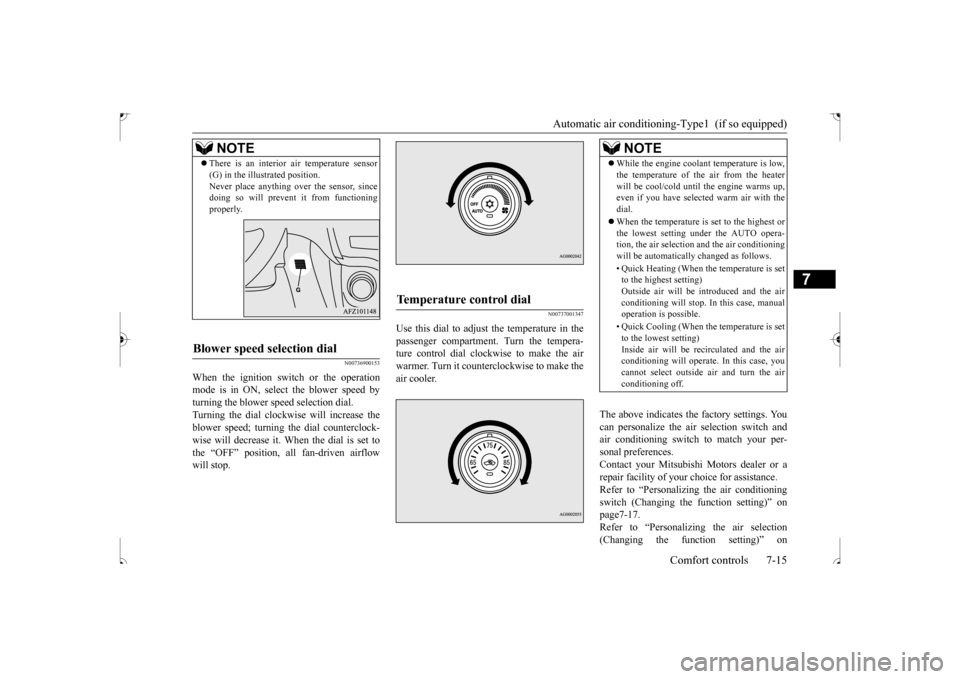
Use this dial to adjust the temperature in the passenger compartment. Turn the tempera-ture control dial clockwise to make the air warmer. Turn it counterclockwise to make the air cooler.
The above indicates the factory settings. You can personalize the air selection switch and air conditioning switch to match your per-sonal preferences. Contact your Mitsubishi Motors dealer or a repair facility of your choice for assistance.Refer to “Personalizing the air conditioning switch (Changing the function setting)” on page7-17.Refer to “Personalizing the air selection (Changing the function setting)” on
NOTE
There is an interior air temperature sensor (G) in the illustrated position. Never place anything over the sensor, since doing so will prevent it from functioning properly.
Blower speed selection dial
Temperature control dial
NOTE
While the engine coolant temperature is low, the temperature of the air from the heater will be cool/cold until the engine warms up, even if you have selected warm air with the dial. When the temperature is set to the highest or the lowest setting under the AUTO opera-tion, the air selection and the air conditioning will be automatically changed as follows. • Quick Heating (When the temperature is set to the highest setting) Outside air will be introduced and the airconditioning will stop. In this case, manual operation is possible. • Quick Cooling (When the temperature is set to the lowest setting) Inside air will be recirculated and the airconditioning will operate. In this case, you cannot select outside air and turn the air conditioning off.
BK0239500US.bo
ok 15 ページ 2016年5月13日 金曜日 午前8時53分