child lock MITSUBISHI TRITON 2011 Owners Manual
[x] Cancel search | Manufacturer: MITSUBISHI, Model Year: 2011, Model line: TRITON, Model: MITSUBISHI TRITON 2011Pages: 369, PDF Size: 26.15 MB
Page 30 of 369
Keys..............................................................................................
1-02
Electronic immobilizer (Anti-theft starting system) .....................1-03
Keyless entry system*.................................................................. 1-04
Doors............................................................................................ 1-06
Central door locks* ....................................................................... 1-07
“Child-protection” rear doors (Double cab) .................................1-08
Manual window control* .............................................................. 1-08
Electric window control*..............................................................1-08
Quarter window (Club cab) .......................................................... 1-12
Rear gate ....................................................................................... 1-13
Sunroof* ....................................................................................... 1-13Locking and unlocking
1
OCRE12E1
Presented by http://mmc-manuals.ru/ \251
Page 35 of 369
Doors
E00300401584CAUTION
l
Make sure the doors
are closed: driving
with doors not completely closed is dan-
gerous.
l Never leave children in the vehicle unat-
tended.
l Be careful not to lock the doors while the
key is inside the vehicle.
NOTE l To
prevent the key from
being locked inside
the vehicle, neither the lock knob on the driv-
er’s door nor the key can be used to lock the
driver’s door when it is open.
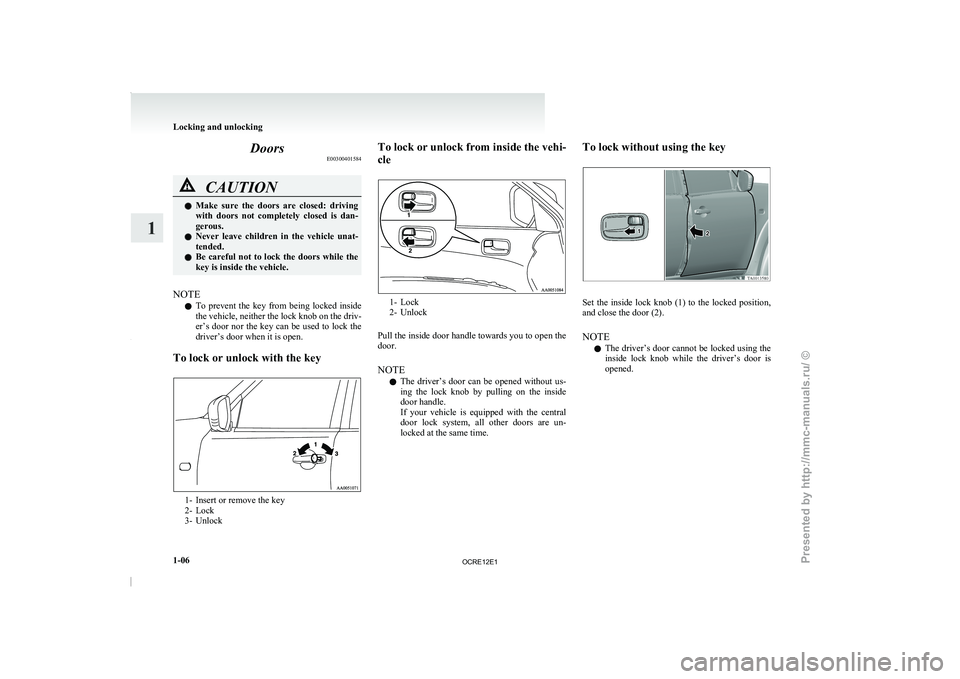
To lock or unlock with the key 1- Insert or remove the key
2- Lock
3- Unlock To lock
or
unlock from inside the vehi-
cle 1- Lock
2- Unlock
Pull the inside door
handle towards you to open the
door.
NOTE
l The driver’s door can be opened without us-
ing the lock knob by pulling on the inside
door handle.
If your vehicle is equipped with the central
door lock system, all other doors are un-
locked at the same time. To lock without using the key
Set the inside lock knob (1) to the locked position,
and close the door (2).
NOTE
l The
driver’s door cannot be
locked using the
inside lock knob while the driver’s door is
opened. Locking and unlocking
1-06
1
OCRE12E1
Presented by http://mmc-manuals.ru/ \251
Page 37 of 369
“Child-protection” rear doors
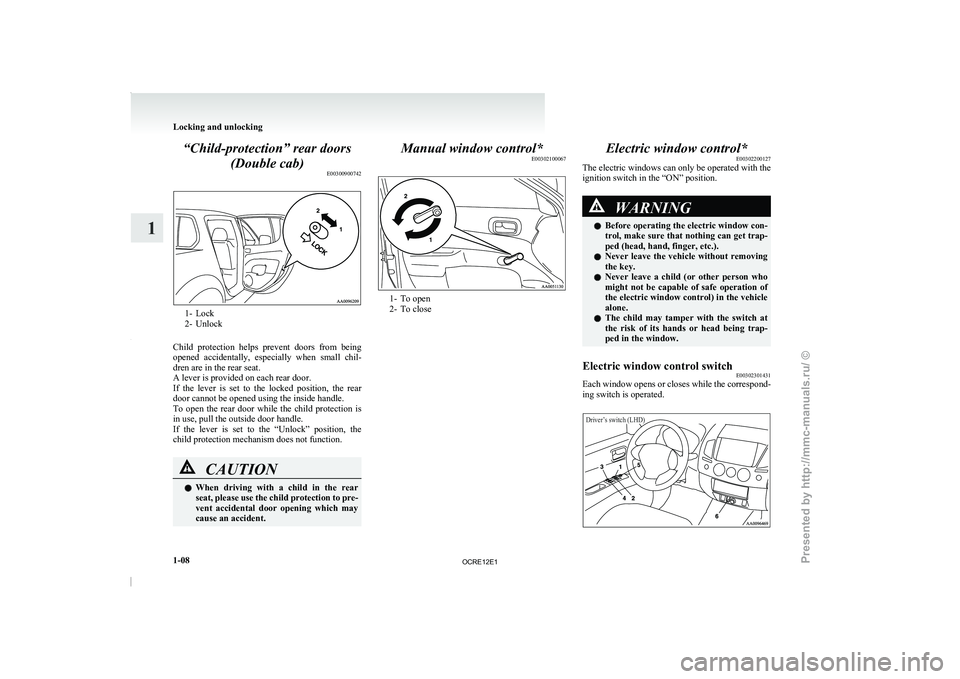
(Double cab) E003009007421- Lock
2- Unlock
Child protection helps prevent
doors from being
opened accidentally, especially when small chil-
dren are in the rear seat.
A lever is provided on each rear door.
If the lever is set to the locked position, the rear
door cannot be opened using the inside handle.
To open the rear door while the child protection is
in use, pull the outside door handle.
If the lever is set to the “Unlock” position, the
child protection mechanism does not function. CAUTION
l
When driving with a
child
in the rear
seat, please use the child protection to pre-
vent accidental door opening which may
cause an accident. Manual window control*
E00302100067 1- To open
2- To close
Electric window control*
E00302200127
The electric windows can only be operated with the
ignition switch in the “ON” position. WARNING
l Before operating the electric
window
con-
trol, make sure that nothing can get trap-
ped (head, hand, finger, etc.).
l Never leave the vehicle without removing
the key.
l Never leave a child (or other person who
might not be capable of safe operation of
the electric window control) in the vehicle
alone.
l The child may tamper with the switch at
the risk of its hands or head being trap-
ped in the window.
Electric window control switch E00302301431
Each window opens or closes while the correspond-
ing switch is operated.
Driver’s switch (LHD) Locking and unlocking
1-08
1
OCRE12E1
Presented by http://mmc-manuals.ru/ \251
Page 39 of 369
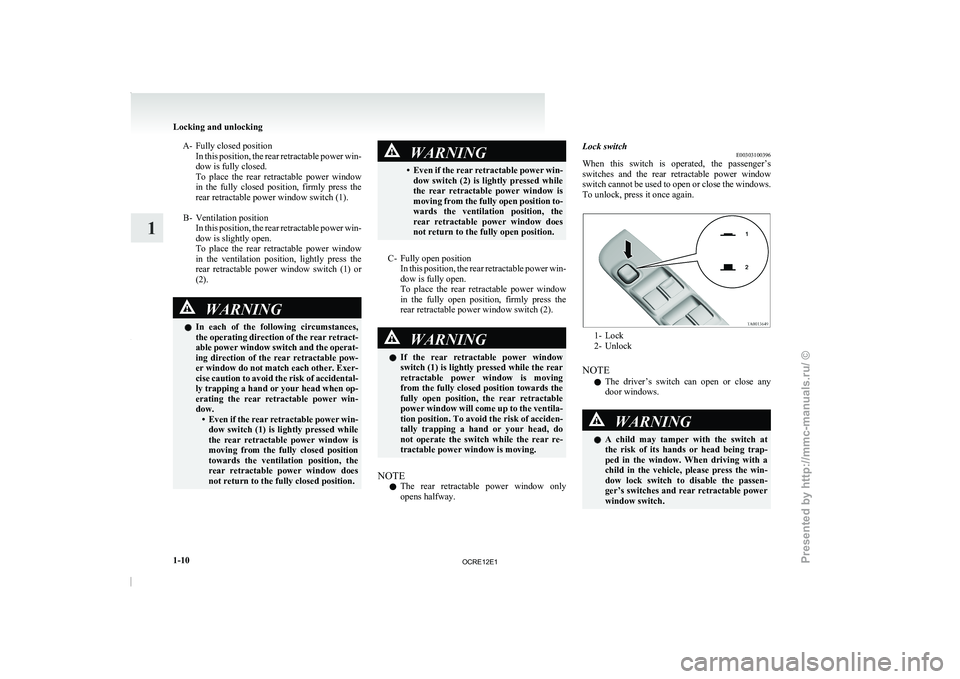
A- Fully closed position
In this position, the rear retractable power win-
dow is fully closed.
To place the rear retractable power window
in the fully closed position, firmly press the
rear retractable power window switch (1).
B- Ventilation position In this position, the rear retractable power win-
dow is slightly open.
To place the rear retractable power window
in the ventilation position, lightly press the
rear retractable power window switch (1) or
(2). WARNING
l In each of the
following
circumstances,
the operating direction of the rear retract-
able power window switch and the operat-
ing direction of the rear retractable pow-
er window do not match each other. Exer-
cise caution to avoid the risk of accidental-
ly trapping a hand or your head when op-
erating the rear retractable power win-
dow. • Even if the rear retractable power win-dow switch (1) is lightly pressed while
the rear retractable power window is
moving from the fully closed position
towards the ventilation position, the
rear retractable power window does
not return to the fully closed position. WARNING
• Even if the rear retractable power win- dow switch (2) is
lightly pressed while
the rear retractable power window is
moving from the fully open position to-
wards the ventilation position, the
rear retractable power window does
not return to the fully open position.
C- Fully open position In this position, the rear
retractable power win-
dow is fully open.
To place the rear retractable power window
in the fully open position, firmly press the
rear retractable power window switch (2). WARNING
l If the rear retractable power
window
switch (1) is lightly pressed while the rear
retractable power window is moving
from the fully closed position towards the
fully open position, the rear retractable
power window will come up to the ventila-
tion position. To avoid the risk of acciden-
tally trapping a hand or your head, do
not operate the switch while the rear re-
tractable power window is moving.
NOTE l The
rear retractable power window
only
opens halfway. Lock switch
E00303100396
When this switch is operated,
the passenger’s
switches and the rear retractable power window
switch cannot be used to open or close the windows.
To unlock, press it once again. 1- Lock
2- Unlock
NOTE l The driver’s switch
can
open or close any
door windows. WARNING
l A
child
may tamper
with
the switch at
the risk of its hands or head being trap-
ped in the window. When driving with a
child in the vehicle, please press the win-
dow lock switch to disable the passen-
ger’s switches and rear retractable power
window switch. Locking and unlocking
1-10
1
OCRE12E1
Presented by http://mmc-manuals.ru/ \251
Page 43 of 369
Safety mechanism
E00303800029
If a hand or head
is trapped in the closing sunroof,
it will reopen automatically.
Nonetheless, make sure that nobody puts their head
or hand out of the sunroof when opening or closing.
The opened sunroof will become operational after
a few seconds.
If the safety mechanism is activated 5 or more
times consecutively or the switch (1) is kept press-
ed for 10 seconds or longer with the sunroof station-
ary in the fully tilted up position, normal closing of
the sunroof will be aborted. In such an event, you
should take the following steps: 1. Press the switch (1) repeatedly until the sun-roof has been fully tilt up.
2. Once the fully tilt up position has been reached, press again and hold the switch (1)
for at least 3 seconds.
3. After pressing the switch (3) to perform full opening, press the switch (2) to fully close
the sunroof.
NOTE l The safety mechanism can be activated if the
driving conditions or other circumstances
cause the sunroof to be subjected to a physi-
cal shock similar to that caused by a trapped
hand or head.
l Avoid stopping the sunroof before it reaches
the opening or closing end during operations.
If this should accidentally happen, repeat the
process from step 1. CAUTION
l
The safety mechanism is cancelled
just be-
fore the sunroof is fully closed. This al-
lows the sunroof to close completely.
Therefore be especially careful that no fin-
gers are trapped in the sunroof.
4. Following this action,
it should
be possible
to operate the sunroof in the normal manner.
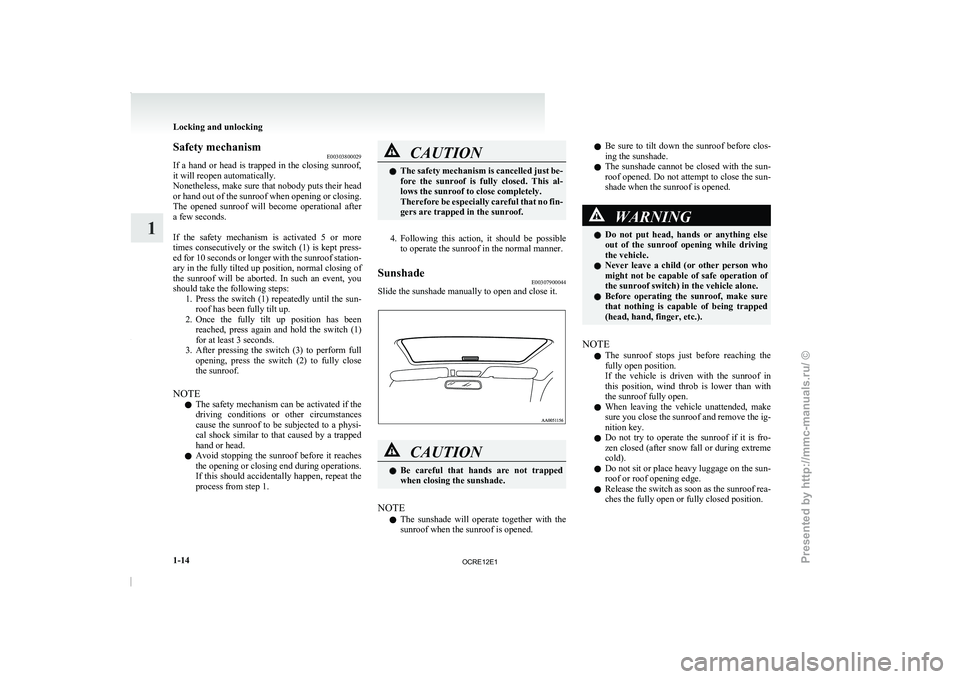
Sunshade E00307900044
Slide the sunshade manually to open and close it. CAUTION
l
Be careful that hands are
not trapped
when closing the sunshade.
NOTE l The
sunshade will operate together
with the
sunroof when the sunroof is opened. l
Be sure to tilt
down
the sunroof before clos-
ing the sunshade.
l The sunshade cannot be closed with the sun-
roof opened. Do not attempt to close the sun-
shade when the sunroof is opened. WARNING
l Do not put head,
hands
or anything else
out of the sunroof opening while driving
the vehicle.
l Never leave a child (or other person who
might not be capable of safe operation of
the sunroof switch) in the vehicle alone.
l Before operating the sunroof, make sure
that nothing is capable of being trapped
(head, hand, finger, etc.).
NOTE l The
sunroof stops just before
reaching the
fully open position.
If the vehicle is driven with the sunroof in
this position, wind throb is lower than with
the sunroof fully open.
l When leaving the vehicle unattended, make
sure you close the sunroof and remove the ig-
nition key.
l Do not try to operate the sunroof if it is fro-
zen closed (after snow fall or during extreme
cold).
l Do not sit or place heavy luggage on the sun-
roof or roof opening edge.
l Release the switch as soon as the sunroof rea-
ches the fully open or fully closed position. Locking and unlocking
1-14
1
OCRE12E1
Presented by http://mmc-manuals.ru/ \251
Page 48 of 369
Seat adjustment
E00400300200
Adjust the driver’s seat so
that you are comfortable
and that you can reach the pedals, steering wheel,
switches etc. while retaining a clear field of vision. WARNING
l Do not attempt to
adjust
the seat while
driving. This can cause loss of vehicle con-
trol and result in an accident. After ad-
justments are made, ensure the seating is
locked in position by attempting to move
the seat forward and rearward without us-
ing the adjusting mechanism.
l It is extremely dangerous to ride in the
cargo area (inside or outside) of a vehicle.
Also, the cargo area and rear seats should
never be used as a play area by children.
In a collision, people or children riding un-
restrained in these areas are more likely
to be seriously injured or killed.
Do not allow people or children to ride in
any area of your vehicle that is not equip-
ped with seats and seat belts, and make
sure that everyone travelling in your vehi-
cle is in a seat and wearing a seat belt, or
in the case of a child is strapped in a child
restraint. WARNING
l To minimize the risk of
personal injury
in the event of a collision or sudden brak-
ing, the seatbacks should always be in the
almost upright position while the vehicle
is in motion. The protection provided by
the seat belts may be reduced significant-
ly when the seatback is reclined. There is
greater risk that the passenger will slide
under the seat belt, resulting in serious in-
jury, when the seatback is reclined. CAUTION
l
Make
sure the
seat is
adjusted by an
adult or with adult supervision for cor-
rect and safe operation.
l Do not place a cushion or the like be-
tween your back and the seatback while
driving. The effectiveness of the head re-
straints will be reduced in the event of an
accident.
l When sliding the seats, be careful not to
catch your hand or foot.
l When sliding or reclining the seat rear-
ward, pay careful attention to the rear
seat passengers. (Double cab and Club
cab) Front seat
E0400400012
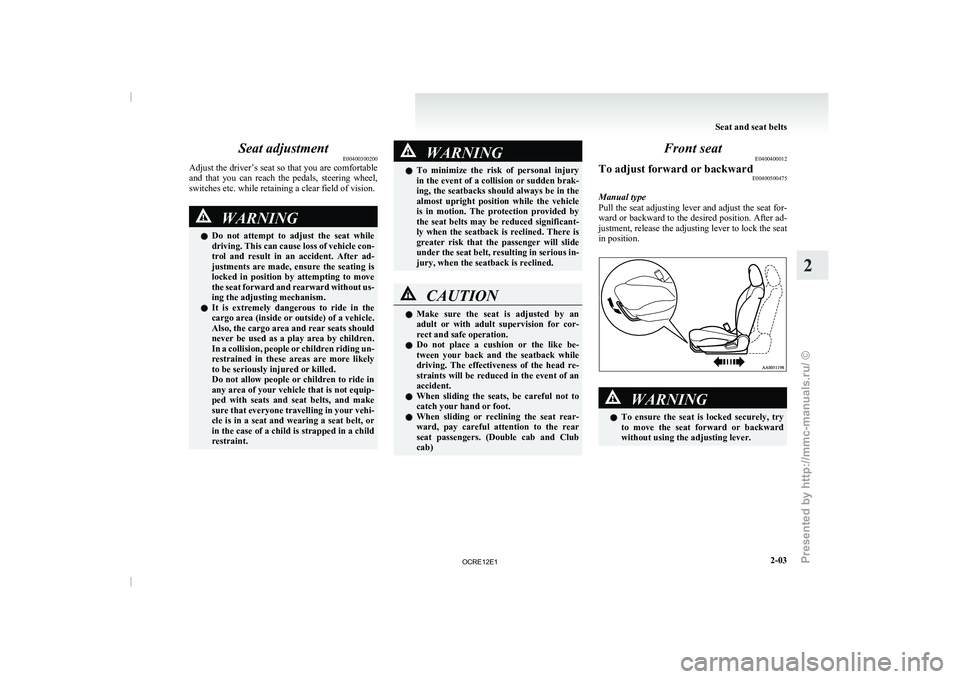
To adjust forward or backward E00400500475
Manual type
Pull the seat
adjusting lever
and adjust the seat for-
ward or backward to the desired position. After ad-
justment, release the adjusting lever to lock the seat
in position. WARNING
l To ensure the seat
is
locked securely, try
to move the seat forward or backward
without using the adjusting lever. Seat and seat belts
2-03 2
OCRE12E1
Presented by http://mmc-manuals.ru/ \251
Page 51 of 369
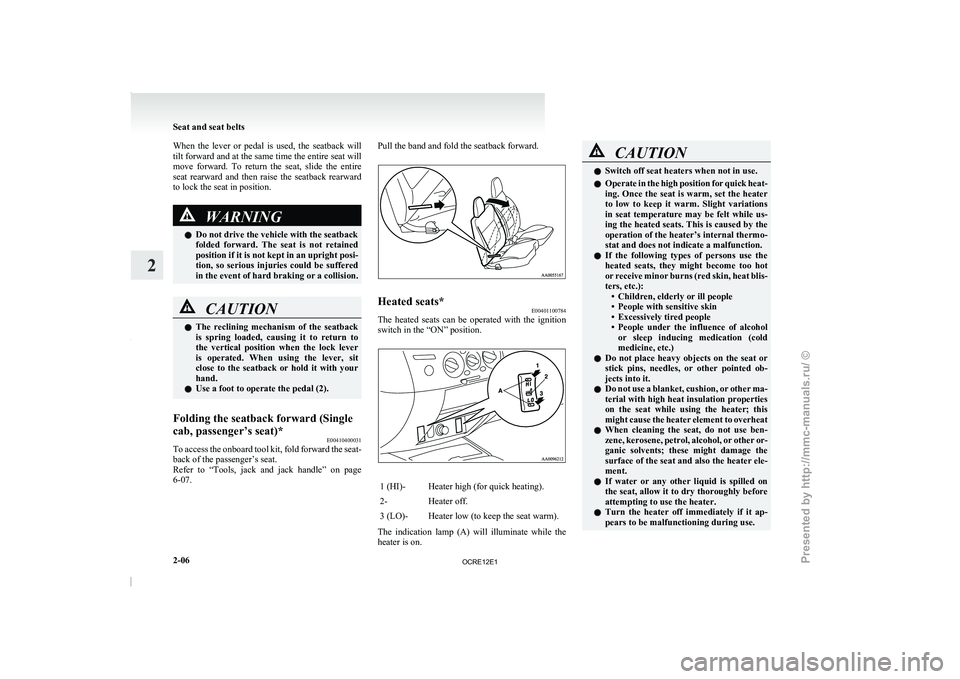
When the lever or pedal is used, the seatback will
tilt forward and at the
same time the entire seat will
move forward. To return the seat, slide the entire
seat rearward and then raise the seatback rearward
to lock the seat in position. WARNING
l Do not drive the vehicle with the seatback
folded forward. The seat
is
not retained
position if it is not kept in an upright posi-
tion, so serious injuries could be suffered
in the event of hard braking or a collision. CAUTION
l
The reclining mechanism of the
seatback
is spring loaded, causing it to return to
the vertical position when the lock lever
is operated. When using the lever, sit
close to the seatback or hold it with your
hand.
l Use a foot to operate the pedal (2).
Folding the seatback forward (Single
cab, passenger’s seat)* E00410400031
To access the onboard tool kit, fold forward the seat-
back of the passenger’s seat.
Refer to “Tools, jack and
jack handle” on page
6-07. Pull the band and fold the seatback forward.
Heated seats*
E00401100784
The heated seats can be operated with the ignition
switch in the “ON” position. 1 (HI)- Heater high (for quick heating).
2- Heater off.
3 (LO)- Heater low (to keep the seat warm).
The indication lamp (A) will illuminate while the
heater is on. CAUTION
l
Switch off seat heaters when not in use.
l Operate in the high position
for quick heat-
ing. Once the seat is warm, set the heater
to low to keep it warm. Slight variations
in seat temperature may be felt while us-
ing the heated seats. This is caused by the
operation of the heater’s internal thermo-
stat and does not indicate a malfunction.
l If the following types of persons use the
heated seats, they might become too hot
or receive minor burns (red skin, heat blis-
ters, etc.):
• Children, elderly or ill people
• People with sensitive skin
• Excessively tired people
• People under the influence of alcoholor sleep inducing medication (cold
medicine, etc.)
l Do not place heavy objects on the seat or
stick pins, needles, or other pointed ob-
jects into it.
l Do not use a blanket, cushion, or other ma-
terial with high heat insulation properties
on the seat while using the heater; this
might cause the heater element to overheat
l When cleaning the seat, do not use ben-
zene, kerosene, petrol, alcohol, or other or-
ganic solvents; these might damage the
surface of the seat and also the heater ele-
ment.
l If water or any other liquid is spilled on
the seat, allow it to dry thoroughly before
attempting to use the heater.
l Turn the heater off immediately if it ap-
pears to be malfunctioning during use. Seat and seat belts
2-06
2
OCRE12E1
Presented by http://mmc-manuals.ru/ \251
Page 54 of 369
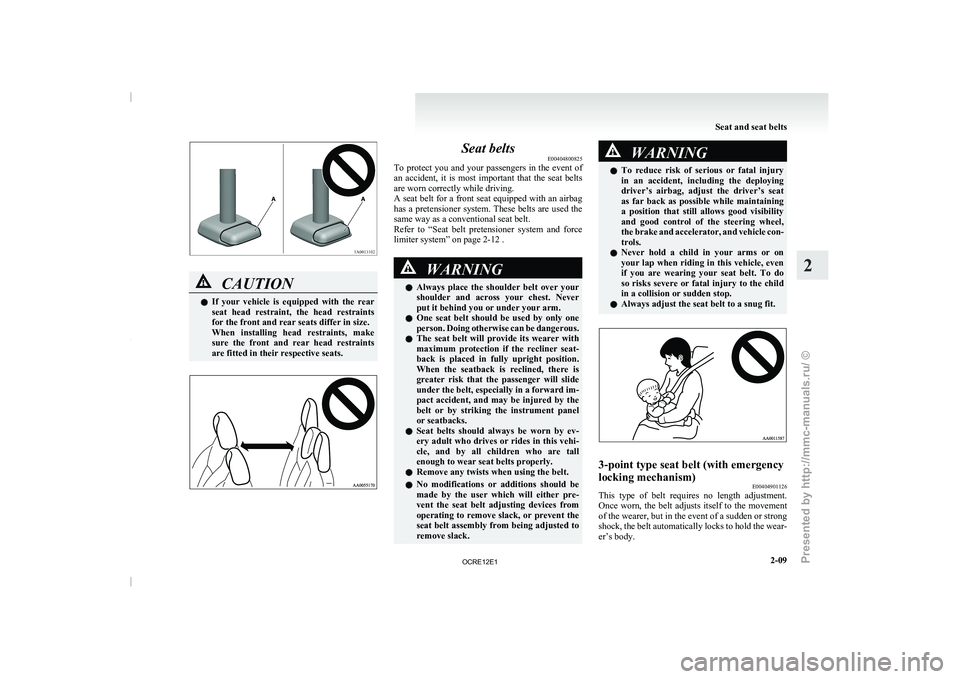
CAUTION
l
If your vehicle is
equipped with the rear
seat head restraint, the head restraints
for the front and rear seats differ in size.
When installing head restraints, make
sure the front and rear head restraints
are fitted in their respective seats. Seat belts
E00404800825
To protect you and your
passengers in the event of
an accident, it is most important that the seat belts
are worn correctly while driving.
A seat belt for a front seat equipped with an airbag
has a pretensioner system. These belts are used the
same way as a conventional seat belt.
Refer to “Seat belt pretensioner system and force
limiter system” on page 2-12 . WARNING
l Always place the shoulder
belt
over your
shoulder and across your chest. Never
put it behind you or under your arm.
l One seat belt should be used by only one
person. Doing otherwise can be dangerous.
l The seat belt will provide its wearer with
maximum protection if the recliner seat-
back is placed in fully upright position.
When the seatback is reclined, there is
greater risk that the passenger will slide
under the belt, especially in a forward im-
pact accident, and may be injured by the
belt or by striking the instrument panel
or seatbacks.
l Seat belts should always be worn by ev-
ery adult who drives or rides in this vehi-
cle, and by all children who are tall
enough to wear seat belts properly.
l Remove any twists when using the belt.
l No modifications or additions should be
made by the user which will either pre-
vent the seat belt adjusting devices from
operating to remove slack, or prevent the
seat belt assembly from being adjusted to
remove slack. WARNING
l To reduce risk of serious
or fatal injury
in an accident, including the deploying
driver’s airbag, adjust the driver’s seat
as far back as possible while maintaining
a position that still allows good visibility
and good control of the steering wheel,
the brake and accelerator, and vehicle con-
trols.
l Never hold a child in your arms or on
your lap when riding in this vehicle, even
if you are wearing your seat belt. To do
so risks severe or fatal injury to the child
in a collision or sudden stop.
l Always adjust the seat belt to a snug fit. 3-point type seat belt (with emergency
locking mechanism)
E00404901126
This type of belt requires no length adjustment.
Once worn, the belt adjusts
itself to the movement
of the wearer, but in the event of a sudden or strong
shock, the belt automatically locks to hold the wear-
er’s body. Seat and seat belts
2-09 2
OCRE12E1
Presented by http://mmc-manuals.ru/ \251
Page 56 of 369
WARNING
l In order to reduce the risk of serious or fa-
tal injury in an accident, always wear
your own seat belt. Do not allow anyone
to ride in your vehicle unless he or she is
also seated and wearing a seat belt. Chil-
dren should additionally be restrained in
a secure child restraint system.
NOTE l When
luggage is placed on
the front passen-
ger seat, a sensor in the seat cushion may, de-
pending on the weight and position of the lug-
gage, cause the warning tone to sound and
the warning lamp to come on (Double cab).
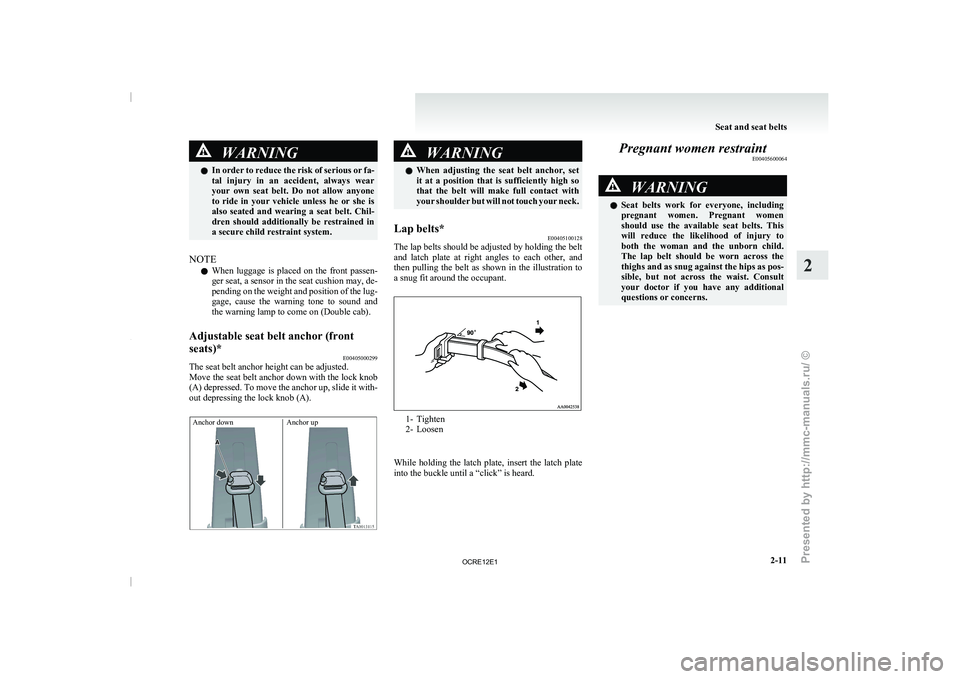
Adjustable seat belt anchor (front
seats)* E00405000299
The seat belt anchor height can be adjusted.
Move the seat belt anchor
down with the lock knob
(A) depressed. To move the anchor up, slide it with-
out depressing the lock knob (A).
Anchor down Anchor up WARNING
l When adjusting the seat belt
anchor, set
it at a position that is sufficiently high so
that the belt will make full contact with
your shoulder but will not touch your neck.
Lap belts* E00405100128
The lap belts should be adjusted by holding the belt
and latch plate
at right
angles to each other, and
then pulling the belt as shown in the illustration to
a snug fit around the occupant. 1- Tighten
2- Loosen
While holding the latch
plate, insert the latch plate
into the buckle until a “click” is heard. Pregnant women restraint
E00405600064 WARNING
l Seat belts work for
everyone,
including
pregnant women. Pregnant women
should use the available seat belts. This
will reduce the likelihood of injury to
both the woman and the unborn child.
The lap belt should be worn across the
thighs and as snug against the hips as pos-
sible, but not across the waist. Consult
your doctor if you have any additional
questions or concerns. Seat and seat belts
2-11 2
OCRE12E1
Presented by http://mmc-manuals.ru/ \251
Page 71 of 369
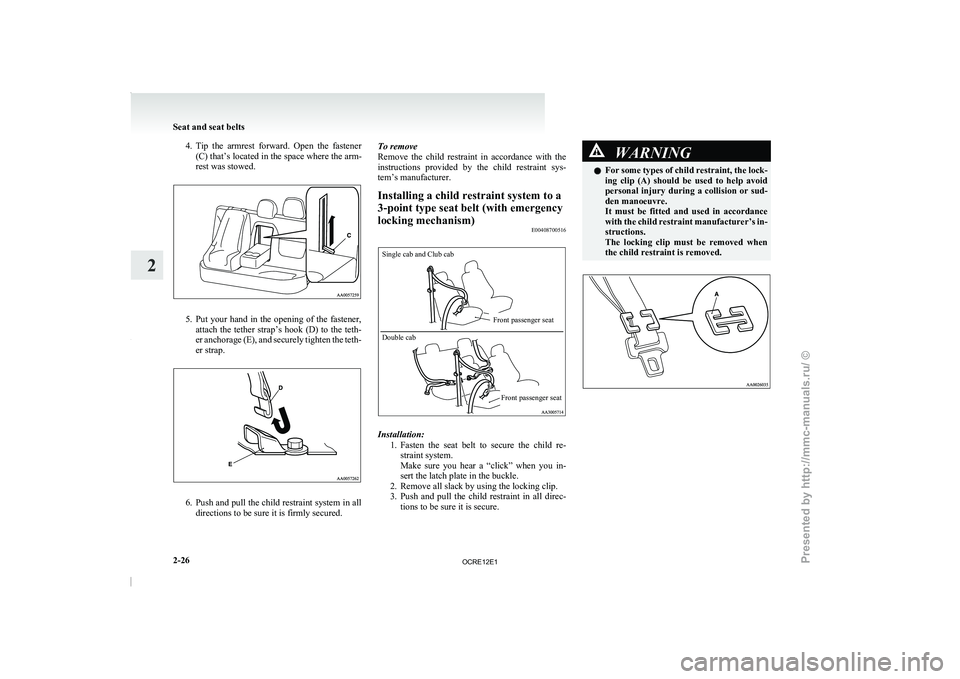
4. Tip the armrest forward. Open the fastener
(C) that’s located in the space where the arm-
rest was stowed. 5. Put your hand in the opening of the fastener,
attach the tether strap’s
hook (D) to the teth-
er anchorage (E), and securely tighten the teth-
er strap. 6. Push and pull the child restraint system in all
directions to be sure it is firmly secured. To remove
Remove the child restraint in
accordance with the
instructions provided by the child restraint sys-
tem’s manufacturer.
Installing a child restraint system to a
3-point type seat belt (with emergency
locking mechanism) E00408700516
Single cab and Club cab
Double cab
Front passenger seat
Front passenger seat Installation:
1. Fasten the seat belt to
secure the child re-
straint system.
Make sure you hear a “click” when you in-
sert the latch plate in the buckle.
2. Remove all slack by using the locking clip.
3. Push and pull the child restraint in all direc- tions to be sure it is secure. WARNING
l For some types of child
restraint, the lock-
ing clip (A) should be used to help avoid
personal injury during a collision or sud-
den manoeuvre.
It must be fitted and used in accordance
with the child restraint manufacturer’s in-
structions.
The locking clip must be removed when
the child restraint is removed. Seat and seat belts
2-26
2
OCRE12E1
Presented by http://mmc-manuals.ru/ \251