lock NISSAN 350Z 2003 Z33 Owners Manual
[x] Cancel search | Manufacturer: NISSAN, Model Year: 2003, Model line: 350Z, Model: NISSAN 350Z 2003 Z33Pages: 227, PDF Size: 2.39 MB
Page 8 of 227
FRONT MANUAL SEAT
ADJUSTMENT
WARNING
IDo not adjust the driver's seat while
driving so full attention may be given
to vehicle operation. The seat may
move suddenly and could cause loss
of control of the vehicle.
IAfter adjustment, gently rock in the
seat to make sure it is securely
locked.
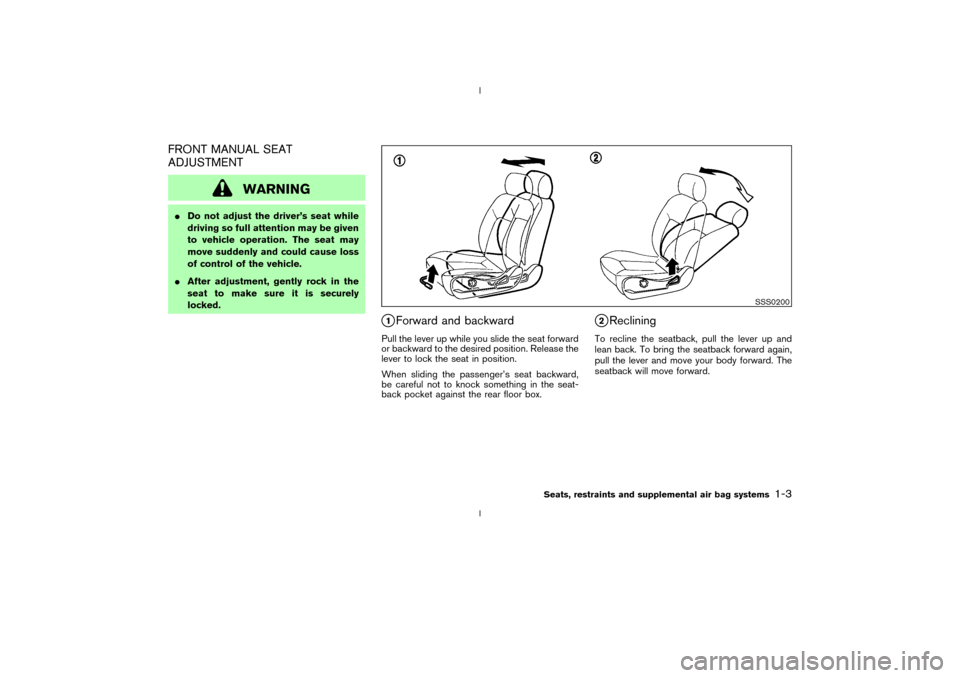
q1Forward and backward
Pull the lever up while you slide the seat forward
or backward to the desired position. Release the
lever to lock the seat in position.
When sliding the passenger's seat backward,
be careful not to knock something in the seat-
back pocket against the rear floor box.
q2Reclining
To recline the seatback, pull the lever up and
lean back. To bring the seatback forward again,
pull the lever and move your body forward. The
seatback will move forward.
SSS0200
Seats, restraints and supplemental air bag systems
1-3
Z
02.9.13/Z33-D/V5.0
X
Page 10 of 227
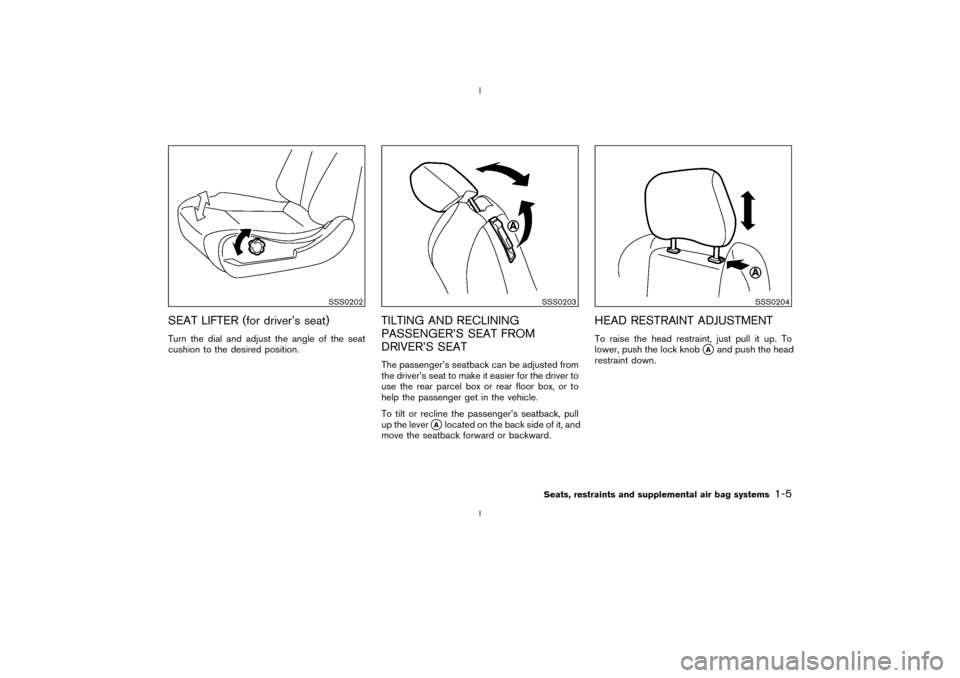
SEAT LIFTER (for driver's seat)Turn the dial and adjust the angle of the seat
cushion to the desired position.
TILTING AND RECLINING
PASSENGER'S SEAT FROM
DRIVER'S SEATThe passenger's seatback can be adjusted from
the driver's seat to make it easier for the driver to
use the rear parcel box or rear floor box, or to
help the passenger get in the vehicle.
To tilt or recline the passenger's seatback, pull
up the lever
qAlocated on the back side of it, and
move the seatback forward or backward.
HEAD RESTRAINT ADJUSTMENTTo raise the head restraint, just pull it up. To
lower, push the lock knob
qAand push the head
restraint down.
SSS0202
SSS0203
SSS0204
Seats, restraints and supplemental air bag systems
1-5
Z
02.9.13/Z33-D/V5.0
X
Page 22 of 227
SUPPLEMENTAL AIR BAG
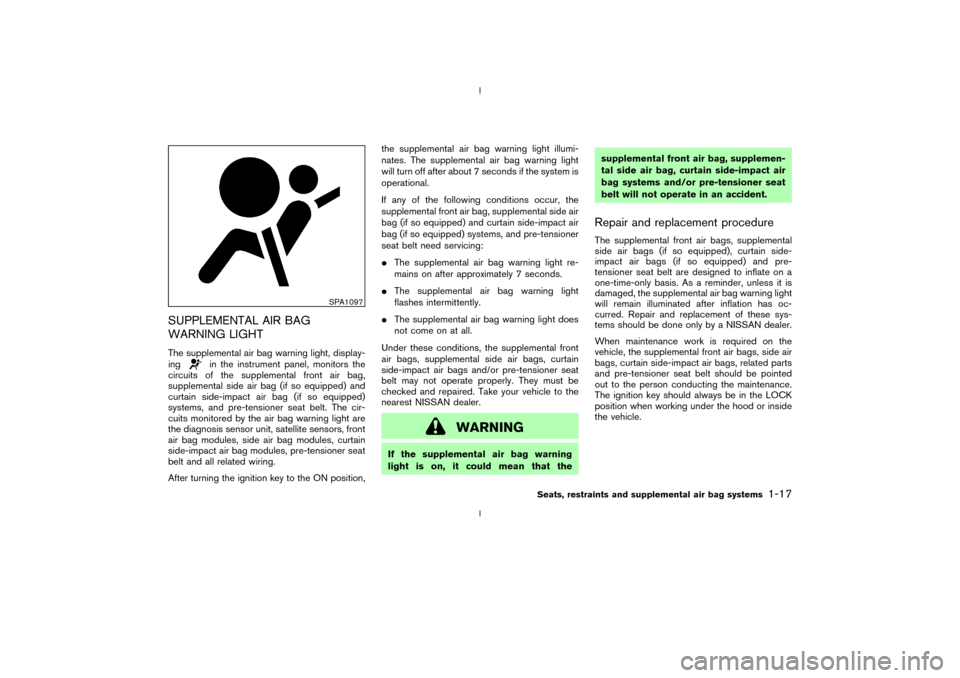
WARNING LIGHTThe supplemental air bag warning light, display-
ing
in the instrument panel, monitors the
circuits of the supplemental front air bag,
supplemental side air bag (if so equipped) and
curtain side-impact air bag (if so equipped)
systems, and pre-tensioner seat belt. The cir-
cuits monitored by the air bag warning light are
the diagnosis sensor unit, satellite sensors, front
air bag modules, side air bag modules, curtain
side-impact air bag modules, pre-tensioner seat
belt and all related wiring.
After turning the ignition key to the ON position,the supplemental air bag warning light illumi-
nates. The supplemental air bag warning light
will turn off after about 7 seconds if the system is
operational.
If any of the following conditions occur, the
supplemental front air bag, supplemental side air
bag (if so equipped) and curtain side-impact air
bag (if so equipped) systems, and pre-tensioner
seat belt need servicing:
IThe supplemental air bag warning light re-
mains on after approximately 7 seconds.
IThe supplemental air bag warning light
flashes intermittently.
IThe supplemental air bag warning light does
not come on at all.
Under these conditions, the supplemental front
air bags, supplemental side air bags, curtain
side-impact air bags and/or pre-tensioner seat
belt may not operate properly. They must be
checked and repaired. Take your vehicle to the
nearest NISSAN dealer.
WARNING
If the supplemental air bag warning
light is on, it could mean that thesupplemental front air bag, supplemen-
tal side air bag, curtain side-impact air
bag systems and/or pre-tensioner seat
belt will not operate in an accident.
Repair and replacement procedureThe supplemental front air bags, supplemental
side air bags (if so equipped), curtain side-
impact air bags (if so equipped) and pre-
tensioner seat belt are designed to inflate on a
one-time-only basis. As a reminder, unless it is
damaged, the supplemental air bag warning light
will remain illuminated after inflation has oc-
curred. Repair and replacement of these sys-
tems should be done only by a NISSAN dealer.
When maintenance work is required on the
vehicle, the supplemental front air bags, side air
bags, curtain side-impact air bags, related parts
and pre-tensioner seat belt should be pointed
out to the person conducting the maintenance.
The ignition key should always be in the LOCK
position when working under the hood or inside
the vehicle.
SPA1097
Seats, restraints and supplemental air bag systems
1-17
Z
02.9.13/Z33-D/V5.0
X
Page 28 of 227
ceive neck or other serious injuries.
You could also slide under the lap
belt and receive serious internal inju-
ries.
IFor most effective protection when
the vehicle is in motion, the seat
should be upright. Always sit well
back in the seat and adjust the seat
belt properly.
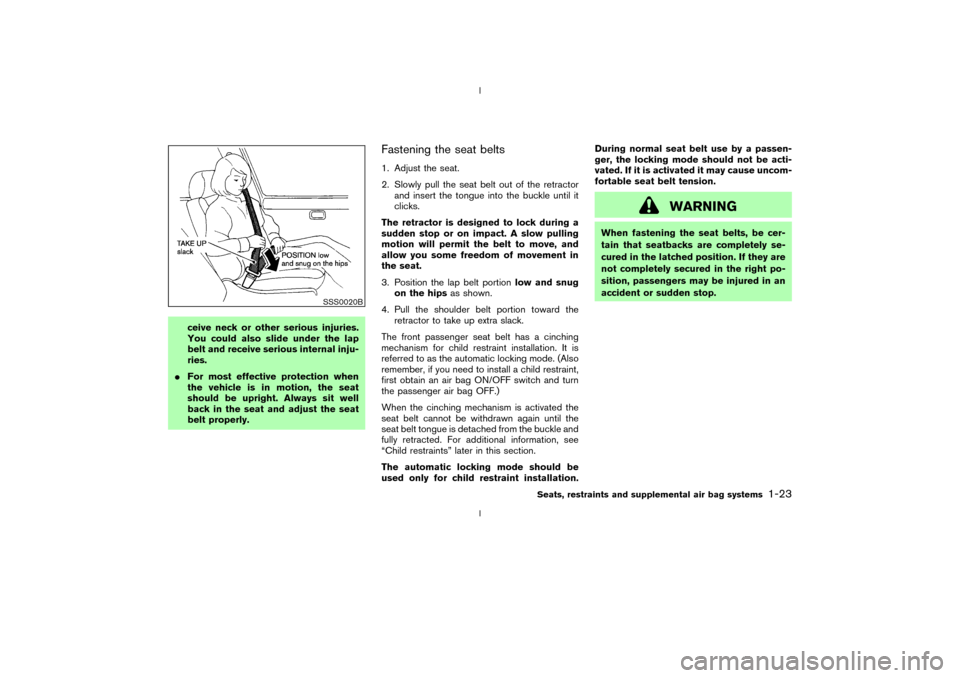
Fastening the seat belts1. Adjust the seat.
2. Slowly pull the seat belt out of the retractor
and insert the tongue into the buckle until it
clicks.
The retractor is designed to lock during a
sudden stop or on impact. A slow pulling
motion will permit the belt to move, and
allow you some freedom of movement in
the seat.
3. Position the lap belt portionlow and snug
on the hipsas shown.
4. Pull the shoulder belt portion toward the
retractor to take up extra slack.
The front passenger seat belt has a cinching
mechanism for child restraint installation. It is
referred to as the automatic locking mode. (Also
remember, if you need to install a child restraint,
first obtain an air bag ON/OFF switch and turn
the passenger air bag OFF.)
When the cinching mechanism is activated the
seat belt cannot be withdrawn again until the
seat belt tongue is detached from the buckle and
fully retracted. For additional information, see
ªChild restraintsº later in this section.
The automatic locking mode should be
used only for child restraint installation.During normal seat belt use by a passen-
ger, the locking mode should not be acti-
vated. If it is activated it may cause uncom-
fortable seat belt tension.
WARNING
When fastening the seat belts, be cer-
tain that seatbacks are completely se-
cured in the latched position. If they are
not completely secured in the right po-
sition, passengers may be injured in an
accident or sudden stop.
SSS0020B
Seats, restraints and supplemental air bag systems
1-23
Z
02.9.13/Z33-D/V5.0
X
Page 29 of 227
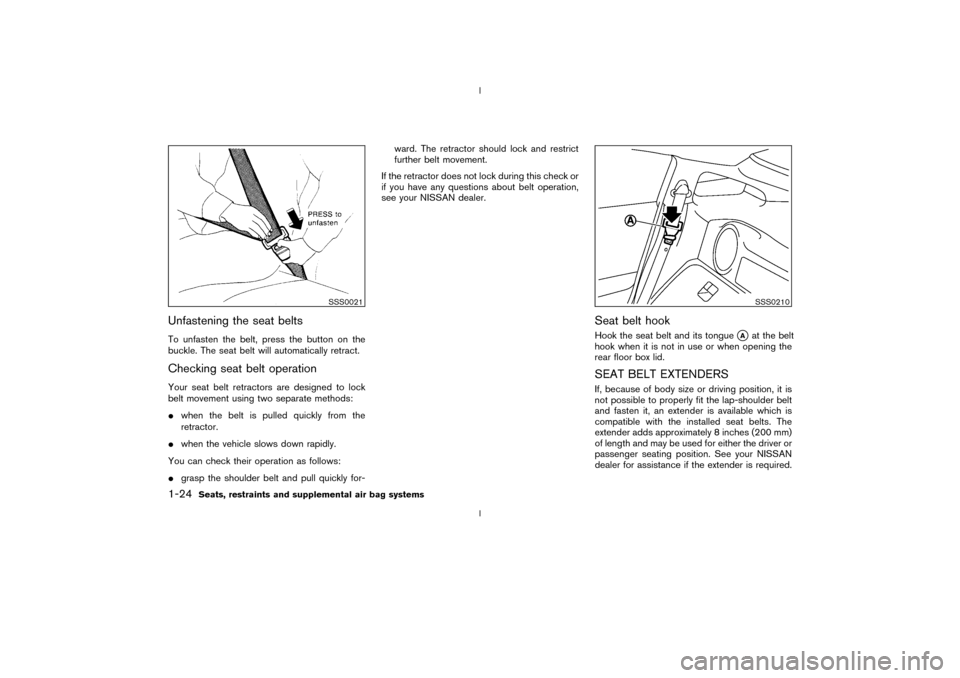
Unfastening the seat beltsTo unfasten the belt, press the button on the
buckle. The seat belt will automatically retract.Checking seat belt operationYour seat belt retractors are designed to lock
belt movement using two separate methods:
Iwhen the belt is pulled quickly from the
retractor.
Iwhen the vehicle slows down rapidly.
You can check their operation as follows:
Igrasp the shoulder belt and pull quickly for-ward. The retractor should lock and restrict
further belt movement.
If the retractor does not lock during this check or
if you have any questions about belt operation,
see your NISSAN dealer.
Seat belt hookHook the seat belt and its tongue
qA
at the belt
hook when it is not in use or when opening the
rear floor box lid.
SEAT BELT EXTENDERSIf, because of body size or driving position, it is
not possible to properly fit the lap-shoulder belt
and fasten it, an extender is available which is
compatible with the installed seat belts. The
extender adds approximately 8 inches (200 mm)
of length and may be used for either the driver or
passenger seating position. See your NISSAN
dealer for assistance if the extender is required.
SSS0021
SSS0210
1-24
Seats, restraints and supplemental air bag systems
Z
02.9.13/Z33-D/V5.0
X
Page 33 of 227
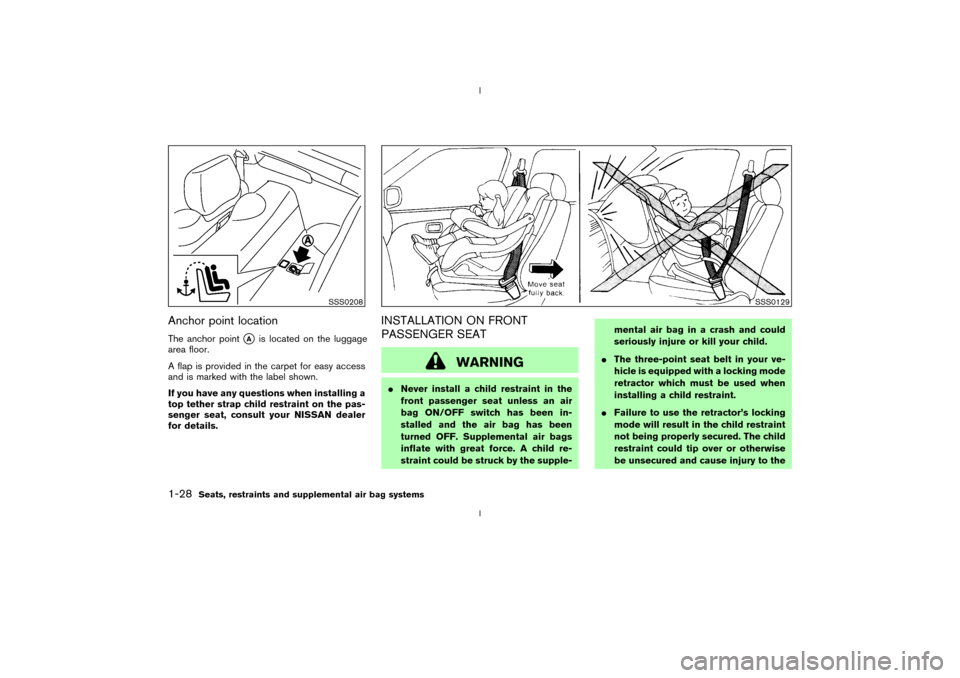
Anchor point locationThe anchor point
qA
is located on the luggage
area floor.
A flap is provided in the carpet for easy access
and is marked with the label shown.
If you have any questions when installing a
top tether strap child restraint on the pas-
senger seat, consult your NISSAN dealer
for details.
INSTALLATION ON FRONT
PASSENGER SEAT
WARNING
INever install a child restraint in the
front passenger seat unless an air
bag ON/OFF switch has been in-
stalled and the air bag has been
turned OFF. Supplemental air bags
inflate with great force. A child re-
straint could be struck by the supple-mental air bag in a crash and could
seriously injure or kill your child.
IThe three-point seat belt in your ve-
hicle is equipped with a locking mode
retractor which must be used when
installing a child restraint.
IFailure to use the retractor's locking
mode will result in the child restraint
not being properly secured. The child
restraint could tip over or otherwise
be unsecured and cause injury to the
SSS0208
SSS0129
1-28
Seats, restraints and supplemental air bag systems
Z
02.9.13/Z33-D/V5.0
X
Page 35 of 227
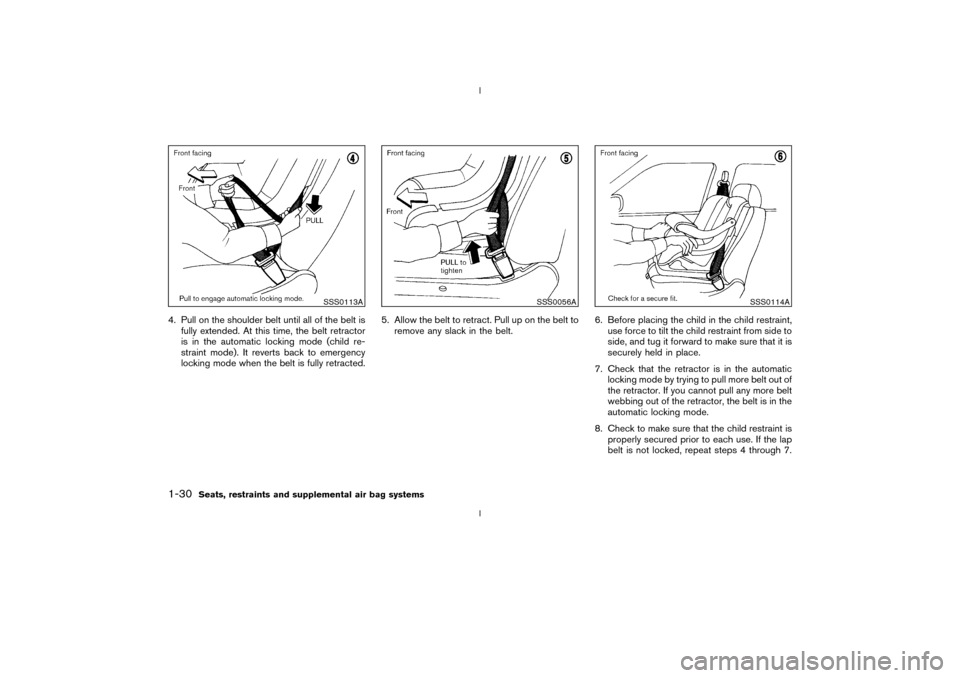
4. Pull on the shoulder belt until all of the belt is
fully extended. At this time, the belt retractor
is in the automatic locking mode (child re-
straint mode). It reverts back to emergency
locking mode when the belt is fully retracted.5. Allow the belt to retract. Pull up on the belt to
remove any slack in the belt.6. Before placing the child in the child restraint,
use force to tilt the child restraint from side to
side, and tug it forward to make sure that it is
securely held in place.
7. Check that the retractor is in the automatic
locking mode by trying to pull more belt out of
the retractor. If you cannot pull any more belt
webbing out of the retractor, the belt is in the
automatic locking mode.
8. Check to make sure that the child restraint is
properly secured prior to each use. If the lap
belt is not locked, repeat steps 4 through 7.
SSS0113A
SSS0056A
SSS0114A
1-30
Seats, restraints and supplemental air bag systems
Z
02.9.13/Z33-D/V5.0
X
Page 36 of 227
After the child restraint is removed and the seat
belt is allowed to wind back into the retractor,
the automatic locking mode (child restraint
mode) is canceled; the seat belt only locks
during a sudden stop or impact.
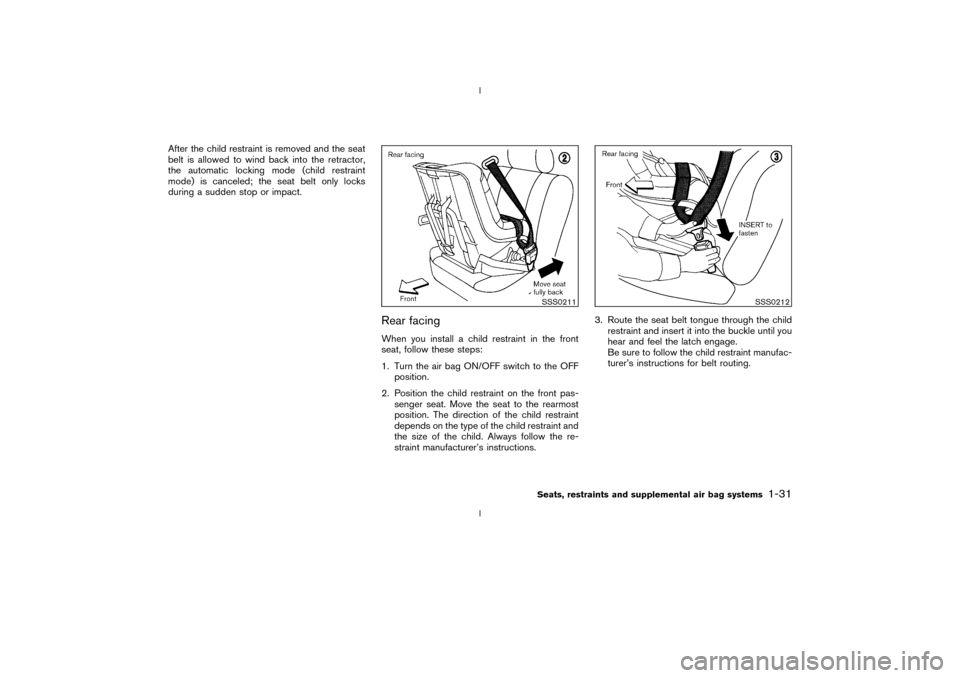
Rear facingWhen you install a child restraint in the front
seat, follow these steps:
1. Turn the air bag ON/OFF switch to the OFF
position.
2. Position the child restraint on the front pas-
senger seat. Move the seat to the rearmost
position. The direction of the child restraint
depends on the type of the child restraint and
the size of the child. Always follow the re-
straint manufacturer's instructions.3. Route the seat belt tongue through the child
restraint and insert it into the buckle until you
hear and feel the latch engage.
Be sure to follow the child restraint manufac-
turer's instructions for belt routing.
SSS0211
SSS0212
Seats, restraints and supplemental air bag systems
1-31
Z
02.9.13/Z33-D/V5.0
X
Page 37 of 227
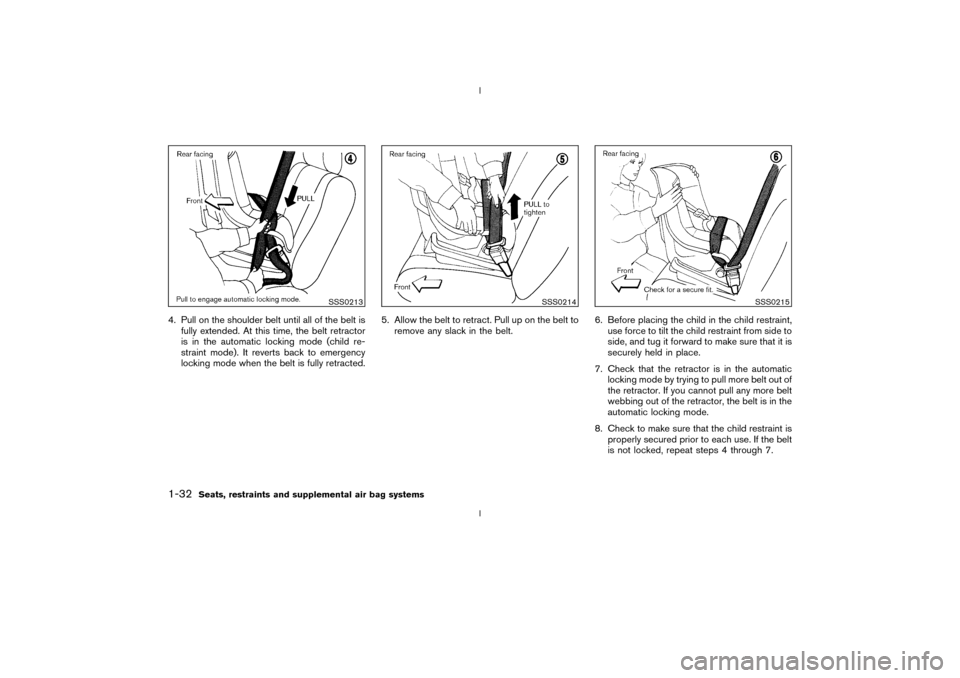
4. Pull on the shoulder belt until all of the belt is
fully extended. At this time, the belt retractor
is in the automatic locking mode (child re-
straint mode). It reverts back to emergency
locking mode when the belt is fully retracted.5. Allow the belt to retract. Pull up on the belt to
remove any slack in the belt.6. Before placing the child in the child restraint,
use force to tilt the child restraint from side to
side, and tug it forward to make sure that it is
securely held in place.
7. Check that the retractor is in the automatic
locking mode by trying to pull more belt out of
the retractor. If you cannot pull any more belt
webbing out of the retractor, the belt is in the
automatic locking mode.
8. Check to make sure that the child restraint is
properly secured prior to each use. If the belt
is not locked, repeat steps 4 through 7.
SSS0213
SSS0214
SSS0215
1-32
Seats, restraints and supplemental air bag systems
Z
02.9.13/Z33-D/V5.0
X
Page 38 of 227

After the child restraint is removed and the seat
belt is allowed to wind back into the retractor,
the automatic locking mode (child restraint
mode) is canceled; the seat belt only locks
during a sudden stop or impact.
Seats, restraints and supplemental air bag systems
1-33
Z
02.9.13/Z33-D/V5.0
X