instrument panel NISSAN 370Z 2020 Owner´s Manual
[x] Cancel search | Manufacturer: NISSAN, Model Year: 2020, Model line: 370Z, Model: NISSAN 370Z 2020Pages: 455, PDF Size: 2.22 MB
Page 230 of 455
4-62Center display, heater, air conditioner, audio, phone and voice recognition systems
WARNING
.The driver must not attempt to
operate the DVD system or wear
the headphones while the vehicle
is in motion so that full attention
may be given to vehicle opera-
tion.
. Do not attempt to modify the
system to display a movie on the
front screen while the vehicle is
being driven. Doing so may dis-
tract the driver and may cause a
collision and serious personal in-
jury or death.
CAUTION
.Only operate the DVD while the
vehicle engine is running. Operat-
ing the DVD for extended periods
of time with the engine OFF can
discharge the vehicle battery.
. Do not allow the system to get
wet. Excessive moisture such as
spilled liquids may cause the
system to malfunction. .
While playing VIDEO-CD media,
this DVD player does not guaran-
tee complete functionality of all
VIDEO-CD formats.
Display settings
To adjust the front display mode, push
the SETTING button while the DVD is
being played, select the “Others” key and
then select the “Display” key.
To adjust the display ON/OFF, brightness,
tint, color and contrast, select the “Display
Adjustment” key and then select each key.
Then you can adjust each item using the
multi-function controller. After changes
have been made push the BACK button
to save the setting.
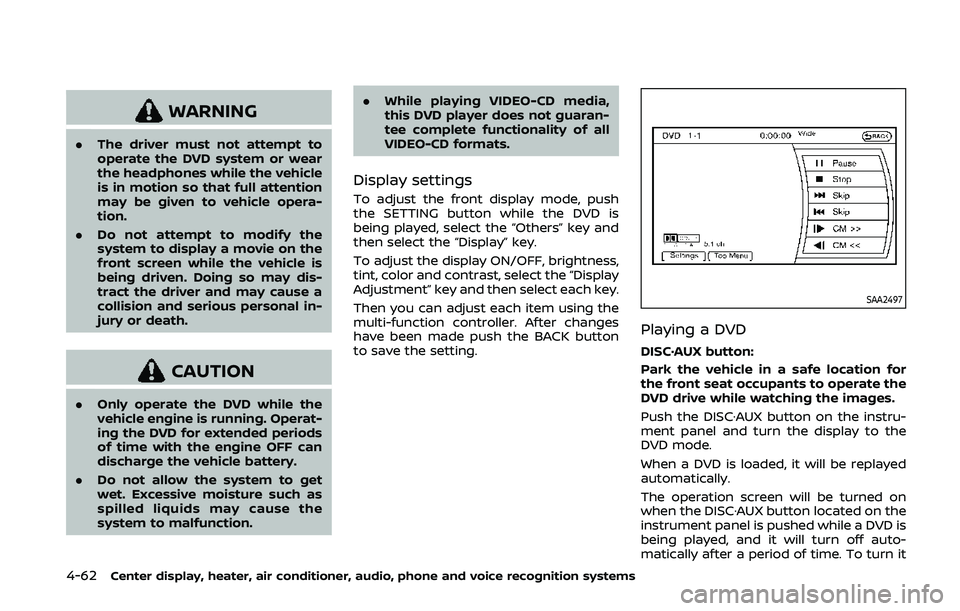
SAA2497
Playing a DVD
DISC·AUX button:
Park the vehicle in a safe location for
the front seat occupants to operate the
DVD drive while watching the images.
Push the DISC·AUX button on the instru-
ment panel and turn the display to the
DVD mode.
When a DVD is loaded, it will be replayed
automatically.
The operation screen will be turned on
when the DISC·AUX button located on the
instrument panel is pushed while a DVD is
being played, and it will turn off auto-
matically after a period of time. To turn it
Page 257 of 455
.Hold Call
Put an incoming call on hold.
. Reject Call
Reject an incoming call.
To finish the call, perform one of the
following procedures listed below.
1. Select the “Hang up” key.
2. Push the PHONE button on the instru- ment panel.
3. Push the
button on the steering
wheel.
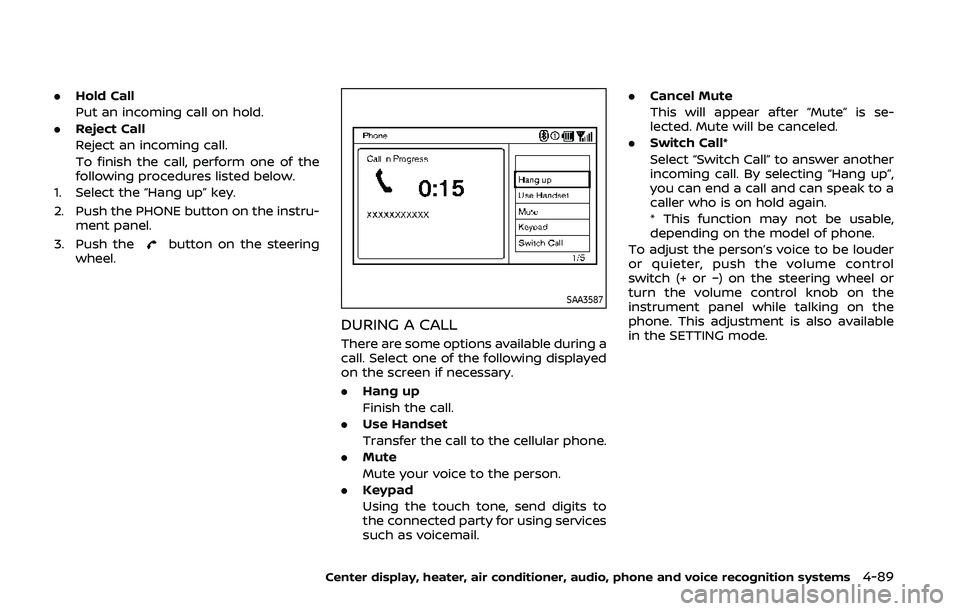
SAA3587
DURING A CALL
There are some options available during a
call. Select one of the following displayed
on the screen if necessary.
. Hang up
Finish the call.
. Use Handset
Transfer the call to the cellular phone.
. Mute
Mute your voice to the person.
. Keypad
Using the touch tone, send digits to
the connected party for using services
such as voicemail. .
Cancel Mute
This will appear after “Mute” is se-
lected. Mute will be canceled.
. Switch Call*
Select “Switch Call” to answer another
incoming call. By selecting “Hang up”,
you can end a call and can speak to a
caller who is on hold again.
* This function may not be usable,
depending on the model of phone.
To adjust the person’s voice to be louder
or quieter, push the volume control
switch (+ or −) on the steering wheel or
turn the volume control knob on the
instrument panel while talking on the
phone. This adjustment is also available
in the SETTING mode.
Center display, heater, air conditioner, audio, phone and voice recognition systems4-89
Page 273 of 455
NISSAN Voice Recognition allows hands-
free operation of the Phone, Navigation,
Information and Audio systems in one of
two modes, Standard Mode or Alternate
Command Mode.
In Standard Mode, commands that are
available are always shown on the display
and announced by the system. You can
complete your desired operation by sim-
ply following the prompts given by the
system. (See “NISSAN voice recognition
Standard Mode” (P.4-105) for details.)
For advanced operation, you can use the
Alternate Command Mode. (See “NISSAN
voice recognition Alternate Command
Mode” (P.4-116) for details.) When this
mode is active, an expanded list of
commands can be spoken after pushing
the TALK
switch, and the voice
command menu prompts are turned off.
Review the expanded command list,
which is available when this mode is
active. Note that in this mode the recog-
nition success rate may be affected as
the number of available commands and
the ways of speaking each command are
increased.
To switch one mode to another, see each
mode description later in this section.
To improve the recognition success rate
when Alternate Command Mode is active,
try using the Speaker Adaptation Func- tion available in that mode. Otherwise, it
is recommended that Alternate Com-
mand Mode be turned off and Standard
Mode be used for the best recognition
performance.
For the voice commands for the naviga-
tion system, refer to the Navigation Sys-
tem Owner’s Manual of your vehicle.
For Roadster models:
The voice recognition system cannot be
operated when the soft top is not closed.
NISSAN VOICE RECOGNITION
STANDARD MODE
The following section is applicable when
the Standard Mode is activated.
The Standard Mode enables you to com-
plete the desired operation by simply
following the prompts that appear on
the display and also are announced by
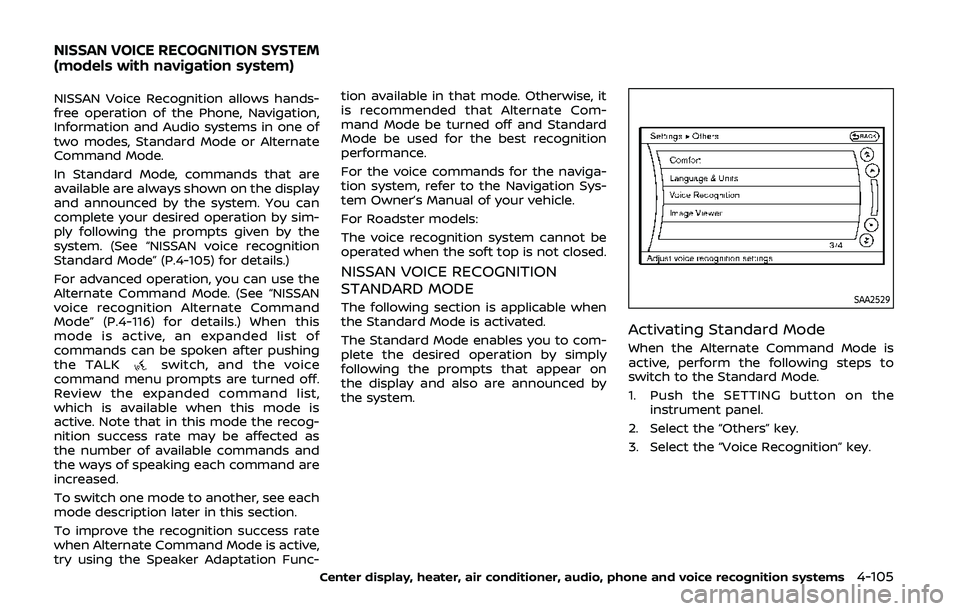
the system.SAA2529
Activating Standard Mode
When the Alternate Command Mode is
active, perform the following steps to
switch to the Standard Mode.
1. Push the SETTING button on the
instrument panel.
2. Select the “Others” key.
3. Select the “Voice Recognition” key.
Center display, heater, air conditioner, audio, phone and voice recognition systems4-105
NISSAN VOICE RECOGNITION SYSTEM
(models with navigation system)
Page 285 of 455
prompted. Review the expanded com-
mand list when this mode is active. See
examples of Alternate Command Mode
screens.
Please note that in this mode the recog-
nition success rate may be affected as
the number of available commands and
ways of speaking each command are
increased. To improve the recognition
success rate, try using the Speaker Adap-
tation Function available in that mode.
(See “Speaker adaptation function (for
Alternate Command Mode)” (P.4-127).)
Otherwise it is recommended that Alter-
nate Command Mode be turned OFF and
Standard Mode be used for the best
recognition performance.
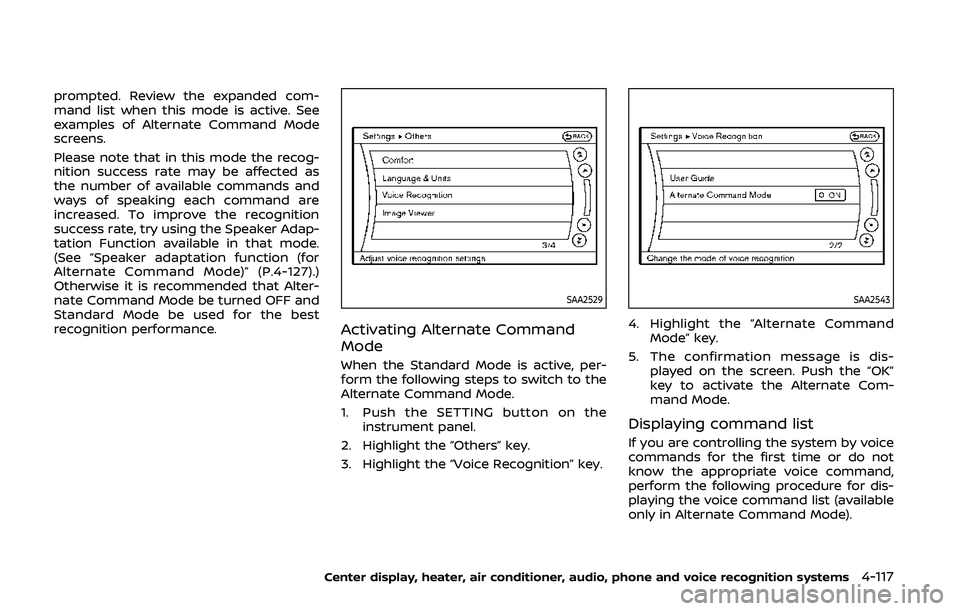
SAA2529
Activating Alternate Command
Mode
When the Standard Mode is active, per-
form the following steps to switch to the
Alternate Command Mode.
1. Push the SETTING button on theinstrument panel.
2. Highlight the “Others” key.
3. Highlight the “Voice Recognition” key.
SAA2543
4. Highlight the “Alternate Command Mode” key.
5. The confirmation message is dis- played on the screen. Push the “OK”
key to activate the Alternate Com-
mand Mode.
Displaying command list
If you are controlling the system by voice
commands for the first time or do not
know the appropriate voice command,
perform the following procedure for dis-
playing the voice command list (available
only in Alternate Command Mode).
Center display, heater, air conditioner, audio, phone and voice recognition systems4-117
Page 295 of 455
— “Dial one eight zero zero six six twosix two zero zero.”
Note 1: For the best voice recognition
phone dialing results, say phone numbers
as single digits.
Note 2: You cannot say 555-6000 as “five
five five six thousands”.
Note 3: When speaking a house number,
speak the number “0” as “zero”. If the
letter “o (oh)” is included in the house
number, it will not be recognized as the
number “0 (zero)” even if you speak “oh”
instead of “zero”. Please speak “zero” for
the number “0 (zero)”, “oh” for the letter “o
(oh)”.
Send digits using dial tone:
. Push the TALK
switch during a
phone call.
. The menu will be launched and you
will be provided with the following
guidance: "Please say the digits to
dial".
. After guidance, say the digits of the
number you want to send. After this,
the digits that have been recognized
will be read out.
. If you push the ENTER button on the
steering wheel or on the multi-func-
tion controller, the selected digits will
be sent.
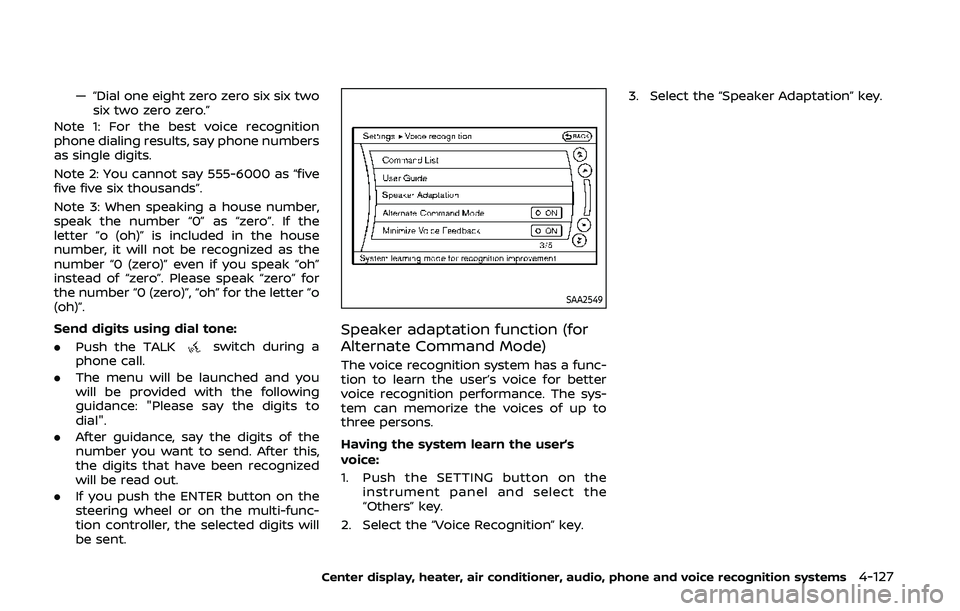
SAA2549
Speaker adaptation function (for
Alternate Command Mode)
The voice recognition system has a func-
tion to learn the user’s voice for better
voice recognition performance. The sys-
tem can memorize the voices of up to
three persons.
Having the system learn the user’s
voice:
1. Push the SETTING button on the
instrument panel and select the
“Others” key.
2. Select the “Voice Recognition” key. 3. Select the “Speaker Adaptation” key.
Center display, heater, air conditioner, audio, phone and voice recognition systems4-127
Page 297 of 455
SAA2553
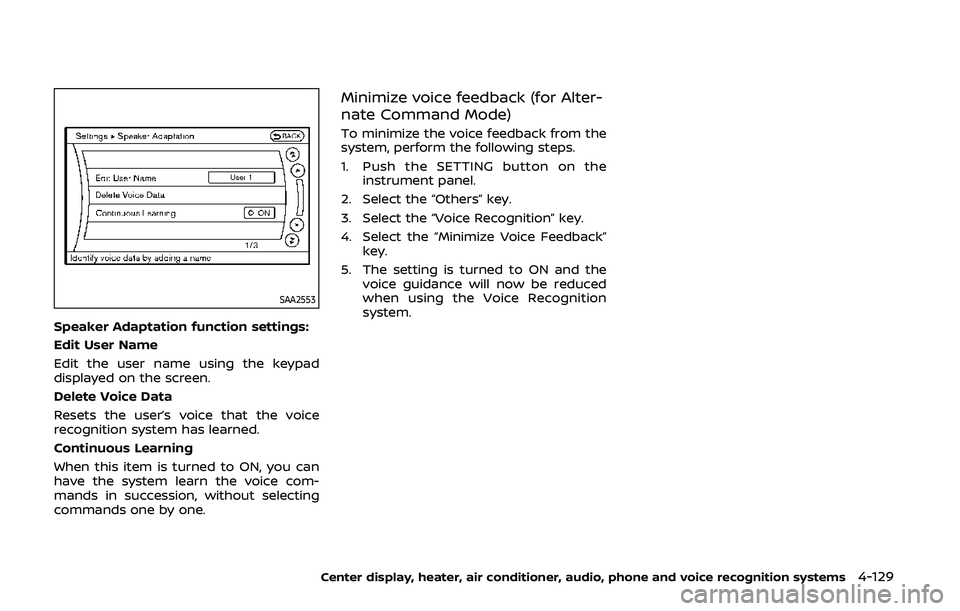
Speaker Adaptation function settings:
Edit User Name
Edit the user name using the keypad
displayed on the screen.
Delete Voice Data
Resets the user’s voice that the voice
recognition system has learned.
Continuous Learning
When this item is turned to ON, you can
have the system learn the voice com-
mands in succession, without selecting
commands one by one.
Minimize voice feedback (for Alter-
nate Command Mode)
To minimize the voice feedback from the
system, perform the following steps.
1. Push the SETTING button on theinstrument panel.
2. Select the “Others” key.
3. Select the “Voice Recognition” key.
4. Select the “Minimize Voice Feedback” key.
5. The setting is turned to ON and the voice guidance will now be reduced
when using the Voice Recognition
system.
Center display, heater, air conditioner, audio, phone and voice recognition systems4-129
Page 306 of 455
5-8Starting and driving
WARNING
Do not operate the push-button
ignition switch while driving the ve-
hicle except in an emergency. (The
engine will stop when the ignition
switch is pushed 3 consecutive times
or the ignition switch is pushed and
held for more than 2 seconds.) If the
engine stops while the vehicle is
being driven, this could lead to a
crash and serious injury.
Before operating the push-button igni-
tion switch, be sure to move the shift
lever to the P (Park) position (for auto-
matic transmission model) or the shift
lever to the N (Neutral) position (for
manual transmission model).
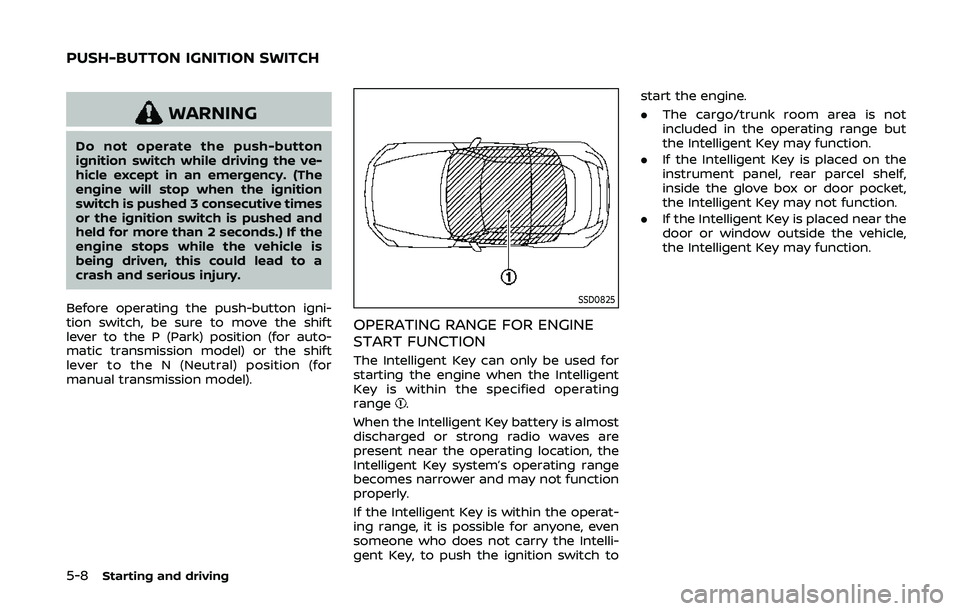
SSD0825
OPERATING RANGE FOR ENGINE
START FUNCTION
The Intelligent Key can only be used for
starting the engine when the Intelligent
Key is within the specified operating
range
.
When the Intelligent Key battery is almost
discharged or strong radio waves are
present near the operating location, the
Intelligent Key system’s operating range
becomes narrower and may not function
properly.
If the Intelligent Key is within the operat-
ing range, it is possible for anyone, even
someone who does not carry the Intelli-
gent Key, to push the ignition switch to start the engine.
.
The cargo/trunk room area is not
included in the operating range but
the Intelligent Key may function.
. If the Intelligent Key is placed on the
instrument panel, rear parcel shelf,
inside the glove box or door pocket,
the Intelligent Key may not function.
. If the Intelligent Key is placed near the
door or window outside the vehicle,
the Intelligent Key may function.
PUSH-BUTTON IGNITION SWITCH
Page 313 of 455
When canceling the manual shift mode,
return the shift lever to the D (Drive)
position. The transmission returns to the
normal driving mode.
When you pull the paddle shifter (if so
equipped) while in the D (Drive) position,
the transmission will shift to the upper or
lower range temporarily. The transmis-
sion will automatically return to the D
(Drive) position after a short period of
time. If you want to return to the D (Drive)
position manually, pull and hold the
paddle shifter (if so equipped) for about
1.5 seconds.
In the manual shift mode, the shift range
is displayed on the transmission position
indicator in the meter.
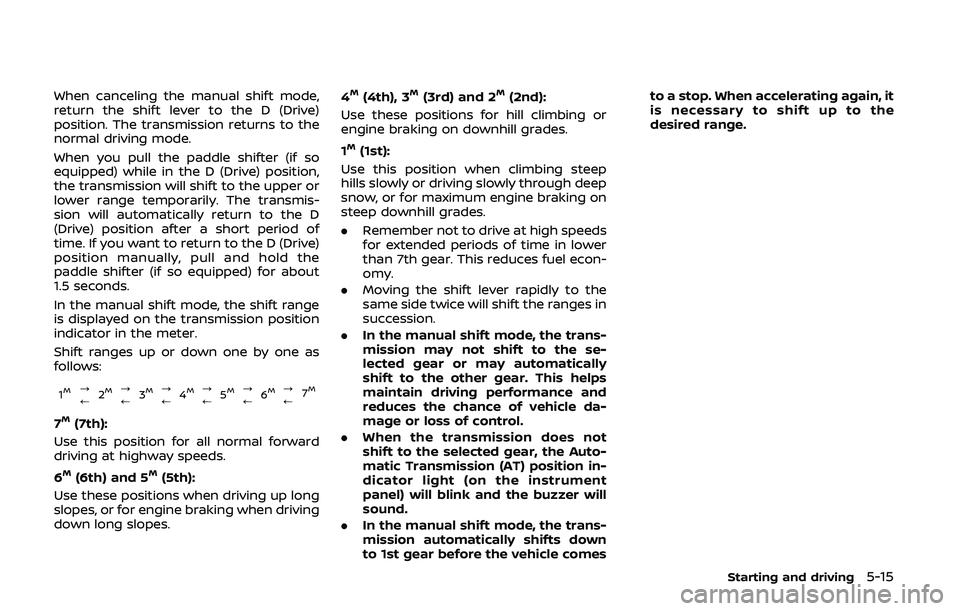
Shift ranges up or down one by one as
follows:
1M?
/2M?
/3M?
/4M?
/5M?
/6M?
/ 7M
7M(7th):
Use this position for all normal forward
driving at highway speeds.
6
M(6th) and 5M(5th):
Use these positions when driving up long
slopes, or for engine braking when driving
down long slopes. 4
M(4th), 3M(3rd) and 2M(2nd):
Use these positions for hill climbing or
engine braking on downhill grades.
1
M(1st):
Use this position when climbing steep
hills slowly or driving slowly through deep
snow, or for maximum engine braking on
steep downhill grades.
. Remember not to drive at high speeds
for extended periods of time in lower
than 7th gear. This reduces fuel econ-
omy.
. Moving the shift lever rapidly to the
same side twice will shift the ranges in
succession.
. In the manual shift mode, the trans-
mission may not shift to the se-
lected gear or may automatically
shift to the other gear. This helps
maintain driving performance and
reduces the chance of vehicle da-
mage or loss of control.
. When the transmission does not
shift to the selected gear, the Auto-
matic Transmission (AT) position in-
dicator light (on the instrument
panel) will blink and the buzzer will
sound.
. In the manual shift mode, the trans-
mission automatically shifts down
to 1st gear before the vehicle comes to a stop. When accelerating again, it
is necessary to shift up to the
desired range.
Starting and driving5-15
Page 327 of 455
faces even with ABS. Stopping
distances may also be longer on
rough, gravel or snow covered
roads, or if you are using tire
chains. Always maintain a safe
distance from the vehicle in front
of you. Ultimately, the driver is
responsible for safety.
. Tire type and condition may also
affect braking effectiveness.
— When replacing tires, install
the specified size of tires on
all four wheels.
— When installing a spare tire, make sure that it is the proper
size and type as specified on
the Tire and Loading Informa-
tion label. See “Tire and Load-
ing Information label” (P.10-
14) of this manual.
— For detailed information, see “Wheels and tires” (P.8-26) of
this manual.
The Anti-lock Braking System (ABS) con-
trols the brakes so the wheels do not lock
during hard braking or when braking on
slippery surfaces. The system detects the
rotation speed at each wheel and varies
the brake fluid pressure to prevent each
wheel from locking and sliding. By pre- venting each wheel from locking, the
system helps the driver maintain steering
control and helps to minimize swerving
and spinning on slippery surfaces.
Using the system
Depress the brake pedal and hold it down.
Depress the brake pedal with firm steady
pressure, but do not pump the brakes.
The ABS will operate to prevent the
wheels from locking up. Steer the vehicle
to avoid obstacles.
WARNING
Do not pump the brake pedal. Doing
so may result in increased stopping
distances.
Self-test feature
The ABS includes electronic sensors, elec-
tric pumps, hydraulic solenoids and a
computer. The computer has a built-in
diagnostic feature that tests the system
each time you start the engine and move
the vehicle at a low speed in forward or
reverse. When the self-test occurs, you
may hear a “clunk” noise and/or feel a
pulsation in the brake pedal. This is
normal and does not indicate a malfunc-
tion. If the computer senses a malfunc-
tion, it switches the ABS off and
illuminates the ABS warning light on the
instrument panel. The brake system then
operates normally, but without anti-lock
assistance.
If the ABS warning light illuminates during
the self-test or while driving, have the
vehicle checked. It is recommended you
visit a NISSAN dealer for this service.
Normal operation
The ABS operates at speeds above 3 to 6
MPH (5 to 10 km/h).
When the ABS senses that one or more
wheels are close to locking up, the
actuator rapidly applies and releases
hydraulic pressure. This action is similar
to pumping the brakes very quickly. You
may feel a pulsation in the brake pedal
and hear a noise from under the hood or
feel a vibration from the actuator when it
is operating. This is normal and indicates
that the ABS is operating properly. How-
ever, the pulsation may indicate that road
conditions are hazardous and extra care
is required while driving.
Starting and driving5-29
Page 328 of 455
5-30Starting and driving
The Vehicle Dynamic Control (VDC) sys-
tem uses various sensors to monitor
driver inputs and vehicle motion. Under
certain driving conditions, the VDC sys-
tem helps to perform the following func-
tions.
.Controls brake pressure to reduce
wheel slip on one slipping drive wheel
so power is transferred to a non
slipping drive wheel on the same axle.
. Controls brake pressure and engine
output to reduce drive wheel slip
based on vehicle speed (traction con-
trol function).
. Controls brake pressure at individual
wheels and engine output to help the
driver maintain control of the vehicle
in the following conditions:
— understeer (vehicle tends to not
follow the steered path despite
increased steering input)
— oversteer (vehicle tends to spin due to certain road or driving condi-
tions).
The VDC system can help the driver to
maintain control of the vehicle, but it
cannot prevent loss of vehicle control in
all driving situations.
When the VDC system operates, the VDC
warning light
in the instrument panel
flashes so note the following: .
The road may be slippery or the
system may determine some action
is required to help keep the vehicle on
the steered path.
. You may feel a pulsation in the brake
pedal and hear a noise or vibration
from under the hood. This is normal
and indicates that the VDC system is
working properly.
. Adjust your speed and driving to the
road conditions.
See “Vehicle Dynamic Control (VDC) warn-
ing light” (P.2-15).
If a malfunction occurs in the system, the
VDC warning light
illuminates in the
instrument panel. The VDC system auto-
matically turns off.
The VDC OFF switch is used to turn off the
VDC system. The VDC off indicator light
illuminates to indicate the VDC sys-
tem is off. When the VDC switch is used to
turn off the system, the VDC system still
operates to prevent one drive wheel from
slipping by transferring power to a non
slipping drive wheel. The VDC warning
light
flashes if this occurs. All other
VDC functions are off, and the VDC
warning light
will not flash. The VDC
system is automatically reset to on when
the ignition switch is placed in the off
position then back to the on position.
See “Vehicle Dynamic Control (VDC) warn- ing light” (P.2-15) and “Vehicle Dynamic
Control (VDC) off indicator light” (P.2-18).
The computer has a built-in diagnostic
feature that tests the system each time
you start the engine and move the vehicle
forward or in reverse at a slow speed.
When the self-test occurs, you may hear a
“clunk” noise and/or feel a pulsation in the
brake pedal. This is normal and is not an
indication of a malfunction.
WARNING
.
The VDC system is designed to
help the driver maintain stability
but does not prevent accidents
due to abrupt steering operation
at high speeds or by careless or
dangerous driving techniques.
Reduce vehicle speed and be
especially careful when driving
and cornering on slippery sur-
faces and always drive carefully.
. Do not modify the vehicle’s sus-
pension. If suspension parts such
as shock absorbers, struts,
springs, stabilizer bars, bushings
and wheels are not NISSAN re-
commended for your vehicle or
are extremely deteriorated, the
VDC system may not operate
VEHICLE DYNAMIC CONTROL (VDC) SYSTEM