heater NISSAN 370Z COUPE 2019 Owners Manual
[x] Cancel search | Manufacturer: NISSAN, Model Year: 2019, Model line: 370Z COUPE, Model: NISSAN 370Z COUPE 2019Pages: 460, PDF Size: 3.06 MB
Page 8 of 460

Illustrated table of contents0
Safety — Seats, seat belts and supplemental restraint
system1
Instruments and controls
Pre-driving checks and adjustments
Center display, heater, air conditioner, audio, phone and
voice recognition systems
Starting and driving
In case of emergency
Appearance and care
Do-it-yourself
Maintenance and schedules
Technical and consumer information
2
3
4
5
6
7
8
9
10
Table of
Contents
Index11
Page 20 of 460

SSI0653
1. Ventilator (P.4-30)
2. Center display and multi-function controlpanel (if so equipped) (P.4-4) or Instru-
ment pocket (if so equipped) (P.2-43)
— Navigation system* (if so equipped)
— Vehicle information and setting but-
tons (if so equipped) (P.4-8)
— Bluetooth® Hands-Free Phone System (P.4-83, P.4-94)
— RearView Monitor (if so equipped)
(P.4-24)
3. Front passenger air bag status light (P.1-36)
4. Front passenger supplemental air bag (P.1-30) 5. Fuse box cover (P.8-18)
6. Push-button ignition switch (P.5-8)
7. Hazard warning flasher switch (P.6-2)
8. Seat heater switch (if so equipped)
(P.2-38) or Climate controlled seat switch
(if so equipped) (P.2-40)
9. Soft top operating switch (for Roadster models) (P.3-23) or Rear hatch release
switch (for Coupe models) (P.3-19)
10. SynchroRev Match mode (S-MODE) switch (if so equipped) (P.5-18)
11. Heater and air conditioner (P.4-31) — Rear window defroster switch (P.2-33)
12. Audio system (P.4-36)
13. Power outlet (P.2-42)
14. Glove box (P.2-44)
*: Refer to the separate Navigation Sys-
tem Owner’s Manual.
Illustrated table of contents0-11
INSTRUMENT PANEL
Page 73 of 460

2-4Instruments and controls
SSI0653
1. Ventilator (P.4-30)
2. Center display and multi-function controlpanel (if so equipped) (P.4-4) or Instru-
ment pocket (if so equipped) (P.2-43)
— Navigation system* (if so equipped)
— Vehicle information and setting but-
tons (if so equipped) (P.4-8)
— Bluetooth® Hands-Free Phone System (P.4-83, P.4-94)
— RearView Monitor (if so equipped)
(P.4-24)
3. Front passenger air bag status light (P.1-36)
4. Front passenger supplemental air bag (P.1-30) 5. Fuse box cover (P.8-18)
6. Push-button ignition switch (P.5-8)
7. Hazard warning flasher switch (P.6-2)
8. Seat heater switch (if so equipped)
(P.2-38) or Climate controlled seat switch
(if so equipped) (P.2-40)
9. Soft top operating switch (for Roadster models) (P.3-23) or Rear hatch release
switch (for Coupe models) (P.3-19)
10. SynchroRev Match mode (S-MODE) switch (if so equipped) (P.5-18)
11. Heater and air conditioner (P.4-31) — Rear window defroster switch (P.2-33)
12. Audio system (P.4-36)
13. Power outlet (P.2-42)
14. Glove box (P.2-44)
*: Refer to the separate Navigation Sys-
tem Owner’s Manual.
INSTRUMENT PANEL
Page 107 of 460

2-38Instruments and controls
SIC4066
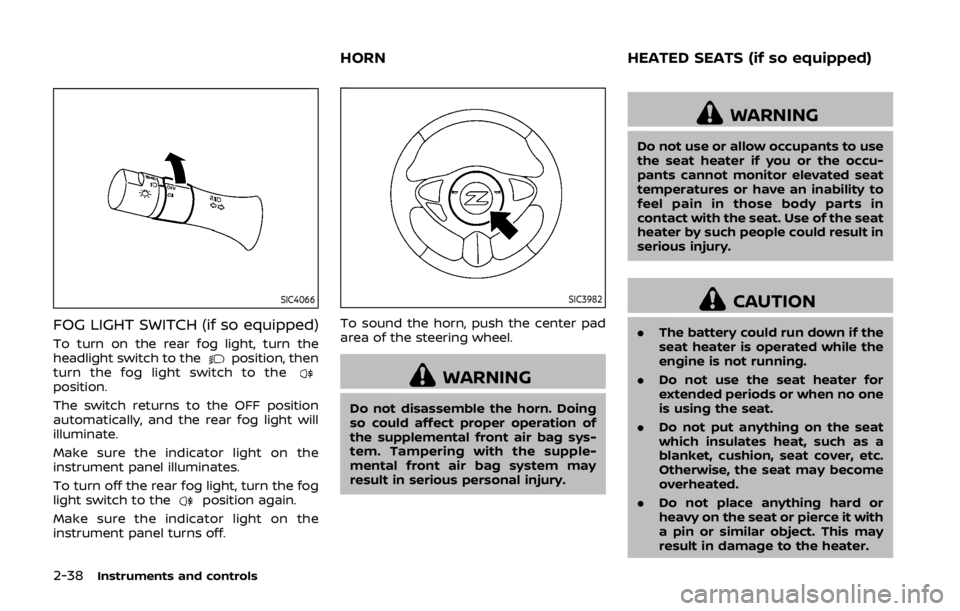
FOG LIGHT SWITCH (if so equipped)
To turn on the rear fog light, turn the
headlight switch to theposition, then
turn the fog light switch to the
position.
The switch returns to the OFF position
automatically, and the rear fog light will
illuminate.
Make sure the indicator light on the
instrument panel illuminates.
To turn off the rear fog light, turn the fog
light switch to the
position again.
Make sure the indicator light on the
instrument panel turns off.
SIC3982
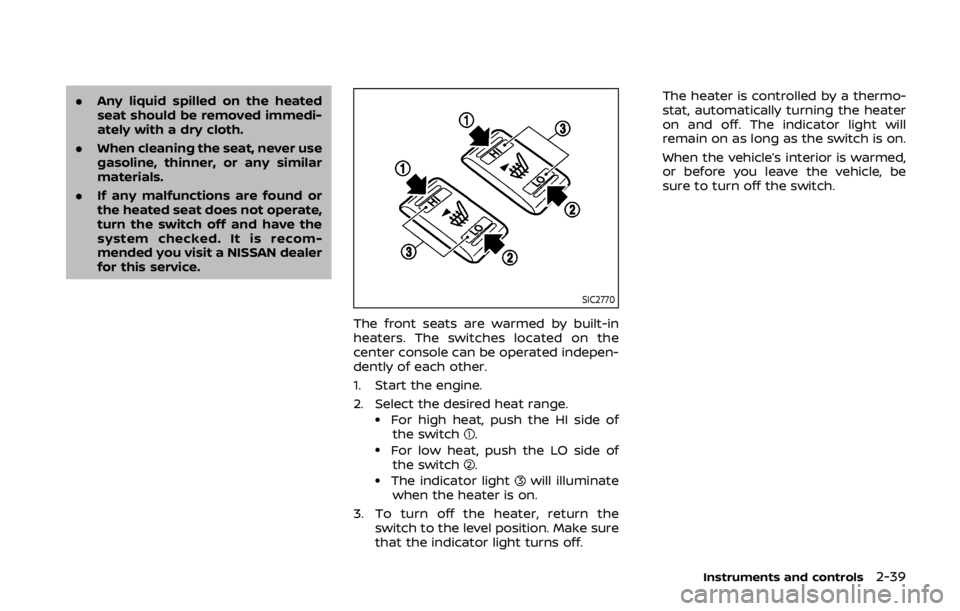
To sound the horn, push the center pad
area of the steering wheel.
WARNING
Do not disassemble the horn. Doing
so could affect proper operation of
the supplemental front air bag sys-
tem. Tampering with the supple-
mental front air bag system may
result in serious personal injury.
WARNING
Do not use or allow occupants to use
the seat heater if you or the occu-
pants cannot monitor elevated seat
temperatures or have an inability to
feel pain in those body parts in
contact with the seat. Use of the seat
heater by such people could result in
serious injury.
CAUTION
. The battery could run down if the
seat heater is operated while the
engine is not running.
. Do not use the seat heater for
extended periods or when no one
is using the seat.
. Do not put anything on the seat
which insulates heat, such as a
blanket, cushion, seat cover, etc.
Otherwise, the seat may become
overheated.
. Do not place anything hard or
heavy on the seat or pierce it with
a pin or similar object. This may
result in damage to the heater.
HORN HEATED SEATS (if so equipped)
Page 108 of 460

.Any liquid spilled on the heated
seat should be removed immedi-
ately with a dry cloth.
. When cleaning the seat, never use
gasoline, thinner, or any similar
materials.
. If any malfunctions are found or
the heated seat does not operate,
turn the switch off and have the
system checked. It is recom-
mended you visit a NISSAN dealer
for this service.
SIC2770
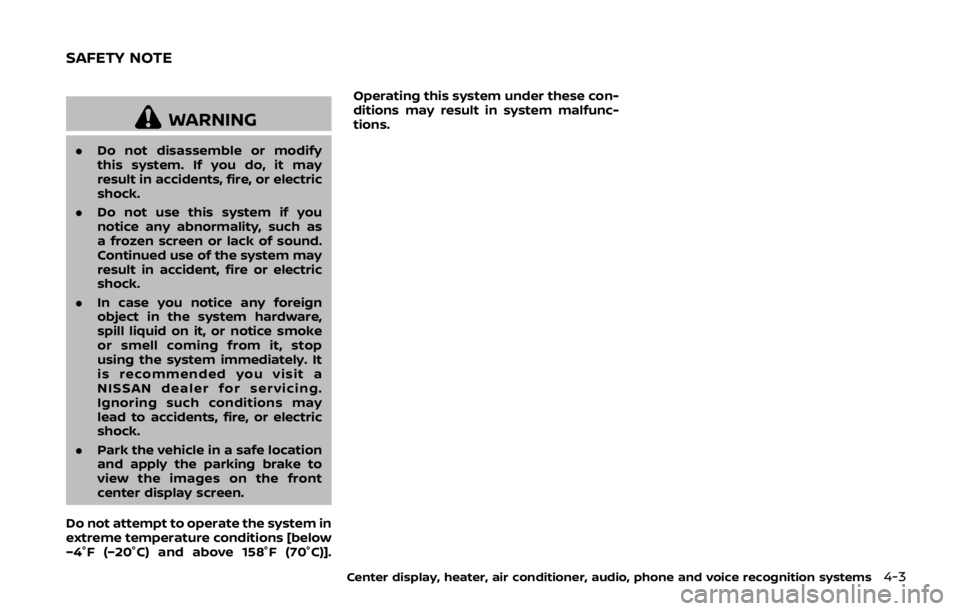
The front seats are warmed by built-in
heaters. The switches located on the
center console can be operated indepen-
dently of each other.
1. Start the engine.
2. Select the desired heat range.
.For high heat, push the HI side of
the switch..For low heat, push the LO side ofthe switch..The indicator lightwill illuminate
when the heater is on.
3. To turn off the heater, return the switch to the level position. Make sure
that the indicator light turns off. The heater is controlled by a thermo-
stat, automatically turning the heater
on and off. The indicator light will
remain on as long as the switch is on.
When the vehicle’s interior is warmed,
or before you leave the vehicle, be
sure to turn off the switch.
Instruments and controls2-39
Page 168 of 460

4 Center display, heater, air conditioner,audio, phone and voice recognition sys-
tems
Safety note ........................................................................\
................ 4-3
Center multi-function control panel
(models with navigation system) .................................... 4-4
How to use multi-function controller .................... 4-4
How to use touch screen ................................................ 4-5
Menu options ........................................................................\
.... 4-7
How to select menus on the screen ...................... 4-7
Vehicle information and settings (models with
navigation system) ...................................................................... 4-8 How to use STATUS button .......................................... 4-8
How to use brightness control and display
ON/OFF button ........................................................................\
4-8
How to use INFO button .................................................. 4-8
How to use SETTING button ...................................... 4-11
RearView monitor (mirror display type) .................. 4-17 RearView Monitor system operation .................. 4-18
How to read displayed lines ....................................... 4-18
Difference between predictive and
actual distances ................................................................... 4-19
Display settings (Type A) (if so equipped) ....... 4-21
Display settings (Type B) (if so equipped) ....... 4-21
RearView Monitor system limitations ................. 4-22
System maintenance ....................................................... 4-23 RearView Monitor (center display type) (if
so equipped) ........................................................................\
......... 4-24
RearView Monitor system operation ................ 4-24
How to read displayed lines .................................... 4-25
How to park with predictive course lines ...... 4-25
Difference between predictive and
actual distances ................................................................ 4-26
Adjusting the screen ...................................................... 4-28
Predictive course line settings ............................... 4-28
RearView Monitor system limitations .............. 4-28
System maintenance .................................................... 4-29
Ventilators ........................................................................\
.............. 4-30 Center ventilators ............................................................ 4-30
Side ventilators .................................................................. 4-30
Heater and air conditioner ................................................ 4-31 Automatic air conditioner (Type A) (if
so equipped) ........................................................................\
. 4-32
Automatic air conditioner (Type B) (if
so equipped) ........................................................................\
. 4-34
Operating tips ..................................................................... 4-36
In-cabin microfilter .......................................................... 4-36
Servicing air conditioner ............................................. 4-36
Audio system ........................................................................\
....... 4-36
Page 170 of 460

WARNING
.Do not disassemble or modify
this system. If you do, it may
result in accidents, fire, or electric
shock.
. Do not use this system if you
notice any abnormality, such as
a frozen screen or lack of sound.
Continued use of the system may
result in accident, fire or electric
shock.
. In case you notice any foreign
object in the system hardware,
spill liquid on it, or notice smoke
or smell coming from it, stop
using the system immediately. It
is recommended you visit a
NISSAN dealer for servicing.
Ignoring such conditions may
lead to accidents, fire, or electric
shock.
. Park the vehicle in a safe location
and apply the parking brake to
view the images on the front
center display screen.
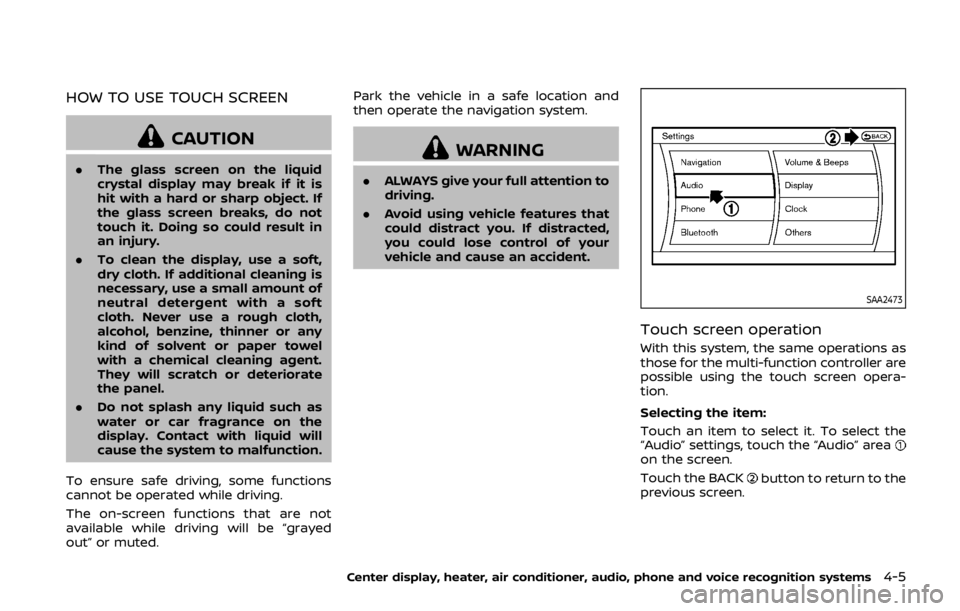
Do not attempt to operate the system in
extreme temperature conditions [below
−4°F (−20°C) and above 158°F (70°C)]. Operating this system under these con-
ditions may result in system malfunc-
tions.
Center display, heater, air conditioner, audio, phone and voice recognition systems4-3
SAFETY NOTE
Page 171 of 460

4-4Center display, heater, air conditioner, audio, phone and voice recognition systems
SAA2273
1. “STATUS” status display button (P.4-8)
2, 3, 7, 8, 9.For navigation system control buttons
(Refer to the separate Navigation System
Owner’s Manual.)
4. Multi-function controller (P.4-4)
5. “PHONE” Bluetooth® Hands-Free Phone System button (P.4-83)
6. “
OFF” brightness control and display
ON/OFF button (P.4-8)
10. “INFO” vehicle and navigation information button (P.4-8)
11. “SETTING” button (P.4-11)
SAA2274
HOW TO USE MULTI-FUNCTION
CONTROLLER
Choose an item on the display using the
main directional buttons(or additional
directional buttonswith navigation
system) or center dial, and push the
ENTER buttonfor operation.
Push the BACK button
to return the
display to the previous screen or delete
characters. Pushing BACK may or may
not save the settings depending on the
menu.
For the VOICE button
functions, refer to
the separate Navigation System Owner’s
Manual.
CENTER MULTI-FUNCTION CONTROL
PANEL (models with navigation system)
Page 172 of 460

HOW TO USE TOUCH SCREEN
CAUTION
.The glass screen on the liquid
crystal display may break if it is
hit with a hard or sharp object. If
the glass screen breaks, do not
touch it. Doing so could result in
an injury.
. To clean the display, use a soft,
dry cloth. If additional cleaning is
necessary, use a small amount of
neutral detergent with a soft
cloth. Never use a rough cloth,
alcohol, benzine, thinner or any
kind of solvent or paper towel
with a chemical cleaning agent.
They will scratch or deteriorate
the panel.
. Do not splash any liquid such as
water or car fragrance on the
display. Contact with liquid will
cause the system to malfunction.
To ensure safe driving, some functions
cannot be operated while driving.
The on-screen functions that are not
available while driving will be “grayed
out” or muted. Park the vehicle in a safe location and
then operate the navigation system.
WARNING
.
ALWAYS give your full attention to
driving.
. Avoid using vehicle features that
could distract you. If distracted,
you could lose control of your
vehicle and cause an accident.
SAA2473
Touch screen operation
With this system, the same operations as
those for the multi-function controller are
possible using the touch screen opera-
tion.
Selecting the item:
Touch an item to select it. To select the
“Audio” settings, touch the “Audio” area
on the screen.
Touch the BACK
button to return to the
previous screen.
Center display, heater, air conditioner, audio, phone and voice recognition systems4-5
Page 173 of 460

4-6Center display, heater, air conditioner, audio, phone and voice recognition systems
SAA2474
Adjusting an item:
Touch the+
or−button to adjust the
settings.
Touch the
orbutton to move
to the previous or next item.
Touch the
orbutton to move
to the previous or next page.
SAA2475
Inputting characters:
Touch the letter or number
.
There are some options available when
inputting characters.
. Uppercase:
Shows uppercase characters.
. Lowercase:
Shows lowercase characters.
. Symbols:
Shows symbols such as the question
mark (?).
. Space:
Inserts a space. .
Delete:
Deletes the last character that has
been input with one touch. Push and
hold the button to delete all of the
characters.
. OK:
Completes character inputs.
Touch screen maintenance
If you clean the display screen, use a dry,
soft cloth. If additional cleaning is neces-
sary, use a small amount of neutral
detergent with a soft cloth. Never spray
the screen with water or detergent.
Dampen the cloth first, and then wipe
the screen.