warning NISSAN 370Z ROADSTER 2017 Z34 Quick Reference Guide
[x] Cancel search | Manufacturer: NISSAN, Model Year: 2017, Model line: 370Z ROADSTER, Model: NISSAN 370Z ROADSTER 2017 Z34Pages: 28, PDF Size: 1.59 MB
Page 2 of 28
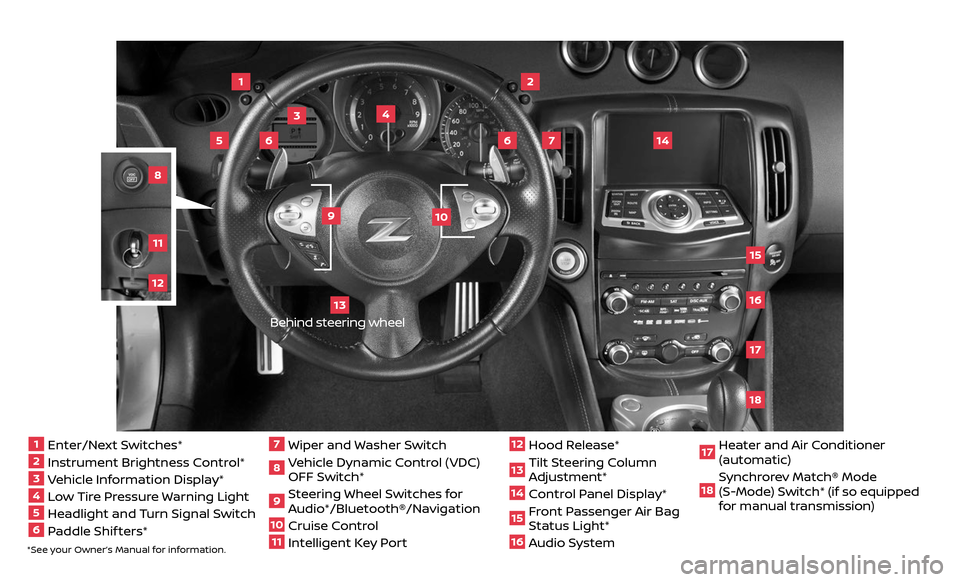
*See your Owner’s Manual for information.1 Enter/Next Switches*2 Instrument Brightness Control*3 Vehicle Information Display*4 Low Tire Pressure Warning Light5 Headlight and Turn Signal Switch6 Paddle Shif ters*
7 Wiper and Washer Switch8 Vehicle Dynamic Control (VDC)
OFF Switch*
9 Steering Wheel Switches for
Audio*/Bluetooth®/Navigation
10 Cruise Control
11 Intelligent Key Port
12 Hood Release*
13 Tilt Steering Column
Adjustment*
14 Control Panel Display* 15 Front Passenger Air Bag
Status Light*
16 Audio System2
3
1
4
6
6
15
5
13
16
14
9
7
10
1718
81211
Behind steering wheel
17 Heater and Air Conditioner (automatic)
18 Synchrorev Match® Mode
(S-Mode) Switch* (if so equipped
for manual transmission)
Page 6 of 28
4
TIRE PRESSURE MONITORING SYSTEM (TPMS)
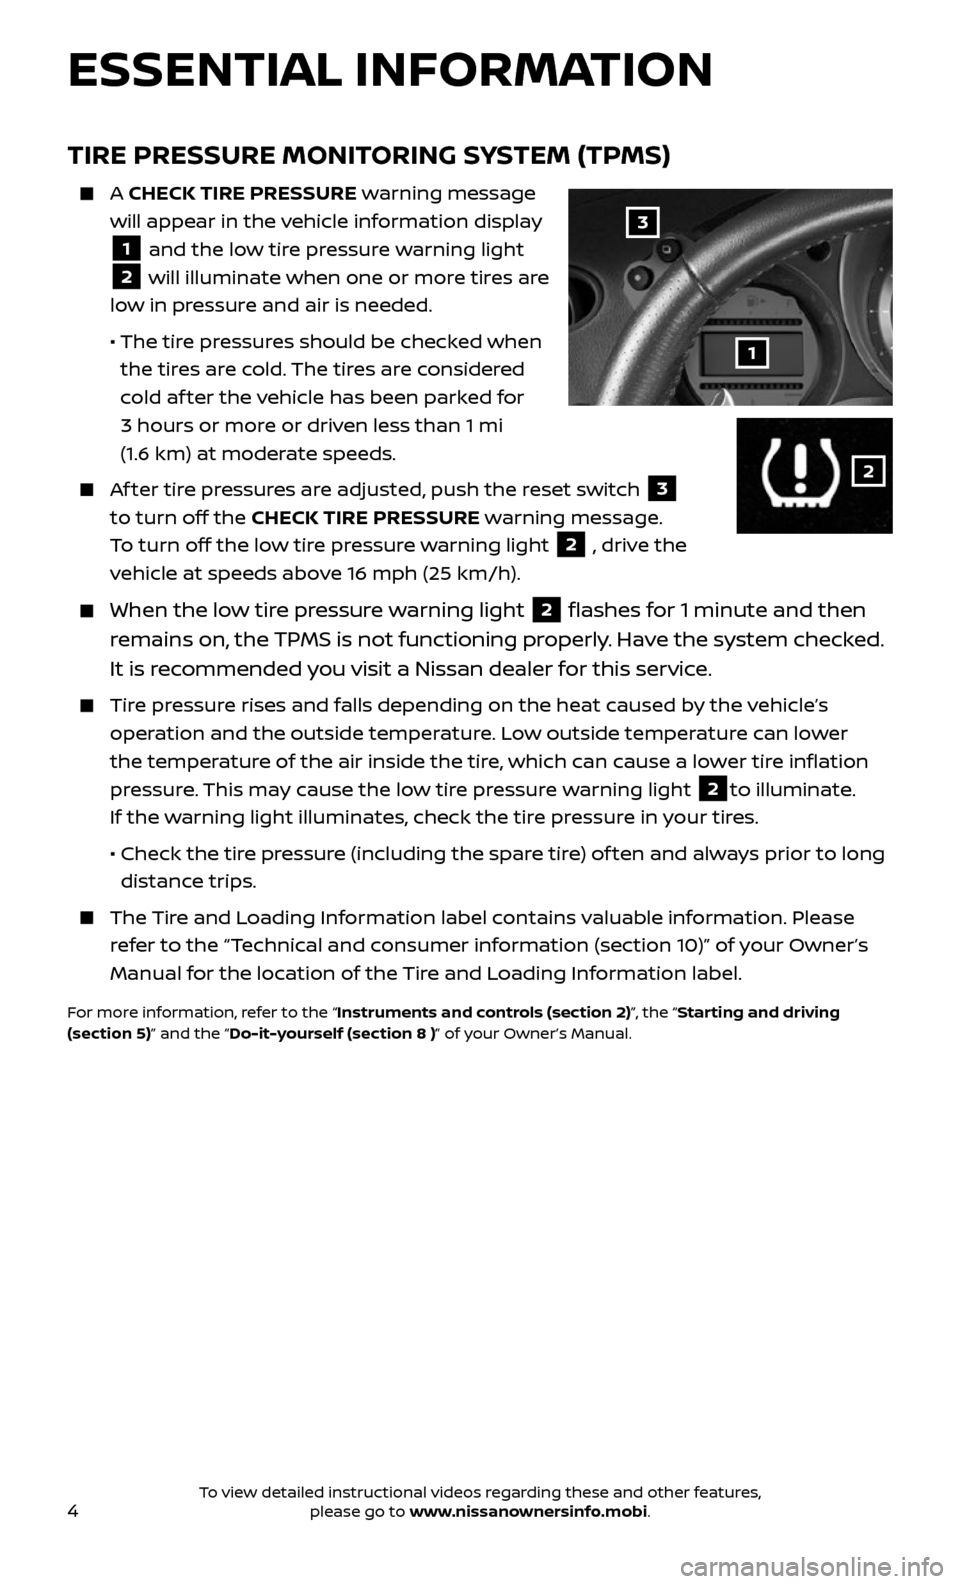
A CHECK TIRE PRESSURE warning message
will appear in the vehicle information display
1 and the low tire pressure warning light
2 will illuminate when one or more tires are
low in pressure and air is needed.
• The tir e pressures should be checked when
the tires are cold. The tires are considered
cold af ter the vehicle has been parked for
3 hours or more or driven less than 1 mi
(1.6 km) at moderate speeds.
Af ter tire pressures are adjusted, push the reset switch 3
to turn off the CHECK TIRE PRESSURE warning message.
To turn off the low tire pressure warning light
2 , drive the
vehicle at speeds above 16 mph (25 km/h).
When the lo w tire pressure warning light 2 flashes for 1 minute and then
remains on, the TPMS is not functioning properly. Have the system checked.
It is recommended you visit a Nissan dealer for this service.
Tire pressure rises and falls depending on the heat caused by the vehicle’s
operation and the outside temperature. Low outside temperature can lower
the temperature of the air inside the tire, which can cause a lower tire inflation
pressure. This may cause the low tire pressure warning light
2to illuminate.
If the warning light illuminates, check the tire pressure in your tires.
• Check the tir e pressure (including the spare tire) of ten and always prior to long
distance trips.
The Tire and Loading Information label contains valuable information. Please
refer to the “Technical and consumer information (section 10)” of your Owner’s
Manual for the location of the Tire and Loading Information label.
For more information, refer to the “Instruments and controls (section 2)”, the “Starting and driving
(section 5)” and the “Do-it-yourself (section 8 )” of your Owner’s Manual.
3
1
2
ESSENTIAL INFORMATION
To view detailed instructional videos regarding these and other features, please go to www.nissanownersinfo.mobi.
Page 7 of 28
5
FUEL-FILLER DOOR
The fuel-filler door is located on the
passenger’s side of the vehicle.
Unlock the fuel-filler door using one of the
following operations then push and release
the lef t side of the door to open:
• Push the door hand le request switch while
carrying the Nissan Intelligent Key® with you.
• Press the button on the Intelligent Key.
• Push the po wer door lock switch to the position.
For more information, refer to the “Pre-driving checks and adjustments (section 3)” of your
Owner’s Manual.
LOOSE FUEL CAP
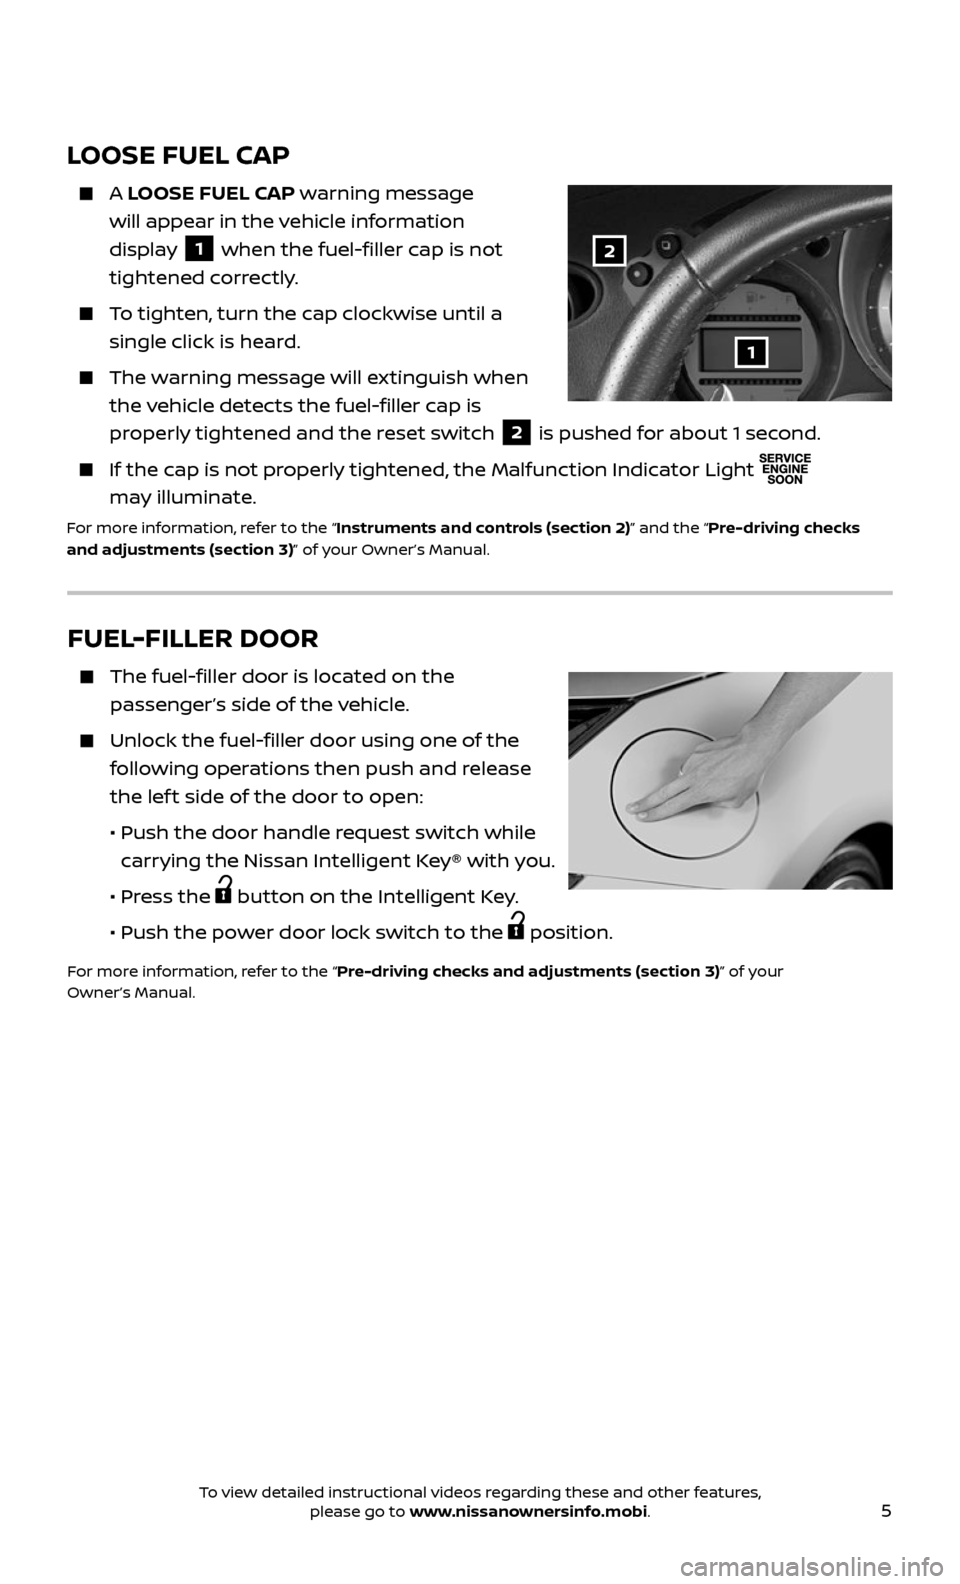
A LOOSE FUEL CAP warning message
will appear in the vehicle information
display
1 when the fuel-filler cap is not
tightened correctly.
To tighten, turn the cap clockwise until a
single click is heard.
The warning message will extinguish when
the vehicle detects the fuel-filler cap is
properly tightened and the reset switch
2 is pushed for about 1 second.
If the cap is not properly tightened, the Malfunction Indicator Light
may illuminate.
For more information, refer to the “Instruments and controls (section 2)” and the “Pre-driving checks
and adjustments (section 3)” of your Owner’s Manual.
2
1
To view detailed instructional videos regarding these and other features, please go to www.nissanownersinfo.mobi.
Page 11 of 28
9
REAR HATCH/TRUNK LID RELEASE
It is important to make sure the Nissan
Intelligent Key® is with you (that is, in your
pocket or purse).
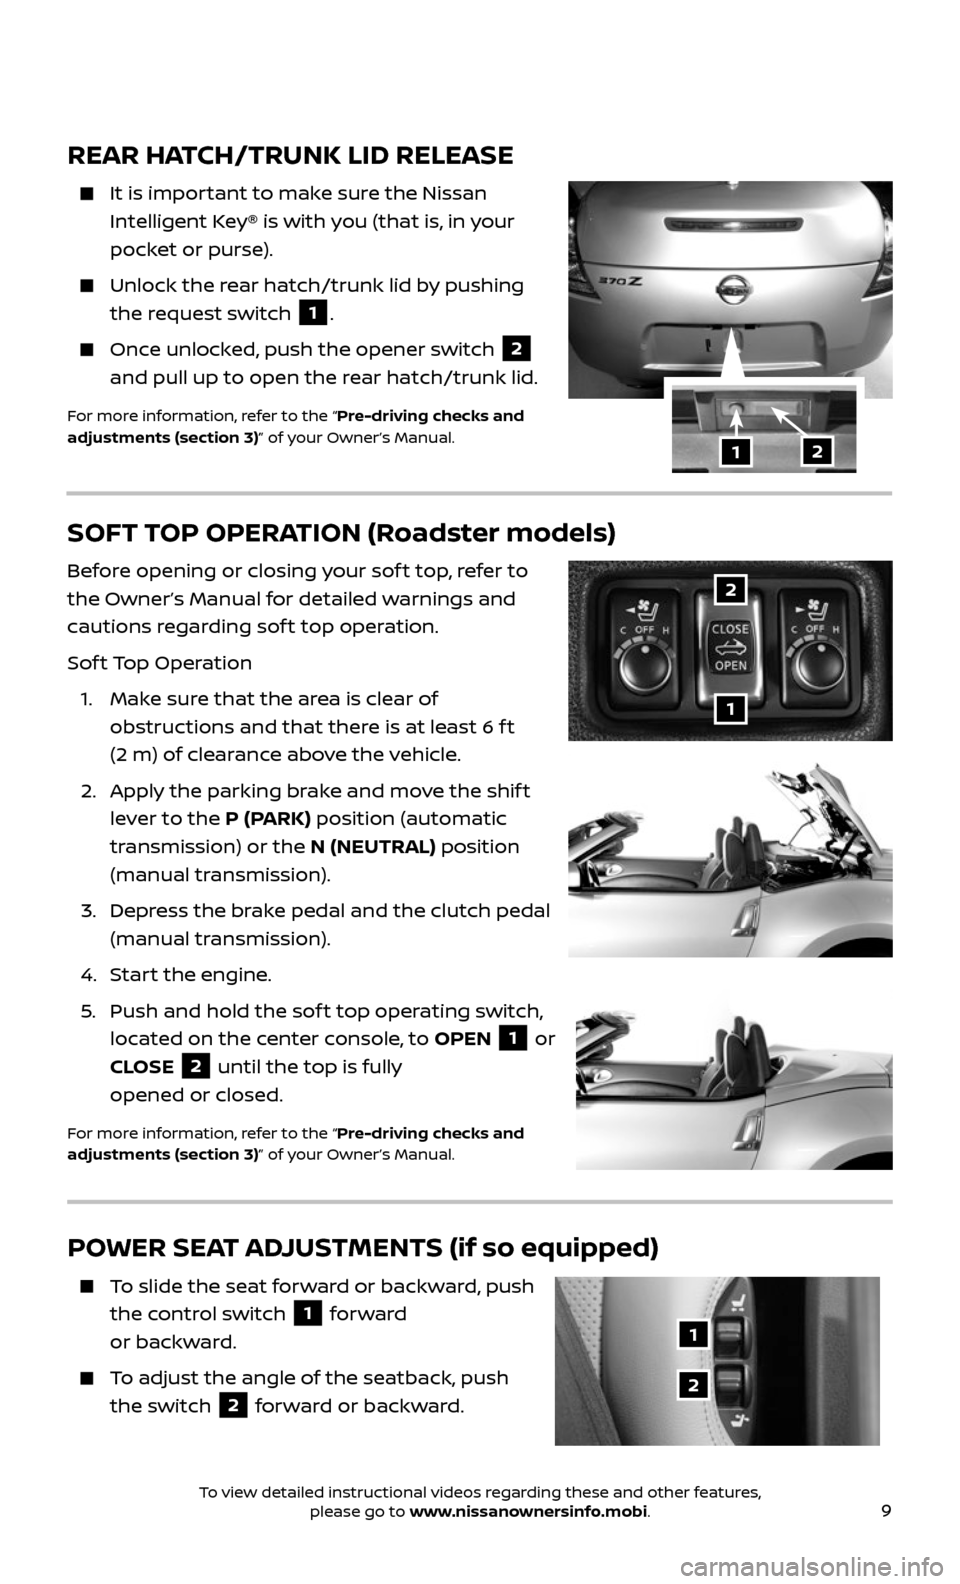
Unlock the r ear hatch/trunk lid by pushing
the request switch 1.
Once unlocked, push the opener switch 2
and pull up to open the rear hatch/trunk lid.
For more information, refer to the “Pre-driving checks and
adjustments (section 3)” of your Owner’s Manual.
12
SOFT TOP OPERATION (Roadster models)
Before opening or closing your sof t top, refer to
the Owner’s Manual for detailed warnings and
cautions regarding sof t top operation.
Sof t Top Operation
1. Make sure that the area is clear of
obstructions and that there is at least 6 f t
(2 m) of clearance above the vehicle.
2. Apply the parking brake and move the shif t
lever to the P (PARK) position (automatic
transmission) or the N (NEUTRAL) position
(manual transmission).
3. Depress the brake pedal and the clutch pedal
(manual transmission).
4. Start the engine.
5. Push and hold the sof t top operating switch,
located on the center console, to OPEN 1 or
CLOSE
2 until the top is fully
opened or closed.
For more information, refer to the “Pre-driving checks and
adjustments (section 3)” of your Owner’s Manual.
1
2
POWER SEAT ADJUSTMENTS (if so equipped)
To slide the seat forward or backward, push
the control switch 1 forward
or backward.
To adjust the angle of the seatback, push
the switch 2 forward or backward.
1
2
To view detailed instructional videos regarding these and other features, please go to www.nissanownersinfo.mobi.
Page 18 of 28
16
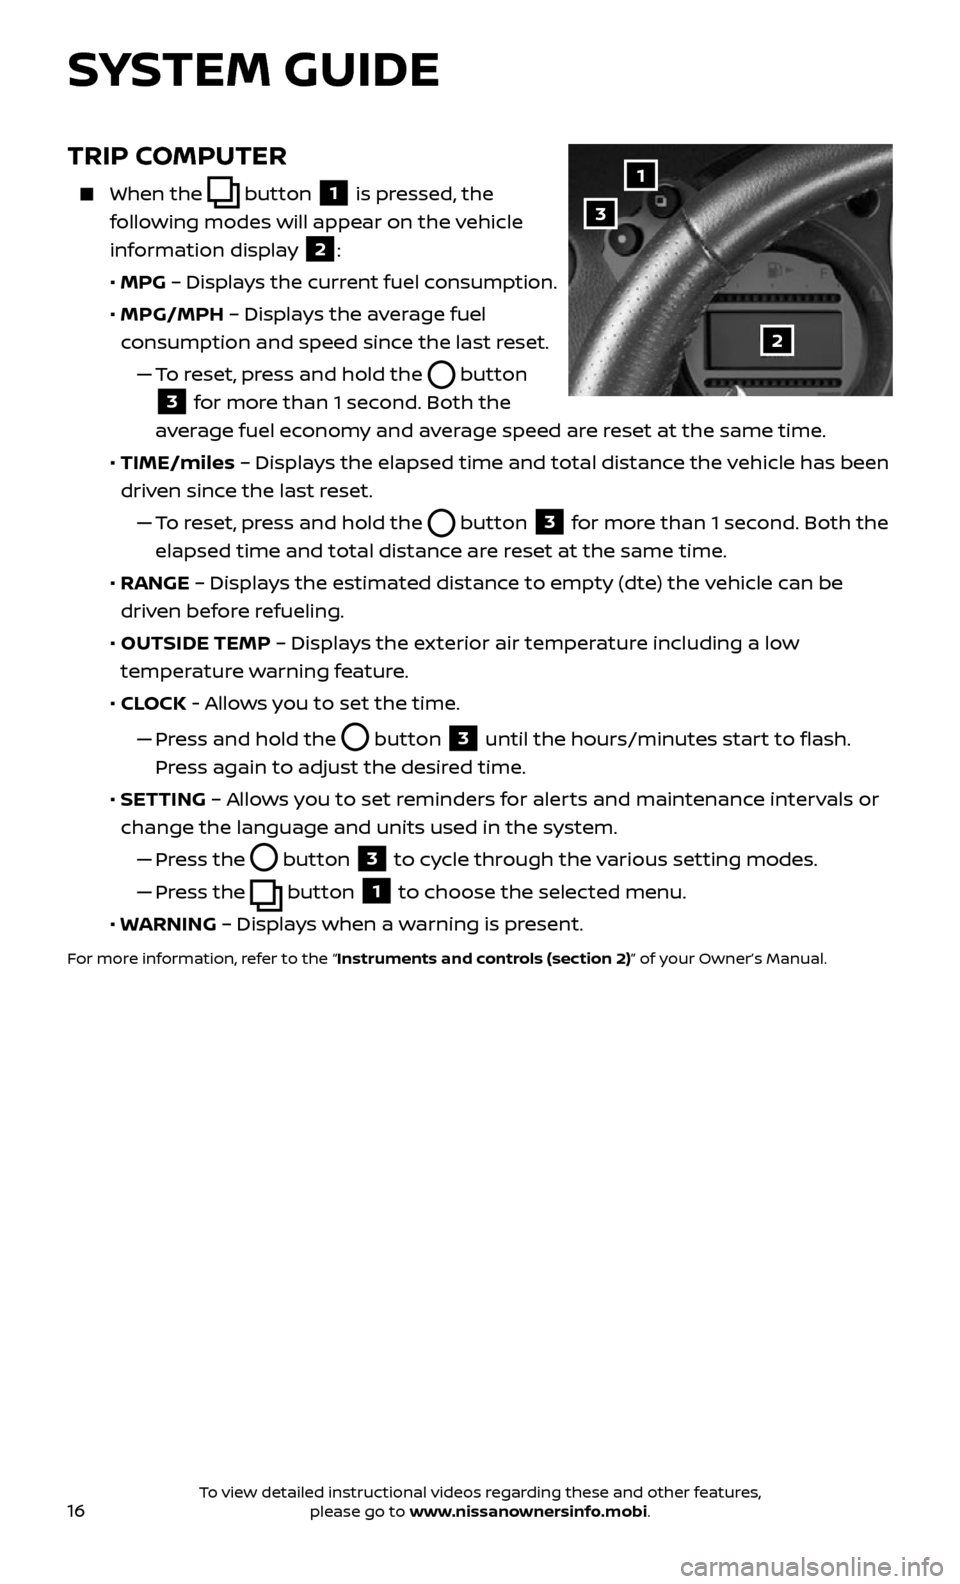
TRIP COMPUTER
When the button 1 is pressed, the
following modes will appear on the vehicle
information display
2:
• MPG – Displays the current fuel consumption.
• MPG/MPH – Displays the average fuel
consumption and speed since the last reset.
— To reset, press and hold the button
3 for more than 1 second. Both the
average fuel economy and average speed are reset at the same time.
• TIME/miles – Displays the elapsed time and total distance the vehicle has been
driven since the last reset.
— To reset, press and hold the button 3 for more than 1 second. Both the
elapsed time and total distance are reset at the same time.
• RANGE – Displays the estimated distance to empty (dte) the vehicle can be
driven before refueling.
• OUTSIDE TEMP – Displays the exterior air temperature including a low
temperature warning feature.
• CLOCK - Allows you to set the time.
— Pr ess and hold the button 3 until the hours/minutes start to flash.
Press again to adjust the desired time.
• SETTING – Allows you to set reminders for alerts and maintenance intervals or
change the language and units used in the system.
— Press the button 3 to cycle through the various setting modes.
— Press the button 1 to choose the selected menu.
• WARNING – Displays when a warning is present.
For more information, refer to the “Instruments and controls (section 2)” of your Owner’s Manual.
1
3
2
SYSTEM GUIDE
To view detailed instructional videos regarding these and other features, please go to www.nissanownersinfo.mobi.