flat tire NISSAN ALTIMA 1996 U13 / 1.G Owners Manual
[x] Cancel search | Manufacturer: NISSAN, Model Year: 1996, Model line: ALTIMA, Model: NISSAN ALTIMA 1996 U13 / 1.GPages: 183, PDF Size: 1.38 MB
Page 84 of 183
1) Move the shift lever into the ``P'' (Park)
position.
2) Turn the ignition key slightly in the ``ON''
direction.
3) Turn the key toward the ``LOCK'' posi-
tion.
4) Remove the key.
If the key is removed from the ignition
switch, the shift lever cannot be moved from
``P'' (Park).The shift lever can be moved if
the ignition switch is in the ``ACC'' posi-
tion. The shift lever can also be moved if
the ignition switch is in the ``ON'' posi-
tion and the foot brake pedal is de-
pressed.
There is an ``OFF'' position in between
``LOCK'' and ``ACC'', although it does not
show on the key cylinder. When the ignition
is in ``OFF'' the steering wheel is not locked.
In order for the steering wheel to be locked,
it must be turned about 1/8 of a turn coun-
terclockwise from the straight up position,
and the key must be removed from the
ignition.WARNING
To lock the steering wheel, remove the
key. To unlock the steering wheel, in-
sert the key and turn it gently while
rotating the steering wheel slightly
right and left.
Never remove the key while driving. If
the key is removed, the steering wheel
will lock. This may cause the driver to
lose control of the vehicle and could
result in serious vehicle damage or
personal injury.
``OFF'' (Manual transmission model) (1)
The engine can be turned off without locking
the steering wheel.
``ACC'' (Accessories) (2)
This position activates electrical accesso-
ries such as the radio when the engine is
not running.
``ON'' Normal operating position (3)
This position turns on the ignition system
and the electrical accessories.``START'' (4)
This position activates the starter motor,
which starts the engine.
cMake sure the area around the vehicle is
clear.
cMaintenance items listed here should be
checked periodically, for example, each
time you check engine oil.
cCheck that all windows and lights are
clean.
cVisually inspect tires for their appearance
and condition. Also check tires for proper
inflation.
cLock all doors.
cPosition seat and adjust head restraints.
cAdjust inside and outside mirrors.
cFasten seat belts and ask all passengers
to do likewise.
cCheck the operation of warning lights
when key is turned to the ``ON'' (3) posi-
tion.
BEFORE STARTING THE
ENGINE
4-5
ZX
Page 92 of 183

cAccelerate slowly and smoothly. Main-
tain cruising speeds with a constant ac-
celerator position.
cDrive at moderate speeds on the high-
way. Driving at high speed will lower fuel
economy.
cAvoid unnecessary stopping and brak-
ing. Maintain a safe distance behind
other vehicles.
cUse a proper gear range which suits road
conditions. On level roads, shift into high
gear as soon as possible.
cAvoid unnecessary engine idling.cKeep your engine tuned up.
cFollow the recommended periodic main-
tenance schedule.
cKeep the tires inflated at the correct
pressure. Low pressure will increase tire
wear and waste fuel.
cKeep the front wheels in correct align-
ment. Improper alignment will cause not
only tire wear but also lower fuel
economy.
cAir conditioning operation lowers fuel
economy. Use the air conditioning only
when necessary.
cWhen cruising at highway speeds, it is
more economical to use the air condition-
ing and leave the windows closed to
reduce drag.
SD1001M
INCREASING FUEL
ECONOMY
4-13
ZX
Page 98 of 183

5 In case of emergency
Flat tire ................................................................. 5-2
Jump starting ........................................................ 5-7
Push starting ........................................................ 5-8
If your vehicle overheats ...................................... 5-9
Tow truck towing ................................................ 5-10
ZX
Page 99 of 183
If you have a flat tire, follow the instructions
below.
Stopping the vehicle
1. Safely move the vehicle off the road
away from traffic.
2. Turn on the hazard warning flashers.
3. Park on a level surface and apply the
parking brake. Shift the manual transmis-
sion into reverse (automatic transmission
in ``P'').
4. Turn off the engine.
WARNING
cMake sure that the parking brake is
securely applied and the manual
transmission is shifted into reverse
(automatic transmission in ``P'').
cNever change tires when the vehicle
is on a slope, ice or slippery areas.
This is dangerous.
cNever change tires if oncoming traf-
fic is close to your vehicle. Wait for
professional road assistance.cRaise the hood to warn other traffic,
and to signal professional road as-
sistance personnel that you need
assistance.
cHave all passengers get out of the
vehicle and stand in a safe place,
away from traffic and clear of the
vehicle.Getting the spare tire and tools
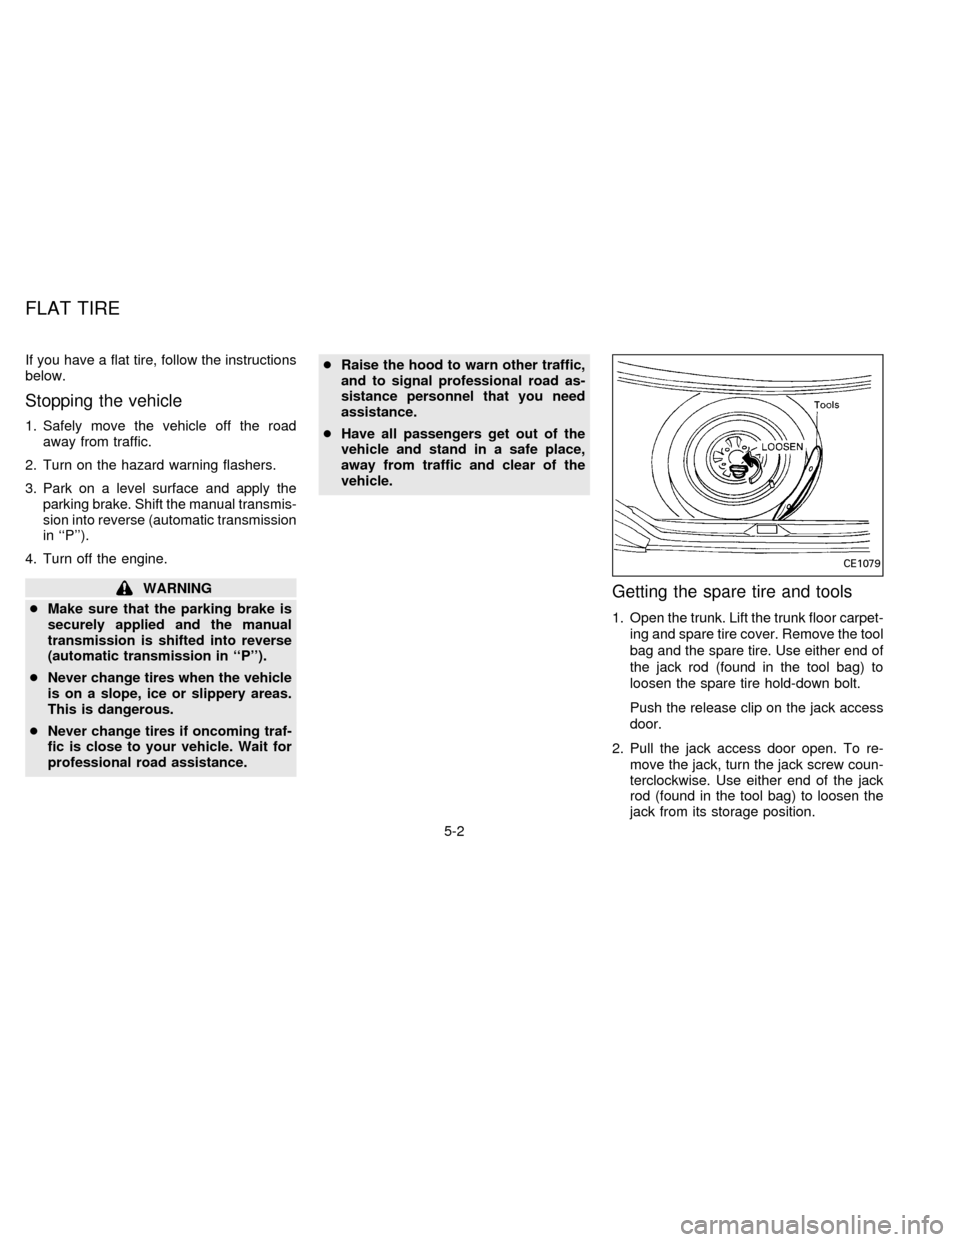
1. Open the trunk. Lift the trunk floor carpet-
ing and spare tire cover. Remove the tool
bag and the spare tire. Use either end of
the jack rod (found in the tool bag) to
loosen the spare tire hold-down bolt.
Push the release clip on the jack access
door.
2. Pull the jack access door open. To re-
move the jack, turn the jack screw coun-
terclockwise. Use either end of the jack
rod (found in the tool bag) to loosen the
jack from its storage position.
CE1079
FLAT TIRE
5-2
ZX
Page 100 of 183
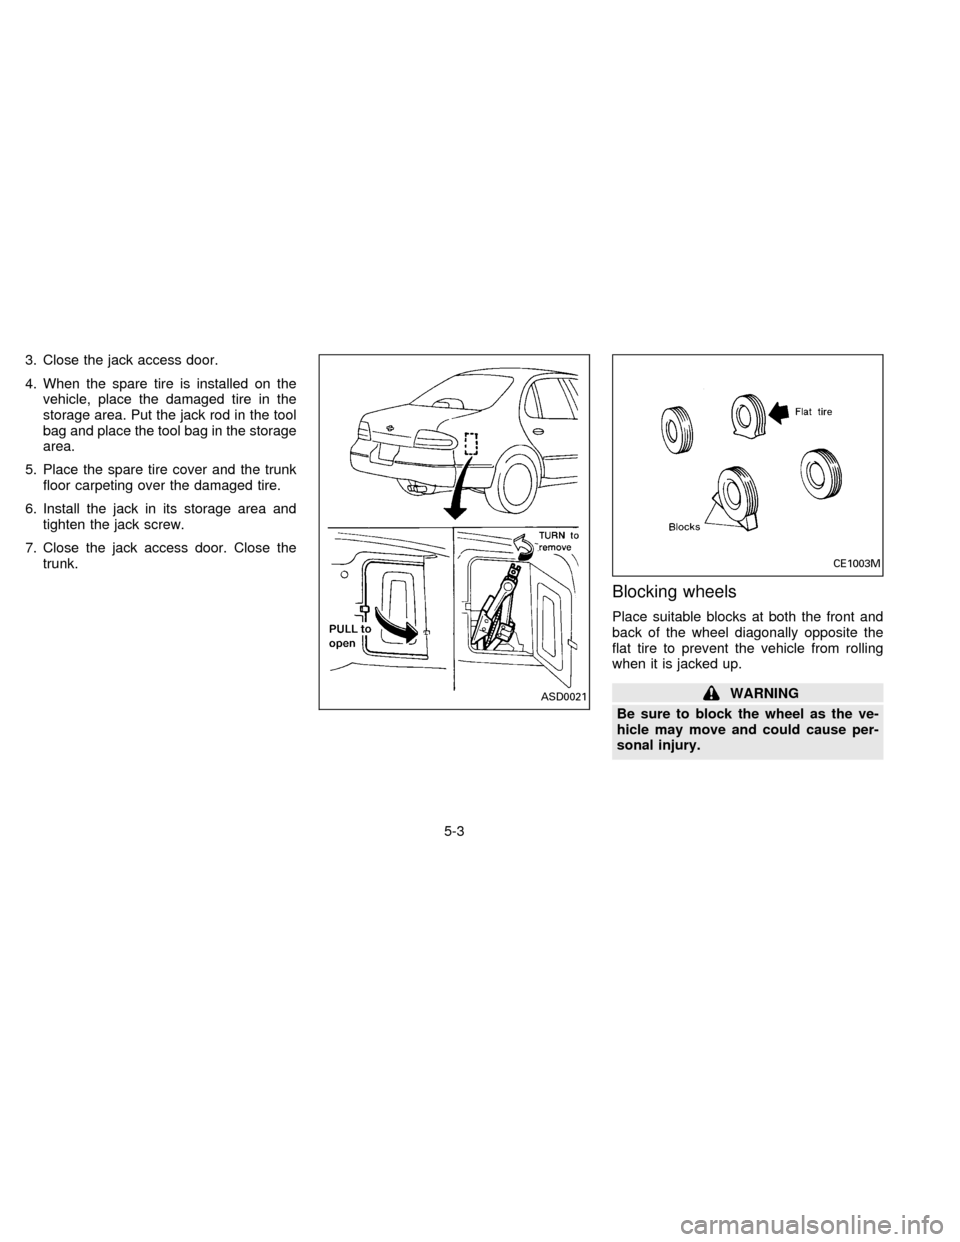
3. Close the jack access door.
4. When the spare tire is installed on the
vehicle, place the damaged tire in the
storage area. Put the jack rod in the tool
bag and place the tool bag in the storage
area.
5. Place the spare tire cover and the trunk
floor carpeting over the damaged tire.
6. Install the jack in its storage area and
tighten the jack screw.
7. Close the jack access door. Close the
trunk.
Blocking wheels
Place suitable blocks at both the front and
back of the wheel diagonally opposite the
flat tire to prevent the vehicle from rolling
when it is jacked up.
WARNING
Be sure to block the wheel as the ve-
hicle may move and could cause per-
sonal injury.ASD0021
CE1003M
5-3
ZX
Page 137 of 183
7. Remove the headlight bulb. Do not shake
or rotate the bulb when removing it.
8. Install the new bulb in the reverse order
of removal.
cBe sure the lip of the rubber cap
contacts the headlight body.
DO NOT TOUCH THE BULB.
CAUTION
cUse the same number and wattage
as originally installed:
Wattage 60/55
Bulb No. HB2
cAiming is not necessary after replac-
ing the bulb.
cDo not leave the bulb out of the
headlight reflector for a long period
of time as dust, moisture, and smoke
may enter the headlight body and
affect the performance of the head-
light.
HEADLIGHT AIMING
ADJUSTMENT
Before performing aiming adjustment, make
sure of the following.
a. Keep all tires inflated to correct pressure.
b. Place vehicle on level ground.
c. See that vehicle is unloaded (except for
full levels of coolant, engine oil and fuel,
and spare tire, jack, and tools). Have the
driver or equivalent weight placed in driv-
er's seat.
Low beam
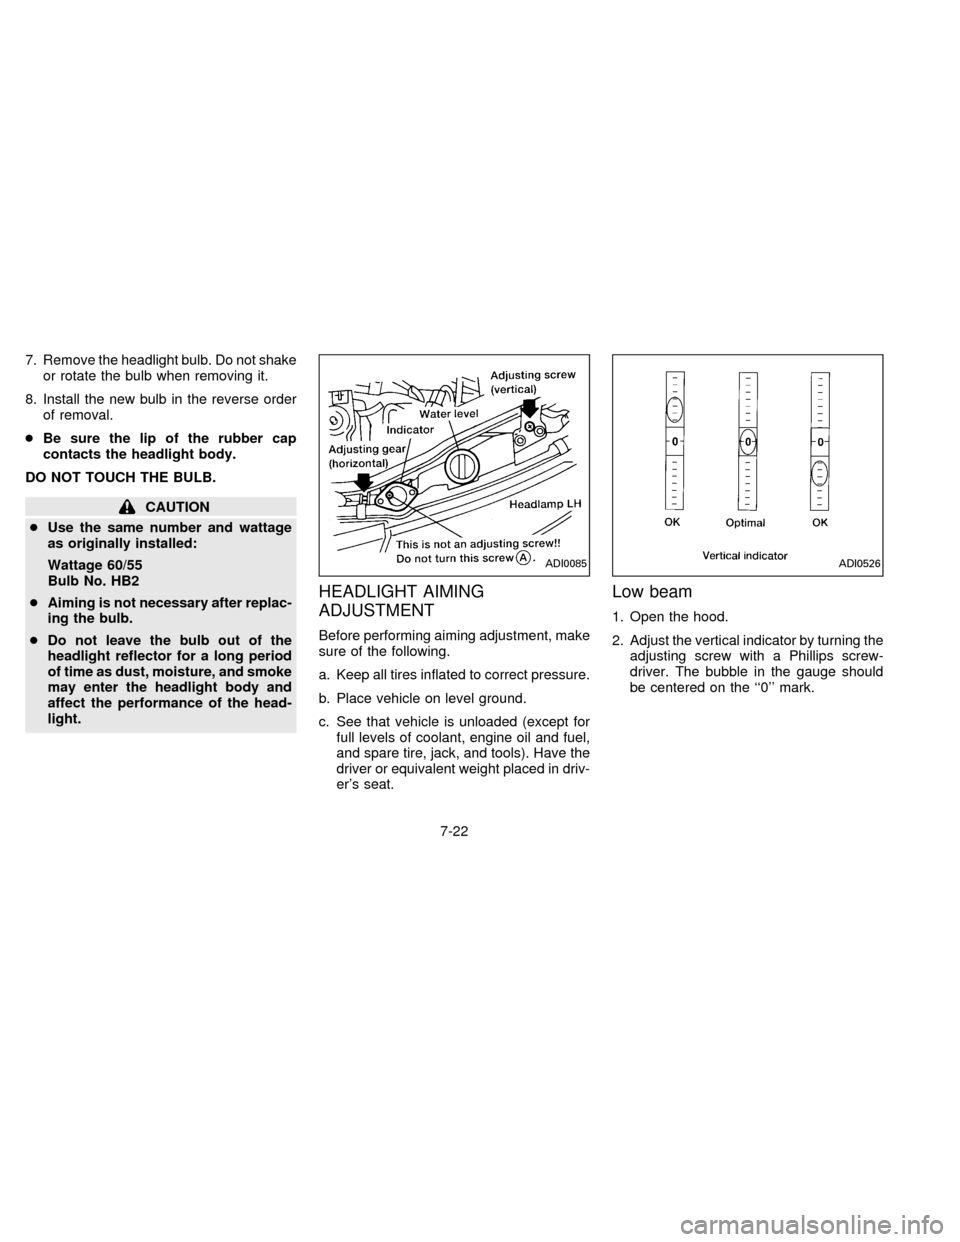
1. Open the hood.
2. Adjust the vertical indicator by turning the
adjusting screw with a Phillips screw-
driver. The bubble in the gauge should
be centered on the ``0'' mark.
ADI0085ADI0526
7-22
ZX
Page 143 of 183
If you have a flat tire, see the ``In case of
emergency'' section.
Maximum inflation pressure
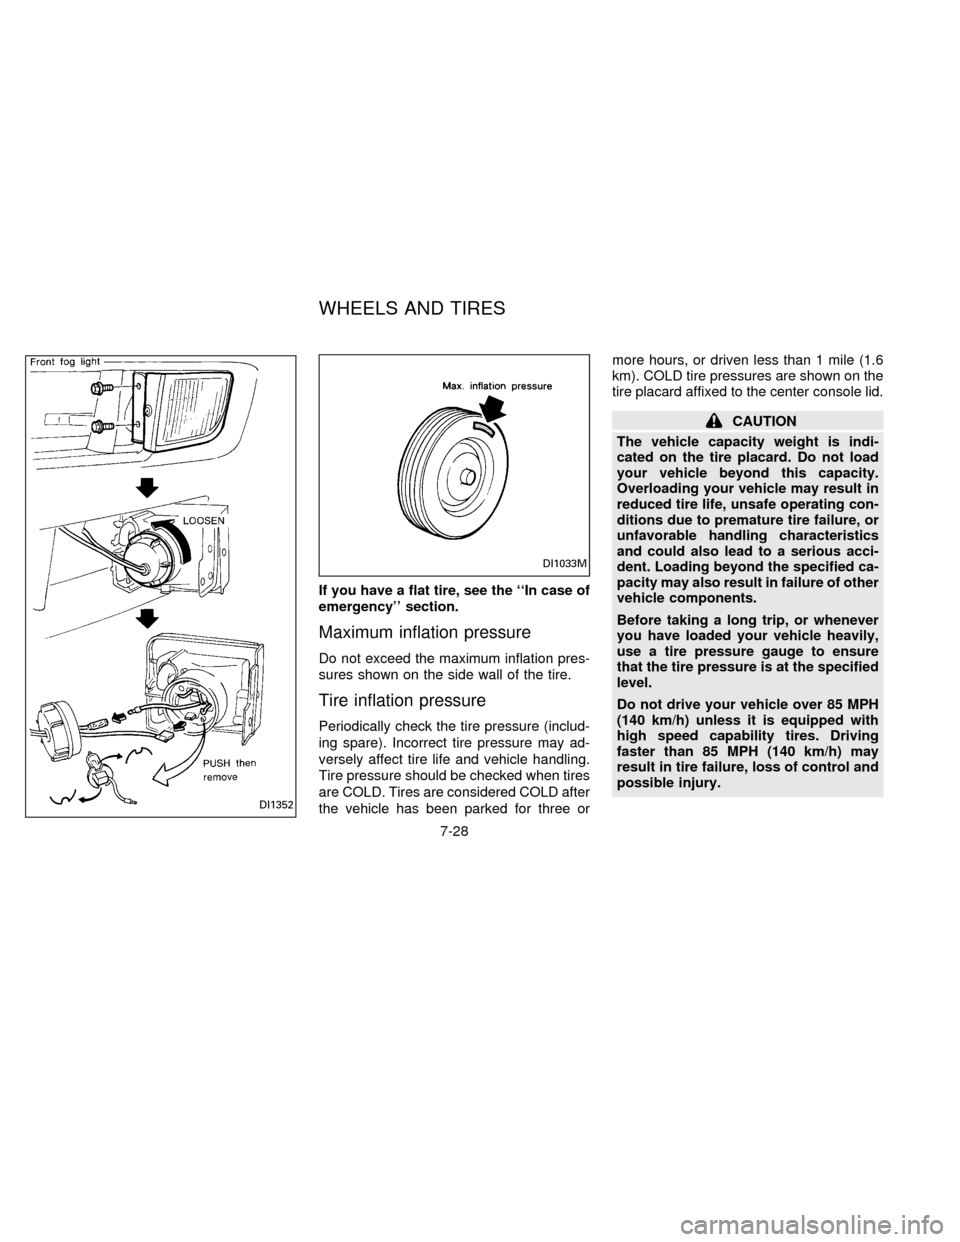
Do not exceed the maximum inflation pres-
sures shown on the side wall of the tire.
Tire inflation pressure
Periodically check the tire pressure (includ-
ing spare). Incorrect tire pressure may ad-
versely affect tire life and vehicle handling.
Tire pressure should be checked when tires
are COLD. Tires are considered COLD after
the vehicle has been parked for three ormore hours, or driven less than 1 mile (1.6
km). COLD tire pressures are shown on the
tire placard affixed to the center console lid.
CAUTION
The vehicle capacity weight is indi-
cated on the tire placard. Do not load
your vehicle beyond this capacity.
Overloading your vehicle may result in
reduced tire life, unsafe operating con-
ditions due to premature tire failure, or
unfavorable handling characteristics
and could also lead to a serious acci-
dent. Loading beyond the specified ca-
pacity may also result in failure of other
vehicle components.
Before taking a long trip, or whenever
you have loaded your vehicle heavily,
use a tire pressure gauge to ensure
that the tire pressure is at the specified
level.
Do not drive your vehicle over 85 MPH
(140 km/h) unless it is equipped with
high speed capability tires. Driving
faster than 85 MPH (140 km/h) may
result in tire failure, loss of control and
possible injury.
DI1352
DI1033M
WHEELS AND TIRES
7-28
ZX
Page 145 of 183
Tire rotation
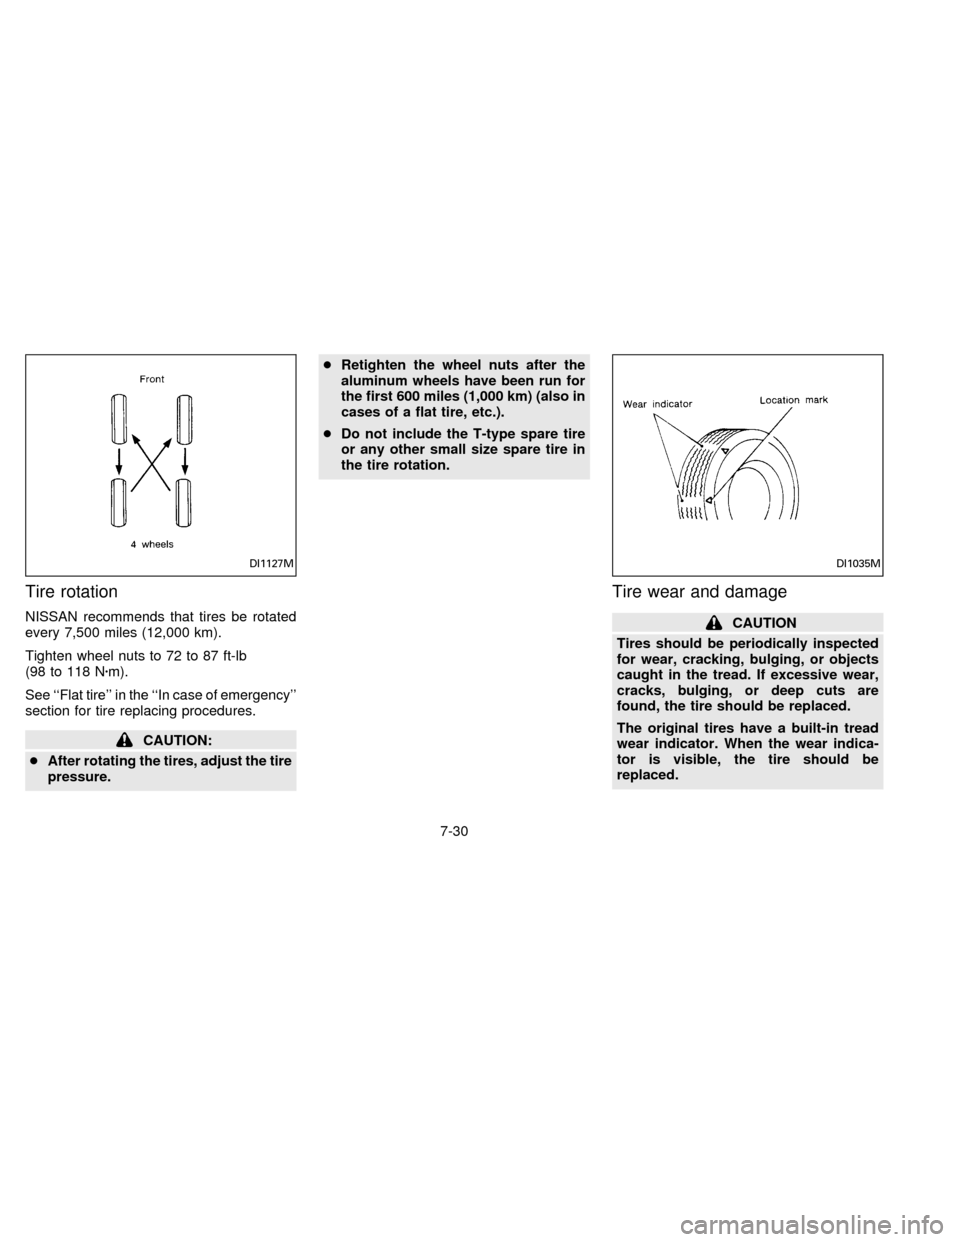
NISSAN recommends that tires be rotated
every 7,500 miles (12,000 km).
Tighten wheel nuts to 72 to 87 ft-lb
(98 to 118 Nzm).
See ``Flat tire'' in the ``In case of emergency''
section for tire replacing procedures.
CAUTION:
cAfter rotating the tires, adjust the tire
pressure.cRetighten the wheel nuts after the
aluminum wheels have been run for
the first 600 miles (1,000 km) (also in
cases of a flat tire, etc.).
cDo not include the T-type spare tire
or any other small size spare tire in
the tire rotation.
Tire wear and damage
CAUTION
Tires should be periodically inspected
for wear, cracking, bulging, or objects
caught in the tread. If excessive wear,
cracks, bulging, or deep cuts are
found, the tire should be replaced.
The original tires have a built-in tread
wear indicator. When the wear indica-
tor is visible, the tire should be
replaced.
DI1127MDI1035M
7-30
ZX
Page 147 of 183
corrosion. Such damage may cause loss
of pressure or poor seal at the tire bead.
cNISSAN recommends that the road
wheels be waxed to protect against road
salt in areas where it is used during
winter.
Spare tire (T-type spare tire)
Observe the following precautions if the
T-type spare tire must be used, otherwise
your vehicle could be damaged or involved
in an accident.
CAUTION
cThe T-type spare tire should be used
only for an emergency. It should be
replaced by the standard tire at the
first opportunity.
cDrive carefully while the T-type
spare tire is installed. Avoid sharp
turns and abrupt braking while
driving.
cPeriodically check tire inflation pres-
sure, and always keep it at 60 psi
(420 kPa, 4.2 bar).cDo not drive your vehicle at speeds
faster than 50 MPH (80 km/h).
cDo not use tire chains on a T-type
spare tire. Tire chains will not fit
properly on the T-type spare tire and
may cause damage to the vehicle.
cWhen driving on roads covered with
snow or ice, the T-type spare tire
should be used on the rear wheel
and the original tire used on the front
wheels (drive wheels). Use tire
chains only on the front two original
tires.
cTire tread of the T-type spare tire will
wear at a faster rate than the original
tire. Replace the T-type spare tire as
soon as the tread wear indicators
appear.
cBecause the T-type spare tire is
smaller than the original tire, ground
clearance is reduced. To avoid dam-
age to the vehicle do not drive over
obstacles. Also do not drive the ve-
hicle through an automatic car wash
since it may get caught.cDo not use the T-type spare tire on
other vehicles.
cDo not use more than one T-type
spare tire at the same time.
cDo not tow a trailer while the T-type
spare tire is installed.
7-32
ZX
Page 172 of 183
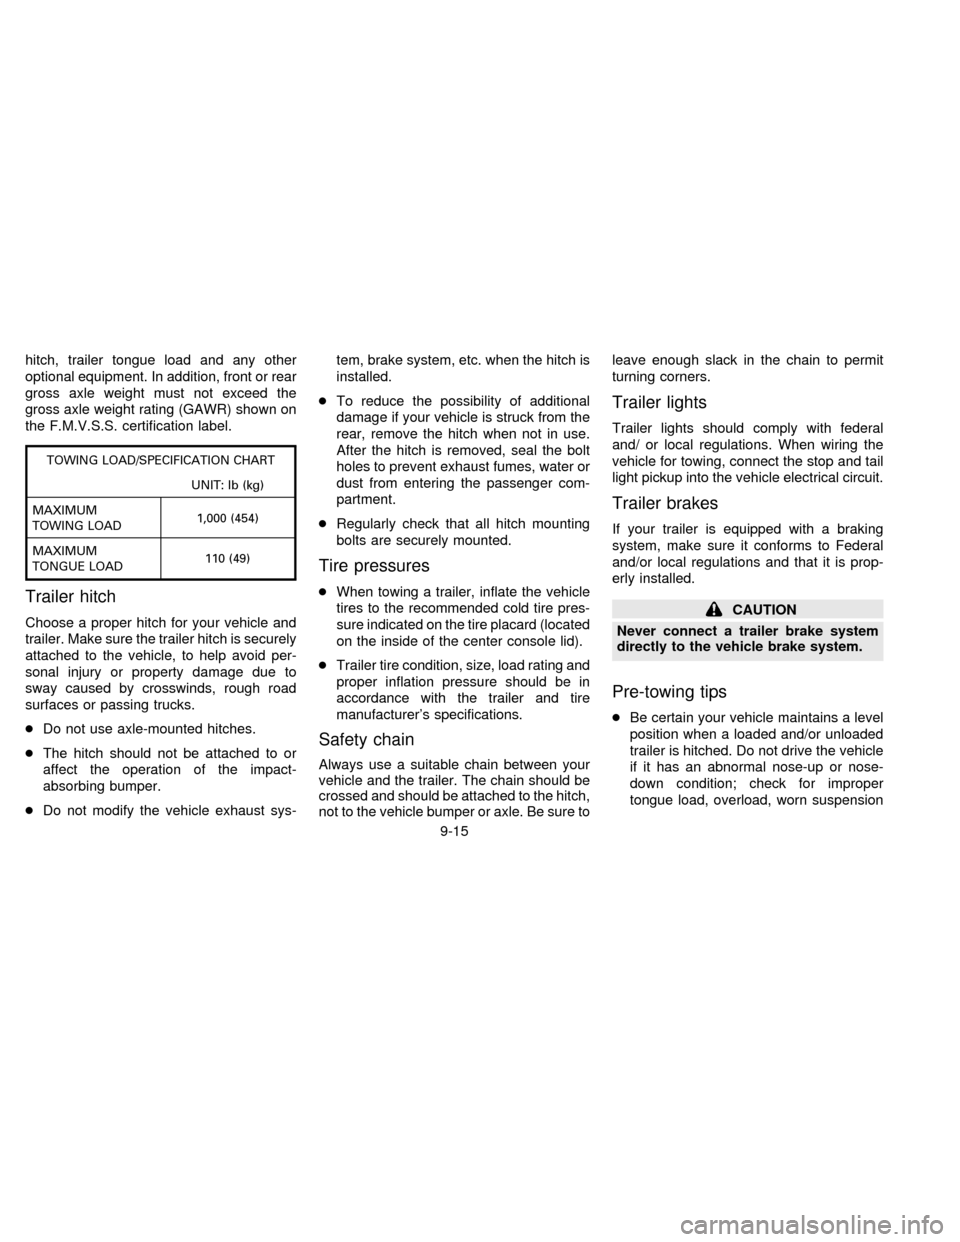
hitch, trailer tongue load and any other
optional equipment. In addition, front or rear
gross axle weight must not exceed the
gross axle weight rating (GAWR) shown on
the F.M.V.S.S. certification label.
TOWING LOAD/SPECIFICATION CHART
UNIT: lb (kg)
MAXIMUM
TOWING LOAD1,000 (454)
MAXIMUM
TONGUE LOAD110 (49)
Trailer hitch
Choose a proper hitch for your vehicle and
trailer. Make sure the trailer hitch is securely
attached to the vehicle, to help avoid per-
sonal injury or property damage due to
sway caused by crosswinds, rough road
surfaces or passing trucks.
cDo not use axle-mounted hitches.
cThe hitch should not be attached to or
affect the operation of the impact-
absorbing bumper.
cDo not modify the vehicle exhaust sys-tem, brake system, etc. when the hitch is
installed.
cTo reduce the possibility of additional
damage if your vehicle is struck from the
rear, remove the hitch when not in use.
After the hitch is removed, seal the bolt
holes to prevent exhaust fumes, water or
dust from entering the passenger com-
partment.
cRegularly check that all hitch mounting
bolts are securely mounted.
Tire pressures
cWhen towing a trailer, inflate the vehicle
tires to the recommended cold tire pres-
sure indicated on the tire placard (located
on the inside of the center console lid).
cTrailer tire condition, size, load rating and
proper inflation pressure should be in
accordance with the trailer and tire
manufacturer's specifications.
Safety chain
Always use a suitable chain between your
vehicle and the trailer. The chain should be
crossed and should be attached to the hitch,
not to the vehicle bumper or axle. Be sure toleave enough slack in the chain to permit
turning corners.
Trailer lights
Trailer lights should comply with federal
and/ or local regulations. When wiring the
vehicle for towing, connect the stop and tail
light pickup into the vehicle electrical circuit.
Trailer brakes
If your trailer is equipped with a braking
system, make sure it conforms to Federal
and/or local regulations and that it is prop-
erly installed.
CAUTION
Never connect a trailer brake system
directly to the vehicle brake system.
Pre-towing tips
cBe certain your vehicle maintains a level
position when a loaded and/or unloaded
trailer is hitched. Do not drive the vehicle
if it has an abnormal nose-up or nose-
down condition; check for improper
tongue load, overload, worn suspension
9-15
ZX