weight NISSAN ALTIMA 1996 U13 / 1.G Owners Manual
[x] Cancel search | Manufacturer: NISSAN, Model Year: 1996, Model line: ALTIMA, Model: NISSAN ALTIMA 1996 U13 / 1.GPages: 183, PDF Size: 1.38 MB
Page 2 of 183

Welcome To The World Of NISSAN
Your new Nissan is the result of our dedication to
produce the finest in safe, reliable and economi-
cal transportation. Your vehicle is the product of
a successful worldwide company that manufac-
tures cars and trucks in over 20 countries and
distributes them in 150 nations.
Nissan vehicles are designed and manufactured
by Nissan Motor Co., Ltd. which was founded in
Tokyo, Japan in 1933, and Nissan affiliates world
wide, collectively growing to become the fourth
largest automaker in the world. In addition to cars
and trucks, Nissan also makes textile machinery,
forklift trucks, marine engines, boats and other
products.
Nissan has made a substantial and growing
investment in North America, starting with the
opening of Nissan Motor Corporation in U.S.A. in
1960, continuing with the production of some
cars and trucks at one of the world's mostmodern manufacturing facilities in Smyrna, Ten-
nessee, vehicle styling at Nissan Design Interna-
tional in San Diego, California, and engineering
at Nissan Research and Development in Farm-
ington Hills, Michigan.
Nissan Motor Corporation in U.S.A. and its deal-
ers employ about 50,000 Americans.
Nissan is also a substantial contributor to the
Canadian economy. Nissan Canada Inc. and its
200 dealers and suppliers employ approximately
4,000 people. These include company employ-
ees and the staffs of Nissan dealers all across
Canada. In addition, many Canadians work for
companies that supply Nissan and Nissan deal-
ers with materials and services ranging from the
operation of port facilities and transportation ser-
vices, to the supply of lubricants, parts and
accessories.Nissan pioneered the use of electronics and
computers in automobiles, and has led the indus-
try in improving both performance and fuel effi-
ciency through new engine designs and the use
of synthetic materials to reduce vehicle weight.
The company has also developed ways to build
quality into its vehicles at each stage of the
production process, both through extensive use
of automation and Ð most importantly Ð
through an awareness thatpeopleare the cen-
tral element in quality control.
From the time the parts arrived from our suppli-
ers until you took delivery of your new Nissan,
dozens of checks were made to ensure that only
the best job was being done in producing and
delivering your vehicle. Nissan also takes great
care to ensure that when you take your Nissan to
your dealer for maintenance, the service techni-
cian will perform his work according to the quality
standards that have been established by the
factory.
Safety has also been built into your Nissan. As
you know, seat belts are an integral part of the
safety systems that will help protect you and your
passengers in the event of a sudden stop or an
accident. We urge you to use the belts every time
you drive the vehicle.
The Nissan story of growth and achievement
reflects our major goal: to provide you, our
customer, with a vehicle that is built with quality
and craftsmanship Ð a product that we can be
proud to build and you can be proud to own.
AFW0001
The inside pages of this manual contain
a minimum of 50% recycled fibers,
including 10% post-consumer fibers.
ZX
Page 137 of 183
7. Remove the headlight bulb. Do not shake
or rotate the bulb when removing it.
8. Install the new bulb in the reverse order
of removal.
cBe sure the lip of the rubber cap
contacts the headlight body.
DO NOT TOUCH THE BULB.
CAUTION
cUse the same number and wattage
as originally installed:
Wattage 60/55
Bulb No. HB2
cAiming is not necessary after replac-
ing the bulb.
cDo not leave the bulb out of the
headlight reflector for a long period
of time as dust, moisture, and smoke
may enter the headlight body and
affect the performance of the head-
light.
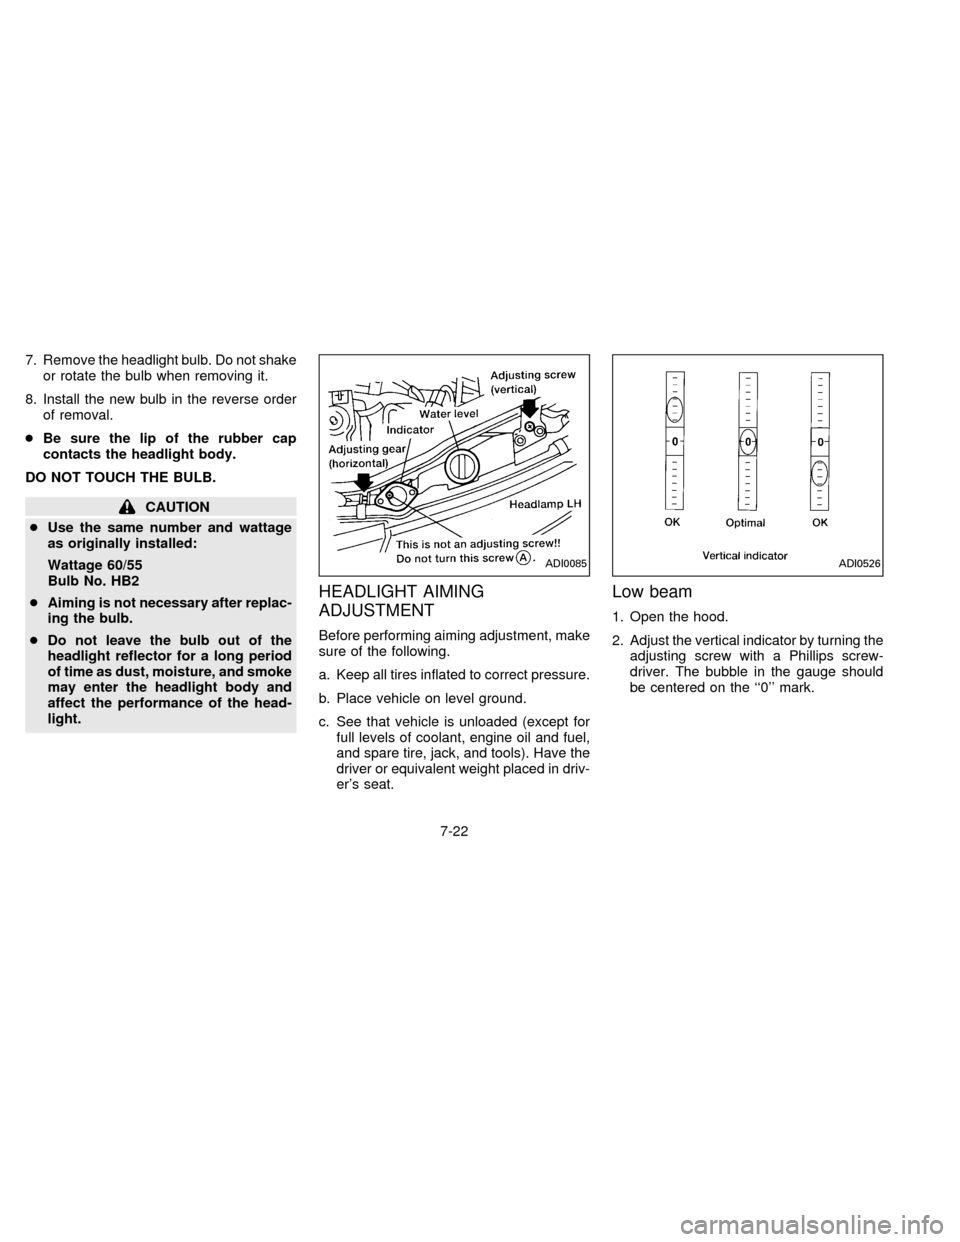
HEADLIGHT AIMING
ADJUSTMENT
Before performing aiming adjustment, make
sure of the following.
a. Keep all tires inflated to correct pressure.
b. Place vehicle on level ground.
c. See that vehicle is unloaded (except for
full levels of coolant, engine oil and fuel,
and spare tire, jack, and tools). Have the
driver or equivalent weight placed in driv-
er's seat.
Low beam
1. Open the hood.
2. Adjust the vertical indicator by turning the
adjusting screw with a Phillips screw-
driver. The bubble in the gauge should
be centered on the ``0'' mark.
ADI0085ADI0526
7-22
ZX
Page 143 of 183
If you have a flat tire, see the ``In case of
emergency'' section.
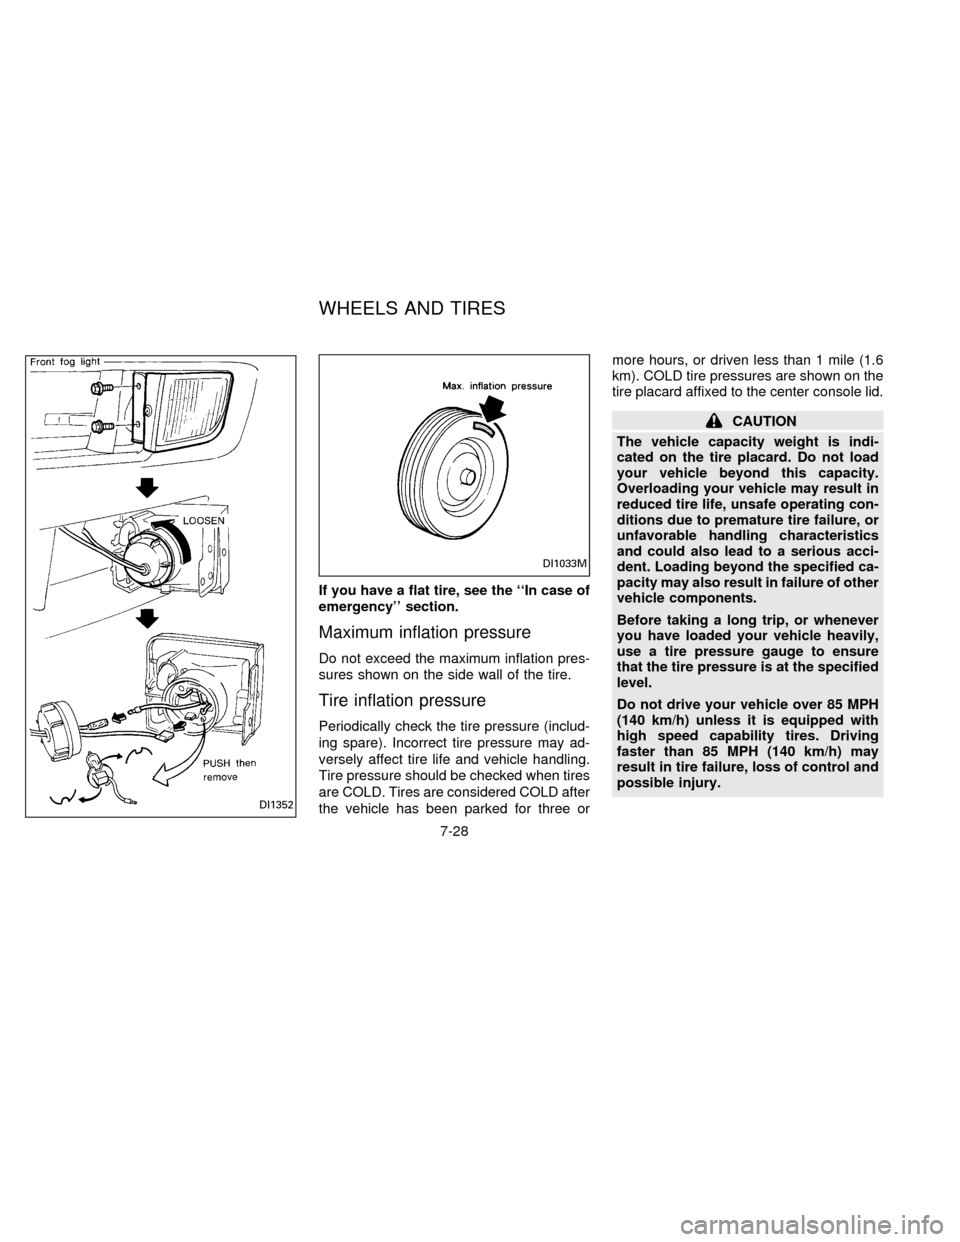
Maximum inflation pressure
Do not exceed the maximum inflation pres-
sures shown on the side wall of the tire.
Tire inflation pressure
Periodically check the tire pressure (includ-
ing spare). Incorrect tire pressure may ad-
versely affect tire life and vehicle handling.
Tire pressure should be checked when tires
are COLD. Tires are considered COLD after
the vehicle has been parked for three ormore hours, or driven less than 1 mile (1.6
km). COLD tire pressures are shown on the
tire placard affixed to the center console lid.
CAUTION
The vehicle capacity weight is indi-
cated on the tire placard. Do not load
your vehicle beyond this capacity.
Overloading your vehicle may result in
reduced tire life, unsafe operating con-
ditions due to premature tire failure, or
unfavorable handling characteristics
and could also lead to a serious acci-
dent. Loading beyond the specified ca-
pacity may also result in failure of other
vehicle components.
Before taking a long trip, or whenever
you have loaded your vehicle heavily,
use a tire pressure gauge to ensure
that the tire pressure is at the specified
level.
Do not drive your vehicle over 85 MPH
(140 km/h) unless it is equipped with
high speed capability tires. Driving
faster than 85 MPH (140 km/h) may
result in tire failure, loss of control and
possible injury.
DI1352
DI1033M
WHEELS AND TIRES
7-28
ZX
Page 158 of 183

9 Technical and consumer information
Capacities and recommended fuel/lubricants ...... 9-2
Engine .................................................................. 9-7
Wheel/tire size ...................................................... 9-7
Dimensions and weights ...................................... 9-8
Registering your vehicle in another country ........ 9-8
Vehicle identification............................................. 9-9
Air conditioner specification ............................... 9-11
Installing front license plate................................ 9-12
Vehicle loading information ................................ 9-13
Trailer towing ...................................................... 9-14
Uniform tire quality grading ................................ 9-17
Emission control system warranty ..................... 9-18
Reporting safety defects .................................... 9-18
Service manual/owner's manual orders ............. 9-19
ZX
Page 165 of 183

Sedan
Overall length in (mm) 180.5 (4,585)
Overall width in (mm) 67.1 (1,705)
Overall height in (mm) 55.9 (1,420)
Front tread in (mm) 57.7 (1,465)
Rear tread in (mm) 57.3 (1,455)
Wheelbase in (mm) 103.1 (2,620)
Gross vehicle weight rating lb (kg)
See the ``F.M.V.S.S.
certification label'' on
the driver side door
pillar. Gross axle weight rating
Front lb (kg)
Rear lb (kg)When planning to travel in another coun-
try,you should first find out if the fuel
available is suitable for your vehicle's en-
gine.
Using fuel with an octane rating that is too
low may cause engine damage. All gasoline
vehicles must be operated with unleaded
gasoline. Therefore, avoid taking your ve-
hicle to areas where appropriate fuel is not
available.
When transferring the registration of
your vehicle to another country, state,
province or district,it may be necessary to
modify the vehicle to meet local laws and
regulations.
The laws and regulations for motor vehicle
emission control and safety standards vary
according to the country, state, province or
district; therefore, vehicle specifications
may differ.
When any vehicle is to be taken into
another country, state, province or dis-
trict and registered, its modifications,
transportation, and registration are the
responsibility of the user. NISSAN is not
responsible for any inconvenience that
may result.
DIMENSIONS AND WEIGHTSREGISTERING YOUR VEHICLE
IN ANOTHER COUNTRY
9-8
ZX
Page 167 of 183

F.M.V.S.S. CERTIFICATION
LABEL
The Federal Motor Vehicle Safety Stan-
dards (F.M.V.S.S.) certification label is af-
fixed as shown. This label contains valuable
vehicle information, such as: Gross Vehicle
Weight Ratings (GVWR), Gross Axle
Weight Rating (GAWR), month and year of
manufacture, Vehicle Identification Number,
(VIN), etc. Review it carefully.
EMISSION CONTROL
INFORMATION LABEL
The emission control information label is
attached as shown.
ATI0022ATI0501
9-10
ZX
Page 170 of 183
VEHICLE LOADING INFORMATION
WARNING
cIt is extremely dangerous to ride in a
cargo area inside of a vehicle. In a
collision, people riding in these ar-
eas are more likely to be seriously
injured or killed.
cDo not allow people to ride in any
area of your vehicle that is not
equipped with seats and seat belts.
c
Be sure everyone in your vehicle is in
a seat and using a seat belt properly.
Terms
It is important to familiarize yourself with the
following terms before loading your vehicle:
cCurb Weight (actual weight of your ve-
hicle) - vehicle weight including: standard
and optional equipment, fluids, emer-
gency tools, and spare tire assembly.
This weightdoes notinclude passen-
gers and cargo.
cGVW (Gross Vehicle Weight) - curb
weight plus the combined weight of pas-
sengers and cargo.cGVWR (Gross Vehicle Weight Rating) -
maximum total weight (load) limit speci-
fied for the vehicle.
cGAWR (Gross Axle Weight Rating) -
maximum weight (load) limit specified for
the front or rear axle.
Determining Vehicle Load Capacity
The load capacity of this vehicle is determined
by weight, not by available cargo space. For
example, a luggage rack, bike carrier, cartop
carrier or similar equipment does not increase
load carrying capacity of your vehicle.
To determine vehicle load capacity:
Vehicle weight can be determined by using
a commercial-grade scale, found at places
such as a truck stop, gravel quarry, grain
elevator, or a scrap metal recycling facility.
1)
Determine the curb weight of your vehicle.
2) Compare the curb weight amount to the
GVWR specified for your vehicle to de-
termine how much more weight your
vehicle can carry.
3) After loading (cargo and passengers),
re-weigh your vehicle to determine if
either GVWR or GAWR for your vehicle
is exceeded. If GVWR is exceeded, re-move cargo as necessary. If either the
front or rear GAWR is exceeded, shift the
load or remove cargo as necessary.
Loading Tips
cThe GVW must not exceed GVWR or
GAWR as specified on the FMVSS Cer-
tification Label.
cDo not load the front and rear axle to the
GAWR. Doing so will exceed the GVWR.
CAUTION
c
Properly secure all cargo to help pre-
vent it from sliding or shifting. In a
sudden stop or collision, unsecured
cargo could cause personal injury.
cDo not load your vehicle any heavier
than the GVWR or the maximum
front and rear GAWRs. If you do,
parts on your vehicle can break, or it
can change the way your vehicle
handles. This could result in loss of
control and cause personal injury.
cOverloading can shorten the life of
your vehicle. Failures caused by
overloading are not covered by your
warranty.
9-13
ZX
Page 171 of 183
Your new vehicle was designed to be used
primarily to carry passengers and cargo.
Remember that towing a trailer will place
additional loads on your vehicle's engine,
drive train, steering, braking and other sys-
tems.
Information on trailer towing ability and the
special equipment required should be ob-
tained from your NISSAN dealer. He can
obtain aNissan Trailer Towing Guidefor
you.
Maximum load limits
Maximum trailer loads:
Never allow the total trailer load to exceed
1,000 lb (454 kg). The total trailer load
equals trailer weight plus its cargo weight.
Towing loads greater than 1,000 lb (454 kg)
or using improper towing equipment could
adversely affect vehicle handling, braking
and performance.
WARNING
Vehicle damage and/or personal injury
resulting from improper towing proce-
dures is not covered by NISSAN warran-
ties. Information on trailer towing and
required towing equipment should be ob-
tained from dealers who specialize in pro-
viding trailers or other towing equipment.
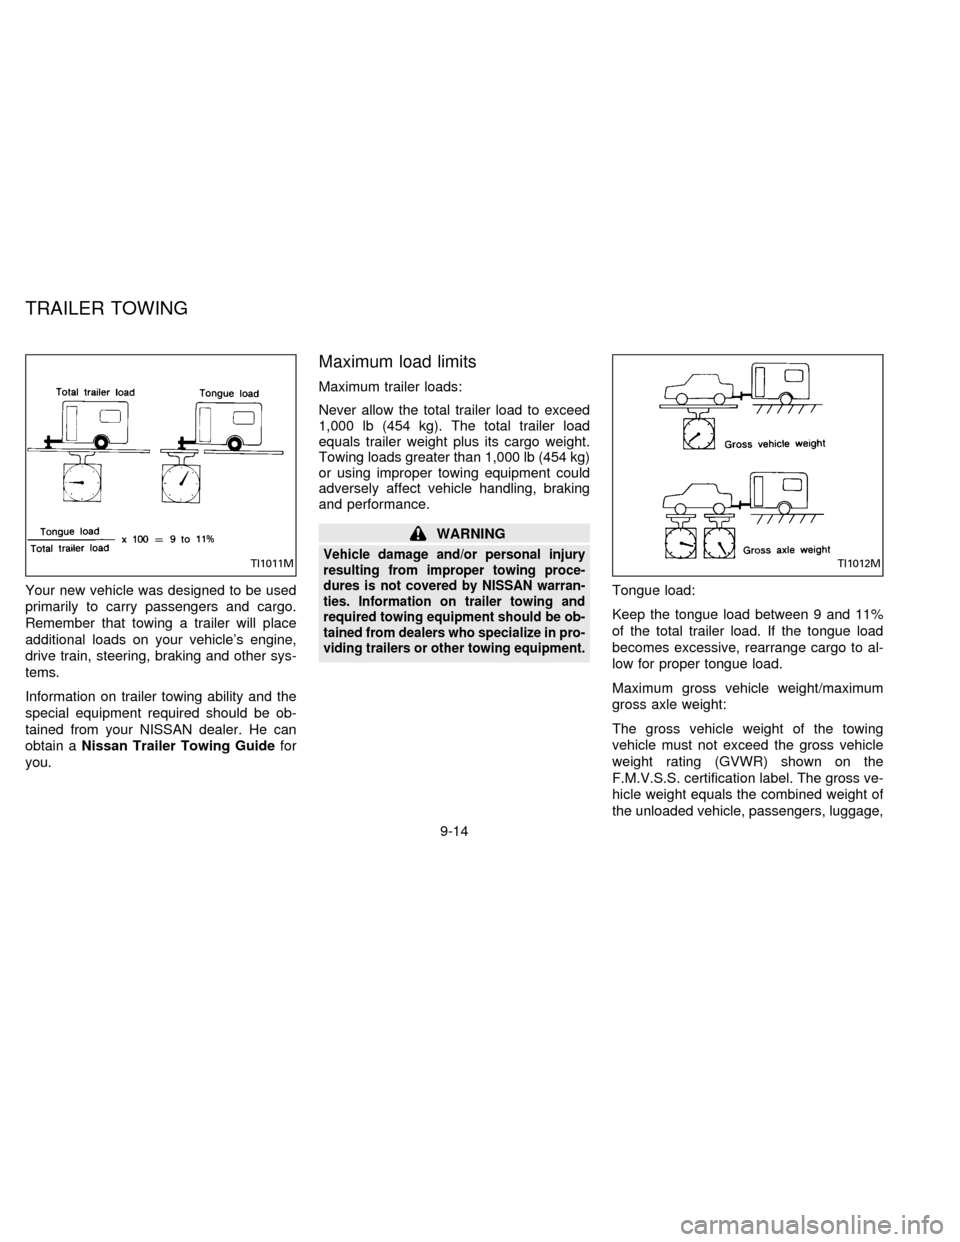
Tongue load:
Keep the tongue load between 9 and 11%
of the total trailer load. If the tongue load
becomes excessive, rearrange cargo to al-
low for proper tongue load.
Maximum gross vehicle weight/maximum
gross axle weight:
The gross vehicle weight of the towing
vehicle must not exceed the gross vehicle
weight rating (GVWR) shown on the
F.M.V.S.S. certification label. The gross ve-
hicle weight equals the combined weight of
the unloaded vehicle, passengers, luggage,
TI1011MTI1012M
TRAILER TOWING
9-14
ZX
Page 172 of 183
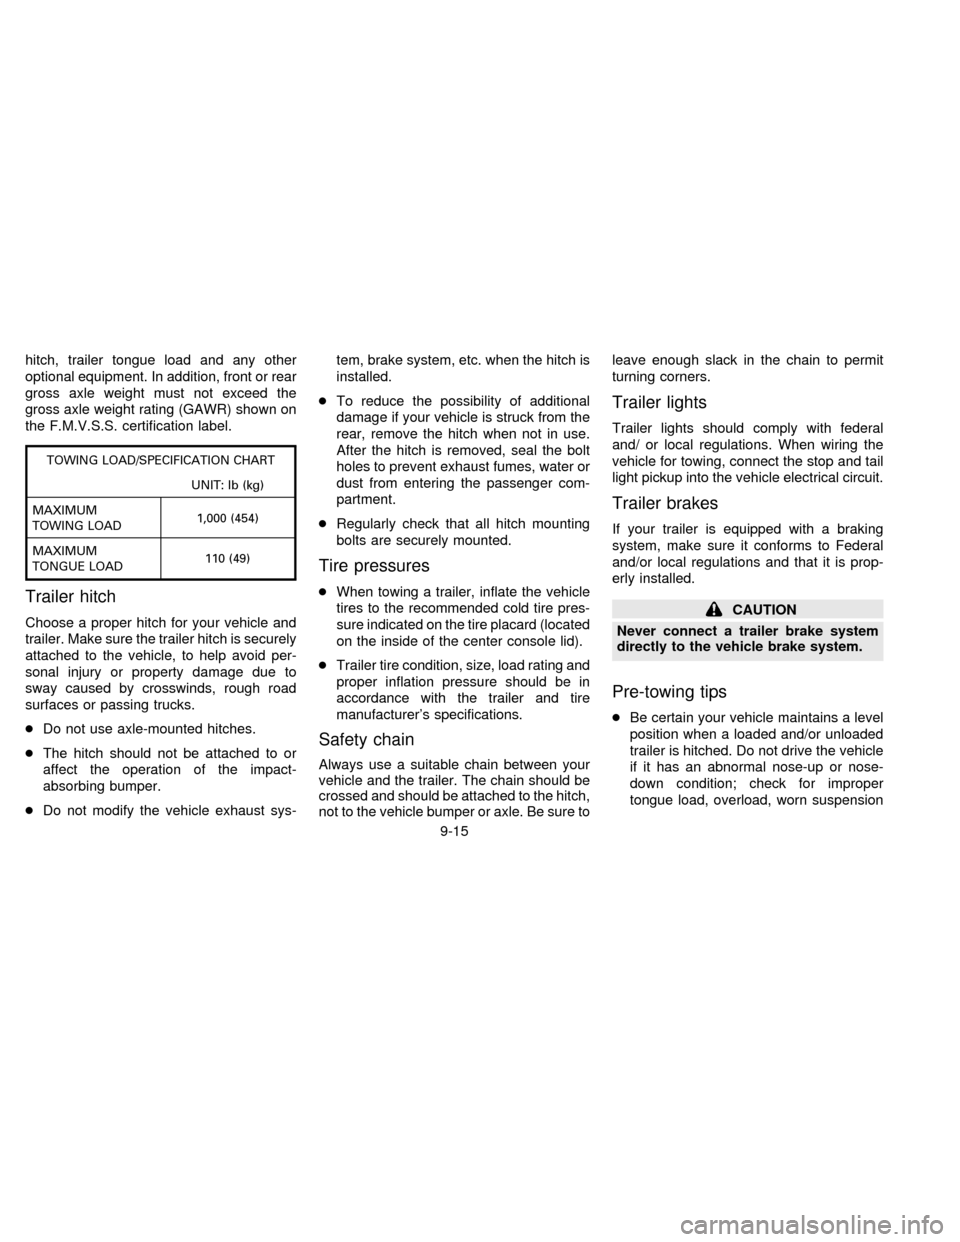
hitch, trailer tongue load and any other
optional equipment. In addition, front or rear
gross axle weight must not exceed the
gross axle weight rating (GAWR) shown on
the F.M.V.S.S. certification label.
TOWING LOAD/SPECIFICATION CHART
UNIT: lb (kg)
MAXIMUM
TOWING LOAD1,000 (454)
MAXIMUM
TONGUE LOAD110 (49)
Trailer hitch
Choose a proper hitch for your vehicle and
trailer. Make sure the trailer hitch is securely
attached to the vehicle, to help avoid per-
sonal injury or property damage due to
sway caused by crosswinds, rough road
surfaces or passing trucks.
cDo not use axle-mounted hitches.
cThe hitch should not be attached to or
affect the operation of the impact-
absorbing bumper.
cDo not modify the vehicle exhaust sys-tem, brake system, etc. when the hitch is
installed.
cTo reduce the possibility of additional
damage if your vehicle is struck from the
rear, remove the hitch when not in use.
After the hitch is removed, seal the bolt
holes to prevent exhaust fumes, water or
dust from entering the passenger com-
partment.
cRegularly check that all hitch mounting
bolts are securely mounted.
Tire pressures
cWhen towing a trailer, inflate the vehicle
tires to the recommended cold tire pres-
sure indicated on the tire placard (located
on the inside of the center console lid).
cTrailer tire condition, size, load rating and
proper inflation pressure should be in
accordance with the trailer and tire
manufacturer's specifications.
Safety chain
Always use a suitable chain between your
vehicle and the trailer. The chain should be
crossed and should be attached to the hitch,
not to the vehicle bumper or axle. Be sure toleave enough slack in the chain to permit
turning corners.
Trailer lights
Trailer lights should comply with federal
and/ or local regulations. When wiring the
vehicle for towing, connect the stop and tail
light pickup into the vehicle electrical circuit.
Trailer brakes
If your trailer is equipped with a braking
system, make sure it conforms to Federal
and/or local regulations and that it is prop-
erly installed.
CAUTION
Never connect a trailer brake system
directly to the vehicle brake system.
Pre-towing tips
cBe certain your vehicle maintains a level
position when a loaded and/or unloaded
trailer is hitched. Do not drive the vehicle
if it has an abnormal nose-up or nose-
down condition; check for improper
tongue load, overload, worn suspension
9-15
ZX
Page 179 of 183

Cooling
Engine cooling ....................................... 7-4
Interior cooling (automatic) ..................... 3-8
Interior cooling (manual)......................... 3-2
Cornering light ........................................... 1-12
Corrosion protection .................................... 6-5
Cruise control............................................. 4-11
Cup holder ................................................. 1-14
D
Daytime running light system
(Canada only) ............................................ 1-11
Defogger switch
Rear window defogger switch .............. 1-10
Defogging/defrosting
Defogging/defrosting (automatic) ........... 3-9
Defogging/defrosting (manual) ............... 3-4
Dimensions and weights.............................. 9-8
Door locks .................................................... 2-2
Door open warning light .............................. 1-6
Drive belts .................................................. 7-14
Driving
Cold weather driving cautions .............. 4-17
Driving with automatic transmission ....... 4-6
Driving with manual transmission ........... 4-8
Precautions when driving ..................... 4-15
Precautions when starting and driving ... 4-2
E
Economy - fuel........................................... 4-13Emission control information label............. 9-10
Emission control system warranty ............. 9-18
Engine
Before starting the engine ...................... 4-5
Capacities and recommended
fuel/lubricants.......................................... 9-2
Changing engine coolant........................ 7-5
Changing engine oil................................ 7-8
Changing engine oil filter........................ 7-9
Checking engine coolant level ............... 7-4
Checking engine oil level ....................... 7-7
Engine compartment check locations .... 7-3
Engine coolant temperature gauge ........ 1-4
Engine cooling system ........................... 7-4
Engine oil ................................................ 7-7
Engine oil and oil filter recommendation. 9-4
Engine oil pressure warning light ........... 1-5
Engine oil viscosity ................................. 9-5
Engine serial number ............................. 9-9
Engine specifications .............................. 9-7
Starting the engine ................................. 4-9
Exhaust gas (carbon monoxide).................. 4-2
F
Flashers (See hazard warning flasher switch)
Flat tire ......................................................... 5-2
Floor mat positioning ................................... 6-4
Fluid (checking)
Automatic transmission fluid (ATF) ........ 7-9
Brake and clutch fluid ........................... 7-11
Engine coolant ........................................ 7-4Engine oil ................................................ 7-7
Power steering fluid .............................. 7-11
Window washer fluid ............................ 7-12
F.M.V.S.S. certification label ..................... 9-10
Front fog light switch ................................. 1-13
Front seats ................................................... 2-9
Fuel
Capacities and recommended
fuel/lubricants.......................................... 9-2
Fuel economy ....................................... 4-13
Fuel filler cap .......................................... 2-8
Fuel filler lid lock operation .................... 2-7
Fuel octane rating................................... 9-3
Fuel recommendation ............................. 9-2
Fuses ......................................................... 7-19
Fusible links ............................................... 7-21
G
Gas station information.............................. 10-6
Gauge
Engine coolant temperature gauge ........ 1-4
Fuel gauge.............................................. 1-4
Odometer ................................................ 1-3
Speedometer .......................................... 1-3
Tachometer............................................. 1-3
Trip odometer ......................................... 1-3
Gear selection (See shifting)
General maintenance .................................. 8-2
Glove box..................................................... 2-5
10-2
ZX