check oil NISSAN ALTIMA 1998 L30 / 2.G Owners Manual
[x] Cancel search | Manufacturer: NISSAN, Model Year: 1998, Model line: ALTIMA, Model: NISSAN ALTIMA 1998 L30 / 2.GPages: 217, PDF Size: 1.77 MB
Page 48 of 217
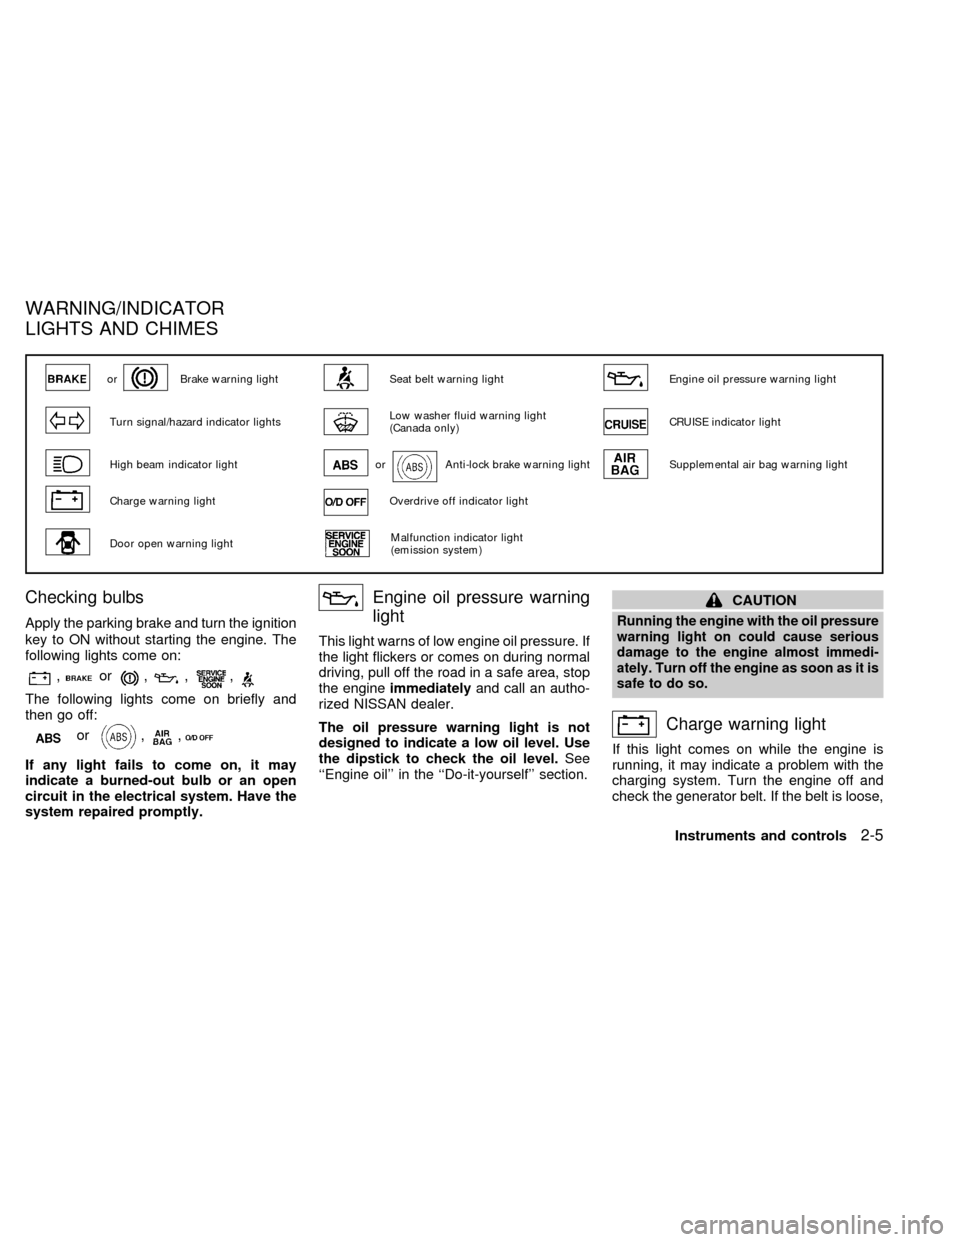
Checking bulbs
Apply the parking brake and turn the ignition
key to ON without starting the engine. The
following lights come on:
,or,,,
The following lights come on briefly and
then go off:
or,,
If any light fails to come on, it may
indicate a burned-out bulb or an open
circuit in the electrical system. Have the
system repaired promptly.
Engine oil pressure warning
light
This light warns of low engine oil pressure. If
the light flickers or comes on during normal
driving, pull off the road in a safe area, stop
the engineimmediatelyand call an autho-
rized NISSAN dealer.
The oil pressure warning light is not
designed to indicate a low oil level. Use
the dipstick to check the oil level.See
``Engine oil'' in the ``Do-it-yourself'' section.
CAUTION
Running the engine with the oil pressure
warning light on could cause serious
damage to the engine almost immedi-
ately. Turn off the engine as soon as it is
safe to do so.
Charge warning light
If this light comes on while the engine is
running, it may indicate a problem with the
charging system. Turn the engine off and
check the generator belt. If the belt is loose,
orBrake warning lightSeat belt warning lightEngine oil pressure warning light
Turn signal/hazard indicator lightsLow washer fluid warning light
(Canada only)CRUISE indicator light
High beam indicator lightorAnti-lock brake warning lightSupplemental air bag warning light
Charge warning lightOverdrive off indicator light
Door open warning lightMalfunction indicator light
(emission system)
WARNING/INDICATOR
LIGHTS AND CHIMES
Instruments and controls2-5
ZX
Page 112 of 217
1) Move the shift selector lever into the P
(Park) position.
2) Turn the ignition key slightly toward the
ON position.
3) Turn the key to the LOCK position.
4) Remove the key.
If the key is removed from the ignition
switch, the shift selector lever cannot be
moved from P (Park).The shift selector
lever can be moved if the ignition switch
is in the ACC position. The shift selector
lever can also be moved if the ignition
switch is in the ON position and the foot
brake pedal is depressed.
There is an OFF position between the
LOCK and ACC positions. The OFF position
is indicated by a ``1'' on the key cylinder.
When the ignition is in OFF, the steering
wheel is not locked.
To lock the steering wheel, remove the
key. In order for the steering wheel to
be locked, it must be turned about 1/8 of
a turn clockwise from the straight up
position. To unlock the steering wheel,
insert the key and turn it gently while
rotating the steering wheel slightly right
and left.WARNING
Never remove the key while driving. If
the key is removed, the steering wheel
will lock. This may cause the driver to
lose control of the vehicle and could
result in serious vehicle damage or
personal injury.
Key positions
LOCK Normal parking position (0)
OFF (1)
The engine can be turned off without locking
the steering wheel.
ACC (Accessories) (2)
This position activates electrical accesso-
ries such as the radio when the engine is
not running.
ON Normal operating position (3)
This position turns on the ignition system
and the electrical accessories.
START (4)
This position activates the starter motor,
which starts the engine.cMake sure the area around the vehicle is
clear.
cMaintenance items listed here should be
checked periodically, for example, each
time you check engine oil.
cCheck that all windows and lights are
clean.
cVisually inspect tires for their appearance
and condition. Also check tires for proper
inflation.
cLock all doors.
cPosition seat and adjust head restraints.
cAdjust inside and outside mirrors.
cFasten seat belts and ask all passengers
to do likewise.
cCheck the operation of warning lights
when key is turned to the ON (3) position.
See ``Checking bulbs'' in the ``Instru-
ments and controls'' section.
BEFORE STARTING THE
ENGINE
Starting and driving5-5
ZX
Page 142 of 217

choosing the proper product.
cWax your vehicle only after a thorough
washing. Follow the instructions supplied
with the wax.
cDo not use a wax containing any abra-
sives, cutting compounds or cleaners
that may damage the vehicle finish.
cIf the surface does not polish easily, use
a ªroad tarº remover and wax again.
Machine compounding or aggressive pol-
ishing on a base coat/clear coat paint finish
may dull the finish or leave swirl marks.
Only use black wax or black shoe polish on
black urethane or polypropylene bumpers.
Removing spots
Remove tar and oil spots, industrial dust,
insects, and tree sap as quickly as possible
from the surface of the paint to avoid lasting
damage or staining. Special cleaning prod-
ucts are available at an authorized NISSAN
dealer or any automotive accessory store.
Underbody
In areas where road salt is used in winter,
the underbody must be cleaned regularly.
This will prevent dirt and salt from buildingup and causing underbody and suspension
corrosion. Before winter and again in the
spring, the underseal must be checked and,
if necessary, retreated.
Cleaning glass
When cleaning the rear window, it may be
easier to clean if the high-mounted stop light
is removed first.
Be careful when removing the high-
mounted stop light to reduce the risk of
damaging the high-mounted stop light
wires.
The high-mounted stop light must be prop-
erly reinstalled before driving your vehicle.
Use glass cleaner to remove smoke and
dust film from the glass surfaces. It is nor-
mal for glass to become coated with a film
AAI1001
Appearance and care7-3
ZX
Page 146 of 217

8 Do-it-yourself
Maintenance precautions .......................................8-2
Engine compartment check locations ....................8-3
Engine cooling system ...........................................8-4
Checking engine coolant level ...............................8-4
Changing engine coolant .......................................8-5
Engine oil ...............................................................8-7
Checking engine oil level .......................................8-7
Changing engine oil ...............................................8-8
Changing engine oil filter .......................................8-9
Automatic transmission fluid (ATF) ........................8-9
Temperature conditions for checking ATF ...........8-10
Power steering fluid..............................................8-11
Brake fluid ............................................................8-11
Clutch fluid............................................................8-11
Window washer fluid ............................................8-12
Battery ..................................................................8-13
Jump starting ........................................................8-13Drive belts ............................................................8-14
Spark plug replacement .......................................8-14
Air cleaner housing filter ......................................8-16
Wiper blades ........................................................8-17
Parking brake check.............................................8-18
Brake pedal ..........................................................8-18
Brake booster .......................................................8-19
Clutch pedal .........................................................8-20
Fuses and fusible links.........................................8-20
Light bulbs ............................................................8-21
Headlights ............................................................8-21
Headlight aiming adjustment ................................8-22
Adjustment after headlight assembly
replacement ..........................................................8-23
Bulb replacement .................................................8-24
Wheels and tires ..................................................8-28
ZX
Page 152 of 217
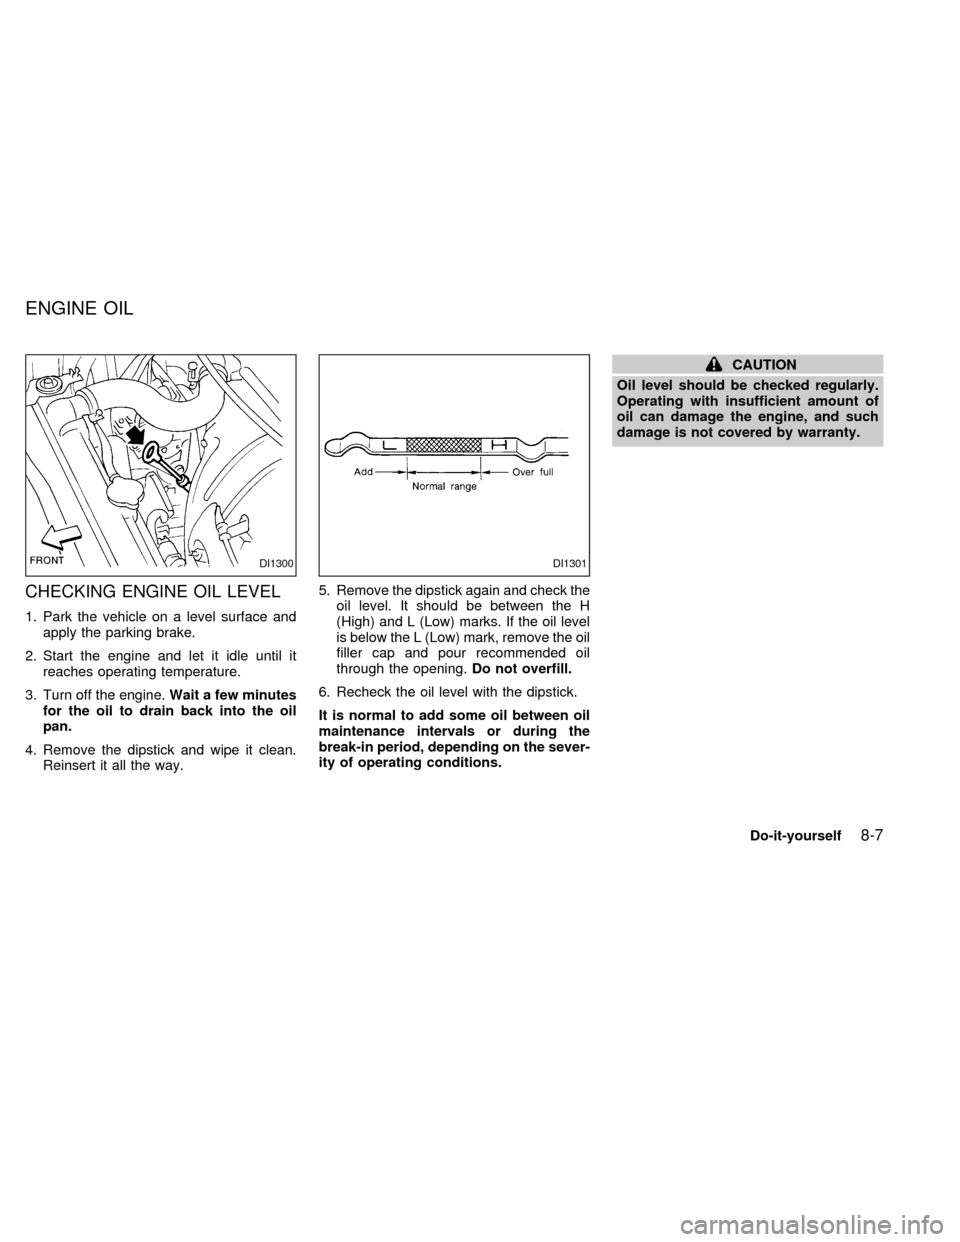
CHECKING ENGINE OIL LEVEL
1. Park the vehicle on a level surface and
apply the parking brake.
2. Start the engine and let it idle until it
reaches operating temperature.
3. Turn off the engine.Wait a few minutes
for the oil to drain back into the oil
pan.
4. Remove the dipstick and wipe it clean.
Reinsert it all the way.5. Remove the dipstick again and check the
oil level. It should be between the H
(High) and L (Low) marks. If the oil level
is below the L (Low) mark, remove the oil
filler cap and pour recommended oil
through the opening.Do not overfill.
6. Recheck the oil level with the dipstick.
It is normal to add some oil between oil
maintenance intervals or during the
break-in period, depending on the sever-
ity of operating conditions.
CAUTION
Oil level should be checked regularly.
Operating with insufficient amount of
oil can damage the engine, and such
damage is not covered by warranty.
DI1300DI1301
ENGINE OIL
Do-it-yourself8-7
ZX
Page 153 of 217
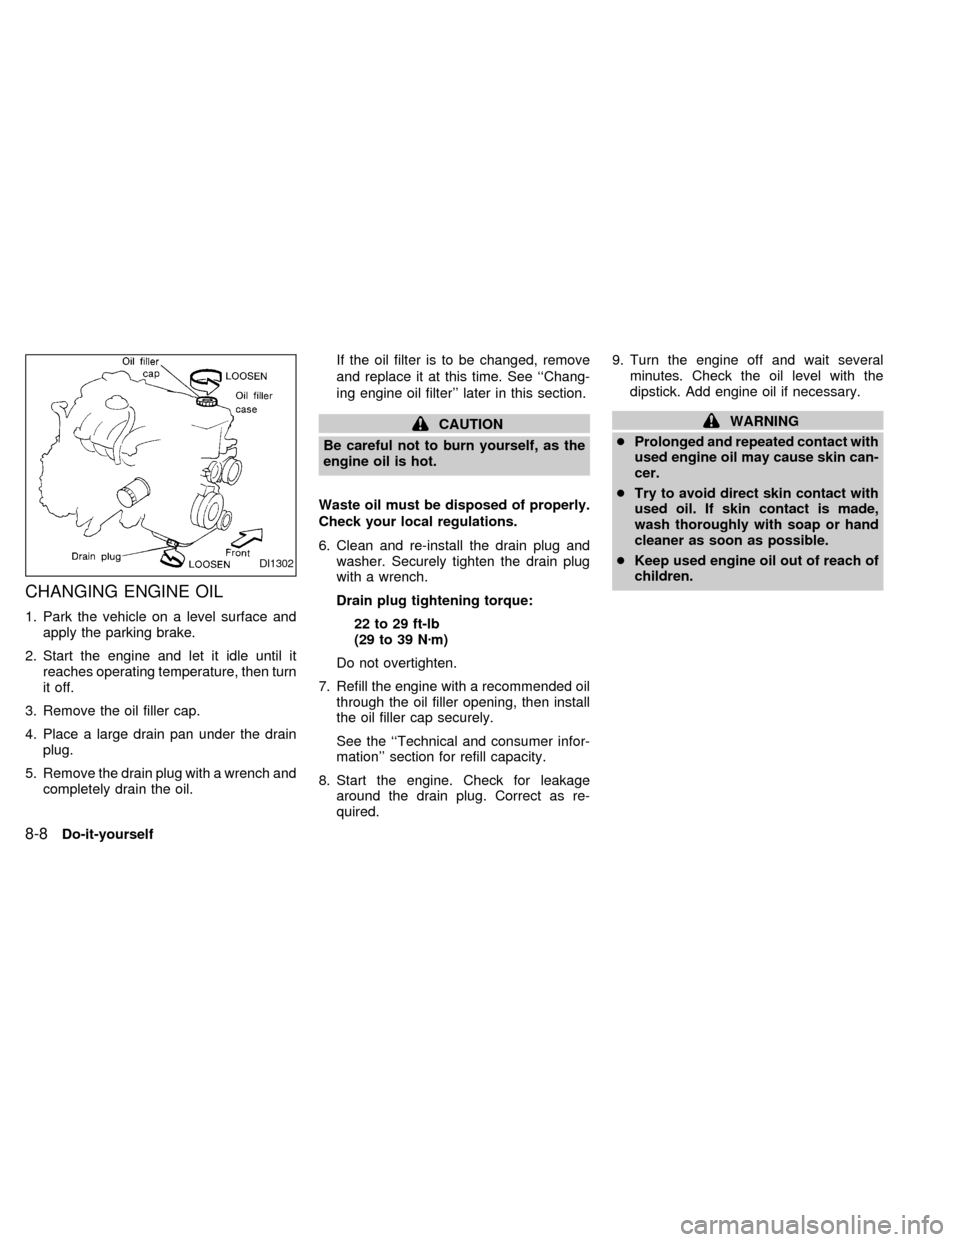
CHANGING ENGINE OIL
1. Park the vehicle on a level surface and
apply the parking brake.
2. Start the engine and let it idle until it
reaches operating temperature, then turn
it off.
3. Remove the oil filler cap.
4. Place a large drain pan under the drain
plug.
5. Remove the drain plug with a wrench and
completely drain the oil.If the oil filter is to be changed, remove
and replace it at this time. See ``Chang-
ing engine oil filter'' later in this section.
CAUTION
Be careful not to burn yourself, as the
engine oil is hot.
Waste oil must be disposed of properly.
Check your local regulations.
6. Clean and re-install the drain plug and
washer. Securely tighten the drain plug
with a wrench.
Drain plug tightening torque:
22 to 29 ft-lb
(29 to 39 Nzm)
Do not overtighten.
7. Refill the engine with a recommended oil
through the oil filler opening, then install
the oil filler cap securely.
See the ``Technical and consumer infor-
mation'' section for refill capacity.
8. Start the engine. Check for leakage
around the drain plug. Correct as re-
quired.9. Turn the engine off and wait several
minutes. Check the oil level with the
dipstick. Add engine oil if necessary.WARNING
cProlonged and repeated contact with
used engine oil may cause skin can-
cer.
cTry to avoid direct skin contact with
used oil. If skin contact is made,
wash thoroughly with soap or hand
cleaner as soon as possible.
cKeep used engine oil out of reach of
children.
DI1302
8-8Do-it-yourself
ZX
Page 154 of 217
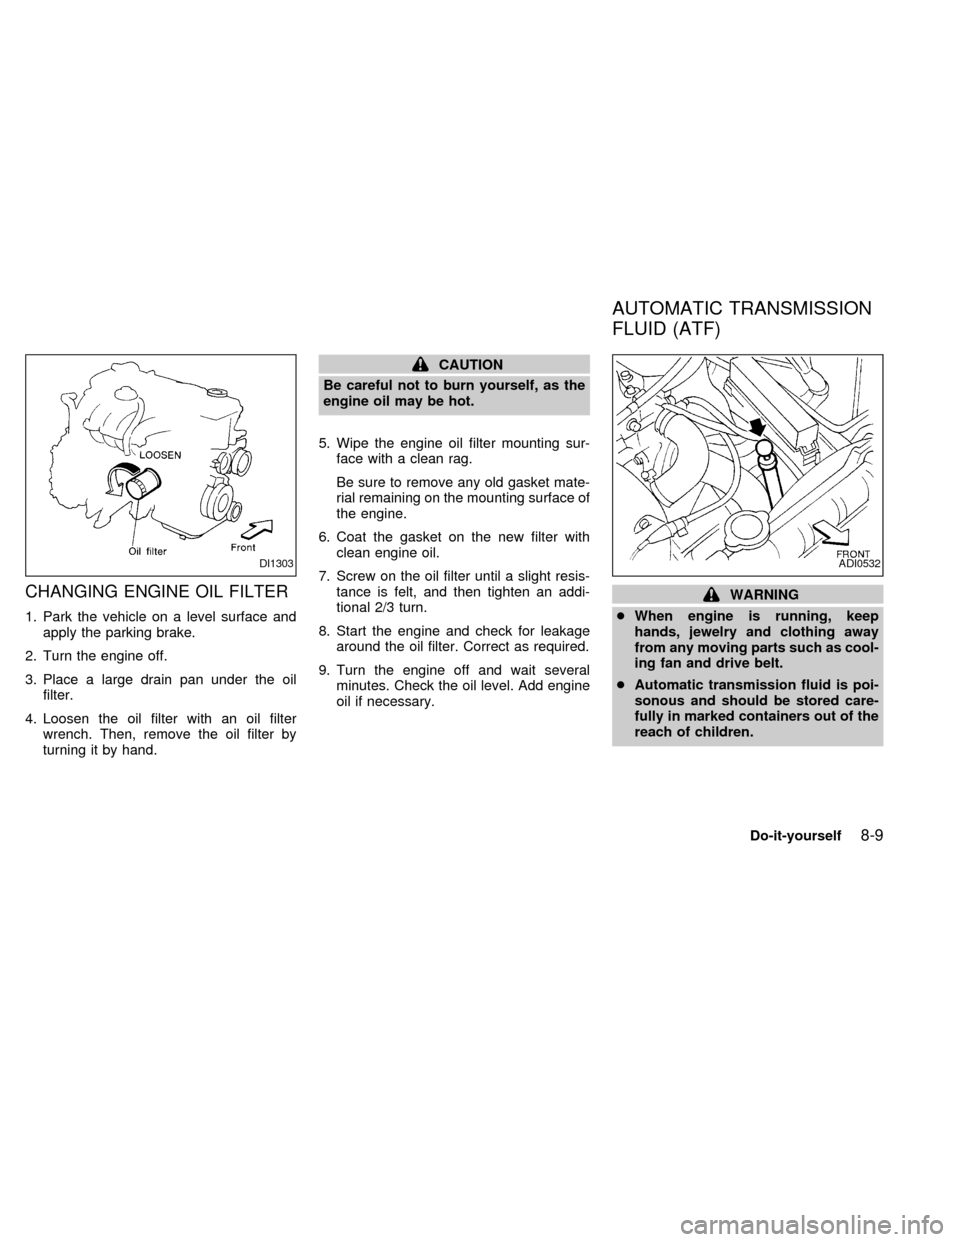
CHANGING ENGINE OIL FILTER
1. Park the vehicle on a level surface and
apply the parking brake.
2. Turn the engine off.
3. Place a large drain pan under the oil
filter.
4. Loosen the oil filter with an oil filter
wrench. Then, remove the oil filter by
turning it by hand.
CAUTION
Be careful not to burn yourself, as the
engine oil may be hot.
5. Wipe the engine oil filter mounting sur-
face with a clean rag.
Be sure to remove any old gasket mate-
rial remaining on the mounting surface of
the engine.
6. Coat the gasket on the new filter with
clean engine oil.
7. Screw on the oil filter until a slight resis-
tance is felt, and then tighten an addi-
tional 2/3 turn.
8. Start the engine and check for leakage
around the oil filter. Correct as required.
9. Turn the engine off and wait several
minutes. Check the oil level. Add engine
oil if necessary.
WARNING
cWhen engine is running, keep
hands, jewelry and clothing away
from any moving parts such as cool-
ing fan and drive belt.
cAutomatic transmission fluid is poi-
sonous and should be stored care-
fully in marked containers out of the
reach of children.
DI1303ADI0532
AUTOMATIC TRANSMISSION
FLUID (ATF)
Do-it-yourself8-9
ZX
Page 168 of 217

a. Keep all of the tires inflated to the correct
pressure.
b. Place the vehicle on level ground.
c. See that the vehicle is unloaded (except
for full levels of coolant, engine oil and
fuel, and spare tire, jack, and tools).
Have the driver or an equivalent weight
placed in the driver's seat.
Low beam
1. Open the hood.
2. Adjust the vertical aim by turning the
adjusting screw with a Phillips screw-
driver.
3. Adjust the horizontal aim by turning the
adjusting screw with a Phillips screw-
driver.
ADJUSTMENT AFTER
HEADLIGHT ASSEMBLY
REPLACEMENT
If the vehicle front body has been repaired
and/or the headlight assembly has been
replaced, check aiming. Use the aiming
chart shown in the illustration.
cUpper edge and left edge of high in-
tensity zone should be within the
range shown at left. Adjust headlights
accordingly.
cDotted lines in the illustration show
center of headlights.
``H'' : Horizontial center line of headlights
``W
L'': Distance between each headlight
center
ADI1039
Do-it-yourself8-23
ZX
Page 181 of 217

Automatic transmission ``Park'' mecha-
nismÐ On a fairly steep hill check that your
vehicle is held securely with the shift selec-
tor lever in the P (Park) position without
applying any brakes.
UNDER THE HOOD AND
VEHICLE
The maintenance items listed here should
be checked periodically, such as each time
you check the engine oil or refuel.
Additional information on the items
marked with an ª*º can be found in the
ªDo-it-yourself'' section of this manual.
Windshield washer fluid*Ð Check that
there is adequate fluid in the tank.
Engine coolant level*Ð Check the cool-
ant level when the engine is cold.
Radiator and hosesÐ Check the front of
the radiator and clean off any dirt, insects,
leaves, etc., that may have accumulated.
Make sure the hoses have no cracks, de-
formation, rot or loose connections.
Brake and (if so equipped) clutch fluid
levels*Ð Make sure that the brake and
clutch fluid level are between the MIN and
MAX lines on each reservoir.Battery*Ð Check the fluid level in each
cell. It should be between the MAX and MIN
lines.
Engine drive belts*Ð Make sure the drive
belts are not frayed, worn, cracked or oily.
Engine oil level*Ð Check the level after
parking the vehicle on a level surface, with
the engine off. Wait a few minutes for the oil
to drain back into the oil pan.
Power steering fluid level* and linesÐ
Check the level when the fluid is cold and
with the engine off. Check the lines for
proper attachment, leaks, cracks, etc.
Automatic transmission fluid level*Ð
Check the level after putting the shift selec-
tor lever in P (Park) with the engine idling at
operating temperature.
Exhaust systemÐ Make sure there are no
cracks, holes, loose joints or supports. If the
sound of the exhaust seems unusual or
there is a smell of exhaust fumes, immedi-
ately have the exhaust system inspected by
a qualified individual. (See the carbon mon-
oxide warning in the ``Starting and driving''
section of this manual.)
UnderbodyÐ The underbody is frequentlyexposed to corrosive substances such as
those used on icy roads or to control dust. It
is very important to remove these sub-
stances from the underbody, otherwise rust
may form on the floor pan, frame, fuel lines
and exhaust system. At the end of winter,
the underbody should be thoroughly flushed
with plain water, especially those areas
where mud and dirt may accumulate. See
the ``Appearance and care'' section for ad-
ditional information.
Fluid leaksÐ Check under the vehicle for
fuel, oil, water or other fluid leaks after the
vehicle has been parked for a while. Water
dripping from the air conditioner after use is
normal. If you should notice any leaks or if
gasoline fumes are evident, check for the
cause and have it corrected immediately by
an authorized NISSAN dealer.
9-4Maintenance
ZX
Page 187 of 217

Additional information on the following
items marked with an ``*'' is found in the
``Do-it- yourself'' section of this manual.
Emission control system
maintenance
Drive belts*Ð Check drive belts for wear,
fraying or cracking and also for proper ten-
sion. Replace any damaged drive belts.
Air cleaner filterÐ Under normal driving
conditions, the air cleaner filter should be
replaced in accordance with the mainte-
nance schedule. However, driving the ve-
hicle in dusty areas may cause rapid clog-
ging of the element. Consequently, the
element may have to be replaced more
frequently.
Evap vapor linesÐ Check vapor lines and
connections for leaks, looseness or deterio-
ration. If leaks are found, replace them.
Fuel linesÐ Check the fuel hoses, piping
and connections for leaks, looseness or
deterioration. Replace any damaged parts.
Fuel filterÐ If the vehicle is operated under
extremely adverse weather conditions or in
areas where ambient temperatures are ei-
ther extremely low or extremely high, thefilter might become clogged. In such an
event, replace the filter immediately.
Engine coolant*Ð Drain and flush the
cooling system.
Engine oil & oil filter*Ð Under normal
driving conditions, the engine oil and oil filter
should be replaced in accordance with the
maintenance schedule. However, under se-
vere driving conditions, they may have to be
replaced more frequently.
Spark plugs*Ð Replace with new plugs
having the correct heat range.
Intake & exhaust valve clearanceÐ Check
the valve clearance if valve noise increases.
Chassis and body maintenance
Brake lines & cablesÐ Check the brake
lines and hoses (including brake booster
vacuum hoses, connections & check valve)
and parking brake cables for proper attach-
ment, leaks, cracks, chafing, abrasion, de-
terioration, etc.
Brake pads, discs, drums & liningsÐ
Check these and the other neighboring brake
components for wear, deterioration and
leaks. Under severe driving conditions, they
may have to be inspected more frequently.
Manual & automatic transmission fluid*
Ð Check the fluid level and visually inspect
for signs of leakage.
Under severe driving conditions, the fluid
should be replaced at the specified interval.
Steering gear & linkage, axle & suspen-
sion parts, and drive shaft bootsÐ
Check for damage, looseness and leakage
of oil or grease. Under severe driving con-
ditions, inspection should be performed
more frequently
Exhaust systemÐ Visually check the ex-
haust pipes, muffler, and hangers for proper
attachment, leaks, cracks, chafing, abra-
sion, deterioration, etc. Under severe driv-
ing conditions, inspection should be per-
formed more frequently.
Supplemental air bag systemÐ Check
the supplemental air bag system compo-
nents for proper attachment, damage, de-
formities, cracks, rust, etc. Work around and
on the supplemental air bag system should
be done by an authorized NISSAN dealer.
EXPLANATION OF
MAINTENANCE ITEMS
9-10Maintenance
ZX