seat adjustment NISSAN ALTIMA 2002 L31 / 3.G Owners Manual
[x] Cancel search | Manufacturer: NISSAN, Model Year: 2002, Model line: ALTIMA, Model: NISSAN ALTIMA 2002 L31 / 3.GPages: 249, PDF Size: 2.02 MB
Page 6 of 249
Table of
ContentsSeats, restraints and supplemental air bag systems
Instruments and controls
Pre-driving checks and adjustments
Heater, air conditioner and audio systems
Starting and driving
In case of emergency
Appearance and care
Maintenance and do-it-yourself
Technical and consumer information
Index
1
2
3
4
5
6
7
8
9
10
Page 8 of 249

1 Seats, restraints and supplemental air
bag systems
Seats ......................................................................1-2
Front manual seat adjustment...........................1-3
Front power seat adjustment (driver's
seat) (if so equipped) ........................................1-4
Folding rear seat ...............................................1-6
Head restraint adjustment .................................1-7
Supplemental restraint system ...............................1-8
Precautions on supplemental restraint
system ...............................................................1-8
Supplemental air bag warning labels ..............1-19
Supplemental air bag warning light .................1-19
Seat belts .............................................................1-21
Precautions on seat belt usage ......................1-21
Child safety ......................................................1-23Pregnant women .............................................1-24
Injured persons ................................................1-24
Three-point type seat belt with retractor .........1-24
Seat belt extenders .........................................1-28
Seat belt maintenance ....................................1-28
Child restraints .....................................................1-28
Precautions on child restraints ........................1-28
Installation on rear seat center or
outboard positions ...........................................1-30
LATCH (Lower anchors and tether for
children) system ...................................................1-35
Top tether strap child restraint ........................1-37
Installation on front passenger seat ................1-38
ZX
Page 10 of 249
FRONT MANUAL SEAT
ADJUSTMENT
WARNING
cDo not adjust the driver's seat while
driving so full attention may be given
to vehicle operation. The seat may
move suddenly and could cause
loss of control of the vehicle.
cAfter adjustment, gently rock in the
seat to make sure it is securely
locked.
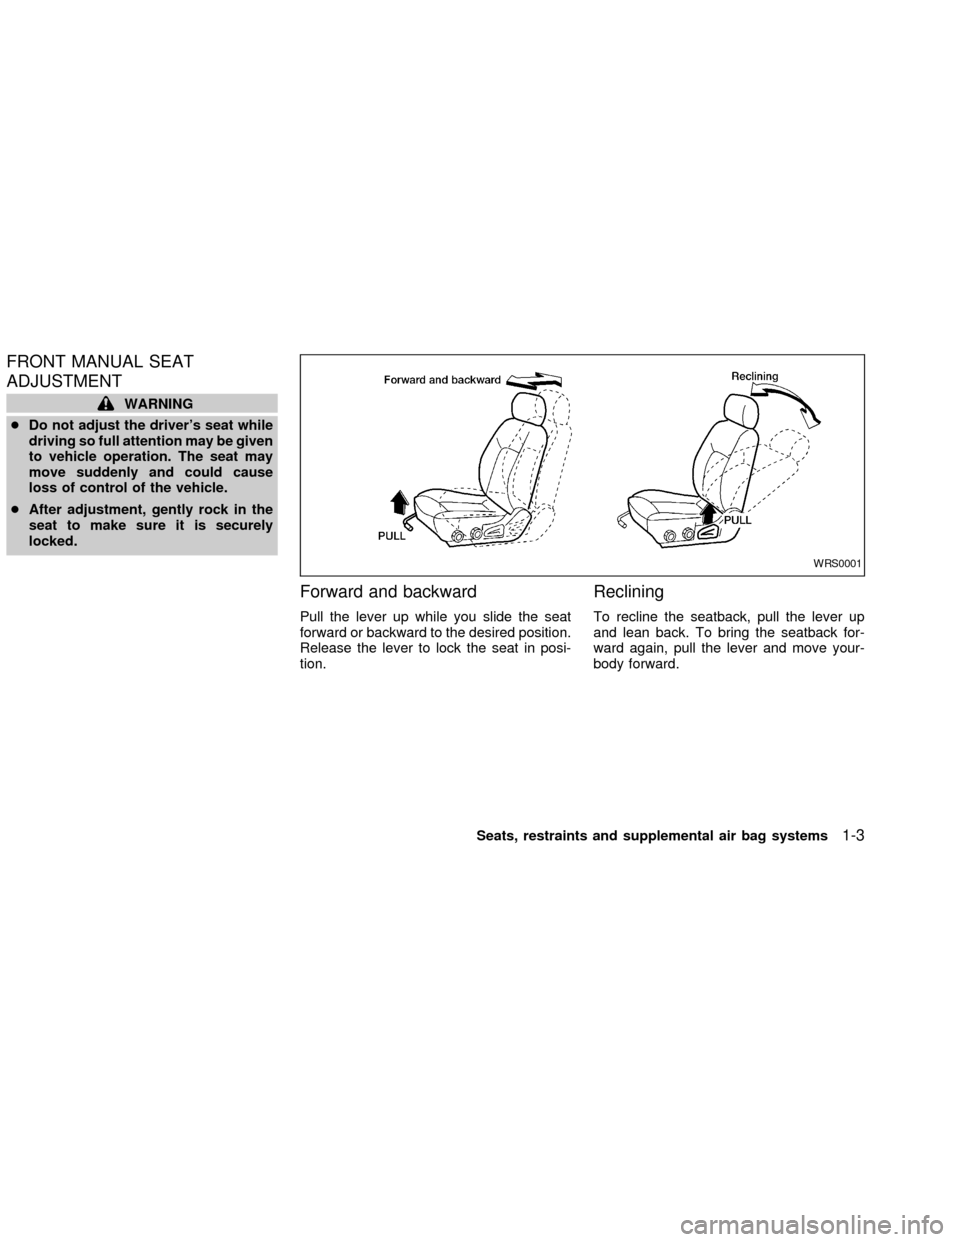
Forward and backward
Pull the lever up while you slide the seat
forward or backward to the desired position.
Release the lever to lock the seat in posi-
tion.
Reclining
To recline the seatback, pull the lever up
and lean back. To bring the seatback for-
ward again, pull the lever and move your-
body forward.
WRS0001
Seats, restraints and supplemental air bag systems1-3
ZX
Page 11 of 249
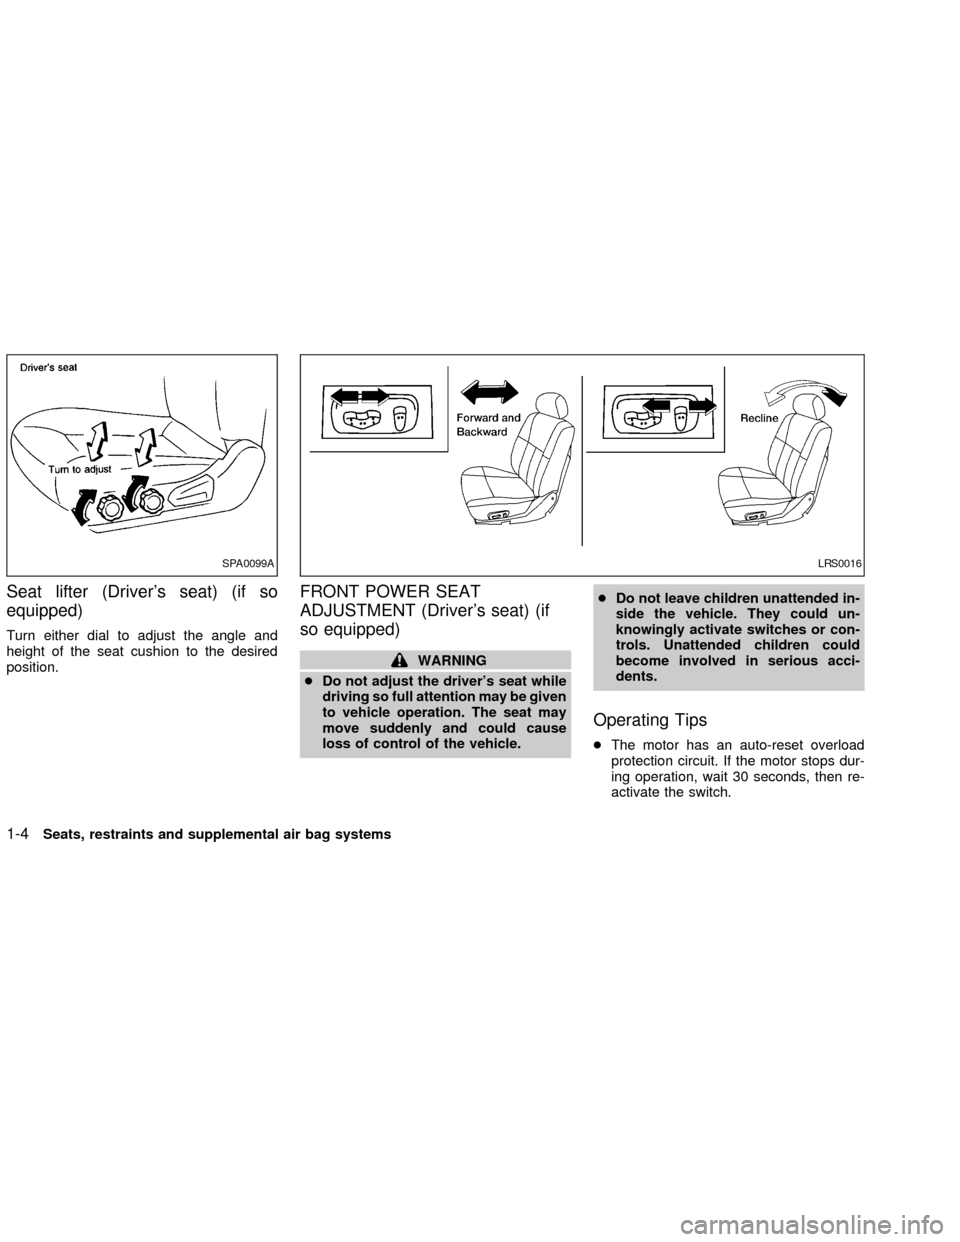
Seat lifter (Driver's seat) (if so
equipped)
Turn either dial to adjust the angle and
height of the seat cushion to the desired
position.
FRONT POWER SEAT
ADJUSTMENT (Driver's seat) (if
so equipped)
WARNING
cDo not adjust the driver's seat while
driving so full attention may be given
to vehicle operation. The seat may
move suddenly and could cause
loss of control of the vehicle.cDo not leave children unattended in-
side the vehicle. They could un-
knowingly activate switches or con-
trols. Unattended children could
become involved in serious acci-
dents.
Operating Tips
cThe motor has an auto-reset overload
protection circuit. If the motor stops dur-
ing operation, wait 30 seconds, then re-
activate the switch.
SPA0099ALRS0016
1-4Seats, restraints and supplemental air bag systems
ZX
Page 14 of 249
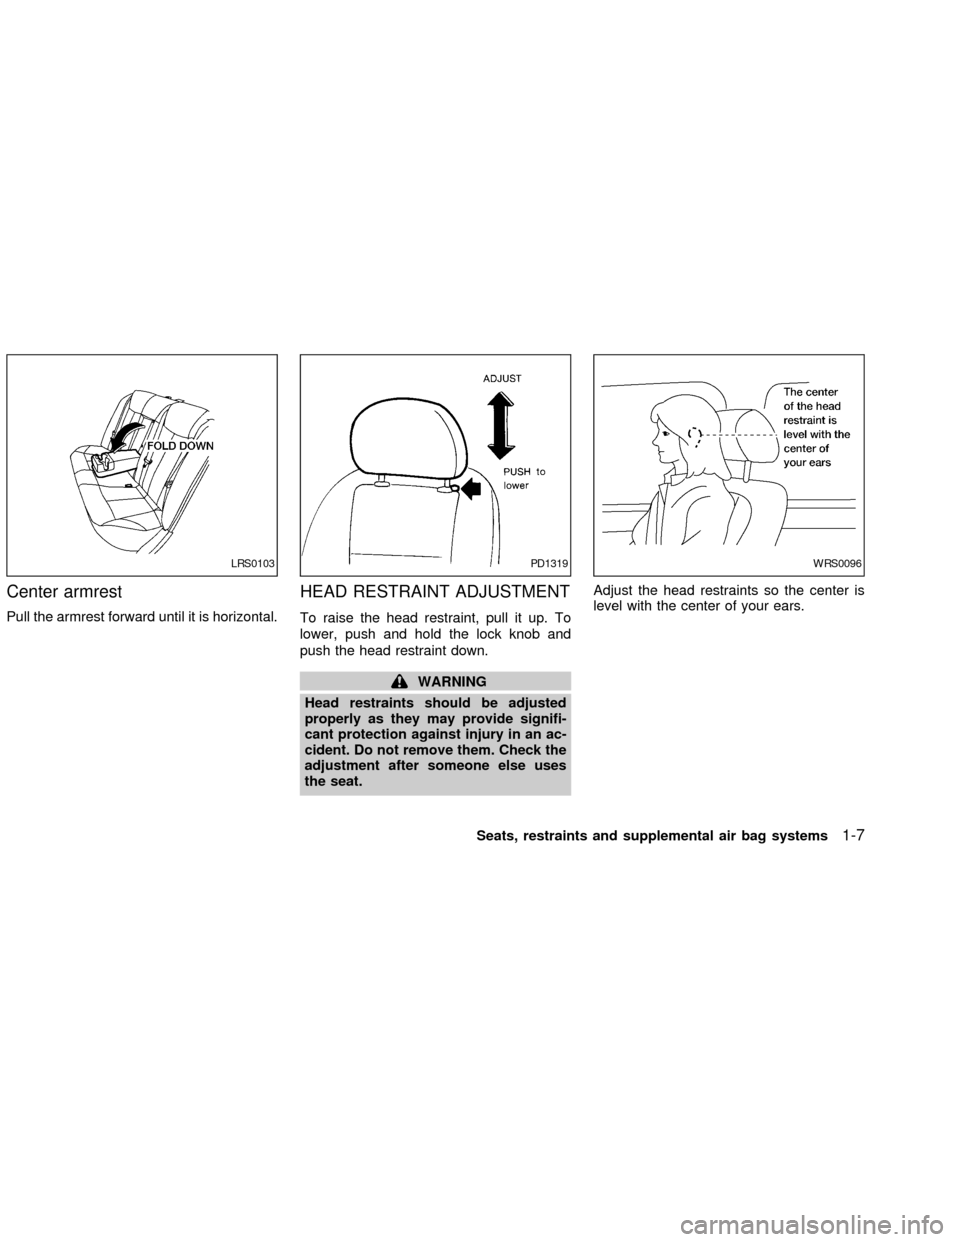
Center armrest
Pull the armrest forward until it is horizontal.
HEAD RESTRAINT ADJUSTMENT
To raise the head restraint, pull it up. To
lower, push and hold the lock knob and
push the head restraint down.
WARNING
Head restraints should be adjusted
properly as they may provide signifi-
cant protection against injury in an ac-
cident. Do not remove them. Check the
adjustment after someone else uses
the seat.Adjust the head restraints so the center is
level with the center of your ears.
LRS0103PD1319WRS0096
Seats, restraints and supplemental air bag systems1-7
ZX
Page 34 of 249
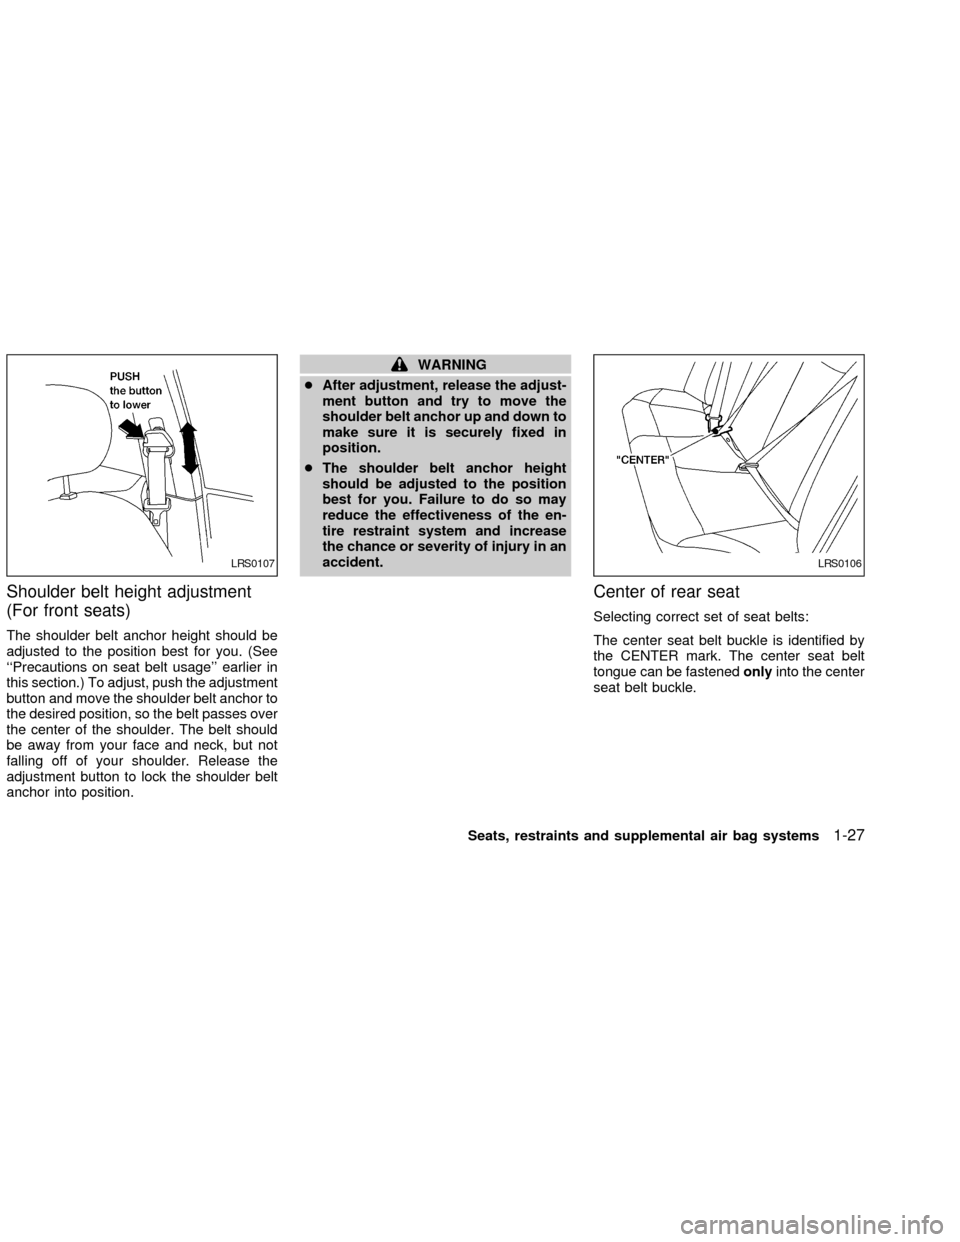
Shoulder belt height adjustment
(For front seats)
The shoulder belt anchor height should be
adjusted to the position best for you. (See
``Precautions on seat belt usage'' earlier in
this section.) To adjust, push the adjustment
button and move the shoulder belt anchor to
the desired position, so the belt passes over
the center of the shoulder. The belt should
be away from your face and neck, but not
falling off of your shoulder. Release the
adjustment button to lock the shoulder belt
anchor into position.
WARNING
cAfter adjustment, release the adjust-
ment button and try to move the
shoulder belt anchor up and down to
make sure it is securely fixed in
position.
cThe shoulder belt anchor height
should be adjusted to the position
best for you. Failure to do so may
reduce the effectiveness of the en-
tire restraint system and increase
the chance or severity of injury in an
accident.
Center of rear seat
Selecting correct set of seat belts:
The center seat belt buckle is identified by
the CENTER mark. The center seat belt
tongue can be fastenedonlyinto the center
seat belt buckle.
LRS0107LRS0106
Seats, restraints and supplemental air bag systems1-27
ZX
Page 89 of 249
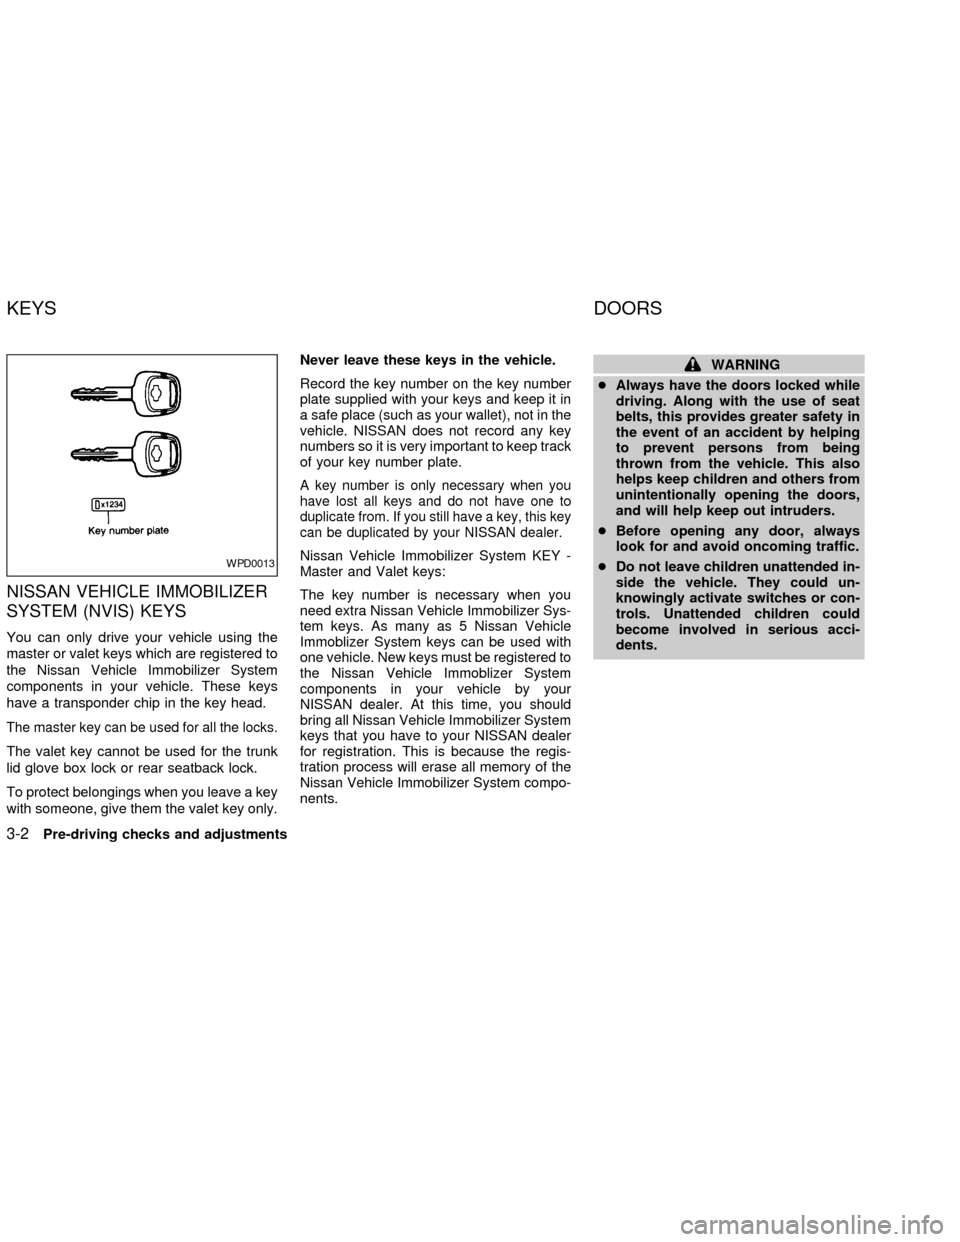
NISSAN VEHICLE IMMOBILIZER
SYSTEM (NVIS) KEYS
You can only drive your vehicle using the
master or valet keys which are registered to
the Nissan Vehicle Immobilizer System
components in your vehicle. These keys
have a transponder chip in the key head.
The master key can be used for all the locks.
The valet key cannot be used for the trunk
lid glove box lock or rear seatback lock.
To protect belongings when you leave a key
with someone, give them the valet key only.Never leave these keys in the vehicle.
Record the key number on the key number
plate supplied with your keys and keep it in
a safe place (such as your wallet), not in the
vehicle. NISSAN does not record any key
numbers so it is very important to keep track
of your key number plate.
A key number is only necessary when you
have lost all keys and do not have one to
duplicate from. If you still have a key, this key
can be duplicated by your NISSAN dealer.
Nissan Vehicle Immobilizer System KEY -
Master and Valet keys:
The key number is necessary when you
need extra Nissan Vehicle Immobilizer Sys-
tem keys. As many as 5 Nissan Vehicle
Immoblizer System keys can be used with
one vehicle. New keys must be registered to
the Nissan Vehicle Immoblizer System
components in your vehicle by your
NISSAN dealer. At this time, you should
bring all Nissan Vehicle Immobilizer System
keys that you have to your NISSAN dealer
for registration. This is because the regis-
tration process will erase all memory of the
Nissan Vehicle Immobilizer System compo-
nents.
WARNING
cAlways have the doors locked while
driving. Along with the use of seat
belts, this provides greater safety in
the event of an accident by helping
to prevent persons from being
thrown from the vehicle. This also
helps keep children and others from
unintentionally opening the doors,
and will help keep out intruders.
cBefore opening any door, always
look for and avoid oncoming traffic.
cDo not leave children unattended in-
side the vehicle. They could un-
knowingly activate switches or con-
trols. Unattended children could
become involved in serious acci-
dents.
WPD0013
KEYS DOORS
3-2Pre-driving checks and adjustments
ZX
Page 99 of 249
To open the trunk from the inside, rotate the
illuminated lever until the lock releases and
push up on the trunk lid. The release lever is
made of a material that glows in the dark
after a brief exposure to ambient light.
The handle is located inside the trunk com-
partment on the trunk lock at the center of
the trunk lid.
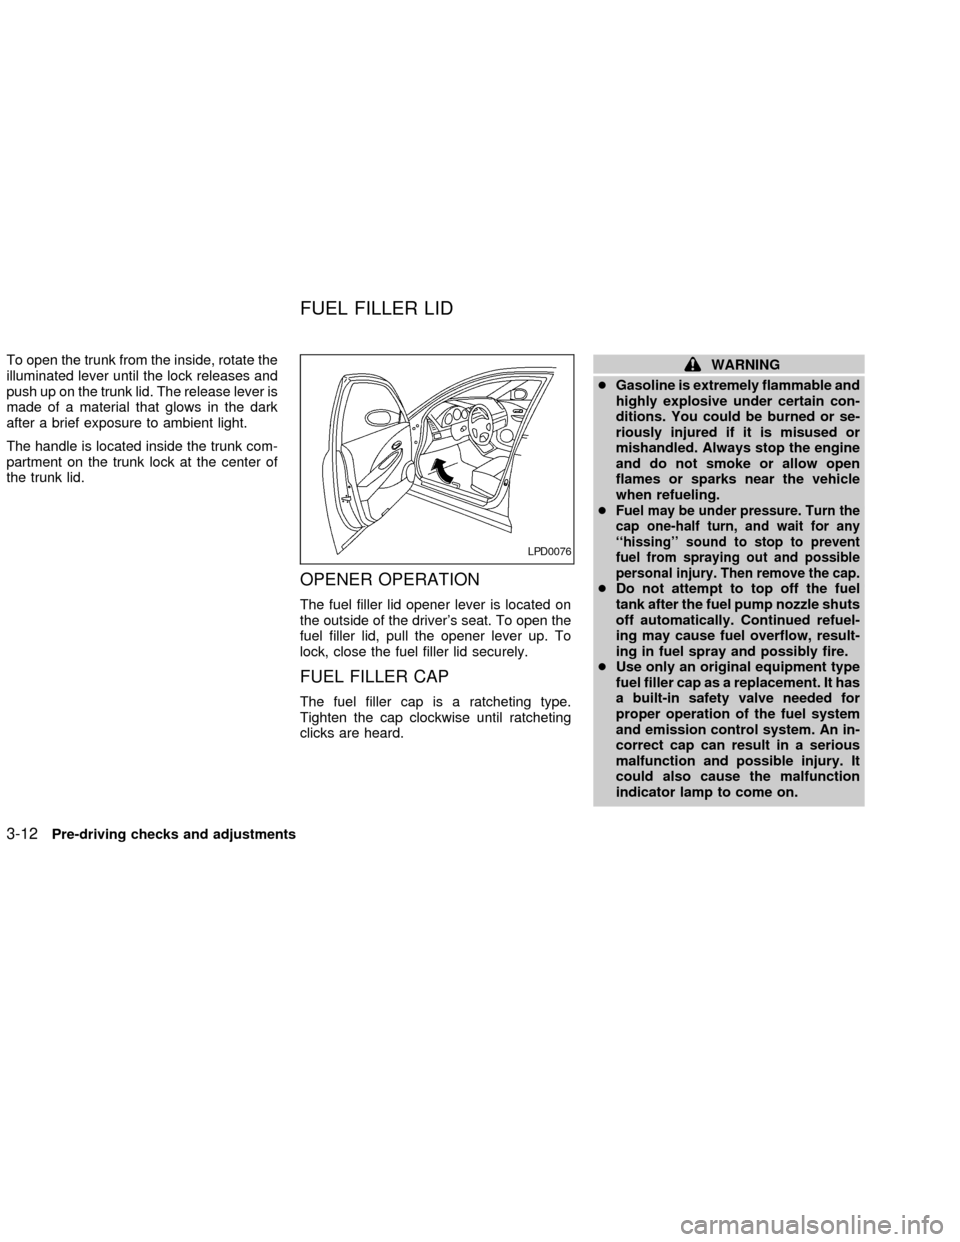
OPENER OPERATION
The fuel filler lid opener lever is located on
the outside of the driver's seat. To open the
fuel filler lid, pull the opener lever up. To
lock, close the fuel filler lid securely.
FUEL FILLER CAP
The fuel filler cap is a ratcheting type.
Tighten the cap clockwise until ratcheting
clicks are heard.
WARNING
cGasoline is extremely flammable and
highly explosive under certain con-
ditions. You could be burned or se-
riously injured if it is misused or
mishandled. Always stop the engine
and do not smoke or allow open
flames or sparks near the vehicle
when refueling.
c
Fuel may be under pressure. Turn the
cap one-half turn, and wait for any
``hissing'' sound to stop to prevent
fuel from spraying out and possible
personal injury. Then remove the cap.
cDo not attempt to top off the fuel
tank after the fuel pump nozzle shuts
off automatically. Continued refuel-
ing may cause fuel overflow, result-
ing in fuel spray and possibly fire.
cUse only an original equipment type
fuel filler cap as a replacement. It has
a built-in safety valve needed for
proper operation of the fuel system
and emission control system. An in-
correct cap can result in a serious
malfunction and possible injury. It
could also cause the malfunction
indicator lamp to come on.
LPD0076
FUEL FILLER LID
3-12Pre-driving checks and adjustments
ZX
Page 101 of 249
TELESCOPIC OPERATION
Push the lever down and adjust the steering
wheel forward or backward to the desired
position.
Pull the lock lever up firmly to lock the
steering wheel in place.
WARNING
Do not adjust the steering wheel any
closer to you than is necessary for
proper steering operation and comfort.
The driver's air bag inflates with great
force. If you are unrestrained, leaning
forward, sitting sideways or out of po-
sition in any way, you are at greater risk
of injury or death in a crash. You may
also receive serious or fatal injuries
from the air bag if you are up against it
when it inflates. Always sit back
against the seatback and as far away as
practical from the steering wheel. Al-
ways use the seat belts.
CAUTION
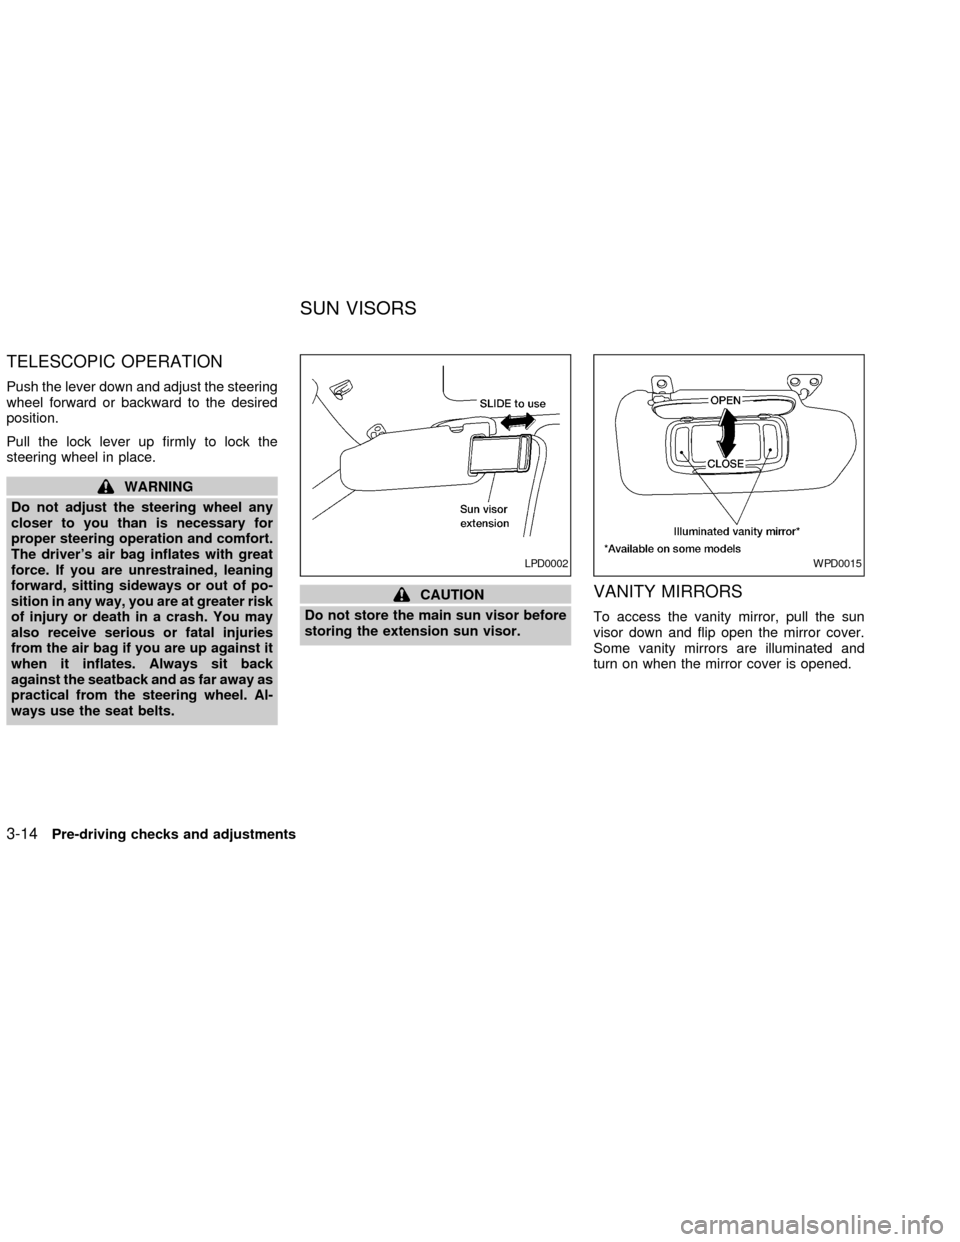
Do not store the main sun visor before
storing the extension sun visor.VANITY MIRRORS
To access the vanity mirror, pull the sun
visor down and flip open the mirror cover.
Some vanity mirrors are illuminated and
turn on when the mirror cover is opened.
LPD0002WPD0015
SUN VISORS
3-14Pre-driving checks and adjustments
ZX
Page 245 of 249

O
Octane rating (See fuel octane rating) ........ 9-3
Odometer ..................................................... 2-3
Oil
Capacities and recommended fuel/
lubricants ................................................ 9-2
Changing engine oil.............................. 8-11
Changing engine oil filter...................... 8-13
Checking engine oil level ..................... 8-10
Engine oil .............................................. 8-10
Engine oil and oil filter
recommendation ..................................... 9-5
Engine oil viscosity ................................. 9-5
Outside mirror control ................................ 3-16
Overheat
If your vehicle overheats ........................ 6-8
Owner's manual/service manual order
information ................................................. 9-21
P
Parking
Parking brake check ............................. 8-25
Parking brake operation ....................... 5-13
Parking/parking on hills ........................ 5-17
Power
Power door locks .................................... 3-3
Power outlet.......................................... 2-25
Power steering fluid .............................. 8-15
Power steering system ......................... 5-18Power windows..................................... 2-31
Precautions
Maintenance precautions ................ 8-2, 8-5
Precautions on seat belt usage............ 1-21
Precautions when starting and driving ... 5-2
Push starting ................................................ 6-8
R
Radio
Car phone or CB radio ......................... 4-29
FM-AM radio with compact disc (CD)
changer ....................................... 4-16, 4-21
Readiness for inspection maintenance
(I/M) test..................................................... 9-20
Rear seat ..................................................... 1-6
Rear window defogger switch ................... 2-17
Refrigerant recommendation ....................... 9-7
Registering your vehicle in another
country ....................................................... 9-10
Remote keyless entry system ..................... 3-5
Reporting safety defects (USA) ................. 9-19
S
Safety
Child safety rear door lock ..................... 3-4
Reporting safety defects (USA) ............ 9-19
Seat adjustment
Front manual seat adjustment................ 1-3
Front power seat adjustment.................. 1-4Seat belt
Precautions on seat belt usage............ 1-21
Seat belt extenders .............................. 1-28
Seat belt maintenance.......................... 1-28
Seat belts.............................................. 1-21
Shoulder belt height adjustment ........... 1-27
Three-point type with retractor ............. 1-24
Seat belt warning light ................................. 2-9
Seatback pockets ...................................... 2-26
Seatback side pockets............................... 2-26
Seats
Front seats.............................................. 1-2
Heated seats ........................................ 2-24
Rear seat ................................................ 1-6
Self-adjusting brakes ................................. 8-26
Servicing air conditioner ............................ 4-11
Shifting
Manual transmission............................. 5-12
Shoulder belt height adjustment ................ 1-27
Spark plug replacement............................. 8-20
Speedometer ............................................... 2-3
Spotlights (See map light) ......................... 2-34
SRS warning label ..................................... 1-19
Starting
Before starting the engine ...................... 5-6
Jump starting................................. 6-6, 8-18
Precautions when starting and driving ... 5-2
Push starting........................................... 6-8
Starting the engine ................................. 5-7
Steering
Power steering fluid .............................. 8-15
Power steering system ......................... 5-18
10-4
ZX