tow NISSAN ALTIMA 2002 L31 / 3.G Owners Manual
[x] Cancel search | Manufacturer: NISSAN, Model Year: 2002, Model line: ALTIMA, Model: NISSAN ALTIMA 2002 L31 / 3.GPages: 249, PDF Size: 2.02 MB
Page 32 of 249
cFor most effective protection when
the vehicle is in motion, the seat
should be upright. Always sit well
back in the seat and adjust the seat
properly. See ªPrecautions on seat
belt usageº earlier in this section.
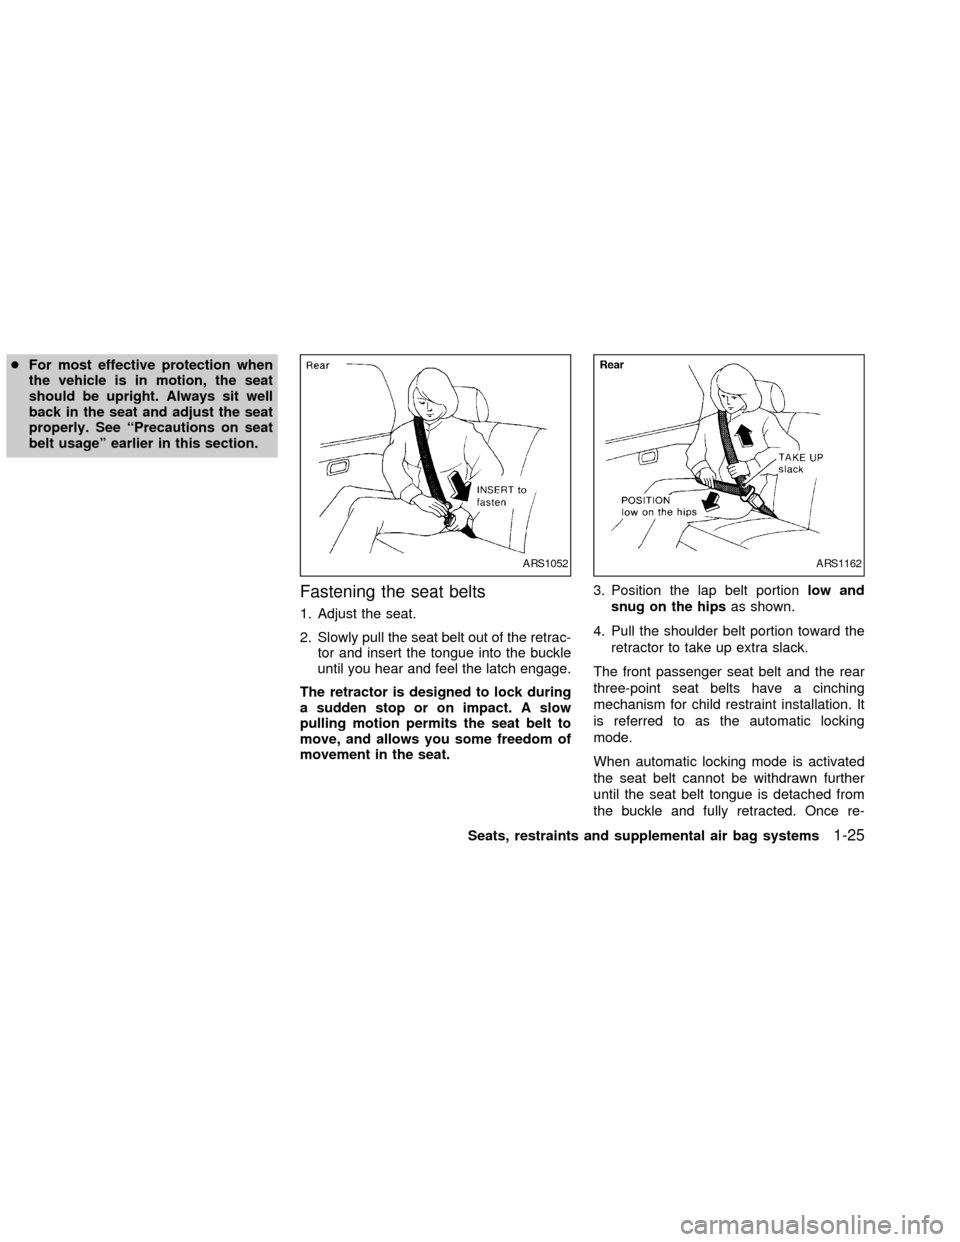
Fastening the seat belts
1. Adjust the seat.
2. Slowly pull the seat belt out of the retrac-
tor and insert the tongue into the buckle
until you hear and feel the latch engage.
The retractor is designed to lock during
a sudden stop or on impact. A slow
pulling motion permits the seat belt to
move, and allows you some freedom of
movement in the seat.3. Position the lap belt portionlow and
snug on the hipsas shown.
4. Pull the shoulder belt portion toward the
retractor to take up extra slack.
The front passenger seat belt and the rear
three-point seat belts have a cinching
mechanism for child restraint installation. It
is referred to as the automatic locking
mode.
When automatic locking mode is activated
the seat belt cannot be withdrawn further
until the seat belt tongue is detached from
the buckle and fully retracted. Once re-
ARS1052ARS1162
Seats, restraints and supplemental air bag systems1-25
ZX
Page 59 of 249
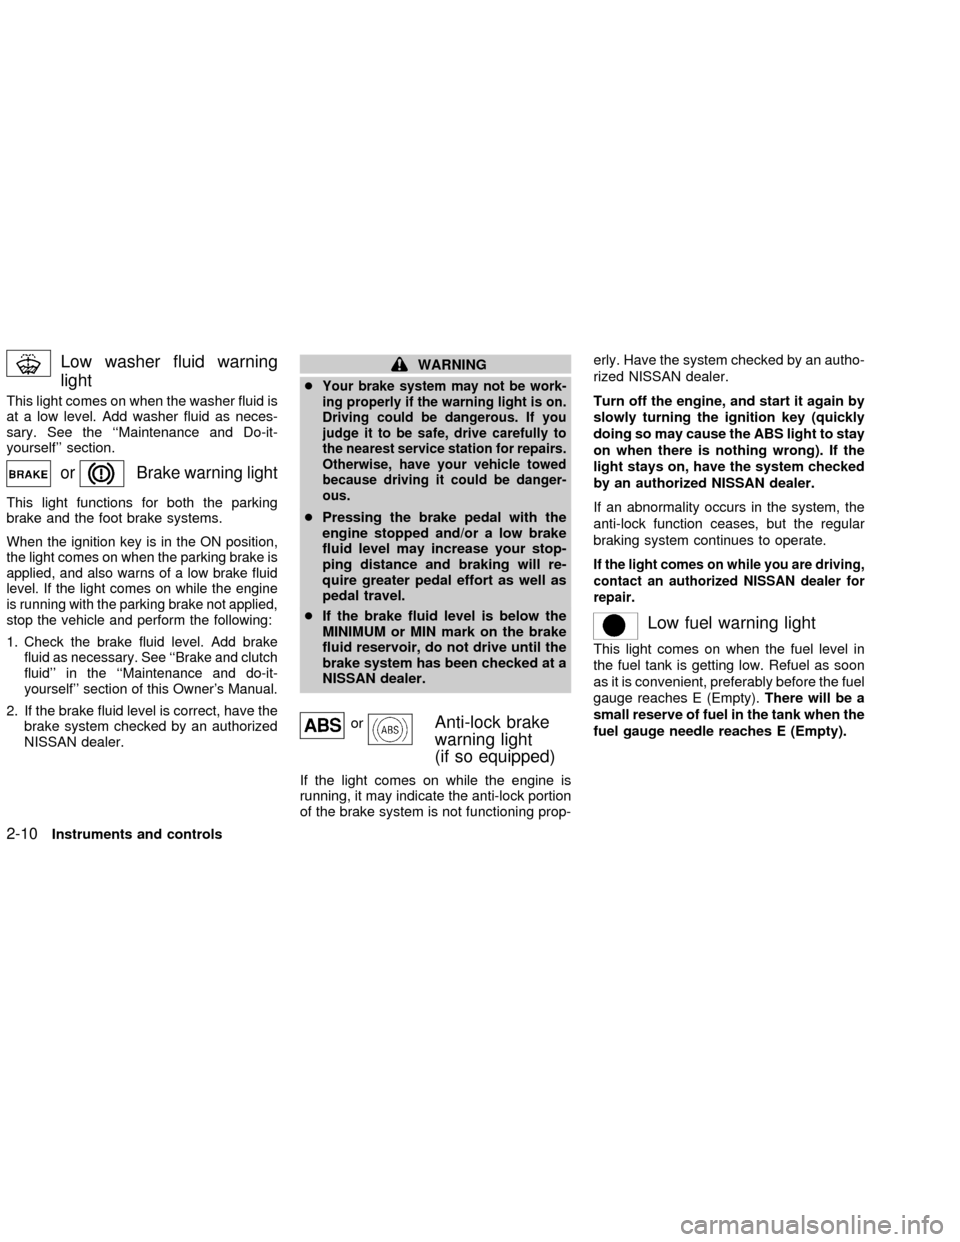
Low washer fluid warning
light
This light comes on when the washer fluid is
at a low level. Add washer fluid as neces-
sary. See the ``Maintenance and Do-it-
yourself'' section.
orBrake warning light
This light functions for both the parking
brake and the foot brake systems.
When the ignition key is in the ON position,
the light comes on when the parking brake is
applied, and also warns of a low brake fluid
level. If the light comes on while the engine
is running with the parking brake not applied,
stop the vehicle and perform the following:
1.Check the brake fluid level. Add brake
fluid as necessary. See ``Brake and clutch
fluid'' in the ``Maintenance and do-it-
yourself'' section of this Owner's Manual.
2. If the brake fluid level is correct, have the
brake system checked by an authorized
NISSAN dealer.
WARNING
c
Your brake system may not be work-
ing properly if the warning light is on.
Driving could be dangerous. If you
judge it to be safe, drive carefully to
the nearest service station for repairs.
Otherwise, have your vehicle towed
because driving it could be danger-
ous.
cPressing the brake pedal with the
engine stopped and/or a low brake
fluid level may increase your stop-
ping distance and braking will re-
quire greater pedal effort as well as
pedal travel.
cIf the brake fluid level is below the
MINIMUM or MIN mark on the brake
fluid reservoir, do not drive until the
brake system has been checked at a
NISSAN dealer.
orAnti-lock brake
warning light
(if so equipped)
If the light comes on while the engine is
running, it may indicate the anti-lock portion
of the brake system is not functioning prop-erly. Have the system checked by an autho-
rized NISSAN dealer.
Turn off the engine, and start it again by
slowly turning the ignition key (quickly
doing so may cause the ABS light to stay
on when there is nothing wrong). If the
light stays on, have the system checked
by an authorized NISSAN dealer.
If an abnormality occurs in the system, the
anti-lock function ceases, but the regular
braking system continues to operate.
If the light comes on while you are driving,
contact an authorized NISSAN dealer for
repair.
Low fuel warning light
This light comes on when the fuel level in
the fuel tank is getting low. Refuel as soon
as it is convenient, preferably before the fuel
gauge reaches E (Empty).There will be a
small reserve of fuel in the tank when the
fuel gauge needle reaches E (Empty).
2-10Instruments and controls
ZX
Page 60 of 249

INDICATOR LIGHTS
Turn signal/hazard indicator
lights
The appropriate light flashes when the turn
signal switch is activated.
Both lights flash when the hazard switch is
turned on.
High beam indicator light
(Blue)
This light comes on when the headlight high
beam is on and goes out when the low
beam is selected.
The high beam indicator light also comes on
when the passing signal is activated.
Cruise main switch indicator
light (if so equipped)
The light comes on when the cruise control
main switch is pushed. The light goes out
when the main switch is pushed again.
While the cruise main switch indicator light
comes on, the cruise control system is
operational.
Cruise set switch indicator
light (if so equipped)
The light comes on while the vehicle speed
is controlled by the cruise control system. If
the light blinks while the engine is running, it
may indicate the cruise control system is not
functioning properly. Have the system
checked by your NISSAN dealer.
Malfunction indicator lamp
(MIL)
If this indicator lamp comes on steady or
blinks while the engine is running, it may
indicate a potential emission control mal-
function.
The malfunction indicator lamp may also
come on steady if the fuel filler cap is loose
or missing, or if the vehicle runs out of fuel.
Check to make sure the fuel filler cap is
installed and closed tightly, and that the
vehicle has at least three gallons of fuel in
the fuel tank.
After a few driving trips, the
lamp
should turn off if no other potential emission
control system malfunction exists.
Operation
The malfunction indicator lamp will come on
in one of two ways:
cMalfunction indicator lamp on steady - An
emission control system malfunction has
been detected. Check the fuel filler cap. If
the fuel filler cap is loose or missing,
tighten or install the cap and continue to
drive the vehicle. The
lamp should
turn off after a few driving trips. If the
lamp does not turn off after a few
driving trips, have the vehicle inspected
by an authorized NISSAN dealer. You do
not need to have your vehicle towed to
the dealer.
cMalfunction indicator lamp blinking - An
engine misfire has been detected which
may damage the emission control sys-
tem. To reduce or avoid emission control
system damage:
a) do not drive at speeds above 45 MPH
(72 km/h).
b) avoid hard acceleration or decelera-
tion.
c) avoid steep uphill grades.
d) if possible, reduce the amount of
cargo being hauled or towed.
Instruments and controls
2-11
ZX
Page 61 of 249
The malfunction indicator lamp may stop
blinking and come on steady. Have the
vehicle inspected by an authorized NISSAN
dealer. You do not need to have your ve-
hicle towed to the dealer.
CAUTION
Continued vehicle operation without
having the emission control system
checked and repaired as necessary
could lead to poor driveability, reduced
fuel economy, and possible damage to
the emission control system.
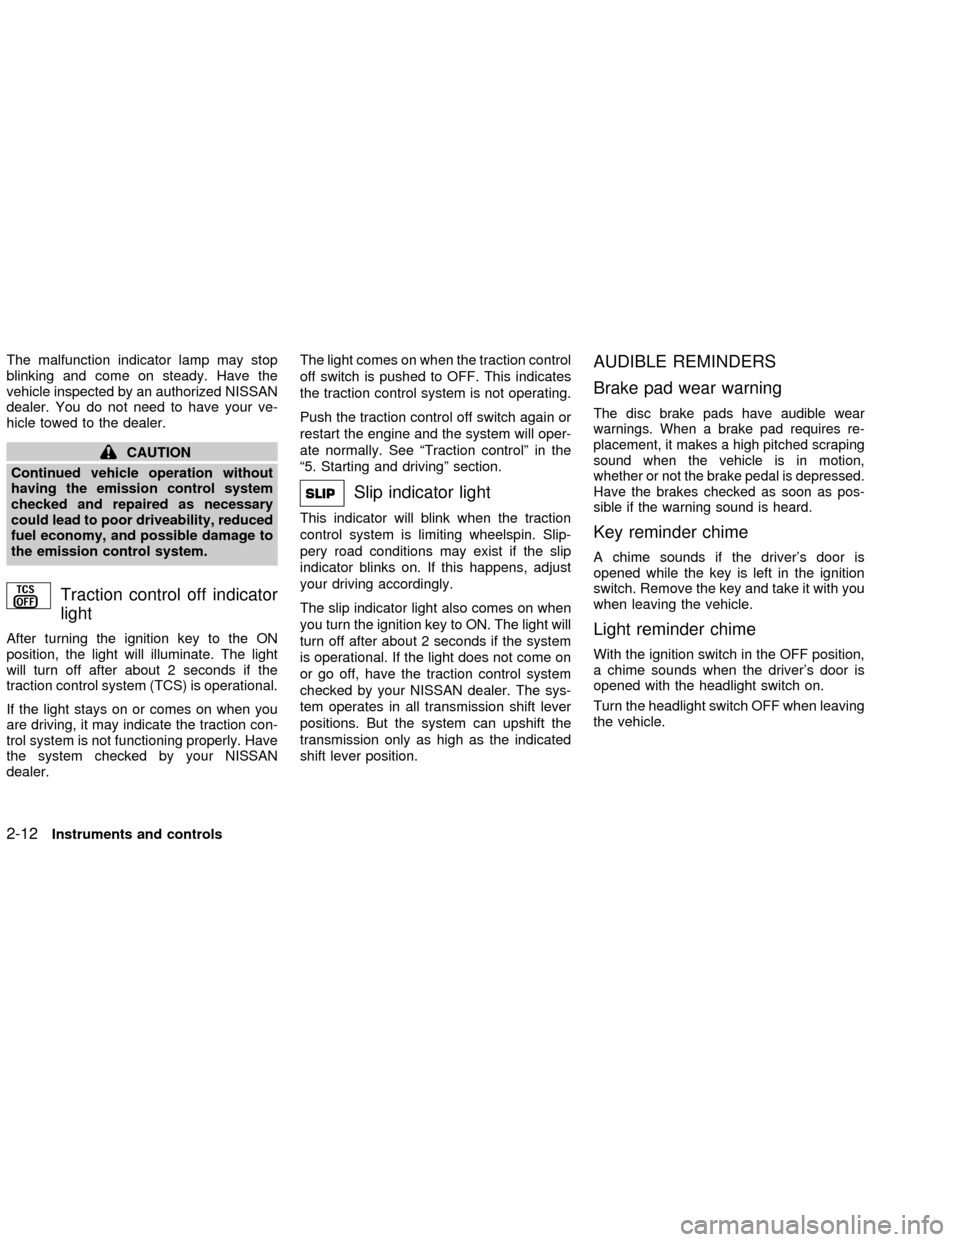
Traction control off indicator
light
After turning the ignition key to the ON
position, the light will illuminate. The light
will turn off after about 2 seconds if the
traction control system (TCS) is operational.
If the light stays on or comes on when you
are driving, it may indicate the traction con-
trol system is not functioning properly. Have
the system checked by your NISSAN
dealer.The light comes on when the traction control
off switch is pushed to OFF. This indicates
the traction control system is not operating.
Push the traction control off switch again or
restart the engine and the system will oper-
ate normally. See ªTraction controlº in the
ª5. Starting and drivingº section.
Slip indicator light
This indicator will blink when the traction
control system is limiting wheelspin. Slip-
pery road conditions may exist if the slip
indicator blinks on. If this happens, adjust
your driving accordingly.
The slip indicator light also comes on when
you turn the ignition key to ON. The light will
turn off after about 2 seconds if the system
is operational. If the light does not come on
or go off, have the traction control system
checked by your NISSAN dealer. The sys-
tem operates in all transmission shift lever
positions. But the system can upshift the
transmission only as high as the indicated
shift lever position.
AUDIBLE REMINDERS
Brake pad wear warning
The disc brake pads have audible wear
warnings. When a brake pad requires re-
placement, it makes a high pitched scraping
sound when the vehicle is in motion,
whether or not the brake pedal is depressed.
Have the brakes checked as soon as pos-
sible if the warning sound is heard.
Key reminder chime
A chime sounds if the driver's door is
opened while the key is left in the ignition
switch. Remove the key and take it with you
when leaving the vehicle.
Light reminder chime
With the ignition switch in the OFF position,
a chime sounds when the driver's door is
opened with the headlight switch on.
Turn the headlight switch OFF when leaving
the vehicle.
2-12Instruments and controls
ZX
Page 66 of 249
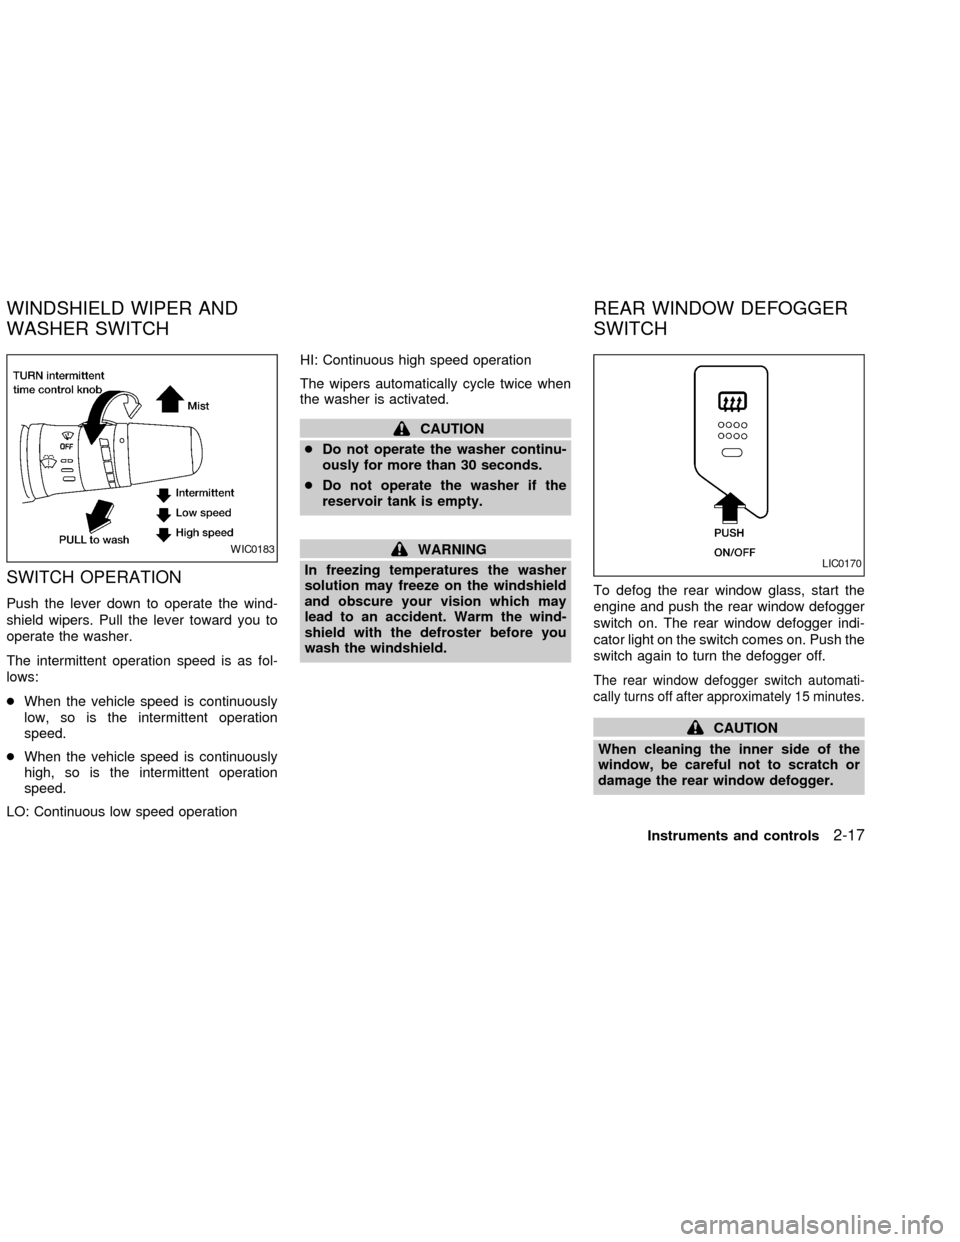
SWITCH OPERATION
Push the lever down to operate the wind-
shield wipers. Pull the lever toward you to
operate the washer.
The intermittent operation speed is as fol-
lows:
cWhen the vehicle speed is continuously
low, so is the intermittent operation
speed.
cWhen the vehicle speed is continuously
high, so is the intermittent operation
speed.
LO: Continuous low speed operationHI: Continuous high speed operation
The wipers automatically cycle twice when
the washer is activated.
CAUTION
cDo not operate the washer continu-
ously for more than 30 seconds.
cDo not operate the washer if the
reservoir tank is empty.
WARNING
In freezing temperatures the washer
solution may freeze on the windshield
and obscure your vision which may
lead to an accident. Warm the wind-
shield with the defroster before you
wash the windshield.To defog the rear window glass, start the
engine and push the rear window defogger
switch on. The rear window defogger indi-
cator light on the switch comes on. Push the
switch again to turn the defogger off.
The rear window defogger switch automati-
cally turns off after approximately 15 minutes.
CAUTION
When cleaning the inner side of the
window, be careful not to scratch or
damage the rear window defogger.
WIC0183LIC0170
WINDSHIELD WIPER AND
WASHER SWITCHREAR WINDOW DEFOGGER
SWITCH
Instruments and controls2-17
ZX
Page 82 of 249
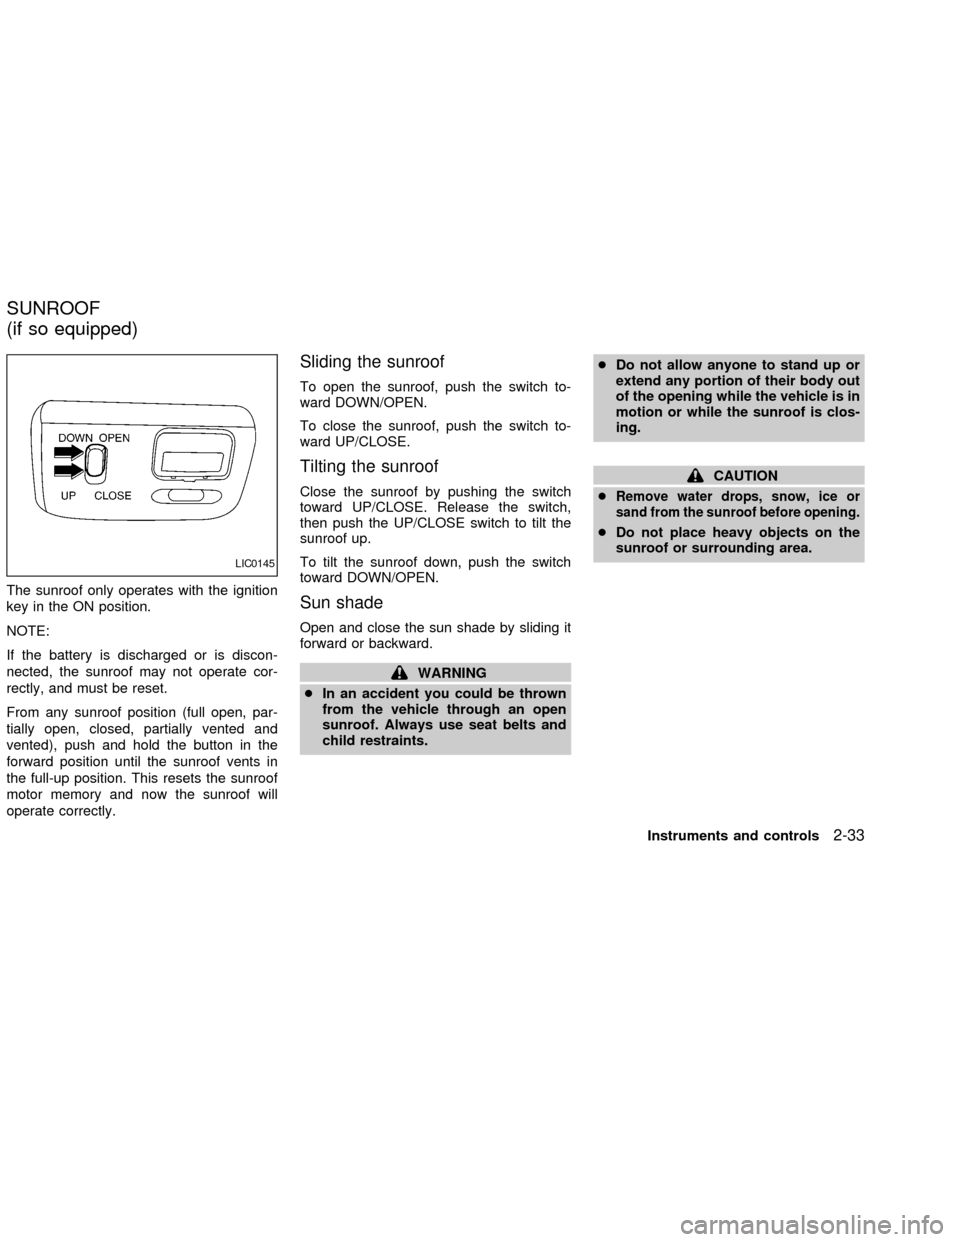
The sunroof only operates with the ignition
key in the ON position.
NOTE:
If the battery is discharged or is discon-
nected, the sunroof may not operate cor-
rectly, and must be reset.
From any sunroof position (full open, par-
tially open, closed, partially vented and
vented), push and hold the button in the
forward position until the sunroof vents in
the full-up position. This resets the sunroof
motor memory and now the sunroof will
operate correctly.
Sliding the sunroof
To open the sunroof, push the switch to-
ward DOWN/OPEN.
To close the sunroof, push the switch to-
ward UP/CLOSE.
Tilting the sunroof
Close the sunroof by pushing the switch
toward UP/CLOSE. Release the switch,
then push the UP/CLOSE switch to tilt the
sunroof up.
To tilt the sunroof down, push the switch
toward DOWN/OPEN.
Sun shade
Open and close the sun shade by sliding it
forward or backward.
WARNING
cIn an accident you could be thrown
from the vehicle through an open
sunroof. Always use seat belts and
child restraints.cDo not allow anyone to stand up or
extend any portion of their body out
of the opening while the vehicle is in
motion or while the sunroof is clos-
ing.
CAUTION
c
Remove water drops, snow, ice or
sand from the sunroof before opening.
cDo not place heavy objects on the
sunroof or surrounding area.
LIC0145
SUNROOF
(if so equipped)
Instruments and controls2-33
ZX
Page 136 of 249
WARNING
cThe exhaust gas and the exhaust-
system are very hot. Keep people,
animals or flammable materials
away from the exhaust system com-
ponents.
cDo not stop or park the vehicle over
flammable materials such as dry
grass, waste paper or rags. They
may ignite and cause a fire.
CAUTION
cDo not use leaded gasoline. Depos-
its from leaded gasoline seriously
reduce the three way catalyst's abil-
ity to help reduce exhaust pollut-
ants.
cKeep your engine tuned up. Malfunc-
tions in the ignition, fuel injection, or
electrical systems can cause over-
rich fuel flow into the three-way cata-
lyst, causing it to overheat. Do not
keep driving if the engine misfires,
or if noticeable loss of performance
or other unusual operating condi-
tions are detected. Have the vehicleinspected promptly by an authorized
NISSAN dealer.
cAvoid driving with an extremely low
fuel level. Running out of fuel could
cause the engine to misfire, damag-
ing the three way catalyst.
cDo not race the engine while warm-
ing it up.
cDo not push or tow your vehicle to
start the engine.AVOIDING COLLISION AND
ROLLOVER
WARNING
Failure to operate this vehicle in a safe
and prudent manner may result in loss
of control or an accident.
Be alert and drive defensively at all times.
Obey all traffic regulations. Avoid excessive
speed, high speed cornering, or sudden
steering maneuvers, because these driving
practices could cause you to lose control of
your vehicle.As with any vehicle, loss of
control could result in a collision with
other vehicles or objects, or cause thevehicle to roll over, particularly if the loss
of control causes the vehicle to slide
sideways.Be attentive at all times, and
avoid driving when tired. Never drive when
under the influence of alcohol or drugs (in-
cluding prescription or over-the-counter
drugs which may cause drowsiness). Al-
ways wear your seat belt as outlined in the
``Seats, restraints and supplemental air bag
systems'' section of this manual, and also
instruct your passengers to do so.
Starting and driving5-3
ZX
Page 137 of 249
DRINKING ALCOHOL/DRUGS
AND DRIVING
WARNING
Never drive under the influence of alco-
hol or drugs. Alcohol in the bloodstream
reduces coordination, delays reaction
time and impairs judgement. Driving after
drinking alcohol increases the likelihood
of being involved in an accident injuring
yourself and others. Additionally, if you
are injured in an accident, alcohol can
increase the severity of the injury.
NISSAN is committed to safe driving. How-
ever, you must choose not to drive under
the influence of alcohol. Every year thou-
sands of people are injured or killed in
alcohol related accidents. Although the local
laws vary on what is considered to be
legally intoxicated, the fact is that alcohol
affects all people differently and most
people underestimate the effects of alcohol.
Remember, drinking and driving don't mix!
And that's true for drugs, too (over the
counter, prescription, and illegal drugs).
Don't drive if your ability to operate your
vehicle is impaired by alcohol, drugs, or
some other physical condition.AUTOMATIC TRANSMISSION
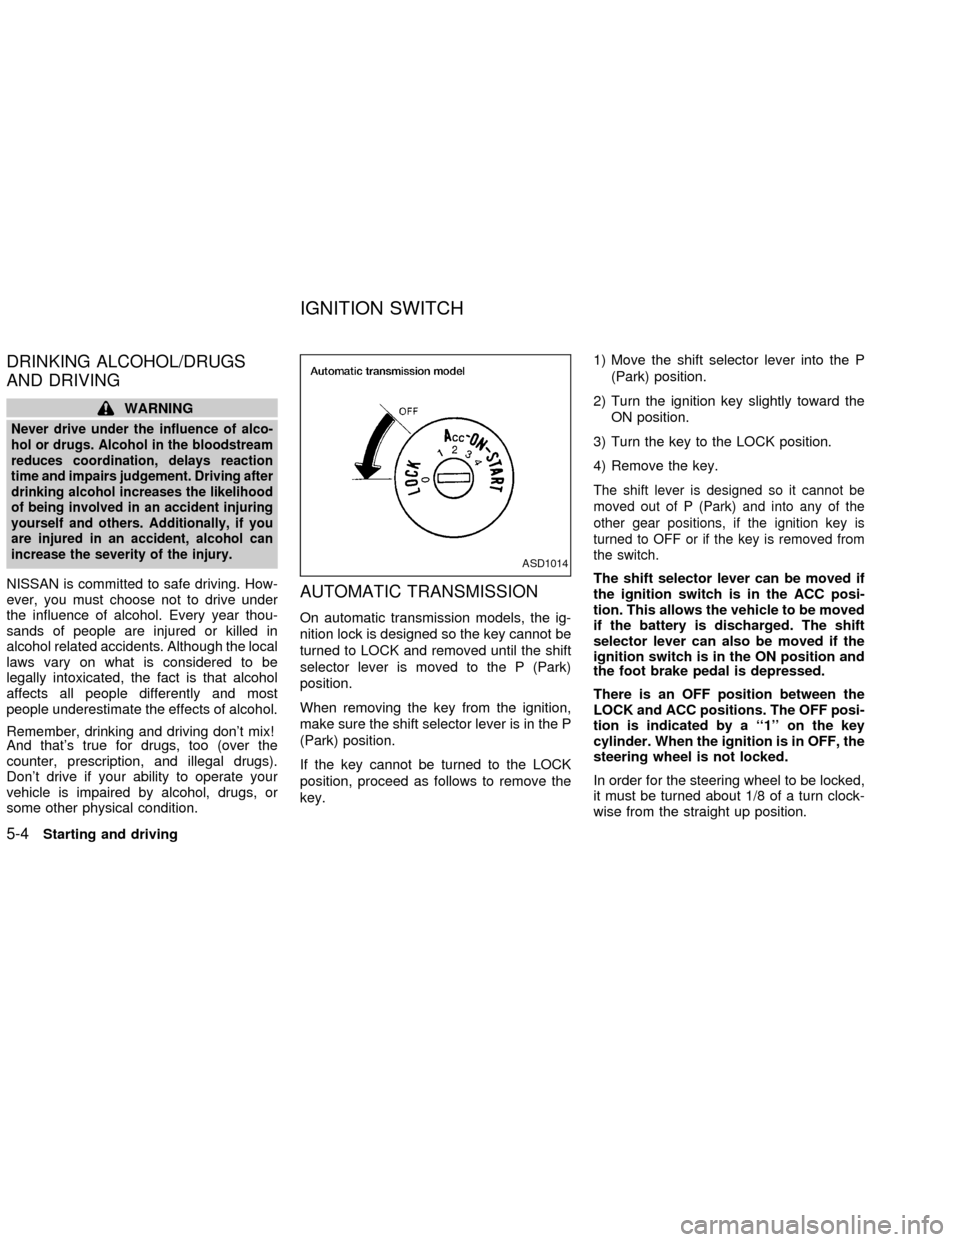
On automatic transmission models, the ig-
nition lock is designed so the key cannot be
turned to LOCK and removed until the shift
selector lever is moved to the P (Park)
position.
When removing the key from the ignition,
make sure the shift selector lever is in the P
(Park) position.
If the key cannot be turned to the LOCK
position, proceed as follows to remove the
key.1) Move the shift selector lever into the P
(Park) position.
2) Turn the ignition key slightly toward the
ON position.
3) Turn the key to the LOCK position.
4) Remove the key.
The shift lever is designed so it cannot be
moved out of P (Park) and into any of the
other gear positions, if the ignition key is
turned to OFF or if the key is removed from
the switch.
The shift selector lever can be moved if
the ignition switch is in the ACC posi-
tion. This allows the vehicle to be moved
if the battery is discharged. The shift
selector lever can also be moved if the
ignition switch is in the ON position and
the foot brake pedal is depressed.
There is an OFF position between the
LOCK and ACC positions. The OFF posi-
tion is indicated by a ``1'' on the key
cylinder. When the ignition is in OFF, the
steering wheel is not locked.
In order for the steering wheel to be locked,
it must be turned about 1/8 of a turn clock-
wise from the straight up position.
ASD1014
IGNITION SWITCH
5-4Starting and driving
ZX
Page 148 of 249

b) Tap the brake pedal; the SET light goes
out.
c) Turn the main switch off. Both the
CRUISE indicator on the main switch and
SET light in the instrument cluster go out.
The cruise control is automatically can-
celled and the SET light in the instrument
panel goes out if:
cyou depress the brake or clutch pedal
while pushing the RES/ACCEL or
COAST/SET switch.
cthe vehicle slows down more than 8 MPH
(13 km/h) below the set speed.
cyou depress the clutch pedal (manual
transmission), or move the shift selector
lever to N (Neutral) (automatic transmis-
sion).
To reset at a faster cruising speed,use
one of the following three methods.
a) Depress the accelerator pedal. When the
vehicle attains the desired speed, push
and release the COAST/SET switch.
b) Push and hold the RES/ACCEL switch.
When the vehicle attains the speed you
desire, release the switch.c)Push and release the RES/ACCEL switch.
Each time you do this, the set speed
increases by about 1 MPH (1.6 km/h).
To reset at a slower cruising speed,use
one of the following three methods:
a) Lightly tap the brake pedal. When the
vehicle attains the desired speed, push
the COAST/SET switch and release it.
b) Push and hold the COAST/SET switch.
Release the switch when the vehicle
slows to the desired speed.
c) Push and release the COAST/SET
switch. Each time you do this, the set
speed decreases by about 1 MPH (1.6
km/h).
To resume the preset speed,push and re-
lease the RES/ACCEL switch. The vehicle
returns to the last set cruising speed when the
vehicle speed is over 30 MPH (48 km/h).
During the first 1,000 miles (1,600 km),
follow these recommendations for the future
reliability and economy of your new vehicle.
cAvoid driving for long periods at constant
speed, either fast or slow.
cDo not accelerate at full throttle in any
gear.
cAvoid quick starts.
cAvoid hard braking as much as possible.
cDo not tow a trailer for the first 500 miles
(800 km).
BREAK-IN SCHEDULE
Starting and driving5-15
ZX
Page 151 of 249
cHEADED UPHILL WITH CURB:s2
Turn the wheels away from the curb and
move the vehicle back until the curb side
wheel gently touches the curb.
cHEADED UPHILL OR DOWNHILL, NO
CURB:
s3
Turn the wheels toward the side of the
road so the vehicle will move away from
the center of the road if it moves.
4. Turn the ignition key to the LOCK posi-
tion and remove the key.The power assisted steering is designed to
use a hydraulic pump, driven by the engine,
to assist steering.
If the engine stops or the hydraulic pump
drive belt breaks, you will still have control of
the vehicle. However, much greater steer-
ing effort is needed, especially in sharp
turns and at low speeds.
WARNING
If the engine is not running or is turned
off while driving, the power assist for
the steering will not work. Steering will
be much harder to operate.The brake system has two separate
hydraulic circuits. If one circuit malfunctions,
you will still have braking at two wheels.
BRAKING PRECAUTIONS
Vacuum assisted brake
The brake booster aids braking by using
engine vacuum. If the engine stops, you can
stop the vehicle by depressing the brake
pedal. However, greater foot pressure on
the brake pedal will be required to stop the
vehicle and stopping distance will be longer.
Using the brakes
Avoid resting your foot on the brake pedal
while driving. This overheats the brakes,
increases wear on the brake linings and
pads, and reduces gas mileage.
To help save the brakes and to prevent the
brakes from overheating, reduce speed and
downshift to a lower gear before going down
a slope or long grade. Overheated brakes
may reduce braking performance and could
result in loss of vehicle control.
Parking brake bedding
The parking brake shoes must be ``bedded
down'' whenever the stopping effect of the
POWER STEERING BRAKE SYSTEM
5-18Starting and driving
ZX