ECO mode NISSAN ALTIMA 2003 L31 / 3.G Owners Manual
[x] Cancel search | Manufacturer: NISSAN, Model Year: 2003, Model line: ALTIMA, Model: NISSAN ALTIMA 2003 L31 / 3.GPages: 256, PDF Size: 3.34 MB
Page 2 of 256
This manual includes information for all options
available on this model. Therefore, you may find
some information that does not apply to your
vehicle.
All information, specifications and illustrations in
this manual are those in effect at the time of
printing. NISSAN reserves the right to change
specifications or design without notice and with-
out obligation.
IMPORTANT INFORMATION ABOUT
THIS MANUAL
You will see various symbols in this manual. They
are used in the following ways:
WARNING
This is used to indicate the presence of a
hazard that could cause death or serious
personal injury. To avoid or reduce the
risk, the procedures must be followed
precisely.
CAUTION
This is used to indicate the presence of a
hazard that could cause minor or moder-
ate personal injury or damage to your ve-
hicle. To avoid or reduce the risk, the pro-
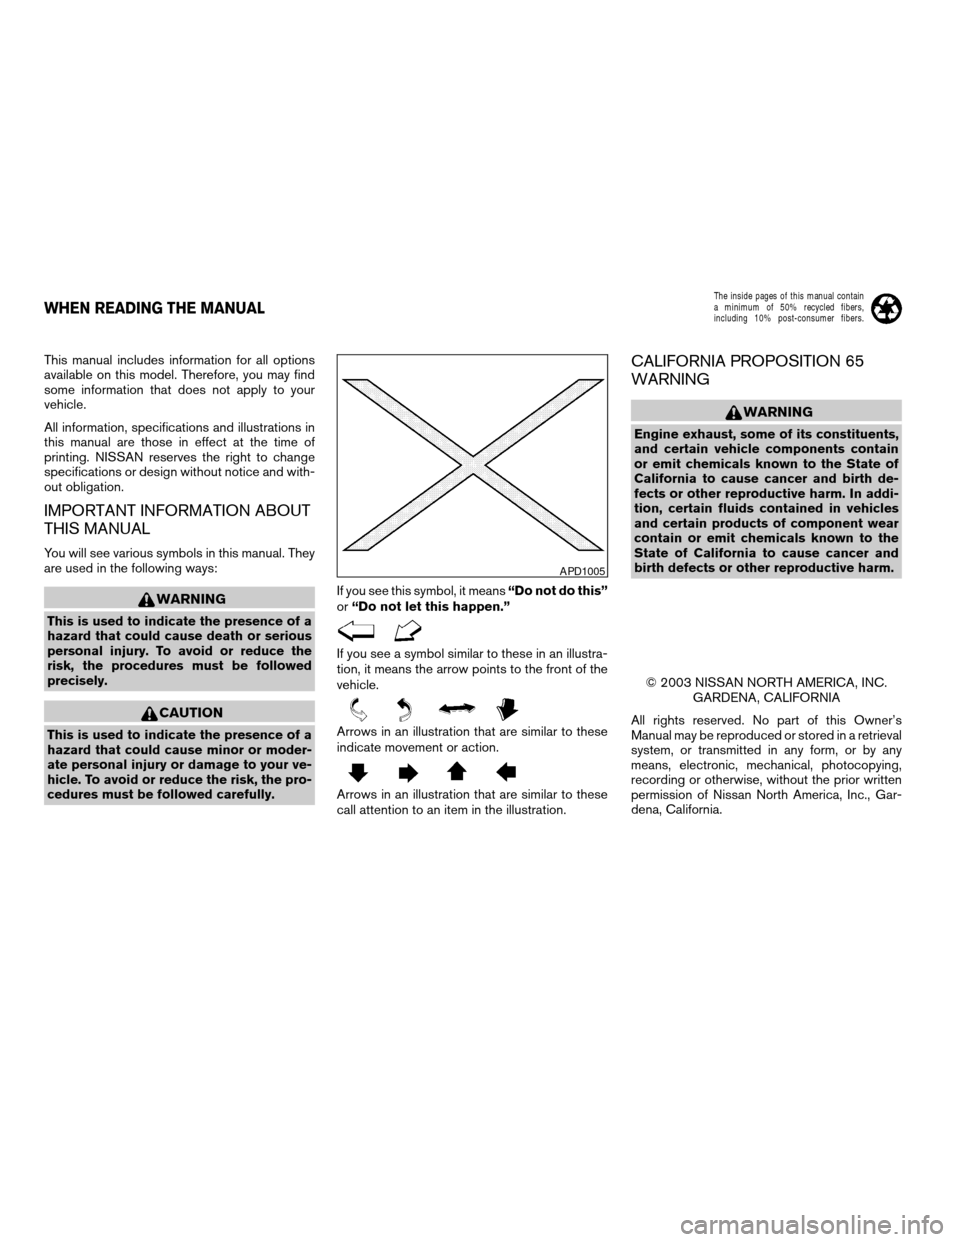
cedures must be followed carefully.If you see this symbol, it means“Do not do this”
or“Do not let this happen.”
If you see a symbol similar to these in an illustra-
tion, it means the arrow points to the front of the
vehicle.
Arrows in an illustration that are similar to these
indicate movement or action.
Arrows in an illustration that are similar to these
call attention to an item in the illustration.
CALIFORNIA PROPOSITION 65
WARNING
WARNING
Engine exhaust, some of its constituents,
and certain vehicle components contain
or emit chemicals known to the State of
California to cause cancer and birth de-
fects or other reproductive harm. In addi-
tion, certain fluids contained in vehicles
and certain products of component wear
contain or emit chemicals known to the
State of California to cause cancer and
birth defects or other reproductive harm.
© 2003 NISSAN NORTH AMERICA, INC.
GARDENA, CALIFORNIA
All rights reserved. No part of this Owner’s
Manual may be reproduced or stored in a retrieval
system, or transmitted in any form, or by any
means, electronic, mechanical, photocopying,
recording or otherwise, without the prior written
permission of Nissan North America, Inc., Gar-
dena, California.
APD1005
WHEN READING THE MANUAL
ZREVIEW COPY:Ð2003 Altima(l30)
Owners Manual(owners)ÐUSA English(nna)
04/21/03Ðdebbie
X
The inside pages of this manual contain
a minimum of 50% recycled fibers,
including 10% post-consumer fibers.
Page 45 of 256
INSTALLATION ON FRONT
PASSENGER SEAT
WARNING
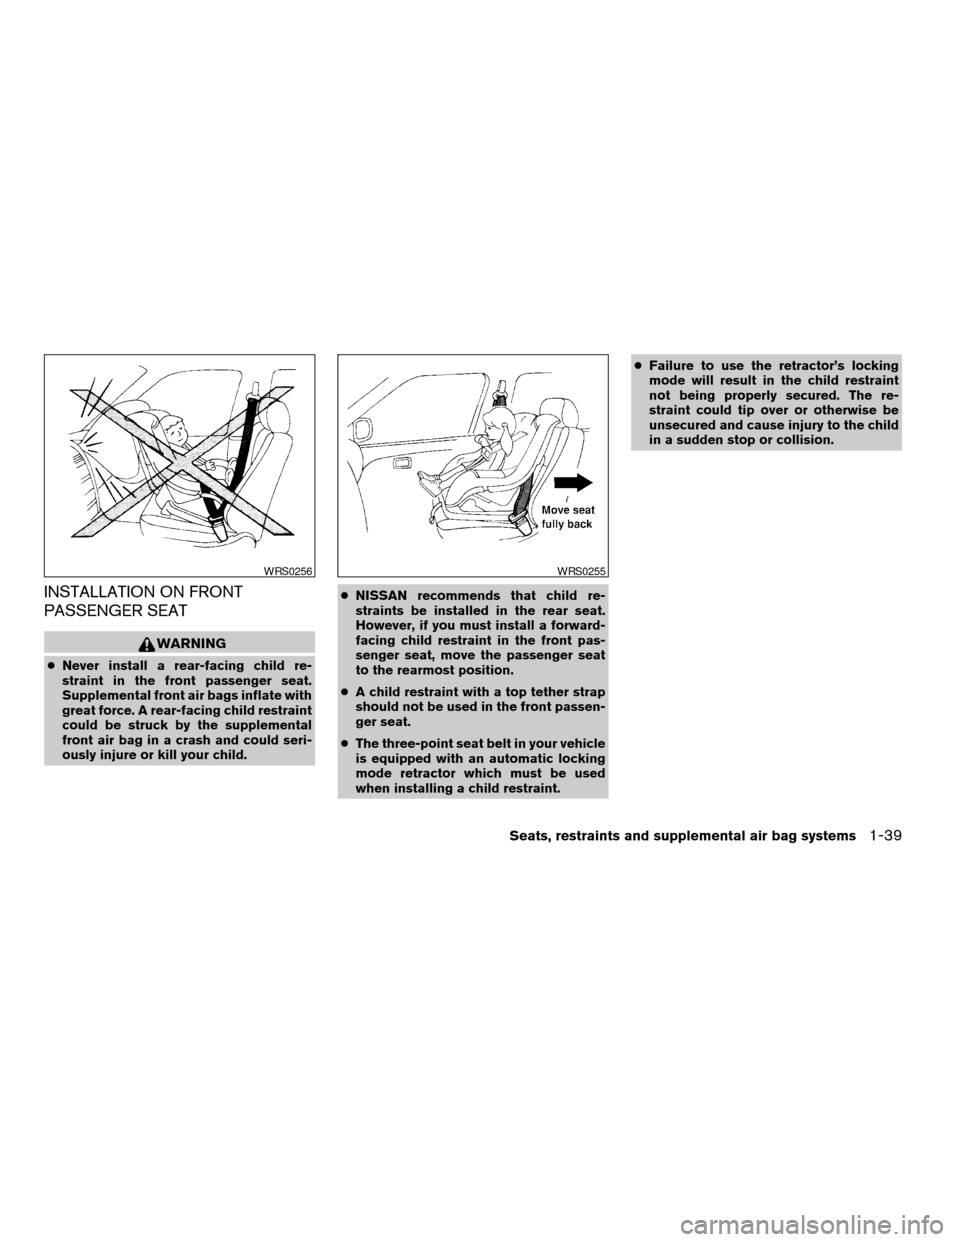
cNever install a rear-facing child re-
straint in the front passenger seat.
Supplemental front air bags inflate with
great force. A rear-facing child restraint
could be struck by the supplemental
front air bag in a crash and could seri-
ously injure or kill your child.cNISSAN recommends that child re-
straints be installed in the rear seat.
However, if you must install a forward-
facing child restraint in the front pas-
senger seat, move the passenger seat
to the rearmost position.
cA child restraint with a top tether strap
should not be used in the front passen-
ger seat.
cThe three-point seat belt in your vehicle
is equipped with an automatic locking
mode retractor which must be used
when installing a child restraint.cFailure to use the retractor’s locking
mode will result in the child restraint
not being properly secured. The re-
straint could tip over or otherwise be
unsecured and cause injury to the child
in a sudden stop or collision.
WRS0256WRS0255
Seats, restraints and supplemental air bag systems1-39
ZREVIEW COPY:Ð2003 Altima(l30)
Owners Manual(owners)ÐUSA English(nna)
04/21/03Ðdebbie
X
Page 52 of 256

TRIP COMPUTER
The display of the trip computer is situated in the
speedometer display. When the ignition is turned
to ON, the display scrolls all the modes of the trip
computer and then shows the mode chosen be-
fore the ignition switch is turned OFF.
If the battery terminal is disconnected,
push the trip computer mode switch more
than 1 second to activate the computer.
When the ignition switch is turned to ON, modes
of the trip computer can be selected by pushing
the trip mode switch on the steering wheel switch
for audio controls or by the trip computer change
button. The following modes can be selected:
Outside air temperature (ICY-°F or °C)
The outside air temperature is displayed in °F or
°C.
The outside air temperature mode includes a low
temperature warning feature: below 37°F (3°C) ,
the outside air temperature mode is automatically
selected and ICY will illuminate in order to draw
the driver’s attention. Press the mode switch if
you wish to return to the mode that was selectedbefore the warning occurred. The ICY indicator
will continue blinking as long as the temperature
remains below 39°F (4°C) .
The ambient temperature sensor is located in
front of the radiator. The sensor may be affected
by road or engine heat, wind directions and other
driving conditions. The display may differ from the
actual ambient temperature or the temperature
displayed on various signs or billboards.
Distance to empty (dte—mile or km)
The distance to empty (dte) mode provides you
with an estimation of the distance that can be
driven before refueling. The dte is constantly be-
ing calculated, based on the amount of fuel in the
fuel tank and the actual fuel consumption.
The display is updated every 30 seconds.
The dte mode includes a low range warning
feature: when the fuel level is low, the dte mode is
automatically selected and the digits blink in or-
der to draw the driver’s attention. Press the mode
switch if you wish to return to the mode that was
selected before the warning occurred. The dte
mark (dte) will remain blinking until the vehicle is
refueled.
When the fuel level drops even lower, the dte
display will change to (----) .
WIC0267
2-4Instruments and controls
ZREVIEW COPY:Ð2003 Altima(l30)
Owners Manual(owners)ÐUSA English(nna)
04/21/03Ðdebbie
X
Page 53 of 256
NOTE:
cIf the amount of fuel added while the
ignition switch is OFF is small, the dis-
play just before the ignition switch is
turned OFF may continue to be dis-
played.
cWhen driving uphill or rounding curves,
the fuel in the tank shifts, which may
momentarily change the display.
Average fuel consumption (Mpg or
l/100km)
The average fuel consumption mode shows the
average fuel consumption since the last reset.
Resetting is done by pressing the mode switch
for more than approximately 1 second. The dis-
play is updated every 30 seconds. At about the
first 1/3 miles (500 m) after a reset, the display
shows (----) .
Average speed (MPH or km/h)
The average speed mode shows the average
vehicle speed since last reset. Resetting is done
by pressing the mode switch for more than ap-
proximately 1 second. The display is updated
every 30 seconds. The first 30 seconds after a
reset, the display shows (----) .
Journey time
The journey time mode shows the time since the
last reset. The displayed time can be reset by
pressing the mode switch for more than approxi-
mately 1 second.
NOTE:
If a low temperature warning and low range
warning occur simultaneously, other dis-
play modes switch automatically to the
outside temperature display.
When the mode switch is pushed, the dis-
play switches to the mode chosen before
the warning display, and the outside air
temperature indicator marked ICY will
blink.
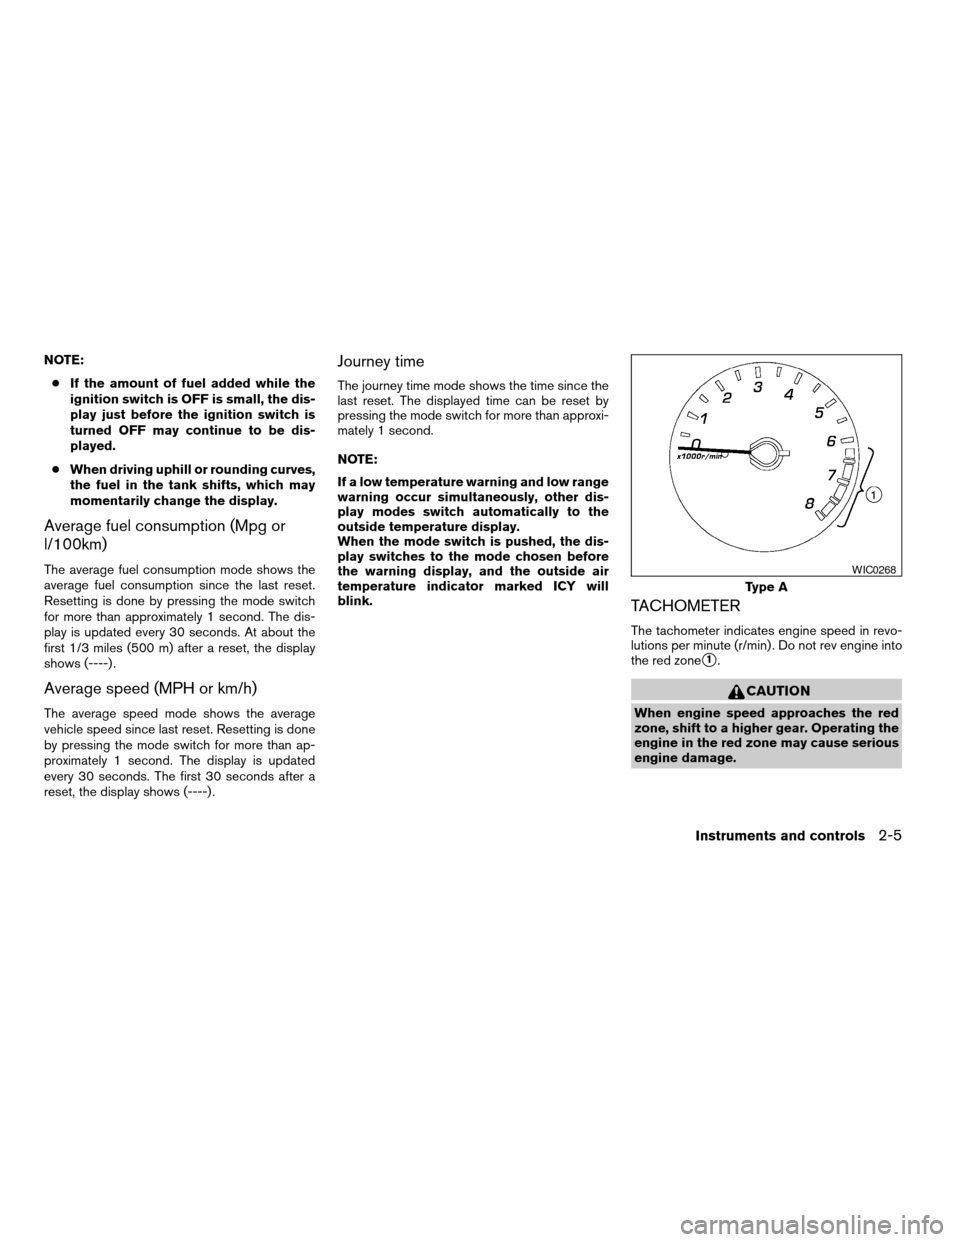
TACHOMETER
The tachometer indicates engine speed in revo-
lutions per minute (r/min) . Do not rev engine into
the red zone
s1.
CAUTION
When engine speed approaches the red
zone, shift to a higher gear. Operating the
engine in the red zone may cause serious
engine damage.
Type A
WIC0268
Instruments and controls2-5
ZREVIEW COPY:Ð2003 Altima(l30)
Owners Manual(owners)ÐUSA English(nna)
04/21/03Ðdebbie
X
Page 86 of 256
The interior lights illuminate when a front or rear
door is opened. Once the doors are closed,
these lights turn off in 30 seconds or turn off
immediately when the key is turned to the ON
position.
BATTERY SAVER
If the vehicle doors are not fully closed and the
interior lights remain illuminated, they eventually
turn off automatically to prevent the battery from
becoming discharged. Interior lights that illumi-
nate when doors are opened turn off after ap-
proximately 30 minutes.The HomeLinkTUniversal Transceiver provides a
convenient way to consolidate the functions of up
to three individual hand-held transmitters into
one built-in device.
HomeLinkTUniversal Transceiver:
cWill operate most Radio Frequency (RF)
devices such as garage doors, gates, home
and office lighting, entry door locks and se-
curity systems.
cIs powered by your vehicle’s battery. No
separate batteries are required. If the vehi-
cle’s battery is discharged or is discon-
nected, HomeLinkTwill retain all program-
ming.
Once the HomeLinkTUniversal Transceiver
is programmed, retain the original trans-
mitter for future programming procedures
(i.e., new vehicle purchases) . Upon sale of
the vehicle, the programmed HomeLinkT
Universal Transceiver buttons should be
erased for security purposes. For addi-
tional information refer to “Programming
the HomeLinkTUniversal Transceiver” later
in this section.
WARNING
cDo not use the HomeLinkTUniversal
Transceiver with any garage door
opener that lacks safety stop and re-
verse features as required by federal
safety standards. (These standards be-
came effective for opener models
manufactured after April 1, 1982) . A ga-
rage door opener which cannot detect
an object in the path of a closing garage
door and then automatically stop and
reverse, does not meet current federal
safety standards. Using a garage door
opener without these features in-
creases the risk of serious injury or
death.
cDuring the programming procedure
your garage door or security gate will
open and close (if the transmitter is
within range) . Make sure that people or
objects are clear of the garage door,
gate, etc. that you are programming.
cYour vehicle’s engine should be turned
off while programming the HomeLinkT
Universal Transceiver.
ILLUMINATED ENTRY SYSTEM HOMELINKTUNIVERSAL
TRANSCEIVER (if so equipped)
2-38Instruments and controls
ZREVIEW COPY:Ð2003 Altima(l30)
Owners Manual(owners)ÐUSA English(nna)
04/21/03Ðdebbie
X
Page 111 of 256
WARNING
cThe air conditioner cooling function op-
erates only when the engine is running.
cDo not leave children, impaired adults,
or pets alone in your vehicle. They could
accidentally injure themselves or oth-
ers through inadvertent operation of
the vehicle. Also, on hot, sunny days,
temperatures in a closed vehicle could
quickly become high enough to cause
severe or possibly fatal injuries to
people or animals.
cDo not use the recirculation mode for
long periods as it may cause the interior
air to become stale and the windows to
fog up.
cPositioning of the heater and/or air
conditioner controls should not be
done while driving so full attention may
be given to vehicle operation.
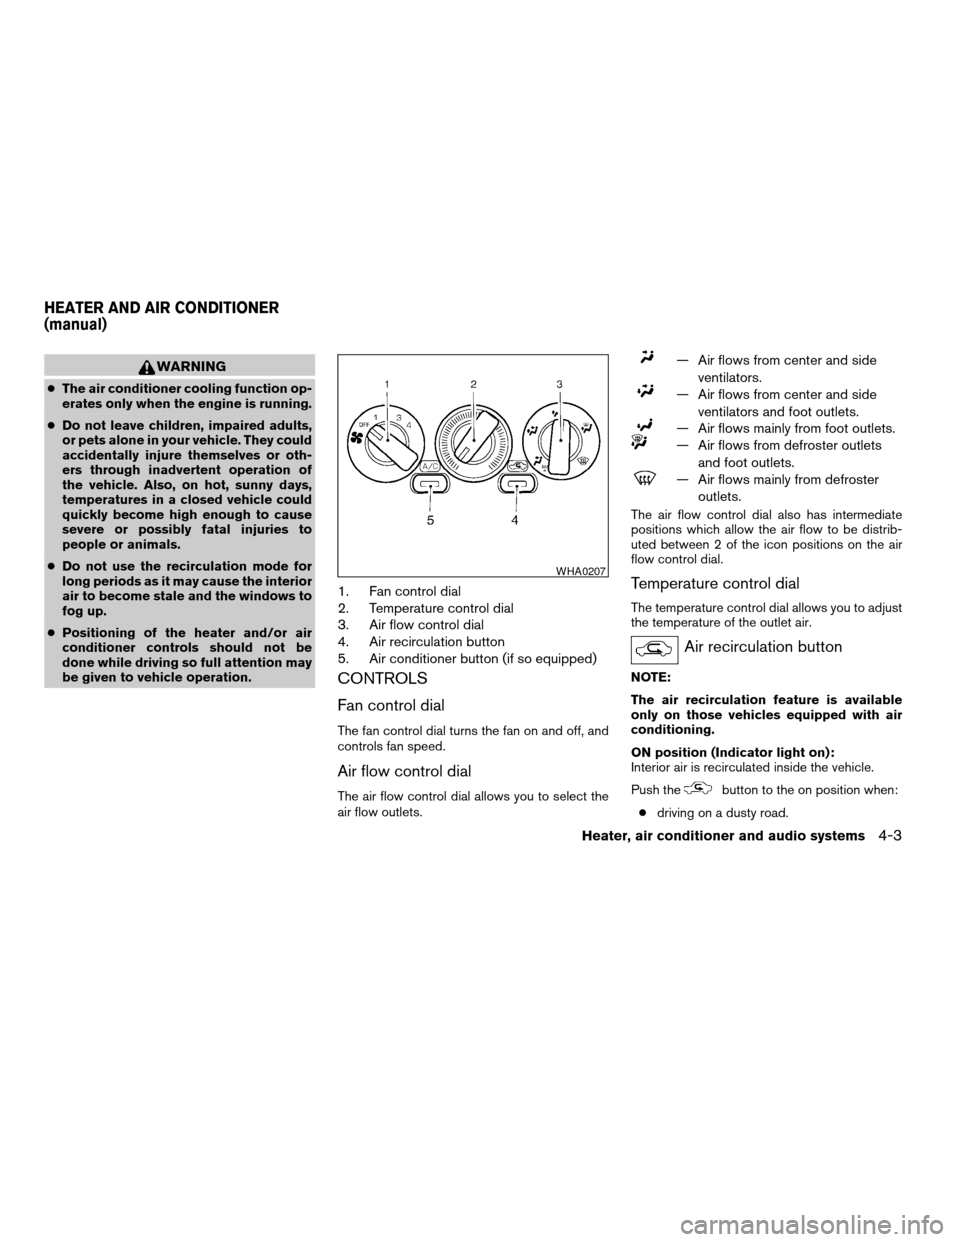
1. Fan control dial
2. Temperature control dial
3. Air flow control dial
4. Air recirculation button
5. Air conditioner button (if so equipped)
CONTROLS
Fan control dial
The fan control dial turns the fan on and off, and
controls fan speed.
Air flow control dial
The air flow control dial allows you to select the
air flow outlets.
— Air flows from center and side
ventilators.
— Air flows from center and side
ventilators and foot outlets.
— Air flows mainly from foot outlets.
— Air flows from defroster outlets
and foot outlets.
— Air flows mainly from defroster
outlets.
The air flow control dial also has intermediate
positions which allow the air flow to be distrib-
uted between 2 of the icon positions on the air
flow control dial.
Temperature control dial
The temperature control dial allows you to adjust
the temperature of the outlet air.
Air recirculation button
NOTE:
The air recirculation feature is available
only on those vehicles equipped with air
conditioning.
ON position (Indicator light on):
Interior air is recirculated inside the vehicle.
Push the
button to the on position when:
cdriving on a dusty road.
WHA0207
HEATER AND AIR CONDITIONER
(manual)
Heater, air conditioner and audio systems4-3
ZREVIEW COPY:Ð2003 Altima(l30)
Owners Manual(owners)ÐUSA English(nna)
04/21/03Ðdebbie
X
Page 118 of 256
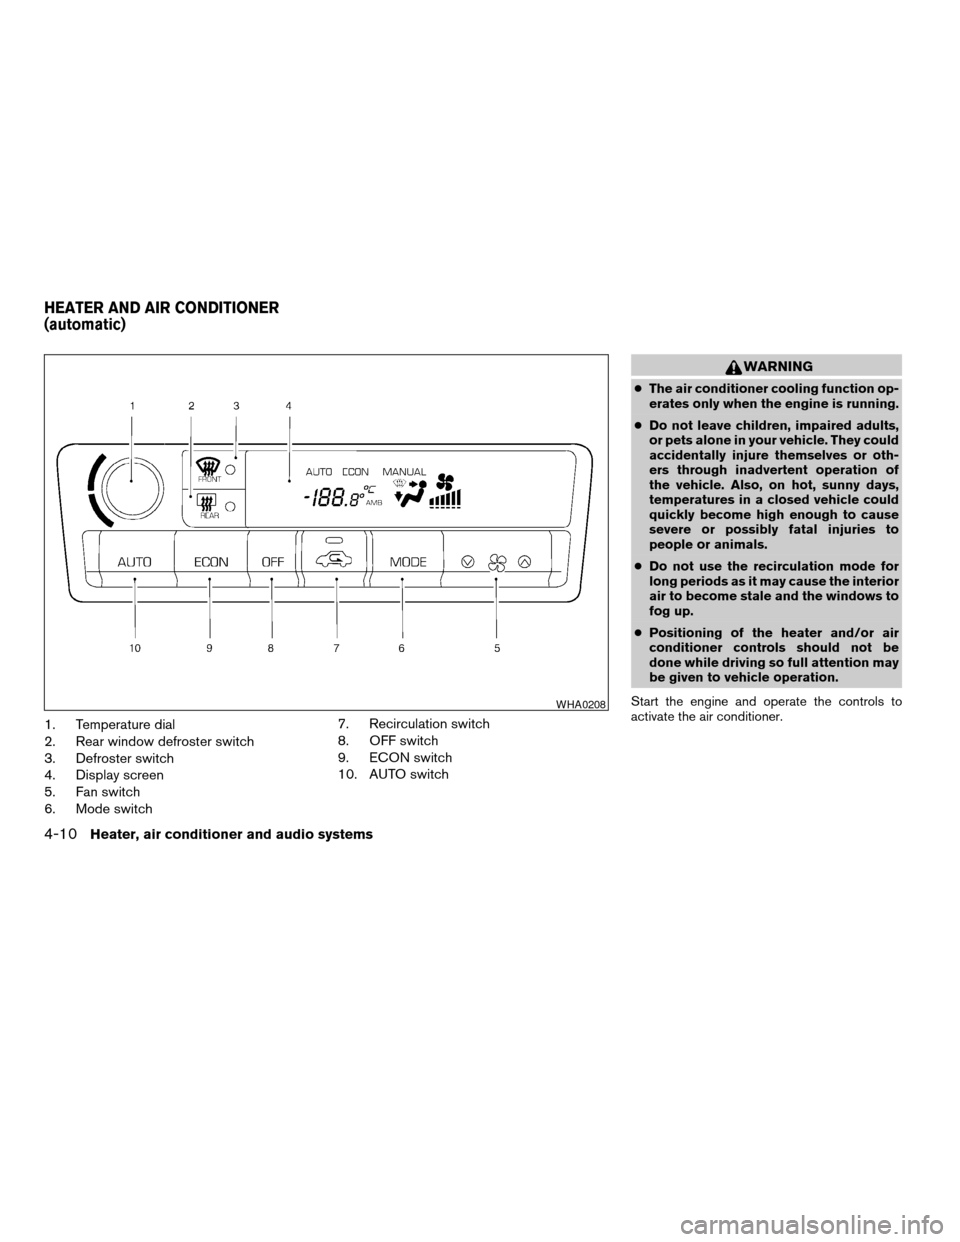
1. Temperature dial
2. Rear window defroster switch
3. Defroster switch
4. Display screen
5. Fan switch
6. Mode switch7. Recirculation switch
8. OFF switch
9. ECON switch
10. AUTO switch
WARNING
cThe air conditioner cooling function op-
erates only when the engine is running.
cDo not leave children, impaired adults,
or pets alone in your vehicle. They could
accidentally injure themselves or oth-
ers through inadvertent operation of
the vehicle. Also, on hot, sunny days,
temperatures in a closed vehicle could
quickly become high enough to cause
severe or possibly fatal injuries to
people or animals.
cDo not use the recirculation mode for
long periods as it may cause the interior
air to become stale and the windows to
fog up.
cPositioning of the heater and/or air
conditioner controls should not be
done while driving so full attention may
be given to vehicle operation.
Start the engine and operate the controls to
activate the air conditioner.
WHA0208
HEATER AND AIR CONDITIONER
(automatic)
4-10Heater, air conditioner and audio systems
ZREVIEW COPY:Ð2003 Altima(l30)
Owners Manual(owners)ÐUSA English(nna)
04/21/03Ðdebbie
X
Page 119 of 256

AUTOMATIC OPERATION
Cooling and/or dehumidified heating
(auto)
This mode may be normally used all year round as
the system automatically works to keep a con-
stant temperature. Air flow distribution and fan
speed are also controlled automatically.
1. Push the AUTO button on. (AUTO will be
displayed.)
2. Turn the temperature dial to the left or right
to set the desired temperature.
cAdjust the temperature dial to about 75°F
(24°C) for normal operation.
cThe temperature of the passenger compart-
ment will be maintained automatically. Air
flow distribution and fan speed are also con-
trolled automatically.
Heating (econ)
The air conditioner does not activate. When you
need to heat only, use this mode.
1. Push the ECON (Economy) button on.
(ECON will be displayed.)
2. Turn the temperature dial to the left or right
to set the desired temperature.cThe temperature of the passenger compart-
ment will be maintained automatically. Air
flow distribution and fan speed are also con-
trolled automatically.
cDo not set the temperature lower than the
outside air temperature. Otherwise the sys-
tem may not work properly.
cNot recommended if windows fog up.
Dehumidified defogging
1. Push the DEF buttonon. The indica-
tor light on the button will come on.
2. Turn the temperature dial to the left or right
to set the desired temperature.
cTo quickly remove ice from the outside of the
windows, push the manual fan control
button
and set to the maximum
position.
cAs soon as possible after the windshield is
clean, push the AUTO button to return to the
auto mode.
cWhen the DEF button
is pushed, the
air conditioner will automatically be turned
on at outside temperatures above 36 - 37°F
(2 - 3°C) . The air conditioning system will
continue to operate until the fan control dial
is turned to OFF or the vehicle is shut off,
even if the air flow control dial is turned to aposition other than the
position. This
dehumidifies the air which helps defog the
windshield. The air recirculate mode auto-
matically turns off, allowing outside air to be
drawn into the passenger compartment to
further improve the defogging performance.
MANUAL OPERATION
Fan speed control
Push the fan control buttonup or down
to manually control the fan speed.
Push the AUTO button to return to automatic
control of the fan speed.
Air recirculation
Push the air recirculation buttonto recir-
culate interior air inside the vehicle. The indicator
light on the switch will come on.
Push it again to make the air inlet controlled
automatically (FRESH, REC/FRE and RECIR-
CULATION) . The indicator will go out.
The air recirculation button will not be activated
when the air conditioner is in DEF mode.
Air flow control
Pushing the manual air flow control button se-
lects the air outlet to:
Heater, air conditioner and audio systems4-11
ZREVIEW COPY:Ð2003 Altima(l30)
Owners Manual(owners)ÐUSA English(nna)
04/21/03Ðdebbie
X
Page 124 of 256
When no CD is loaded, the radio comes on.
Pushing the PWR/VOL control knob again turns
the system off.
Turn the PWR/VOL control knob to the right to
increase volume or to the left to decrease volume.
Adjusting tone quality and speaker balance
Press the AUDIO button to enter the audio adjust
mode:
Bass!Mid!Treb!Fade!Bal
Press the TUNE/FF-REV (
or)or
SEEK/TRACK (
or) to adjust to the
desired levels. The display will return to the regu-
lar radio display after 7 seconds, or you may
press the AUDIO button again to return to the
regular radio display.
Clock operation
Pressing the MENU or CLOCK button displays
the clock with the radio on or off. Press the MENU
or CLOCK button again to turn off the clock
display.
Clock set
1. Press and hold the MENU or CLOCK button
until it beeps (longer than 2 seconds) .2. The hours will start flashing. Press
TUNE/FF-REV (
or)or
SEEK/TRACK (
or) to adjust
the hours.
3. Press the MENU or CLOCK button to
switch to the minute adjustment.
4. Press TUNE/FF-REV (
or)or
SEEK/TRACK (
or) to adjust
the minutes.
5. Press the MENU or CLOCK button again to
exit the clock set mode.
The display will return to the regular clock display
after 7 seconds, or you may press the MENU or
CLOCK button again to return to the regular
clock display.
FM-AM radio operation
FM-AM band select
Push the AM or the FM button to change from AM
to FM reception.
The FM stereo indicator, ST, illuminates during
FM stereo reception. When the stereo broadcast
signal is weak, the radio automatically changes
from stereo to monaural reception.
TUNE/FF—REV
WARNING
The radio should not be tuned while driv-
ing so full attention may be given to ve-
hicle operation.
Use the
andbuttons for manual
tuning. To move quickly through the channels,
hold the tuning buttons down.
SEEK tuning
Push SEEK/TRACK (
or) . SEEK
tuning begins from low to high frequencies or
high to low frequencies, depending on which
button is pressed, and stops at the next broad-
casting station. If using the up button, once the
highest broadcasting station is reached, the ra-
dio continues in the SEEK mode at the lowest
broadcasting station. If using the down button,
once the lowest broadcasting station is reached,
the radio continues in the SEEK mode at the
highest broadcasting station.
SCAN tuning
Push the SCAN button. SCAN illuminates in the
display window. SCAN tuning begins from low to
high frequencies or high to low frequencies.
SCAN tuning stops for 5 seconds at each broad-
casting station that has sufficient signal strength.
4-16Heater, air conditioner and audio systems
ZREVIEW COPY:Ð2003 Altima(l30)
Owners Manual(owners)ÐUSA English(nna)
04/21/03Ðdebbie
X
Page 125 of 256

When scanning, SCAN blinks in the display.
Pushing the SCAN button again during this 5
second period stops SCAN tuning and the radio
remains tuned to that station.
Station memory operation — Travel Preset
is OFF
Each preset mode (A, B or C) has 6 presets,
capable of storing any combination of AM, FM
and FM RDS stations.
Press the PRESET ABC button to change be-
tween the presets:
A!B!C
The radio displays icon A, B or C to indicate
which set of presets is active.
To store a radio station in a preset:
1. Select the desired preset by pressing PRE-
SET ABC.
2. Tune to the desired station.
3. Press the desired station select button (>2
seconds) .
4. When the indicator illuminates in the station
selection button, a beep will sound indicat-
ing memorization is complete. For FM sta-
tions, the indicator will turn green. For AM
stations, the indicator will turn amber.5. Other station select buttons can be set in
the same manner.
If the battery cable is disconnected, or if the radio
fuse opens, the radio memory is canceled. In that
case, reset the desired stations.
Turning ON Travel Preset
1. Press the TRAVEL preset button (<1.5 sec-
onds) . The TRAVEL icon shows in the dis-
play.
2. The radio selects the strongest stations in
the area and stores them in Travel Presets A,
B and C. 12 FM stations and 6 AM stations
are the default settings. To change the de-
fault settings, see “Editing Travel Preset”
later in this section.
3. When finished storing radio stations, the
radio tunes to the first stored preset of Travel
Preset A.
4. If the radio cannot find any stations, the radio
displays“NO STATION”and mutes the au-
dio.
5. If the radio cannot fill all the presets, the
remaining presets are stored with 87.9 for
FM and 600 for AM.
The TUNE, SCAN, SEEK and preset memory
functions are available while Travel Preset mode
is on.Canceling Travel Preset
Press the TRAVEL preset button (<1.5 seconds)
to clear the Travel Preset memory. This turns off
the Travel icon. The radio returns to the last used
preset of A, B or C in the permanent preset
memory.
Storing Travel Preset stations in permanent
memory
1. While in Travel Preset mode, press and hold
the TRAVEL preset button until it beeps (>3
seconds) .
2. The presets are transferred from Travel Pre-
set memory to the permanent preset
memory for A, B, and C.“LOAD”is dis-
played.
3. The TRAVEL preset indicator turns off.
Preset Scan
Pressing the Preset Scan button (<1.5 seconds)
scans the permanent preset memory that is se-
lected (A, B or C) from1-6for5seconds. If the
Travel Preset is ON, the travel preset that is
selected (A, B or C) from1-6isscanned for 5
seconds.
Heater, air conditioner and audio systems4-17
ZREVIEW COPY:Ð2003 Altima(l30)
Owners Manual(owners)ÐUSA English(nna)
04/21/03Ðdebbie
X