display NISSAN ALTIMA 2005 L31 / 3.G Owners Manual
[x] Cancel search | Manufacturer: NISSAN, Model Year: 2005, Model line: ALTIMA, Model: NISSAN ALTIMA 2005 L31 / 3.GPages: 304, PDF Size: 4.91 MB
Page 5 of 304
Table of
ContentsIllustrated table of contents
Safety—Seats, seat belts and supplemental restraint system
Instruments and controls
Pre-driving checks and adjustments
Display screen, heater, air conditioner and audio systems
Starting and driving
In case of emergency
Appearance and care
Maintenance and do-it-yourself
Technical and consumer information
Index
0
1
2
3
4
5
6
7
8
9
10
Page 66 of 304
SUPPLEMENTAL AIR BAG
WARNING LIGHT
The supplemental air bag warning light,
displayingin the instrument panel, moni-
tors the circuits of the supplemental front air bag,
supplemental side air bag and curtain side-
impact air bag (if so equipped) and pre-tensioner
seat belt systems. The circuits monitored by the
supplemental air bag warning light are the diag-
nosis sensor unit, crash zone sensor, satellite
sensors, front air bag modules, side air bag mod-
ules, curtain side-impact air bag modules, pre-
tensioner seat belts and all related wiring. When the ignition key is in the ON or START
position, the supplemental air bag warning light
illuminates for about 7 seconds and then turns
off. This means the system is operational.
If any of the following conditions occur, the
supplemental front air bag, supplemental side air
bag and curtain side-impact air bag (if so
equipped) and pre-tensioner seat belt systems
need servicing:
c The supplemental air bag warning light re-
mains on after approximately 7 seconds.
c The supplemental air bag warning light
flashes intermittently.
c The supplemental air bag warning light does
not come on at all.
Under these conditions, the supplemental front
air bag, supplemental side air bags and curtain
side-impact air bag (if so equipped) or pre-
tensioner seat belt systems may not operate
properly. It must be checked and repaired. Take
your vehicle to the nearest NISSAN dealer.
WARNING
If the supplemental air bag warning light
is on, it could mean that the supplemental
front air bag, supplemental side air bag,
curtain side-impact air bag systems (if so
equipped) and/or pre-tensioner seat belt
systems will not operate in an accident. To
help avoid injury to yourself or others,
have your vehicle checked by a NISSAN
dealer as soon as possible.
Repair and replacement procedure
The supplemental front air bags, supplemental
side air bags, curtain side-impact air bags (if so
equipped) and pre-tensioner seat belts are de-
signed to inflate on a one-time-only basis. As a
reminder, unless it is damaged, the supplemental
air bag warning light remains illuminated after
inflation has occurred. Repair and replacement of
these supplemental air bag systems should be
done only by a NISSAN dealer.
When maintenance work is required on the ve-
hicle, the supplemental front air bags, supple-
mental side air bags, curtain side-impact air bags
(if so equipped) , pre-tensioner seat belts and
related parts should be pointed out to the person
performing the maintenance. The ignition key
should always be in the LOCK position when
working under the hood or inside the vehicle.LRS0100
1-48Safety—Seats, seat belts and supplemental restraint system
ZREVIEW COPYÐ2005 Altima (l30)
Owners ManualÐUSA_English (nna)
06/28/04Ðtbrooks
X
Page 72 of 304
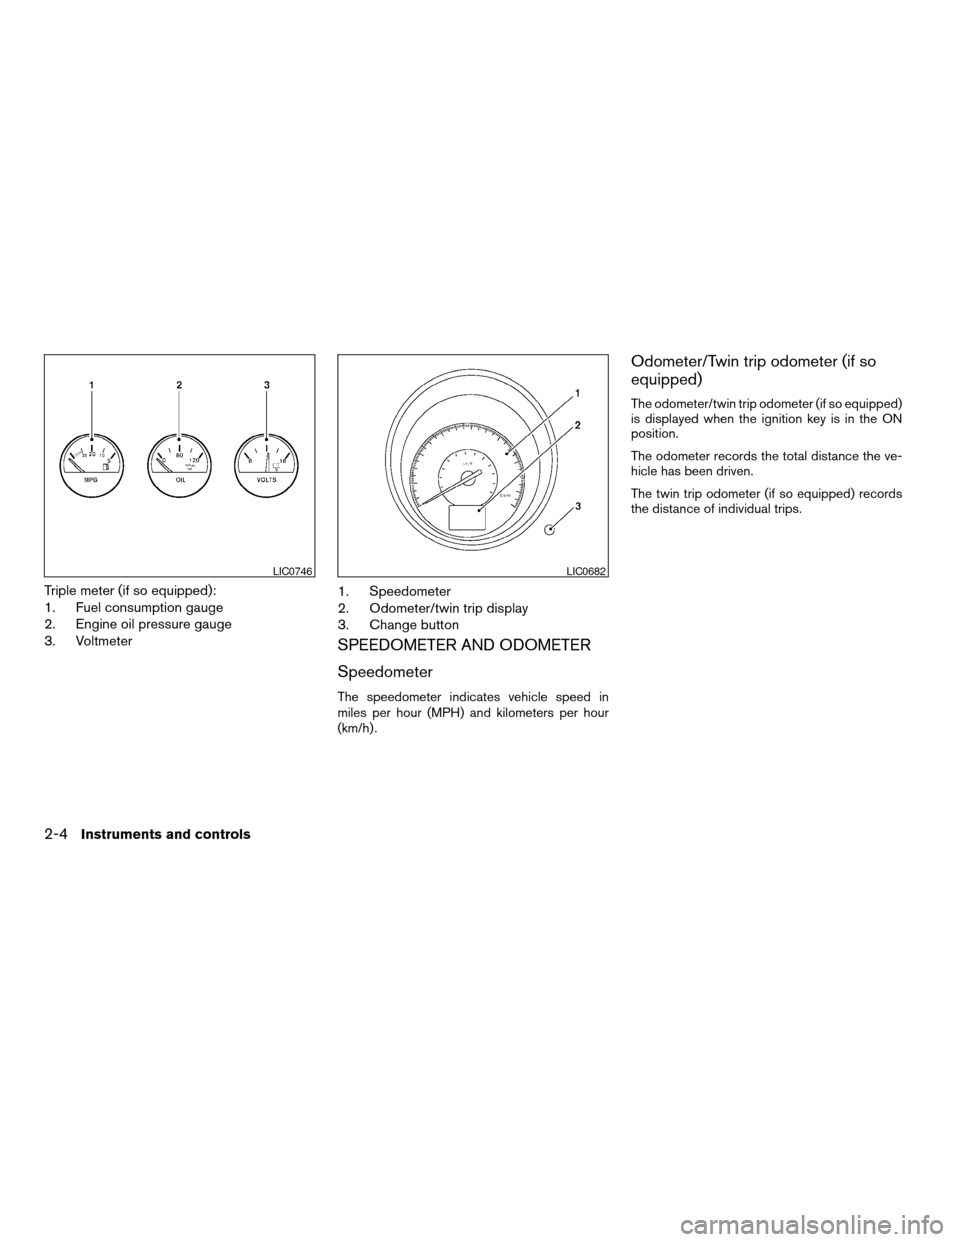
Triple meter (if so equipped):
1. Fuel consumption gauge
2. Engine oil pressure gauge
3. Voltmeter1. Speedometer
2. Odometer/twin trip display
3. Change button
SPEEDOMETER AND ODOMETER
Speedometer
The speedometer indicates vehicle speed in
miles per hour (MPH) and kilometers per hour
(km/h) .
Odometer/Twin trip odometer (if so
equipped)
The odometer/twin trip odometer (if so equipped)
is displayed when the ignition key is in the ON
position.
The odometer records the total distance the ve-
hicle has been driven.
The twin trip odometer (if so equipped) records
the distance of individual trips.
LIC0746LIC0682
2-4Instruments and controls
ZREVIEW COPYÐ2005 Altima
(l30)
Owners ManualÐUSA_English (nna)
06/28/04Ðtbrooks
X
Page 73 of 304
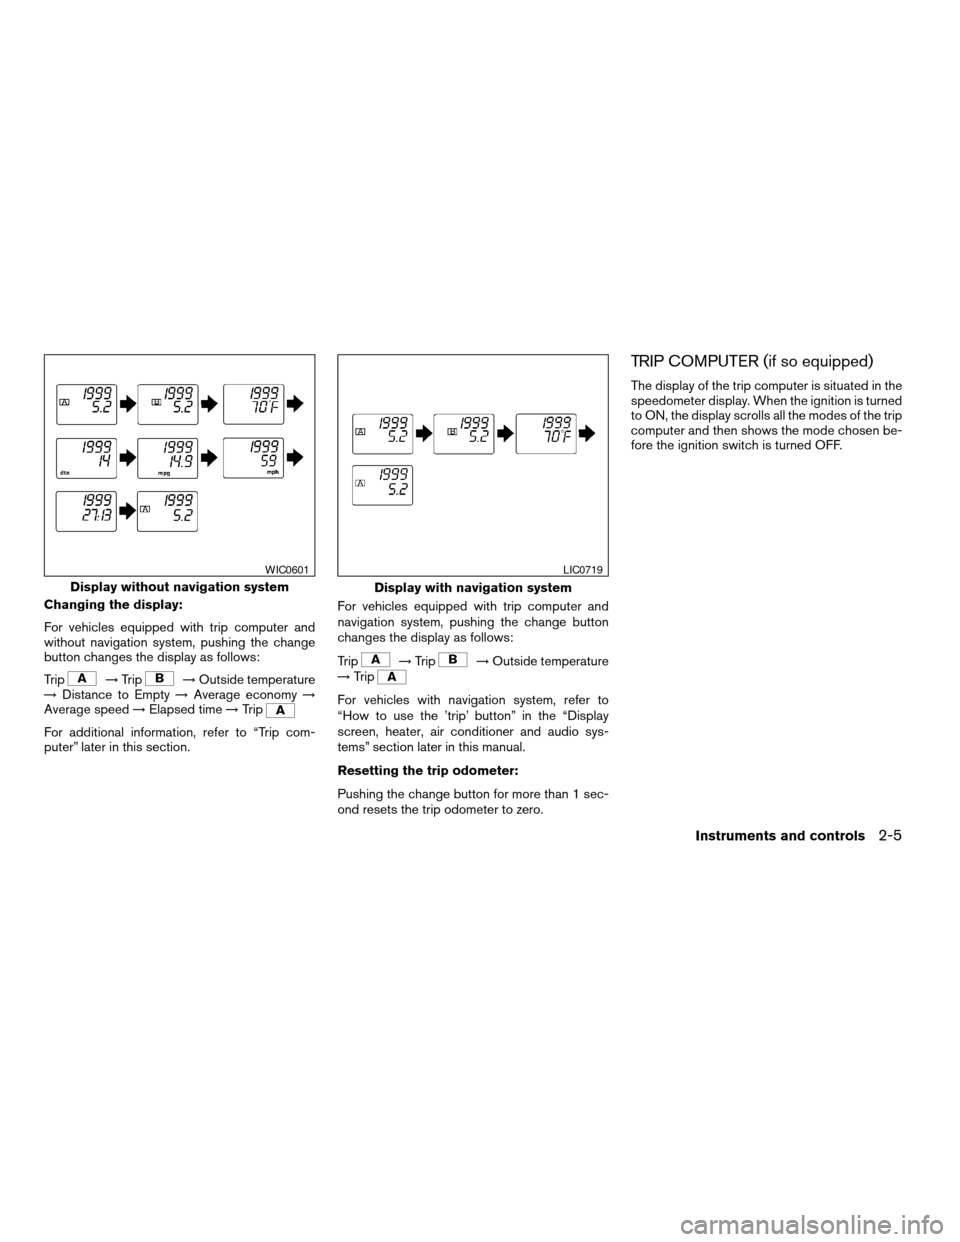
Changing the display:
For vehicles equipped with trip computer and
without navigation system, pushing the change
button changes the display as follows:
Trip
!Trip!Outside temperature
! Distance to Empty !Average economy !
Average speed !Elapsed time !Trip
For additional information, refer to “Trip com-
puter” later in this section. For vehicles equipped with trip computer and
navigation system, pushing the change button
changes the display as follows:
Trip
!
Trip!Outside temperature
! Trip
For vehicles with navigation system, refer to
“How to use the ’trip’ button” in the “Display
screen, heater, air conditioner and audio sys-
tems” section later in this manual.
Resetting the trip odometer:
Pushing the change button for more than 1 sec-
ond resets the trip odometer to zero.
TRIP COMPUTER (if so equipped)
The display of the trip computer is situated in the
speedometer display. When the ignition is turned
to ON, the display scrolls all the modes of the trip
computer and then shows the mode chosen be-
fore the ignition switch is turned OFF.
Display without navigation system
WIC0601
Display with navigation system
LIC0719
Instruments and controls2-5
ZREVIEW COPYÐ2005 Altima (l30)
Owners ManualÐUSA_English (nna)
06/28/04Ðtbrooks
X
Page 74 of 304
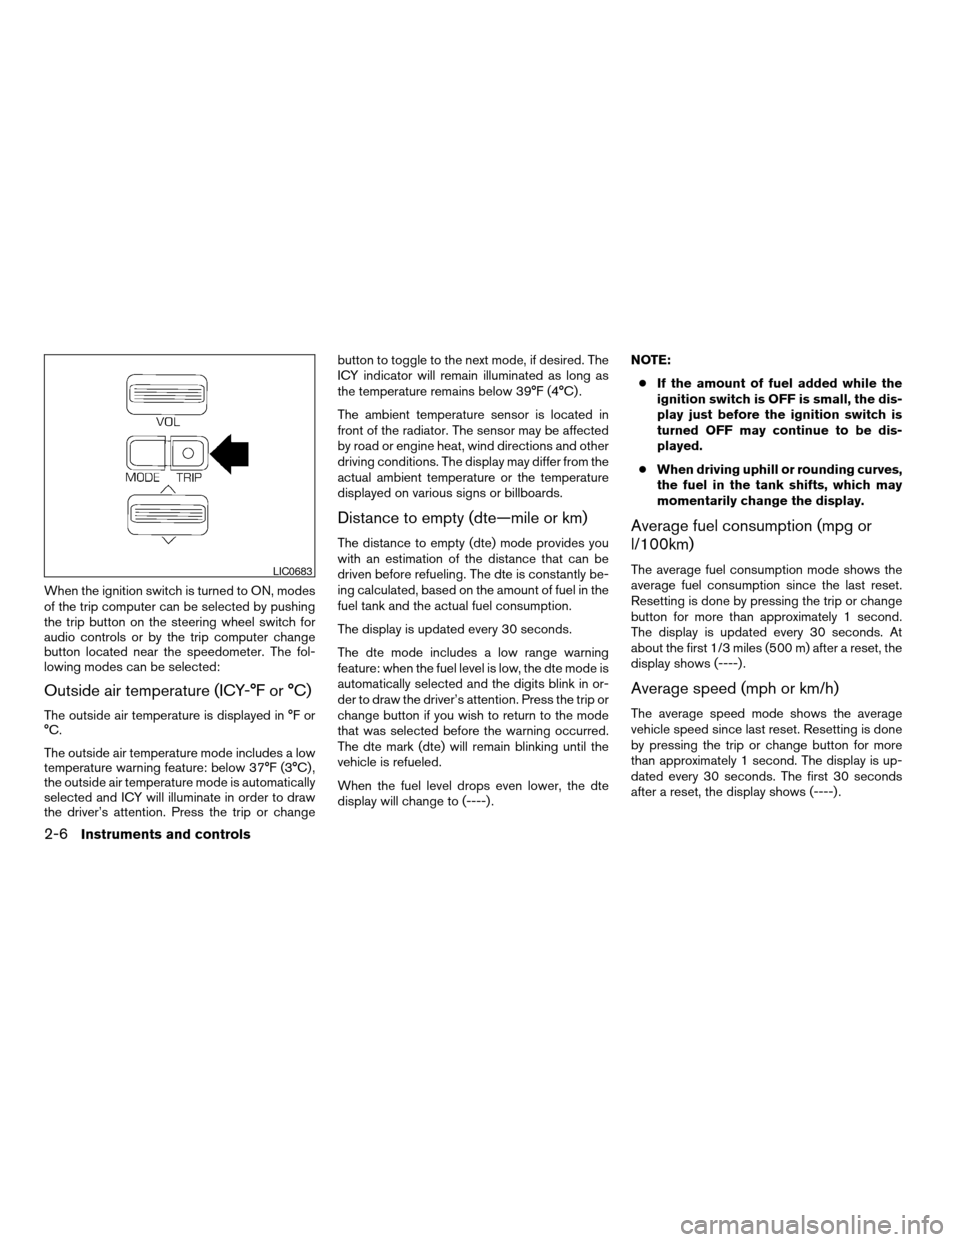
When the ignition switch is turned to ON, modes
of the trip computer can be selected by pushing
the trip button on the steering wheel switch for
audio controls or by the trip computer change
button located near the speedometer. The fol-
lowing modes can be selected:
Outside air temperature (ICY-°F or °C)
The outside air temperature is displayed in °F or
°C.
The outside air temperature mode includes a low
temperature warning feature: below 37°F (3°C) ,
the outside air temperature mode is automatically
selected and ICY will illuminate in order to draw
the driver’s attention. Press the trip or changebutton to toggle to the next mode, if desired. The
ICY indicator will remain illuminated as long as
the temperature remains below 39°F (4°C) .
The ambient temperature sensor is located in
front of the radiator. The sensor may be affected
by road or engine heat, wind directions and other
driving conditions. The display may differ from the
actual ambient temperature or the temperature
displayed on various signs or billboards.
Distance to empty (dte—mile or km)
The distance to empty (dte) mode provides you
with an estimation of the distance that can be
driven before refueling. The dte is constantly be-
ing calculated, based on the amount of fuel in the
fuel tank and the actual fuel consumption.
The display is updated every 30 seconds.
The dte mode includes a low range warning
feature: when the fuel level is low, the dte mode is
automatically selected and the digits blink in or-
der to draw the driver’s attention. Press the trip or
change button if you wish to return to the mode
that was selected before the warning occurred.
The dte mark (dte) will remain blinking until the
vehicle is refueled.
When the fuel level drops even lower, the dte
display will change to (----) .
NOTE:
c If the amount of fuel added while the
ignition switch is OFF is small, the dis-
play just before the ignition switch is
turned OFF may continue to be dis-
played.
c When driving uphill or rounding curves,
the fuel in the tank shifts, which may
momentarily change the display.
Average fuel consumption (mpg or
l/100km)
The average fuel consumption mode shows the
average fuel consumption since the last reset.
Resetting is done by pressing the trip or change
button for more than approximately 1 second.
The display is updated every 30 seconds. At
about the first 1/3 miles (500 m) after a reset, the
display shows (----) .
Average speed (mph or km/h)
The average speed mode shows the average
vehicle speed since last reset. Resetting is done
by pressing the trip or change button for more
than approximately 1 second. The display is up-
dated every 30 seconds. The first 30 seconds
after a reset, the display shows (----) .
LIC0683
2-6Instruments and controls
ZREVIEW COPYÐ2005 Altima (l30)
Owners ManualÐUSA_English (nna)
06/28/04Ðtbrooks
X
Page 75 of 304
Journey time
The journey time mode shows the time since the
last reset. The displayed time can be reset by
pressing the trip or change button for more than
approximately 1 second.
NOTE:
If a low temperature warning and low range
warning occur simultaneously, other dis-
play modes switch automatically to the
outside temperature display.
TACHOMETER
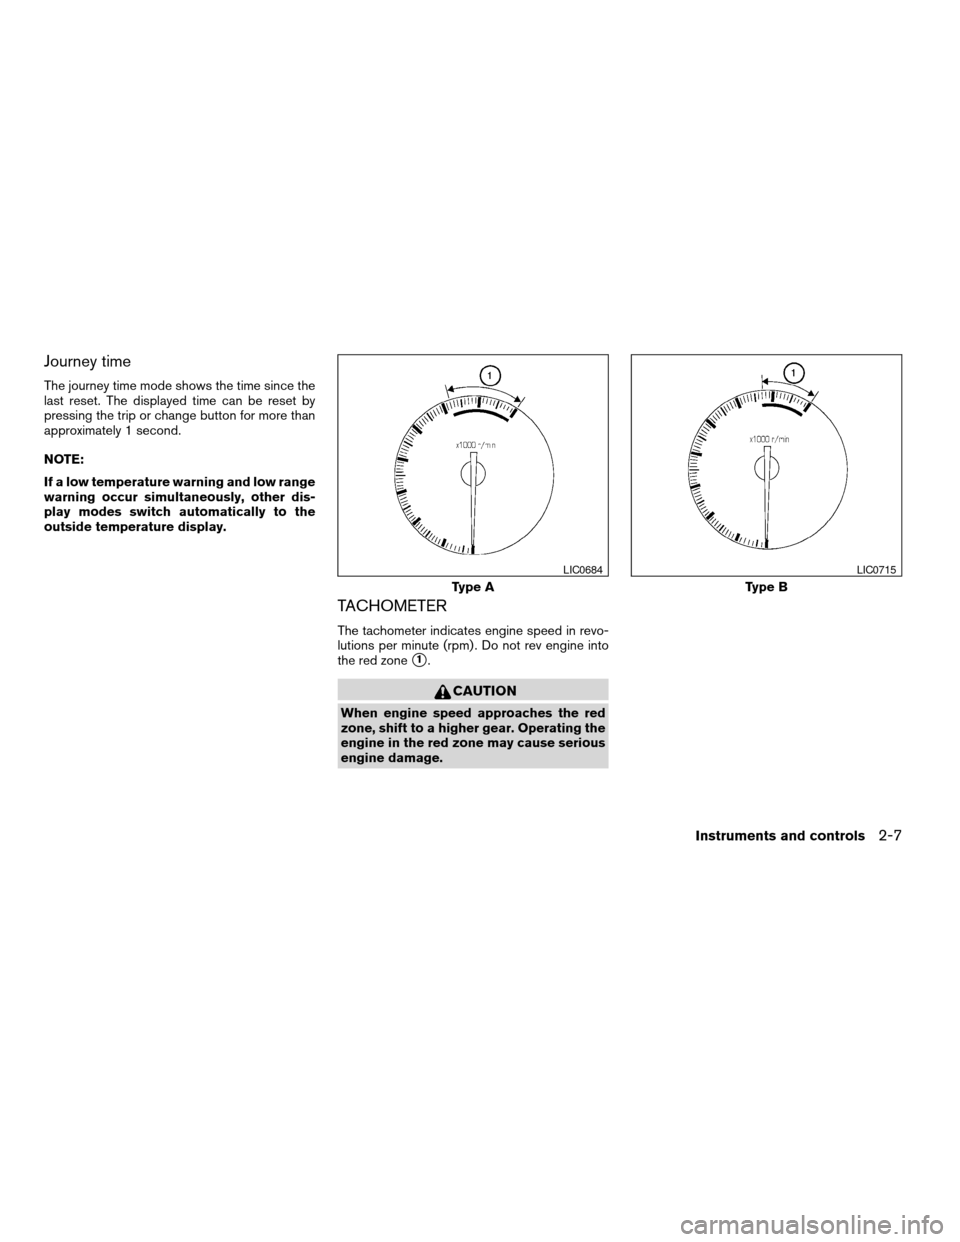
The tachometer indicates engine speed in revo-
lutions per minute (rpm) . Do not rev engine into
the red zone
s1.
CAUTION
When engine speed approaches the red
zone, shift to a higher gear. Operating the
engine in the red zone may cause serious
engine damage.
Type A
LIC0684
Type B
LIC0715
Instruments and controls2-7
ZREVIEW COPYÐ2005 Altima(l30)
Owners ManualÐUSA_English (nna)
06/28/04Ðtbrooks
X
Page 85 of 304
Keyfob operation:
cPush the
button on the keyfob.
All doors lock. The hazard lights flash
twice and the horn beeps once to indicate
all doors are locked.
c When the
button is pushed with
all doors locked, the hazard lights flash
twice and the horn beeps once as a re-
minder that the doors are already locked.
For vehicles with navigation system, see
9 Vehicle electronic systems 9in the 9Display
screen, heater, air conditioner and audio
systems 9section later in this manual. For
vehicles without navigation system, see 9Si-
lencing the horn beep feature 9in the 9Pre-
driving checks and adjustments 9section
later in this manual.
4. Confirm that the security indicator light comes on. The security light stays on for
about 30 seconds. The vehicle security sys-
tem is now pre-armed. After about 30 sec-
onds the vehicle security system automati-
cally shifts into the armed phase. The
security light begins to flash once every 3
seconds. If, during the 30-second pre-arm
time period, the door is unlocked by the key
or the keyfob, or the ignition key is turned to
ACC or ON, the system will not arm. c
If the key is turned slowly when locking
the door, the system may not arm. Fur-
thermore, if the key is turned beyond
the vertical position toward the unlock
position to remove the key, the system
may be disarmed when the key is re-
moved. If the indicator light fails to
glow for 30 seconds, unlock the door
once and lock it again.
c Even when the driver and/or passen-
gers are in the vehicle, the system will
arm with all doors and trunk lid closed
and locked with the ignition key in the
OFF position.
Vehicle security system activation
The vehicle security system will give the following
alarm:
c The headlights blink and the horn sounds
intermittently.
c The alarm automatically turns off after ap-
proximately 50 seconds. However, the alarm
reactivates if the vehicle is tampered with
again. The alarm can be shut off by unlocking
a door or trunk lid with the key, or by pressing
the
button on the keyfob. The alarm is activated by:
c opening the door or trunk lid without using
the key or keyfob (even if the door is un-
locked by releasing the door inside lock
switch) .
How to stop an activated alarm
The alarm stops only by unlocking a door or the
trunk lid with the key, or by pressing the
button on the keyfob.
NISSAN VEHICLE IMMOBILIZER
SYSTEM (NVIS)
The NISSAN Vehicle Immobilizer System (NVIS)
will not allow the engine to start without the use of
a registered NVIS key.
If the engine fails to start using a registered NVIS
key (for example, when interference is caused by
another NVIS key, an automated toll road device
or automatic payment device on the key ring) ,
restart the engine using the following proce-
dures:
1. Leave the ignition switch in the ON position for approximately 5 seconds.
2. Turn the ignition switch to the OFF or LOCK position, and wait approximately 10 sec-
onds.
3. Repeat steps 1 and 2.
Instruments and controls2-17
ZREVIEW COPYÐ2005 Altima (l30)
Owners ManualÐUSA_English (nna)
06/28/04Ðtbrooks
X
Page 91 of 304
NOTE:
Autolight activation sensitivity and the
time delay for autolight shutoff is adjust-
able for vehicles with navigation system.
See “Vehicle electronic systems” in the
“Display screen, heater, air conditioner and
audio systems” section later in this manual.
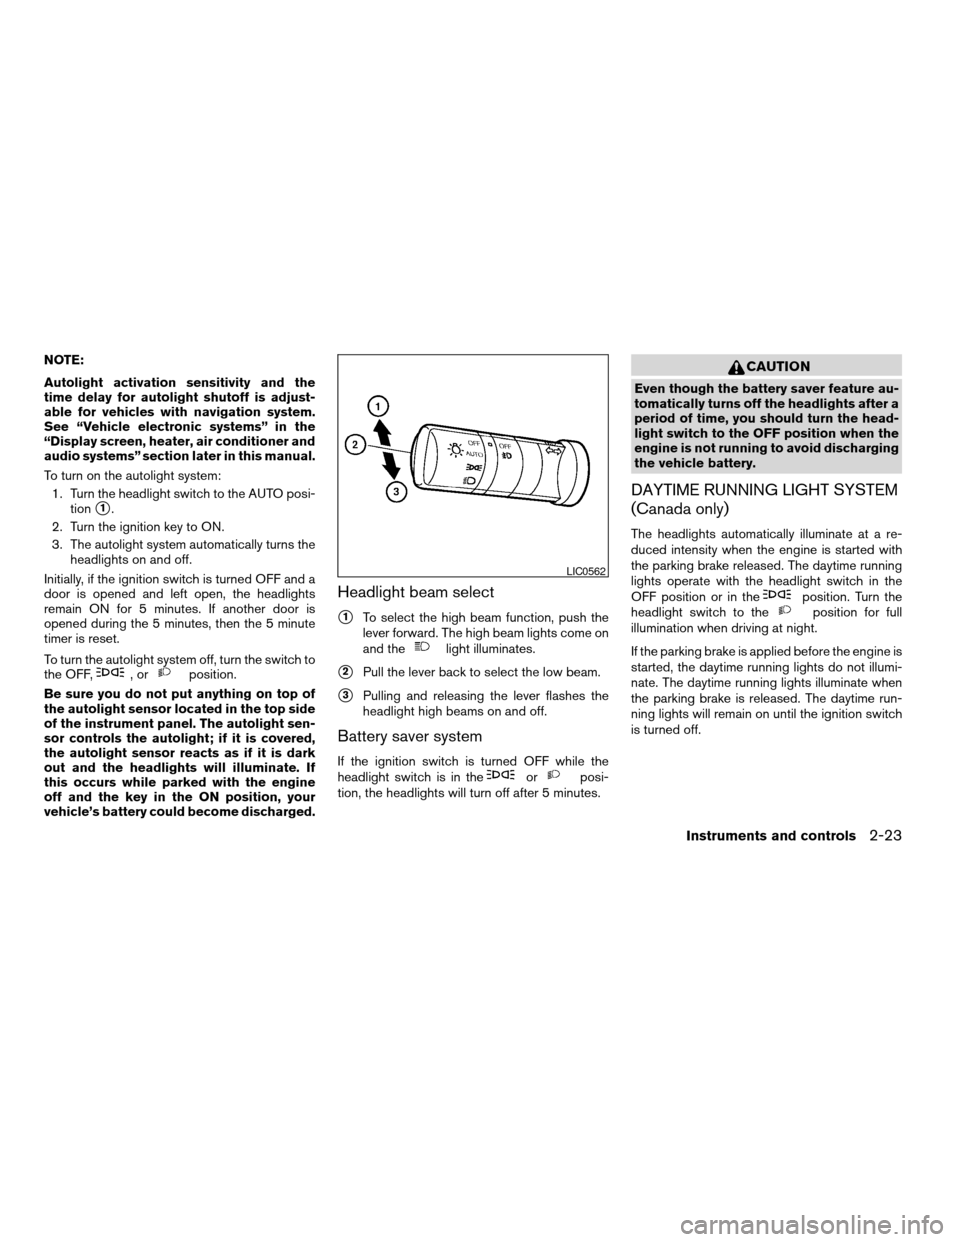
To turn on the autolight system:1. Turn the headlight switch to the AUTO posi- tion
s1.
2. Turn the ignition key to ON.
3. The autolight system automatically turns the headlights on and off.
Initially, if the ignition switch is turned OFF and a
door is opened and left open, the headlights
remain ON for 5 minutes. If another door is
opened during the 5 minutes, then the 5 minute
timer is reset.
To turn the autolight system off, turn the switch to
the OFF,
,orposition.
Be sure you do not put anything on top of
the autolight sensor located in the top side
of the instrument panel. The autolight sen-
sor controls the autolight; if it is covered,
the autolight sensor reacts as if it is dark
out and the headlights will illuminate. If
this occurs while parked with the engine
off and the key in the ON position, your
vehicle’s battery could become discharged.
Headlight beam select
s1To select the high beam function, push the
lever forward. The high beam lights come on
and the
light illuminates.
s2Pull the lever back to select the low beam.
s3Pulling and releasing the lever flashes the
headlight high beams on and off.
Battery saver system
If the ignition switch is turned OFF while the
headlight switch is in theorposi-
tion, the headlights will turn off after 5 minutes.
CAUTION
Even though the battery saver feature au-
tomatically turns off the headlights after a
period of time, you should turn the head-
light switch to the OFF position when the
engine is not running to avoid discharging
the vehicle battery.
DAYTIME RUNNING LIGHT SYSTEM
(Canada only)
The headlights automatically illuminate at a re-
duced intensity when the engine is started with
the parking brake released. The daytime running
lights operate with the headlight switch in the
OFF position or in the
position. Turn the
headlight switch to theposition for full
illumination when driving at night.
If the parking brake is applied before the engine is
started, the daytime running lights do not illumi-
nate. The daytime running lights illuminate when
the parking brake is released. The daytime run-
ning lights will remain on until the ignition switch
is turned off.
LIC0562
Instruments and controls2-23
ZREVIEW COPYÐ2005 Altima (l30)
Owners ManualÐUSA_English (nna)
06/28/04Ðtbrooks
X
Page 117 of 304
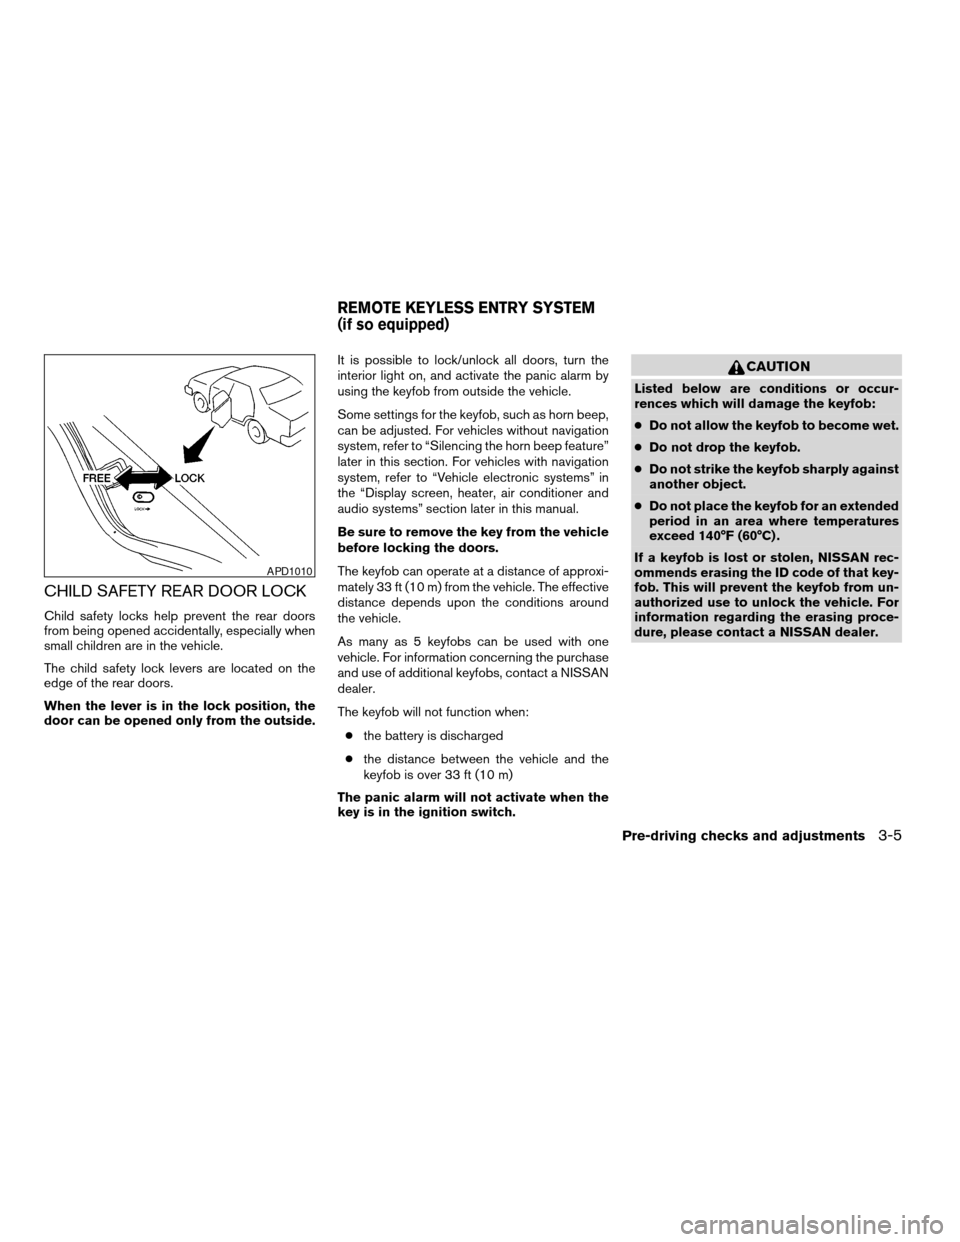
CHILD SAFETY REAR DOOR LOCK
Child safety locks help prevent the rear doors
from being opened accidentally, especially when
small children are in the vehicle.
The child safety lock levers are located on the
edge of the rear doors.
When the lever is in the lock position, the
door can be opened only from the outside.It is possible to lock/unlock all doors, turn the
interior light on, and activate the panic alarm by
using the keyfob from outside the vehicle.
Some settings for the keyfob, such as horn beep,
can be adjusted. For vehicles without navigation
system, refer to “Silencing the horn beep feature”
later in this section. For vehicles with navigation
system, refer to “Vehicle electronic systems” in
the “Display screen, heater, air conditioner and
audio systems” section later in this manual.
Be sure to remove the key from the vehicle
before locking the doors.
The keyfob can operate at a distance of approxi-
mately 33 ft (10 m) from the vehicle. The effective
distance depends upon the conditions around
the vehicle.
As many as 5 keyfobs can be used with one
vehicle. For information concerning the purchase
and use of additional keyfobs, contact a NISSAN
dealer.
The keyfob will not function when:
c the battery is discharged
c the distance between the vehicle and the
keyfob is over 33 ft (10 m)
The panic alarm will not activate when the
key is in the ignition switch.
CAUTION
Listed below are conditions or occur-
rences which will damage the keyfob:
c Do not allow the keyfob to become wet.
c Do not drop the keyfob.
c Do not strike the keyfob sharply against
another object.
c Do not place the keyfob for an extended
period in an area where temperatures
exceed 140°F (60°C) .
If a keyfob is lost or stolen, NISSAN rec-
ommends erasing the ID code of that key-
fob. This will prevent the keyfob from un-
authorized use to unlock the vehicle. For
information regarding the erasing proce-
dure, please contact a NISSAN dealer.
APD1010
REMOTE KEYLESS ENTRY SYSTEM
(if so equipped)
Pre-driving checks and adjustments3-5
ZREVIEW COPYÐ2005 Altima (l30)
Owners ManualÐUSA_English (nna)
06/28/04Ðtbrooks
X
Page 120 of 304
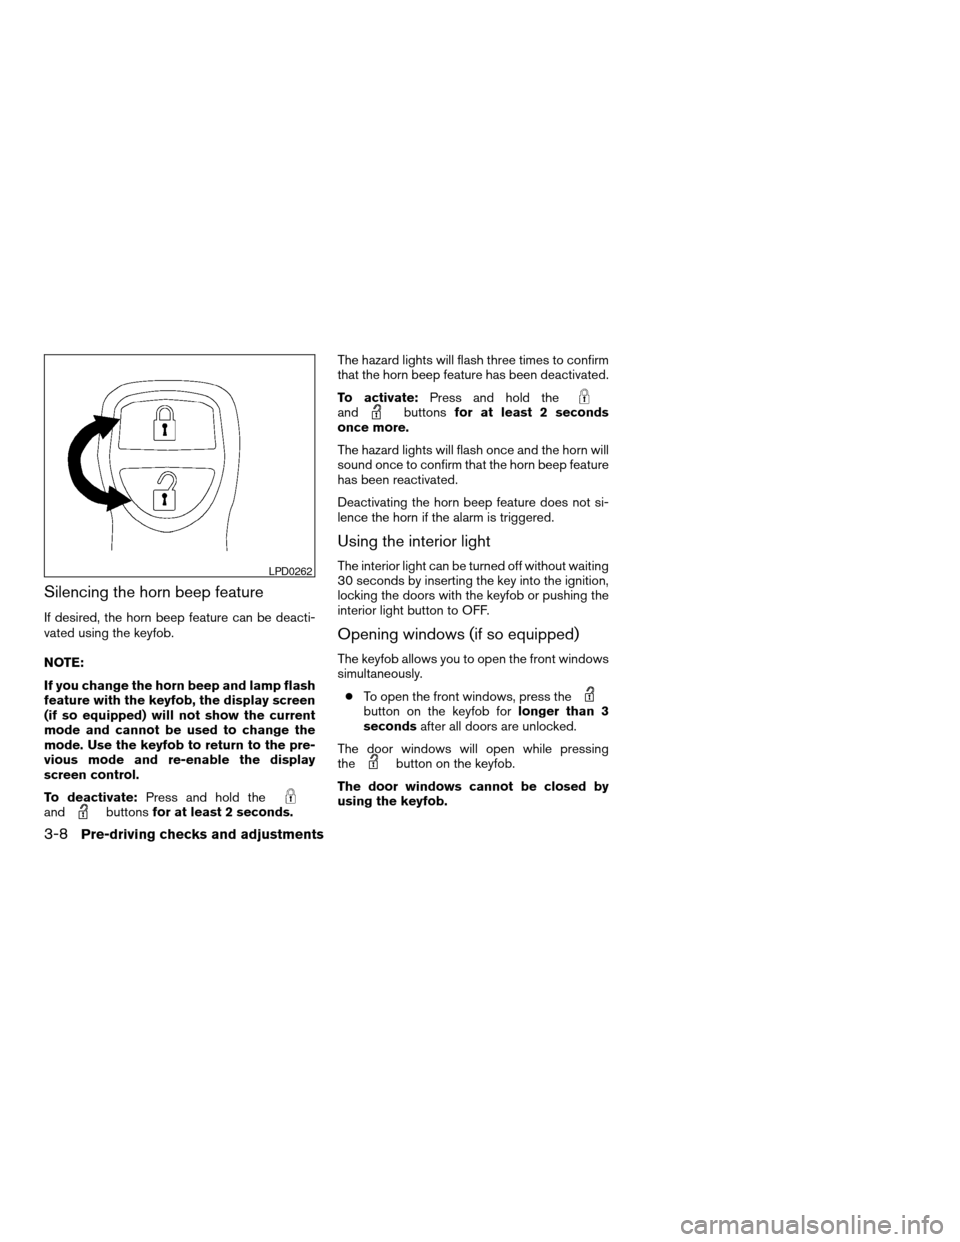
Silencing the horn beep feature
If desired, the horn beep feature can be deacti-
vated using the keyfob.
NOTE:
If you change the horn beep and lamp flash
feature with the keyfob, the display screen
(if so equipped) will not show the current
mode and cannot be used to change the
mode. Use the keyfob to return to the pre-
vious mode and re-enable the display
screen control.
To deactivate:Press and hold the
andbuttonsfor at least 2 seconds. The hazard lights will flash three times to confirm
that the horn beep feature has been deactivated.
To activate:
Press and hold the
andbuttonsfor at least 2 seconds
once more.
The hazard lights will flash once and the horn will
sound once to confirm that the horn beep feature
has been reactivated.
Deactivating the horn beep feature does not si-
lence the horn if the alarm is triggered.
Using the interior light
The interior light can be turned off without waiting
30 seconds by inserting the key into the ignition,
locking the doors with the keyfob or pushing the
interior light button to OFF.
Opening windows (if so equipped)
The keyfob allows you to open the front windows
simultaneously.
c To open the front windows, press the
button on the keyfob for longer than 3
seconds after all doors are unlocked.
The door windows will open while pressing
the
button on the keyfob.
The door windows cannot be closed by
using the keyfob.
LPD0262
3-8Pre-driving checks and adjustments
ZREVIEW COPYÐ2005 Altima (l30)
Owners ManualÐUSA_English (nna)
06/28/04Ðtbrooks
X