air condition NISSAN ALTIMA 2013 L33 / 5.G Owner's Manual
[x] Cancel search | Manufacturer: NISSAN, Model Year: 2013, Model line: ALTIMA, Model: NISSAN ALTIMA 2013 L33 / 5.GPages: 413, PDF Size: 4.52 MB
Page 184 of 413
4. Push thebutton. The indicator light
comes on.
5. Turn the temperature control dial to the de- sired position.
Dehumidified defogging
This mode is used to defog the windows and
dehumidify the air.
1. Press the
air flow control button.
2. Turn the fan control dial to the desired posi- tion.
● When the
orare selected, the
air conditioner automatically turns on (the
indicator light may or may not illuminate) if
the outside temperature is more than 36°F
(2°C) . This dehumidifies the air which helps
defog the windshield. The
mode au-
tomatically turns off, allowing outside air to
be drawn into the passenger compartment
to further improve the defogging perfor-
mance.
● The air conditioner is always on in
mode, regardless of whether the indicator
light is on or off.
3. Turn the temperature control dial to the de- sired position.
Operating tips
●Keep the windows and moonroof closed
while the air conditioner is in operation.
● After parking in the sun, drive for 2 or 3 min-
utes with the windows open to vent hot air
from the passenger compartment. Then,
close the windows. This allows the air con-
ditioner to cool the interior more quickly.
● The air conditioning system should be
operated for approximately 10 minutes
at least once a month. This helps pre-
vent damage to the system due to lack
of lubrication.
● A visible mist may be seen coming from the
ventilators in hot, humid conditions as the air
is cooled rapidly. This does not indicate a
malfunction.
● If the engine coolant temperature
gauge indicates engine coolant tem-
perature over the normal range, turn
the air conditioner off. See “If your
vehicle overheats” in the “In case of
emergency” section of this manual.
AIR FLOW CHARTS
The following charts show the button and dial
positions for MAXIMUM AND QUICK heating,
cooling or defrosting. The air recirculation
button should always be in the OFF posi-
tion for heating and defrosting.
Monitor, climate, audio, phone and voice recognition systems4-25
Page 188 of 413
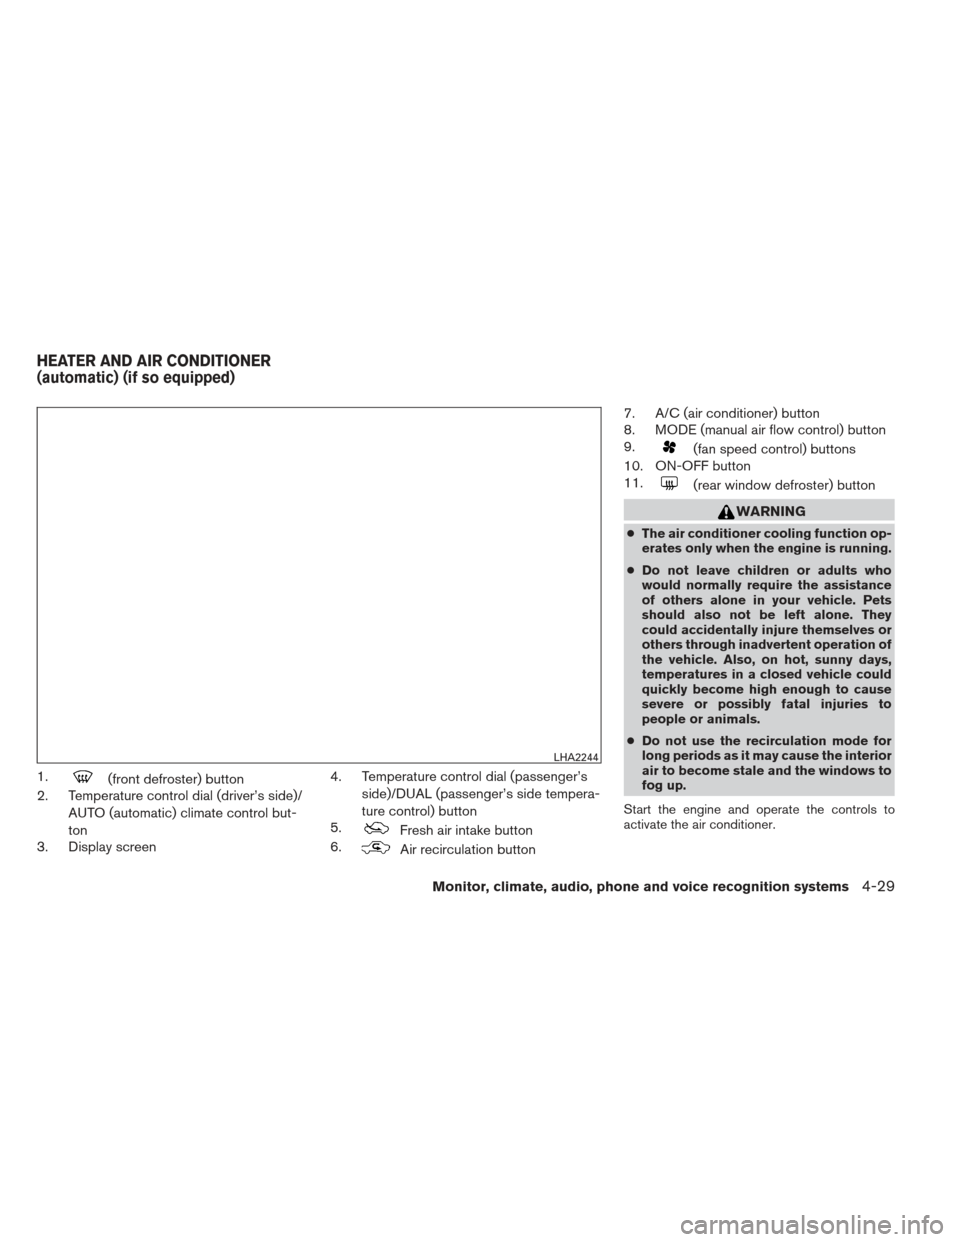
1.(front defroster) button
2. Temperature control dial (driver’s side)/
AUTO (automatic) climate control but-
ton
3. Display screen 4. Temperature control dial (passenger’s
side)/DUAL (passenger’s side tempera-
ture control) button
5.
Fresh air intake button
6.
Air recirculation button 7. A/C (air conditioner) button
8. MODE (manual air flow control) button
9.
(fan speed control) buttons
10. ON-OFF button
11.
(rear window defroster) button
WARNING
● The air conditioner cooling function op-
erates only when the engine is running.
● Do not leave children or adults who
would normally require the assistance
of others alone in your vehicle. Pets
should also not be left alone. They
could accidentally injure themselves or
others through inadvertent operation of
the vehicle. Also, on hot, sunny days,
temperatures in a closed vehicle could
quickly become high enough to cause
severe or possibly fatal injuries to
people or animals.
● Do not use the recirculation mode for
long periods as it may cause the interior
air to become stale and the windows to
fog up.
Start the engine and operate the controls to
activate the air conditioner.
LHA2244
HEATER AND AIR CONDITIONER
(automatic) (if so equipped)
Monitor, climate, audio, phone and voice recognition systems4-29
Page 189 of 413
AUTOMATIC OPERATION
Cooling and/or dehumidified heating
(AUTO)
This mode may be used all year round as the
system automatically works to keep a constant
temperature. Air flow distribution and fan speed
are also controlled automatically.1. Press the AUTO button on. (The indicator on the button will illuminate and AUTO will be
displayed.)
2. Turn the temperature control dial to the left or right to set the desired temperature.
● Adjust the temperature display to about
75°F (24°C) for normal operation.
● The temperature of the passenger compart-
ment will be maintained automatically. Air
flow distribution and fan speed are also con-
trolled automatically.
● A visible mist may be seen coming from the
vents in hot, humid conditions as the air is
cooled rapidly. This does not indicate a mal-
function.
3. You can individually set driver’s and front passenger’s side temperature using each
temperature control dial. When the DUAL
button or passenger’s side temperature dial
is turned, the DUAL indicator will come on. To turn off the passenger’s side temperature
control, press the DUAL button.
Heating (A/C OFF)
The air conditioner does not activate. When you
need to heat only, use this mode.
1. Press the A/C button. (A/C OFF will be displayed and A/C indicator will turn off.)
2. Turn the temperature control dial to set the desired temperature.
● The temperature of the passenger compart-
ment will be maintained automatically. Air
flow distribution and fan speed are also con-
trolled automatically.
● Do not set the temperature lower than the
outside air temperature. Otherwise, the sys-
tem may not work properly.
● Not recommended if windows fog up.
Dehumidified defrosting or defogging
1. Press thefront defroster button on.
(The indicator light on the button will come
on.)
2. Turn the temperature control dial to set the desired temperature. ●
To quickly remove ice from the outside of the
windows, use the fan speed control dial to
set the fan speed to maximum.
● As soon as possible after the windshield is
clean, press the AUTO button to return to
the automatic mode.
● When the
front defroster button is
pressed, the air conditioner will automati-
cally be turned on at outside temperatures
above 36°F (2°C) (The indicator light may or
may not illuminate) . The air recirculate mode
automatically turns off, allowing outside air
to be drawn into the passenger compart-
ment to further improve the defogging per-
formance.
MANUAL OPERATION
Fan speed control
Press the fan control buttonsto manually
control the fan speed.
Press the AUTO button to return to automatic
control of the fan speed.
Air recirculation
Press theair recirculation button to recir-
culate interior air inside the vehicle. The
indicator light on the button will come on.
4-30Monitor, climate, audio, phone and voice recognition systems
Page 190 of 413
The air recirculation cannot be activated when
the air conditioner is in the
front defrosting
mode or the
front defrosting and foot out-
let mode.
Fresh air intake
Press thefresh air intake button to draw
outside air into the passenger compartment.
The
indicator light on the button will come
on.
Automatic intake air control
In the AUTO mode, the intake air will be con-
trolled automatically. To manually control the in-
take air, press the
air recirculation button.
To return to the automatic control mode, press
and hold the
air recirculation button or
press and hold the
fresh air intake button
for about 2 seconds. The indicator lights (both air
recirculation and fresh air intake buttons) will
flash twice, and then the intake air will be con-
trolled automatically.
Air flow control
Pressing the MODE button manually controls air
flow and selects the air outlet:
— Air flows from center and side
vents.
— Air flows from center and sidevents and foot outlets.
— Air flows mainly from foot outlets.
— Air flows from defroster and footoutlets.
— Air flows from defroster outlets.
To turn system off
Press the OFF button.
Rear window and outside mirror (if so
equipped) defroster switch
For more information about the rear window and
outside mirror (if so equipped) defroster switch,
see “Rear window and outside mirror defroster
switch” in the “Instruments and controls” section
of this manual.
OPERATING TIPS
●When the engine coolant temperature and
outside air temperature are low, the air flow
from the foot outlets may not operate for a
maximum of 150 seconds. However, this is
not a malfunction. After the coolant tempera-
ture warms up, air flow from the foot outlets
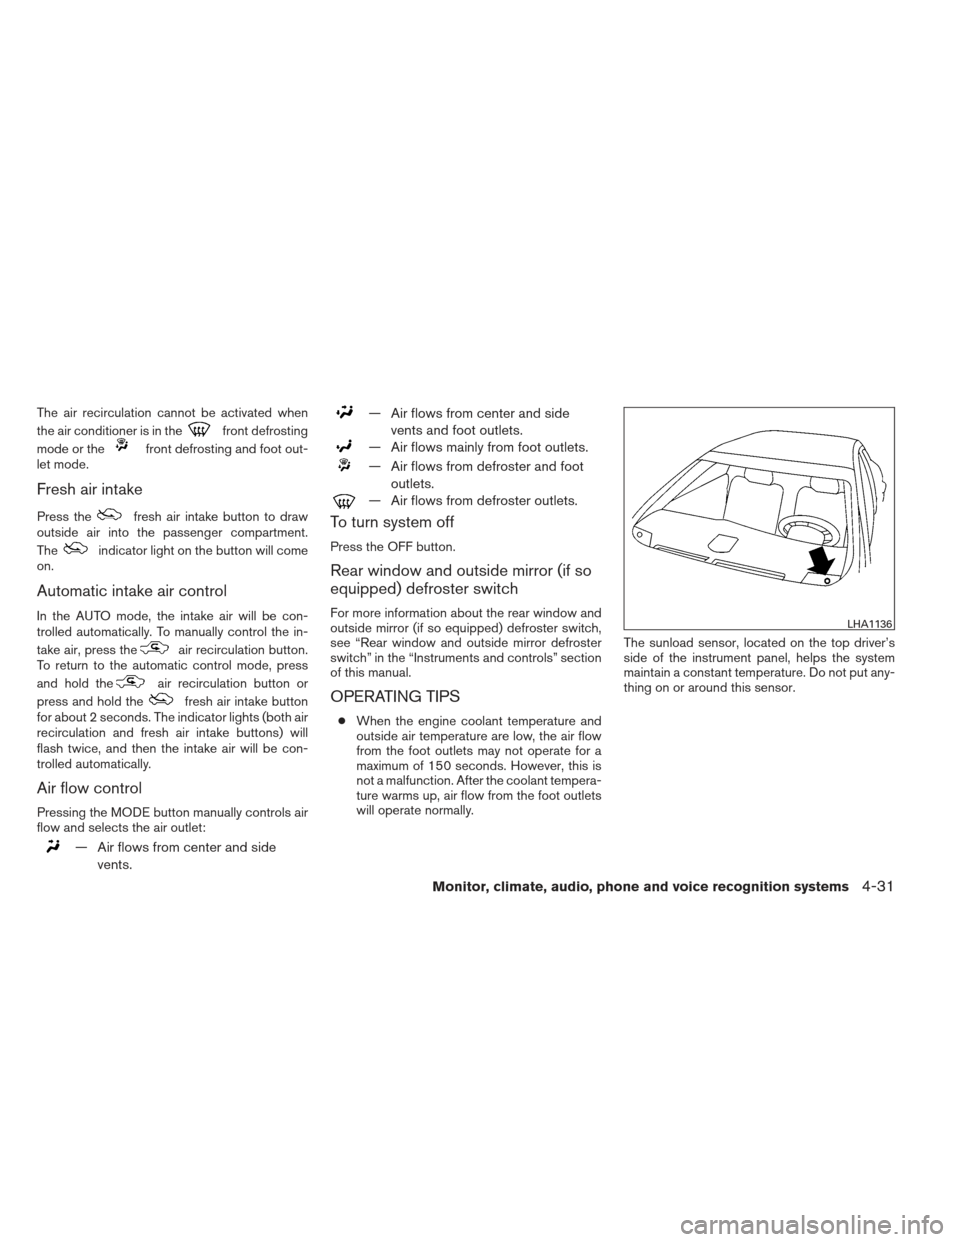
will operate normally. The sunload sensor, located on the top driver’s
side of the instrument panel, helps the system
maintain a constant temperature. Do not put any-
thing on or around this sensor.
LHA1136
Monitor, climate, audio, phone and voice recognition systems4-31
Page 191 of 413
The air conditioner system in your NISSAN ve-
hicle is charged with a refrigerant designed with
the environment in mind.
This refrigerant does not harm the earth’s
ozone layer.
Special charging equipment and lubricant is re-
quired when servicing your NISSAN air condi-
tioner. Using improper refrigerants or lubricants
will cause severe damage to your air conditioner
system. See “Air conditioner system refrigerant
and oil recommendations” in the “Technical and
consumer information” section of this manual.
A NISSAN dealer is able to service your “environ-
mentally friendly” air conditioning system.
WARNING
The air conditioner system contains re-
frigerant under high pressure. To avoid
personal injury, any air conditioner ser-
vice should be done only by an experi-
enced technician with proper equipment.
RADIO
With the ignition placed in the ACC or ON posi-
tion, press the PWR (power)/VOL (volume) knob
to turn the radio on. If you listen to the radio with
the engine not running, the ignition should be
placed in the ACC position.
Radio reception is affected by station signal
strength, distance from radio transmitter, build-
ings, bridges, mountains and other external influ-
ences. Intermittent changes in reception quality
normally are caused by these external influences.
Using a cellular phone in or near the ve-
hicle may influence radio reception quality.
Radio reception
Your NISSAN radio system is equipped with
state-of-the-art electronic circuits to enhance ra-
dio reception. These circuits are designed to
extend reception range, and to enhance the qual-
ity of that reception.
However, there are some general characteristics
of both FM and AM radio signals that can affect
radio reception quality in a moving vehicle, even
when the finest equipment is used. These char-
acteristics are completely normal in a given re-
ception area and do not indicate any malfunction
in your NISSAN radio system.Reception conditions will constantly change be-
cause of vehicle movement. Buildings, terrain,
signal distance and interference from other ve-
hicles can work against ideal reception. De-
scribed below are some of the factors that can
affect your radio reception.
Some cellular phones or other devices may
cause interference or a buzzing noise to come
from the audio system speakers. Storing the de-
vice in a different location may reduce or elimi-
nate the noise.
FM RADIO RECEPTION
Range: FM range is normally limited to 25 – 30 mi
(40 – 48 km) , with monaural (single channel) FM
having slightly more range than stereo FM. Exter-
nal influences may sometimes interfere with FM
station reception even if the FM station is within
25 mi (40 km) . The strength of the FM signal is
directly related to the distance between the
transmitter and receiver. FM signals follow a line-
of-sight path, exhibiting many of the same char-
acteristics as light. For example, they will reflect
off objects.
Fade and drift: As your vehicle moves away from
a station transmitter, the signals will tend to fade
and/or drift.
SERVICING AIR CONDITIONER AUDIO SYSTEM
4-32Monitor, climate, audio, phone and voice recognition systems
Page 199 of 413
●Do not connect a USB device if a connector,
cable or USB port is wet. Allow the connector,
cable, and USB port to dry completely before
connecting the USB device. (Wait for
24 hours or more until it is dry.) If the connec-
tor and USB port are exposed to fluids other
than water, evaporative residue may cause a
short circuit between the connector pins and
USB port. In this case, replace the cable and
USB port. Otherwise damage to the USB
device and a loss of function may occur.
●If the cable is damaged (insulation cut, con-
nectors cracked, contamination such as liq-
uids, dust, dirt, etc. in the connectors) , do
not use the cable. Replace the cable with a
new one.
● Do not put a USB device in a location where
static electricity occurs, electrical noise is
generated or hot air from the air conditioner
blows directly on it. Doing so may cause the
data stored on the USB device to be cor-
rupted.
Notes for iPod® use:
iPod® is a trademark of Apple Inc., registered in
the U.S. and other countries. ● Improperly plugging in the iPod may cause a
checkmark to be displayed on and off (flick-
ering) . Always make sure that the iPod is
connected properly. ●
An iPod® nano (1st Generation) may remain
in fast forward or rewind mode if it is con-
nected during a seek operation. In this case,
please manually reset the iPod.
● An iPod® nano (2nd Generation) will con-
tinue to fast-forward or rewind if it is discon-
nected during a seek operation.
● An incorrect song title may appear when the
Play Mode is changed while using an iPod®
nano (2nd Generation) .
● Audiobooks may not play in the same order
as they appear on an iPod®.
● Large video files cause slow responses in an
iPod®. The vehicle center display may mo-
mentarily black out, but will soon recover.
● If an iPod® automatically selects large video
files while in the shuffle mode, the vehicle
center display may momentarily black out,
but will soon recover.
Bluetooth® streaming audio
●Some Bluetooth® audio devices may not be
recognized by the in-vehicle audio system.
● It is necessary to set up the wireless con-
nection between a compatible Bluetooth®
audio device and the in-vehicle Bluetooth®
module before using the Bluetooth® audio. ●
Operating procedure of the Bluetooth® au-
dio will vary depending on the devices. Make
sure how to operate your audio device be-
fore using it with this system.
● The Bluetooth® audio may be stopped un-
der the following conditions:
● Receiving a call on the Hands-Free
Phone System.
● Checking the connection to the hands-
free phone.
● Do not place the Bluetooth® audio device in
an area surrounded by metal or far away from
the in-vehicle Bluetooth® module to prevent
tone quality degradation and wireless con-
nection disruption.
● While an audio device is connected through
the Bluetooth® wireless connection, the
battery power of the device may discharge
quicker than usual.
● This system supports the Bluetooth® Audio
Distribution Profile (A2DP, AVRCP) .BLUETOOTH® is a
trademark owned by
Bluetooth SIG, Inc. and
licensed to Visteon.
4-40Monitor, climate, audio, phone and voice recognition systems
Page 216 of 413
USB INTERFACE (models without
Navigation System) (if so equipped)Connecting a device to the USB input
jack
CAUTION
●
Do not force the USB device into the
USB port. Inserting the USB device
tilted or up-side-down into the port may
damage the USB device and the port.
Make sure that the USB device is con-
nected correctly into the USB port.
(Some USB devices come with a
mark as a guide. Make sure that the
mark is facing the correct direction be-
fore inserting the device.)
● Do not locate objects near the USB de-
vice to prevent the objects from leaning
on the USB device and the port. Pres-
sure from the objects may damage the
USB device and the port.
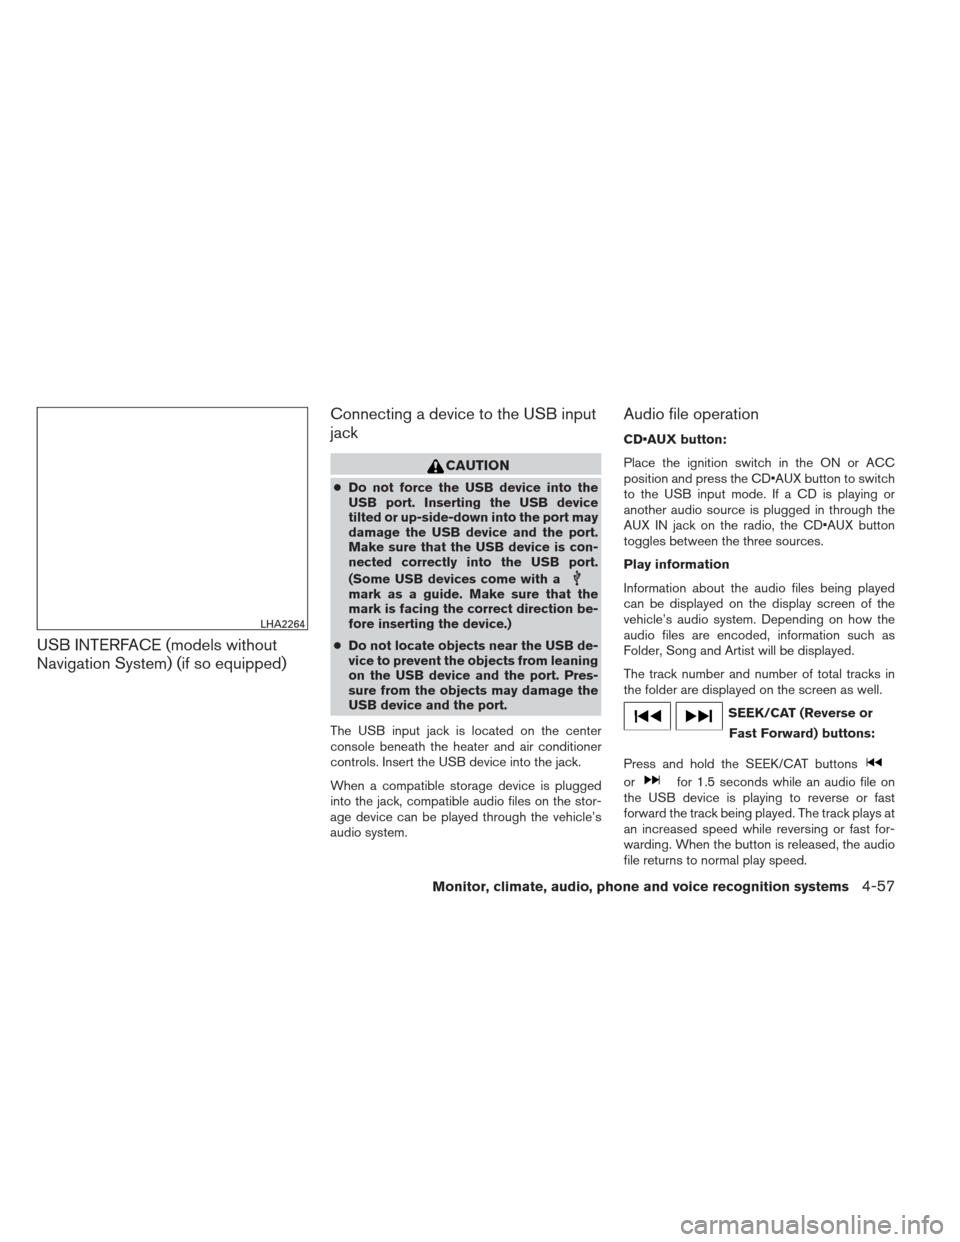
The USB input jack is located on the center
console beneath the heater and air conditioner
controls. Insert the USB device into the jack.
When a compatible storage device is plugged
into the jack, compatible audio files on the stor-
age device can be played through the vehicle’s
audio system.
Audio file operation
CD button:
Place the ignition switch in the ON or ACC
position and press the CD button to switch
to the USB input mode. If a CD is playing or
another audio source is plugged in through the
AUX IN jack on the radio, the CD button
toggles between the three sources.
Play information
Information about the audio files being played
can be displayed on the display screen of the
vehicle’s audio system. Depending on how the
audio files are encoded, information such as
Folder, Song and Artist will be displayed.
The track number and number of total tracks in
the folder are displayed on the screen as well.
SEEK/CAT (Reverse or Fast Forward) buttons:
Press and hold the SEEK/CAT buttons
orfor 1.5 seconds while an audio file on
the USB device is playing to reverse or fast
forward the track being played. The track plays at
an increased speed while reversing or fast for-
warding. When the button is released, the audio
file returns to normal play speed.
LHA2264
Monitor, climate, audio, phone and voice recognition systems4-57
Page 218 of 413
Connecting a device to the USB input
jack
CAUTION
●Do not force the USB device into the
USB port. Inserting the USB device
tilted or up-side-down into the port may
damage the USB device and the port.
Make sure that the USB device is con-
nected correctly into the USB port.
(Some USB devices come with a
mark as a guide. Make sure that the
mark is facing the correct direction be-
fore inserting the device.)
● Do not locate objects near the USB de-
vice to prevent the objects from leaning
on the USB device and the port. Pres-
sure from the objects may damage the
USB device and the port.
The USB input jack is located on the center
console beneath the heater and air conditioner
controls. Insert the USB device into the jack.
When a compatible storage device is plugged
into the jack, compatible audio files on the stor-
age device can be played through the vehicle’s
audio system.
Audio file operation
AUX button:
Place the ignition switch in the ON or ACC
position and press the AUX button to switch to
the USB input mode. If another audio source is
playing and a USB memory device is inserted,
press the AUX button repeatedly until the center
display changes to the USB memory mode.
If the system has been turned off while the USB
memory was playing, push the ON-OFF/VOL
control knob to restart the USB memory.
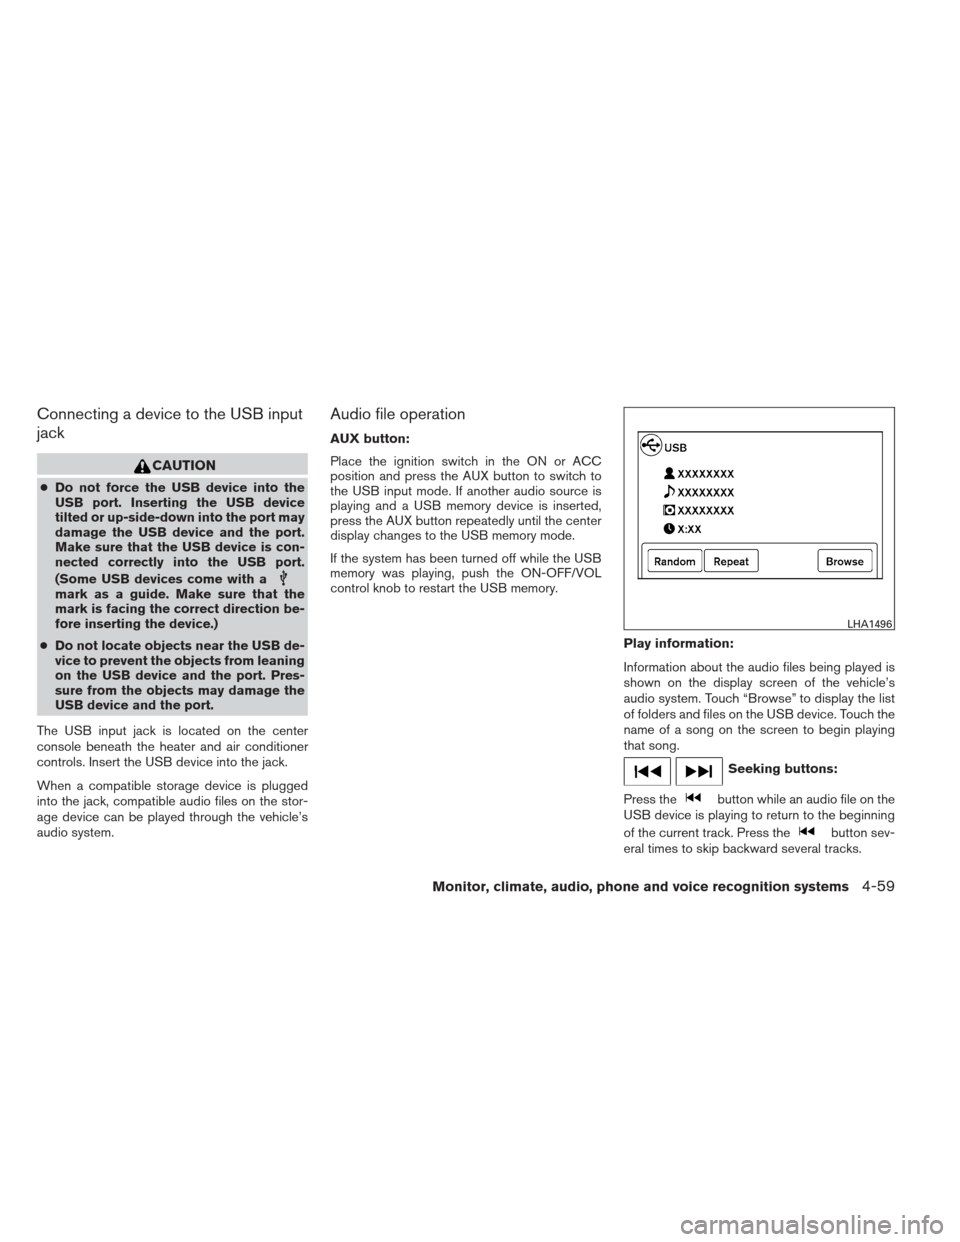
Play information:
Information about the audio files being played is
shown on the display screen of the vehicle’s
audio system. Touch “Browse” to display the list
of folders and files on the USB device. Touch the
name of a song on the screen to begin playing
that song.
Seeking buttons:
Press the
button while an audio file on the
USB device is playing to return to the beginning
of the current track. Press the
button sev-
eral times to skip backward several tracks.
LHA1496
Monitor, climate, audio, phone and voice recognition systems4-59
Page 219 of 413
Press thebutton while an audio file on the
USB device is playing to advance one track.
Press the
button several times to skip for-
ward several tracks. If the last track in a folder on
the USB device is skipped, the first track of the
next folder is played.
Random and repeat play mode:
While files on a USB device are playing, the play
pattern can be altered so that songs are repeated
or played randomly.
Random:
Touch the “Random” key to apply a random play
pattern to the USB device. When the random
mode is active, the
icon is displayed to the
left of the song title or album name to denote
which random pattern is applied. To cancel Ran-
dom mode, touch the “Random” key until
no
icon is displayed.
Repeat:
Touch the “Repeat” key to apply a repeat play
pattern to the USB device. When the repeat
mode is active, the
icon is displayed to the
left of the song title or album name to denote
which repeat pattern is applied. To cancel Repeat
mode, touch the “Repeat” key until no
icon
is displayed.
iPod®* PLAYER OPERATION
WITHOUT NAVIGATION SYSTEM (if
so equipped) Connecting iPod®
CAUTION
●
Do not force the iPod® cable into the
USB port. Inserting the USB device
tilted or up-side-down into the port may
damage the iPod® cable and the port.
Make sure that the iPod® cable is con-
nected correctly into the USB port.
(Some iPod® cables come with a
mark as a guide. Make sure that the
mark is facing the correct direction be-
fore inserting the iPod® cable.)
● Do not locate objects near the iPod®
cable to prevent the objects from lean-
ing on the iPod® cable and the port.
Pressure from the objects may damage
the iPod® cable and the port.
To connect an iPod® to the vehicle so that the
iPod® can be controlled with the audio system
controls and display screen, use the USB jack
located on the center console below the heater
and air conditioner controls. Connect the iPod®-
specific end of the cable to the iPod® and the
USB end of the cable to the USB jack on the
vehicle. If your iPod® supports charging via a
USB connection, its battery will be charged while
connected to the vehicle with the ignition switch
in the ACC or ON position.
LHA2264
4-60Monitor, climate, audio, phone and voice recognition systems
Page 222 of 413
Connecting iPod®
CAUTION
●Do not force the iPod® cable into the
USB port. Inserting the USB device
tilted or up-side-down into the port may
damage the iPod® cable and the port.
Make sure that the iPod® cable is con-
nected correctly into the USB port.
(Some iPod® cables come with a
mark as a guide. Make sure that the
mark is facing the correct direction be-
fore inserting the iPod® cable.)
● Do not locate objects near the iPod®
cable to prevent the objects from lean-
ing on the iPod® cable and the port.
Pressure from the objects may damage
the iPod® cable and the port.
To connect an iPod® to the vehicle so that the
iPod® can be controlled with the audio system
controls and display screen, use the USB jack
located on the center console below the heater
and air conditioner controls. Connect the iPod®-
specific end of the cable to the iPod® and the
USB end of the cable to the USB jack on the
vehicle. If your iPod® supports charging via a
USB connection, its battery will be charged while
connected to the vehicle with the ignition switch
in the ACC or ON position. While connected to the vehicle, the iPod® can
only be operated by the vehicle audio controls.
To disconnect the iPod® from the vehicle, re-
move the USB end of the cable from the USB
jack on the vehicle, then remove the cable from
the iPod®.
* iPod® is a trademark of Apple Inc., registered in
the U.S. and other countries.Compatibility
The following models are compatible:
● iPod® 5th Generation (firmware version
1.2.3 or later)
● iPod® Classic (firmware version 1.1.1 or
later)
● iPod® Touch (firmware version 2.0.0 or
later)*
● iPod® Nano - 1st generation (firmware ver-
sion 1.3.1 or later)
● iPod® Nano - 2nd generation (firmware ver-
sion 1.1.3 or later)
● iPod® Nano - 3rd generation (firmware ver-
sion 1.1.3 or later)
● iPod® Nano - 4th generation (firmware ver-
sion 1.0.4 or later) ●
iPod® Nano - 5th generation (firmware ver-
sion 1.0.1 or later)
* Some features of this iPod® may not be fully
functional.
Make sure that your iPod® firmware is updated to
the version indicated above.
Monitor, climate, audio, phone and voice recognition systems4-63