ad blue NISSAN ALTIMA 2015 L33 / 5.G Owners Manual
[x] Cancel search | Manufacturer: NISSAN, Model Year: 2015, Model line: ALTIMA, Model: NISSAN ALTIMA 2015 L33 / 5.GPages: 441, PDF Size: 4.59 MB
Page 7 of 441
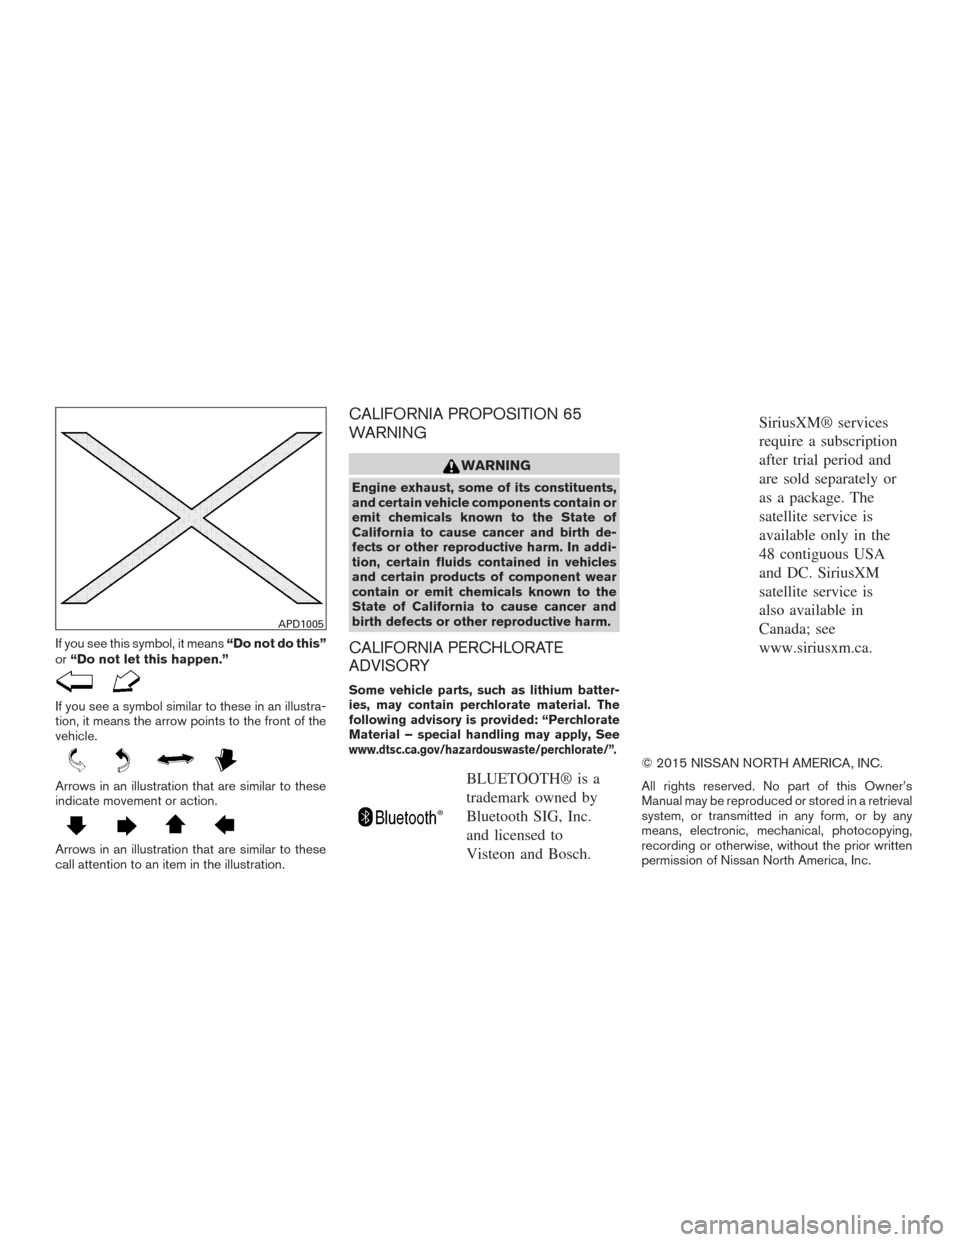
If you see this symbol, it means“Do not do this”
or “Do not let this happen.”
If you see a symbol similar to these in an illustra-
tion, it means the arrow points to the front of the
vehicle.
Arrows in an illustration that are similar to these
indicate movement or action.
Arrows in an illustration that are similar to these
call attention to an item in the illustration.
CALIFORNIA PROPOSITION 65
WARNING
WARNING
Engine exhaust, some of its constituents,
and certain vehicle components contain or
emit chemicals known to the State of
California to cause cancer and birth de-
fects or other reproductive harm. In addi-
tion, certain fluids contained in vehicles
and certain products of component wear
contain or emit chemicals known to the
State of California to cause cancer and
birth defects or other reproductive harm.
CALIFORNIA PERCHLORATE
ADVISORY
Some vehicle parts, such as lithium batter-
ies, may contain perchlorate material. The
following advisory is provided: “Perchlorate
Material – special handling may apply, See
www.dtsc.ca.gov/hazardouswaste/perchlorate/”.
BLUETOOTH® is a
trademark owned by
Bluetooth SIG, Inc.
and licensed to
Visteon and Bosch.
SiriusXM® services
require a subscription
after trial period and
are sold separately or
as a package. The
satellite service is
available only in the
48 contiguous USA
and DC. SiriusXM
satellite service is
also available in
Canada; see
www.siriusxm.ca.
© 2015 NISSAN NORTH AMERICA, INC.
All rights reserved. No part of this Owner’s
Manual may be reproduced or stored in a retrieval
system, or transmitted in any form, or by any
means, electronic, mechanical, photocopying,
recording or otherwise, without the prior written
permission of Nissan North America, Inc.
APD1005
Page 16 of 441
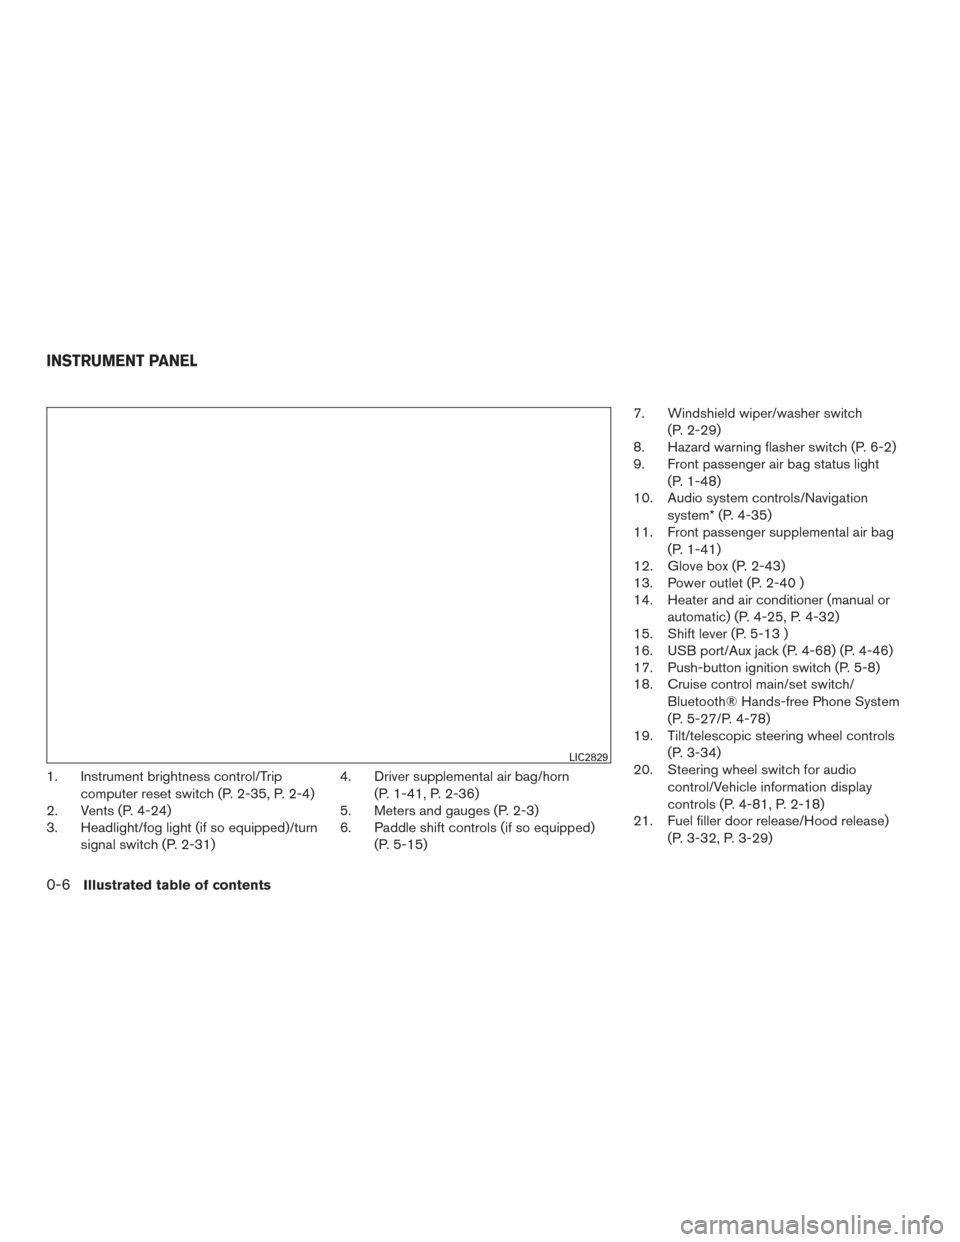
1. Instrument brightness control/Tripcomputer reset switch (P. 2-35, P. 2-4)
2. Vents (P. 4-24)
3. Headlight/fog light (if so equipped)/turn
signal switch (P. 2-31) 4. Driver supplemental air bag/horn
(P. 1-41, P. 2-36)
5. Meters and gauges (P. 2-3)
6. Paddle shift controls (if so equipped)
(P. 5-15) 7. Windshield wiper/washer switch
(P. 2-29)
8. Hazard warning flasher switch (P. 6-2)
9. Front passenger air bag status light
(P. 1-48)
10. Audio system controls/Navigation
system* (P. 4-35)
11. Front passenger supplemental air bag
(P. 1-41)
12. Glove box (P. 2-43)
13. Power outlet (P. 2-40 )
14. Heater and air conditioner (manual or
automatic) (P. 4-25, P. 4-32)
15. Shift lever (P. 5-13 )
16. USB port/Aux jack (P. 4-68) (P. 4-46)
17. Push-button ignition switch (P. 5-8)
18. Cruise control main/set switch/
Bluetooth® Hands-free Phone System
(P. 5-27/P. 4-78)
19. Tilt/telescopic steering wheel controls
(P. 3-34)
20. Steering wheel switch for audio
control/Vehicle information display
controls (P. 4-81, P. 2-18)
21. Fuel filler door release/Hood release)
(P. 3-32, P. 3-29)
LIC2829
INSTRUMENT PANEL
0-6Illustrated table of contents
Page 20 of 441
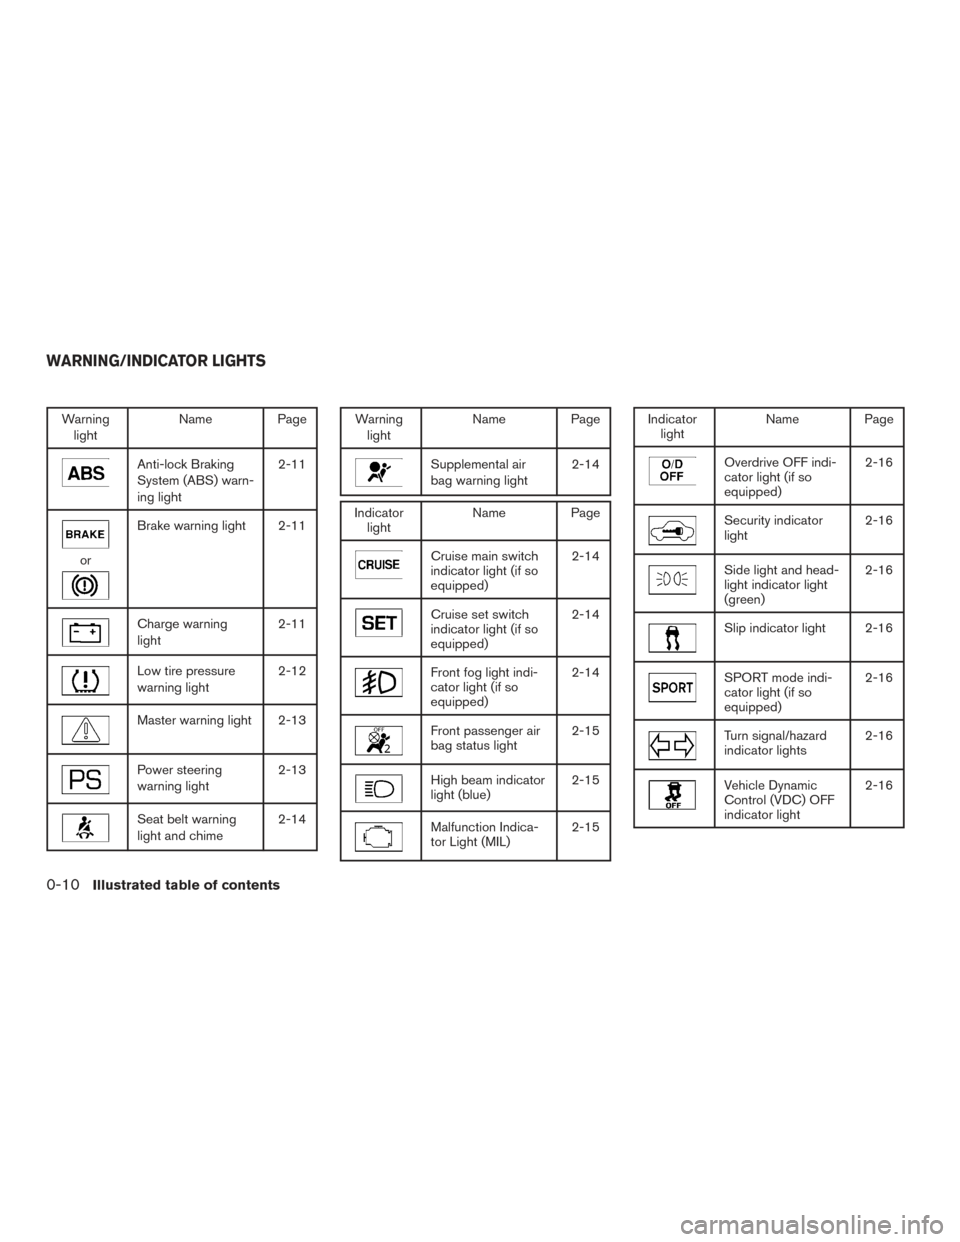
Warninglight Name Page
Anti-lock Braking
System (ABS) warn-
ing light 2-11
or
Brake warning light 2-11
Charge warning
light
2-11
Low tire pressure
warning light2-12
Master warning light 2-13
Power steering
warning light2-13
Seat belt warning
light and chime2-14
Warning
light Name Page
Supplemental air
bag warning light 2-14
Indicator
light Name Page
Cruise main switch
indicator light (if so
equipped) 2-14
Cruise set switch
indicator light (if so
equipped)2-14
Front fog light indi-
cator light (if so
equipped)2-14
Front passenger air
bag status light
2-15
High beam indicator
light (blue)2-15
Malfunction Indica-
tor Light (MIL)2-15
Indicator
light Name Page
Overdrive OFF indi-
cator light (if so
equipped) 2-16
Security indicator
light
2-16
Side light and head-
light indicator light
(green)2-16
Slip indicator light 2-16
SPORT mode indi-
cator light (if so
equipped)2-16
Turn signal/hazard
indicator lights
2-16
Vehicle Dynamic
Control (VDC) OFF
indicator light2-16
WARNING/INDICATOR LIGHTS
0-10Illustrated table of contents
Page 84 of 441
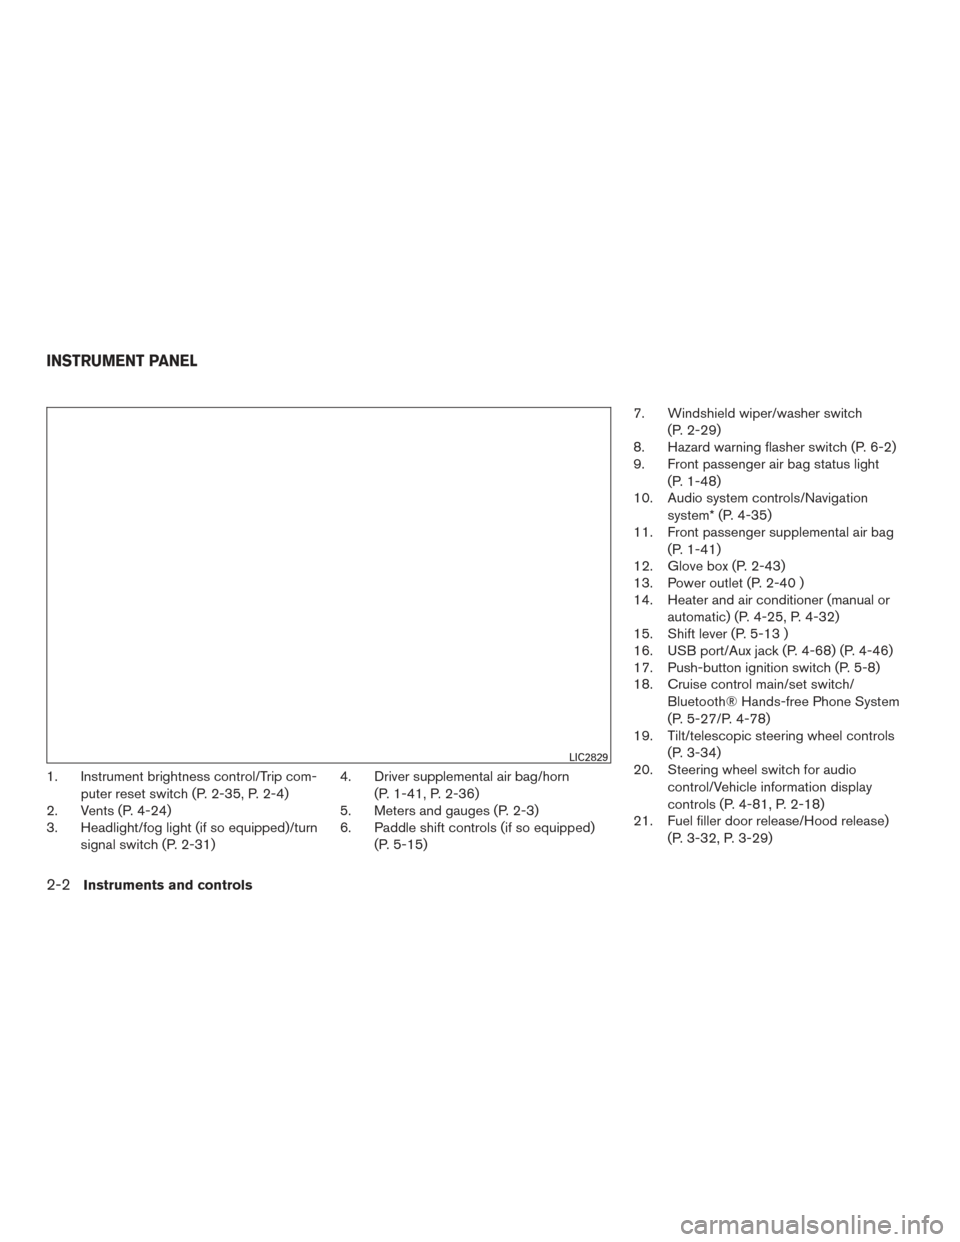
1. Instrument brightness control/Trip com-puter reset switch (P. 2-35, P. 2-4)
2. Vents (P. 4-24)
3. Headlight/fog light (if so equipped)/turn
signal switch (P. 2-31) 4. Driver supplemental air bag/horn
(P. 1-41, P. 2-36)
5. Meters and gauges (P. 2-3)
6. Paddle shift controls (if so equipped)
(P. 5-15) 7. Windshield wiper/washer switch
(P. 2-29)
8. Hazard warning flasher switch (P. 6-2)
9. Front passenger air bag status light
(P. 1-48)
10. Audio system controls/Navigation
system* (P. 4-35)
11. Front passenger supplemental air bag
(P. 1-41)
12. Glove box (P. 2-43)
13. Power outlet (P. 2-40 )
14. Heater and air conditioner (manual or
automatic) (P. 4-25, P. 4-32)
15. Shift lever (P. 5-13 )
16. USB port/Aux jack (P. 4-68) (P. 4-46)
17. Push-button ignition switch (P. 5-8)
18. Cruise control main/set switch/
Bluetooth® Hands-free Phone System
(P. 5-27/P. 4-78)
19. Tilt/telescopic steering wheel controls
(P. 3-34)
20. Steering wheel switch for audio
control/Vehicle information display
controls (P. 4-81, P. 2-18)
21. Fuel filler door release/Hood release)
(P. 3-32, P. 3-29)
LIC2829
INSTRUMENT PANEL
2-2Instruments and controls
Page 92 of 441
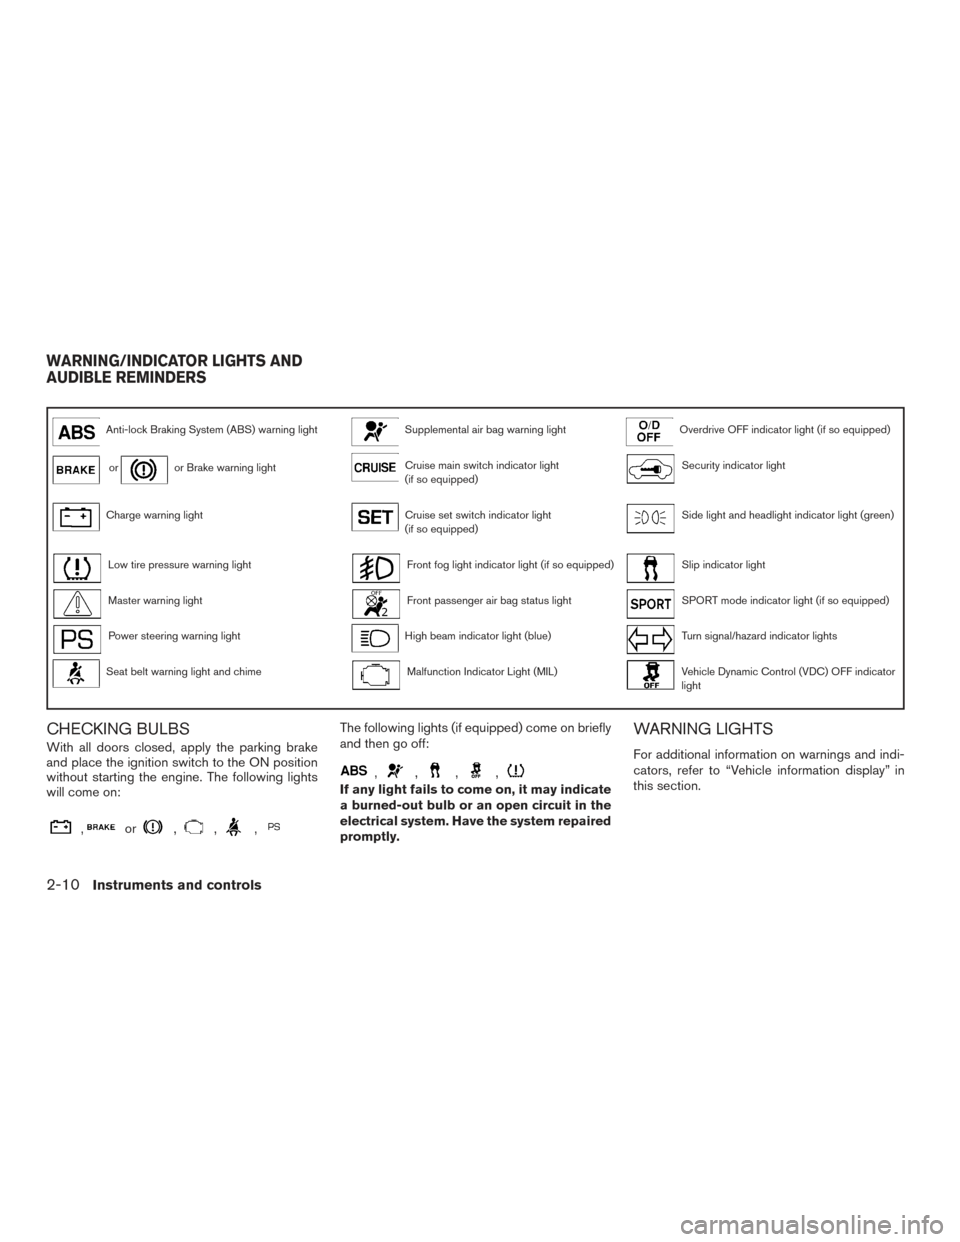
Anti-lock Braking System (ABS) warning lightSupplemental air bag warning lightOverdrive OFF indicator light (if so equipped)
oror Brake warning lightCruise main switch indicator light
(if so equipped)Security indicator light
Charge warning lightCruise set switch indicator light
(if so equipped)Side light and headlight indicator light (green)
Low tire pressure warning lightFront fog light indicator light (if so equipped)Slip indicator light
Master warning lightFront passenger air bag status lightSPORT mode indicator light (if so equipped)
Power steering warning lightHigh beam indicator light (blue)Turn signal/hazard indicator lights
Seat belt warning light and chimeMalfunction Indicator Light (MIL)Vehicle Dynamic Control (VDC) OFF indicator
light
CHECKING BULBS
With all doors closed, apply the parking brake
and place the ignition switch to the ON position
without starting the engine. The following lights
will come on:
,or,,,
The following lights (if equipped) come on briefly
and then go off:
,,,,
If any light fails to come on, it may indicate
a burned-out bulb or an open circuit in the
electrical system. Have the system repaired
promptly.
WARNING LIGHTS
For additional information on warnings and indi-
cators, refer to “Vehicle information display” in
this section.
WARNING/INDICATOR LIGHTS AND
AUDIBLE REMINDERS
2-10Instruments and controls
Page 97 of 441
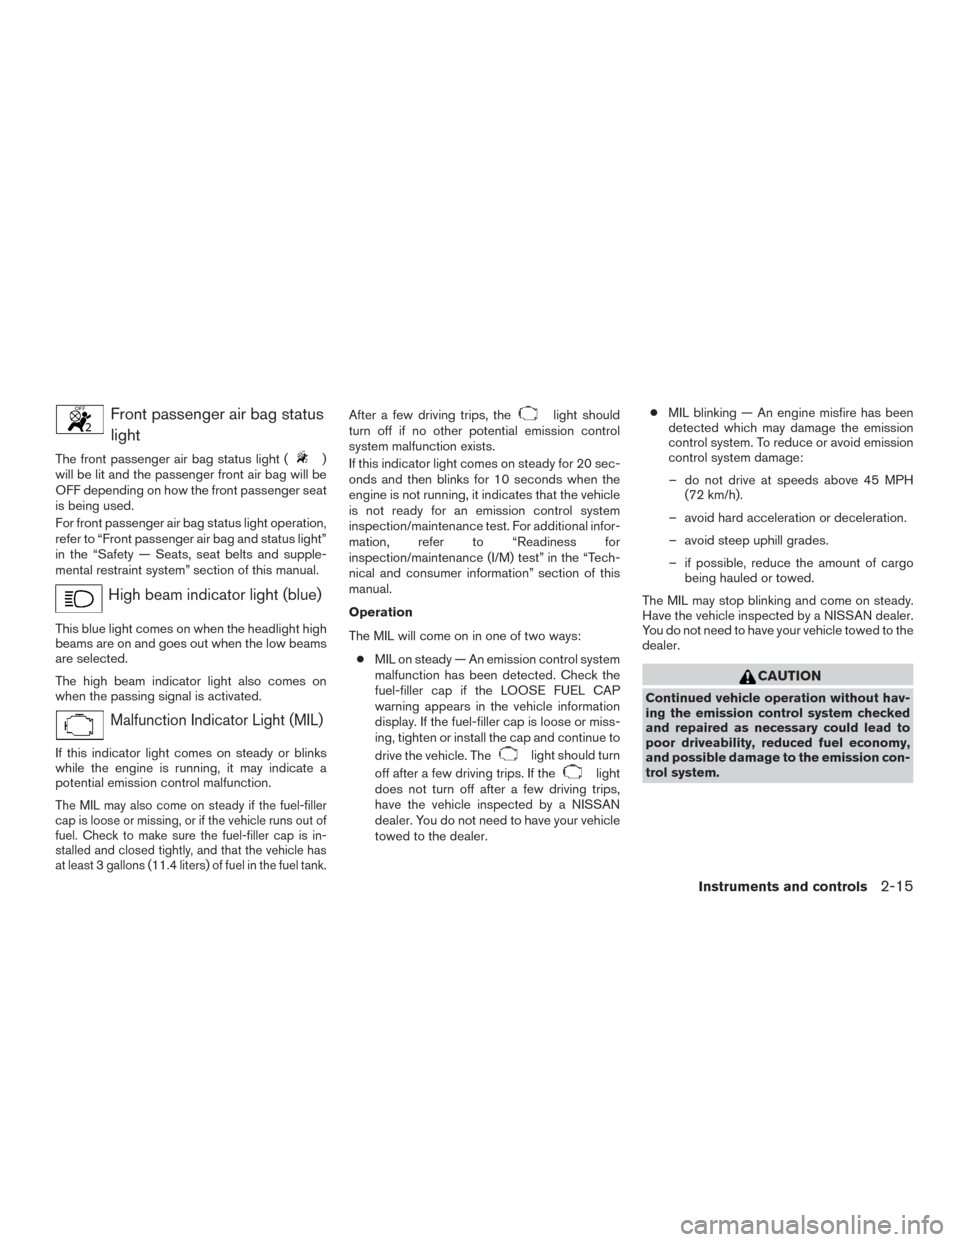
Front passenger air bag statuslight
The front passenger air bag status light ()
will be lit and the passenger front air bag will be
OFF depending on how the front passenger seat
is being used.
For front passenger air bag status light operation,
refer to “Front passenger air bag and status light”
in the “Safety — Seats, seat belts and supple-
mental restraint system” section of this manual.
High beam indicator light (blue)
This blue light comes on when the headlight high
beams are on and goes out when the low beams
are selected.
The high beam indicator light also comes on
when the passing signal is activated.
Malfunction Indicator Light (MIL)
If this indicator light comes on steady or blinks
while the engine is running, it may indicate a
potential emission control malfunction.
The MIL may also come on steady if the fuel-filler
cap is loose or missing, or if the vehicle runs out of
fuel. Check to make sure the fuel-filler cap is in-
stalled and closed tightly, and that the vehicle has
at least 3 gallons (11.4 liters) of fuel in the fuel tank.
After a few driving trips, thelight should
turn off if no other potential emission control
system malfunction exists.
If this indicator light comes on steady for 20 sec-
onds and then blinks for 10 seconds when the
engine is not running, it indicates that the vehicle
is not ready for an emission control system
inspection/maintenance test. For additional infor-
mation, refer to “Readiness for
inspection/maintenance (I/M) test” in the “Tech-
nical and consumer information” section of this
manual.
Operation
The MIL will come on in one of two ways:
● MIL on steady — An emission control system
malfunction has been detected. Check the
fuel-filler cap if the LOOSE FUEL CAP
warning appears in the vehicle information
display. If the fuel-filler cap is loose or miss-
ing, tighten or install the cap and continue to
drive the vehicle. The
light should turn
off after a few driving trips. If the
light
does not turn off after a few driving trips,
have the vehicle inspected by a NISSAN
dealer. You do not need to have your vehicle
towed to the dealer. ●
MIL blinking — An engine misfire has been
detected which may damage the emission
control system. To reduce or avoid emission
control system damage:
– do not drive at speeds above 45 MPH (72 km/h).
– avoid hard acceleration or deceleration.
– avoid steep uphill grades.
– if possible, reduce the amount of cargo being hauled or towed.
The MIL may stop blinking and come on steady.
Have the vehicle inspected by a NISSAN dealer.
You do not need to have your vehicle towed to the
dealer.
CAUTION
Continued vehicle operation without hav-
ing the emission control system checked
and repaired as necessary could lead to
poor driveability, reduced fuel economy,
and possible damage to the emission con-
trol system.
Instruments and controls2-15
Page 176 of 441
FM/AM/SAT radio with compact disc (CD)
player (Type B) (if so equipped).................4-62
USB (Universal Serial Bus) connection port
(models without Navigation System)
(if so equipped) ............................... 4-68
USB (Universal Serial Bus) connection port
(models with Navigation System)
(if so equipped) ............................... 4-70
iPod®* player operation without Navigation
System (if so equipped) ........................ 4-73
iPod®* player operation with Navigation
System (if so equipped) ........................ 4-75
Bluetooth® streaming audio without
Navigation System (Type A) (if so equipped) ......4-78
Bluetooth® streaming audio without
Navigation System (Type B) (if so equipped) ......4-79
Bluetooth® streaming audio with Navigation
System ....................................... 4-79
CD care and cleaning .......................... 4-81
Steering wheel switch for audio control ..........4-81
Antenna ...................................... 4-82
NissanConnect
SMMobile Apps (if so equipped) .....4-83
Registering with NissanConnectSMMobile
Apps ......................................... 4-83Connect Phone
............................... 4-83
Application Download .......................... 4-84
Car phone or CB radio ............................ 4-84
Bluetooth® Hands-Free Phone System without
Navigation System (Type A) (if so equipped) .........4-85
Regulatory Information ......................... 4-86
Using the system .............................. 4-87
Control buttons ............................... 4-89
Getting started ................................ 4-89
List of voice commands ........................ 4-91
Voice Adaptation (VA) mode ....................4-96
Manual control . . .............................. 4-97
Troubleshooting guide ......................... 4-98
Bluetooth® Hands-Free Phone System without
Navigation System (Type B) (if so equipped) .........4-99
Regulatory Information ........................ 4-100
Using the system ............................. 4-101
Control buttons .............................. 4-102
Connecting procedure ........................ 4-103
Voice commands ............................. 4-104
Making a call . ................................ 4-105
Receiving a call .............................. 4-106
During a call ................................. 4-106
Page 177 of 441
Ending a call................................. 4-106
Text messaging ............................... 4-107
Bluetooth® settings .......................... 4-108
Manual control ............................... 4-109
Bluetooth® Hands-Free Phone System with
Navigation System (if so equipped) ................4-110
Regulatory Information ........................ 4-111
Voice commands ............................. 4-112
Connecting Procedure ........................ 4-112
Vehicle phonebook ........................... 4-113
Making a call ................................. 4-113
Receiving a call .............................. 4-113
During a call ................................. 4-113
Ending a call ................................. 4-113
Text messaging ............................... 4-114Bluetooth® settings
.......................... 4-116
Phone settings ............................... 4-117
NISSAN Voice Recognition System
(if so equipped) ................................. 4-118
Using the system ............................. 4-118
System features .............................. 4-119
Bluetooth® Hands-Free Phone System
voice commands ............................. 4-120
Navigation System voice commands ............4-121
Audio system voice commands .................4-121
Information voice commands ...................4-121
My Apps Voice Commands ....................4-121
Help voice commands ........................ 4-122
Troubleshooting guide ........................ 4-122
Page 179 of 441
9. CAMERA button
10. NAV button*
* For additional information regarding the Naviga-
tion system control buttons, refer to the separate
Navigation System Owner’s Manual.
** For additional information regarding the
Bluetooth® Hands-Free Phone System control
button, refer to “Bluetooth® Hands-Free Phone
System with Navigation System (if so equipped)”
in this section.
When you use this system, make sure the engine
is running.
If you use the system with the engine not
running (ignition ON or ACC) for a long
time, it will discharge the battery, and the
engine will not start.
Reference symbols:
“Example” — Words marked in quotes refer to a
key shown only on the display. These keys can be
selected by touching the screen.HOW TO USE THE TOUCH-
SCREEN
CAUTION
● The glass display screen may break if it
is hit with a hard or sharp object. If the
glass screen breaks, do not touch it.
Doing so could result in an injury.
● To clean the display, never use a rough
cloth, alcohol, benzine, thinner or any
kind of solvent or paper towel with a
chemical cleaning agent. They will
scratch or deteriorate the panel.
● Do not splash any liquid such as water
or car fragrance on the display. Contact
with liquid will cause the system to
malfunction.
To help ensure safe driving, some functions can-
not be operated while driving.
The on-screen functions that are not available
while driving will be “grayed out” or muted.
Park the vehicle in a safe location and then oper-
ate the navigation system.
WARNING
● ALWAYS give your full attention to
driving.
● Avoid using vehicle features that could
distract you. If distracted, you could
lose control of your vehicle and cause
an accident.
Monitor, climate, audio, phone and voice recognition systems4-5
Page 182 of 441
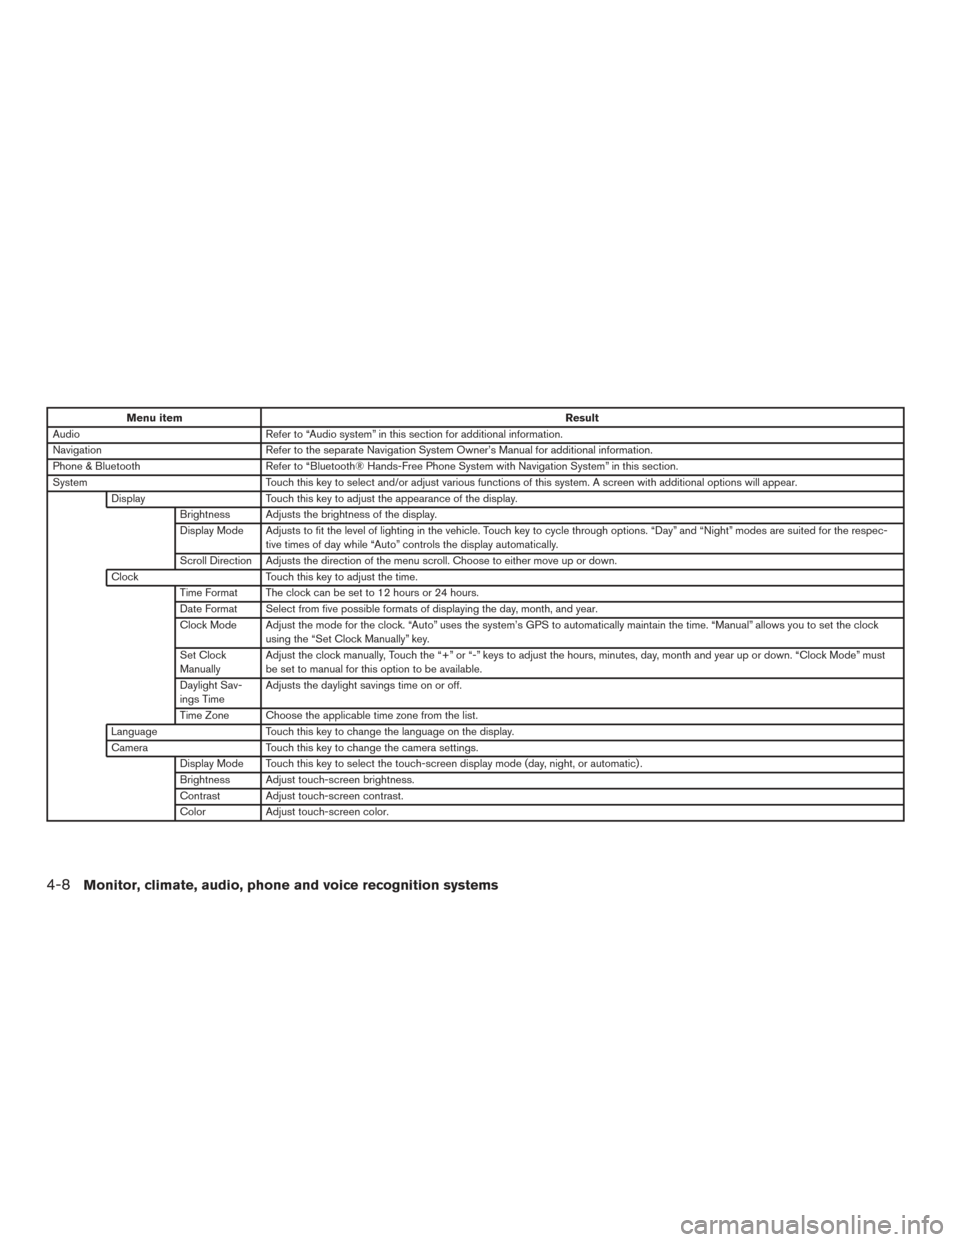
Menu itemResult
Audio Refer to “Audio system” in this section for additional information.
Navigation Refer to the separate Navigation System Owner’s Manual for additional information.
Phone & Bluetooth Refer to “Bluetooth® Hands-Free Phone System with Navigation System” in this section.
System Touch this key to select and/or adjust various functions of this system. A screen with additional options will appear.
Display Touch this key to adjust the appearance of the display.
Brightness Adjusts the brightness of the display.
Display Mode Adjusts to fit the level of lighting in the vehicle. Touch key to cycle through options. “Day” and “Night” modes are suited for the respec- tive times of day while “Auto” controls the display automatically.
Scroll Direction Adjusts the direction of the menu scroll. Choose to either move up or down.
Clock Touch this key to adjust the time.
Time Format The clock can be set to 12 hours or 24 hours.
Date Format Select from five possible formats of displaying the day, month, and year.
Clock Mode Adjust the mode for the clock. “Auto” uses the system’s GPS to automatically maintain the time. “Manual” allows you to set the clock using the “Set Clock Manually” key.
Set Clock
Manually Adjust the clock manually, Touch the “+” or “-” keys to adjust the hours, minutes, day, month and year up or down. “Clock Mode” must
be set to manual for this option to be available.
Daylight Sav-
ings Time Adjusts the daylight savings time on or off.
Time Zone Choose the applicable time zone from the list.
Language Touch this key to change the language on the display.
Camera Touch this key to change the camera settings.
Display Mode Touch this key to select the touch-screen display mode (day, night, or automatic) .
Brightness Adjust touch-screen brightness.
Contrast Adjust touch-screen contrast.
Color Adjust touch-screen color.
4-8Monitor, climate, audio, phone and voice recognition systems