change wheel NISSAN ALTIMA 2023 User Guide
[x] Cancel search | Manufacturer: NISSAN, Model Year: 2023, Model line: ALTIMA, Model: NISSAN ALTIMA 2023Pages: 644, PDF Size: 4.12 MB
Page 253 of 644
Synchronize climate settings
Press the SYNC button to synchronize cli-
mate settings. The sync indicator will turn
on.
Pressing SYNC will synchronize driver's and
front passenger's climate settings.
To change climate settings when SYNC is
active (the SYNC indicator is on):
• The driver's side temperature control dialwill control the driver and front passenger
temperatures.
• The fan speed control dial will control the fan speeds.
To exit SYNC:
• To remove the front passenger from SYNC, turn the passenger's side tem-
perature control dial.
• Pressing SYNC multiple times will re- activate SYNC.
To turn system off
Press the ON-OFF button.
Rear window and outside mirror
defroster switch
For additional information, see “Rear win-
dow and outside mirror (if so equipped)
defroster switch” (P. 2-56).
Heated seat switches
For additional information, see “Heated
seat switches” (P. 2-64).
Heated steering wheel switch
For additional information, see “Heated
steering wheel switch” (P. 2-65).OPERATING TIPS
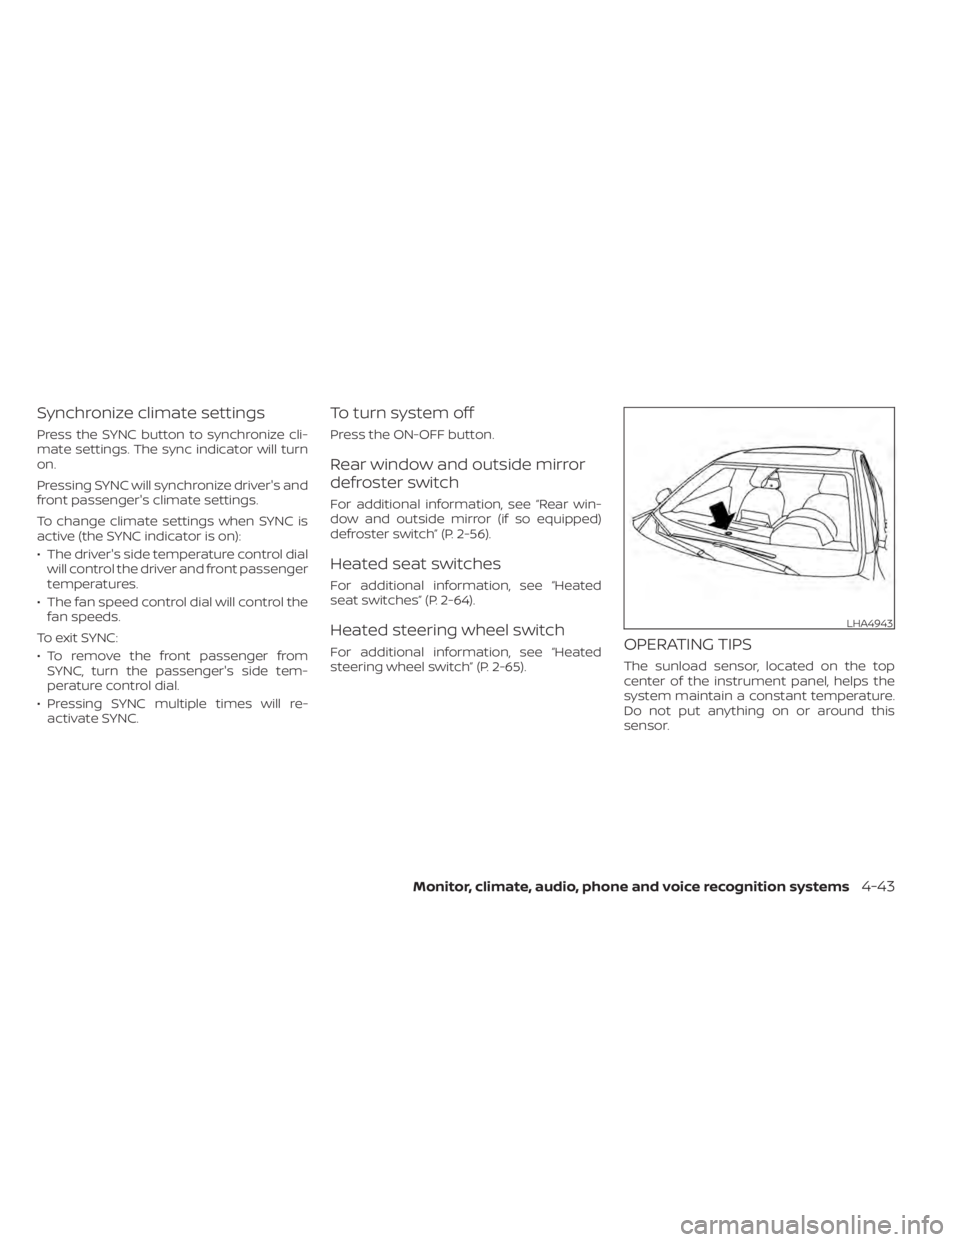
The sunload sensor, located on the top
center of the instrument panel, helps the
system maintain a constant temperature.
Do not put anything on or around this
sensor.
LHA4943
Monitor, climate, audio, phone and voice recognition systems4-43
Page 262 of 644
• Refresh: Touch the “Refresh” key to scanand update the station list displayed on
the right side of the AM Menu screen.
(SEEK/TRACK) buttons
Press the
orbuttons to tune
from low to high or high to low frequencies
and to stop at the next broadcasting
station.
1 to 6 Station memory operations
Up to six stations can be registered in the
preset list.
1. Select the AM radio band.
2. Tune to the station you wish to store.
3. Touch and hold one of the preset num- bers in the preset list.
The information such as frequency will be
displayed on the preset list.
To select and listen to the preset stations,
push
on the steering wheel briefly or
touch a preferred station on the preset list
on the radio screen.
FM radio operation
Press theMENU button and touch the
“FM Menu” key or press the AUDIO button
and select FM on the bottom of the Launch
Bar to bring up the FM display screen. If another audio source is playing when the
“FM” key is pressed, the audio source play-
ing will automatically be turned off and the
last radio station played will begin playing.
The FM stereo indicator (STEREO) is shown
on the screen during FM stereo reception.
When the stereo broadcast signal is weak,
the radio automatically changes from ste-
reo to monaural reception.
FM Menu
Touch the “FM” Menu key to display the FM
Menu screen options:
• SCAN: To scan tune the stations, touch
the “FM Menu” key on the radio screen
and then touch the “SCAN” key. The sta-
tions will be tuned from low to high fre-
quencies and stop at each broadcasting
stations for several seconds. Touching
the “SCAN” key again during this period of
several seconds will stop tuning and the
radio will remain tuned to that station.
• Refresh: Touch the “Refresh” key to up- date the station list displayed on the right
side of the FM Menu screen.
• RDS Info: Radio station and song informa- tion can be displayed on the FM display
screen.
(SEEK/TRACK) buttons
Press the
orbuttons to tune
from low to high or high to low frequencies
and to stop at the next broadcasting
station.
1 to 12 Station memory operations
Up to 12 stations can be registered in the
preset list.
1. Select the FM radio band.
2. Tune to the station you wish to store.
3. Touch and hold one of the preset num- bers in the preset list.
The information such as frequency will be
displayed on the preset list.
To select and listen to the preset stations,
push
on the steering wheel briefly or
touch a preferred station on the preset list
on the radio screen.
Auxiliary (AUX) devices operation
Connecting auxiliary devices
Connect an AUX device into the AUX input
jack located on the center console below
the heater and air conditioner controls.
4-52Monitor, climate, audio, phone and voice recognition systems
Page 263 of 644
The AUX input jack accepts any standard
analog audio input such as from a portable
cassette player, CD player, MP3 player or
phone.
Insert a 1/8 in (3.5 mm) stereo mini plug in
the audio input jack. If a cable with a mono
plug is used, the audio output may not
function normally.
Activation and playing
Turn on the AUX device. Connect an AUX
cable to the AUX device and the AUX input
jack. Select AUX mode from the audio
source menu screen or by pressing the
Source button on the steering wheel.
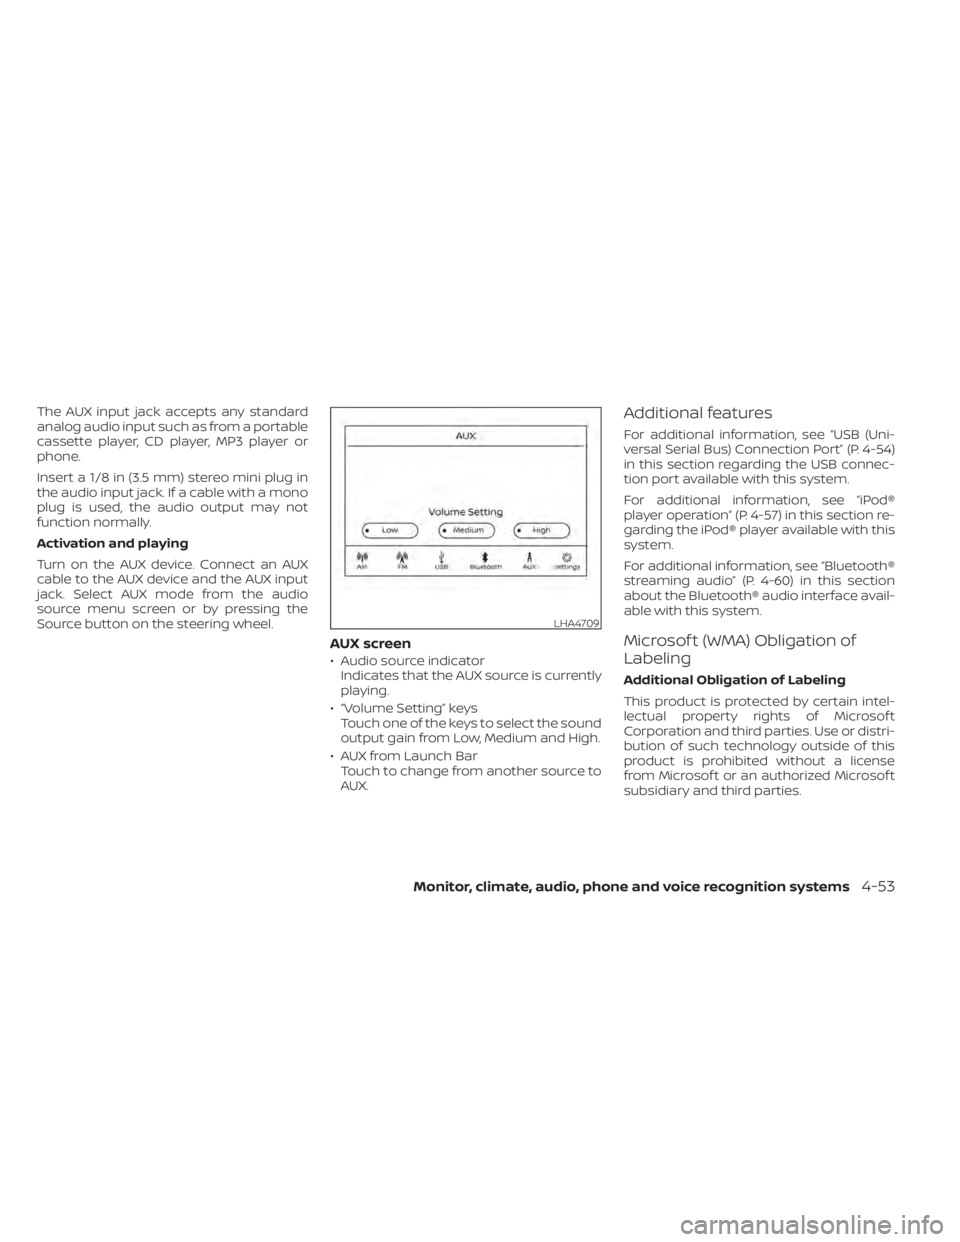
AUX screen
• Audio source indicatorIndicates that the AUX source is currently
playing.
• “Volume Setting” keys Touch one of the keys to select the sound
output gain from Low, Medium and High.
• AUX from Launch Bar Touch to change from another source to
AUX.
Additional features
For additional information, see “USB (Uni-
versal Serial Bus) Connection Port” (P. 4-54)
in this section regarding the USB connec-
tion port available with this system.
For additional information, see “iPod®
player operation” (P. 4-57) in this section re-
garding the iPod® player available with this
system.
For additional information, see “Bluetooth®
streaming audio” (P. 4-60) in this section
about the Bluetooth® audio interface avail-
able with this system.
Microsof t (WMA) Obligation of
Labeling
Additional Obligation of Labeling
This product is protected by certain intel-
lectual property rights of Microsof t
Corporation and third parties. Use or distri-
bution of such technology outside of this
product is prohibited without a license
from Microsof t or an authorized Microsof t
subsidiary and third parties.
LHA4709
Monitor, climate, audio, phone and voice recognition systems4-53
Page 271 of 644
Automatic Connecting Procedure
If no phone is connected to the system,
press and hold the
button on the
steering wheel for less than 1.5 seconds.
Af ter the prompt, speak “Add Phone”, the
system will announce “transferring to the
add phone settings menu”. The system will
start the pairing procedure. When a com-
patible phone is found, a message with a
PIN appears on the screen. Operate the
Bluetooth® phone to complete the con-
nection process. For additional informa-
tion, see “Bluetooth® connections screen”
(P. 4-81).
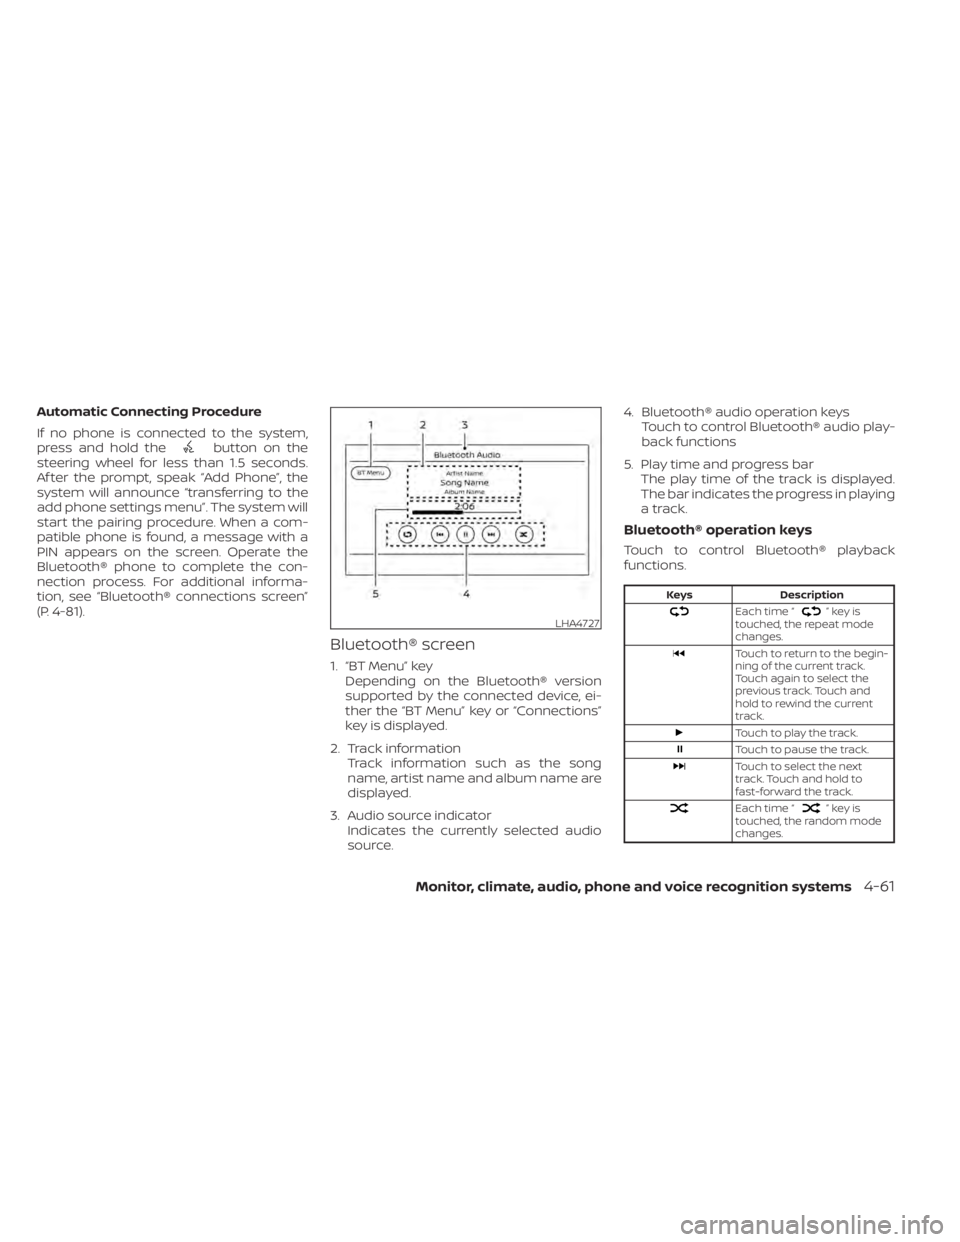
Bluetooth® screen
1. “BT Menu” key Depending on the Bluetooth® version
supported by the connected device, ei-
ther the “BT Menu” key or “Connections”
key is displayed.
2. Track information Track information such as the song
name, artist name and album name are
displayed.
3. Audio source indicator Indicates the currently selected audio
source. 4. Bluetooth® audio operation keys
Touch to control Bluetooth® audio play-
back functions
5. Play time and progress bar The play time of the track is displayed.
The bar indicates the progress in playing
a track.
Bluetooth® operation keys
Touch to control Bluetooth® playback
functions.
Keys Description
Each time “”keyis
touched, the repeat mode
changes.
Touch to return to the begin-
ning of the current track.
Touch again to select the
previous track. Touch and
hold to rewind the current
track.
Touch to play the track.
Touch to pause the track.
Touch to select the next
track. Touch and hold to
fast-forward the track.
Each time “”keyis
touched, the random mode
changes.
LHA4727
Monitor, climate, audio, phone and voice recognition systems4-61
Page 273 of 644
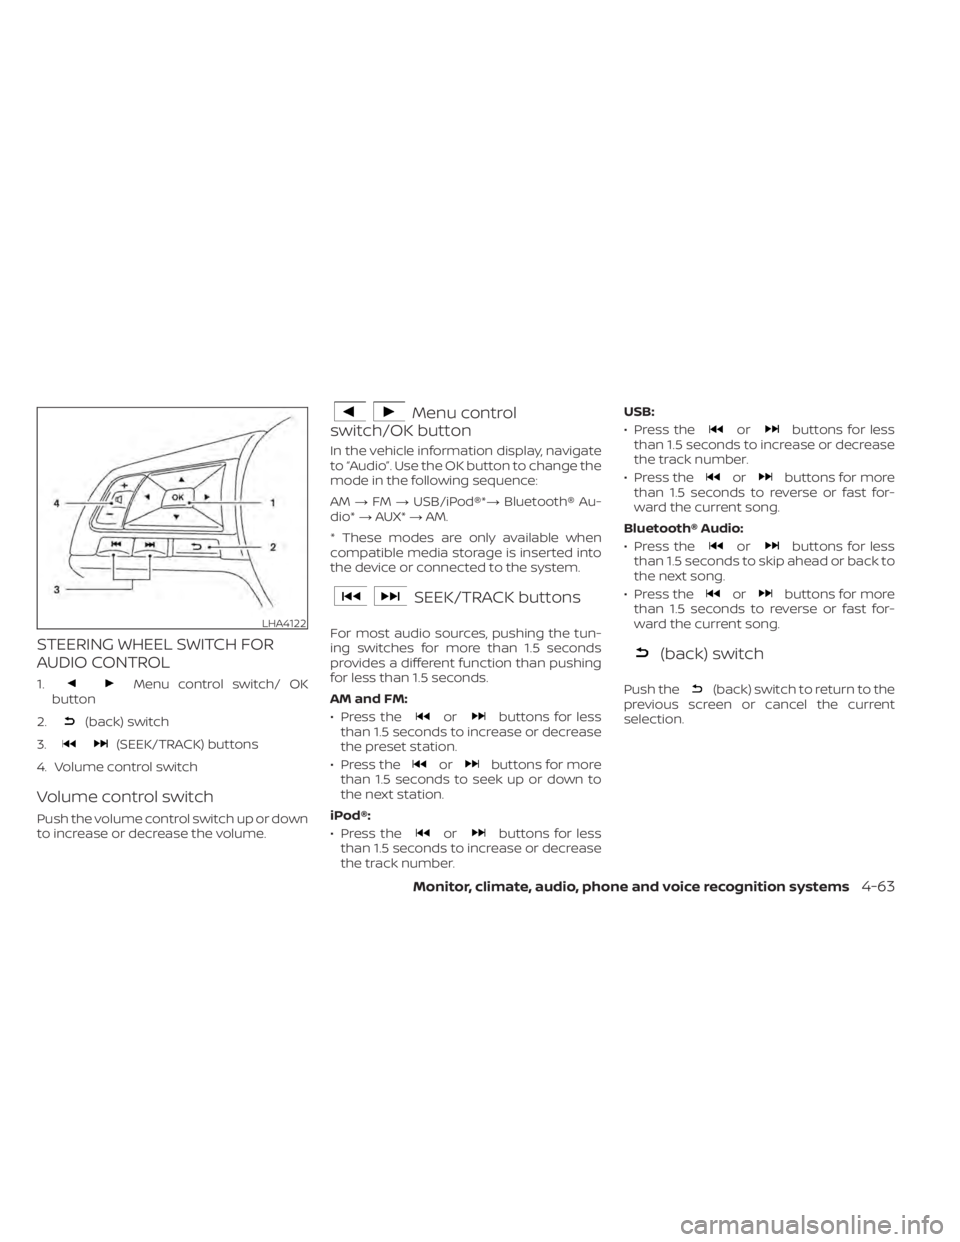
STEERING WHEEL SWITCH FOR
AUDIO CONTROL
1.Menu control switch/ OK
button
2.
(back) switch
3.
(SEEK/TRACK) buttons
4. Volume control switch
Volume control switch
Push the volume control switch up or down
to increase or decrease the volume.
Menu control
switch/OK button
In the vehicle information display, navigate
to “Audio”. Use the OK button to change the
mode in the following sequence:
AM →FM →USB/iPod®*→ Bluetooth® Au-
dio* →AUX* →AM.
* These modes are only available when
compatible media storage is inserted into
the device or connected to the system.
SEEK/TRACK buttons
For most audio sources, pushing the tun-
ing switches for more than 1.5 seconds
provides a different function than pushing
for less than 1.5 seconds.
AM and FM:
• Press the
orbuttons for less
than 1.5 seconds to increase or decrease
the preset station.
• Press the
orbuttons for more
than 1.5 seconds to seek up or down to
the next station.
iPod®:
• Press the
orbuttons for less
than 1.5 seconds to increase or decrease
the track number. USB:
• Press the
orbuttons for less
than 1.5 seconds to increase or decrease
the track number.
• Press the
orbuttons for more
than 1.5 seconds to reverse or fast for-
ward the current song.
Bluetooth® Audio:
• Press the
orbuttons for less
than 1.5 seconds to skip ahead or back to
the next song.
• Press the
orbuttons for more
than 1.5 seconds to reverse or fast for-
ward the current song.
(back) switch
Push the(back) switch to return to the
previous screen or cancel the current
selection.
LHA4122
Monitor, climate, audio, phone and voice recognition systems4-63
Page 276 of 644
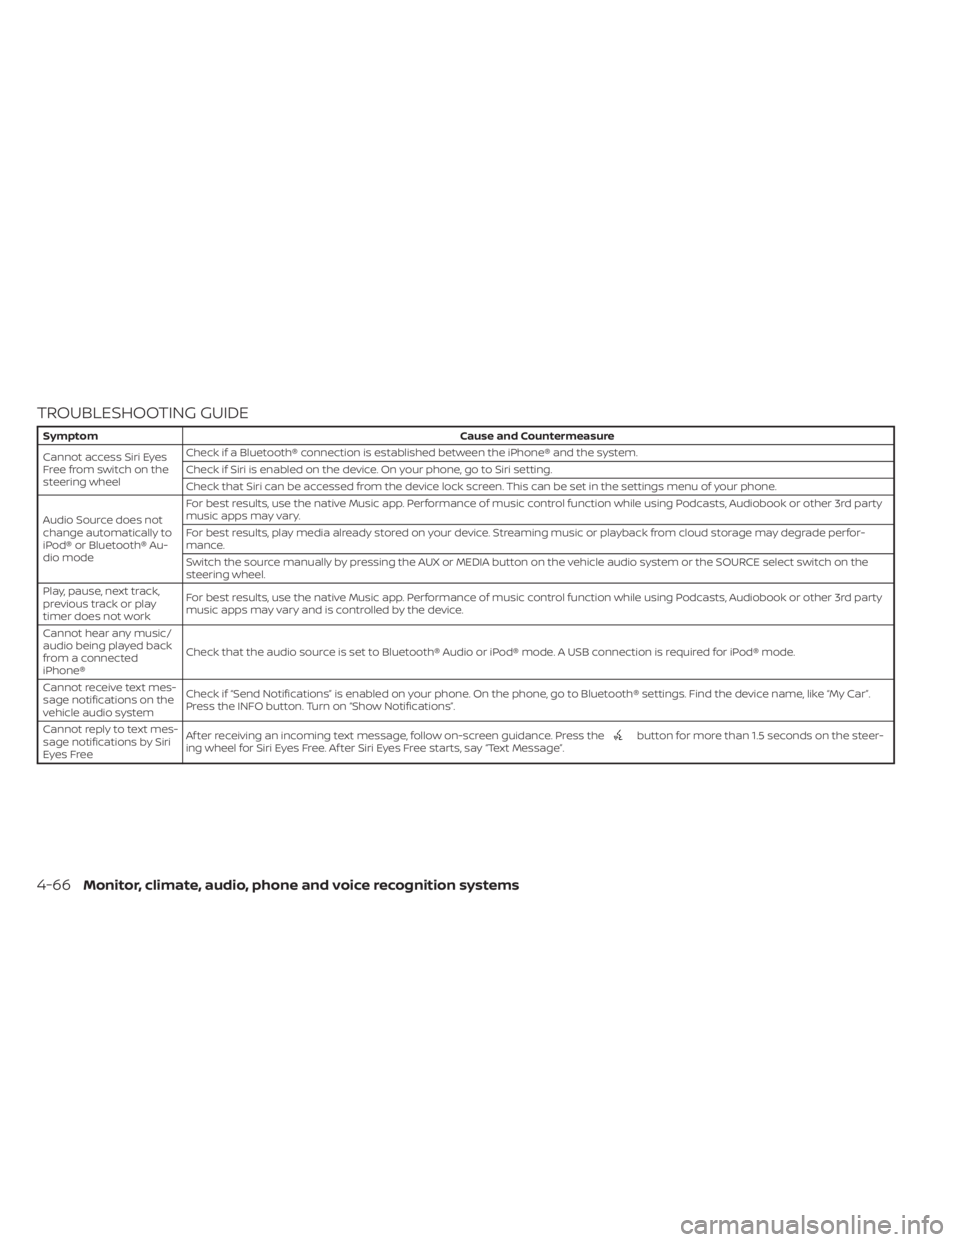
TROUBLESHOOTING GUIDE
SymptomCause and Countermeasure
Cannot access Siri Eyes
Freefromswitchonthe
steering wheel Check if a Bluetooth® connection is established between the iPhone® and the system.
Check if Siri is enabled on the device. On your phone, go to Siri setting.
Check that Siri can be accessed from the device lock screen. This can be set in the settings menu of your phone.
Audio Source does not
change automatically to
iPod® or Bluetooth® Au-
dio mode For best results, use the native Music app. Performance of music control function while using Podcasts, Audiobook or other 3rd party
music apps may vary.
For best results, play media already stored on your device. Streaming music or playback from cloud storage may degrade perfor-
mance.
Switch the source manually by pressing the AUX or MEDIA button on the vehicle audio system or the SOURCE select switch on the
steering wheel.
Play, pause, next track,
previous track or play
timer does not work For best results, use the native Music app. Performance of music control function while using Podcasts, Audiobook or other 3rd party
music apps may vary and is controlled by the device.
Cannot hear any music/
audio being played back
from a connected
iPhone® Check that the audio source is set to Bluetooth® Audio or iPod® mode. A USB connection is required for iPod® mode.
Cannot receive text mes-
sage notifications on the
vehicle audio system Check if “Send Notifications” is enabled on your phone. On the phone, go to Bluetooth® settings. Find the device name, like “My Car”.
Press the INFO button. Turn on “Show Notifications”.
Cannot reply to text mes-
sage notifications by Siri
Eyes Free Af ter receiving an incoming text message, follow on-screen guidance. Press the
button for more than 1.5 seconds on the steer-
ing wheel for Siri Eyes Free. Af ter Siri Eyes Free starts, say “Text Message”.
4-66Monitor, climate, audio, phone and voice recognition systems
Page 306 of 644
The vehicle must be driven as appropriate
based on the conditions of the vehicle, road
and traffic.
WARNING
The following actions can increase the
chance of losing control of the vehicle if
there is a sudden loss of tire air pres-
sure. Losing control of the vehicle may
cause a collision and result in personal
injury.
• The vehicle generally moves or pulls
in the direction of the flat tire.
• Do not rapidly apply the brakes.
• Do not rapidly release the accelerator
pedal.
• Do not rapidly turn the steering
wheel.
1. Remain calm and do not overreact.
2. Maintain a firm grip on the steering wheel with both hands and try to hold a
straight course.
3. When appropriate, slowly release the ac- celerator pedal to gradually slow the
vehicle. 4. Gradually steer the vehicle to a safe lo-
cation off the road and away from traffic
if possible.
5. Lightly apply the brake pedal to gradu- ally stop the vehicle.
6. Turn on the hazard warning flashers and contact a roadside emergency service
to change the tire. For additional infor-
mation, see “Changing a flat tire” (P. 6-4).
DRINKING ALCOHOL/DRUGS AND
DRIVING
WARNING
Never drive under the influence of alco-
hol or drugs. Alcohol in the blood-
stream reduces coordination, delays
reaction time and impairs judgement.
Driving af ter drinking alcohol increases
the likelihood of being involved in an
accident injuring yourself and others.
Additionally, if you are injured in an ac-
cident, alcohol can increase the sever-
ity of the injury. NISSAN is committed to safe driving. How-
ever, you must choose not to drive under
the influence of alcohol. Every year thou-
sands of people are injured or killed in
alcohol-related collisions. Although the lo-
cal laws vary on what is considered to be
legally intoxicated, the fact is that alcohol
affects all people differently and most
people underestimate the effects of
alcohol.
Remember, drinking and driving don't mix!
That is true for drugs (over-the-counter,
prescription) and illegal drugs, too. Don't
drive if your ability to operate your vehicle is
impaired by alcohol, drugs, or some other
physical condition.
DRIVING SAFETY PRECAUTIONS
Your NISSAN is designed for both normal
and off-road use. However, avoid driving in
deep water or mud as your NISSAN is
mainly designed for leisure use, unlike a
conventional off-road vehicle.
Remember that 2-Wheel Drive (2WD) mod-
els are less capable than All-Wheel Drive
(AWD) models for rough road driving and
extrication when stuck in deep snow or
mud, or the like.
5-10Starting and driving
Page 334 of 644
LDW SYSTEM LIMITATIONS
WARNING
Listed below are the system limitations
for the LDW system. Failure to follow
the warnings and instructions for
proper use of the LDW system could re-
sult in serious injury or death.
• The system will not operate at
speeds below approximately 37 mph
(60 km/h) or if it cannot detect lane
markers.
• Do not use the LDW system under the
following conditions as it may not
function properly:
– During bad weather (rain, fog,
snow, etc.).
– When driving on slippery roads,
such as on ice or snow.
– When driving on winding or un-
even roads.
– When there is a lane closure due to
road repairs.
– When driving in a makeshif t or
temporary lane.
– When driving on roads where the
lane width is too narrow. –
When driving without normal tire
conditions (for example, tire wear,
low tire pressure, installation of
spare tire, tire chains, nonstan-
dard wheels).
– When the vehicle is equipped with
non-original brake parts or sus-
pension parts.
– When you are towing a trailer or
other vehicle.
• The system may not function prop-
erly under the following conditions:
– On roads where there are multiple
parallel lane markers; lane mark-
ers that are faded or not painted
clearly; yellow painted lane mark-
ers; non-standard lane markers;
or lane markers covered with wa-
ter, dirt, snow, etc.
– On roads where the discontinued
lane markers are still detectable.
– On roads where there are sharp
curves.
–
On roads where there are sharply contrasting objects, such as shad-
ows, snow, water, wheel ruts, seams
or lines remaining af ter road re-
pairs. (The LDW system could detect
these items as lane markers.)
– On roads where the traveling lane
merges or separates.
– When the vehicle’s traveling direc-
tion does not align with the lane
marker.
– When traveling close to the ve-
hicle in front of you, which ob-
structs the lane camera unit de-
tection range.
– When rain, snow, dirt or an object
adheres to the windshield in front
of the lane camera unit.
– When the headlights are not
bright due to dirt on the lens or if
the aiming is not adjusted
properly.
– When strong light enters the lane
camera unit. (For example, the
light directly shines on the front of
the vehicle at sunrise or sunset.)
– When a sudden change in bright-
ness occurs. (For example, when
the vehicle enters or exits a tunnel
or under a bridge.)
5-38Starting and driving
Page 339 of 644
I-LI SYSTEM LIMITATIONS
WARNING
Listed below are the system limitations
for the I-LI system. Failure to follow the
warnings and instructions for proper
use of the I-LI system could result in
serious injury or death.
• The I-LI system may activate if you
change lanes without first activating
your turn signal or, for example, if a
construction zone directs traffic to
cross an existing lane marker. If this
occurs you may need to apply correc-
tive steering to complete your lane
change.
• Because the I-LI may not activate un-
der the road, weather, and lane
marker conditions described in this
section, it may not activate every
time your vehicle begins to leave its
lane and you will need to apply cor-
rective steering.
• When the I-LI system is operating,
avoid excessive or sudden steering
maneuvers. Otherwise, you could
lose control of the vehicle. •
The I-LI system will not operate at
speeds below approximately 37 mph
(60 km/h) or if it cannot detect lane
markers.
• Do not use the I-LI system under the
following conditions as it may not
function properly:
– During bad weather (rain, fog,
snow, etc.).
– When driving on slippery roads,
such as on ice or snow.
– When driving on winding or un-
even roads.
– When there is a lane closure due to
road repairs.
– When driving in a makeshif t or
temporary lane.
– When driving on roads where the
lane width is too narrow.
– When driving without normal tire
conditions (for example, tire wear,
low tire pressure, installation of
spare tire, tire chains, non-
standard wheels).
– When the vehicle is equipped with
nonoriginal brake parts or sus-
pension parts.
– When you are towing a trailer or
other vehicle. –
On roads where there are multiple
parallel lane markers; lane mark-
ers that are faded or not painted
clearly; yellow painted lane mark-
ers; non-standard lane markers;
or lane markers covered with wa-
ter, dirt, snow, etc.
– On roads where discontinued lane
markers are still detectable.
– On roads where there are sharp
curves.
– On roads where there are sharply
contrasting objects, such as shad-
ows, snow, water, wheel ruts,
seams or lines remaining af ter
road repairs. (The I-LI system
could detect these items as lane
markers.)
– On roads where the traveling lane
merges or separates.
– When the vehicle’s traveling direc-
tion does not align with the lane
marker.
– When traveling close to the ve-
hicle in front of you, which ob-
structs the lane camera unit de-
tection range.
Starting and driving5-43
Page 340 of 644
–When rain, snow or dirt adheres to
the windshield in front of the lane
camera unit.
– When the headlights are not
bright due to dirt on the lens or if
the aiming is not adjusted
properly.
– When strong light enters the lane
camera unit. (For example, the
light directly shines on the front of
the vehicle at sunrise or sunset.)
– When a sudden change in bright-
ness occurs. (For example, when
the vehicle enters or exits a tunnel
or under a bridge.)
While the I-LI system is operating, you may
hear a sound of brake operation. This is
normal and indicates that the I-LI system is
operating properly.SYSTEM TEMPORARILY
UNAVAILABLE
Condition A:
The warning and assist functions of the I-LI
system are not designed to work under the
following conditions:
• When you operate the lane change signal and change the traveling lanes in the di-
rection of the signal. (The I-LI system will
be deactivated for approximately 2 sec-
onds af ter the lane change signal is
turned off.)
• When the vehicle speed lowers to less than approximately 37 mph (60 km/h).
Af ter the above conditions have finished
and the necessary operating conditions
are satisfied, the warning and assist func-
tions will resume.
Condition B:
The assist function of the I-LI system is not
designed to work under the following con-
ditions (warning is still functional):
• When the brake pedal is depressed.
• When the steering wheel is turned as far as necessary for the vehicle to change
lanes.
• When the vehicle is accelerated during I-LI system operation. • When the Intelligent Cruise Control (ICC)
approach warning occurs.
• When the hazard warning flashers are operated.
• When driving on a curve at high speed.
Af ter the above conditions have finished
and the necessary operating conditions
are satisfied, the I-LI system application of
the brakes will resume.
Condition C:
If the following messages appear in the
vehicle information display, the I-LI system
will be turned off automatically.
• “Not Available Poor Road Conditions”: When the VDC system (except Traction
Control System [TCS] function) or ABS
operates.
• “Currently not available”: When the VDC system is turned off.
Action to take:
When the above conditions no longer exist,
turn off the I-LI system. Push the ProPILOT
Assist switch (for vehicles with ProPILOT
Assist) on the steering wheel again to turn
the I-LI system back on.
5-44Starting and driving