brake NISSAN ALTIMA 2023 Owner's Manual
[x] Cancel search | Manufacturer: NISSAN, Model Year: 2023, Model line: ALTIMA, Model: NISSAN ALTIMA 2023Pages: 644, PDF Size: 4.12 MB
Page 140 of 644
Forward Driving Aids temporarily
disabled Front Sensor blocked See
Owner’s Manual
This message appears when the front ra-
dar sensor may be obstructed due to:
• mud, dirt, snow, ice, etc.
• inclement weather (rain, fog, snow, etc.).
All forward driving aids are temporarily dis-
abled until the system detects that the
front radar sensor is no longer obstructed.
For additional information, see:
• Automatic Emergency Braking (AEB) withPedestrian Detection (P. 5-135)
• ProPILOT Assist (P. 5-94)
• Intelligent Forward Collision Warning (I- FCW) (P. 5-147)
Intelligent Cruise Control
(ICC) indicators (if so
equipped)
These indicators show the Intelligent
Cruise Control (ICC) system status. The sta-
tus is shown by color. For additional infor-
mation, see “Intelligent Cruise Control (ICC)”
(P. 5-71).
Intelligent Lane
Intervention (I-LI) indicator
This indicator shows when the I-LI system
is engaged.
For additional information, see “Intelligent
Lane Intervention (I-LI)” (P. 5-40).
Lane Departure Warning
(LDW) indicator
This indicator shows when the LDW system
is engaged.
For additional information, see “Lane De-
parture Warning (LDW)” (P. 5-33) and “Intelli-
gent Lane Intervention (I-LI)” (P. 5-40).
Malfunction
This warning appears when one or more of
the following systems (if so equipped) is
not functioning properly:
• Automatic Emergency Braking (AEB) withPedestrian Detection
• Intelligent Forward Collision Warning (I-FCW)
If one or more of these warning appears,
have the system checked. It is recom-
mended that you visit a NISSAN dealer for
this service. For additional information, see “Automatic
Emergency Braking (AEB) with Pedestrian
Detection” (P. 5-135) or “Intelligent Forward
Collision Warning (I-FCW) (P. 5-147).
Malfunction: See Owner’s Manual
This warning appears when one or more of
the following systems (if so equipped) is
not functioning properly:
• Traffic Sign Recognition (TSR)
• Rear Automatic Braking (RAB)
If one or more of these warning appears,
have the system checked. It is recom-
mended that you visit a NISSAN dealer for
this service.
Not Available Parking Brake On
This message may appear when the ProPI-
LOT Assist system is engaged.
Under the following condition, the ProPILOT
Assist system is automatically canceled:
• The electronic parking brake is applied.
The above system cannot be used when
the electronic parking is activated.
For additional information, see "ProPILOT
Assist (P. 5-94) and “Parking brake” (P. 5-25).
2-50Instruments and controls
Page 152 of 644
If the ambient image sensor is damaged
due to an accident, it is recommended that
you visit a NISSAN dealer.
Battery saver system
If the ignition switch is placed in the OFF
position while the headlight switch is in the
orposition, the headlights will
turn off af ter a period of time.
CAUTION
Even though the battery saver feature
automatically turns off the headlights
af ter a period of time, you should turn
the headlight switch to the OFF posi-
tion when the engine is not running to
avoid discharging the vehicle battery.
LED DAYTIME RUNNING LIGHTS
(DRL) SYSTEM (if so equipped)
The LED DRL automatically illuminate at
100% intensity when the engine is started
and the parking brake released. The LED
Daytime Running Lights (DRL) operate with
the headlight switch in any position. When
you turn the headlight switch to the
position for full illumination, the LED DRL
illuminate at a lower intensity. If the parking brake is applied before the
engine is started, the LED DRL do not illumi-
nate. The LED DRL illuminate when the
parking brake is released. The LED DRL will
remain on until the ignition switch is placed
in the OFF position.
At dusk, the headlights, interior controls
and switches will automatically illuminate if
the headlight switch is in the AUTO
position.
WARNING
When the LED DRL system is active, tail
lights on your vehicle are not on. It is
necessary at dusk to turn on your
headlights. Failure to do so could cause
an accident injuring yourself and
others.
INSTRUMENT BRIGHTNESS
CONTROL
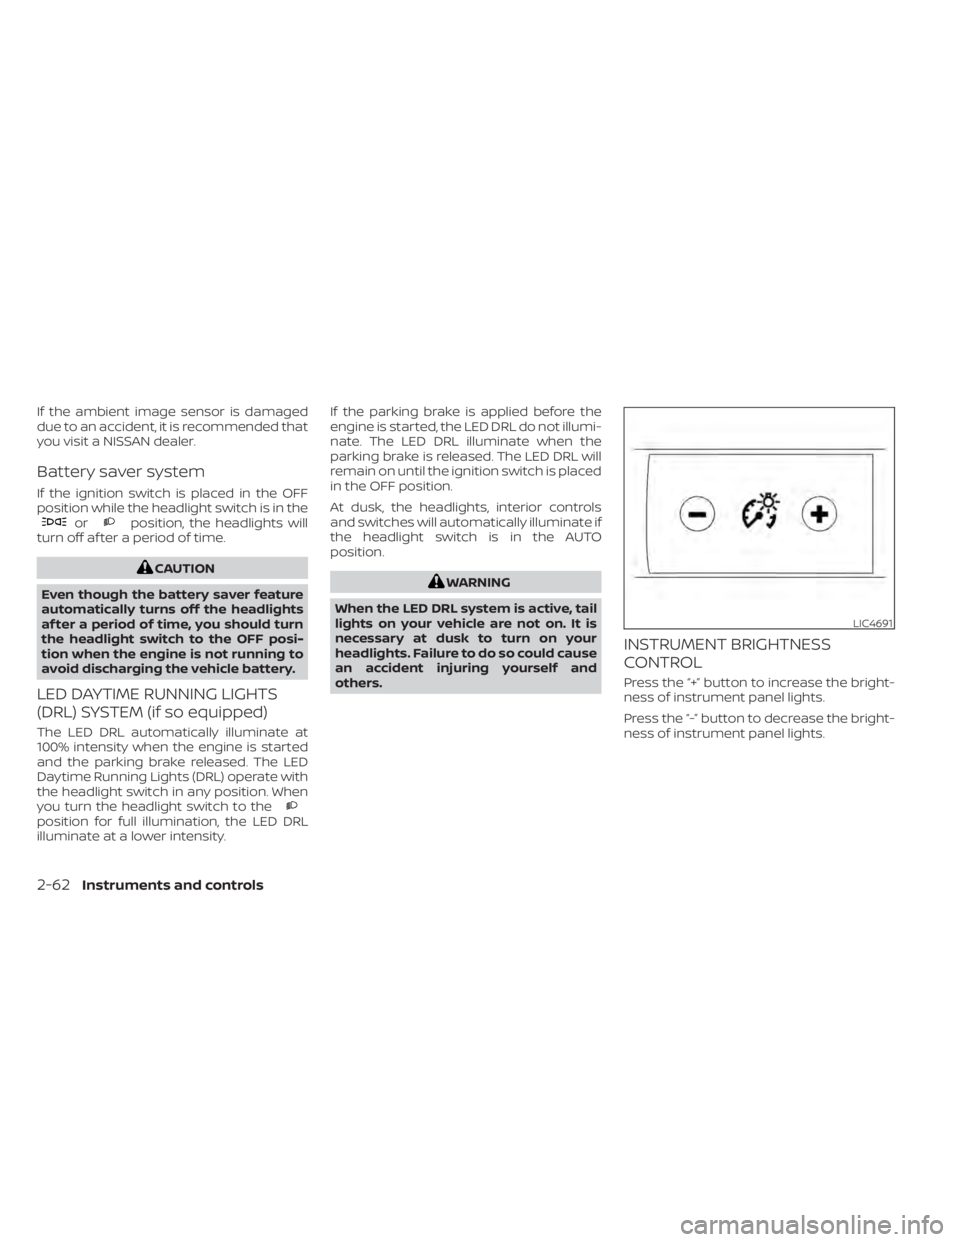
Press the “+” button to increase the bright-
ness of instrument panel lights.
Press the “-” button to decrease the bright-
ness of instrument panel lights.
LIC4691
2-62Instruments and controls
Page 196 of 644
CAUTION
When the Intelligent Key battery is dis-
charged or other strong radio wave
sources are present near the operating
location, the Intelligent Key operating
range becomes narrower, and the Intel-
ligent Key may not function properly.
The Remote Engine Start function can only
be used when the Intelligent Key is within
the specified operating range from the
vehicle.
The Remote Engine Start operating range
is approximately 197 f t (60 m) from the
vehicle.
REMOTE STARTING THE VEHICLE
To use the Remote Engine Start feature to
start the engine perform the following:
1. Aim the Intelligent Key at the vehicle.
2. Press the
button to lock all doors.
3. Within 5 seconds press and hold the
button until the turn signal lights
flash and the tail lamps turn on. If the
vehicle is not within view press and hold
the
button for at least 2 seconds. The following events will occur when the
engine starts:
• The parking lights will turn on and remain
on as long as the engine is running.
• The doors will be locked and the climate control system may come on.
• The engine will continue to run for 10 min- utes. Repeat the steps to extend the time
for an additional 10 minutes. For addi-
tional information, see “Extending engine
run time” (P. 3-20).
Depress and hold the brake then push the
push-button ignition switch to the ON po-
sition before driving. For additional infor-
mation, see “Driving the vehicle” (P. 5-18).
EXTENDING ENGINE RUN TIME
The Remote Engine Start feature can be
extended one time by performing the
steps listed in “Remote starting the vehicle”
in this section. Run time will be calculated
as follows:
• The first 10 minute run time will start when the Remote Engine Start function is
performed. • The second 10 minutes will start immedi-
ately when the Remote Engine Start
function is performed again. For example,
if the engine has been running for 5 min-
utes, and 10 minutes are added, the en-
gine will run for a total of 15 minutes.
• Extending engine run time will count to- wards the two Remote Engine Start limit.
A maximum of two Remote Engine Starts,
or a single Remote Engine Start with an
extension, are allowed between ignition
cycles. The ignition switch must be cycled
to the ON position and then back to the
OFF position before the Remote Engine
Start procedure can be used again.
CANCELING A REMOTE ENGINE
START
To cancel a Remote Engine Start, perform
one of the following:
• Aim the Intelligent Key at the vehicle and press
until the parking lights turn off.
• Turn on the hazard warning flashers.
• Cycle the ignition switch ON and then OFF.
• The extended engine run time has expired.
• The first 10 minute timer has expired.
• The engine hood has been opened.
3-20Pre-driving checks and adjustments
Page 197 of 644
• The shif t lever is moved out of park.
• The alarm sounds due to illegal entry intothe vehicle.
• The ignition switch is pushed without an Intelligent Key in the vehicle.
• The ignition switch is pushed with an In- telligent Key in the vehicle but the brake
pedal is not depressed.
CONDITIONS THE REMOTE ENGINE
START WILL NOT WORK
The Remote Engine Start will not operate if
any of the following conditions are present:
• The ignition switch is placed in the ONposition.
• The hood is not securely closed.
• The hazard indicator lights are on.
• The engine is still running. The engine must be completely stopped. Wait at
least 6 seconds if the engine goes from
running to off. This is not applicable when
extending engine run time.
• The
button is not pressed and held
for at least 2 seconds. • The
button is not pressed and held
within 5 seconds of pressing the lock
button.
• The brake is pressed.
• The doors are not closed and locked.
• The trunk is open.
• The Key System Error remains solid in the vehicle information display.
• The alarm sounds due to illegal entry into the vehicle.
• Two Remote Engine Starts, or a single Remote Engine Start with an extension,
have already been used.
• The vehicle is not in P (Park).
• There is a detected registered key already inside of the vehicle.
• The Remote Engine Start feature has been switched to the OFF using the “Ve-
hicle Settings” menu on the vehicle infor-
mation display. For additional informa-
tion, see “Vehicle information display - 5
inch (13 cm) Type A (if so equipped)”
(P. 2-18) or “Vehicle information display - 7
inch (18 cm) Type B (if so equipped)”
(P. 2-34). The Remote Engine Start may display a
warning or indicator in the vehicle informa-
tion display. For additional information, see
“Vehicle information display - 5 inch (13 cm)
Type A (if so equipped)” (P. 2-18) or “Vehicle
information display - 7 inch (18 cm) Type B (if
so equipped)” (P. 2-34).
Pre-driving checks and adjustments3-21
Page 222 of 644
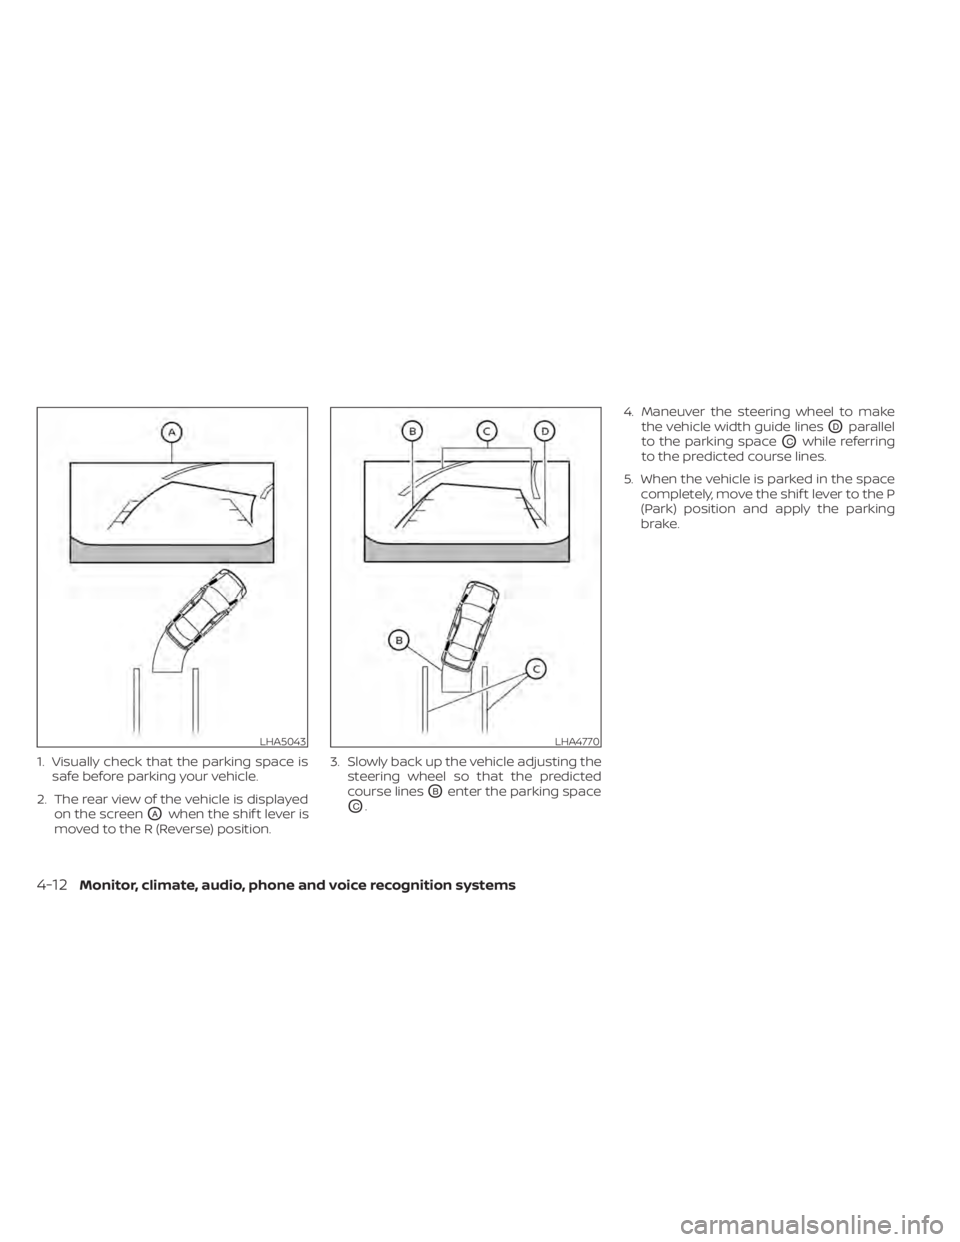
1. Visually check that the parking space issafe before parking your vehicle.
2. The rear view of the vehicle is displayed on the screen
OAwhen the shif t lever is
moved to the R (Reverse) position. 3. Slowly back up the vehicle adjusting the
steering wheel so that the predicted
course lines
OBenter the parking space
OC. 4. Maneuver the steering wheel to make
the vehicle width guide lines
ODparallel
to the parking space
OCwhile referring
to the predicted course lines.
5. When the vehicle is parked in the space completely, move the shif t lever to the P
(Park) position and apply the parking
brake.
LHA5043LHA4770
4-12Monitor, climate, audio, phone and voice recognition systems
Page 233 of 644
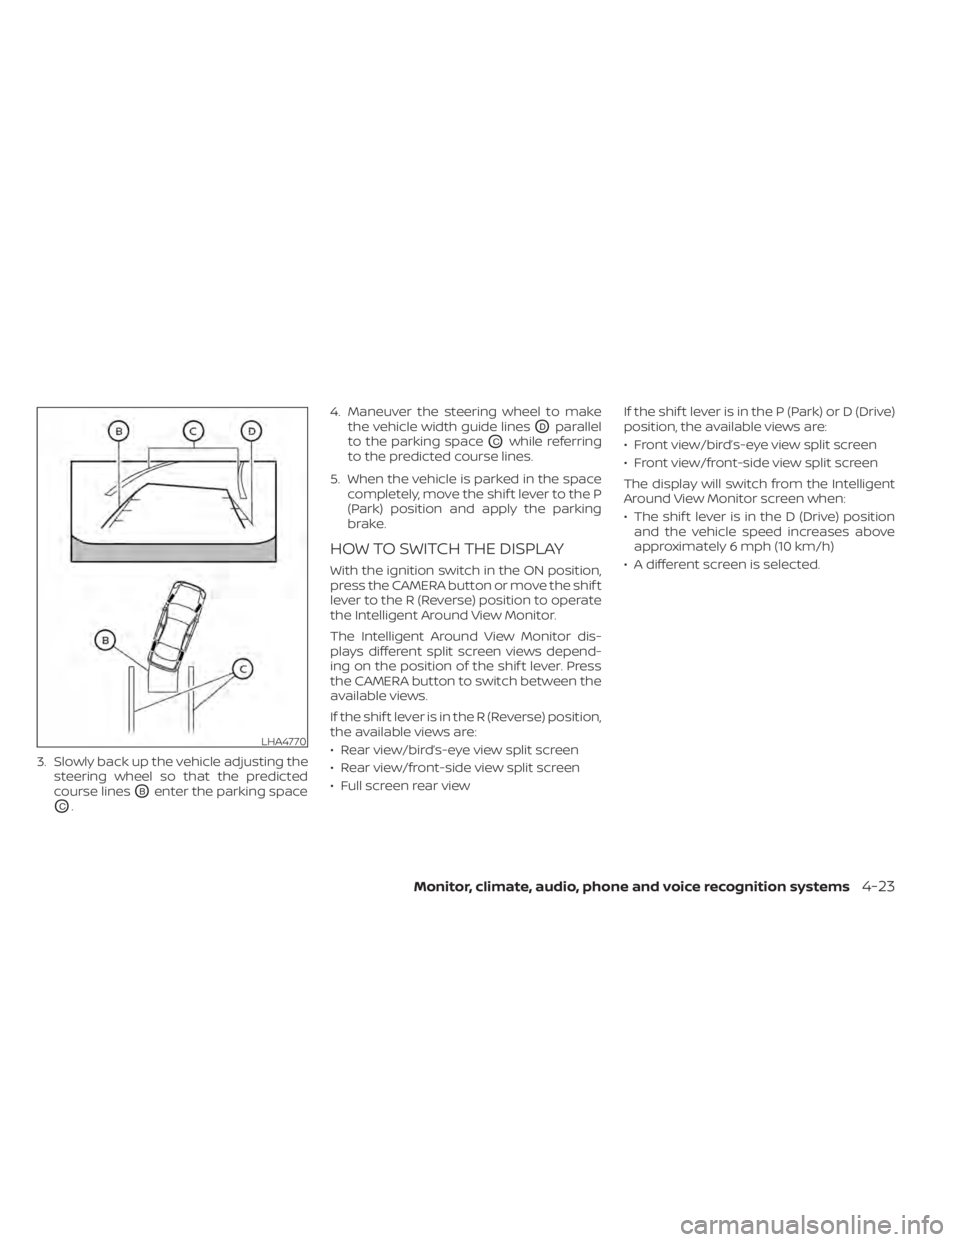
3. Slowly back up the vehicle adjusting thesteering wheel so that the predicted
course lines
OBenter the parking space
OC. 4. Maneuver the steering wheel to make
the vehicle width guide lines
ODparallel
to the parking space
OCwhile referring
to the predicted course lines.
5. When the vehicle is parked in the space completely, move the shif t lever to the P
(Park) position and apply the parking
brake.
HOW TO SWITCH THE DISPLAY
With the ignition switch in the ON position,
press the CAMERA button or move the shif t
lever to the R (Reverse) position to operate
the Intelligent Around View Monitor.
The Intelligent Around View Monitor dis-
plays different split screen views depend-
ing on the position of the shif t lever. Press
the CAMERA button to switch between the
available views.
If the shif t lever is in the R (Reverse) position,
the available views are:
• Rear view/bird’s-eye view split screen
• Rear view/front-side view split screen
• Full screen rear view If the shif t lever is in the P (Park) or D (Drive)
position, the available views are:
• Front view/bird’s-eye view split screen
• Front view/front-side view split screen
The display will switch from the Intelligent
Around View Monitor screen when:
• The shif t lever is in the D (Drive) position
and the vehicle speed increases above
approximately 6 mph (10 km/h)
• A different screen is selected.
LHA4770
Monitor, climate, audio, phone and voice recognition systems4-23
Page 234 of 644
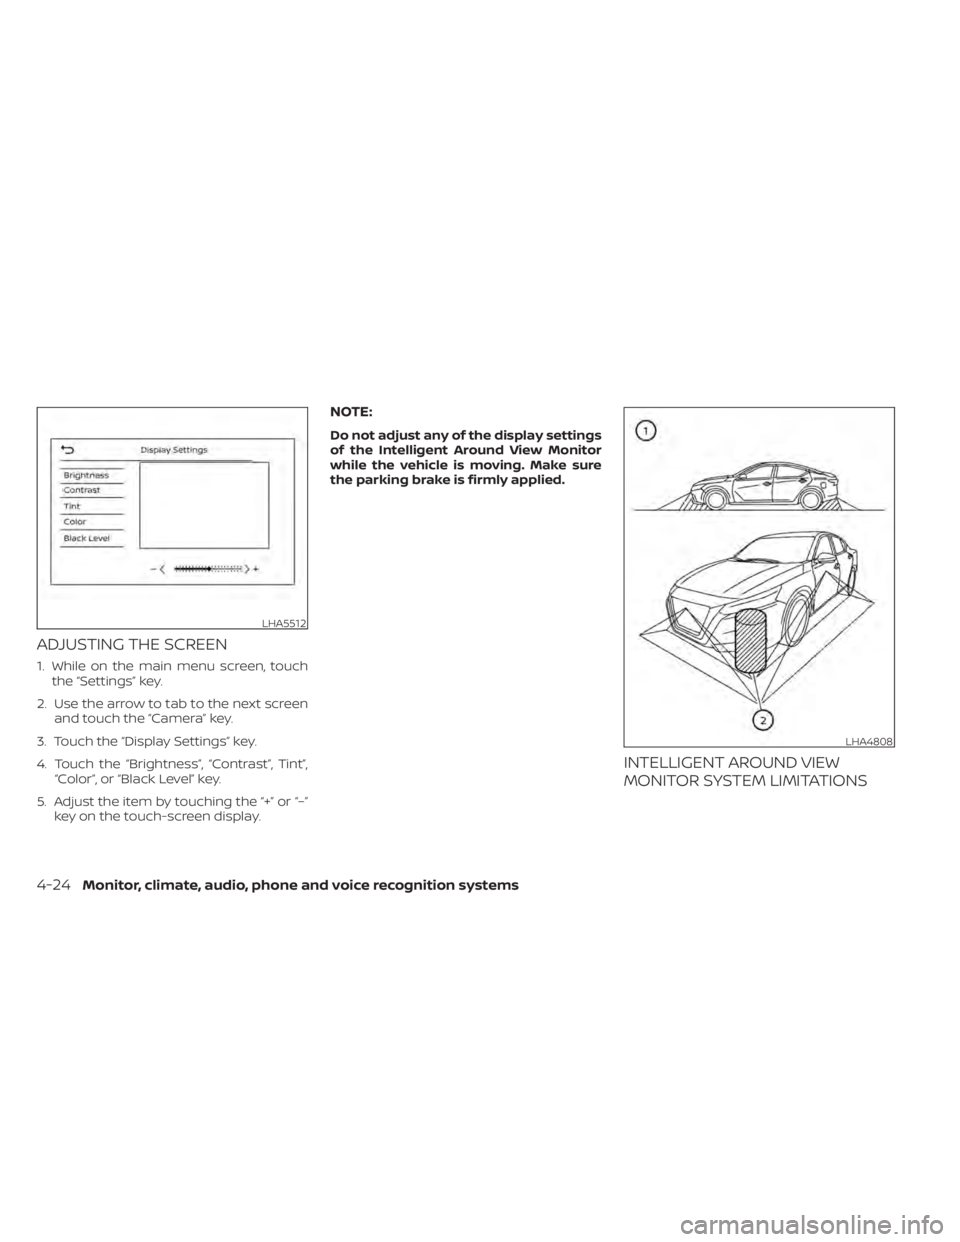
ADJUSTING THE SCREEN
1. While on the main menu screen, touchthe “Settings” key.
2. Use the arrow to tab to the next screen and touch the “Camera” key.
3. Touch the “Display Settings” key.
4. Touch the “Brightness”, “Contrast”, Tint”, “Color”, or “Black Level” key.
5. Adjust the item by touching the “+” or “–” key on the touch-screen display.
NOTE:
Do not adjust any of the display settings
of the Intelligent Around View Monitor
while the vehicle is moving. Make sure
the parking brake is firmly applied.
INTELLIGENT AROUND VIEW
MONITOR SYSTEM LIMITATIONS
LHA5512
LHA4808
4-24Monitor, climate, audio, phone and voice recognition systems
Page 296 of 644
5 Starting and driving
Precautions when starting and driving..........5-4
Exhaust gas (carbon monoxide) ..............5-4
Three-way catalyst ...........................5-4
Tire Pressure Monitoring System
(TPMS) .......................................5-5
Avoiding collision and rollover ................5-9
Off-roadrecovery ............................5-9
Rapid air pressure loss .......................5-9
Drinking alcohol/drugs and driving ..........5-10
Driving safety precautions ...................5-10
Push-button ignition switch ....................5-13
Operating range ............................ 5-14
Push-button ignition switch positions .......5-14
Emergency engine shut off ..................5-15
NISSAN Intelligent Key® battery
discharge ................................... 5-15
NISSAN Vehicle Immobilizer System .........5-16
Before starting the engine .....................5-16
Starting the engine ............................. 5-16
Remote Engine Start ........................ 5-17
Driving the vehicle .............................. 5-18
Continuously Variable Transmission
(CVT) ........................................ 5-18
Parking brake .................................. 5-25
Manual parking brake (pedal type) ...........5-25
Electronic parking brake (switch type) .......5-25 Automatic brake hold (if so equipped)
..........5-27
How to activate/deactivate the
automatic brake hold function ..............5-28
How to use the automatic brake hold
function ..................................... 5-29
Traffic Sign Recognition (TSR) (if so equipped) . . . 5-30 System operation ........................... 5-31
Turning the Traffic Sign Recognition
(TSR) system on and off .....................5-32
System temporarily unavailable .............5-32
System malfunction ......................... 5-32
System maintenance .......................5-33
Lane Departure Warning (LDW) .................5-33
LDW system operation ......................5-34
How to enable/disable the LDW system .....5-36
LDW system limitations .....................5-38
System temporarily unavailable .............5-39
System malfunction ......................... 5-39
System maintenance .......................5-39
Intelligent
Lane Intervention (I-LI)
(if so equipped) ................................. 5-40
I-LI system operation ........................ 5-41
How to enable/disable the I-LI system ......5-42
I-LI system limitations .......................5-43
System temporarily unavailable .............5-44
System malfunction ......................... 5-45
Page 298 of 644
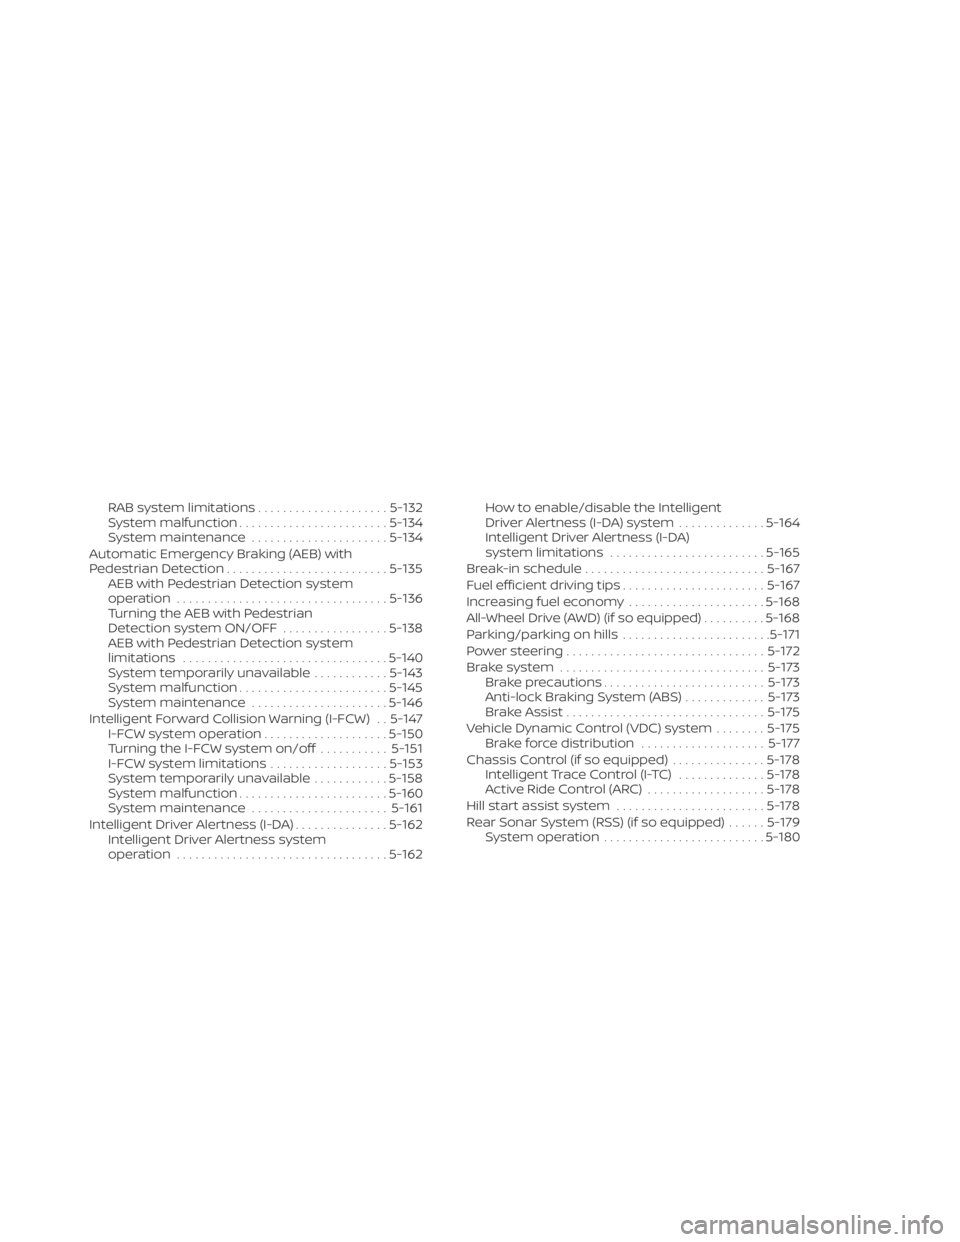
RAB system limitations.....................5-132
System malfunction ........................ 5-134
System maintenance ......................5-134
Automatic Emergency Braking (AEB) with
Pedestrian Detection .......................... 5-135
AEB with Pedestrian Detection system
operation .................................. 5-136
Turning the AEB with Pedestrian
Detection system ON/OFF .................5-138
AEB with Pedestrian Detection system
limitations ................................. 5-140
System temporarily unavailable ............5-143
System malfunction ........................ 5-145
System maintenance ......................5-146
Intelligent Forward Collision Warning (I-FCW) . . 5-147 I-FCW system operation ....................5-150
Turning the I-FCW system on/off ...........5-151
I-FCW system limitations ...................5-153
System temporarily unavailable ............5-158
System malfunction ........................ 5-160
System maintenance ......................5-161
Intelligent Driver Alertness (I-DA) ...............5-162
Intelligent Driver Alertness system
operation .................................. 5-162How to enable/disable the Intelligent
Driver Alertness (I-DA) system
..............5-164
Intelligent Driver Alertness (I-DA)
system limitations ......................... 5-165
Break-in schedule ............................. 5-167
Fuel efficient driving tips .......................5-167
Increasing fuel economy ......................5-168
All-Wheel Drive (AWD) (if so equipped) ..........5-168
Parking/parking on hills ........................5-171
Power steering ................................ 5-172
Brake system ................................. 5-173
Brake precautions .......................... 5-173
Anti-lock Braking System (ABS) .............5-173
Brake Assist ................................ 5-175
Vehicle Dynamic Control (VDC) system ........5-175
Brake force distribution ....................5-177
Chassis Control (if so equipped) ...............
5-178
Intelligent
Trace Control (I-TC) ..............5-178
Active Ride Control (ARC) ...................5-178
Hill start assist system ........................5-178
Rear Sonar System (RSS) (if so equipped) ......5-179
System operation .......................... 5-180
Page 304 of 644

FCC Notice:
For USA:
This device complies with Part 15 of the
FCC Rules. Operation is subject to the fol-
lowing two conditions: (1) This device
may not cause harmful interference, and
(2) this device must accept any interfer-
ence received, including interference
that may cause undesired operation.
NOTE:
Changes or modifications not ex-
pressly approved by the party respon-
sible for compliance could void the us-
er's authority to operate the
equipment.
For Canada:
This device contains licence-exempt
transmitter(s)/receiver(s) that comply
with Innovation, Science and Economic
Development Canada’s licence-exempt
RSS(s). Operation is subject to the fol-
lowing two conditions: (1) This device
may not cause interference. (2) This de-
vice must accept any interference, in-
cluding interference that may cause un-
desired operation of the device.
TPMS with Easy-Fill Tire Alert
When adding air to an under-inflated tire,
the TPMS with Easy-Fill Tire Alert provides
visual and audible signals outside the ve-
hicle to help you inflate the tires to the rec-
ommended COLD tire pressure.
Vehicle set-up
1. Park the vehicle in a safe and level place.
2. Apply the parking brake and place theshif t lever in the P (Park) position.
3. Place the ignition switch in the ON posi- tion. Do not start the engine.
Operation
1. Add air to the tire.
2. Af ter a few seconds, the hazard indica- tors will start flashing.
3. When the designated pressure is reached, the horn beeps once and the
hazard indicators stop flashing.
4. Perform the above steps for each tire. • If the tire is over-inflated more thanapproximately 4 psi (30 kPa), the horn
beeps and the hazard indicators flash
three times. To correct the pressure,
push the core of the valve stem on the
tire briefly to release pressure. When the pressure reaches the designated
pressure, the horn beeps once.
• If the hazard indicator does not flash within approximately 15 seconds af ter
starting to inflate the tire, it indicates
that the Easy-Fill Tire Alert is not
operating.
• The TPMS will not activate the Easy-Fill Tire Alert under the following
conditions:– If there is interference from an exter- nal device or transmitter.
– The air pressure from the inflation device is not sufficient to inflate the
tire.
– There is a malfunction in the TPMS.
– There is a malfunction in the horn or hazard indicators.
– The identification code of the tire pressure sensor is not registered to
the system.
– The battery of the tire pressure sen- sor is low.
• If the Easy-Fill Tire Alert does not oper- ate due to TPMS interference, move
the vehicle about 3 f t (1 m) backward
or forward and try again.
If the Easy-Fill Tire Alert is not working, use a
tire pressure gauge.
5-8Starting and driving