check engine NISSAN ARMADA 2005 1.G Owner's Manual
[x] Cancel search | Manufacturer: NISSAN, Model Year: 2005, Model line: ARMADA, Model: NISSAN ARMADA 2005 1.GPages: 352, PDF Size: 6.46 MB
Page 226 of 352

This position activates electrical accessories
such as the radio when the engine is not running.
ON: Normal operating position (3)
This position turns on the ignition system and the
electrical accessories.
START: (4)
This position starts the engine. As soon as the
engine has started, release the key. It automati-
cally returns to the ON position.
NISSAN VEHICLE IMMOBILIZER
SYSTEM (NVIS)
The NISSAN Vehicle Immobilizer System (NVIS)
will not allow the engine to start without the use of
the registered NVIS key.
If the engine fails to start using the registered
NVIS key, it may be due to interference caused by
another NVIS key, an automated toll road device
or automated payment device on the key ring.
Restart the engine using the following proce-
dures:
1. Leave the ignition switch in the ON position
for approximately 5 seconds.
2. Turn the ignition switch to the OFF or LOCK
position and wait approximately 10 seconds.3. Repeat step 1 and 2 again.
4. Restart the engine while holding the device
(which may have caused the interference)
separate from the registered NVIS key.
If this procedure allows the engine to start,
NISSAN recommends placing the registered
NVIS key on a separate key ring to avoid interfer-
ence from other devices.cMake sure the area around the vehicle is
clear.
cCheck fluid levels such as engine oil, cool-
ant, brake fluid, and window washer fluid as
frequently as possible, or at least whenever
you refuel.
cCheck that all windows and lights are clean.
cVisually inspect tires for their appearance
and condition. Also check tires for proper
inflation.
cLock all doors.
cPosition seat and adjust head restraints.
cAdjust inside and outside mirrors.
cFasten seat belts and ask all passengers to
do likewise.
cCheck the operation of warning lights when
the key is turned to the ON (3) position. See
“Warning/indicator lights and audible re-
minders” in the “Instruments and controls”
section of this manual.
BEFORE STARTING THE ENGINE
5-8Starting and driving
ZREVIEW COPYÐ2005 Armada(wzw)
Owners ManualÐUSA_English(nna)
12/02/04Ðdebbie
X
Page 228 of 352
If:
1. The engine coolant temperature is not re-
duced.
2. The air conditioning cooling function does
not turn back ON.
3. The engine oil pressure warning/engine
coolant temperature high indicator
il-
luminates, this may indicate a malfunction.
Move the vehicle off the road in a safe area
and allow the engine to cool. If after check-
ing the oil and coolant, the
remains
on, do not continue to drive and call a
NISSAN dealer.
The malfunction indicator lamp may also come
ON. Ifonlyit remains on, you do not need to have
your vehicle towed, but have it inspected soon by
a NISSAN dealer. See “Malfunction indicator
lamp” in the “Warning and indicator lights” sec-
tion of this manual.
WARNING
Overheating can result in reduced engine
power and vehicle speed. The reduced
speed may be lower than other traffic,
which could increase the chance of a col-
lision. Be especially careful when driving.
Pull to the side of the road to a safe area.
Allow the engine to cool and return to
normal operation. See “If your vehicle
overheats” in the “In case of emergency”
section of this manual.
CAUTION
Running the engine with the engine oil
pressure warning light on could cause se-
rious damage to the engine almost imme-
diately. Such damage is not covered by
warranty. Turn off the engine as soon as it
is safe to do so.
AUTOMATIC TRANSMISSION
WARNING
cDo not depress the accelerator pedal
while shifting from P (Park) or N (Neu-
tral) to R (Reverse) , or L (Low) . Always
depress the brake pedal until shifting is
completed. Failure to do so could cause
you to lose control and have an
accident.
cCold engine idle speed is high, so use
caution when shifting into a forward or
reverse gear before the engine has
warmed up.
cNever shift to P (Park) or R (Reverse)
while the vehicle is moving. This could
cause an accident.
CAUTION
cWhen stopping the vehicle on an uphill
grade, do not hold the vehicle by de-
pressing the accelerator pedal. The foot
brake should be used for this purpose.
cDo not downshift abruptly on slippery
roads. This may cause a loss of control.
The automatic transmission in your vehicle is
electronically controlled to produce maximum
power and smooth operation.
5-10Starting and driving
ZREVIEW COPYÐ2005 Armada(wzw)
Owners ManualÐUSA_English(nna)
12/02/04Ðdebbie
X
Page 231 of 352
Shift lock release
If the battery is discharged, the shift selector lever
may not be moved from the P (Park) position even
with the brake pedal depressed.
To move the shift selector lever, release the shift
lock. The shift selector lever can be moved to N
(Neutral) . However, the steering wheel will be
locked unless the ignition switch is turned to the
ON position. This allows the vehicle to be moved
if the battery is discharged.
To push the shift lock release, complete the fol-
lowing procedure:1. Turn the ignition key to the LOCK position
and remove the key
2. Apply the parking brake.
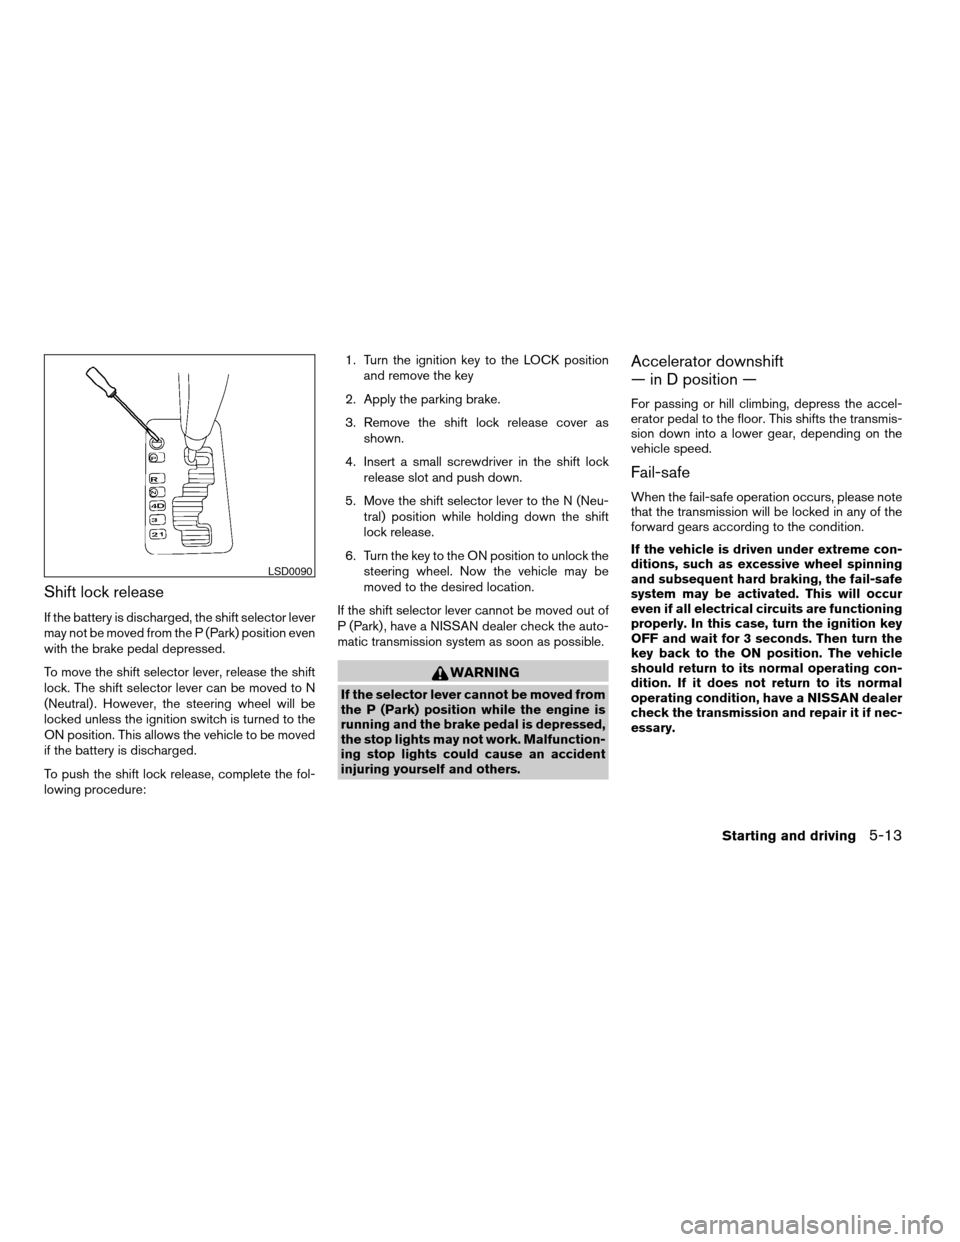
3. Remove the shift lock release cover as
shown.
4. Insert a small screwdriver in the shift lock
release slot and push down.
5. Move the shift selector lever to the N (Neu-
tral) position while holding down the shift
lock release.
6. Turn the key to the ON position to unlock the
steering wheel. Now the vehicle may be
moved to the desired location.
If the shift selector lever cannot be moved out of
P (Park) , have a NISSAN dealer check the auto-
matic transmission system as soon as possible.
WARNING
If the selector lever cannot be moved from
the P (Park) position while the engine is
running and the brake pedal is depressed,
the stop lights may not work. Malfunction-
ing stop lights could cause an accident
injuring yourself and others.
Accelerator downshift
— in D position —
For passing or hill climbing, depress the accel-
erator pedal to the floor. This shifts the transmis-
sion down into a lower gear, depending on the
vehicle speed.
Fail-safe
When the fail-safe operation occurs, please note
that the transmission will be locked in any of the
forward gears according to the condition.
If the vehicle is driven under extreme con-
ditions, such as excessive wheel spinning
and subsequent hard braking, the fail-safe
system may be activated. This will occur
even if all electrical circuits are functioning
properly. In this case, turn the ignition key
OFF and wait for 3 seconds. Then turn the
key back to the ON position. The vehicle
should return to its normal operating con-
dition. If it does not return to its normal
operating condition, have a NISSAN dealer
check the transmission and repair it if nec-
essary.
LSD0090
Starting and driving5-13
ZREVIEW COPYÐ2005 Armada(wzw)
Owners ManualÐUSA_English(nna)
12/02/04Ðdebbie
X
Page 239 of 352
cEngine idling speed is high while warm-
ing up the engine. Be especially careful
when starting or driving on slippery sur-
faces with the 4WD shift switch set in
AUTO.
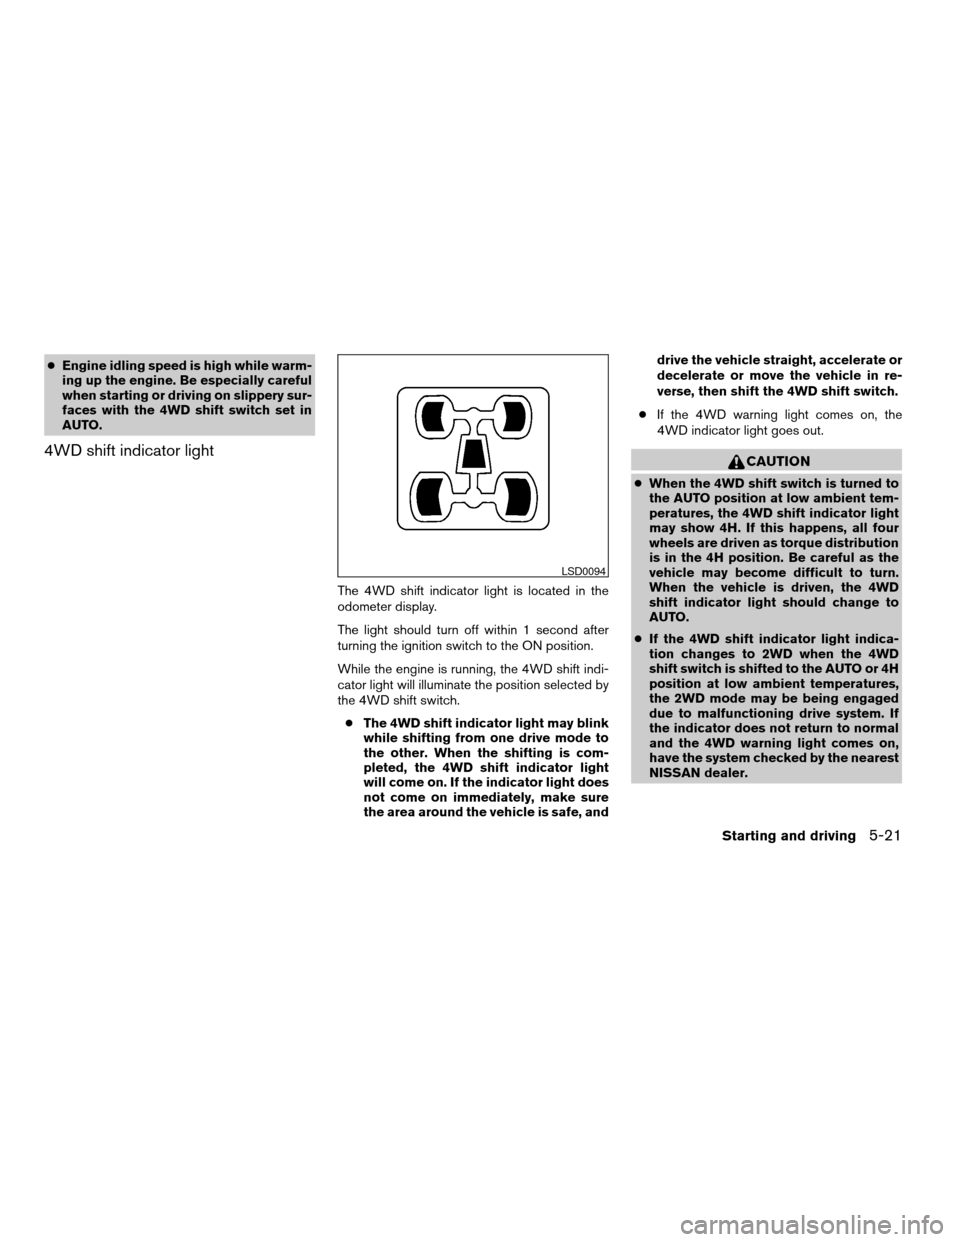
4WD shift indicator light
The 4WD shift indicator light is located in the
odometer display.
The light should turn off within 1 second after
turning the ignition switch to the ON position.
While the engine is running, the 4WD shift indi-
cator light will illuminate the position selected by
the 4WD shift switch.
cThe 4WD shift indicator light may blink
while shifting from one drive mode to
the other. When the shifting is com-
pleted, the 4WD shift indicator light
will come on. If the indicator light does
not come on immediately, make sure
the area around the vehicle is safe, anddrive the vehicle straight, accelerate or
decelerate or move the vehicle in re-
verse, then shift the 4WD shift switch.
cIf the 4WD warning light comes on, the
4WD indicator light goes out.
CAUTION
cWhen the 4WD shift switch is turned to
the AUTO position at low ambient tem-
peratures, the 4WD shift indicator light
may show 4H. If this happens, all four
wheels are driven as torque distribution
is in the 4H position. Be careful as the
vehicle may become difficult to turn.
When the vehicle is driven, the 4WD
shift indicator light should change to
AUTO.
cIf the 4WD shift indicator light indica-
tion changes to 2WD when the 4WD
shift switch is shifted to the AUTO or 4H
position at low ambient temperatures,
the 2WD mode may be being engaged
due to malfunctioning drive system. If
the indicator does not return to normal
and the 4WD warning light comes on,
have the system checked by the nearest
NISSAN dealer.
LSD0094
Starting and driving5-21
ZREVIEW COPYÐ2005 Armada(wzw)
Owners ManualÐUSA_English(nna)
12/02/04Ðdebbie
X
Page 240 of 352
4WD warning light
Warning lightComes on or blinks
when:
Comes onThere is a malfunc-
tion in the 4–wheel
drive system
Blinks rapidlyThe transfer case
oil temperature is
abnormally high
Blinks slowlyThe difference in
wheel rotation is
large
The 4WD warning light is located in the meter.
The 4WD warning light comes on when the key
switch is turned to ON. It turns off soon after the
engine is started.
If any malfunction occurs in the 4WD system
when the key switch is ON, the warning light will
either remain illuminated or blink.
If the 4WD warning light comes on, the 4WD
shift indicator light goes out.High-temperature transfer case oil makes the
warning light blink rapidly (about twice per sec-
ond) . If the warning light blinks rapidly during
operation, stop the vehicle in a safe place imme-
diately. Then if the light goes off after a while, you
can continue driving.
A large difference between the diameters of front
and rear wheels will make the warning light blink
slowly (about once per two seconds) . Change
the 4WD shift switch into 2WD and do not drive
fast.
CAUTION
cIf the warning light comes on or blinks
slowly during operation or rapidly after
stopping the vehicle for a while, have
your vehicle checked by a NISSAN
dealer as soon as possible.
cShifting between 4H and 4LO is not
recommended when the 4WD warning
light turns on.
cWhen the warning light comes on, the
2WD mode may be engaged even if the
4WD shift switch is in AUTO or 4H. Be
especially careful when driving. If corre-
sponding parts are malfunctioning, the
4WD mode will not be engaged even if
the 4WD shift switch is shifted.cDo not drive the vehicle in the 4H or 4LO
position on dry hard surface roads. Driv-
ing on dry, hard surfaces in 4H or 4LO
may cause unnecessary noise, tire wear
and increased fuel consumption.
If the 4WD warning light turns on when
you are driving on dry hard surface
roads:
cin the AUTO or 4H position, shift the
4WD shift switch to 2WD.
cin the 4LO position, stop the vehicle,
move the automatic transmission
shift selector lever to the N position
with the brake pedal depressed, and
shift the 4WD shift switch to 2WD.
cIf the warning light is still on after the
above operation, have your vehicle
checked by a NISSAN dealer as soon as
possible.
cThe transfer case may be damaged if
you continue driving with the warning
light blinking rapidly.
5-22Starting and driving
ZREVIEW COPYÐ2005 Armada(wzw)
Owners ManualÐUSA_English(nna)
12/02/04Ðdebbie
X
Page 246 of 352
cThe system is designed as an aid to the
driver in detecting large stationary ob-
jects to help avoid damaging the ve-
hicle. The system will not detect small
objects below the bumper, and may not
detect objects close to the bumper or
on the ground.
cIf your vehicle sustains damage to the
rear bumper fascia, leaving it mis-
aligned or bent, the sensing zone may
be altered causing inaccurate measure-
ment of obstacles or false alarms.
The Rear Sonar System (RSS) sounds a tone to
warn the driver of obstacles near the rear bumper
when the shift selector is in R (Reverse) . The
system may not detect objects at speeds above 3
mph (5 km/h) and may not detect certain angular
or moving objects.
The RSS detects obstacles up to 6 feet (1.8 m)
from the rear bumper with a decreased coverage
area at the outer corners of the bumper, (refer to
the illustration for approximate zone coverage
areas) . As you move closer to the obstacle, the
rate of the tone increases. When the obstacle is
less than 10 inches (25.0 cm) away, the tone will
sound continuously. If the RSS detects a station-
ary or receding object further than 10 inches
(25.0 cm) from the side of the vehicle, the tonewill sound for only three seconds. Once the sys-
tem detects an object approaching, the tone will
sound again.
The RSS automatically turns on when the gear
selector is placed in R (Reverse) and the ignition
is ON. The RSS OFF switch on the instrument
panel allows the driver to turn the RSS on and off.
To turn the RSS off, the ignition must be ON, and
the gear selector in R (Reverse) . An indicator
light on the switch will illuminate when the system
is turned off. If the indicator light illuminates when
the RSS is not turned off, it may indicate a failure
in the RSS.
Keep the RSS sensors (located on the rear
bumper fascia) free from snow, ice and large
accumulations of dirt (do not clean the sensors
with sharp objects) . If the sensors are covered, it
will affect the accuracy of the RSS.FREEING A FROZEN DOOR LOCK
To prevent a door lock from freezing, apply de-
icer through the key hole. If the lock becomes
frozen, heat the key before inserting it into the key
hole.
ANTI-FREEZE
In the winter when it is anticipated that the tem-
perature will drop below 32°F (0°C) , check the
anti-freeze to assure proper winter protection.
For details, see ‘‘Engine cooling system’’ in the
‘‘Maintenance and do-it-yourself’’ section of this
manual.
BATTERY
If the battery is not fully charged during extremely
cold weather conditions, the battery fluid may
freeze and damage the battery. To maintain maxi-
mum efficiency, the battery should be checked
regularly. For details, see ‘‘Battery’’ in the ‘‘Main-
tenance and do-it-yourself’’ section of this
manual.
DRAINING OF COOLANT WATER
If the vehicle is to be left outside without anti-
freeze, drain the cooling system, including the
engine block. Refill before operating the vehicle.
COLD WEATHER DRIVING
5-28Starting and driving
ZREVIEW COPYÐ2005 Armada(wzw)
Owners ManualÐUSA_English(nna)
12/02/04Ðdebbie
X
Page 247 of 352
For details, see ‘‘Changing engine coolant’’ in the
‘‘Maintenance and do-it-yourself’’ section of this
manual.
TIRE EQUIPMENT
1. SUMMER tires have a tread designed to
provide superior performance on dry pave-
ment. However, the performance of these
tires will be substantially reduced in snowy
and icy conditions. If you operate your ve-
hicle on snowy or icy roads, NISSAN recom-
mends the use of MUD & SNOW or ALL
SEASON TIRES on all four wheels. Please
consult a NISSAN dealer for the tire type,
size, speed rating and availability informa-
tion.
2. For additional traction on icy roads, studded
tires may be used. However, some U.S.
states and Canadian provinces prohibit their
use. Check local, state and provincial laws
before installing studded tires.
Skid and traction capabilities of studded
snow tires on wet or dry surfaces may be
poorer than that of non-studded snow tires.
3. Tire chains may be used.
Use of tire chains may be prohibited accord-
ing to location. Check the local laws before
installing tire chains. When installing tire
chains, make sure they are of proper size forthe tires on your vehicle and are installed
according to the chain manufacturer’s sug-
gestions.Use only SAE Class “S”
chains.Class “S” chains are used on ve-
hicles with restricted tire to vehicle clear-
ance. Vehicles that can use Class “S” chains
are designed to meet the minimum clear-
ances between the tire and the closest ve-
hicle suspension or body component re-
quired to accommodate the use of a winter
traction device (tire chains or cables) . The
minimum clearances are determined using
the factory equipped tire size. Other types
may damage your vehicle. Use chain ten-
sioners when recommended by the tire
chain manufacturer to ensure a tight fit.
Loose end links of the tire chain must be
secured or removed to prevent the possibil-
ity of whipping action damage to the fenders
or underbody. If possible, avoid fully loading
your vehicle when using tire chains. In addi-
tion, drive at a reduced speed. Otherwise,
your vehicle may be damaged and/or vehicle
handling and performance may be adversely
affected.
Never install tire chains on spare tires. Do
not use tire chains on dry roads.
SPECIAL WINTER EQUIPMENT
It is recommended that the following items be
carried in the vehicle during winter:
cA scraper and stiff-bristled brush to remove
ice and snow from the windows and wiper
blades.
cA sturdy, flat board to be placed under the
jack to give it firm support.
cA shovel to dig the vehicle out of snowdrifts.
cExtra window washer fluid to refill the reser-
voir tank.
DRIVING ON SNOW OR ICE
WARNING
cWet ice (32°F, 0°C and freezing rain) ,
very cold snow or ice can be slick and
very hard to drive on. The vehicle will
have much less traction or “grip” under
these conditions. Try to avoid driving on
wet ice until the road is salted or
sanded.
cWhatever the condition, drive with cau-
tion. Accelerate and slow down with
care. If accelerating or downshifting too
fast, the drive wheels will lose even
more traction.
Starting and driving5-29
ZREVIEW COPYÐ2005 Armada(wzw)
Owners ManualÐUSA_English(nna)
12/02/04Ðdebbie
X
Page 250 of 352
LOW TIRE PRESSURE WARNING
SYSTEM
This vehicle is equipped with the low tire pres-
sure warning system. It monitors tire pressure of
all tires except the spare. When the tire pressure
monitoring system warning light is lit, one or more
of your tires is significantly under-inflated. If
equipped, the system also displays pressure of
all tires (except the spare tire) on the display
screen by sending a signal from a sensor that is
installed in each wheel. If the vehicle is being
driven with low tire pressure (lower than 28 psi,
193 kPa) , the low tire pressure warning system
will activate and warn you of it by the low tire
pressure warning light. This system will activate
only when the vehicle is driven at speeds above
20 MPH (32 km/h) . For more details, refer to
“Warning/indicator lights and audible reminders”
in the “Instruments and controls” section, “Tire
pressure information” in the “Display screen,
heater, air conditioner and audio systems” sec-
tion and “Low tire pressure warning system” in
the “Starting and driving” section.
WARNING
cIf the low tire pressure warning light
flashes while driving, avoid sudden
steering maneuvers or abrupt braking,
reduce vehicle speed, pull off the road
to a safe location and stop the vehicle
as soon as possible. Serious vehicle
damage could occur and may lead to an
accident and could result in serious
personal injury. Check the tire pressure
for all four tires. Adjust the tire pressure
to the recommended COLD tire pres-
sure shown on the Tire and Loading
Information label to turn the low tire
pressure warning light OFF. If you have
a flat tire, replace it with a spare tire as
soon as possible.
cWhen a spare tire is mounted or a wheel
is replaced, tire pressure will not be
indicated and the low tire pressure
warning system will not function. Con-
tact your NISSAN dealer as soon as
possible for tire replacement and/or
system resetting.
cDo not inject any tire liquid or aerosol
tire sealant into the tires, as this may
cause a malfunction of the tire pressure
sensors.
CHANGING A FLAT TIRE
If you have a flat tire, follow the instructions be-
low.
Stopping the vehicle
1. Safely move the vehicle off the road and
away from traffic.
2. Turn on the hazard warning flashers.
3. Park on a level surface and apply the parking
brake. Shift the transmission into P (Park) .
4. Turn off the engine.
5. Raise the hood to warn other traffic and to
signal professional road assistance person-
nel that you need assistance.
6. Have all passengers get out of the vehicle
and stand in a safe place, away from traffic
and clear of the vehicle.
WARNING
cMake sure the parking brake is securely
applied and the automatic transmission
is shifted into P (Park) .
cNever change tires when the vehicle is
on a slope, ice or slippery areas. This is
hazardous.
FLAT TIRE
6-2In case of emergency
ZREVIEW COPYÐ2005 Armada(wzw)
Owners ManualÐUSA_English(nna)
11/18/04Ðtbrooks
X
Page 258 of 352
3. Get out of the vehicle. Look and listen for
steam or coolant escaping from the radiator
before opening the hood. (If steam or cool-
ant is escaping, turn off the engine.) Do not
open the hood further until no steam or
coolant can be seen.
4. Open the engine hood.
WARNING
If steam or water is coming from the en-
gine, stand clear to prevent getting
burned.
5. Visually check drive belts for damage or
looseness. Also check if the cooling fan is
running. The radiator hoses and radiator
should not leak water. If coolant is leaking,
the water pump belt is missing or loose, or
the cooling fan does not run, stop the en-
gine.
WARNING
Be careful not to allow your hands, hair,
jewelry or clothing to come into contact
with, or get caught in, engine belts or the
engine cooling fan. The engine cooling
fan can start at any time when the coolant
temperature is high.6. After the engine cools down, check the cool-
ant level in the engine coolant reservoir tank
with the engine running. Add coolant to the
engine coolant reservoir tank if necessary.
Have your vehicle repaired at a NISSAN
dealer.When towing your vehicle, all State (Provincial in
Canada) and local regulations for towing must be
followed. Incorrect towing equipment could dam-
age your vehicle. Towing instructions are avail-
able from a NISSAN dealer. Local service opera-
tors are generally familiar with the applicable laws
and procedures for towing. To assure proper
towing and to prevent accidental damage to your
vehicle, NISSAN recommends having a service
operator tow your vehicle. It is advisable to have
the service operator carefully read the following
precautions:
WARNING
cNever ride in a vehicle that is being
towed.
cNever get under your vehicle after it has
been lifted by a tow truck.
CAUTION
cWhen towing, make sure that the trans-
mission, axles, steering system and
powertrain are in working condition. If
any unit is damaged, dollies must be
used.
cAlways attach safety chains before
towing.
TOWING YOUR VEHICLE
6-10In case of emergency
ZREVIEW COPYÐ2005 Armada(wzw)
Owners ManualÐUSA_English(nna)
11/18/04Ðtbrooks
X
Page 269 of 352

8 Maintenance and do-it-yourself
Maintenance requirements..........................8-2
General maintenance..............................8-2
Explanation of general maintenance items.........8-2
Maintenance precautions...........................8-5
Engine compartment check locations................8-6
Engine cooling system.............................8-7
Checking engine coolant level...................8-7
Changing engine coolant........................8-8
Engine oil.........................................8-8
Checking engine oil level........................8-8
Changing engine oil............................8-9
Changing engine oil filter.......................8-10
5-speed automatic transmission fluid...............8-11
Power steering fluid...............................8-11
Brake fluid.......................................8-11
Brake fluid....................................8-12
Window washer fluid.............................8-12
Window washer fluid reservoir..................8-12
Battery..........................................8-13
Jump starting.................................8-14
Drive belts.......................................8-14
Spark plugs......................................8-15
Replacing spark plugs.........................8-15Air cleaner.......................................8-16
In-cabin microfilter.............................8-16
Windshield wiper blades..........................8-17
Cleaning.....................................8-17
Replacing....................................8-18
Parking brake and brake pedal.....................8-20
Checking parking brake........................8-20
Checking brake pedal..........................8-20
Brake booster.................................8-21
Fuses...........................................8-21
Engine compartment...........................8-22
Passenger compartment.......................8-23
Battery replacement..............................8-24
Lights...........................................8-25
Headlights....................................8-25
Fog lights (if so equipped)......................8-26
Exterior and interior lights.......................8-27
Wheels and tires.................................8-31
Tire pressure..................................8-31
Tire labeling...................................8-35
Types of tires..................................8-38
Tire chains....................................8-38
Changing wheels and tires.....................8-39
ZREVIEW COPYÐ2005 Armada(wzw)
Owners ManualÐUSA_English(nna)
11/18/04Ðtbrooks
X