change wheel NISSAN ARMADA 2009 Owners Manual
[x] Cancel search | Manufacturer: NISSAN, Model Year: 2009, Model line: ARMADA, Model: NISSAN ARMADA 2009Pages: 465, PDF Size: 6.33 MB
Page 76 of 465
on the driver’s side of the instrument panel, will
blink. Have the system checked by a NISSAN
dealer.
Other supplemental front-impact air bag
precautions
WARNING
cDo not place any objects on the steer-
ing wheel pad or on the instrument
panel. Also, do not place any objects
between any occupant and the steering
wheel or instrument panel. Such ob-
jects may become dangerous projec-
tiles and cause injury if the front air
bags inflate.
cImmediately after inflation, several
front air bag system components will be
hot. Do not touch them; you may se-
verely burn yourself.
cNo unauthorized changes should be
made to any components or wiring of
the supplemental air bag system. This is
to prevent accidental inflation of the
supplemental air bag or damage to the
supplemental air bag system.cDo not make unauthorized changes to
your vehicle’s electrical system, sus-
pension system or front end structure.
This could affect proper operation of
the front air bag system.
cTampering with the front air bag system
may result in serious personal injury.
Tampering includes changes to the
steering wheel and the instrument
panel assembly by placing material
over the steering wheel pad and above
the instrument panel or by installing
additional trim material around the air
bag system.
cModifying or tampering with the front
passenger seat may result in serious
personal injury. For example, do not
change the front seats by placing mate-
rial on the seat cushion or by installing
additional trim material, such as seat
covers, on the seat that are not specifi-
cally designed to assure proper air bag
operation. Additionally, do not stow any
objects under the front passenger seat
or the seat cushion and seatback. Such
objects may interfere with the proper
operation of the occupant classifica-
tion sensor (pressure sensor) .cNo unauthorized changes should be
made to any components or wiring of
the seat belt system. This may affect the
front air bag system. Tampering with
the seat belt system may result in seri-
ous personal injury.
cWork on and around the front air bag
system should be done by a NISSAN
dealer. Installation of electrical equip-
ment should also be done by a NISSAN
dealer. The Supplemental Restraint
System (SRS) wiring should not be
modified or disconnected. Unautho-
rized electrical test equipment and
probing devices should not be used on
the air bag system.
cA cracked windshield should be re-
placed immediately by a qualified re-
pair facility. A cracked windshield could
affect the function of the supplemental
air bag system.
cThe SRS wiring harness connectors are
yellow and orange for easy
identification.
When selling your vehicle, we request that you
inform the buyer about the front air bag system
and guide the buyer to the appropriate sections
in this Owner’s Manual.
1-60Safety—Seats, seat belts and supplemental restraint system
ZREVIEW COPYÐ2009 Armada(wzw)
Owners ManualÐUSA_English(nna)
02/26/08Ðdebbie
X
ProCarManuals.com
Page 82 of 465
2 Instruments and controls
Instrument panel...................................2-2
Meters and gauges................................2-4
Speedometer and odometer.....................2-5
Tachometer....................................2-6
Engine coolant temperature gauge...............2-6
Fuel gauge....................................2-7
Engine oil pressure gauge.......................2-8
Voltmeter......................................2-8
Automatic transmission fluid temperature
gauge.........................................2-9
Compass display (if so equipped)...................2-9
Compass display..............................2-10
Zone variation change procedure................2-11
Warning/indicator lights and audible reminders......2-13
Checking bulbs...............................2-13
Warning lights................................2-13
Indicator lights................................2-18
Audible reminders.............................2-20
Vehicle Information Display........................2-21
How to use the Vehicle Information Display.......2-21
Security systems.................................2-27
Vehicle security system.........................2-27
NISSAN vehicle immobilizer system.............2-29Windshield wiper and washer switch...............2-30
Switch operation..............................2-30
Rear window wiper and washer switch..............2-31
Rear window and outside mirror defroster switch.....2-32
Headlight and turn signal switch....................2-32
Headlight control switch........................2-32
Daytime running light system (Canada only)......2-34
Instrument brightness control...................2-35
Turn signal switch.............................2-35
Fog light switch (if so equipped)................2-35
Hazard warning flasher switch.....................2-36
Horn............................................2-36
Heated seat (if so equipped).......................2-37
Heated steering wheel (if so equipped).............2-37
Vehicle Dynamic Control (VDC) off switch...........2-38
Front and rear sonar system off switch..............2-38
Tow mode switch (if so equipped)..................2-39
Power outlet.....................................2-40
Storage.........................................2-41
Instrument panel storage trays..................2-41
Console box..................................2-41
Glove box....................................2-43
Sunglasses holder.............................2-43
ZREVIEW COPYÐ2009 Armada(wzw)
Owners ManualÐUSA_English(nna)
02/26/08Ðdebbie
X
ProCarManuals.com
Page 180 of 465
4 Monitor, climate, audio, phone and voice
recognition systems
Control panel buttons — color screen without
Navigation System.................................4-2
How to use the NISSAN controller...............4-3
How to select menus on the screen..............4-4
How to use the STATUS button..................4-4
How to use the INFO button.....................4-4
How to use the SETTING button.................4-9
OFF button.............................4-16
Control panel buttons — color screen with
Navigation System (if so equipped).................4-16
How to use the NISSAN controller..............4-17
How to use the touch screen...................4-17
Start-up screen...............................4-19
How to select menus on the screen.............4-19
How to use the STATUS button.................4-20
How to use the INFO button....................4-20
How to use the SETTING button................4-25
OFF button.............................4-32
Rearview monitor (if so equipped)..................4-32
How to read the displayed lines.................4-33
Adjusting the screen...........................4-33
Operating tips.................................4-34
Vents...........................................4-35Heater and air conditioner (automatic)..............4-36
Automatic operation...........................4-36
Manual operation..............................4-37
Operating tips.................................4-37
Rear seat air conditioner..........................4-38
Controls......................................4-39
Servicing air conditioner...........................4-39
Audio system....................................4-39
Radio........................................4-39
FM radio reception............................4-40
AM radio reception............................4-40
Satellite radio reception (if so equipped).........4-40
Audio operation precautions....................4-41
FM/AM/SAT radio with compact disc (CD)
changer (if so equipped).......................4-47
FM/AM/SAT radio with compact disc (CD)
player (if so equipped).........................4-55
CompactFlash™ (CF) player operation
(if so equipped)...............................4-60
Music Box hard-disk drive audio system
(if so equipped)...............................4-62
CD/CF (CompactFlash™) care and cleaning......4-71
Steering wheel switch for audio control..........4-73
ZREVIEW COPYÐ2009 Armada(wzw)
Owners ManualÐUSA_English(nna)
02/26/08Ðdebbie
X
ProCarManuals.com
Page 210 of 465
Select to turn off all sounds made when a door
handle request switch is pushed, by selecting the
“OFF” key.
Intelligent Key Unlock Reply:Select to
change the sound of the Intelligent Key mode
used when a door handle request switch is
pushed to unlock.
Select to turn off all sounds made when a door
handle request switch is pushed, by selecting the
“OFF” key.
Lift Steering Wheel on Exit:Select to turn on
or turn off the steering wheel moving upward for
easy exit when the ignition switch is in the OFF
position and the driver’s door is opened. After
getting into the vehicle and pushing the ignition
switch to the ACC position, the steering wheel
moves to the previous position.
Slide Driver Seat Back on Exit:Select to turn
on or turn off the driver’s seat moving backwards
for easy exit when the ignition switch is in the OFF
position and the driver’s door is opened. After
getting into the vehicle and pushing the ignition
switch to the ACC position, the driver’s seat
moves to the previous position.
Return All Settings to Default:Select to
change all the comfort and convenience systems
to their default settings.
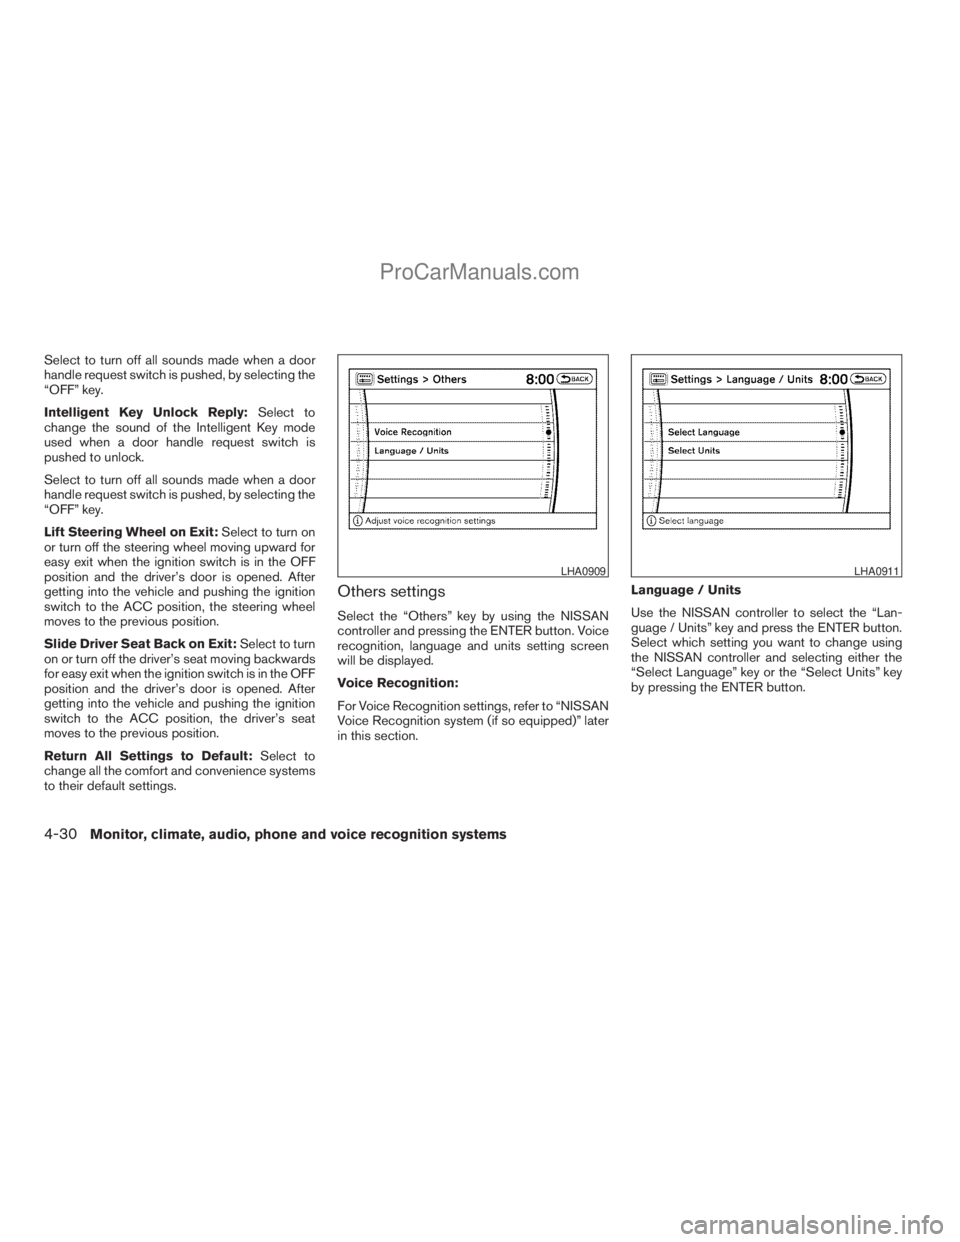
Others settings
Select the “Others” key by using the NISSAN
controller and pressing the ENTER button. Voice
recognition, language and units setting screen
will be displayed.
Voice Recognition:
For Voice Recognition settings, refer to “NISSAN
Voice Recognition system (if so equipped)” later
in this section.Language / Units
Use the NISSAN controller to select the “Lan-
guage / Units” key and press the ENTER button.
Select which setting you want to change using
the NISSAN controller and selecting either the
“Select Language” key or the “Select Units” key
by pressing the ENTER button.
LHA0909LHA0911
4-30Monitor, climate, audio, phone and voice recognition systems
ZREVIEW COPYÐ2009 Armada(wzw)
Owners ManualÐUSA_English(nna)
02/26/08Ðdebbie
X
ProCarManuals.com
Page 253 of 465
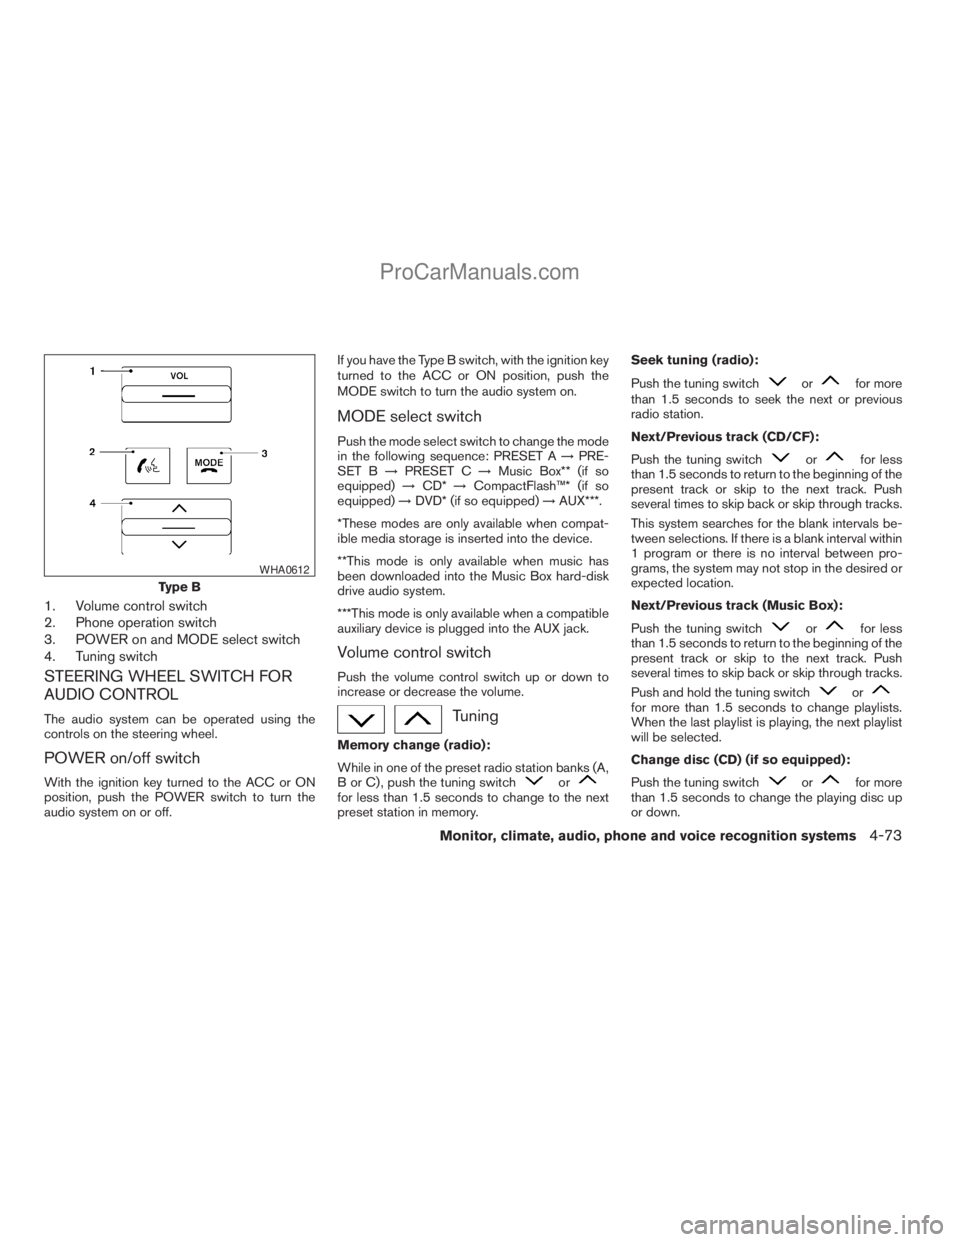
1. Volume control switch
2. Phone operation switch
3. POWER on and MODE select switch
4. Tuning switch
STEERING WHEEL SWITCH FOR
AUDIO CONTROL
The audio system can be operated using the
controls on the steering wheel.
POWER on/off switch
With the ignition key turned to the ACC or ON
position, push the POWER switch to turn the
audio system on or off.If you have the Type B switch, with the ignition key
turned to the ACC or ON position, push the
MODE switch to turn the audio system on.
MODE select switch
Push the mode select switch to change the mode
in the following sequence: PRESET A!PRE-
SET B!PRESET C!Music Box** (if so
equipped)!CD*!CompactFlash™* (if so
equipped)!DVD* (if so equipped)!AUX***.
*These modes are only available when compat-
ible media storage is inserted into the device.
**This mode is only available when music has
been downloaded into the Music Box hard-disk
drive audio system.
***This mode is only available when a compatible
auxiliary device is plugged into the AUX jack.
Volume control switch
Push the volume control switch up or down to
increase or decrease the volume.
Tuning
Memory change (radio):
While in one of the preset radio station banks (A,
B or C) , push the tuning switch
orfor less than 1.5 seconds to change to the next
preset station in memory.Seek tuning (radio):
Push the tuning switch
orfor more
than 1.5 seconds to seek the next or previous
radio station.
Next/Previous track (CD/CF):
Push the tuning switch
orfor less
than 1.5 seconds to return to the beginning of the
present track or skip to the next track. Push
several times to skip back or skip through tracks.
This system searches for the blank intervals be-
tween selections. If there is a blank interval within
1 program or there is no interval between pro-
grams, the system may not stop in the desired or
expected location.
Next/Previous track (Music Box):
Push the tuning switch
orfor less
than 1.5 seconds to return to the beginning of the
present track or skip to the next track. Push
several times to skip back or skip through tracks.
Push and hold the tuning switch
orfor more than 1.5 seconds to change playlists.
When the last playlist is playing, the next playlist
will be selected.
Change disc (CD) (if so equipped):
Push the tuning switch
orfor more
than 1.5 seconds to change the playing disc up
or down.
Type B
WHA0612
Monitor, climate, audio, phone and voice recognition systems4-73
ZREVIEW COPYÐ2009 Armada(wzw)
Owners ManualÐUSA_English(nna)
02/26/08Ðdebbie
X
ProCarManuals.com
Page 276 of 465
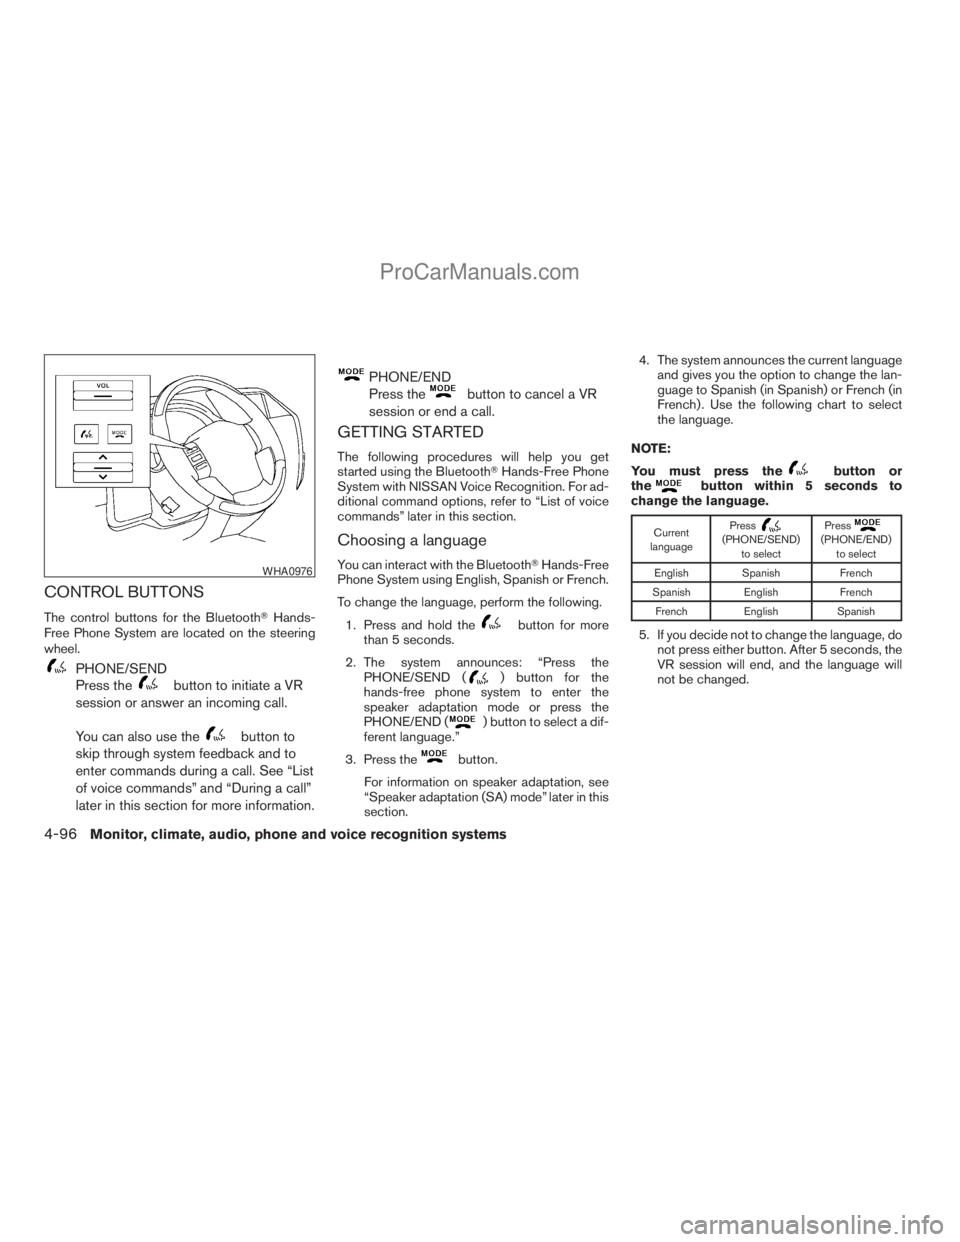
CONTROL BUTTONS
The control buttons for the BluetoothTHands-
Free Phone System are located on the steering
wheel.
PHONE/SEND
Press the
button to initiate a VR
session or answer an incoming call.
You can also use the
button to
skip through system feedback and to
enter commands during a call. See “List
of voice commands” and “During a call”
later in this section for more information.
PHONE/END
Press the
button to cancel a VR
session or end a call.
GETTING STARTED
The following procedures will help you get
started using the BluetoothTHands-Free Phone
System with NISSAN Voice Recognition. For ad-
ditional command options, refer to “List of voice
commands” later in this section.
Choosing a language
You can interact with the BluetoothTHands-Free
Phone System using English, Spanish or French.
To change the language, perform the following.
1. Press and hold the
button for more
than 5 seconds.
2. The system announces: “Press the
PHONE/SEND (
) button for the
hands-free phone system to enter the
speaker adaptation mode or press the
PHONE/END (
) button to select a dif-
ferent language.”
3. Press the
button.
For information on speaker adaptation, see
“Speaker adaptation (SA) mode” later in this
section.4. The system announces the current language
and gives you the option to change the lan-
guage to Spanish (in Spanish) or French (in
French) . Use the following chart to select
the language.
NOTE:
You must press the
button or
thebutton within 5 seconds to
change the language.
Current
languagePress(PHONE/SEND)
to selectPress(PHONE/END)
to select
English Spanish French
Spanish English French
French English Spanish
5. If you decide not to change the language, do
not press either button. After 5 seconds, the
VR session will end, and the language will
not be changed.
WHA0976
4-96Monitor, climate, audio, phone and voice recognition systems
ZREVIEW COPYÐ2009 Armada(wzw)
Owners ManualÐUSA_English(nna)
02/26/08Ðdebbie
X
ProCarManuals.com
Page 277 of 465

Pairing procedure
NOTE:
The pairing procedure must be performed
when the vehicle is stationary. If the vehicle
starts moving during the procedure, the
procedure will be cancelled.
Main Menu
“Setup”
sA
“Pair phone”sB
“New phone”sC
Initiate from handsetsD
Name phonesE
Assign prioritysF
Choose ringtonesG
1. Press thebutton on the steering
wheel. The system announces the available
commands.
2. Say: “Setup”
sA. The system acknowledges
the command and announces the next set of
available commands.
3. Say: “Pair phone”
sB. The system acknowl-
edges the command and announces the
next set of available commands.4. Say: “New phone”
sC. The system acknowl-
edges the command and asks you to initiate
pairing from the phone handset
sD.
The pairing procedure of the cellular phone
varies according to each cellular phone
model. See the cellular phone Owner’s
Manual for details. You can also visit
www.nissanusa.com/bluetooth for instruc-
tions on pairing NISSAN recommended cel-
lular phones.
When prompted for a Passkey code, enter
“1234” from the handset. The Passkey code
“1234” has been assigned by NISSAN and
cannot be changed.
5. The system asks you to say a name for the
phone
sE.
If the name is too long or too short, the
system tells you, then prompts you for a
name again.
Also, if more than one phone is paired and
the name sounds too much like a name
already used, the system tells you, then
prompts you for a name again.6. The system asks you to assign a priority level
sF. The priority level determines which
phone is active when more than one paired
BluetoothTphone is in the vehicle. Follow
the instructions provided by the system or
refer to “Setup” later in this section for more
information on changing priorities.
7. The system will ask if you would like to select
a custom ring tone
sG. Follow the instruc-
tions provided by the system or refer to
“Setup” later in this section for more infor-
mation on selecting ringtones.
Making a call by entering a phone
number
Main Menu
“Call”
sA
Number (speak digits)sB
“Dial”sC
1. Press thebutton on steering wheel. A
tone will sound.
2. Say: “Call”
sA. The system acknowledges
the command and announces the next set of
available commands.
Say: “Call International” to dial more than 10
digits or any special characters.
Monitor, climate, audio, phone and voice recognition systems4-97
ZREVIEW COPYÐ2009 Armada(wzw)
Owners ManualÐUSA_English(nna)
02/26/08Ðdebbie
X
ProCarManuals.com
Page 282 of 465
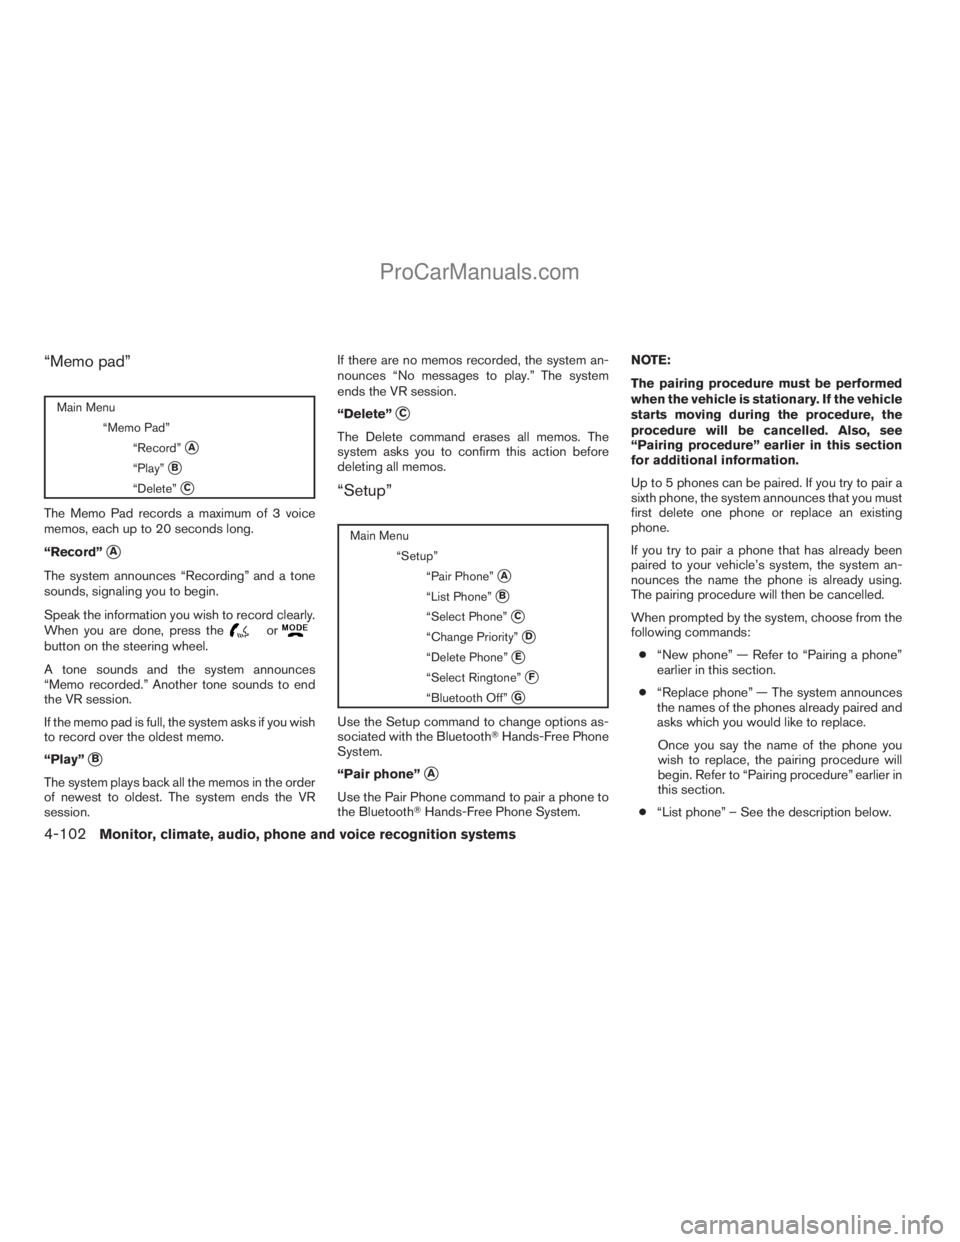
“Memo pad”
Main Menu
“Memo Pad”
“Record”
sA
“Play”sB
“Delete”sC
The Memo Pad records a maximum of 3 voice
memos, each up to 20 seconds long.
“Record”
sA
The system announces “Recording” and a tone
sounds, signaling you to begin.
Speak the information you wish to record clearly.
When you are done, press the
orbutton on the steering wheel.
A tone sounds and the system announces
“Memo recorded.” Another tone sounds to end
the VR session.
If the memo pad is full, the system asks if you wish
to record over the oldest memo.
“Play”
sB
The system plays back all the memos in the order
of newest to oldest. The system ends the VR
session.If there are no memos recorded, the system an-
nounces “No messages to play.” The system
ends the VR session.
“Delete”
sC
The Delete command erases all memos. The
system asks you to confirm this action before
deleting all memos.
“Setup”
Main Menu
“Setup”
“Pair Phone”
sA
“List Phone”sB
“Select Phone”sC
“Change Priority”sD
“Delete Phone”sE
“Select Ringtone”sF
“Bluetooth Off”sG
Use the Setup command to change options as-
sociated with the BluetoothTHands-Free Phone
System.
“Pair phone”
sA
Use the Pair Phone command to pair a phone to
the BluetoothTHands-Free Phone System.NOTE:
The pairing procedure must be performed
when the vehicle is stationary. If the vehicle
starts moving during the procedure, the
procedure will be cancelled. Also, see
“Pairing procedure” earlier in this section
for additional information.
Up to 5 phones can be paired. If you try to pair a
sixth phone, the system announces that you must
first delete one phone or replace an existing
phone.
If you try to pair a phone that has already been
paired to your vehicle’s system, the system an-
nounces the name the phone is already using.
The pairing procedure will then be cancelled.
When prompted by the system, choose from the
following commands:
c“New phone” — Refer to “Pairing a phone”
earlier in this section.
c“Replace phone” — The system announces
the names of the phones already paired and
asks which you would like to replace.
Once you say the name of the phone you
wish to replace, the pairing procedure will
begin. Refer to “Pairing procedure” earlier in
this section.
c“List phone” – See the description below.
4-102Monitor, climate, audio, phone and voice recognition systems
ZREVIEW COPYÐ2009 Armada(wzw)
Owners ManualÐUSA_English(nna)
02/26/08Ðdebbie
X
ProCarManuals.com
Page 292 of 465
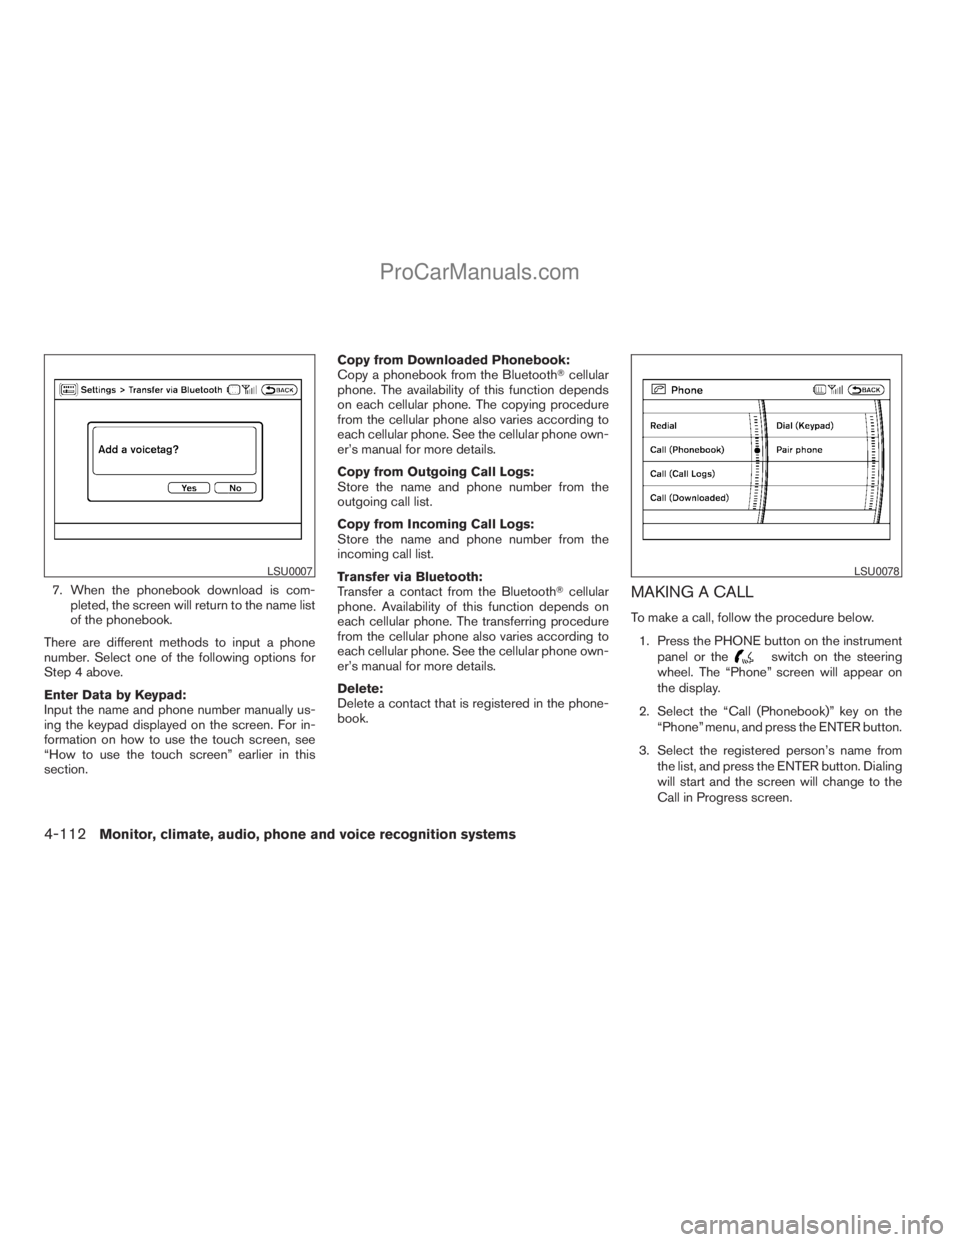
7. When the phonebook download is com-
pleted, the screen will return to the name list
of the phonebook.
There are different methods to input a phone
number. Select one of the following options for
Step 4 above.
Enter Data by Keypad:
Input the name and phone number manually us-
ing the keypad displayed on the screen. For in-
formation on how to use the touch screen, see
“How to use the touch screen” earlier in this
section.Copy from Downloaded Phonebook:
Copy a phonebook from the BluetoothTcellular
phone. The availability of this function depends
on each cellular phone. The copying procedure
from the cellular phone also varies according to
each cellular phone. See the cellular phone own-
er’s manual for more details.
Copy from Outgoing Call Logs:
Store the name and phone number from the
outgoing call list.
Copy from Incoming Call Logs:
Store the name and phone number from the
incoming call list.
Transfer via Bluetooth:
Transfer a contact from the BluetoothTcellular
phone. Availability of this function depends on
each cellular phone. The transferring procedure
from the cellular phone also varies according to
each cellular phone. See the cellular phone own-
er’s manual for more details.
Delete:
Delete a contact that is registered in the phone-
book.MAKING A CALL
To make a call, follow the procedure below.
1. Press the PHONE button on the instrument
panel or the
switch on the steering
wheel. The “Phone” screen will appear on
the display.
2. Select the “Call (Phonebook)” key on the
“Phone” menu, and press the ENTER button.
3. Select the registered person’s name from
the list, and press the ENTER button. Dialing
will start and the screen will change to the
Call in Progress screen.
LSU0007LSU0078
4-112Monitor, climate, audio, phone and voice recognition systems
ZREVIEW COPYÐ2009 Armada(wzw)
Owners ManualÐUSA_English(nna)
02/26/08Ðdebbie
X
ProCarManuals.com
Page 293 of 465
4. After the call is over, perform one of the
following to finish the call:
a. Select the “Hang up” key on the Call in
Progress screen and press the ENTER
button.
b. Press the
switch on the steering
wheel.
c. When the Call in Progress screen is dis-
played, press the PHONE button on the
instrument panel to hang up. If any other
screen is currently displayed, press the
PHONE button to display the Call in
Progress screen first, then press the
PHONE button again to hang up.
There are different methods to make a call. Select
one of the following options instead of “Call
(Phonebook)” in Step 2 above.
cRedial:
Dial the previously dialed number again.
cCall (Call Logs):
Select the name or phone number from the
incoming or outgoing call logs.
cCall (Downloaded):
Select the name or phone number from the
downloaded call list.cDial (Keypad):
Input the phone number manually using the
keypad displayed on the screen. For infor-
mation on how to use the touch screen, see
“How to use the touch screen” earlier in this
section.
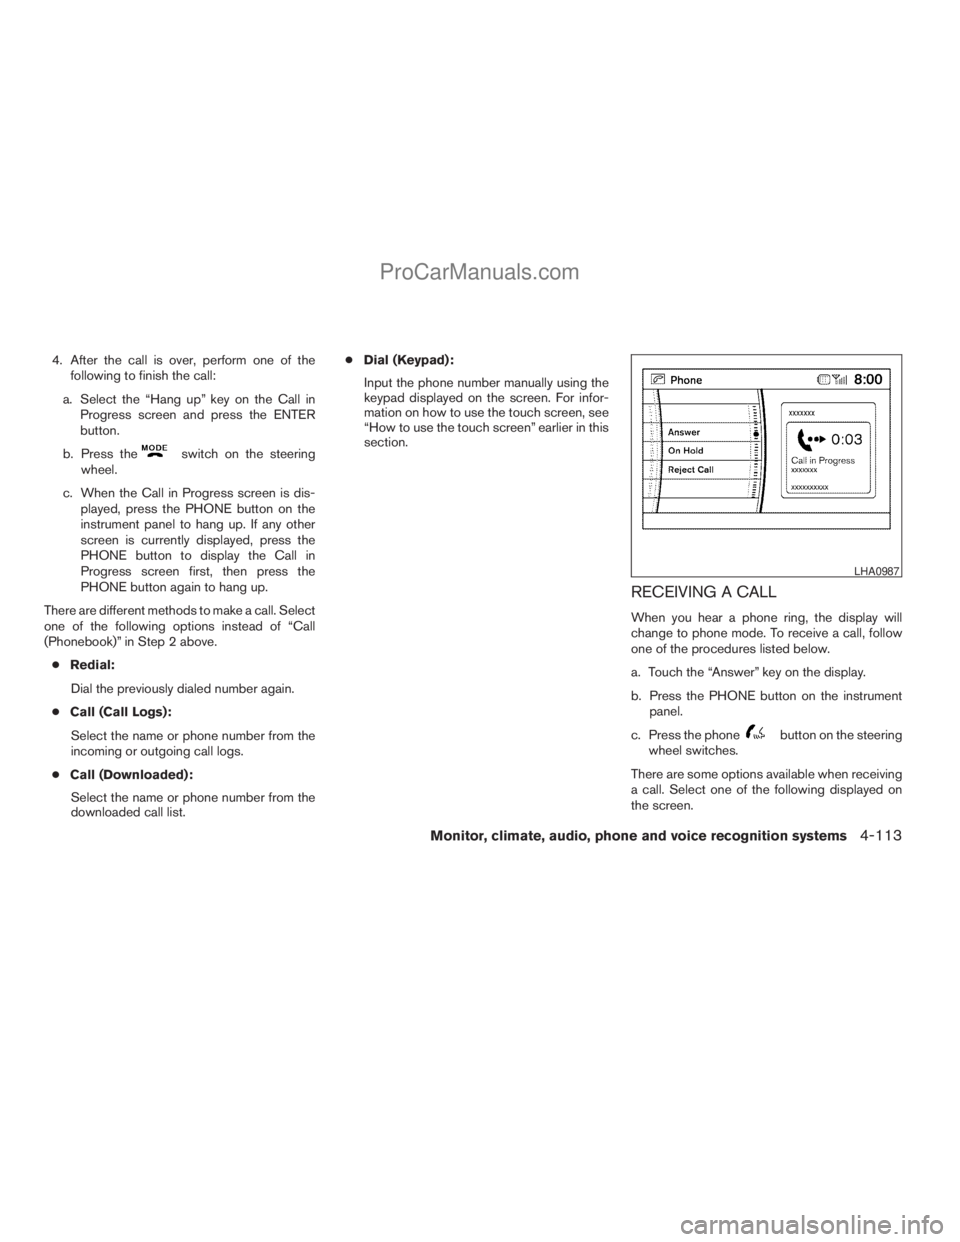
RECEIVING A CALL
When you hear a phone ring, the display will
change to phone mode. To receive a call, follow
one of the procedures listed below.
a. Touch the “Answer” key on the display.
b. Press the PHONE button on the instrument
panel.
c. Press the phone
button on the steering
wheel switches.
There are some options available when receiving
a call. Select one of the following displayed on
the screen.
LHA0987
Monitor, climate, audio, phone and voice recognition systems4-113
ZREVIEW COPYÐ2009 Armada(wzw)
Owners ManualÐUSA_English(nna)
02/26/08Ðdebbie
X
ProCarManuals.com