radio controls NISSAN ARMADA 2009 Owners Manual
[x] Cancel search | Manufacturer: NISSAN, Model Year: 2009, Model line: ARMADA, Model: NISSAN ARMADA 2009Pages: 465, PDF Size: 6.33 MB
Page 141 of 465
The HomeLinkTUniversal Transceiver provides a
convenient way to consolidate the functions of up
to three individual hand-held transmitters into
one built-in device.
HomeLinkTUniversal Transceiver:
cWill operate most Radio Frequency (RF)
devices such as garage doors, gates, home
and office lighting, entry door locks and se-
curity systems.
cIs powered by your vehicle’s battery. No
separate batteries are required. If the vehi-
cle’s battery is discharged or is discon-
nected, HomeLinkTwill retain all program-
ming.
Once the HomeLinkTUniversal Transceiver
is programmed, retain the original trans-
mitter for future programming procedures
(Example: new vehicle purchases) . Upon
sale of the vehicle, the programmed
HomeLinkTUniversal Transceiver buttons
should be erased for security purposes. For
additional information refer to “Program-
ming HomeLinkT” later in this section.WARNING
cDo not use the HomeLinkTUniversal
Transceiver with any garage door
opener that lacks safety stop and re-
verse features as required by federal
safety standards. (These standards be-
came effective for opener models
manufactured after April 1, 1982) . A ga-
rage door opener which cannot detect
an object in the path of a closing garage
door and then automatically stop and
reverse, does not meet current federal
safety standards. Using a garage door
opener without these features in-
creases the risk of serious injury or
death.
cDuring the programming procedure
your garage door or security gate will
open and close (if the transmitter is
within range) . Make sure that people or
objects are clear of the garage door,
gate, etc. that you are programming.
cYour vehicle’s engine should be turned
off while programming the HomeLinkT
Universal Transceiver.
PROGRAMMING HOMELINKT
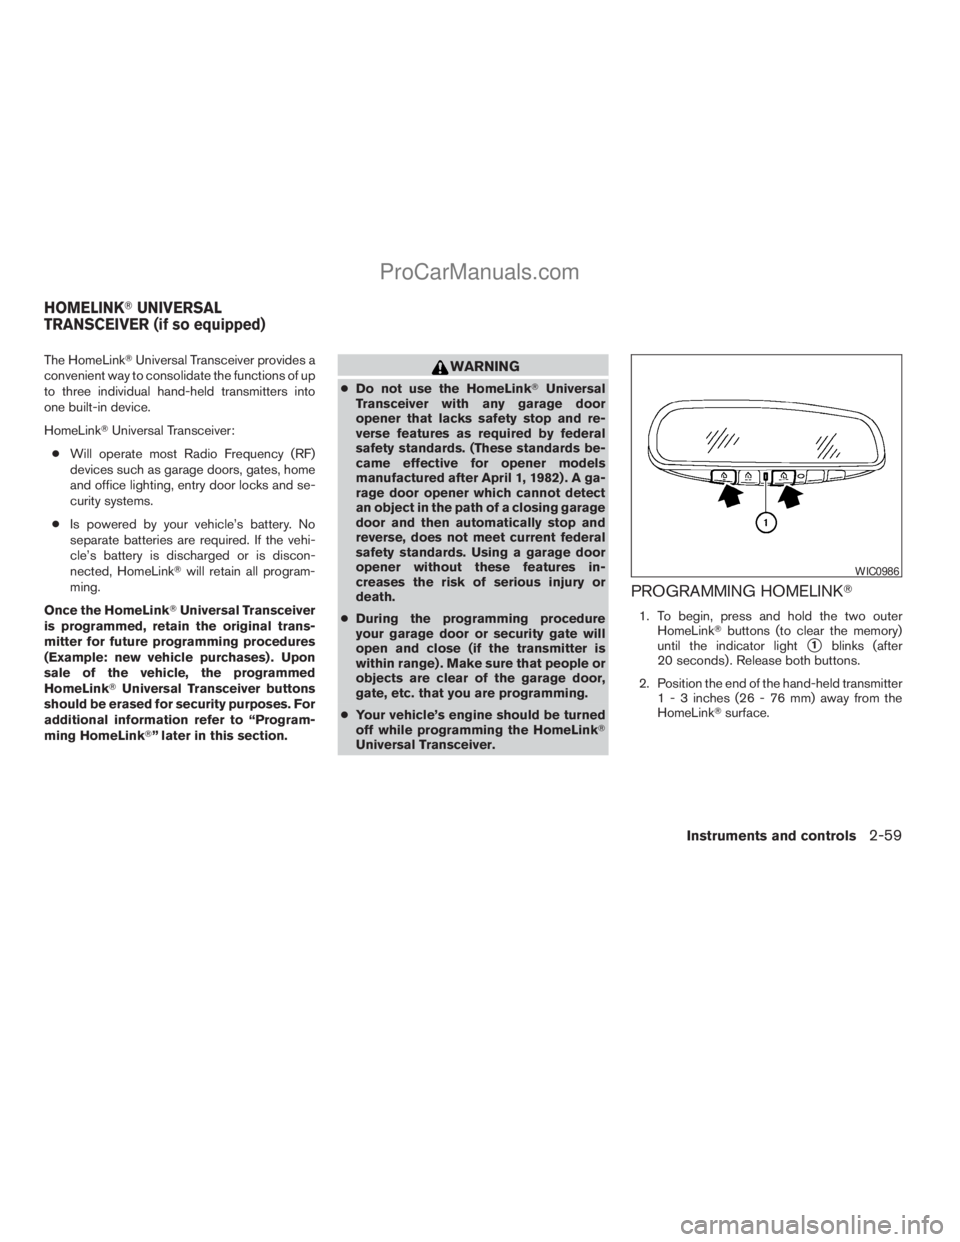
1. To begin, press and hold the two outer
HomeLinkTbuttons (to clear the memory)
until the indicator light
s1blinks (after
20 seconds) . Release both buttons.
2. Position the end of the hand-held transmitter
1 - 3 inches (26 - 76 mm) away from the
HomeLinkTsurface.
WIC0986
HOMELINKTUNIVERSAL
TRANSCEIVER (if so equipped)
Instruments and controls2-59
ZREVIEW COPYÐ2009 Armada(wzw)
Owners ManualÐUSA_English(nna)
02/26/08Ðdebbie
X
ProCarManuals.com
Page 180 of 465
4 Monitor, climate, audio, phone and voice
recognition systems
Control panel buttons — color screen without
Navigation System.................................4-2
How to use the NISSAN controller...............4-3
How to select menus on the screen..............4-4
How to use the STATUS button..................4-4
How to use the INFO button.....................4-4
How to use the SETTING button.................4-9
OFF button.............................4-16
Control panel buttons — color screen with
Navigation System (if so equipped).................4-16
How to use the NISSAN controller..............4-17
How to use the touch screen...................4-17
Start-up screen...............................4-19
How to select menus on the screen.............4-19
How to use the STATUS button.................4-20
How to use the INFO button....................4-20
How to use the SETTING button................4-25
OFF button.............................4-32
Rearview monitor (if so equipped)..................4-32
How to read the displayed lines.................4-33
Adjusting the screen...........................4-33
Operating tips.................................4-34
Vents...........................................4-35Heater and air conditioner (automatic)..............4-36
Automatic operation...........................4-36
Manual operation..............................4-37
Operating tips.................................4-37
Rear seat air conditioner..........................4-38
Controls......................................4-39
Servicing air conditioner...........................4-39
Audio system....................................4-39
Radio........................................4-39
FM radio reception............................4-40
AM radio reception............................4-40
Satellite radio reception (if so equipped).........4-40
Audio operation precautions....................4-41
FM/AM/SAT radio with compact disc (CD)
changer (if so equipped).......................4-47
FM/AM/SAT radio with compact disc (CD)
player (if so equipped).........................4-55
CompactFlash™ (CF) player operation
(if so equipped)...............................4-60
Music Box hard-disk drive audio system
(if so equipped)...............................4-62
CD/CF (CompactFlash™) care and cleaning......4-71
Steering wheel switch for audio control..........4-73
ZREVIEW COPYÐ2009 Armada(wzw)
Owners ManualÐUSA_English(nna)
02/26/08Ðdebbie
X
ProCarManuals.com
Page 181 of 465
Rear audio controls............................4-74
Antenna......................................4-75
NISSAN mobile entertainment system (MES)
(if so equipped)..................................4-75
Digital video disc (DVD) player controls..........4-77
Remote control................................4-78
Flip-down screen..............................4-78
Before operating the DVD mobile
entertainment system..........................4-80
Playing a digital versatile disc (DVD).............4-81
Remote control operation.......................4-86
Care and maintenance.........................4-88
How to handle the DVD........................4-88
Car phone or CB radio............................4-91
BluetoothTHands-Free Phone System without
Navigation System (if so equipped).................4-92
Regulatory Information.........................4-93
Using the system..............................4-94
Control buttons...............................4-96
Getting started................................4-96
List of voice commands........................4-98
Speaker adaptation (SA) mode.................4-104
Troubleshooting guide........................4-106BluetoothTHands-Free Phone System with
Navigation System (if so equipped)................4-107
Regulatory Information........................4-109
Voice commands.............................4-109
Pairing procedure............................4-109
Phonebook..................................4-111
Making a call.................................4-112
Receiving a call..............................4-113
During a call.................................4-114
Ending a call.................................4-115
Phone setting................................4-115
Call volume..................................4-117
NISSAN Voice Recognition System
(if so equipped).................................4-118
NISSAN Voice Recognition Standard Mode.....4-118
Using the system.............................4-121
Before Starting...............................4-121
Giving voice commands.......................4-121
NISSAN Voice Recognition Alternate
Command Mode.............................4-129
Using the system.............................4-136
Speaker Adaptation Function..................4-138
Troubleshooting guide........................4-141
ZREVIEW COPYÐ2009 Armada(wzw)
Owners ManualÐUSA_English(nna)
02/26/08Ðdebbie
X
ProCarManuals.com
Page 219 of 465
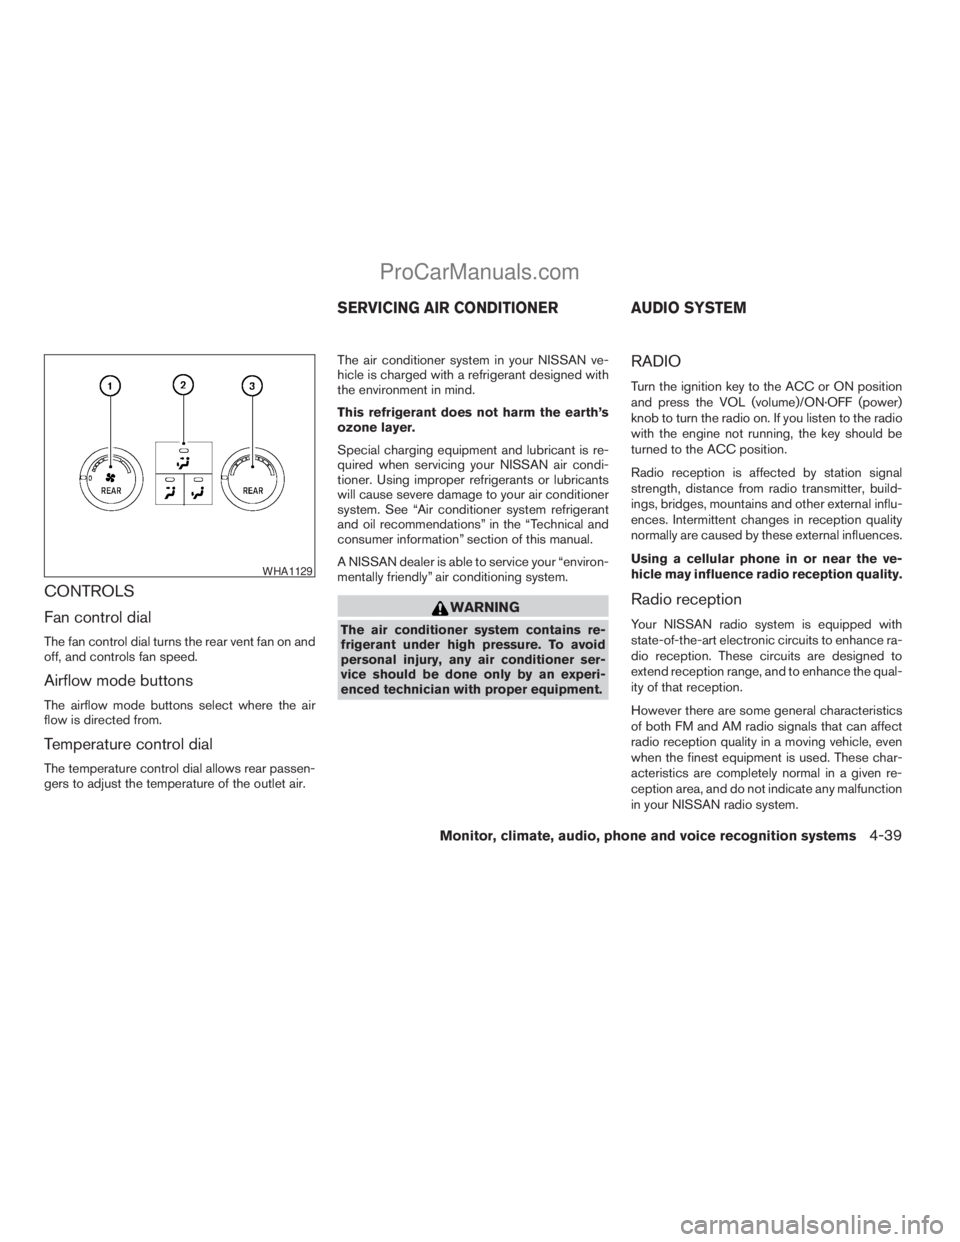
CONTROLS
Fan control dial
The fan control dial turns the rear vent fan on and
off, and controls fan speed.
Airflow mode buttons
The airflow mode buttons select where the air
flow is directed from.
Temperature control dial
The temperature control dial allows rear passen-
gers to adjust the temperature of the outlet air.The air conditioner system in your NISSAN ve-
hicle is charged with a refrigerant designed with
the environment in mind.
This refrigerant does not harm the earth’s
ozone layer.
Special charging equipment and lubricant is re-
quired when servicing your NISSAN air condi-
tioner. Using improper refrigerants or lubricants
will cause severe damage to your air conditioner
system. See “Air conditioner system refrigerant
and oil recommendations” in the “Technical and
consumer information” section of this manual.
A NISSAN dealer is able to service your “environ-
mentally friendly” air conditioning system.
WARNING
The air conditioner system contains re-
frigerant under high pressure. To avoid
personal injury, any air conditioner ser-
vice should be done only by an experi-
enced technician with proper equipment.
RADIO
Turn the ignition key to the ACC or ON position
and press the VOL (volume)/ON·OFF (power)
knob to turn the radio on. If you listen to the radio
with the engine not running, the key should be
turned to the ACC position.
Radio reception is affected by station signal
strength, distance from radio transmitter, build-
ings, bridges, mountains and other external influ-
ences. Intermittent changes in reception quality
normally are caused by these external influences.
Using a cellular phone in or near the ve-
hicle may influence radio reception quality.
Radio reception
Your NISSAN radio system is equipped with
state-of-the-art electronic circuits to enhance ra-
dio reception. These circuits are designed to
extend reception range, and to enhance the qual-
ity of that reception.
However there are some general characteristics
of both FM and AM radio signals that can affect
radio reception quality in a moving vehicle, even
when the finest equipment is used. These char-
acteristics are completely normal in a given re-
ception area, and do not indicate any malfunction
in your NISSAN radio system.
WHA1129
SERVICING AIR CONDITIONER AUDIO SYSTEM
Monitor, climate, audio, phone and voice recognition systems4-39
ZREVIEW COPYÐ2009 Armada(wzw)
Owners ManualÐUSA_English(nna)
02/26/08Ðdebbie
X
ProCarManuals.com
Page 239 of 465
SEEK/CAT and TRACK
buttons:
When the SEEK/CAT
button is pressed
while a compact disc is playing, the track being
played returns to its beginning. Press several
times to skip back through tracks. The compact
disc will go back the number of times the button
is pressed.
When the TRACK
button is pressed while
the compact disc is playing, the next track will
start to play from its beginning. Press several
times to skip through tracks. The compact disc
will advance the number of times the button is
pressed. (When the last track on the compact
disc is skipped through, the first track will be
played.)
The NISSAN controller can also be used to se-
lect tracks when a CD is being played.
SEEK/CAT and TRACK
(Rewind·Fast Forward)
buttons:
Press and hold the SEEK/CAT
(rewind)
button or the TRACK(fast forward) button
while a compact disc is playing; the compact disc
will play while rewinding or fast forwarding. When
the button is released, the compact disc will
return to normal play speed.When the CD button is pressed with the system
off and the compact disc loaded the system will
turn on and the compact disc will start to play.
When the CD button is pressed with the com-
pact disc loaded with the tape or the radio play-
ing, the tape or radio will automatically be turned
off and the compact disc will start to play.
TUNE FLDR (Folder) knob
While playing an MP3/WMA CD, turn the
TUNE/FLDR knob right or left to scan forward or
backward through available folders.
SCAN·RPT (random and repeat) button:
When the SCAN·RPT button is pressed while the
compact disc is being played, the play pattern
can be changed as follows:
CD:
1 DISC RPT!1 TRK RPT!1 DISC RDM!1
DISC RPT
MP3/WMA CD:
1 DISC RPT!1 FOLDER RPT!1 TRK RPT!
1 DISC RDM!1 FOLDER RDM!1 DISC RPT
1 DISC RPT: the entire disc will be repeated.
1 TRK RPT: the current track playing will be
repeated.1 DISC RDM: all tracks will be played randomly.
1 FOLDER RPT: the folder currently being ac-
cessed will be repeated.
1 FOLDER RDM: the tracks in the current folder
being accessed will be played randomly.
REAR CTRL:
Pressing the REAR CTRL button turns the rear
seat audio controller on. Rear Controls UN-
LOCKED will display. Pressing the REAR CTRL
button again will turn the rear seat audio control-
ler off. Rear Controls LOCKED will display. If the
vehicle is not equipped with a rear seat audio
controller, the display will show “Rear Controls
Not Available”.
Press and hold the REAR CTRL button for ap-
proximately 1.5 seconds to turn on the rear dis-
play screen on. Rear Display ON will display.
Press and hold the REAR CTRL button again will
turn the rear display screen off. Rear Display OFF
will display. If the vehicle is not equipped with a
rear display screen, the display will show “Rear
Controls Not Available”.(SPEAKER CONTROL) button:
Press the
button to turn the rear speakers
off and the headphones on. Press this button
again to turn rear seat speakers back on and the
headphones off.
Monitor, climate, audio, phone and voice recognition systems4-59
ZREVIEW COPYÐ2009 Armada(wzw)
Owners ManualÐUSA_English(nna)
02/26/08Ðdebbie
X
ProCarManuals.com
Page 253 of 465
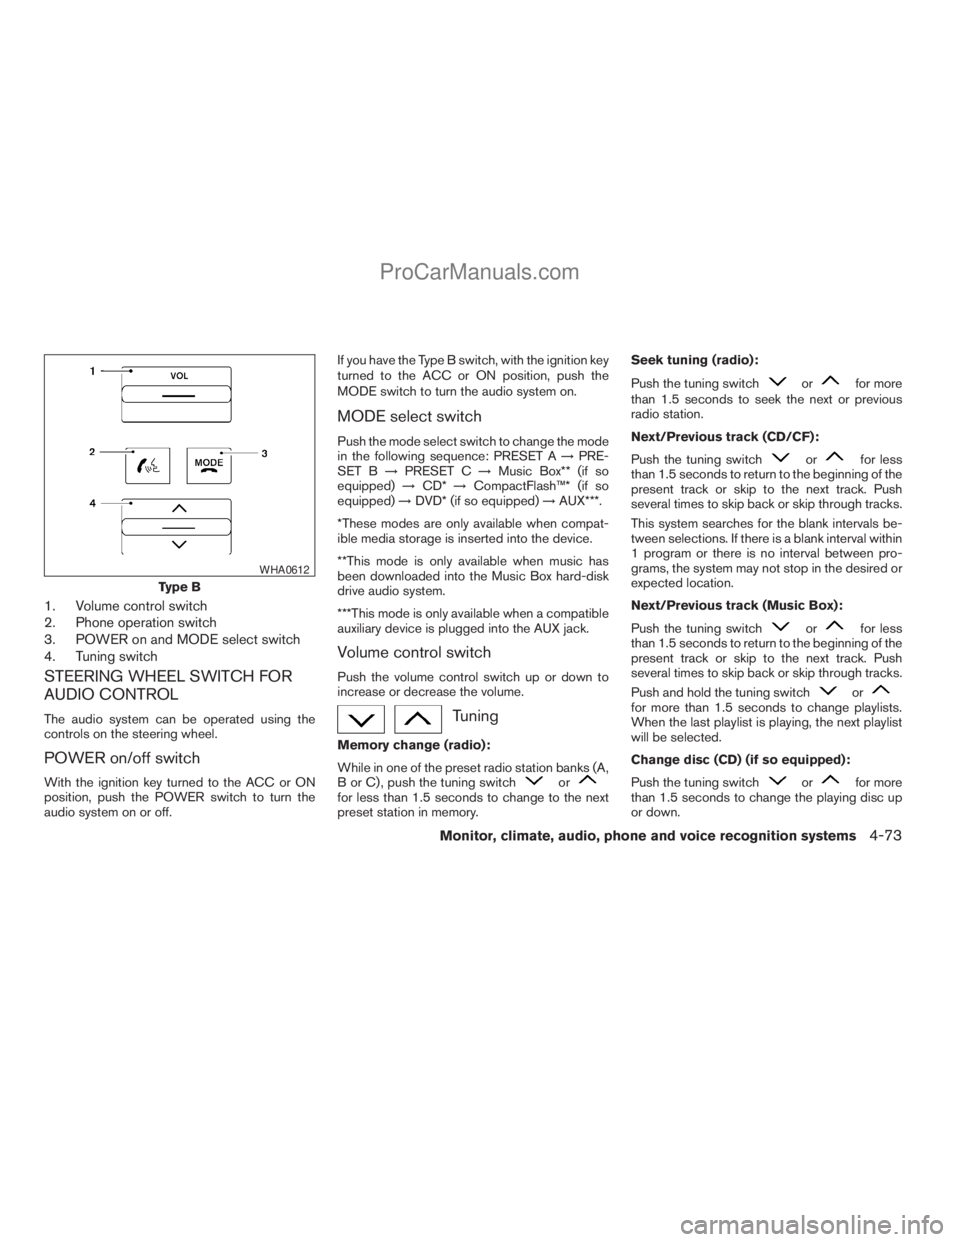
1. Volume control switch
2. Phone operation switch
3. POWER on and MODE select switch
4. Tuning switch
STEERING WHEEL SWITCH FOR
AUDIO CONTROL
The audio system can be operated using the
controls on the steering wheel.
POWER on/off switch
With the ignition key turned to the ACC or ON
position, push the POWER switch to turn the
audio system on or off.If you have the Type B switch, with the ignition key
turned to the ACC or ON position, push the
MODE switch to turn the audio system on.
MODE select switch
Push the mode select switch to change the mode
in the following sequence: PRESET A!PRE-
SET B!PRESET C!Music Box** (if so
equipped)!CD*!CompactFlash™* (if so
equipped)!DVD* (if so equipped)!AUX***.
*These modes are only available when compat-
ible media storage is inserted into the device.
**This mode is only available when music has
been downloaded into the Music Box hard-disk
drive audio system.
***This mode is only available when a compatible
auxiliary device is plugged into the AUX jack.
Volume control switch
Push the volume control switch up or down to
increase or decrease the volume.
Tuning
Memory change (radio):
While in one of the preset radio station banks (A,
B or C) , push the tuning switch
orfor less than 1.5 seconds to change to the next
preset station in memory.Seek tuning (radio):
Push the tuning switch
orfor more
than 1.5 seconds to seek the next or previous
radio station.
Next/Previous track (CD/CF):
Push the tuning switch
orfor less
than 1.5 seconds to return to the beginning of the
present track or skip to the next track. Push
several times to skip back or skip through tracks.
This system searches for the blank intervals be-
tween selections. If there is a blank interval within
1 program or there is no interval between pro-
grams, the system may not stop in the desired or
expected location.
Next/Previous track (Music Box):
Push the tuning switch
orfor less
than 1.5 seconds to return to the beginning of the
present track or skip to the next track. Push
several times to skip back or skip through tracks.
Push and hold the tuning switch
orfor more than 1.5 seconds to change playlists.
When the last playlist is playing, the next playlist
will be selected.
Change disc (CD) (if so equipped):
Push the tuning switch
orfor more
than 1.5 seconds to change the playing disc up
or down.
Type B
WHA0612
Monitor, climate, audio, phone and voice recognition systems4-73
ZREVIEW COPYÐ2009 Armada(wzw)
Owners ManualÐUSA_English(nna)
02/26/08Ðdebbie
X
ProCarManuals.com
Page 254 of 465
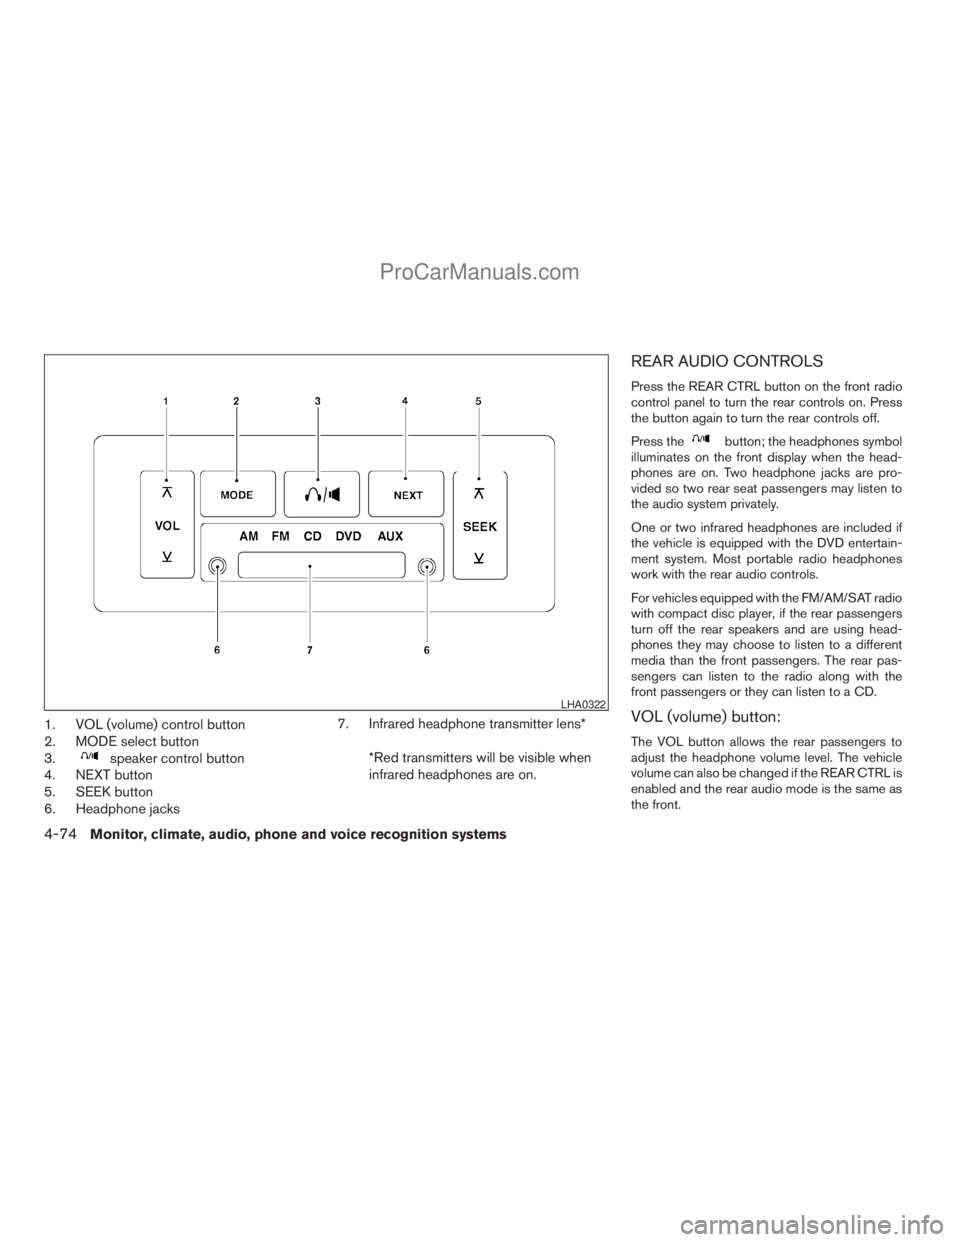
1. VOL (volume) control button
2. MODE select button
3.
speaker control button
4. NEXT button
5. SEEK button
6. Headphone jacks7. Infrared headphone transmitter lens*
*Red transmitters will be visible when
infrared headphones are on.
REAR AUDIO CONTROLS
Press the REAR CTRL button on the front radio
control panel to turn the rear controls on. Press
the button again to turn the rear controls off.
Press the
button; the headphones symbol
illuminates on the front display when the head-
phones are on. Two headphone jacks are pro-
vided so two rear seat passengers may listen to
the audio system privately.
One or two infrared headphones are included if
the vehicle is equipped with the DVD entertain-
ment system. Most portable radio headphones
work with the rear audio controls.
For vehicles equipped with the FM/AM/SAT radio
with compact disc player, if the rear passengers
turn off the rear speakers and are using head-
phones they may choose to listen to a different
media than the front passengers. The rear pas-
sengers can listen to the radio along with the
front passengers or they can listen to a CD.
VOL (volume) button:
The VOL button allows the rear passengers to
adjust the headphone volume level. The vehicle
volume can also be changed if the REAR CTRL is
enabled and the rear audio mode is the same as
the front.
LHA0322
4-74Monitor, climate, audio, phone and voice recognition systems
ZREVIEW COPYÐ2009 Armada(wzw)
Owners ManualÐUSA_English(nna)
02/26/08Ðdebbie
X
ProCarManuals.com
Page 255 of 465
(SPEAKER CONTROL) button:
Press this
button to turn the rear speakers
off and headphones on. Press thisbutton
again to turn rear seat speakers back on and
headphones off.
MODE button:
The MODE button allows the rear passengers to
change between AM, FM, CD, DVD and AUX.
The media options are listed on the face plate of
the rear audio controls. When a source of media
is selected, the media label will be illuminated.
SEEK button:
In AM or FM mode, the SEEK button allows the
rear seat passengers to find the next radio station
up or down the station band frequency.
In CD mode, the SEEK button allows the rear
passengers to find the next or previous selection
on the CD.
NEXT button:
When the NEXT button is pressed while in AM or
FM mode, the radio will change to the next preset.
The NEXT button does not function while in SAT
radio mode or when playing a DVD or CD.
ANTENNA
Window antenna
The antenna pattern is printed inside the rear
passenger and driver side windows.
CAUTION
cDo not place metalized film near the
rear driver or passenger side window
glass or attach any metal parts to it. This
may cause poor reception or noise.
cWhen cleaning the inside of the rear
driver or passenger side window, be
careful not to scratch or damage the
window antenna. Lightly wipe along the
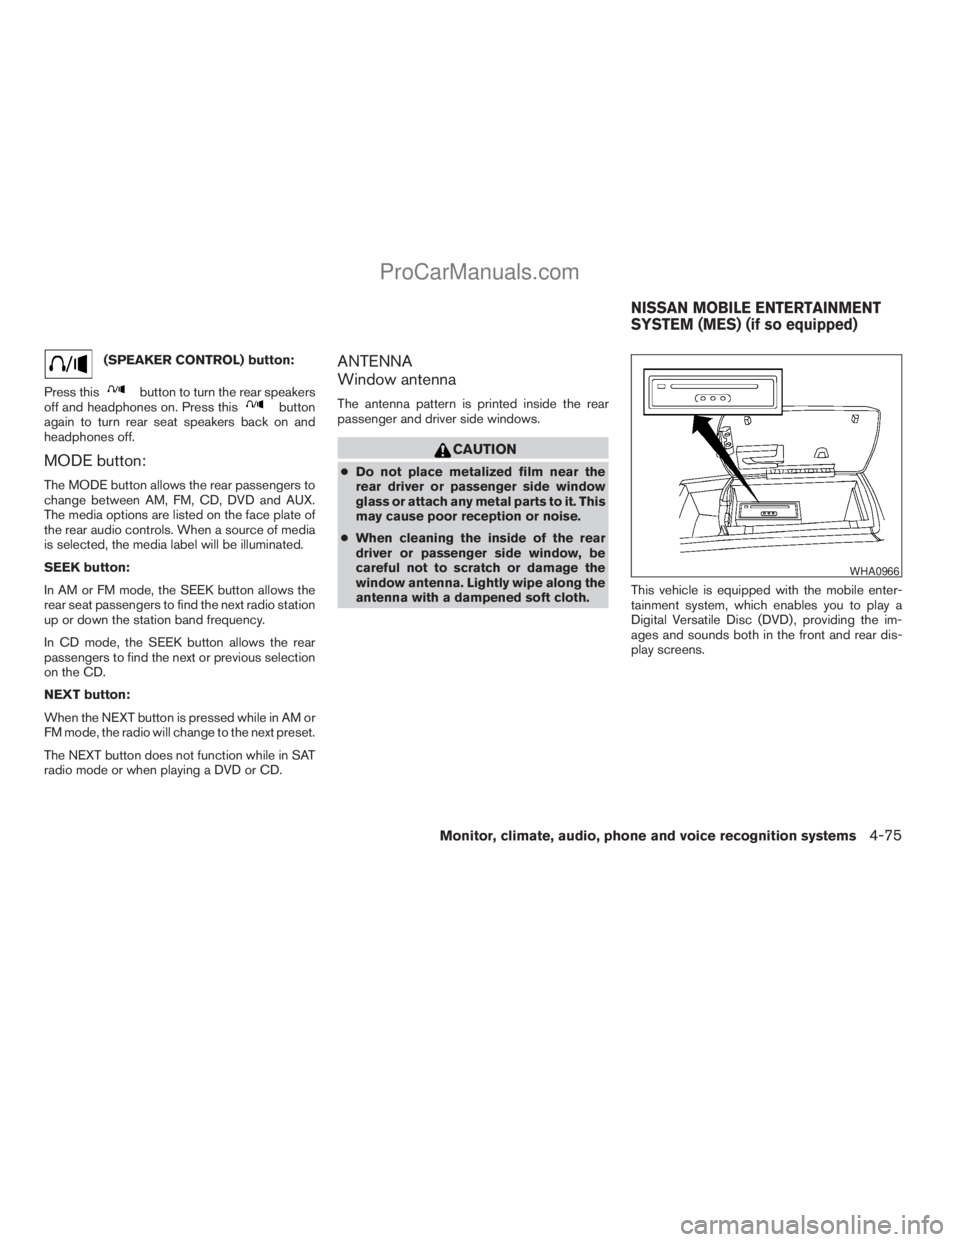
antenna with a dampened soft cloth.This vehicle is equipped with the mobile enter-
tainment system, which enables you to play a
Digital Versatile Disc (DVD) , providing the im-
ages and sounds both in the front and rear dis-
play screens.
WHA0966
NISSAN MOBILE ENTERTAINMENT
SYSTEM (MES) (if so equipped)
Monitor, climate, audio, phone and voice recognition systems4-75
ZREVIEW COPYÐ2009 Armada(wzw)
Owners ManualÐUSA_English(nna)
02/26/08Ðdebbie
X
ProCarManuals.com
Page 457 of 465
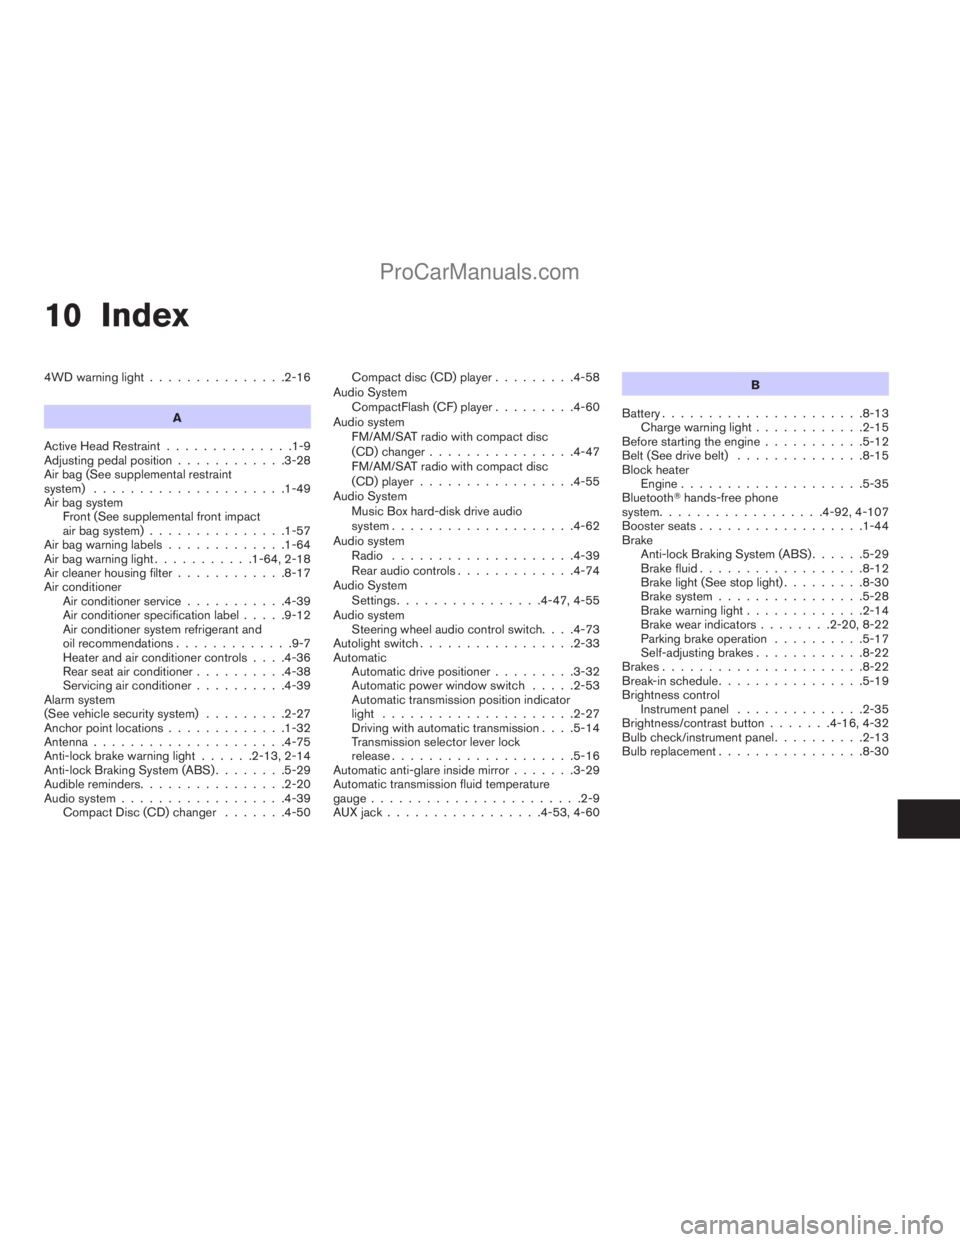
10 Index
4WD warning light...............2-16
A
Active Head Restraint..............1-9
Adjusting pedal position............3-28
Air bag (See supplemental restraint
system).....................1-49
Air bag system
Front (See supplemental front impact
air bag system)...............1-57
Air bag warning labels.............1-64
Air bag warning light...........1-64, 2-18
Air cleaner housing filter............8-17
Air conditioner
Air conditioner service...........4-39
Air conditioner specification label.....9-12
Air conditioner system refrigerant and
oil recommendations.............9-7
Heater and air conditioner controls. . . .4-36
Rear seat air conditioner..........4-38
Servicing air conditioner..........4-39
Alarm system
(See vehicle security system).........2-27
Anchor point locations.............1-32
Antenna.....................4-75
Anti-lock brake warning light......2-13, 2-14
Anti-lock Braking System (ABS)........5-29
Audible reminders................2-20
Audio system..................4-39
Compact Disc (CD) changer.......4-50Compact disc (CD) player.........4-58
Audio System
CompactFlash (CF) player.........4-60
Audio system
FM/AM/SAT radio with compact disc
(CD) changer................4-47
FM/AM/SAT radio with compact disc
(CD) player.................4-55
Audio System
Music Box hard-disk drive audio
system....................4-62
Audio system
Radio....................4-39
Rear audio controls.............4-74
Audio System
Settings................4-47, 4-55
Audio system
Steering wheel audio control switch. . . .4-73
Autolight switch.................2-33
Automatic
Automatic drive positioner.........3-32
Automatic power window switch.....2-53
Automatic transmission position indicator
light.....................2-27
Driving with automatic transmission. . . .5-14
Transmission selector lever lock
release....................5-16
Automatic anti-glare inside mirror.......3-29
Automatic transmission fluid temperature
gauge.......................2-9
AUX jack.................4-53, 4-60B
Battery......................8-13
Charge warning light............2-15
Before starting the engine...........5-12
Belt (See drive belt)..............8-15
Block heater
Engine....................5-35
BluetoothThands-free phone
system..................4-92, 4-107
Booster seats..................1-44
Brake
Anti-lock Braking System (ABS)......5-29
Brake fluid..................8-12
Brake light (See stop light).........8-30
Brake system................5-28
Brake warning light.............2-14
Brake wear indicators........2-20, 8-22
Parking brake operation..........5-17
Self-adjusting brakes............8-22
Brakes......................8-22
Break-in schedule................5-19
Brightness control
Instrument panel..............2-35
Brightness/contrast button.......4-16, 4-32
Bulb check/instrument panel..........2-13
Bulb replacement................8-30
ZREVIEW COPYÐ2009 Armada(wzw)
Owners ManualÐUSA_English(nna)
02/26/08Ðdebbie
X
ProCarManuals.com
Page 458 of 465
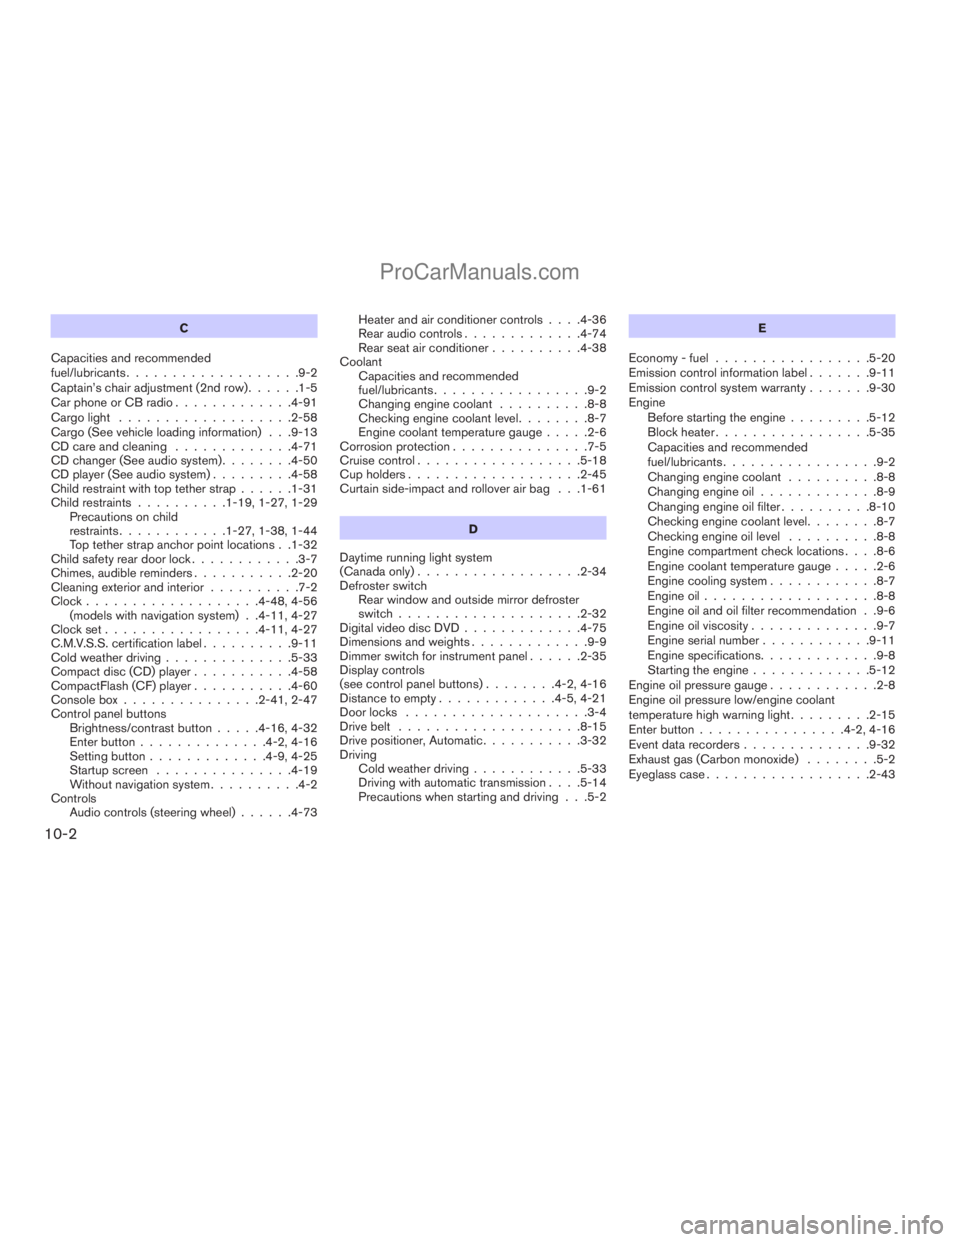
C
Capacities and recommended
fuel/lubricants...................9-2
Captain’s chair adjustment (2nd row)......1-5
Car phone or CB radio.............4-91
Cargo light...................2-58
Cargo (See vehicle loading information) . . .9-13
CD care and cleaning.............4-71
CD changer (See audio system)........4-50
CD player (See audio system).........4-58
Child restraint with top tether strap......1-31
Child restraints..........1-19, 1-27, 1-29
Precautions on child
restraints............1-27, 1-38, 1-44
Top tether strap anchor point locations . .1-32
Child safety rear door lock............3-7
Chimes, audible reminders...........2-20
Cleaning exterior and interior..........7-2
Clock...................4-48, 4-56
(models with navigation system) . .4-11, 4-27
Clock set.................4-11, 4-27
C.M.V.S.S. certification label..........9-11
Cold weather driving..............5-33
Compact disc (CD) player...........4-58
CompactFlash (CF) player...........4-60
Console box...............2-41, 2-47
Control panel buttons
Brightness/contrast button.....4-16, 4-32
Enter button..............4-2, 4-16
Setting button.............4-9, 4-25
Startup screen...............4-19
Without navigation system..........4-2
Controls
Audio controls (steering wheel)......4-73Heater and air conditioner controls. . . .4-36
Rear audio controls.............4-74
Rear seat air conditioner..........4-38
Coolant
Capacities and recommended
fuel/lubricants.................9-2
Changing engine coolant..........8-8
Checking engine coolant level........8-7
Engine coolant temperature gauge.....2-6
Corrosion protection...............7-5
Cruise control..................5-18
Cup holders...................2-45
Curtain side-impact and rollover air bag . . .1-61
D
Daytime running light system
(Canada only)..................2-34
Defroster switch
Rear window and outside mirror defroster
switch....................2-32
Digital video disc DVD.............4-75
Dimensions and weights.............9-9
Dimmer switch for instrument panel......2-35
Display controls
(see control panel buttons)........4-2, 4-16
Distance to empty.............4-5, 4-21
Door locks....................3-4
Drive belt....................8-15
Drive positioner, Automatic...........3-32
Driving
Cold weather driving............5-33
Driving with automatic transmission. . . .5-14
Precautions when starting and driving . . .5-2E
Economy - fuel.................5-20
Emission control information label.......9-11
Emission control system warranty.......9-30
Engine
Before starting the engine.........5-12
Block heater.................5-35
Capacities and recommended
fuel/lubricants.................9-2
Changing engine coolant..........8-8
Changing engine oil.............8-9
Changing engine oil filter..........8-10
Checking engine coolant level........8-7
Checking engine oil level..........8-8
Engine compartment check locations. . . .8-6
Engine coolant temperature gauge.....2-6
Engine cooling system............8-7
Engine oil...................8-8
Engine oil and oil filter recommendation . .9-6
Engine oil viscosity..............9-7
Engine serial number............9-11
Engine specifications.............9-8
Starting the engine.............5-12
Engine oil pressure gauge............2-8
Engine oil pressure low/engine coolant
temperature high warning light.........2-15
Enter button................4-2, 4-16
Event data recorders..............9-32
Exhaust gas (Carbon monoxide)........5-2
Eyeglass case..................2-43
10-2
ZREVIEW COPYÐ2009 Armada(wzw)
Owners ManualÐUSA_English(nna)
02/26/08Ðdebbie
X
ProCarManuals.com