manual transmission NISSAN ARMADA 2012 1.G Owners Manual
[x] Cancel search | Manufacturer: NISSAN, Model Year: 2012, Model line: ARMADA, Model: NISSAN ARMADA 2012 1.GPages: 489, PDF Size: 5.28 MB
Page 118 of 489
Cruise main switch indicator
This indicator illuminates when the cruise control
main switch is pushed. The indicator turns off
when the main switch is pushed again. When the
cruise main switch indicator illuminates, the
cruise control system is operational.
Cruise set switch indicator light
The light comes on while the vehicle speed is
controlled by the cruise control system. If the light
blinks while the engine is running, it may indicate
the cruise control system is not functioning prop-
erly. Have the system checked by a NISSAN
dealer.
NISSAN Intelligent Key™ battery dis-
charge indicator (NISSAN Intelligent Key™
model)
This indicator illuminates when the Intelligent Key
battery is running out of power.
If this indicator illuminates, replace the battery
with a new one. See “Battery replacement” in the
“Maintenance and do-it-yourself” section.
Transfer 4LO position indicator (
model)
This indicator illuminates when the 4WD shift
switch is set in the 4LO position with the ignition
switch placed in the ON position.If the 4WD shift switch is set in the 4LO position
and the indicator blinks, stop the vehicle, drive
slowly forward and the indicator will turn on.
When you shift between 4H and 4LO, stop the
vehicle, move the shift selector to the N (Neutral)
position, then depress and turn the 4WD shift
switch to 4LO or 4H.
The transfer case may be damaged if you shift the
switch while driving.
You cannot move the transfer 4WD shift switch
between 4H and 4LO unless you have first
stopped the vehicle and moved the shift selector
to N (Neutral) . Make sure the transfer 4LO posi-
tion indicator illuminates when you shift the 4WD
shift switch to 4LO.
The indicator may blink while shifting from
one drive mode to the other.
4WD shift indicator (
model)
While the engine is running, the 4WD shift indi-
cator will illuminate the position selected by the
4WD shift switch.
The 4WD shift indicator may blink while
shifting from one drive mode to the other.
Automatic transmission position indicator
When the ignition switch is placed in the ON
position, this indicator shows the shift selector position. See “Driving the vehicle” in the “Starting
and driving” section of this manual.
Loose fuel cap warning
This warning appears when the fuel-filler cap is
not tightened correctly after the vehicle has been
refueled. See “Fuel-filler cap” in the “Pre-driving
checks and adjustments” section.
Check tire pressure warning
This warning appears when the low tire pressure
warning light in the meter illuminates and low tire
pressure is detected. If this warning appears,
stop the vehicle and adjust the tire pressure to
the recommended COLD tire pressure shown on
the Tire and Loading Information label. See “Low
tire pressure warning light” earlier in this section
and “Tire Pressure Monitoring System (TPMS)”
in the “Starting and driving” section.
Instruments and controls2-25
Page 345 of 489
●Do not drive across steep slopes. In-
stead drive either straight up or straight
down the slopes. Off-road vehicles can
tip over sideways much more easily
than they can forward or backward.
● Many hills are too steep for any vehicle.
If you drive up them, you may stall. If
you drive down them, you may not be
able to control your speed. If you drive
across them, you may roll over.
● Do not shift gears while driving on
downhill grades as this could cause
loss of control of the vehicle.
● Stay alert when driving to the top of a
hill. At the top there could be a drop-off
or other hazard that could cause an
accident.
● If your engine stalls or you cannot make
it to the top of a steep hill, never at-
tempt to turn around. Your vehicle
could tip or roll over. Always back
straight down in R (Reverse) gear and
apply brakes to control your speed.
● Heavy braking going down a hill could
cause your brakes to overheat and fade,
resulting in loss of control and an acci-
dent. Apply brakes lightly and use a low
gear to control your speed. ●
Unsecured cargo can be thrown around
when driving over rough terrain. Prop-
erly secure all cargo so it will not be
thrown forward and cause injury to you
or your passengers.
● To avoid raising the center of gravity
excessively, do not exceed the rated
capacity of the roof rack and evenly
distribute the load. Secure heavy loads
in the cargo area as far forward and as
low as possible. Do not equip the ve-
hicle with tires larger than specified in
this manual. This could cause your ve-
hicle to roll over.
● Do not grip the inside or spokes of the
steering wheel when driving off-road.
The steering wheel could move sud-
denly and injure your hands. Instead
drive with your fingers and thumbs on
the outside of the rim.
● Before operating the vehicle, ensure
that the driver and all passengers have
their seat belts fastened.
● Lower your speed when encountering
strong crosswinds. With a higher center
of gravity, your NISSAN is more af-
fected by strong side winds. Slower
speeds ensure better vehicle control. ●
Do not drive beyond the performance
capability of the tires, even with 4WD
engaged.
● For 4WD equipped vehicles, do not at-
tempt to raise two wheels off the
ground and shift the transmission to
any drive or reverse position with the
engine running. Doing so may result in
drivetrain damage or unexpected ve-
hicle movement which could result in
serious vehicle damage or personal
injury.
● Do not attempt to test a 4WD equipped
vehicle on a 2-wheel dynamometer
(such as the dynamometers used by
some states for emissions testing) , or
similar equipment even if the other two
wheels are raised off the ground. Make
sure you inform test facility personnel
that your vehicle is equipped with 4WD
before it is placed on a dynamometer.
Using the wrong test equipment may
result in drivetrain damage or unex-
pected vehicle movement which could
result in serious vehicle damage or per-
sonal injury.
● Accelerating quickly, sharp steering
maneuvers or sudden braking may
cause loss of control.
5-8Starting and driving
Page 351 of 489
●If the engine is very hard to start because
it is flooded, depress the accelerator
pedal all the way to the floor and hold it.
Crank the engine for 5 to 6 seconds. After
cranking the engine, release the accel-
erator pedal. Crank the engine with your
foot off the accelerator pedal by turn-
ing the ignition key to START. Release the
key when the engine starts. If the engine
starts, but fails to run, repeat the above
procedure.
CAUTION
Do not operate the starter for more than
15 seconds at a time. If the engine does
not start, turn the key off and wait 10
seconds before cranking again, otherwise
the starter could be damaged.
4. Allow the engine to idle for at least 30 sec- onds after starting. Do not race the engine
while warming it up. Drive at moderate
speed for a short distance first, especially in
cold weather.
In cold weather, keep the engine running for
a minimum of 2–3 minutes before shutting it
off. Starting and stopping the engine over a
short period of time may make the vehicle
more difficult to start.
ENGINE PROTECTION MODE
The engine has an engine protection mode to
reduce the chance of damage if the coolant tem-
perature becomes too high (for example, when
climbing steep grades in high temperature with
heavy loads, such as when towing a trailer) .
When the engine temperature reaches a certain
level: ● The engine coolant temperature gauge will
move toward the H position.
● Engine power may be reduced.
● The air conditioning cooling function may be
automatically turned OFF for a short time
(the blower will continue to operate) .
Engine power and, under some conditions, ve-
hicle speed will decrease. Vehicle speed can be
controlled with the accelerator pedal, but the
vehicle may not accelerate at the desired speed.
The transmission will downshift or upshift as it
reaches prescribed shift points. You can also
shift manually.
As driving conditions change and engine coolant
temperature is reduced, vehicle speed can be
increased using the accelerator pedal, and air
conditioning cooling function will automatically
be turned back ON. If:
1. The engine coolant temperature is not re- duced.
2. The air conditioning cooling function does not turn back ON.
3. The engine oil pressure warning/engine coolant temperature high indicator
il-
luminates, this may indicate a malfunction.
Move the vehicle off the road in a safe area
and allow the engine to cool. If after check-
ing the oil and coolant, the
remains
on, do not continue to drive and call a
NISSAN dealer.
The check engine light may also come ON. If
only it remains on, you do not need to have your
vehicle towed, but have it inspected soon by a
NISSAN dealer. See “Check engine light” in the
“Instruments and controls ” section of this
manual.
DRIVING THE VEHICLE
5-14Starting and driving
Page 352 of 489
WARNING
Overheating can result in reduced engine
power and vehicle speed. The reduced
speed may be lower than other traffic,
which could increase the chance of a col-
lision. Be especially careful when driving.
If the vehicle cannot maintain a safe driv-
ing speed, pull to the side of the road in a
safe area. Allow the engine to cool and
return to normal operation. See “If your
vehicle overheats” in the “In case of emer-
gency” section of this manual.
CAUTION
Running the engine with the engine oil
pressure warning light on could cause se-
rious damage to the engine almost imme-
diately. Such damage is not covered by
warranty. Turn off the engine as soon as it
is safe to do so.
AUTOMATIC TRANSMISSION
WARNING
●Do not depress the accelerator pedal
while shifting from P (Park) or N (Neu-
tral) to R (Reverse) , or L (Low) . Always
depress the brake pedal until shifting is
completed. Failure to do so could cause
you to lose control and have an
accident.
● Cold engine idle speed is high, so use
caution when shifting into a forward or
reverse gear before the engine has
warmed up.
● Never shift to P (Park) or R (Reverse)
while the vehicle is moving. This could
cause an accident.
● Except in an emergency, do not shift to
the N (Neutral) position while driving.
Doing so can cause a loss of engine
braking which may result in a collision,
serious personal injury or death. In ad-
dition, coasting with the transmission
in the N (Neutral) position may cause
serious damage to the transmission.
CAUTION
● When stopping the vehicle on an uphill
grade, do not hold the vehicle by de-
pressing the accelerator pedal. The foot
brake should be used for this purpose.
● Do not downshift abruptly on slippery
roads. This may cause a loss of control.
The automatic transmission in your vehicle is
electronically controlled to produce maximum
power and smooth operation.
The recommended operating procedures for this
transmission are shown on the following pages.
Follow these procedures for maximum vehicle
performance and driving enjoyment.
Starting the vehicle
1. After starting the engine, fully depress the foot brake pedal before moving the shift
selector out of the P (Park) position.
2. Keep the foot brake pedal depressed and move the shift selector into a driving gear.
3. Release the foot brake, then gradually start the vehicle in motion.
Starting and driving5-15
Page 404 of 489
The engine cooling system is filled at the factory
with a pre-diluted mixture of 50% Genuine
NISSAN Long Life Antifreeze/Coolant (blue) and
50% water to provide year-round anti-freeze and
coolant protection. The antifreeze solution con-
tains rust and corrosion inhibitors. Additional en-
gine cooling system additives are not necessary.
WARNING
●Never remove the radiator or coolant
reservoir cap when the engine is hot.
Wait until the engine and radiator cool
down. Serious burns could be caused
by high pressure fluid escaping from
the radiator. See precautions in “If your
vehicle overheats” found in the “In case
of emergency” section of this manual.
● The radiator is equipped with a pres-
sure type radiator cap. To prevent en-
gine damage, use only a genuine
NISSAN radiator cap.
CAUTION
● Never use any cooling system additives
such as radiator sealer. Additives may
clog the cooling system and cause
damage to the engine, transmission
and/or cooling system.
● When adding or replacing coolant, be
sure to use only Genuine NISSAN Long
Life Antifreeze/Coolant (blue) or
equivalent. Genuine NISSAN Long Life
Antifreeze/Coolant (blue) is pre-diluted
to provide antifreeze protection to -34°
F (-37° C) . If additional freeze protec-
tion is needed due to weather where
you operate your vehicle, add Genuine
NISSAN Long Life Antifreeze/Coolant
(blue) concentrate following the direc-
tions on the container. If an equivalent
coolant other than Genuine NISSAN
Long Life Antifreeze/Coolant (blue) is
used, follow the coolant manufacturer’s
instructions to maintain minimum anti-
freeze protection to -34° F (-37° C) . The
use of other types of coolant solutions
other than Genuine NISSAN Long Life
Antifreeze/Coolant (blue) or equivalent
may damage the engine cooling
system. ●
The life expectancy of the factory-fill
coolant is 105,000 miles (168,000 km) or
7 years. Mixing any other type of cool-
ant other than Genuine NISSAN Long
Life Antifreeze/Coolant (blue) , includ-
ing Genuine NISSAN Long Life
Antifreeze/Coolant (green) , or the use
of non-distilled water will reduce the
life expectancy of the factory-fill cool-
ant. Refer to the Nissan Service and
Maintenance Guide for more details.
ENGINE COOLING SYSTEM
Maintenance and do-it-yourself8-7
Page 442 of 489
Replacing wheels and tires
When replacing a tire, use the same size, tread
design, speed rating and load carrying capacity
as originally equipped. Recommended types and
sizes are shown in “Wheels and tires” in the
“Technical and consumer information” section of
this manual.
WARNING
●The use of tires other than those recom-
mended or the mixed use of tires of
different brands, construction (bias,
bias-belted or radial) , or tread patterns
can adversely affect the ride, braking,
handling, VDC system, ground clear-
ance, body-to-tire clearance, tire chain
clearance, speedometer calibration,
headlight aim and bumper height.
Some of these effects may lead to acci-
dents and could result in serious per-
sonal injury.
● If your vehicle was originally equipped
with 4 tires that were the same size and
you are only replacing 2 of the 4 tires,
install the new tires on the rear axle.
Placing new tires on the front axle may
cause loss of vehicle control in some
driving conditions and cause an acci-
dent and personal injury. ●
If the wheels are changed for any rea-
son, always replace with wheels which
have the same off-set dimension.
Wheels of a different off-set could
cause premature tire wear, degrade ve-
hicle handling characteristics, affect
the VDC system and/or interference
with the brake discs/drums. Such inter-
ference can lead to decreased braking
efficiency and/or early brake pad/shoe
wear. Refer to “Wheels and tires” in the
“Technical and consumer information”
section of this manual for wheel off-set
dimensions.
● When a spare tire is mounted or a wheel
is replaced, tire pressure will not be
indicated, the TPMS will not function
and the low tire pressure warning light
will flash for approximately 1 minute.
The light will remain on after 1 minute.
Contact your NISSAN dealer as soon as
possible for tire replacement and/or
system resetting.
● Replacing tires with those not originally
specified by NISSAN could affect the
proper operation of the TPMS. ●
Do not install a damaged or deformed
wheel or tire even if it has been re-
paired. Such wheels or tires could have
structural damage and could fail with-
out warning.
● The use of retread tires is not
recommended.
● For additional information regarding
tires, refer to “Important Tire Safety In-
formation” (US) or “Tire Safety Informa-
tion” (Canada) in the Warranty Informa-
tion Booklet.
Four-wheel drive models
CAUTION
Always use tires of the same type, size,
brand, construction (bias, bias-belted or
radial) , and tread pattern on all four
wheels. Failure to do so may result in a
circumference difference between tires
on the front and rear axles which will
cause excessive tire wear and may dam-
age the transmission, transfer case and
differential gears.
Maintenance and do-it-yourself8-45
Page 472 of 489
Trailer towing tips
In order to gain skill and an understanding of the
vehicle’s behavior, you should practice turning,
stopping and backing up in an area which is free
from traffic. Steering stability and braking perfor-
mance will be somewhat different than under
normal driving conditions.● Always secure items in the trailer to prevent
load shift while driving.
● Lock the trailer hitch coupler with a pin or
lock to prevent the coupler from inadver-
tently becoming unlatched.
● Avoid abrupt starts, acceleration or stops.
● Avoid sharp turns or lane changes.
● Always drive your vehicle at a moderate
speed.
● When backing up, hold the bottom of the
steering wheel with one hand. Move your
hand in the direction in which you want the
trailer to go. Make small corrections and
back up slowly. If possible, have someone
guide you when you are backing up.
Always block the wheels on both vehicle and
trailer when parking. Parking on a slope is not
recommended; however, if you must do so:
CAUTION
If you move the shift selector to the P
(Park) position before blocking the
wheels and applying the parking brake,
transmission damage could occur.
1. Apply and hold the brake pedal.
2. Have someone place blocks on the downhill side of the vehicle and trailer wheels.
3. After the wheel blocks are in place, slowly release the brake pedal until the blocks ab-
sorb the vehicle load.
4. Apply the parking brake.
5. Shift the transmission into P (Park) .
6. Make sure the
indicator light (if so
equipped) indicates the transfer case is in
4H, 4L, or 2H and that the ATP light is off. If
the
indicator light is flashing, or the
ATP light is ON, make sure the transmission
is in P (Park) (A/T) and turn the 4WD switch
to 2WD or 4H. See “Automatic transmission
park warning light” in the “Instruments and
controls” section and “Using four wheel
drive (4WD)” in the “Starting and driving”
section.
7. Turn off the engine. To drive away:
1. Start the vehicle.
2. Apply and hold the brake pedal.
3. Shift the transmission into gear.
4. Release the parking brake.
5. Drive slowly until the vehicle and trailer are clear from the blocks.
6. Apply and hold the brake pedal.
7. Have someone retrieve and store the blocks. ● While going downhill, the weight of the
trailer pushing on the tow vehicle may de-
crease overall stability. Therefore, to main-
tain adequate control, reduce your speed
and shift to a lower gear. Avoid long or
repeated use of the brakes when descend-
ing a hill, as this reduces their effectiveness
and could cause overheating. Shifting to a
lower gear instead provides “engine brak-
ing” and reduces the need to brake as fre-
quently.
● If the engine coolant temperature rises to a
high temperature, refer to “If your vehicle
overheats” in the “In case of emergency”
section of this owner’s manual.
● Trailer towing requires more fuel than normal
circumstances.
Technical and consumer information9-29
Page 473 of 489
●Avoid towing a trailer for your vehicle’s first
500 miles (805 km) .
● For the first 500 miles (805 km) that you do
tow, do not drive over 50 MPH (80 km/h) .
● Have your vehicle serviced more often than
at intervals specified in the recommended
Maintenance Schedule in the “NISSAN Ser-
vice and Maintenance Guide”.
● When making a turn, your trailer wheels will
be closer to the inside of the turn than your
vehicle wheels. To compensate for this,
make a larger than normal turning radius
during the turn.
● Crosswinds and rough roads will adversely
affect vehicle/trailer handling, possibly caus-
ing vehicle sway. When being passed by
larger vehicles, be prepared for possible
changes in crosswinds that could affect ve-
hicle handling.
Do the following if the trailer begins to sway: 1. Take your foot off the accelerator pedal to allow the vehicle to coast and steer as
straight ahead as the road conditions allow.
This combination will help stabilize the ve-
hicle
– Do not correct trailer sway by steering or applying the brakes. 2. When the trailer sway stops, gently apply the
brakes and pull to the side of the road in a
safe area.
3. Try to rearrange the trailer load so it is bal- anced as described earlier in this section.
● Be careful when passing other vehicles.
Passing while towing a trailer requires con-
siderably more distance than normal pass-
ing. Remember, the length of the trailer must
also pass the other vehicle before you can
safely change lanes.
● Use the Tow Mode or downshift the trans-
mission to a lower gear for engine braking
when driving down steep or long hills. This
will help slow the vehicle without applying
the brakes.
● Avoid holding the brake pedal down too long
or too frequently. This could cause the
brakes to overheat, resulting in reduced
braking efficiency.
● Increase your following distance to allow for
greater stopping distances while towing a
trailer. Anticipate stops and brake gradually.
● NISSAN recommends that the cruise con-
trol not be used while towing a trailer. ●
Some states or provinces have specific
regulations and speed limits for vehicles that
are towing trailers. Obey the local speed
limits.
● Check your hitch, trailer wiring harness con-
nections, and trailer wheel lug nuts after 50
miles (80 km) of travel and at every break.
● When launching a boat, don’t allow the wa-
ter level to go over the exhaust tail pipe or
rear bumper.
● Make sure you disconnect the trailer lights
before backing the trailer into the water or
the trailer lights may burn out.
When towing a trailer, final drive gear oil
should be replaced and transmission
oil/fluid should be changed more fre-
quently. For additional information, see the
“Maintenance and do-it-yourself” section
earlier in this manual.
Tow mode
Using tow mode is recommended when pulling a
heavy trailer or hauling a heavy load. Press the
TOW MODE switch to activate tow mode. The
indicator light on the TOW MODE switch illumi-
nates when tow mode is selected. Press the
TOW MODE switch again to turn tow mode off.
Tow mode is automatically cancelled when the
ignition switch is turned OFF.
9-30Technical and consumer information
Page 474 of 489
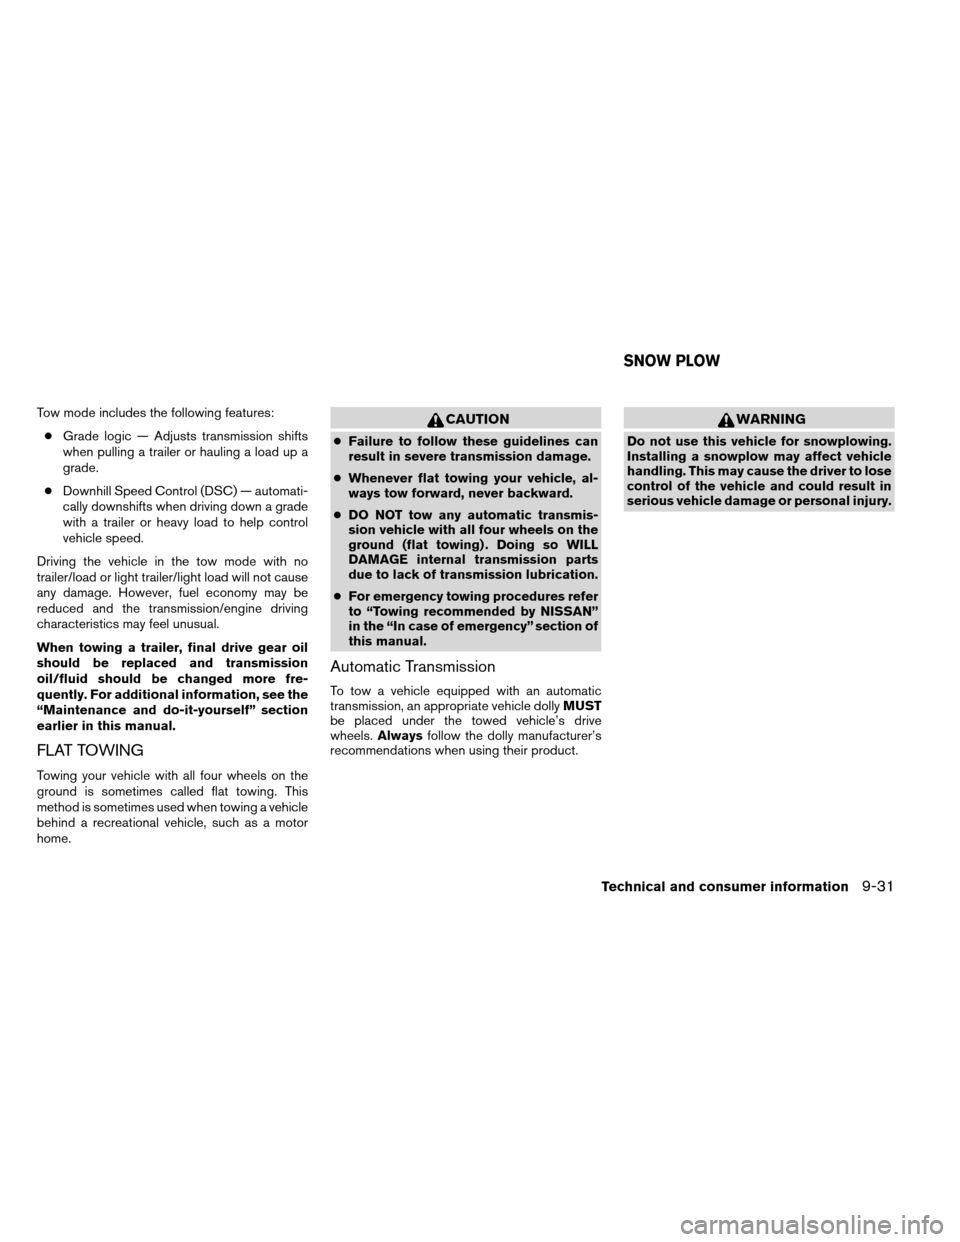
Tow mode includes the following features:● Grade logic — Adjusts transmission shifts
when pulling a trailer or hauling a load up a
grade.
● Downhill Speed Control (DSC) — automati-
cally downshifts when driving down a grade
with a trailer or heavy load to help control
vehicle speed.
Driving the vehicle in the tow mode with no
trailer/load or light trailer/light load will not cause
any damage. However, fuel economy may be
reduced and the transmission/engine driving
characteristics may feel unusual.
When towing a trailer, final drive gear oil
should be replaced and transmission
oil/fluid should be changed more fre-
quently. For additional information, see the
“Maintenance and do-it-yourself” section
earlier in this manual.
FLAT TOWING
Towing your vehicle with all four wheels on the
ground is sometimes called flat towing. This
method is sometimes used when towing a vehicle
behind a recreational vehicle, such as a motor
home.
CAUTION
● Failure to follow these guidelines can
result in severe transmission damage.
● Whenever flat towing your vehicle, al-
ways tow forward, never backward.
● DO NOT tow any automatic transmis-
sion vehicle with all four wheels on the
ground (flat towing) . Doing so WILL
DAMAGE internal transmission parts
due to lack of transmission lubrication.
● For emergency towing procedures refer
to “Towing recommended by NISSAN”
in the “In case of emergency” section of
this manual.
Automatic Transmission
To tow a vehicle equipped with an automatic
transmission, an appropriate vehicle dolly MUST
be placed under the towed vehicle’s drive
wheels. Always follow the dolly manufacturer’s
recommendations when using their product.
WARNING
Do not use this vehicle for snowplowing.
Installing a snowplow may affect vehicle
handling. This may cause the driver to lose
control of the vehicle and could result in
serious vehicle damage or personal injury.
SNOW PLOW
Technical and consumer information9-31
Page 485 of 489
S
Safety Child safety rear door lock ..........3-7
Child seat belts .....1-36, 1-44, 1-49, 1-54
Reporting safety defects (US only) .....9-33
Screen (See NISSAN mobile entertainment
system) ......................4-79
Seat adjustment Front manual seat adjustment ........1-2
Front power seat adjustment .........1-4
Second row bench seats ...........1-6
Second row captain’s chair ..........1-5
Third row power folding seats .......1-23
Seatback pockets ................2-43
Seat belt Child safety ..................1-35
Infants and small children ..........1-35
Injured Person ................1-28
Larger children ................1-36
Precautions on seat belt usage .......1-25
Pregnant women ...............1-28
Pre-tensioner seat belt system .......1-70
Rear center seat belt ............1-31
Seat belt extenders .............1-34
Seat belt maintenance ............1-34
Seat belts ...................1-25
Shoulder belt height adjustment ......1-33
Three-point type with retractor .......1-28
Seat belt warning light ..............2-18
Seats Adjustment ...................1-2
Automatic drive positioner ..........3-36
Front seats ...................1-2
Heated seats .................2-35 Manual front seat adjustment
.........1-2
Second row captain’s chair adjustment .....1-5
Security indicator light ..............2-20
Security system (NISSAN vehicle immobilizer
system) , engine start ........2-27, 3-4, 5-13
Self-adjusting brakes ..............8-23
Service
manual order form ...........9-35
Servicing air conditioner .............4-39
Setting button ...............4-9, 4-25
Shifting Automatic transmission ...........5-16
Shift lock release .................5-18
Shoulder belt height adjustment ........1-33
Side air bag system (See supplemental side air
bag, curtain and rollover air bag systems) . . .1-69
Sonar Front system .................5-36
Rear system .................5-35
Spark plug replacement .............8-17
Speedometer ...................2-5
SRS warning label ................1-71
Starting Before starting the engine ..........5-13
Jump starting .................6-8
Precautions when starting and driving . . . .5-2
Push starting .................6-10
Starting the engine .............5-13
Startup screen ..................4-19
Steering Heated steering wheel ...........2-36
Power steering fluid .............8-12
Power steering system ...........5-31
Tilting steering wheel ............3-30
Steering wheel audio control switch ......4-74
Stop light .....................8-32
Storage ......................2-40 Overhead storage compartment
......2-43
Storage bin ................2-44, 2-48
Storage tray ...................2-40
Sunglasses case .................2-42
Sunglasses holder ................2-42
Sunroof ......................2-55
Sunroof (see Moonroof) .............2-55
Sun visors ....................3-31
Supplemental
air bag warning labels ......1-71
Supplemental air bag warning light . . .1-72, 2-18
Supplemental front impact air bag system . . .1-64
Supplemental restraint system Information and warning labels .......1-71
Precautions on supplemental restraint
system ....................1-57
Supplemental restraint system
(Supplemental air bag system) .........1-57
Switch Autolight switch ...............2-31
Automatic power window switch ......2-53
Fog light switch ...............2-34
Hazard warning flasher switch .......2-34
Headlight and turn signal switch ......2-30
Headlight control switch ..........2-30
Ignition switch .................5-9
Power door lock switch ............3-6
Rear sonar system off switch ........2-37
Rear window and outside mirror defroster
switch .....................2-30
Rear window wiper and washer
switches ...................2-29
Turn signal switch ..............2-33
Vehicle dynamic control (VDC) off
switch .....................2-37
Windshield wiper and washer switch . . .2-28
10-6