NISSAN ARMADA 2014 1.G 08IT Navigation Manual
Manufacturer: NISSAN, Model Year: 2014, Model line: ARMADA, Model: NISSAN ARMADA 2014 1.GPages: 252, PDF Size: 2.86 MB
Page 81 of 252
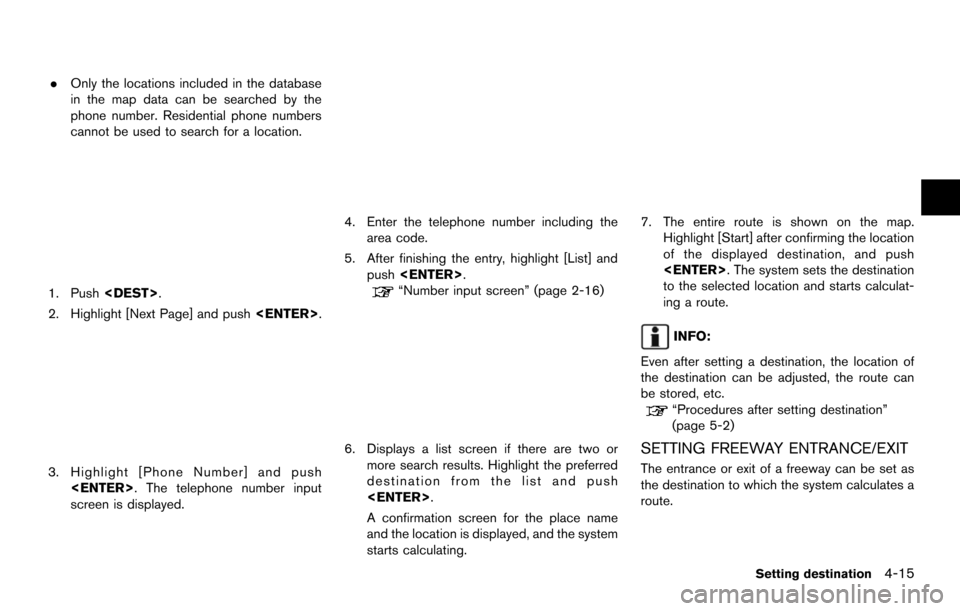
.Only the locations included in the database
in the map data can be searched by the
phone number. Residential phone numbers
cannot be used to search for a location.
1. Push
2. Highlight [Next Page] and push
3. Highlight [Phone Number] and push
screen is displayed.
4. Enter the telephone number including thearea code.
5. After finishing the entry, highlight [List] and push
“Number input screen” (page 2-16)
6. Displays a list screen if there are two or
more search results. Highlight the preferred
destination from the list and push
A confirmation screen for the place name
and the location is displayed, and the system
starts calculating.
7. The entire route is shown on the map.Highlight [Start] after confirming the location
of the displayed destination, and push
to the selected location and starts calculat-
ing a route.
INFO:
Even after setting a destination, the location of
the destination can be adjusted, the route can
be stored, etc.
“Procedures after setting destination”
(page 5-2)
SETTING FREEWAY ENTRANCE/EXIT
The entrance or exit of a freeway can be set as
the destination to which the system calculates a
route.
Setting destination4-15
Page 82 of 252
![NISSAN ARMADA 2014 1.G 08IT Navigation Manual 4-16Setting destination
1. Push<DEST>.
2. Highlight [Next Page] and push <ENTER>.
3. Highlight [Freeway Entrance/Exit] and push
<ENTER>. A character input screen is
displayed.
4. Enter the name of the NISSAN ARMADA 2014 1.G 08IT Navigation Manual 4-16Setting destination
1. Push<DEST>.
2. Highlight [Next Page] and push <ENTER>.
3. Highlight [Freeway Entrance/Exit] and push
<ENTER>. A character input screen is
displayed.
4. Enter the name of the](/img/5/348/w960_348-81.png)
4-16Setting destination
1. Push
2. Highlight [Next Page] and push
3. Highlight [Freeway Entrance/Exit] and push
displayed.
4. Enter the name of the freeway.
5. After finishing the entry, highlight [List] and
push
6. Highlight the freeway of the destination from
the list, and push
7. Highlight [Entrance] or [Exit] and push
8. Select the preferred destination from the list.The position of the selected location is
displayed in the preview on the right side
of the screen. Then, push
Page 83 of 252
![NISSAN ARMADA 2014 1.G 08IT Navigation Manual INFO:
By selecting [By Distance], the list can be
sorted by the nearest distance.
9. The entire route is shown on the map. Highlight [Start] after confirming the location
of the displayed destination, NISSAN ARMADA 2014 1.G 08IT Navigation Manual INFO:
By selecting [By Distance], the list can be
sorted by the nearest distance.
9. The entire route is shown on the map. Highlight [Start] after confirming the location
of the displayed destination,](/img/5/348/w960_348-82.png)
INFO:
By selecting [By Distance], the list can be
sorted by the nearest distance.
9. The entire route is shown on the map. Highlight [Start] after confirming the location
of the displayed destination, and push
to the selected location and starts calculat-
ing a route.
INFO:
Even after setting a destination, the location of
the destination can be adjusted, the route can
be stored, etc.
“Procedures after setting destination”
(page 5-2)
SETTING INTERSECTION
An intersection of any two streets can be set as
the destination to which the system calculates a
route.
1. Push
2. Highlight [Next Page] and push
3. Highlight [Intersection] and push
displayed.
4. Enter the name of the 1st street.
After finishing the entry, highlight [List] and
push
Setting destination4-17
Page 84 of 252
4-18Setting destination
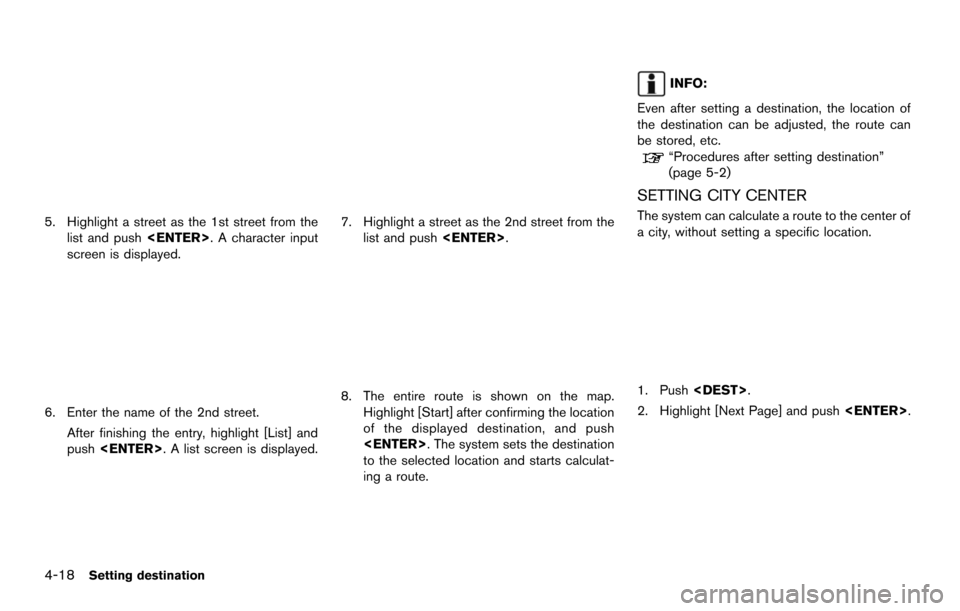
5. Highlight a street as the 1st street from thelist and push
screen is displayed.
6. Enter the name of the 2nd street.
After finishing the entry, highlight [List] and
push
7. Highlight a street as the 2nd street from the
list and push
8. The entire route is shown on the map.
Highlight [Start] after confirming the location
of the displayed destination, and push
to the selected location and starts calculat-
ing a route.
INFO:
Even after setting a destination, the location of
the destination can be adjusted, the route can
be stored, etc.
“Procedures after setting destination”
(page 5-2)
SETTING CITY CENTER
The system can calculate a route to the center of
a city, without setting a specific location.
1. Push
2. Highlight [Next Page] and push
Page 85 of 252
![NISSAN ARMADA 2014 1.G 08IT Navigation Manual 3. Highlight [City Center] and push<ENTER>. A character input screen is
displayed.
4. Enter the name of the city, highlight [List]and push <ENTER>. A list screen is
displayed.
INFO:
Highlight [Last 5 NISSAN ARMADA 2014 1.G 08IT Navigation Manual 3. Highlight [City Center] and push<ENTER>. A character input screen is
displayed.
4. Enter the name of the city, highlight [List]and push <ENTER>. A list screen is
displayed.
INFO:
Highlight [Last 5](/img/5/348/w960_348-84.png)
3. Highlight [City Center] and push
displayed.
4. Enter the name of the city, highlight [List]and push
displayed.
INFO:
Highlight [Last 5 Cities] and push
as destinations.
5. Highlight the preferred destination from the list and push
selected location is displayed in the preview
on the right side of the screen.
INFO:
By selecting [By Distance], the list can be
sorted by the nearest distance.
6. The selected destination is displayed at the center of the map. Highlight [Start] after
confirming the location of the displayed
destination, and push
selected location and starts calculating a
route.
INFO:
Even after setting a destination, the location
of the destination can be adjusted, the route
can be stored, etc.
“Procedures after setting destination”
(page 5-2)
SETTING POINT ON MAP
A location scrolled to on the map can be set as
the destination to which the system calculates a
route.
1. Scroll the map, place the cross pointer over the preferred location, and push
Setting destination4-19
Page 86 of 252
4-20Setting destination
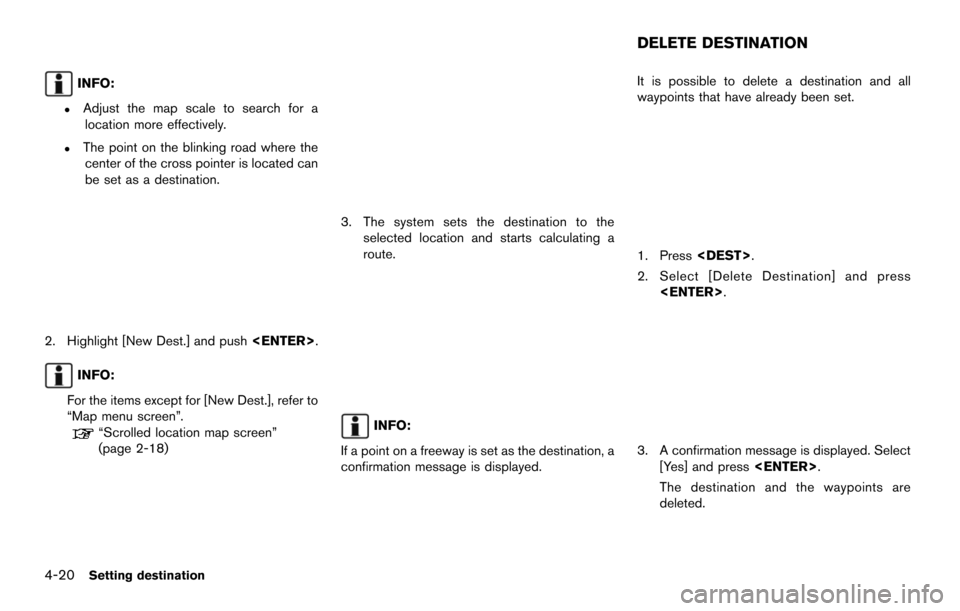
INFO:
.Adjust the map scale to search for alocation more effectively.
.The point on the blinking road where thecenter of the cross pointer is located can
be set as a destination.
2. Highlight [New Dest.] and push
INFO:
For the items except for [New Dest.], refer to
“Map menu screen”.
“Scrolled location map screen”
(page 2-18)
3. The system sets the destination to the selected location and starts calculating a
route.
INFO:
If a point on a freeway is set as the destination, a
confirmation message is displayed. It is possible to delete a destination and all
waypoints that have already been set.
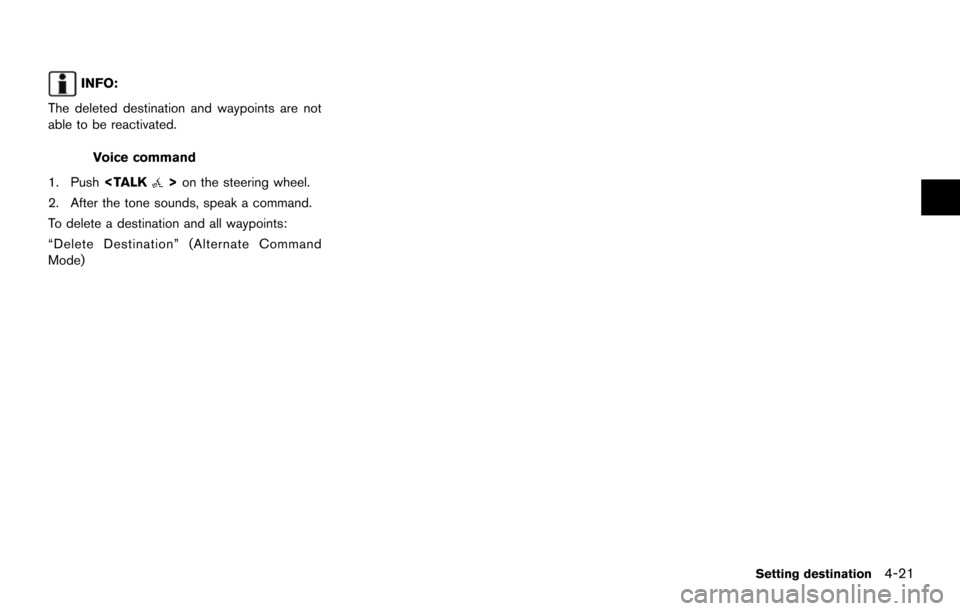
1. Press
2. Select [Delete Destination] and press
3. A confirmation message is displayed. Select
[Yes] and press
The destination and the waypoints are
deleted.
DELETE DESTINATION
Page 87 of 252
INFO:
The deleted destination and waypoints are not
able to be reactivated.
Voice command
1. Push
2. After the tone sounds, speak a command.
To delete a destination and all waypoints:
“Delete Destination” (Alternate Command
Mode)
Setting destination4-21
Page 88 of 252

4-22Setting destination
MEMO
Page 89 of 252
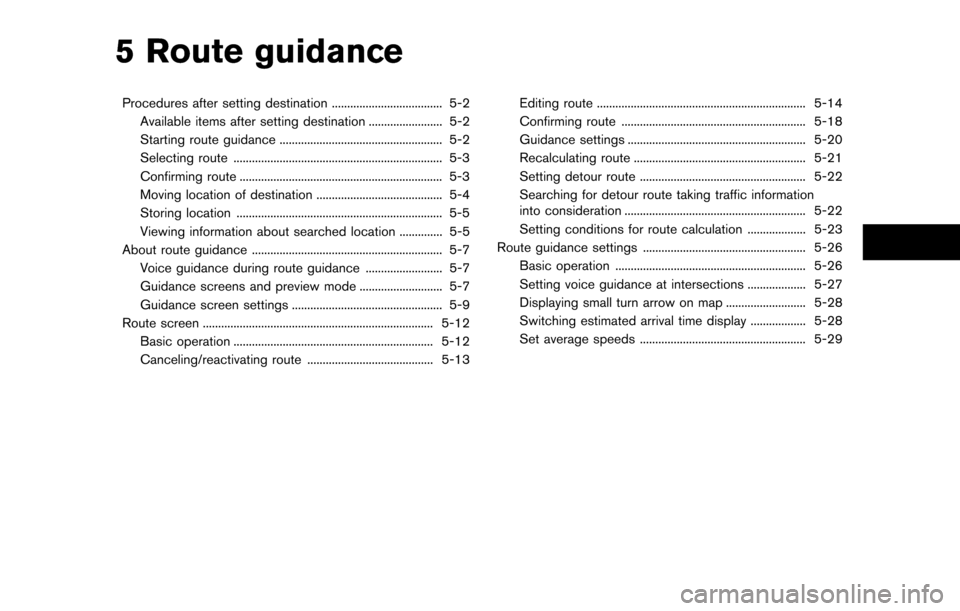
5 Route guidance
Procedures after setting destination .................................... 5-2Available items after setting destination ........................ 5-2
Starting route guidance ..................................................... 5-2
Selecting route .................................................................... 5-3
Confirming route .................................................................. 5-3
Moving location of destination ......................................... 5-4
Storing location ................................................................... 5-5
Viewing information about searched location .............. 5-5
About route guidance .............................................................. 5-7 Voice guidance during route guidance ......................... 5-7
Guidance screens and preview mode ........................... 5-7
Guidance screen settings ................................................. 5-9
Route screen ........................................................................\
... 5-12 Basic operation ................................................................. 5-12
Canceling/reactivating route ......................................... 5-13 Editing route .................................................................... 5-14
Confirming route ............................................................ 5-18
Guidance settings .......................................................... 5-20
Recalculating route ........................................................ 5-21
Setting detour route ...................................................... 5-22
Searching for detour route taking traffic information
into consideration ........................................................... 5-22
Setting conditions for route calculation ................... 5-23
Route guidance settings ..................................................... 5-26 Basic operation .............................................................. 5-26
Setting voice guidance at intersections ................... 5-27
Displaying small turn arrow on map .......................... 5-28
Switching estimated arrival time display .................. 5-28
Set average speeds ...................................................... 5-29
Page 90 of 252
![NISSAN ARMADA 2014 1.G 08IT Navigation Manual 5-2Route guidance
After performing a route search, the route
guidance can be started immediately. Also, it is
possible to confirm or change a route.
AVAILABLE ITEMS AFTER SETTING
DESTINATION
.[Start]: NISSAN ARMADA 2014 1.G 08IT Navigation Manual 5-2Route guidance
After performing a route search, the route
guidance can be started immediately. Also, it is
possible to confirm or change a route.
AVAILABLE ITEMS AFTER SETTING
DESTINATION
.[Start]:](/img/5/348/w960_348-89.png)
5-2Route guidance
After performing a route search, the route
guidance can be started immediately. Also, it is
possible to confirm or change a route.
AVAILABLE ITEMS AFTER SETTING
DESTINATION
.[Start]:
Starts route guidance to the selected
destination.
“Starting route guidance” (page 5-2)
. [More Routes]:
Displays 3 alternative routes.
“Selecting route” (page 5-3)
. [Add/Route Info]:
Displays the route information or add a
destination or a waypoint.
“Confirming route” (page 5-3)
. [Move Location]:
Displays a map screen and allows the
location of the destination to be adjusted.
“Moving location of destination”
(page 5-4)
. [Store Location]:
Stores the location in the Address Book.
“Storing location” (page 5-5)
. [Place Info]:
Displays information about the facility that is
set as the destination if it is included in the
map data.
“Viewing information about searched
location” (page 5-5)
INFO:
. If no operations are performed on the
system for several seconds, [Start] is auto-
matically selected, and the system starts
route guidance.
. When using waypoints, [More Routes] is
disabled. After the route is started, push
to change the route between each waypoint.
“Editing route” (page 5-14)
. The same screen as when [Move Location]
is selected can be displayed with the
following operations:
— Touching the map screen — Pushing the directional buttons except
for the up/down button (multi-function
controller with directional buttons)
— Pushing the slide switch except in the upward/downward direction (multi-func-
tion controller without directional but-
tons)
STARTING ROUTE GUIDANCE
1. Highlight [Start] and push
Route guidance starts.
PROCEDURES AFTER SETTING
DESTINATION