door lock NISSAN ARMADA 2019 Owner´s Manual
[x] Cancel search | Manufacturer: NISSAN, Model Year: 2019, Model line: ARMADA, Model: NISSAN ARMADA 2019Pages: 536, PDF Size: 2.56 MB
Page 11 of 536
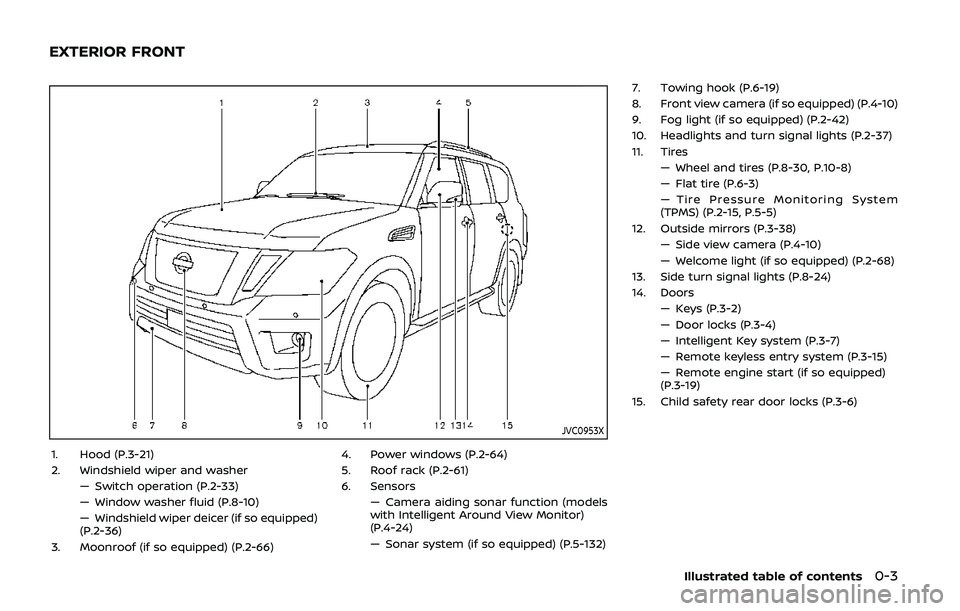
JVC0953X
1. Hood (P.3-21)
2. Windshield wiper and washer— Switch operation (P.2-33)
— Window washer fluid (P.8-10)
— Windshield wiper deicer (if so equipped)
(P.2-36)
3. Moonroof (if so equipped) (P.2-66) 4. Power windows (P.2-64)
5. Roof rack (P.2-61)
6. Sensors
— Camera aiding sonar function (models
with Intelligent Around View Monitor)
(P.4-24)
— Sonar system (if so equipped) (P.5-132) 7. Towing hook (P.6-19)
8. Front view camera (if so equipped) (P.4-10)
9. Fog light (if so equipped) (P.2-42)
10. Headlights and turn signal lights (P.2-37)
11. Tires
— Wheel and tires (P.8-30, P.10-8)
— Flat tire (P.6-3)
— Tire Pressure Monitoring System
(TPMS) (P.2-15, P.5-5)
12. Outside mirrors (P.3-38) — Side view camera (P.4-10)
— Welcome light (if so equipped) (P.2-68)
13. Side turn signal lights (P.8-24)
14. Doors — Keys (P.3-2)
— Door locks (P.3-4)
— Intelligent Key system (P.3-7)
— Remote keyless entry system (P.3-15)
— Remote engine start (if so equipped)
(P.3-19)
15. Child safety rear door locks (P.3-6)
Illustrated table of contents0-3
EXTERIOR FRONT
Page 13 of 536
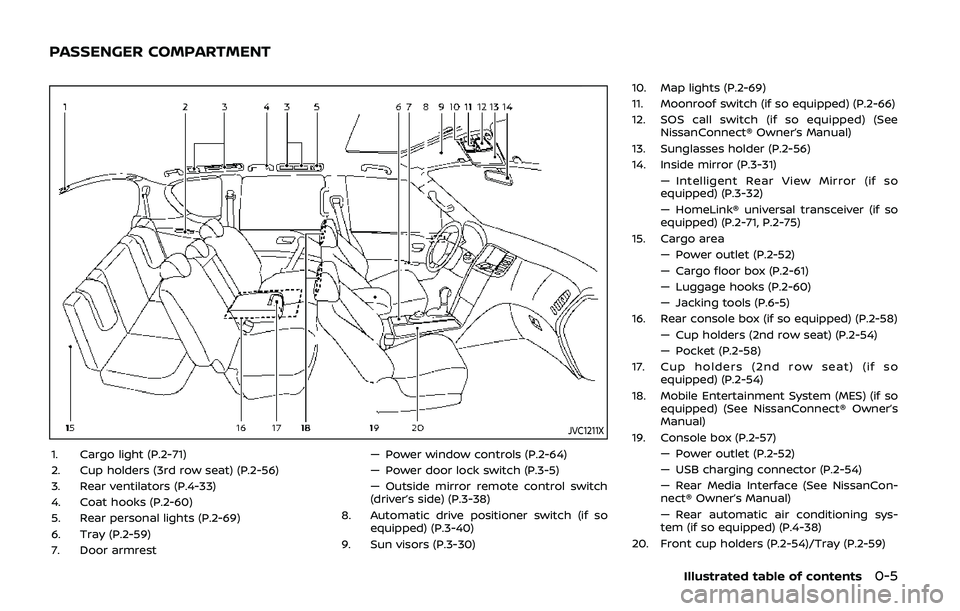
JVC1211X
1. Cargo light (P.2-71)
2. Cup holders (3rd row seat) (P.2-56)
3. Rear ventilators (P.4-33)
4. Coat hooks (P.2-60)
5. Rear personal lights (P.2-69)
6. Tray (P.2-59)
7. Door armrest— Power window controls (P.2-64)
— Power door lock switch (P.3-5)
— Outside mirror remote control switch
(driver’s side) (P.3-38)
8. Automatic drive positioner switch (if so equipped) (P.3-40)
9. Sun visors (P.3-30) 10. Map lights (P.2-69)
11. Moonroof switch (if so equipped) (P.2-66)
12. SOS call switch (if so equipped) (See
NissanConnect® Owner’s Manual)
13. Sunglasses holder (P.2-56)
14. Inside mirror (P.3-31) — Intelligent Rear View Mirror (if so
equipped) (P.3-32)
— HomeLink® universal transceiver (if so
equipped) (P.2-71, P.2-75)
15. Cargo area — Power outlet (P.2-52)
— Cargo floor box (P.2-61)
— Luggage hooks (P.2-60)
— Jacking tools (P.6-5)
16. Rear console box (if so equipped) (P.2-58) — Cup holders (2nd row seat) (P.2-54)
— Pocket (P.2-58)
17. Cup holders (2nd row seat) (if so equipped) (P.2-54)
18. Mobile Entertainment System (MES) (if so equipped) (See NissanConnect® Owner’s
Manual)
19. Console box (P.2-57) — Power outlet (P.2-52)
— USB charging connector (P.2-54)
— Rear Media Interface (See NissanCon-
nect® Owner’s Manual)
— Rear automatic air conditioning sys-
tem (if so equipped) (P.4-38)
20. Front cup holders (P.2-54)/Tray (P.2-59)
Illustrated table of contents0-5
PASSENGER COMPARTMENT
Page 105 of 536
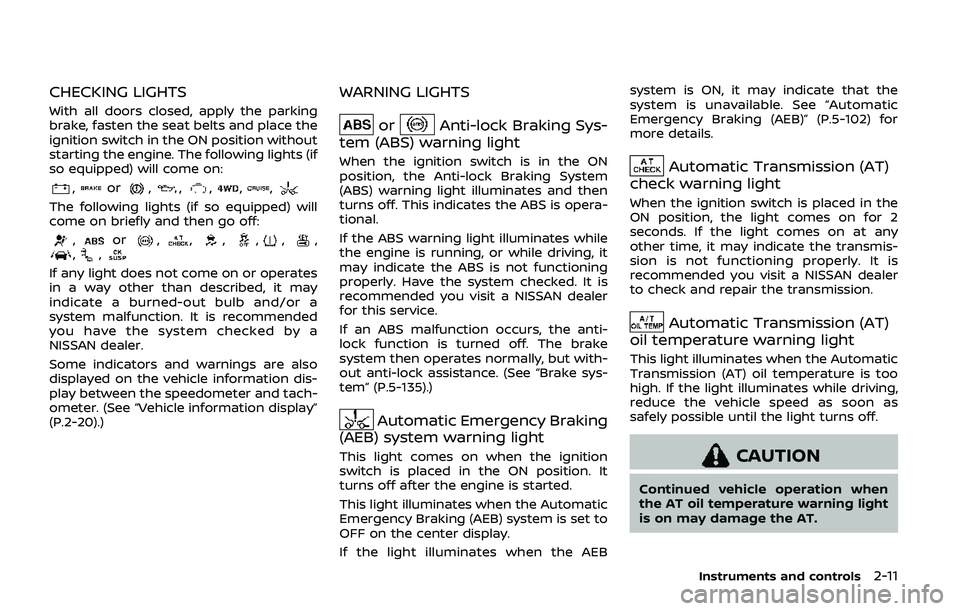
CHECKING LIGHTS
With all doors closed, apply the parking
brake, fasten the seat belts and place the
ignition switch in the ON position without
starting the engine. The following lights (if
so equipped) will come on:
,or,,,,,
The following lights (if so equipped) will
come on briefly and then go off:
,or,,,,,,,,
If any light does not come on or operates
in a way other than described, it may
indicate a burned-out bulb and/or a
system malfunction. It is recommended
you have the system checked by a
NISSAN dealer.
Some indicators and warnings are also
displayed on the vehicle information dis-
play between the speedometer and tach-
ometer. (See “Vehicle information display”
(P.2-20).)
WARNING LIGHTS
orAnti-lock Braking Sys-
tem (ABS) warning light
When the ignition switch is in the ON
position, the Anti-lock Braking System
(ABS) warning light illuminates and then
turns off. This indicates the ABS is opera-
tional.
If the ABS warning light illuminates while
the engine is running, or while driving, it
may indicate the ABS is not functioning
properly. Have the system checked. It is
recommended you visit a NISSAN dealer
for this service.
If an ABS malfunction occurs, the anti-
lock function is turned off. The brake
system then operates normally, but with-
out anti-lock assistance. (See “Brake sys-
tem” (P.5-135).)
Automatic Emergency Braking
(AEB) system warning light
This light comes on when the ignition
switch is placed in the ON position. It
turns off after the engine is started.
This light illuminates when the Automatic
Emergency Braking (AEB) system is set to
OFF on the center display.
If the light illuminates when the AEB system is ON, it may indicate that the
system is unavailable. See “Automatic
Emergency Braking (AEB)” (P.5-102) for
more details.
Automatic Transmission (AT)
check warning light
When the ignition switch is placed in the
ON position, the light comes on for 2
seconds. If the light comes on at any
other time, it may indicate the transmis-
sion is not functioning properly. It is
recommended you visit a NISSAN dealer
to check and repair the transmission.
Automatic Transmission (AT)
oil temperature warning light
This light illuminates when the Automatic
Transmission (AT) oil temperature is too
high. If the light illuminates while driving,
reduce the vehicle speed as soon as
safely possible until the light turns off.
CAUTION
Continued vehicle operation when
the AT oil temperature warning light
is on may damage the AT.
Instruments and controls2-11
Page 114 of 536
2-20Instruments and controls
Vehicle Dynamic Control (VDC)
off indicator light
When the ignition switch is in the ON
position, the Vehicle Dynamic Control
(VDC) off indicator light illuminates and
then turns off.
The light comes on when the VDC off
switch is pushed to OFF. This indicates
that the VDC system is not operating.
When the 4L position is selected with the
Four-Wheel Drive (4WD) shift switch, the
VDC system is disabled and the VDC off
indicator light illuminates. (4WD models)
For additional information, see “Vehicle
Dynamic Control (VDC) system” (P.5-138).
AUDIBLE REMINDERS
Key reminder chime
A chime will sound if the driver side door
is opened while the ignition switch is
placed in the ACC position. Make sure
the ignition switch is placed in the OFF
position, and take the Intelligent Key with
you when leaving the vehicle.
Light reminder chime
A chime will sound when the driver side
door is opened with the light switch in the
orposition and the ignition
switch in the ACC, OFF or LOCK position.
Turn the light switch off when you leave
the vehicle.
Parking brake reminder chime
The chime will sound if the vehicle is
driven at more than 4 MPH (7 km/h) with
the parking brake applied. Stop the vehi-
cle and release the parking brake.
Brake pad wear warning
The disc brake pads have audible wear
warnings. When a brake pad requires
replacement, it will make a high pitched
scraping sound when the vehicle is in
motion. This scraping sound will first
occur only when the brake pedal is
depressed. After more wear of the brake
pad, the sound will always be heard even
if the brake pedal is not depressed. Have
the brakes checked as soon as possible if
the warning sound is heard.
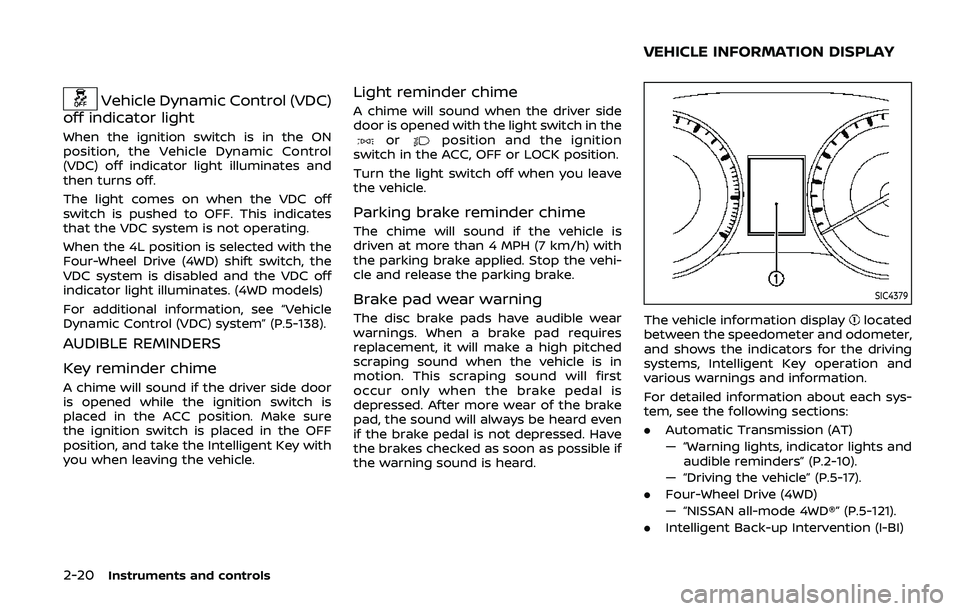
SIC4379
The vehicle information displaylocated
between the speedometer and odometer,
and shows the indicators for the driving
systems, Intelligent Key operation and
various warnings and information.
For detailed information about each sys-
tem, see the following sections:
. Automatic Transmission (AT)
— “Warning lights, indicator lights and
audible reminders” (P.2-10).
— “Driving the vehicle” (P.5-17).
. Four-Wheel Drive (4WD)
— “NISSAN all-mode 4WD®” (P.5-121).
. Intelligent Back-up Intervention (I-BI)
VEHICLE INFORMATION DISPLAY
Page 117 of 536
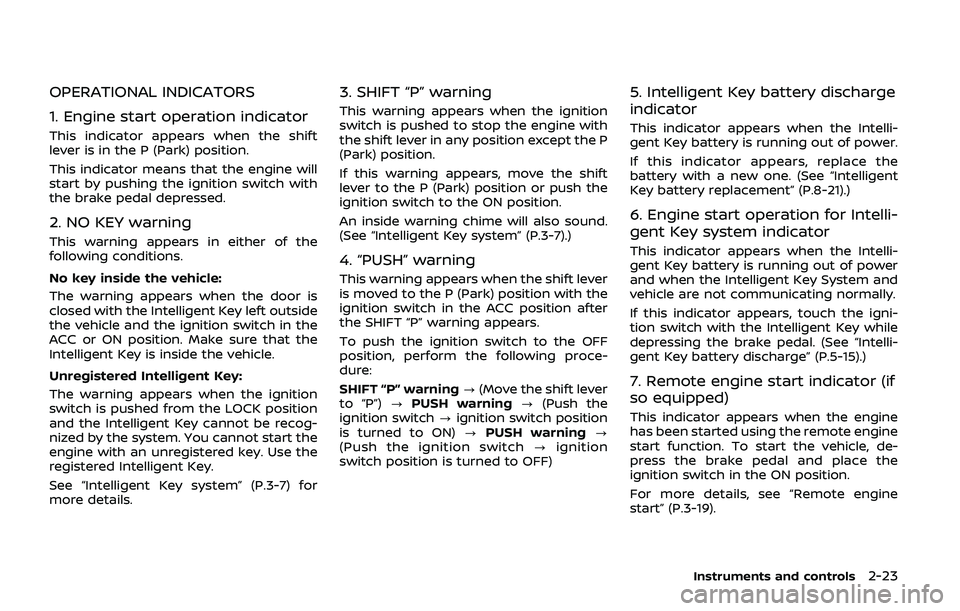
OPERATIONAL INDICATORS
1. Engine start operation indicator
This indicator appears when the shift
lever is in the P (Park) position.
This indicator means that the engine will
start by pushing the ignition switch with
the brake pedal depressed.
2. NO KEY warning
This warning appears in either of the
following conditions.
No key inside the vehicle:
The warning appears when the door is
closed with the Intelligent Key left outside
the vehicle and the ignition switch in the
ACC or ON position. Make sure that the
Intelligent Key is inside the vehicle.
Unregistered Intelligent Key:
The warning appears when the ignition
switch is pushed from the LOCK position
and the Intelligent Key cannot be recog-
nized by the system. You cannot start the
engine with an unregistered key. Use the
registered Intelligent Key.
See “Intelligent Key system” (P.3-7) for
more details.
3. SHIFT “P” warning
This warning appears when the ignition
switch is pushed to stop the engine with
the shift lever in any position except the P
(Park) position.
If this warning appears, move the shift
lever to the P (Park) position or push the
ignition switch to the ON position.
An inside warning chime will also sound.
(See “Intelligent Key system” (P.3-7).)
4. “PUSH” warning
This warning appears when the shift lever
is moved to the P (Park) position with the
ignition switch in the ACC position after
the SHIFT “P” warning appears.
To push the ignition switch to the OFF
position, perform the following proce-
dure:
SHIFT “P” warning?(Move the shift lever
to “P”) ?PUSH warning ?(Push the
ignition switch ?ignition switch position
is turned to ON) ?PUSH warning ?
(Push the ignition switch ?ignition
switch position is turned to OFF)
5. Intelligent Key battery discharge
indicator
This indicator appears when the Intelli-
gent Key battery is running out of power.
If this indicator appears, replace the
battery with a new one. (See “Intelligent
Key battery replacement” (P.8-21).)
6. Engine start operation for Intelli-
gent Key system indicator
This indicator appears when the Intelli-
gent Key battery is running out of power
and when the Intelligent Key System and
vehicle are not communicating normally.
If this indicator appears, touch the igni-
tion switch with the Intelligent Key while
depressing the brake pedal. (See “Intelli-
gent Key battery discharge” (P.5-15).)
7. Remote engine start indicator (if
so equipped)
This indicator appears when the engine
has been started using the remote engine
start function. To start the vehicle, de-
press the brake pedal and place the
ignition switch in the ON position.
For more details, see “Remote engine
start” (P.3-19).
Instruments and controls2-23
Page 124 of 536
2-30Instruments and controls
.UNIT
Select this submenu to choose the
unit.
. EFFECTS
Select this submenu to turn on and off
the needle sweep function when
starting the engine.
7. Warning check
SKIP:
Push the
switchto move to the
warning check mode.
Push the
switchto select other
menus.
DETAIL:
This item is available only when a warning
is displayed.
Select this menu to see the details of
warnings.SIC2133
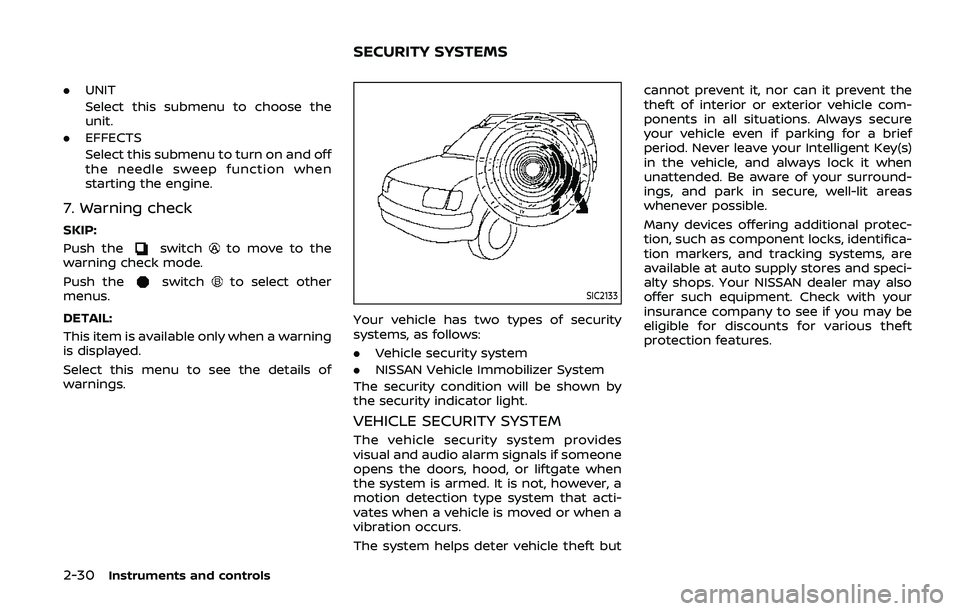
Your vehicle has two types of security
systems, as follows:
. Vehicle security system
. NISSAN Vehicle Immobilizer System
The security condition will be shown by
the security indicator light.
VEHICLE SECURITY SYSTEM
The vehicle security system provides
visual and audio alarm signals if someone
opens the doors, hood, or liftgate when
the system is armed. It is not, however, a
motion detection type system that acti-
vates when a vehicle is moved or when a
vibration occurs.
The system helps deter vehicle theft but cannot prevent it, nor can it prevent the
theft of interior or exterior vehicle com-
ponents in all situations. Always secure
your vehicle even if parking for a brief
period. Never leave your Intelligent Key(s)
in the vehicle, and always lock it when
unattended. Be aware of your surround-
ings, and park in secure, well-lit areas
whenever possible.
Many devices offering additional protec-
tion, such as component locks, identifica-
tion markers, and tracking systems, are
available at auto supply stores and speci-
alty shops. Your NISSAN dealer may also
offer such equipment. Check with your
insurance company to see if you may be
eligible for discounts for various theft
protection features.
SECURITY SYSTEMS
Page 125 of 536
SIC2045
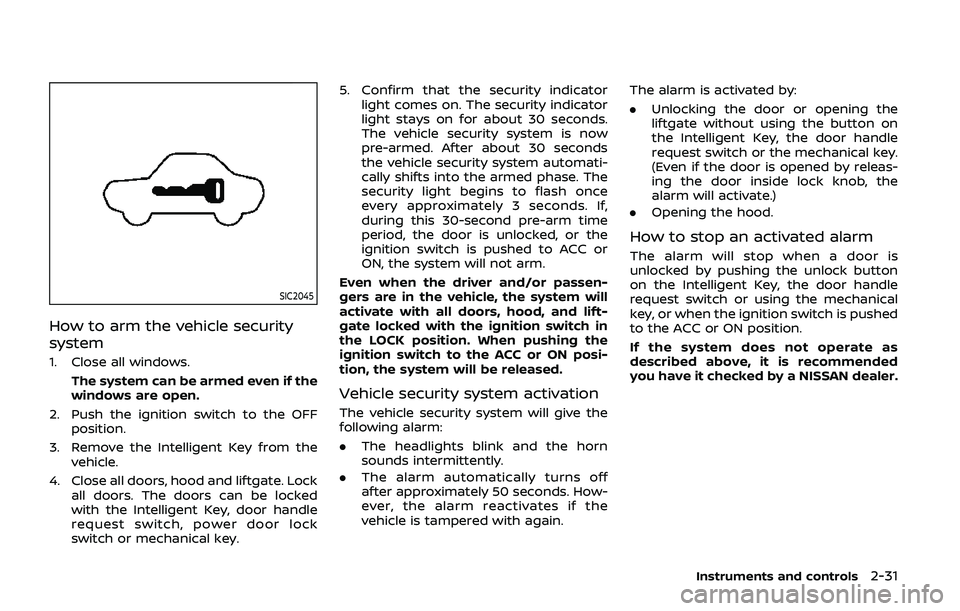
How to arm the vehicle security
system
1. Close all windows.The system can be armed even if the
windows are open.
2. Push the ignition switch to the OFF position.
3. Remove the Intelligent Key from the vehicle.
4. Close all doors, hood and liftgate. Lock all doors. The doors can be locked
with the Intelligent Key, door handle
request switch, power door lock
switch or mechanical key. 5. Confirm that the security indicator
light comes on. The security indicator
light stays on for about 30 seconds.
The vehicle security system is now
pre-armed. After about 30 seconds
the vehicle security system automati-
cally shifts into the armed phase. The
security light begins to flash once
every approximately 3 seconds. If,
during this 30-second pre-arm time
period, the door is unlocked, or the
ignition switch is pushed to ACC or
ON, the system will not arm.
Even when the driver and/or passen-
gers are in the vehicle, the system will
activate with all doors, hood, and lift-
gate locked with the ignition switch in
the LOCK position. When pushing the
ignition switch to the ACC or ON posi-
tion, the system will be released.
Vehicle security system activation
The vehicle security system will give the
following alarm:
. The headlights blink and the horn
sounds intermittently.
. The alarm automatically turns off
after approximately 50 seconds. How-
ever, the alarm reactivates if the
vehicle is tampered with again. The alarm is activated by:
.
Unlocking the door or opening the
liftgate without using the button on
the Intelligent Key, the door handle
request switch or the mechanical key.
(Even if the door is opened by releas-
ing the door inside lock knob, the
alarm will activate.)
. Opening the hood.
How to stop an activated alarm
The alarm will stop when a door is
unlocked by pushing the unlock button
on the Intelligent Key, the door handle
request switch or using the mechanical
key, or when the ignition switch is pushed
to the ACC or ON position.
If the system does not operate as
described above, it is recommended
you have it checked by a NISSAN dealer.
Instruments and controls2-31
Page 133 of 536
SIC3670
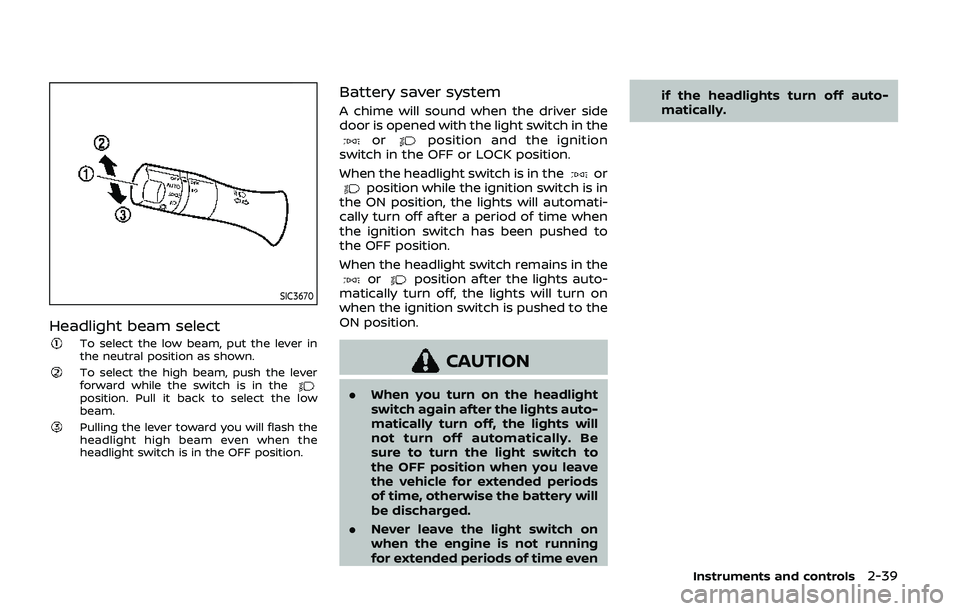
Headlight beam select
To select the low beam, put the lever in
the neutral position as shown.
To select the high beam, push the lever
forward while the switch is in the
position. Pull it back to select the low
beam.
Pulling the lever toward you will flash the
headlight high beam even when the
headlight switch is in the OFF position.
Battery saver system
A chime will sound when the driver side
door is opened with the light switch in the
orposition and the ignition
switch in the OFF or LOCK position.
When the headlight switch is in the
orposition while the ignition switch is in
the ON position, the lights will automati-
cally turn off after a period of time when
the ignition switch has been pushed to
the OFF position.
When the headlight switch remains in the
orposition after the lights auto-
matically turn off, the lights will turn on
when the ignition switch is pushed to the
ON position.
CAUTION
. When you turn on the headlight
switch again after the lights auto-
matically turn off, the lights will
not turn off automatically. Be
sure to turn the light switch to
the OFF position when you leave
the vehicle for extended periods
of time, otherwise the battery will
be discharged.
. Never leave the light switch on
when the engine is not running
for extended periods of time even if the headlights turn off auto-
matically.
Instruments and controls2-39
Page 144 of 536
2-50Instruments and controls
TURNING THE REAR DOOR ALERT
SYSTEM ON/OFF
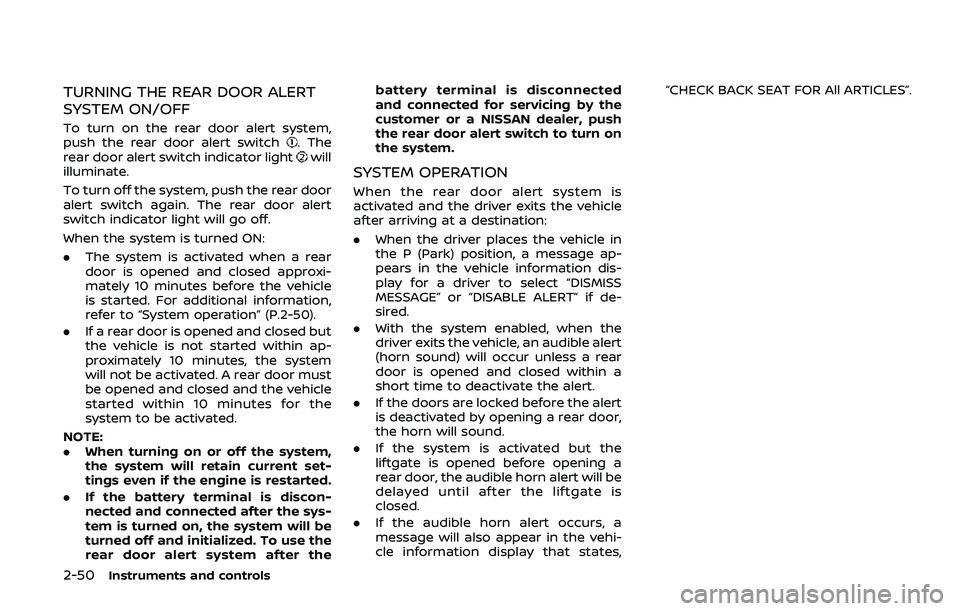
To turn on the rear door alert system,
push the rear door alert switch. The
rear door alert switch indicator lightwill
illuminate.
To turn off the system, push the rear door
alert switch again. The rear door alert
switch indicator light will go off.
When the system is turned ON:
. The system is activated when a rear
door is opened and closed approxi-
mately 10 minutes before the vehicle
is started. For additional information,
refer to “System operation” (P.2-50).
. If a rear door is opened and closed but
the vehicle is not started within ap-
proximately 10 minutes, the system
will not be activated. A rear door must
be opened and closed and the vehicle
started within 10 minutes for the
system to be activated.
NOTE:
. When turning on or off the system,
the system will retain current set-
tings even if the engine is restarted.
. If the battery terminal is discon-
nected and connected after the sys-
tem is turned on, the system will be
turned off and initialized. To use the
rear door alert system after the battery terminal is disconnected
and connected for servicing by the
customer or a NISSAN dealer, push
the rear door alert switch to turn on
the system.SYSTEM OPERATION
When the rear door alert system is
activated and the driver exits the vehicle
after arriving at a destination:
.
When the driver places the vehicle in
the P (Park) position, a message ap-
pears in the vehicle information dis-
play for a driver to select “DISMISS
MESSAGE” or “DISABLE ALERT” if de-
sired.
. With the system enabled, when the
driver exits the vehicle, an audible alert
(horn sound) will occur unless a rear
door is opened and closed within a
short time to deactivate the alert.
. If the doors are locked before the alert
is deactivated by opening a rear door,
the horn will sound.
. If the system is activated but the
liftgate is opened before opening a
rear door, the audible horn alert will be
delayed until after the liftgate is
closed.
. If the audible horn alert occurs, a
message will also appear in the vehi-
cle information display that states, “CHECK BACK SEAT FOR All ARTICLES”.
Page 158 of 536
2-64Instruments and controls
POWER WINDOWS
WARNING
.Make sure that all passengers
have their hands, etc. inside the
vehicle while it is in motion and
before closing the windows. Use
the window lock switch to pre-
vent unexpected use of the
power windows.
. To help avoid risk of injury or
death through unintended opera-
tion of the vehicle and or its
systems, including entrapment
in windows or inadvertent door
lock activation, do not leave chil-
dren, people who require the
assistance of others or pets un-
attended in your vehicle. Addi-
tionally, the temperature inside a
closed vehicle on a warm day can
quickly become high enough to
cause a significant risk of injury
or death to people and pets.
The power windows operate when the
ignition switch is in the ON position or for
about 45 seconds after the ignition
switch is pushed to the OFF position. If
the driver’s or front passenger’s door is
opened during this period of about 45 seconds, power to the windows is can-
celed.
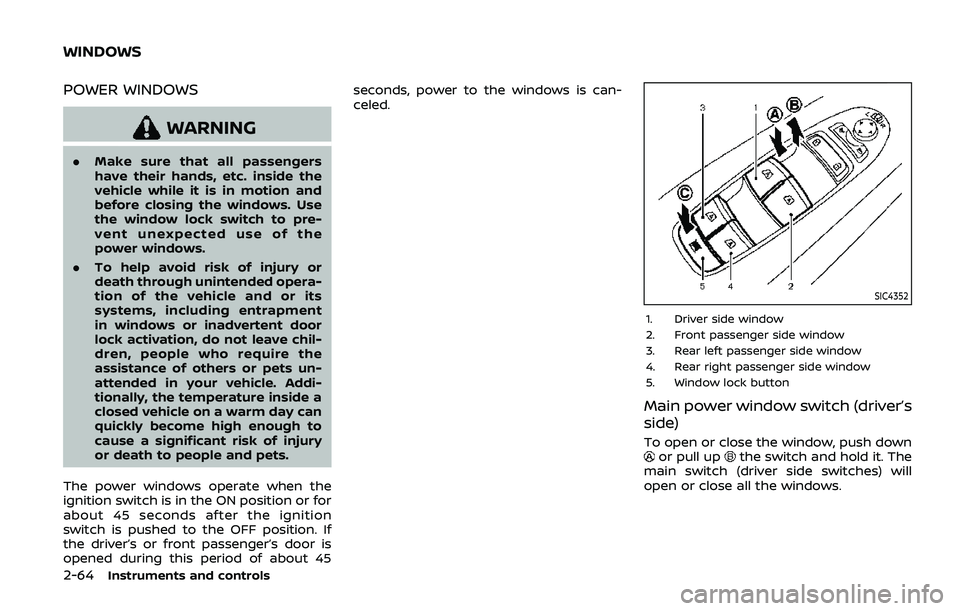
SIC4352
1. Driver side window
2. Front passenger side window
3. Rear left passenger side window
4. Rear right passenger side window
5. Window lock button
Main power window switch (driver’s
side)
To open or close the window, push downor pull upthe switch and hold it. The
main switch (driver side switches) will
open or close all the windows.
WINDOWS