NISSAN ARMADA 2023 Owners Manual
Manufacturer: NISSAN, Model Year: 2023, Model line: ARMADA, Model: NISSAN ARMADA 2023Pages: 604, PDF Size: 2.97 MB
Page 441 of 604
.If it is difficult to free the vehicle,
repeat forward and backward move-
ment to increase the movement.
. If the vehicle is stuck deep in mud, tire
chains may be effective.
CAUTION
.Do not spin the tires excessively.
Tires will sink deep into the mud,
making it difficult to free the
vehicle.
. Avoid shifting gears with the en-
gine running at high speeds as
this may cause malfunction.
SSD1048
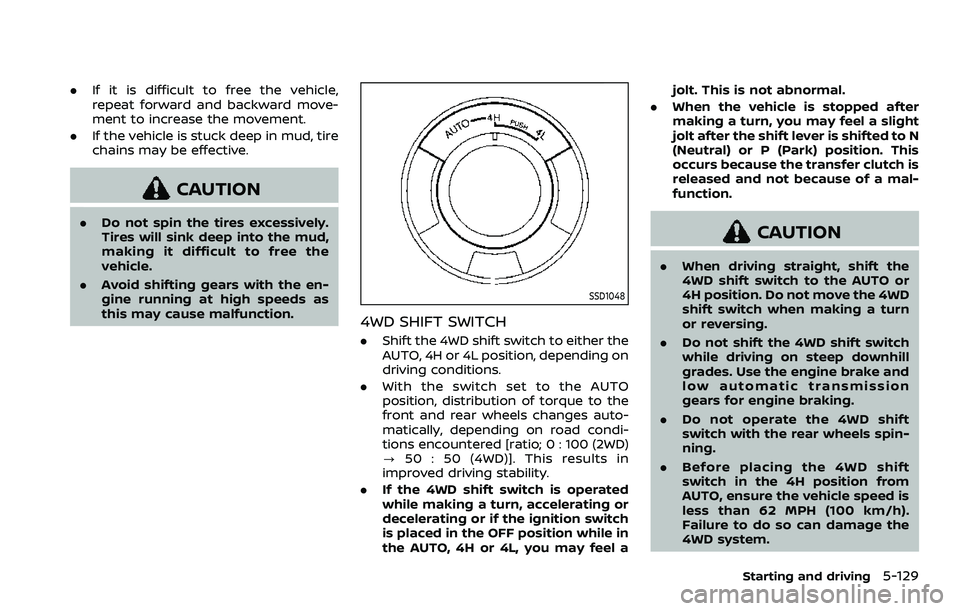
4WD SHIFT SWITCH
.Shift the 4WD shift switch to either the
AUTO, 4H or 4L position, depending on
driving conditions.
. With the switch set to the AUTO
position, distribution of torque to the
front and rear wheels changes auto-
matically, depending on road condi-
tions encountered [ratio; 0 : 100 (2WD)
? 50 : 50 (4WD)]. This results in
improved driving stability.
. If the 4WD shift switch is operated
while making a turn, accelerating or
decelerating or if the ignition switch
is placed in the OFF position while in
the AUTO, 4H or 4L, you may feel a jolt. This is not abnormal.
. When the vehicle is stopped after
making a turn, you may feel a slight
jolt after the shift lever is shifted to N
(Neutral) or P (Park) position. This
occurs because the transfer clutch is
released and not because of a mal-
function.
CAUTION
.When driving straight, shift the
4WD shift switch to the AUTO or
4H position. Do not move the 4WD
shift switch when making a turn
or reversing.
. Do not shift the 4WD shift switch
while driving on steep downhill
grades. Use the engine brake and
low automatic transmission
gears for engine braking.
. Do not operate the 4WD shift
switch with the rear wheels spin-
ning.
. Before placing the 4WD shift
switch in the 4H position from
AUTO, ensure the vehicle speed is
less than 62 MPH (100 km/h).
Failure to do so can damage the
4WD system.
Starting and driving5-129
Page 442 of 604
5-130Starting and driving
.Never shift the 4WD shift switch
between 4L and 4H while driving.
. Engine idling speed is high while
warming up the engine. Be espe-
cially careful when starting or
driving on slippery surfaces with
the 4WD shift switch in AUTO.
SSD1058
4WD shift indicator
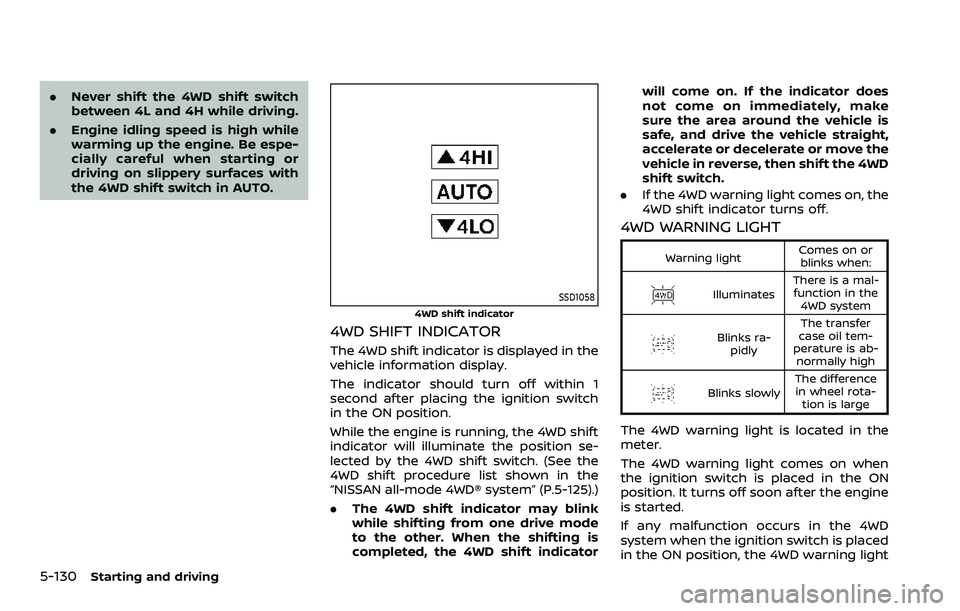
4WD SHIFT INDICATOR
The 4WD shift indicator is displayed in the
vehicle information display.
The indicator should turn off within 1
second after placing the ignition switch
in the ON position.
While the engine is running, the 4WD shift
indicator will illuminate the position se-
lected by the 4WD shift switch. (See the
4WD shift procedure list shown in the
“NISSAN all-mode 4WD® system” (P.5-125).)
.The 4WD shift indicator may blink
while shifting from one drive mode
to the other. When the shifting is
completed, the 4WD shift indicator will come on. If the indicator does
not come on immediately, make
sure the area around the vehicle is
safe, and drive the vehicle straight,
accelerate or decelerate or move the
vehicle in reverse, then shift the 4WD
shift switch.
. If the 4WD warning light comes on, the
4WD shift indicator turns off.
4WD WARNING LIGHT
Warning light Comes on or
blinks when:
Illuminates There is a mal-
function in the 4WD system
Blinks ra- pidly The transfer
case oil tem-
perature is ab- normally high
Blinks slowly The difference
in wheel rota- tion is large
The 4WD warning light is located in the
meter.
The 4WD warning light comes on when
the ignition switch is placed in the ON
position. It turns off soon after the engine
is started.
If any malfunction occurs in the 4WD
system when the ignition switch is placed
in the ON position, the 4WD warning light
Page 443 of 604
will either remain illuminated or blink.
If the 4WD warning light comes on, the
4WD shift indicator turns off.
High-temperature transfer case oil makes
the 4WD warning light blink rapidly (about
twice per second). If the warning light
blinks rapidly during operation, stop the
vehicle in a safe place immediately. Then
if the light turns off after a while, you can
continue driving.
A large difference between the diameters
of front and rear wheels will make the
4WD warning light blink slowly (about
once per two seconds). Change the 4WD
shift switch to AUTO and do not drive fast.
CAUTION
.If the 4WD warning light comes
on or blinks slowly during opera-
tion or rapidly after stopping the
vehicle for a while, have your
vehicle checked as soon as pos-
sible. It is recommended you visit
a NISSAN dealer for this service.
. Shifting between 4HI and 4LO is
not recommended when the 4WD
warning light turns on.
. When the 4WD warning light
comes on, the 2WD mode may be engaged even if the 4WD shift
switch is in AUTO or 4H. Be
especially careful when driving. If
corresponding parts are malfunc-
tioning, the 4WD mode will not be
engaged even if the 4WD shift
switch is shifted.
. Do not drive the vehicle in the 4HI
or 4LO position on dry hard sur-
face roads. Driving on dry, hard
surfaces in 4HI or 4LO may cause
unnecessary noise, tire wear and
increased fuel consumption.
If the 4WD warning light turns on
when driving on dry hard surface
roads:
— in the AUTO or 4HI position,
shift the 4WD shift switch to
AUTO.
— in the 4LO position, stop the vehicle and shift the transmis-
sion shift lever to the N (Neu-
tral) position and shift the
4WD shift switch to AUTO.
. If the 4WD warning light is still on
after the above operation, have
your vehicle checked as soon as
possible. It is recommended you
visit a NISSAN dealer for this
service. .
The transfer case may be da-
maged if you continue driving
with the warning light blinking.
Starting and driving5-131
Page 444 of 604
5-132Starting and driving
WARNING
.Never rely solely on the hill start
assist system to prevent the ve-
hicle from moving backward on a
hill. Always drive carefully and
attentively. Depress the brake
pedal when the vehicle is stopped
on a steep hill. Be especially care-
ful when stopped on a hill on
frozen or muddy roads. Failure
to prevent the vehicle from rolling
backwards may result in a loss of
control of the vehicle and possi-
ble serious injury or death.
. The hill start assist system is not
designed to hold the vehicle at a
standstill on a hill. Depress the
brake pedal when the vehicle is
stopped on a steep hill. Failure to
do so may cause the vehicle to
roll backwards and may result in
a collision or serious personal
injury.
. The hill start assist system may
not prevent the vehicle from roll-
ing backwards on a hill under all
load or road conditions. Always
be prepared to depress the brake
pedal to prevent the vehicle from
rolling backwards. Failure to do so may result in a collision or
serious personal injury.
The hill start assist system automatically
keeps the brakes applied to help prevent
the vehicle from rolling backwards in the
time it takes the driver to release the
brake pedal and apply the accelerator
when the vehicle is stopped on a hill.
The hill start assist system will operate
automatically under the following condi-
tions:
. The transmission is shifted to a for-
ward or reverse gear.
. The vehicle is stopped completely on a
hill by applying the brake.
The maximum holding time is 2 seconds.
After 2 seconds the vehicle will begin to
roll back and the hill start assist system
will stop operating completely.
The hill start assist system will not
operate when the transmission is shifted
to the N (Neutral) or P (Park) position or
on a flat and level road.
When the Vehicle Dynamic Control (VDC)
warning light illuminates in the meter, the
hill start assist system will not operate.
(See “Warning lights, indicator lights and
audible reminders” (P.2-11).)
HILL START ASSIST SYSTEM
Page 445 of 604
SD1006MA
WARNING
.Do not stop or park the vehicle
over flammable materials such as
dry grass, waste paper or rags.
They may ignite and cause a fire.
. Never leave the engine running
while the vehicle is unattended.
. Do not leave children unattended
inside the vehicle. They could
unknowingly activate switches
or controls. Unattended children
could become involved in serious
accidents. .
To help avoid risk of injury or
death through unintended opera-
tion of the vehicle and/or its
systems, do not leave children,
people who require the assis-
tance of others or pets unat-
tended in your vehicle.
Additionally, the temperature in-
side a closed vehicle on a warm
day can quickly become high
enough to cause a significant risk
of injury or death to people and
pets.
. Safe parking procedures require
that both the parking brake be
applied and the transmission be placed in the P (Park) position.
Failure to do so could cause the
vehicle to move unexpectedly or
roll away and result in an acci-
dent.
. Make sure the automatic trans-
mission shift lever has been
pushed as far forward as it can
go and cannot be moved without
depressing the foot brake pedal.
1. Firmly apply the parking brake.
2. Move the shift lever to the P (Park) position.
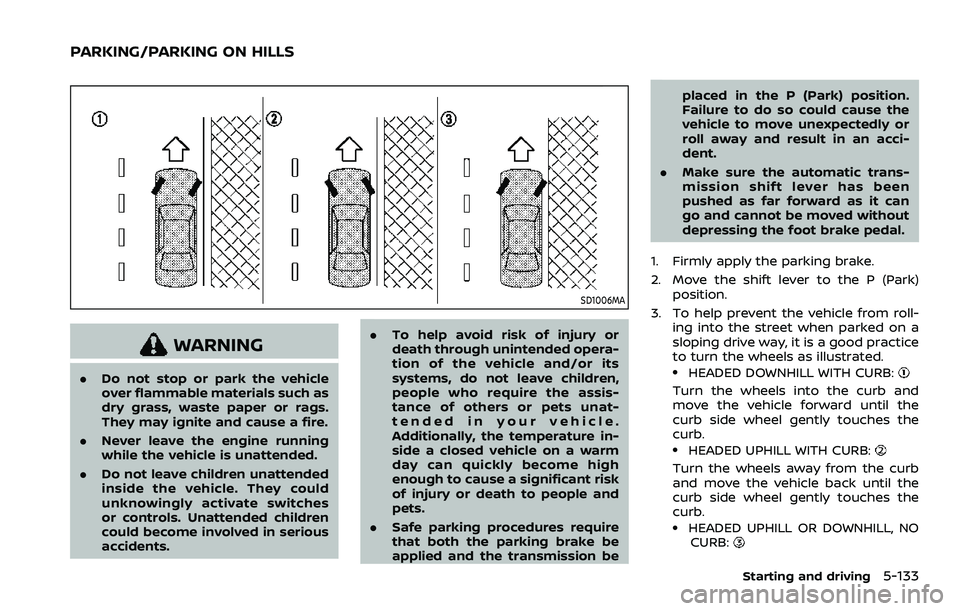
3. To help prevent the vehicle from roll- ing into the street when parked on a
sloping drive way, it is a good practice
to turn the wheels as illustrated..HEADED DOWNHILL WITH CURB:
Turn the wheels into the curb and
move the vehicle forward until the
curb side wheel gently touches the
curb.
.HEADED UPHILL WITH CURB:
Turn the wheels away from the curb
and move the vehicle back until the
curb side wheel gently touches the
curb.
.HEADED UPHILL OR DOWNHILL, NOCURB:
Starting and driving5-133
PARKING/PARKING ON HILLS
Page 446 of 604
5-134Starting and driving
Turn the wheels toward the side of
the road so the vehicle will move away
from the center of the road if it moves.
4. Push the ignition switch to the OFF position.
SIC4474
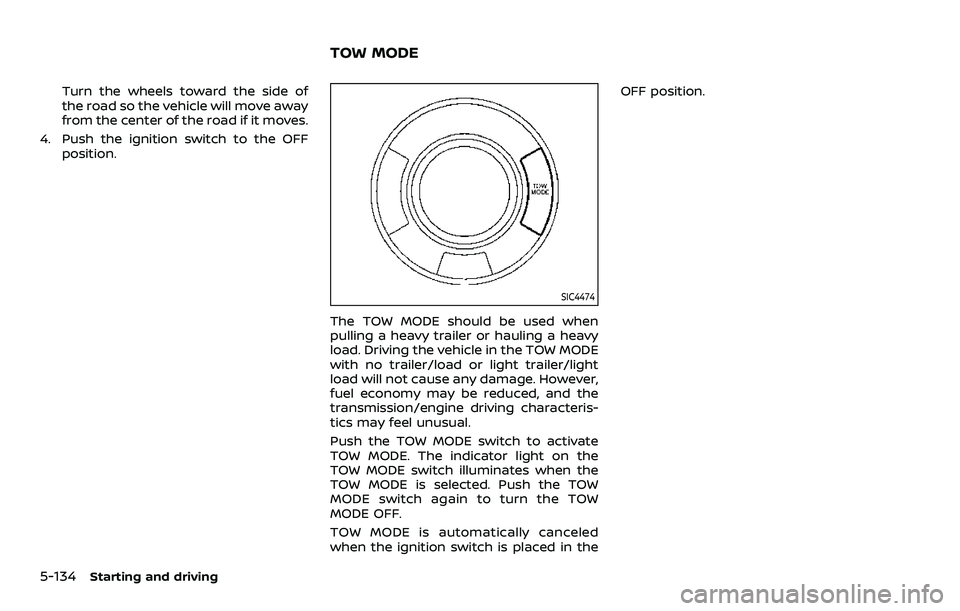
The TOW MODE should be used when
pulling a heavy trailer or hauling a heavy
load. Driving the vehicle in the TOW MODE
with no trailer/load or light trailer/light
load will not cause any damage. However,
fuel economy may be reduced, and the
transmission/engine driving characteris-
tics may feel unusual.
Push the TOW MODE switch to activate
TOW MODE. The indicator light on the
TOW MODE switch illuminates when the
TOW MODE is selected. Push the TOW
MODE switch again to turn the TOW
MODE OFF.
TOW MODE is automatically canceled
when the ignition switch is placed in the OFF position.
TOW MODE
Page 447 of 604
SIC4454
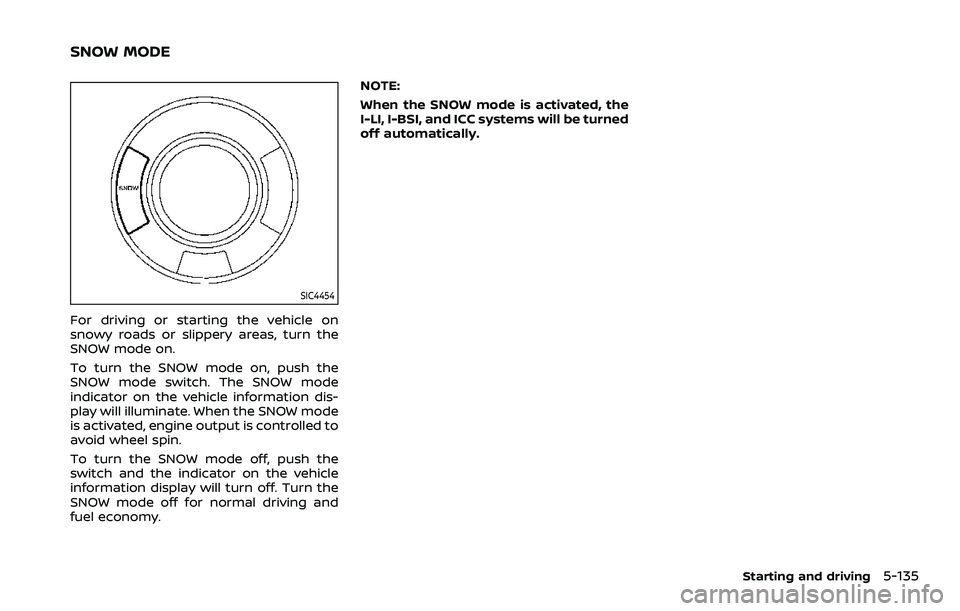
For driving or starting the vehicle on
snowy roads or slippery areas, turn the
SNOW mode on.
To turn the SNOW mode on, push the
SNOW mode switch. The SNOW mode
indicator on the vehicle information dis-
play will illuminate. When the SNOW mode
is activated, engine output is controlled to
avoid wheel spin.
To turn the SNOW mode off, push the
switch and the indicator on the vehicle
information display will turn off. Turn the
SNOW mode off for normal driving and
fuel economy.NOTE:
When the SNOW mode is activated, the
I-LI, I-BSI, and ICC systems will be turned
off automatically.
Starting and driving5-135
SNOW MODE
Page 448 of 604
5-136Starting and driving
SSD0622
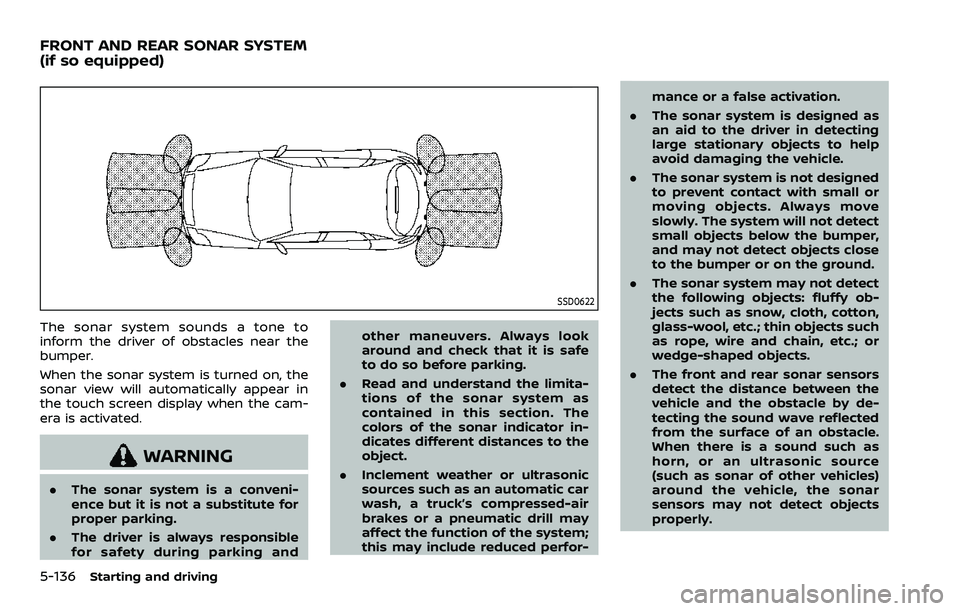
The sonar system sounds a tone to
inform the driver of obstacles near the
bumper.
When the sonar system is turned on, the
sonar view will automatically appear in
the touch screen display when the cam-
era is activated.
WARNING
.The sonar system is a conveni-
ence but it is not a substitute for
proper parking.
. The driver is always responsible
for safety during parking and other maneuvers. Always look
around and check that it is safe
to do so before parking.
. Read and understand the limita-
tions of the sonar system as
contained in this section. The
colors of the sonar indicator in-
dicates different distances to the
object.
. Inclement weather or ultrasonic
sources such as an automatic car
wash, a truck’s compressed-air
brakes or a pneumatic drill may
affect the function of the system;
this may include reduced perfor- mance or a false activation.
. The sonar system is designed as
an aid to the driver in detecting
large stationary objects to help
avoid damaging the vehicle.
. The sonar system is not designed
to prevent contact with small or
moving objects. Always move
slowly. The system will not detect
small objects below the bumper,
and may not detect objects close
to the bumper or on the ground.
. The sonar system may not detect
the following objects: fluffy ob-
jects such as snow, cloth, cotton,
glass-wool, etc.; thin objects such
as rope, wire and chain, etc.; or
wedge-shaped objects.
. The front and rear sonar sensors
detect the distance between the
vehicle and the obstacle by de-
tecting the sound wave reflected
from the surface of an obstacle.
When there is a sound such as
horn, or an ultrasonic source
(such as sonar of other vehicles)
around the vehicle, the sonar
sensors may not detect objects
properly.
FRONT AND REAR SONAR SYSTEM
(if so equipped)
Page 449 of 604
If your vehicle sustains damage to the
bumper fascia, leaving it misaligned or
bent, the sensing zone may be altered
causing inaccurate measurement of ob-
stacles or false alarms.
CAUTION
.Excessive noise (such as audio
system volume or an open vehi-
cle window) will interfere with the
tone and it may not be heard.
. Keep the sonar sensors (located
on the bumper fascia) free from
snow, ice and large accumula-
tions of dirt. Do not clean the
sonar sensors with sharp objects.
If the sensors are covered, the
accuracy of the sonar function
will be diminished.
SYSTEM OPERATION
The system informs with a visual and
audible signal of front obstacles when the
shift lever is in the D (Drive) position and
both front and rear obstacles when the
shift lever is in the R (Reverse) position.
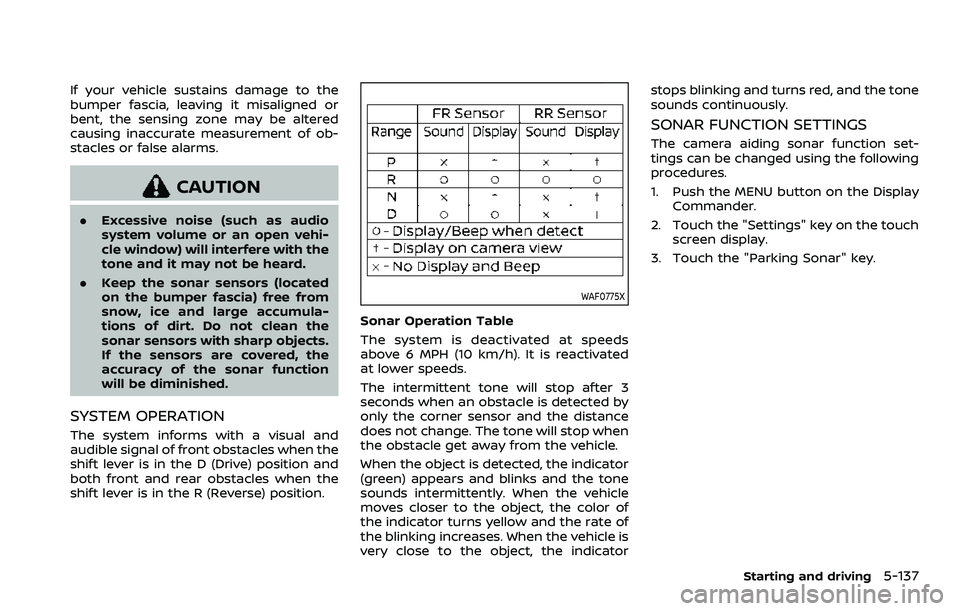
WAF0775X
Sonar Operation Table
The system is deactivated at speeds
above 6 MPH (10 km/h). It is reactivated
at lower speeds.
The intermittent tone will stop after 3
seconds when an obstacle is detected by
only the corner sensor and the distance
does not change. The tone will stop when
the obstacle get away from the vehicle.
When the object is detected, the indicator
(green) appears and blinks and the tone
sounds intermittently. When the vehicle
moves closer to the object, the color of
the indicator turns yellow and the rate of
the blinking increases. When the vehicle is
very close to the object, the indicator stops blinking and turns red, and the tone
sounds continuously.
SONAR FUNCTION SETTINGS
The camera aiding sonar function set-
tings can be changed using the following
procedures.
1. Push the MENU button on the Display
Commander.
2. Touch the "Settings" key on the touch screen display.
3. Touch the "Parking Sonar" key.
Starting and driving5-137
Page 450 of 604
5-138Starting and driving
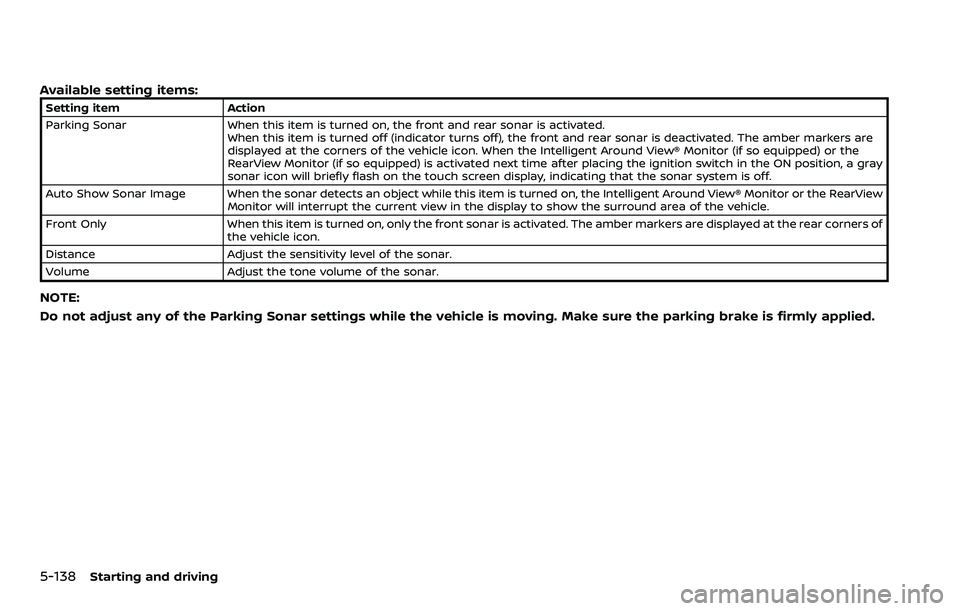
Available setting items:
Setting itemAction
Parking Sonar When this item is turned on, the front and rear sonar is activated.
When this item is turned off (indicator turns off), the front and rear sonar is deactivated. The amber markers are
displayed at the corners of the vehicle icon. When the Intelligent Around View® Monitor (if so equipped) or the
RearView Monitor (if so equipped) is activated next time after placing the ignition switch in the ON position, a gray
sonar icon will briefly flash on the touch screen display, indicating that the sonar system is off.
Auto Show Sonar Image When the sonar detects an object while this item is turned on, the Intelligent Around View® Monitor or the RearView Monitor will interrupt the current view in the display to show the surround area of the vehicle.
Front Only When this item is turned on, only the front sonar is activated. The amber markers are displayed at the rear corners of
the vehicle icon.
Distance Adjust the sensitivity level of the sonar.
Volume Adjust the tone volume of the sonar.
NOTE:
Do not adjust any of the Parking Sonar settings while the vehicle is moving. Make sure the parking brake is firmly applied.