key NISSAN CUBE 2011 3.G Quick Reference Guide
[x] Cancel search | Manufacturer: NISSAN, Model Year: 2011, Model line: CUBE, Model: NISSAN CUBE 2011 3.GPages: 12, PDF Size: 0.9 MB
Page 6 of 12

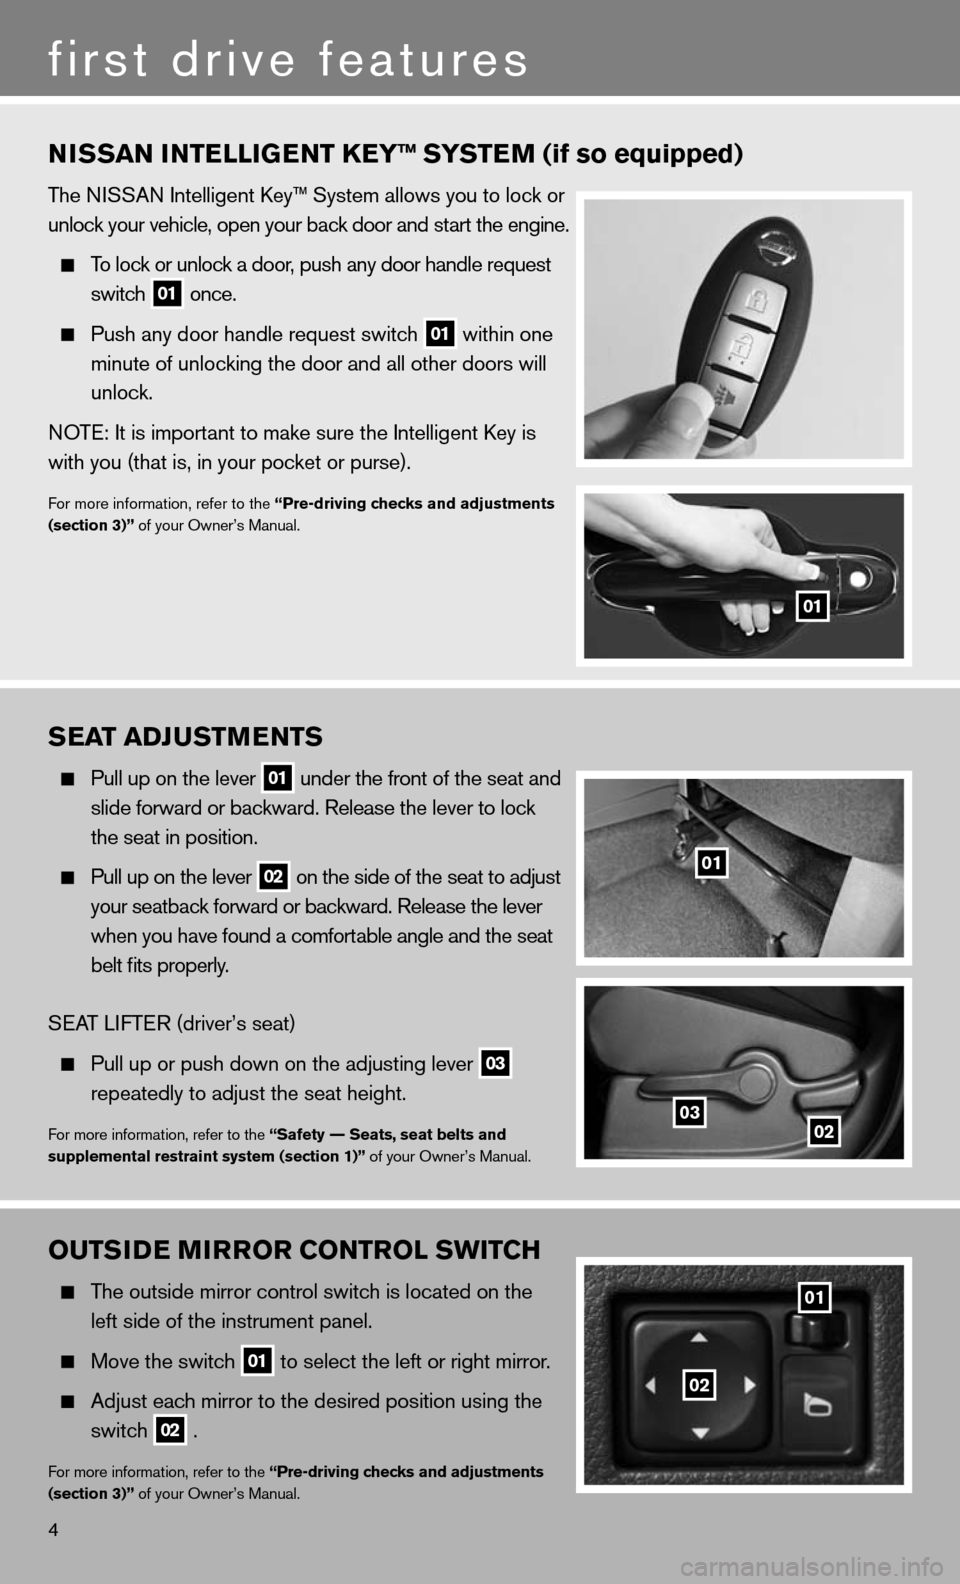
OuTSIDe MIrrOr CONTr OL SwITCH
The outside mirror control switch is located on the
left side of the instrument panel.
Move the switch
01 to select the left or right mirror.
Adjust each mirror to the desired position using the
switch
02 .
f
or more information, refer to the “Pre-driving checks and adjustments
(section 3)” of your Owner’s Manual.
S ea T aDJ uSTM eNTS
Pull up on the lever
01 under the front of the seat and
slide forward or backward. Release the lever to lock
the seat in position.
Pull up on the lever
02 on the side of the seat to adjust
your seatback forward or backward. Release the lever
when you have found a comfortable angle and the seat
belt fits properly.
SeAT LifTe R (driver’s seat)
Pull up or push down on the adjusting lever
03
repeatedly to adjust the seat height.
f
or more information, refer to the “Safety –– Seats, seat belts and
supplemental restraint system (section 1)” of your Owner’s Manual.
4
NISSaN INTe LLIGeNT K eY™ SYSTe M (if so equipped)
The niSSA n intelligent key™ System allows you to lock or
unlock your vehicle, open your back door and start the engine.
To lock or unlock a door, push any door handle request
switch
01 once.
Push any door handle request switch
01 within one
minute of unlocking the door and all other doors will
unlock.
n OT e: it is important to make sure the intelligent key is
with you (that is, in your pocket or purse).
f or more information, refer to the “Pre-driving checks and adjustments
(section 3)” of your Owner’s Manual.
first drive features
02
0203
01
01
01
Page 7 of 12

01
5
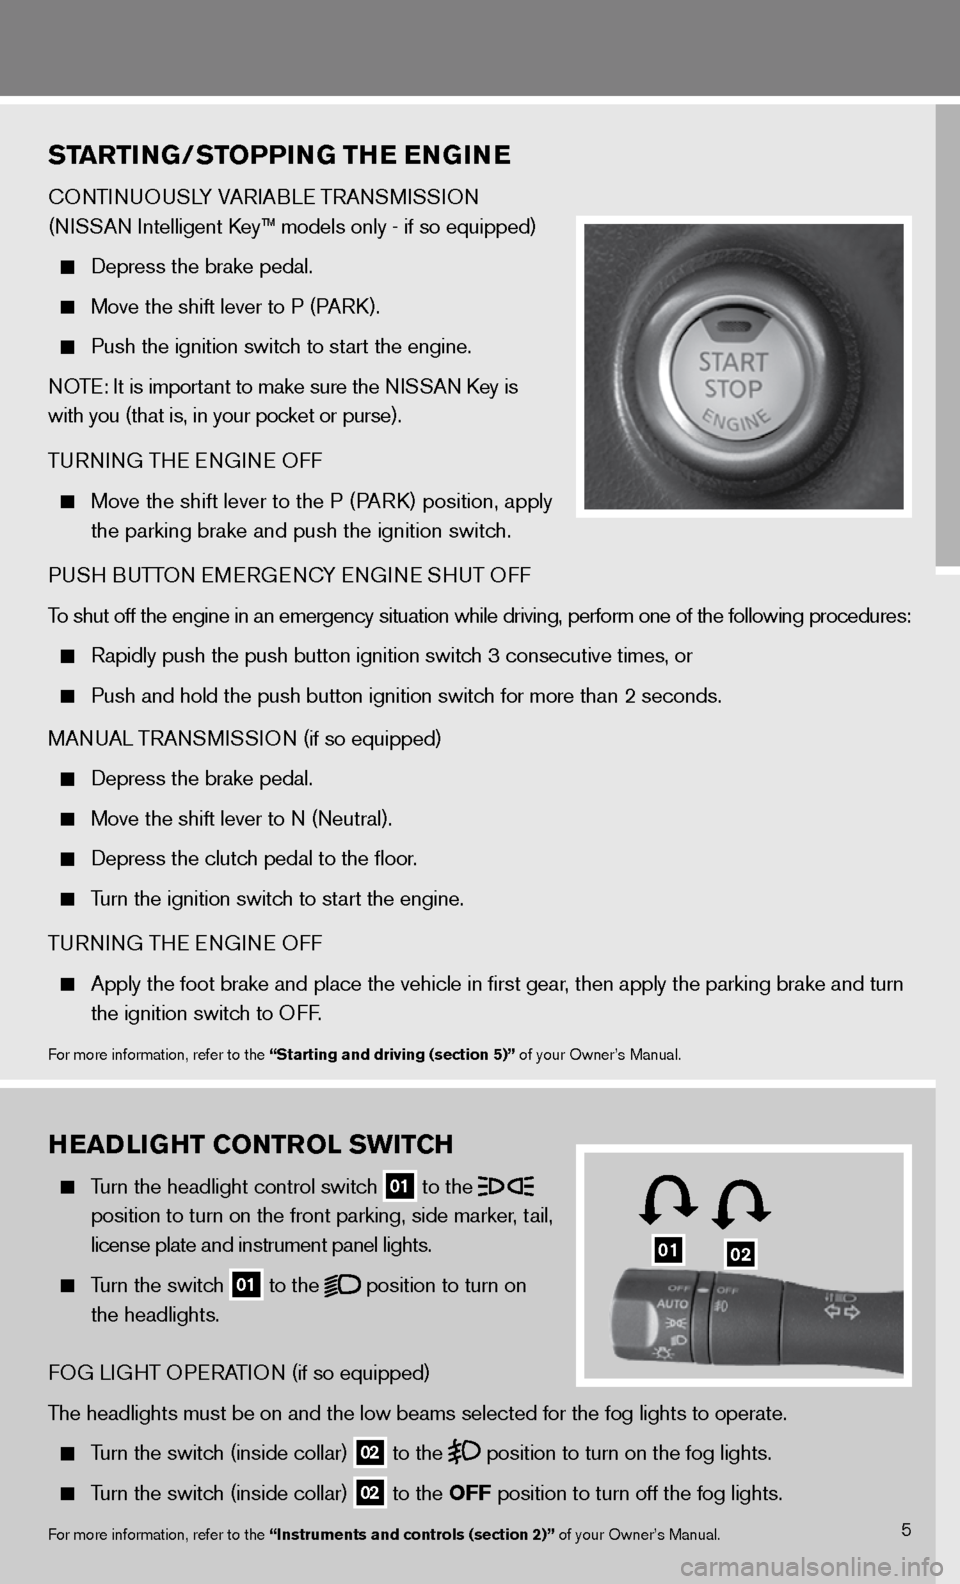
STarTING/STOPPING TH e eNGIN e
cO nTinu OuSLY VAR iABL e TRA nSM iSS iO n
(ni SSAn intelligent k ey™ models only - if so equipped)
depress the brake pedal.
Move the shift lever to P (PAR k).
Push the ignition switch to start the engine.
n OTe: it is important to make sure the ni SSAn key is
with you (that is, in your pocket or purse).
T uRnin G THe en Gine Off
Move the shift lever to the P (PAR k) position, apply
the parking brake and push the ignition switch.
P u SH B uTTO n eMeRG enc Y en Gine SH uT Off
To shut off the engine in an emergency situation while driving, perform one of the following procedures:
Rapidly push the push button ignition switch 3 consecutive times, or
Push and hold the push button ignition switch for more than 2 seconds.
MAnu AL TRAn SMiSS iO n (if so equipped)
depress the brake pedal.
Move the shift lever to n (neutral).
depress the clutch pedal to the floor.
Turn the ignition switch to start the engine.
T uRnin G THe en Gine Off
Apply the foot brake and place the vehicle in first gear, then apply the parking brake and turn
the ignition switch to O ff.
for more information, refer to the “Starting and driving (section 5)” of your Owner’s Manual.
H eaDLIGHT CONTr OL SwITCH
Turn the headlight control switch
01 to the
position to turn on the front parking, side marker, tail,
license plate and instrument panel lights.
Turn the switch
01 to the
position to turn on
the headlights.
fOG Li GHT OP eRATi On (if so equipped)
The headlights must be on and the low beams selected for the fog lights to operate.
Turn the switch (inside collar)
02 to the
position to turn on the fog lights.
Turn the switch (inside collar)
02 to the OFF position to turn off the fog lights.
f
or more information, refer to the “Instruments and controls (section 2)” of your Owner’s Manual.
02
Page 10 of 12

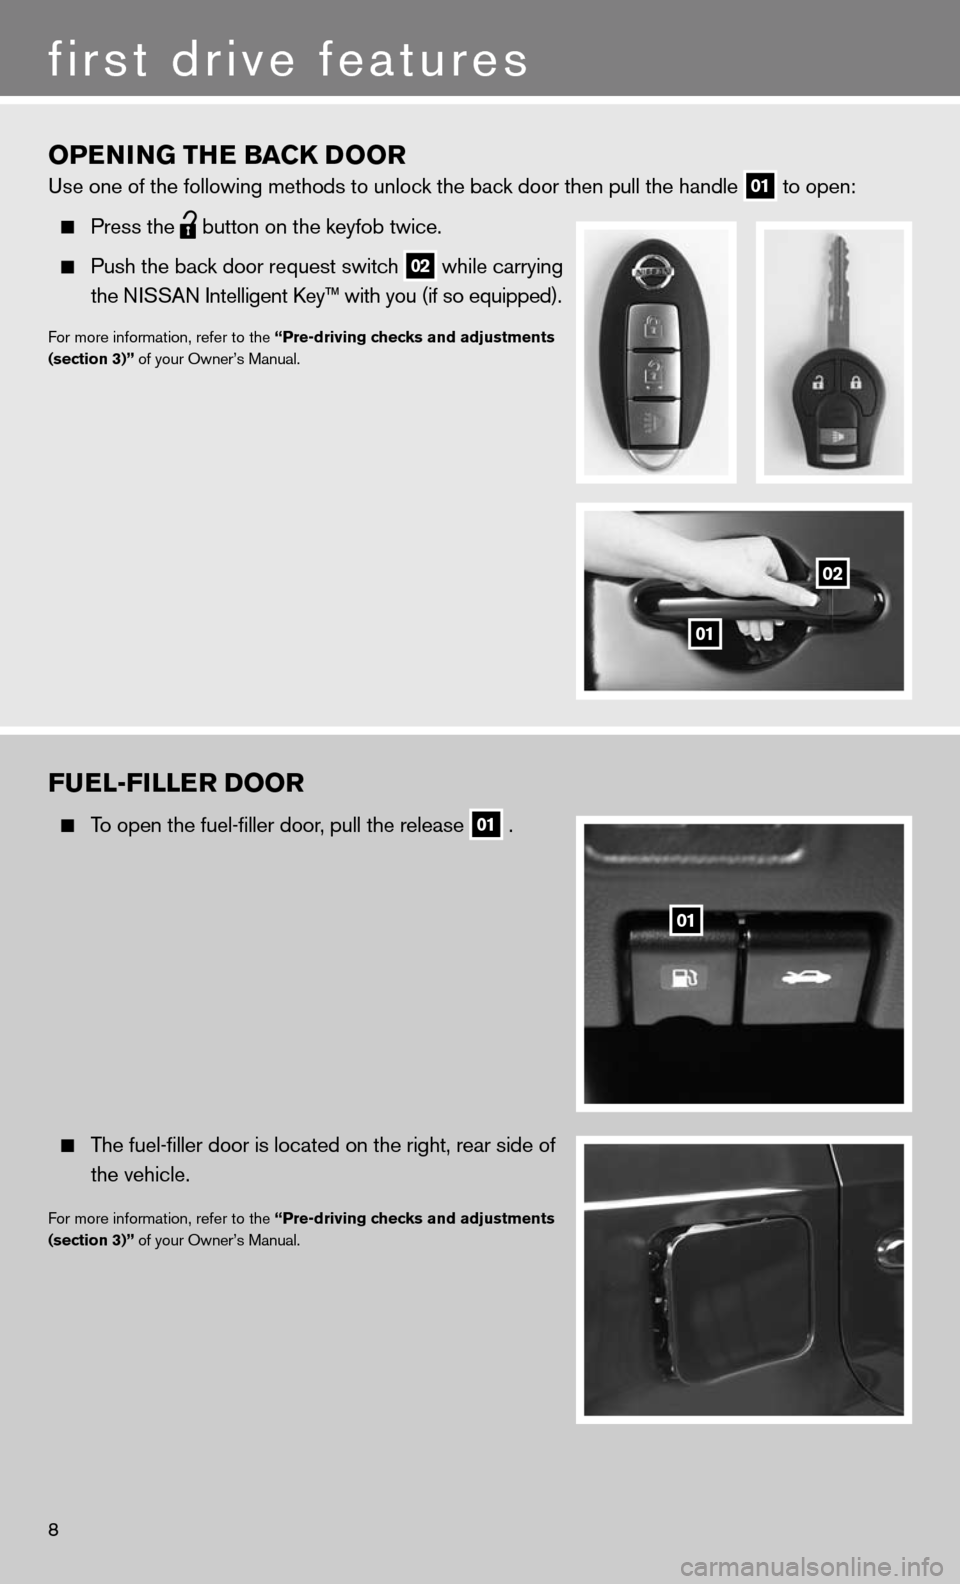
OPeNING TH e BaCK DOOr
use one of the following methods to unlock the back door then pull the handle
01 to open:
Press the
button on the keyfob twice.
Push the back door request switch
02 while carrying
the ni SSAn intelligent k ey™ with you (if so equipped).
for more information, refer to the “Pre-driving checks and adjustments
(section 3)” of your Owner’s Manual.
first drive features
8
Fue L-FILLer DOOr
To open the fuel-filler door, pull the release
01 .
The fuel-filler door is located on the right, rear side of
the vehicle.
for more information, refer to the “Pre-driving checks and adjustments
(section 3)” of your Owner’s Manual.
01
02
01