key NISSAN CUBE 2014 3.G Service Manual
[x] Cancel search | Manufacturer: NISSAN, Model Year: 2014, Model line: CUBE, Model: NISSAN CUBE 2014 3.GPages: 332, PDF Size: 2.59 MB
Page 149 of 332
4-8Center display, heater, air conditioner, audio and phone systems
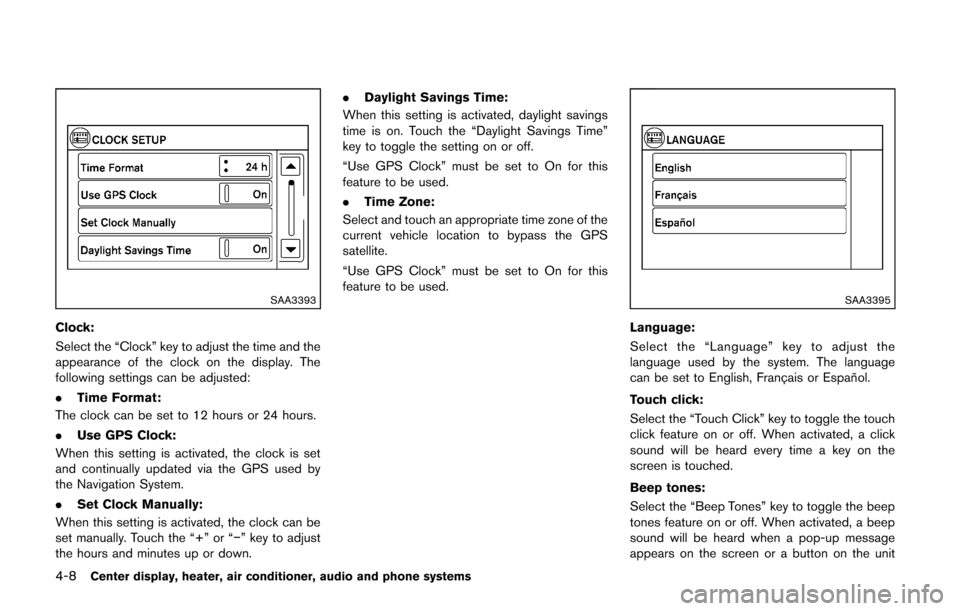
SAA3393
Clock:
Select the “Clock” key to adjust the time and the
appearance of the clock on the display. The
following settings can be adjusted:
.Time Format:
The clock can be set to 12 hours or 24 hours.
. Use GPS Clock:
When this setting is activated, the clock is set
and continually updated via the GPS used by
the Navigation System.
. Set Clock Manually:
When this setting is activated, the clock can be
set manually. Touch the “+” or “−” key to adjust
the hours and minutes up or down. .
Daylight Savings Time:
When this setting is activated, daylight savings
time is on. Touch the “Daylight Savings Time”
key to toggle the setting on or off.
“Use GPS Clock” must be set to On for this
feature to be used.
. Time Zone:
Select and touch an appropriate time zone of the
current vehicle location to bypass the GPS
satellite.
“Use GPS Clock” must be set to On for this
feature to be used.
SAA3395
Language:
Select the “Language” key to adjust the
language used by the system. The language
can be set to English, Franc¸ ais or Espan ˜
ol.
Touch click:
Select the “Touch Click” key to toggle the touch
click feature on or off. When activated, a click
sound will be heard every time a key on the
screen is touched.
Beep tones:
Select the “Beep Tones” key to toggle the beep
tones feature on or off. When activated, a beep
sound will be heard when a pop-up message
appears on the screen or a button on the unit
Page 150 of 332
(such as thebutton) is pressed and held for
two seconds.
Reset all settings/memory:
Select the “Reset All Settings/Memory” key to
return all settings to default and to clear the
memory.
Traffic Info setup
Refer to the separate Navigation System Own-
er’s Manual for information regarding this item. When the shift lever is shifted into the R
(Reverse) position, the monitor display shows
the view to the rear of the vehicle.
The system is designed as an aid to the driver in
situations such as slot parking or parallel
parking.WARNING
Failure to follow the warnings and
instructions for proper use of the Rear-
View Monitor could result in serious
injury or death.
.
The RearView monitor is a conve-
nience but it is not a substitute for
proper backing. Always turn and
look out the windows, and check
mirrors to be sure that it is safe to
move before operating the vehicle.
Always back up slowly.
. The system is designed as an aid to
the driver in showing large station-
ary objects directly behind the vehi-
cle, to help avoid damaging the
vehicle.
. The system cannot completely elim-
inate blind spots and may not show
every object. .
Underneath the bumper and the
corner areas of the bumper cannot
be viewed on the RearView Monitor
because of its monitoring range
limitation. The system will not show
small objects below the bumper,
and may not show objects close to
the bumper or on the ground.
. Objects viewed in the RearView
Monitor differ from actual distance
because a wide-angle lens is used.
. Objects in the RearView Monitor
will appear visually opposite than
when viewed in the rear view and
outside mirrors
. Make sure that the back door is
securely closed when backing up.
. Do not put anything on the rear view
camera.
. When washing the vehicle with
high-pressure water, be sure not to
spray it around the camera. Other-
wise, water may enter the camera
unit causing water condensation on
the lens, a malfunction, fire or an
electric shock.
. Do not strike the camera. It is a
precision instrument. Otherwise, it
Center display, heater, air conditioner, audio and phone systems4-9
REARVIEW MONITOR (if so
equipped)
Page 154 of 332
course.
HOW TO ADJUST THE SCREEN
The brightness can be adjusted by performing
the following procedure.
1. Push the SETUP button and then select the“System” key.
2. Select the “Display” key. The “Brightness” key is displayed.
3. Select the preferred brightness level.
OPERATING TIPS
. When the shift lever is shifted to the R
(Reverse) position, the monitor screen auto-
matically changes to the RearView Monitor
mode. However, the radio can be heard.
. When the view is switched, the display
images on the screen may be displayed with
some delay.
. When the temperature is extremely high or
low, the screen may not clearly display
objects. This is not a malfunction.
. When strong light is directly coming on the
camera, objects may not be displayed
clearly. This is not a malfunction.
. Vertical lines may be seen in objects on the
screen. This is due to strong reflected light
from the bumper. This is not a malfunction. .
The screen may flicker under fluorescent
light. This is not a malfunction.
. The colors of objects on the RearView
Monitor may differ somewhat from the actual
color of objects. This is not a malfunction.
. Objects on the monitor may not be clear in a
dark environment. This is not a malfunction.
. If dirt, rain or snow accumulates on the
camera, the RearView Monitor may not
display object clearly. Clean the camera.
. Do not use alcohol, benzine or thinner to
clean the camera. This will cause discolora-
tion. To clean the camera, wipe with a cloth
dampened with diluted mild cleaning agent
and then wipe with a dry cloth.
. Do not damage the camera as the monitor
screen may be adversely affected.
. Do not use wax on the camera window.
Wipe off any wax with a clean cloth
dampened with mild detergent diluted with
water.
SAA2343
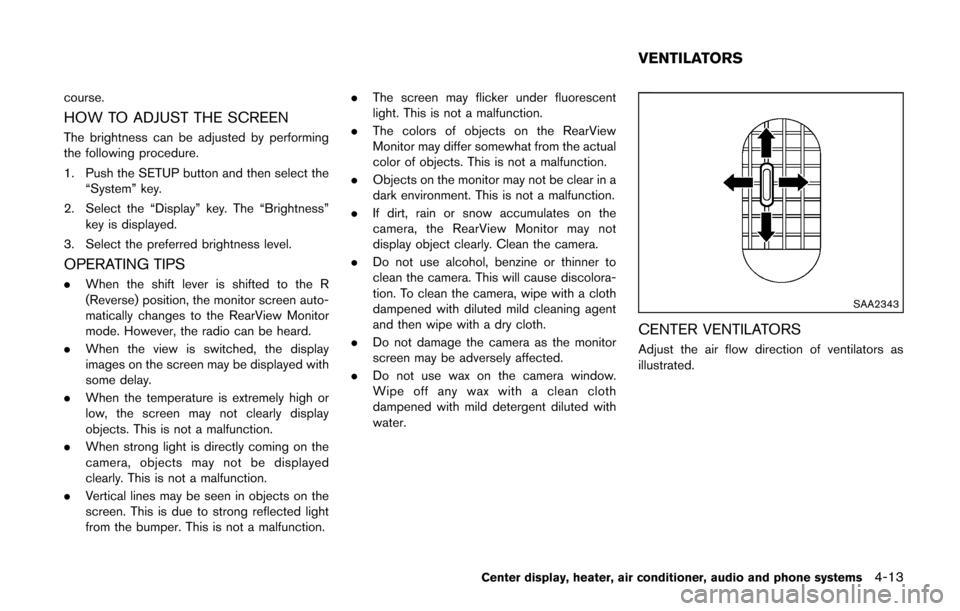
CENTER VENTILATORS
Adjust the air flow direction of ventilators as
illustrated.
Center display, heater, air conditioner, audio and phone systems4-13
VENTILATORS
Page 181 of 332
4-40Center display, heater, air conditioner, audio and phone systems
TUNE (Tuning):
.For AM and FM radio
Turn the TUNE/SCROLL knob for manual
tuning.
. For SiriusXM Satellite Radio
Turn the TUNE/SCROLL knob to seek
channels from all of the categories when
any category is not selected.
SEEK tuning:
. For AM and FM radio
Push the SEEK/CATEGORY button
orto tune from low to high or high to low
frequencies and to stop at the next broad-
casting station.
. For SiriusXM Satellite Radio
Push the SEEK/CATEGORY button
orto tune to the first channel of the next or
previous category.
Tuning with the touch screen (AM and FM
radio):
When in AM or FM mode, the radio can be
tuned using the touch screen. To bring up the
visual tuner, touch the “Tune” key on the lower
right corner of the screen. A screen appears
with a bar running from low frequencies on the
left to high frequencies on the right. Touch the
screen at the location of the frequency you wish to tune and the station will change to that
frequency. To return to the regular radio display
screen, touch the “OK” key.
toStation memory operations:
12 stations/channels can be set for the FM band
(6 each for FM1 and FM2) , 18 for SiriusXM
Satellite Radio (6 each for XM1, XM2 and XM3)
and 6 stations can be set for the AM band.
1. Choose the radio band using the radio band select button.
2. Tune to the desired station/channel using the SEEK/CATEGORY button or the TUNE/
SCROLL knob.
3. Push and hold the desired station preset button
tountil the beep sound is
heard.
4. The station indicator will then come on and the sound will resume. Memorizing is now
complete.
5. Other buttons can be set in the same manner.
If the battery cable is disconnected, or if the fuse
opens, the radio memory will be erased. In that
case, reset the desired stations/channels.
Channels (SiriusXM Satellite Radio):
When the SiriusXM Satellite Radio is being
played, select “Channels” key to display a list of channels. Select a preferred channel from the
list to change to that channel.
Categories (SiriusXM Satellite Radio):
When the SiriusXM Satellite Radio is being
played, select “Categories” key to display a list
of channels. Select a preferred channel from the
list to display options within that category.
Compact Disc (CD) player operation
Place the ignition switch in the ACC or ON
position and insert the Compact Disc (CD) into
the slot with the label side facing up. The CD will
be guided automatically into the slot and start
playing.
If the radio is already operating, it will auto-
matically turn off and the CD will play.
If the system has been turned off while the CD
was playing, pushing the ON·OFF button will
start the CD.
Do not use 3.1 in (8 cm) discs.
PLAY:
When the CD button is pushed with the system
off and the CD loaded, the system will turn on
and the CD will start to play.
When the CD button is pushed with the CD
loaded and the radio playing, the radio will
automatically be turned off and the CD will start
Page 182 of 332
to play.
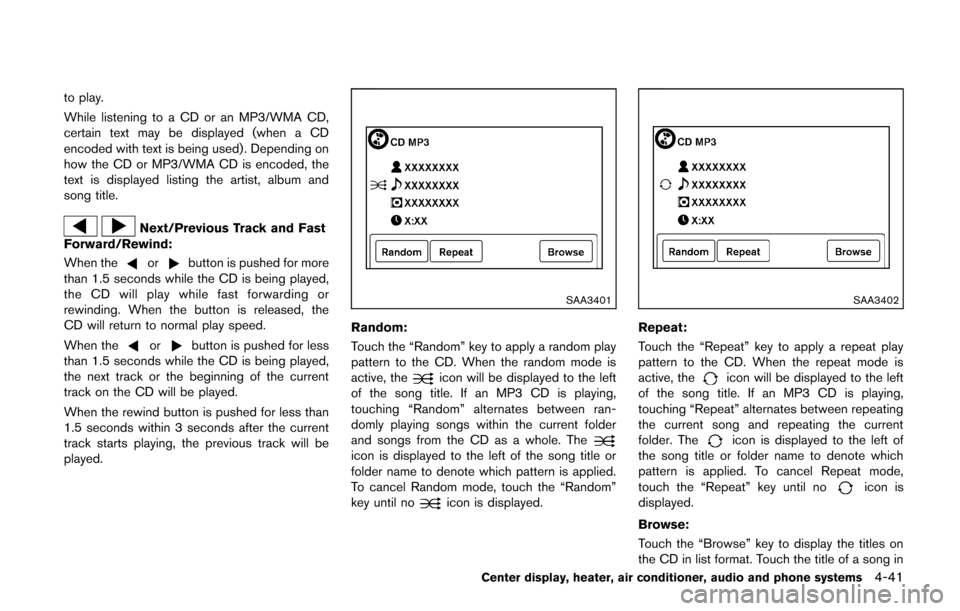
While listening to a CD or an MP3/WMA CD,
certain text may be displayed (when a CD
encoded with text is being used). Depending on
how the CD or MP3/WMA CD is encoded, the
text is displayed listing the artist, album and
song title.
Next/Previous Track and Fast
Forward/Rewind:
When the
orbutton is pushed for more
than 1.5 seconds while the CD is being played,
the CD will play while fast forwarding or
rewinding. When the button is released, the
CD will return to normal play speed.
When the
orbutton is pushed for less
than 1.5 seconds while the CD is being played,
the next track or the beginning of the current
track on the CD will be played.
When the rewind button is pushed for less than
1.5 seconds within 3 seconds after the current
track starts playing, the previous track will be
played.
SAA3401
Random:
Touch the “Random” key to apply a random play
pattern to the CD. When the random mode is
active, the
icon will be displayed to the left
of the song title. If an MP3 CD is playing,
touching “Random” alternates between ran-
domly playing songs within the current folder
and songs from the CD as a whole. The
icon is displayed to the left of the song title or
folder name to denote which pattern is applied.
To cancel Random mode, touch the “Random”
key until no
icon is displayed.
SAA3402
Repeat:
Touch the “Repeat” key to apply a repeat play
pattern to the CD. When the repeat mode is
active, the
icon will be displayed to the left
of the song title. If an MP3 CD is playing,
touching “Repeat” alternates between repeating
the current song and repeating the current
folder. The
icon is displayed to the left of
the song title or folder name to denote which
pattern is applied. To cancel Repeat mode,
touch the “Repeat” key until no
icon is
displayed.
Browse:
Touch the “Browse” key to display the titles on
the CD in list format. Touch the title of a song in
Center display, heater, air conditioner, audio and phone systems4-41
Page 183 of 332
4-42Center display, heater, air conditioner, audio and phone systems
the list to begin playing that song. If an MP3 CD
is playing, touching the “Browse” key will also
list the folders on the disc. Follow the procedure
for selecting a song with the touchscreen to
choose a folder.
CD EJECT:
When the CD EJECT button is pushed with the
CD loaded, the CD will be ejected.
When this button is pushed while the CD is
being played, the CD will be ejected.
If the CD is ejected and is not removed, it
will be pulled back into the slot to protect
it.
AUX (Auxiliary) input
AUX IN jack:
The AUX IN jack is located on the lower center
of the instrument panel. The AUX IN audio input
jack accepts any standard analog audio input
such as from a portable cassette tape/CD
player, MP3 player or laptop computer.
NISSAN strongly recommends using a stereo
mini plug cable when connecting your music
device to the audio system. Music may not play
properly when a monaural cable is used.
AUX (Auxiliary) button:
To switch to the AUX mode, push the AUX
button when a compatible audio device is
connected into the AUX IN jack.
When the AUX button is pushed with no device
plugged into the jack, the audio system does not
change to the AUX mode.
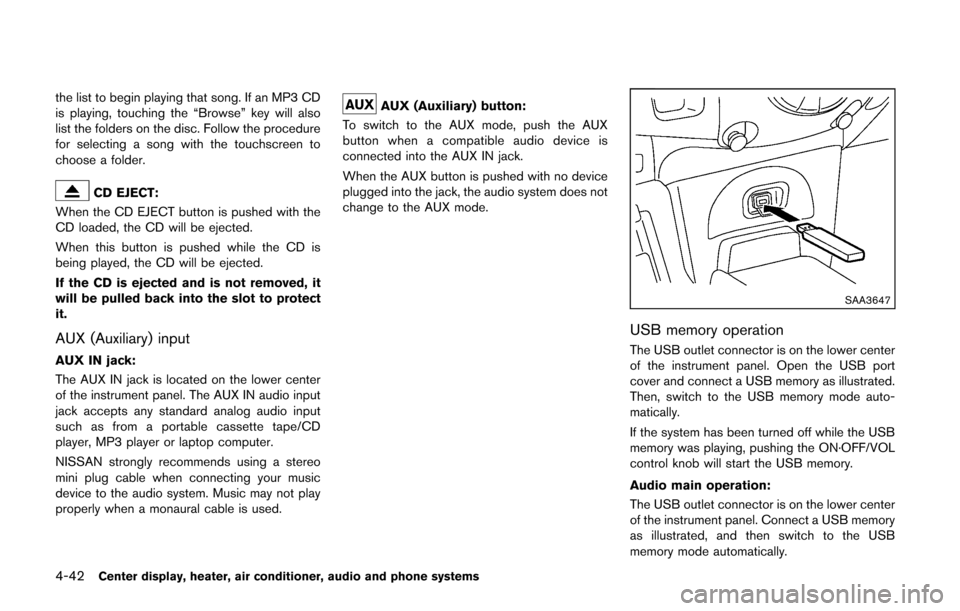
SAA3647
USB memory operation
The USB outlet connector is on the lower center
of the instrument panel. Open the USB port
cover and connect a USB memory as illustrated.
Then, switch to the USB memory mode auto-
matically.
If the system has been turned off while the USB
memory was playing, pushing the ON·OFF/VOL
control knob will start the USB memory.
Audio main operation:
The USB outlet connector is on the lower center
of the instrument panel. Connect a USB memory
as illustrated, and then switch to the USB
memory mode automatically.
Page 185 of 332
4-44Center display, heater, air conditioner, audio and phone systems
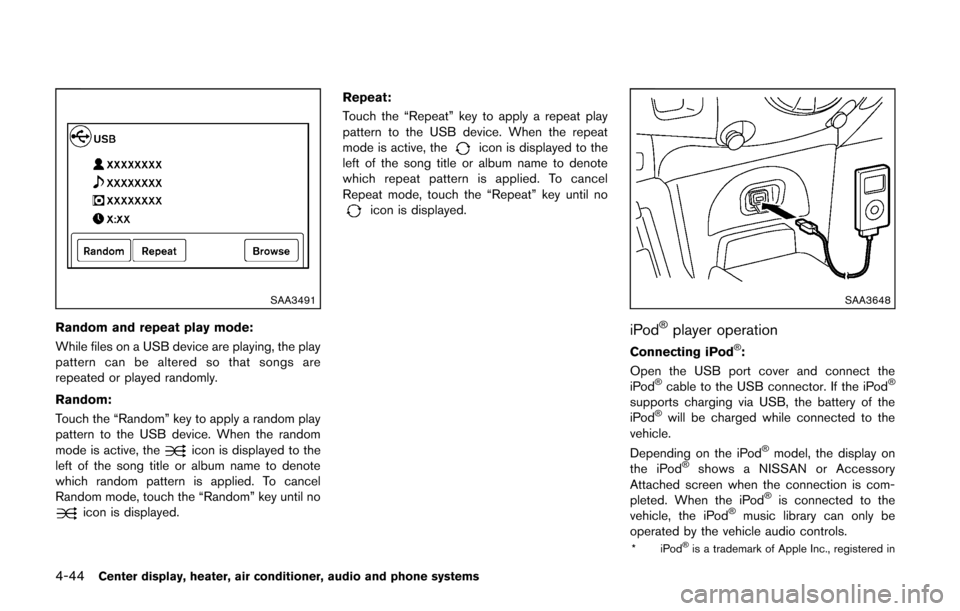
SAA3491
Random and repeat play mode:
While files on a USB device are playing, the play
pattern can be altered so that songs are
repeated or played randomly.
Random:
Touch the “Random” key to apply a random play
pattern to the USB device. When the random
mode is active, the
icon is displayed to the
left of the song title or album name to denote
which random pattern is applied. To cancel
Random mode, touch the “Random” key until no
icon is displayed. Repeat:
Touch the “Repeat” key to apply a repeat play
pattern to the USB device. When the repeat
mode is active, the
icon is displayed to the
left of the song title or album name to denote
which repeat pattern is applied. To cancel
Repeat mode, touch the “Repeat” key until no
icon is displayed.
SAA3648
iPod®player operation
Connecting iPod®:
Open the USB port cover and connect the
iPod
®cable to the USB connector. If the iPod®
supports charging via USB, the battery of the
iPod®will be charged while connected to the
vehicle.
Depending on the iPod
®model, the display on
the iPod®shows a NISSAN or Accessory
Attached screen when the connection is com-
pleted. When the iPod
®is connected to the
vehicle, the iPod®music library can only be
operated by the vehicle audio controls.
*iPod®is a trademark of Apple Inc., registered in
Page 187 of 332
4-46Center display, heater, air conditioner, audio and phone systems
.Genres
. Songs
. Composers
. Audiobooks
. Podcasts
The following touch-panel buttons shown on the
screen are also available:
.
: returns to the previous screen.
.
: plays/pauses the music selected.
SEEK/CATEGORY button:
Push the FF or REW button for more than 1.5
seconds while an iPod
®is playing to fast-
forward or rewind through the track. When the
button is released, the iPod
®will return to the
normal play speed.
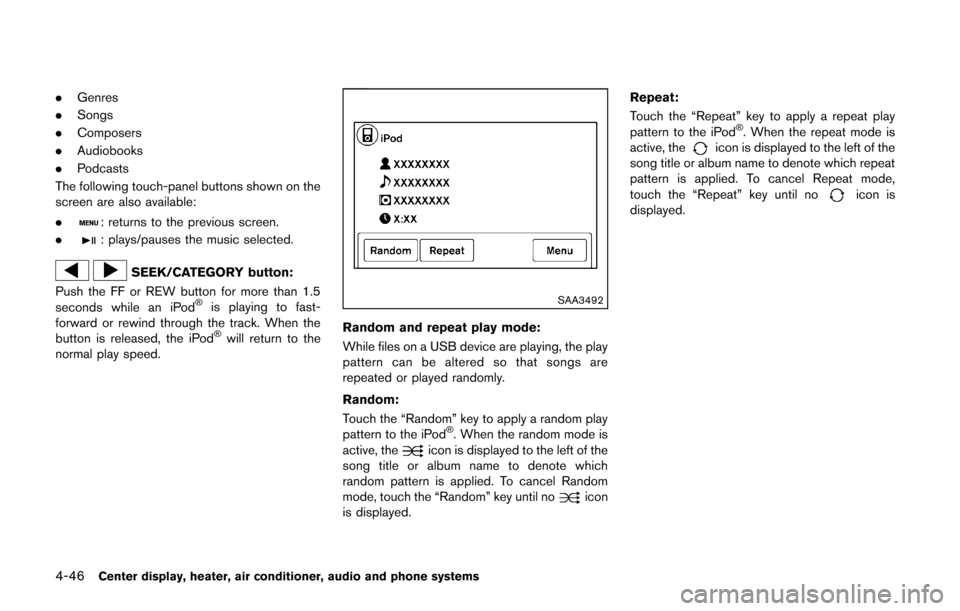
SAA3492
Random and repeat play mode:
While files on a USB device are playing, the play
pattern can be altered so that songs are
repeated or played randomly.
Random:
Touch the “Random” key to apply a random play
pattern to the iPod
®. When the random mode is
active, theicon is displayed to the left of the
song title or album name to denote which
random pattern is applied. To cancel Random
mode, touch the “Random” key until no
icon
is displayed. Repeat:
Touch the “Repeat” key to apply a repeat play
pattern to the iPod
®. When the repeat mode is
active, theicon is displayed to the left of the
song title or album name to denote which repeat
pattern is applied. To cancel Repeat mode,
touch the “Repeat” key until no
icon is
displayed.
Page 196 of 332
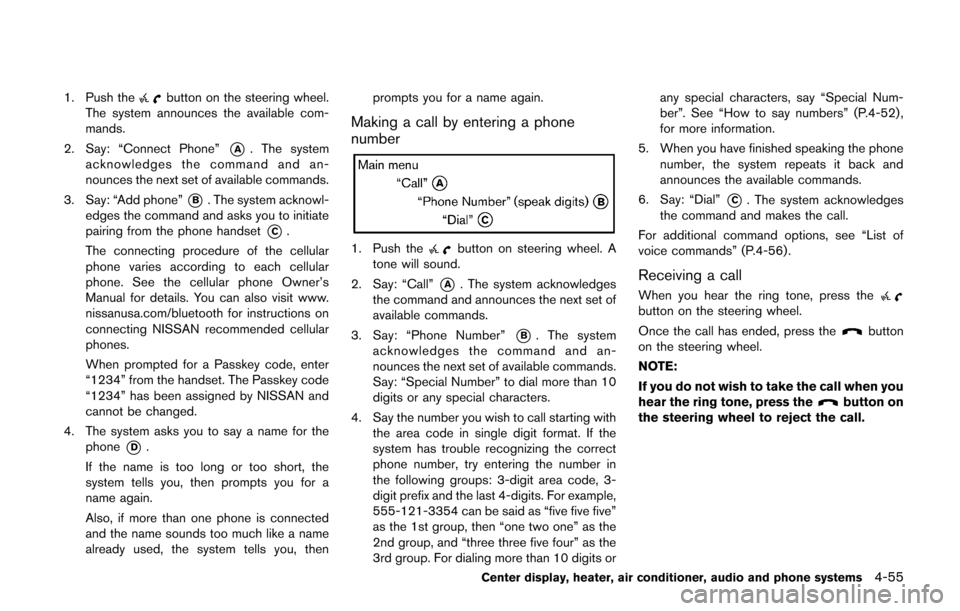
1. Push thebutton on the steering wheel.
The system announces the available com-
mands.
2. Say: “Connect Phone”
*A. The system
acknowledges the command and an-
nounces the next set of available commands.
3. Say: “Add phone”
*B. The system acknowl-
edges the command and asks you to initiate
pairing from the phone handset
*C.
The connecting procedure of the cellular
phone varies according to each cellular
phone. See the cellular phone Owner’s
Manual for details. You can also visit www.
nissanusa.com/bluetooth for instructions on
connecting NISSAN recommended cellular
phones.
When prompted for a Passkey code, enter
“1234” from the handset. The Passkey code
“1234” has been assigned by NISSAN and
cannot be changed.
4. The system asks you to say a name for the phone
*D.
If the name is too long or too short, the
system tells you, then prompts you for a
name again.
Also, if more than one phone is connected
and the name sounds too much like a name
already used, the system tells you, then prompts you for a name again.
Making a call by entering a phone
number
1. Push thebutton on steering wheel. A
tone will sound.
2. Say: “Call”
*A. The system acknowledges
the command and announces the next set of
available commands.
3. Say: “Phone Number”
*B. The system
acknowledges the command and an-
nounces the next set of available commands.
Say: “Special Number” to dial more than 10
digits or any special characters.
4. Say the number you wish to call starting with the area code in single digit format. If the
system has trouble recognizing the correct
phone number, try entering the number in
the following groups: 3-digit area code, 3-
digit prefix and the last 4-digits. For example,
555-121-3354 can be said as “five five five”
as the 1st group, then “one two one” as the
2nd group, and “three three five four” as the
3rd group. For dialing more than 10 digits or any special characters, say “Special Num-
ber”. See “How to say numbers” (P.4-52) ,
for more information.
5. When you have finished speaking the phone number, the system repeats it back and
announces the available commands.
6. Say: “Dial”
*C. The system acknowledges
the command and makes the call.
For additional command options, see “List of
voice commands” (P.4-56) .
Receiving a call
When you hear the ring tone, press thebutton on the steering wheel.
Once the call has ended, press the
button
on the steering wheel.
NOTE:
If you do not wish to take the call when you
hear the ring tone, press the
button on
the steering wheel to reject the call.
Center display, heater, air conditioner, audio and phone systems4-55
Page 206 of 332
5 Starting and driving
Precautions when starting and driving ................................ 5-2Exhaust gas (carbon monoxide) ...................................... 5-2
Three-way catalyst .............................................................. 5-3
Tire Pressure Monitoring System (TPMS) .................... 5-3
Avoiding collision and rollover ......................................... 5-5
Off-road recovery ................................................................ 5-6
Rapid air pressure loss ...................................................... 5-6
Drinking alcohol/drugs and driving ................................. 5-7
Ignition switch (models without Intelligent
Key system) ........................................................................\
........ 5-7
Continuously Variable Transmission (CVT) ................... 5-8
Manual Transmission (MT) ................................................ 5-8
Key positions ........................................................................\
5-9
Push-button ignition switch (models with Intelligent
Key system) ........................................................................\
........ 5-9 Operating range for engine start function .................... 5-9
Push-button ignition switch operation ........................ 5-10
Push-button ignition switch positions ......................... 5-10
Emergency engine shut off ............................................ 5-11
Intelligent Key battery discharge .................................. 5-11
Before starting the engine ................................................... 5-12
Starting the engine ................................................................ 5-12 Models without Intelligent Key system ....................... 5-12
Models with Intelligent Key system ............................. 5-13 Driving the vehicle ................................................................. 5-14
Continuously Variable Transmission (CVT) ............. 5-14
Manual Transmission (MT) ........................................... 5-18
Parking brake ........................................................................\
.. 5-20
Cruise control ........................................................................\
. 5-21 Precautions on cruise control ..................................... 5-21
Cruise control operations ............................................ 5-22
Break-in schedule ................................................................. 5-23
Fuel Efficient Driving Tips ................................................... 5-23
Increasing fuel economy ...................................................... 5-24
Parking/parking on hills ........................................................ 5-25
Electric power steering system ......................................... 5-26
Brake system ........................................................................\
.. 5-27
Braking precautions ...................................................... 5-27
Anti-lock Braking System (ABS) ............................... 5-27
Vehicle Dynamic Control (VDC) system ......................... 5-29
Cold weather driving ............................................................ 5-30 Freeing a frozen door lock ........................................... 5-30
Anti-freeze ........................................................................\
5-30
Battery ........................................................................\
....... 5-30
Draining of coolant water ............................................. 5-30
Tire equipment ................................................................ 5-31
Special winter equipment ............................................ 5-31
Driving on snow or ice ................................................. 5-31