NISSAN FRONTIER 1998 D22 / 1.G Repair Manual
Manufacturer: NISSAN, Model Year: 1998, Model line: FRONTIER, Model: NISSAN FRONTIER 1998 D22 / 1.GPages: 224, PDF Size: 1.7 MB
Page 61 of 224
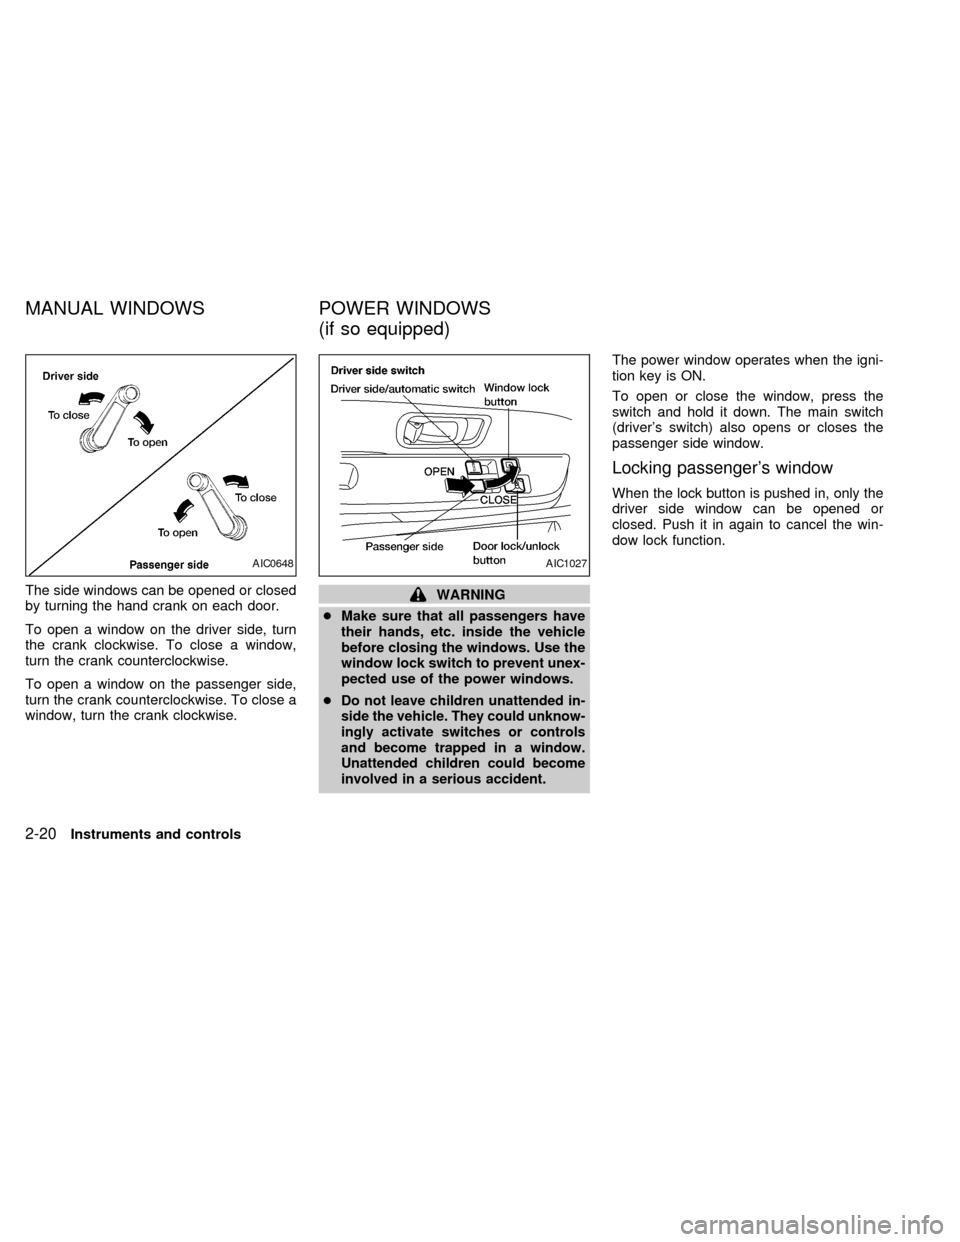
The side windows can be opened or closed
by turning the hand crank on each door.
To open a window on the driver side, turn
the crank clockwise. To close a window,
turn the crank counterclockwise.
To open a window on the passenger side,
turn the crank counterclockwise. To close a
window, turn the crank clockwise.WARNING
cMake sure that all passengers have
their hands, etc. inside the vehicle
before closing the windows. Use the
window lock switch to prevent unex-
pected use of the power windows.
c
Do not leave children unattended in-
side the vehicle. They could unknow-
ingly activate switches or controls
and become trapped in a window.
Unattended children could become
involved in a serious accident.
The power window operates when the igni-
tion key is ON.
To open or close the window, press the
switch and hold it down. The main switch
(driver's switch) also opens or closes the
passenger side window.
Locking passenger's window
When the lock button is pushed in, only the
driver side window can be opened or
closed. Push it in again to cancel the win-
dow lock function.
AIC0648AIC1027
MANUAL WINDOWS POWER WINDOWS
(if so equipped)
2-20Instruments and controls
ZX
Page 62 of 224

Passenger's switch
The passenger's switch opens or closes the
passenger's window. To open the window,
push the switch down. To close the window,
lift the switch up.
AUTOMATIC POWER WINDOW
SWITCH
To fully open the driver's side window, com-
pletely press the driver's side window switch
down and release it; it need not be held. The
window automatically opens all the way. To
stop the window, pull up on the switch while
the window is opening.Squeeze the handles of the lever, then slide
the window open.
AIC1028AIC0615AIC0745
REAR SLIDING WINDOW
(if so equipped)
Instruments and controls2-21
ZX
Page 63 of 224
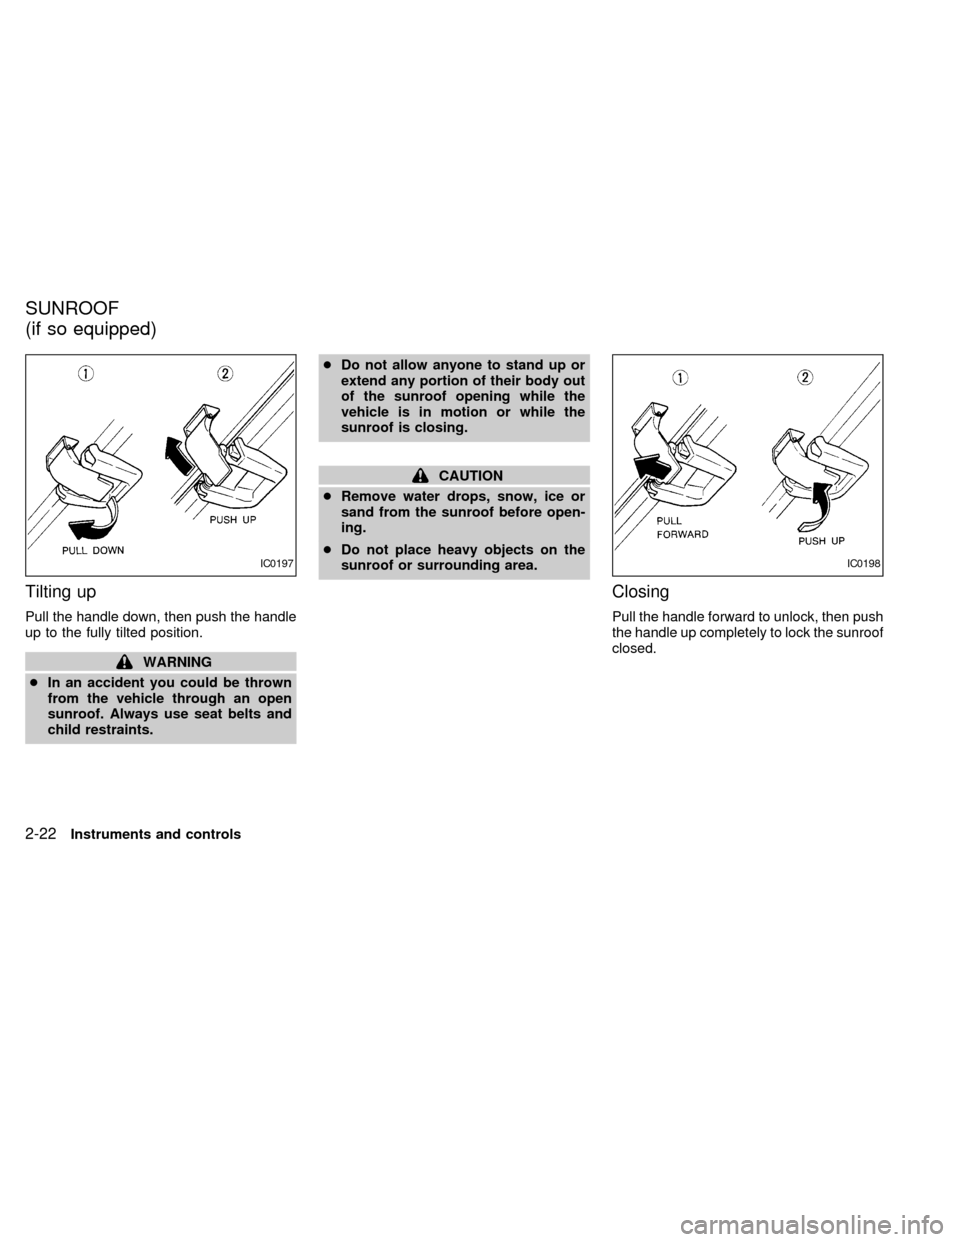
Tilting up
Pull the handle down, then push the handle
up to the fully tilted position.
WARNING
cIn an accident you could be thrown
from the vehicle through an open
sunroof. Always use seat belts and
child restraints.cDo not allow anyone to stand up or
extend any portion of their body out
of the sunroof opening while the
vehicle is in motion or while the
sunroof is closing.
CAUTION
cRemove water drops, snow, ice or
sand from the sunroof before open-
ing.
cDo not place heavy objects on the
sunroof or surrounding area.
Closing
Pull the handle forward to unlock, then push
the handle up completely to lock the sunroof
closed.
IC0197IC0198
SUNROOF
(if so equipped)
2-22Instruments and controls
ZX
Page 64 of 224
WARNING
Do not remove or install the sun shade
while driving so that full attention may
be given to the driving operation.
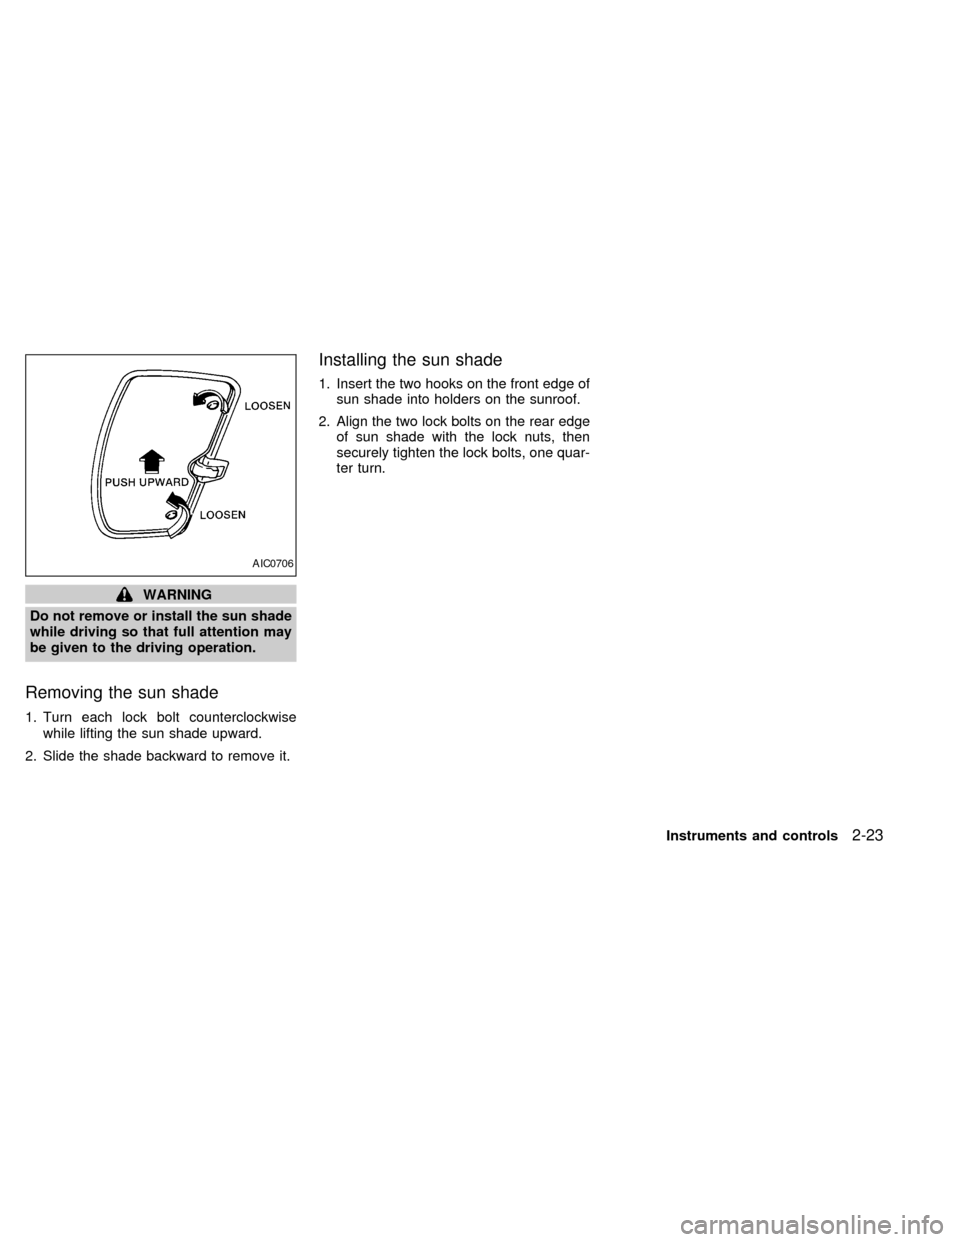
Removing the sun shade
1. Turn each lock bolt counterclockwise
while lifting the sun shade upward.
2. Slide the shade backward to remove it.
Installing the sun shade
1. Insert the two hooks on the front edge of
sun shade into holders on the sunroof.
2. Align the two lock bolts on the rear edge
of sun shade with the lock nuts, then
securely tighten the lock bolts, one quar-
ter turn.
AIC0706
Instruments and controls2-23
ZX
Page 65 of 224
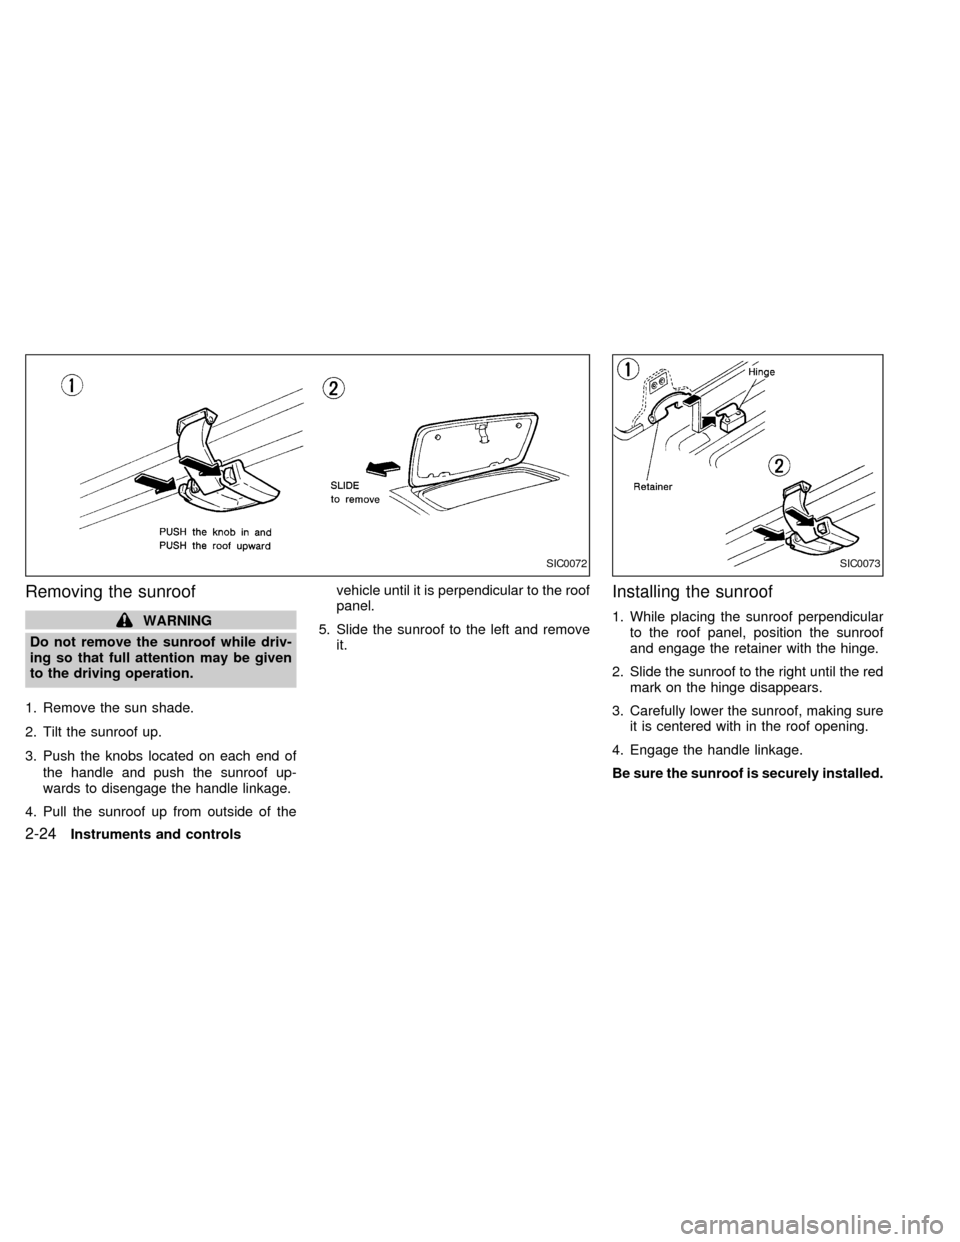
Removing the sunroof
WARNING
Do not remove the sunroof while driv-
ing so that full attention may be given
to the driving operation.
1. Remove the sun shade.
2. Tilt the sunroof up.
3. Push the knobs located on each end of
the handle and push the sunroof up-
wards to disengage the handle linkage.
4. Pull the sunroof up from outside of thevehicle until it is perpendicular to the roof
panel.
5. Slide the sunroof to the left and remove
it.
Installing the sunroof
1. While placing the sunroof perpendicular
to the roof panel, position the sunroof
and engage the retainer with the hinge.
2. Slide the sunroof to the right until the red
mark on the hinge disappears.
3. Carefully lower the sunroof, making sure
it is centered with in the roof opening.
4. Engage the handle linkage.
Be sure the sunroof is securely installed.
SIC0072SIC0073
2-24Instruments and controls
ZX
Page 66 of 224

3 Pre-driving checks and adjustments
Key .........................................................................3-2
Door locks ..............................................................3-2
Power door lock (if so equipped) ...........................3-3
Multi-remote control system (if so equipped).........3-4
Battery replacement ...............................................3-7
Hood release ..........................................................3-8
Glove box ...............................................................3-9
Fuel filler cap ..........................................................3-9Tailgate latch ........................................................3-10
Tie down hooks ....................................................3-12
Tilting steering wheel (if so equipped) .................3-12
Outside mirror remote control (if so equipped) ....3-13
Outside mirrors .....................................................3-13
Inside mirror .........................................................3-14
Vanity mirror (if so equipped)...............................3-14
ZX
Page 67 of 224
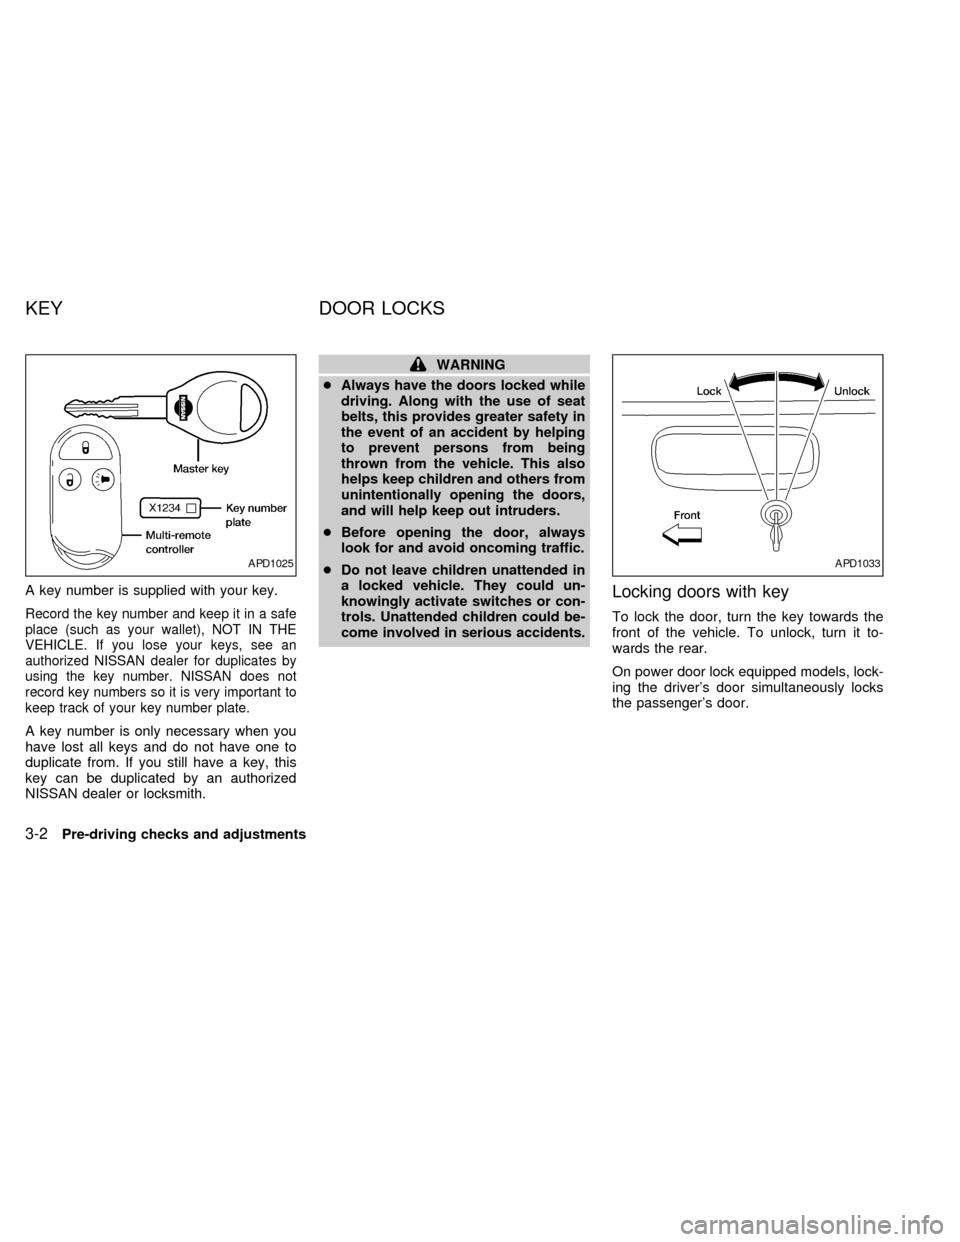
A key number is supplied with your key.
Record the key number and keep it in a safe
place (such as your wallet), NOT IN THE
VEHICLE. If you lose your keys, see an
authorized NISSAN dealer for duplicates by
using the key number. NISSAN does not
record key numbers so it is very important to
keep track of your key number plate.
A key number is only necessary when you
have lost all keys and do not have one to
duplicate from. If you still have a key, this
key can be duplicated by an authorized
NISSAN dealer or locksmith.
WARNING
cAlways have the doors locked while
driving. Along with the use of seat
belts, this provides greater safety in
the event of an accident by helping
to prevent persons from being
thrown from the vehicle. This also
helps keep children and others from
unintentionally opening the doors,
and will help keep out intruders.
cBefore opening the door, always
look for and avoid oncoming traffic.
cDo not leave children unattended in
a locked vehicle. They could un-
knowingly activate switches or con-
trols. Unattended children could be-
come involved in serious accidents.
Locking doors with key
To lock the door, turn the key towards the
front of the vehicle. To unlock, turn it to-
wards the rear.
On power door lock equipped models, lock-
ing the driver's door simultaneously locks
the passenger's door.
APD1025APD1033
KEY DOOR LOCKS
3-2Pre-driving checks and adjustments
ZX
Page 68 of 224

Locking doors without key
To lock the doors without the key, push the
inside lock knob to the lock position, then
close the door.
When locking the door this way, be certain
not to leave the key inside the vehicle.
POWER DOOR LOCK
(if so equipped)
The power door lock system allows you to
lock or unlock both doors simultaneously.
Turning the key to the front of the vehicle
locks both doors.
Turning the key one time to the rear of the
vehicle unlocks that door. From that posi-
tion, returning the key to neutral (where the
key can only be removed and inserted) and
turning it to the rear again within 5 seconds
unlocks both doors.To lock from the outside without a key, push
the door lock button (driver side only) or the
door lock knob (driver or passenger side),
then close the door. When locking the door
this way, be certain not to leave the key
inside the vehicle. If the key is left in the
ignition, all doors will unlock automatically.
AIC1012APD1041APD1049
Pre-driving checks and adjustments3-3
ZX
Page 69 of 224
MULTI-REMOTE CONTROL
SYSTEM (if so equipped)
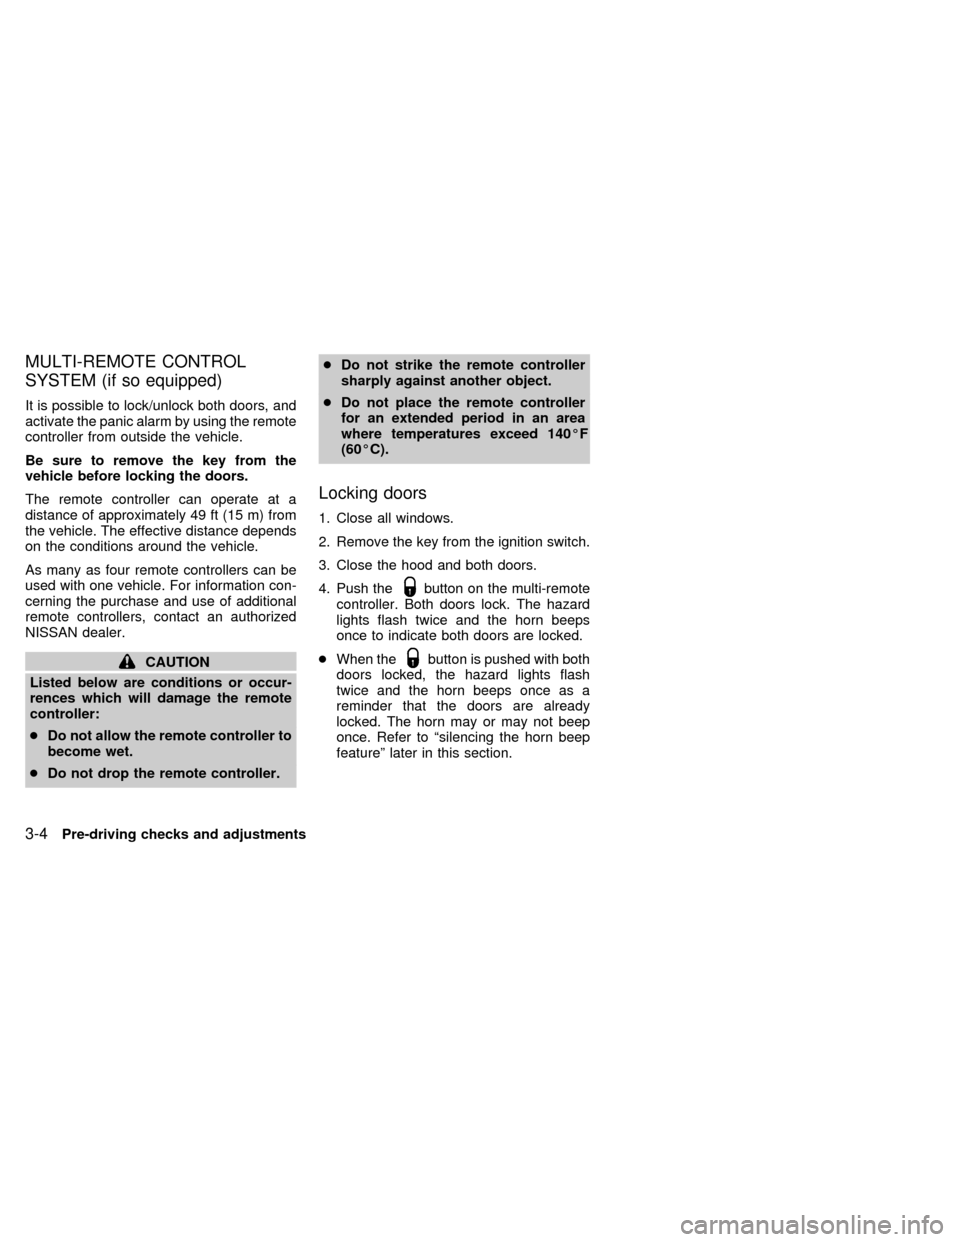
It is possible to lock/unlock both doors, and
activate the panic alarm by using the remote
controller from outside the vehicle.
Be sure to remove the key from the
vehicle before locking the doors.
The remote controller can operate at a
distance of approximately 49 ft (15 m) from
the vehicle. The effective distance depends
on the conditions around the vehicle.
As many as four remote controllers can be
used with one vehicle. For information con-
cerning the purchase and use of additional
remote controllers, contact an authorized
NISSAN dealer.
CAUTION
Listed below are conditions or occur-
rences which will damage the remote
controller:
cDo not allow the remote controller to
become wet.
cDo not drop the remote controller.cDo not strike the remote controller
sharply against another object.
cDo not place the remote controller
for an extended period in an area
where temperatures exceed 140ÉF
(60ÉC).
Locking doors
1. Close all windows.
2. Remove the key from the ignition switch.
3. Close the hood and both doors.
4. Push the
button on the multi-remote
controller. Both doors lock. The hazard
lights flash twice and the horn beeps
once to indicate both doors are locked.
cWhen the
button is pushed with both
doors locked, the hazard lights flash
twice and the horn beeps once as a
reminder that the doors are already
locked. The horn may or may not beep
once. Refer to ªsilencing the horn beep
featureº later in this section.
3-4Pre-driving checks and adjustments
ZX
Page 70 of 224

Unlocking doors
1. Push thebutton on the multi-
remote controller. Only the driver's side
door unlocks.
2. Push the
button on the multi-remote controller again within five sec-
onds. The passenger door unlocks.
3. The interior light illuminates for 30 sec-
onds when the light switch is in the O
position.The interior light can be turned off without
waiting 30 seconds by inserting the key into
the ignition or locking the doors with the
multi-remote controller or pushing the
interior light switch to the OFF position.
Using the panic alarm
If you are near your vehicle and feel threat-
ened, you may activate the panic alarm to
call attention as follows:
1. Push the
button on the remote con-
troller forlonger than 1.5 seconds.
2. The theft warning alarm and headlights
will stay on for 30 seconds.
3. The panic alarm stops when:
cit has run for 30 seconds, or
cthe
,or thebutton is
pressed, on the multi-remote controller.
APD1035
Pre-driving checks and adjustments3-5
ZX