change wheel NISSAN FRONTIER 2001 D22 / 1.G Owners Manual
[x] Cancel search | Manufacturer: NISSAN, Model Year: 2001, Model line: FRONTIER, Model: NISSAN FRONTIER 2001 D22 / 1.GPages: 290, PDF Size: 3.14 MB
Page 22 of 290
choking. Those with a history of a breathing
condition should get fresh air promptly.
The supplemental air bags, along with the use
of the seat belts, helps to cushion the impact
force on the face and chest of the occupant. It
can help save lives and reduce serious inju-
ries. However, an inflating supplemental air
bag may cause facial abrasions or other inju-
ries. Supplemental air bags do not provide
restraint to the lower body.
Seat belts should be correctly worn and the
driver and passenger seated upright as far
as practical away from the steering wheel or
instrument panel. Since the supplemental
air bags inflate quickly in order to help
protect the front occupants, the force of the
supplemental air bags inflating can increase
the risk of injury if the occupant is too close
to or against the supplemental air bag mod-
ule during inflation.
The supplemental air bags deflate quickly
after a collision.
The supplemental air bags operate only
when the ignition switch is in the ON or
START position.
WARNING
cDo not place any objects on the
steering wheel pad or on the instru-
ment panel. Also, do not place any
objects between any occupant and
the steering wheel or on the instru-
ment panel. Such objects may be-
come dangerous projectiles, and
cause injury if the supplemental air
bag inflates.
cRight after inflation, several supple-
mental air bag system components
will be hot. Do not touch them; you
may severely burn yourself.
c
No unauthorized changes should be
made to any components or wiring of
the supplemental air bag system. This
is to prevent accidental inflation of
the supplemental air bag or damage
to the supplemental air bag system.
cDo not make unauthorized changes to
your vehicle's electrical system, sus-
pension system or front end structure.
This could affect proper operation of
the supplemental air bag system.c
Tampering with the supplemental air
bag system may result in serious per-
sonal injury. Tampering includes
changes to the steering wheel and the
instrument panel assembly, by plac-
ing material over the steering wheel
pad and above the instrument panel,
or by installing additional trim mate-
rial around the supplemental air bag
system.
cWork around and on the supplemen-
tal air bag system should be done by
an authorized NISSAN dealer. Instal-
lation of electrical equipment should
also be done by an authorized NIS-
SAN dealer. The yellow Supplemen-
tal Restraint System (SRS) wiring
should not be modified or discon-
nected. Unauthorized electrical test
equipment and probing devices
should not be used on the supple-
mental air bag system.
cSRS wiring harnesses are covered
with yellow insulation either just be-
fore the harness connectors or over
the complete harness for easy iden-
tification.
Seats, restraints and supplemental air bag systems
1-15
ZX
Page 105 of 290

4Heater, air conditioner and audio systems
Ventilators ..............................................................4-2
Heater and air conditioner......................................4-3
Controls .............................................................4-3
Heater operation ................................................4-4
Air conditioner operation
(if so equipped)..................................................4-5
Air flow charts ....................................................4-6
Servicing air conditioner .........................................4-9
Audio system ........................................................4-10
FM-AM radio with compact disc (CD)
player (if so equipped).....................................4-10FM-AM radio with cassette player and
compact disc (CD) player
(if so equipped)................................................4-17
FM-AM radio with compact disc (CD)
changer (if so equipped) .................................4-25
Steering wheel switch for audio controls ........4-38
Antenna ...........................................................4-39
Car phone or CB radio .........................................4-39
ZX
Page 142 of 290
cDo not use the following CDs as they
may cause the CD player to malfunc-
tion:
c8 cm (3.1 in) discs with an adapter
cRecordable compact discs (CD-R)
cRewritable compact discs (CD-
RW)
cCDs that are not round
cCDs with a paper label
cCDs that are warped, scratched or
have abnormal edges
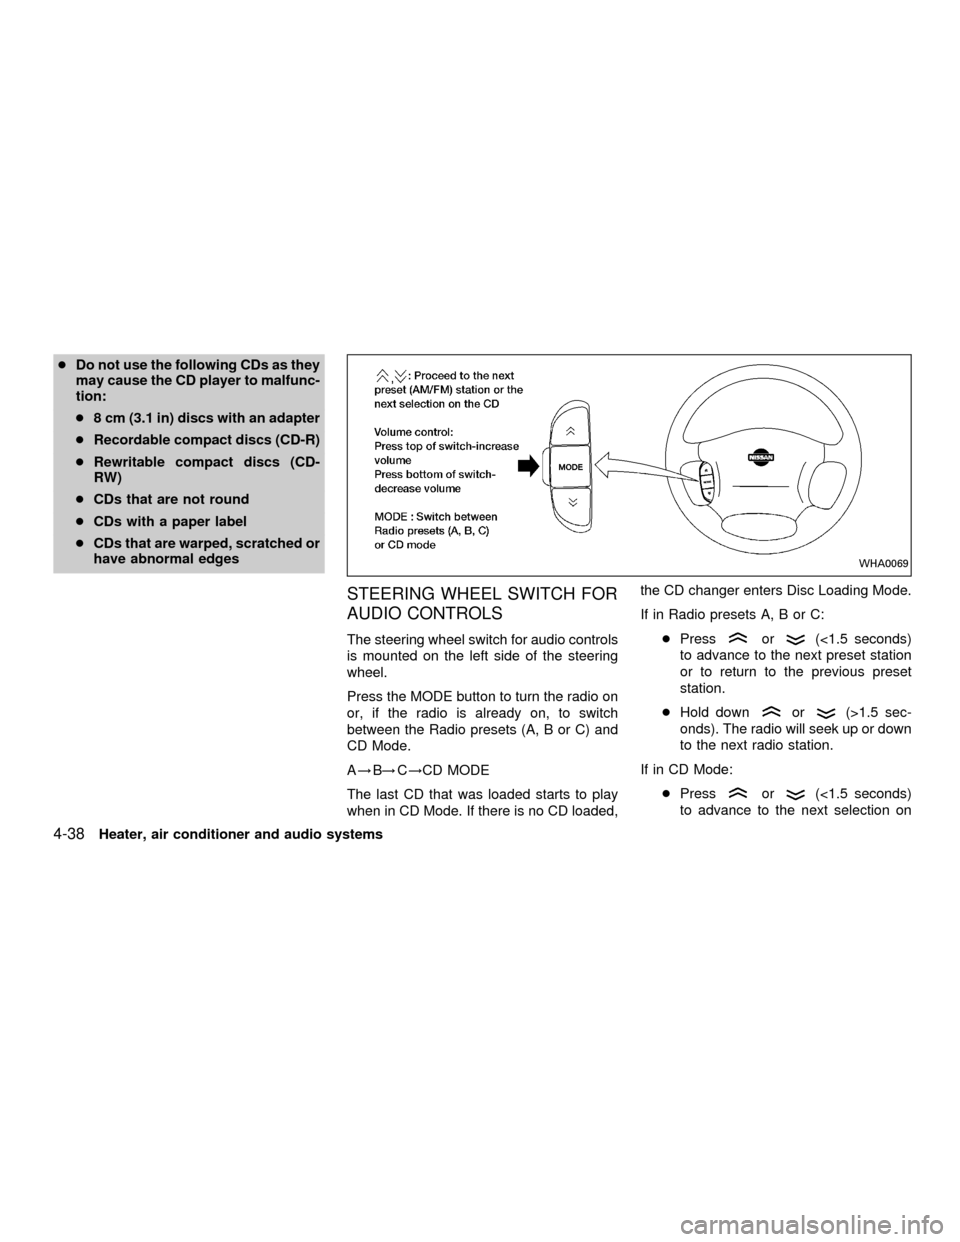
STEERING WHEEL SWITCH FOR
AUDIO CONTROLS
The steering wheel switch for audio controls
is mounted on the left side of the steering
wheel.
Press the MODE button to turn the radio on
or, if the radio is already on, to switch
between the Radio presets (A, B or C) and
CD Mode.
A!B!C!CD MODE
The last CD that was loaded starts to play
when in CD Mode. If there is no CD loaded,the CD changer enters Disc Loading Mode.
If in Radio presets A, B or C:
cPressor(<1.5 seconds)
to advance to the next preset station
or to return to the previous preset
station.
cHold down
or(>1.5 sec-
onds). The radio will seek up or down
to the next radio station.
If in CD Mode:
cPress
or(<1.5 seconds)
to advance to the next selection on
WHA0069
4-38Heater, air conditioner and audio systems
ZX
Page 176 of 290
CHANGING A FLAT TIRE
If you have a flat tire, follow the instructions
below:
Stopping the vehicle
1. Safely move the vehicle off the road and
away from traffic.
2. Turn on the hazard warning flashers.
3. Park on a level surface and apply the
parking brake. Shift the manual transmis-
sion into R (Reverse), or the automatic
transmission into P (Park).
WARNING
c
The transfer control lever
must be in the 2H, 4H or 4L position.
c
Do not leave the transfer control le-
ver in the N (Neutral) position. Other-
wise, the vehicle could roll unexpect-
edly even if the manual transmission
is in any gear or the automatic trans-
mission is in the P (Park) position.
This could result in serious personal
injury or property damage.
4. Turn off the engine.5. Raise the hood to warn other traffic and
to signal professional road assistance
personnel that you require assistance.
6. Have all passengers get out of the ve-
hicle and stand in a safe place away from
traffic and clear of the vehicle.
WARNING
cMake sure the parking brake is se-
curely applied and the manual trans-
mission is shifted into R (Reverse),
or the automatic transmission into P
(Park).
cNever change tires when the vehicle
is on a slope, ice or slippery areas.
This is hazardous.
cNever change tires if oncoming traf-
fic is close to your vehicle. Wait for
professional road assistance.
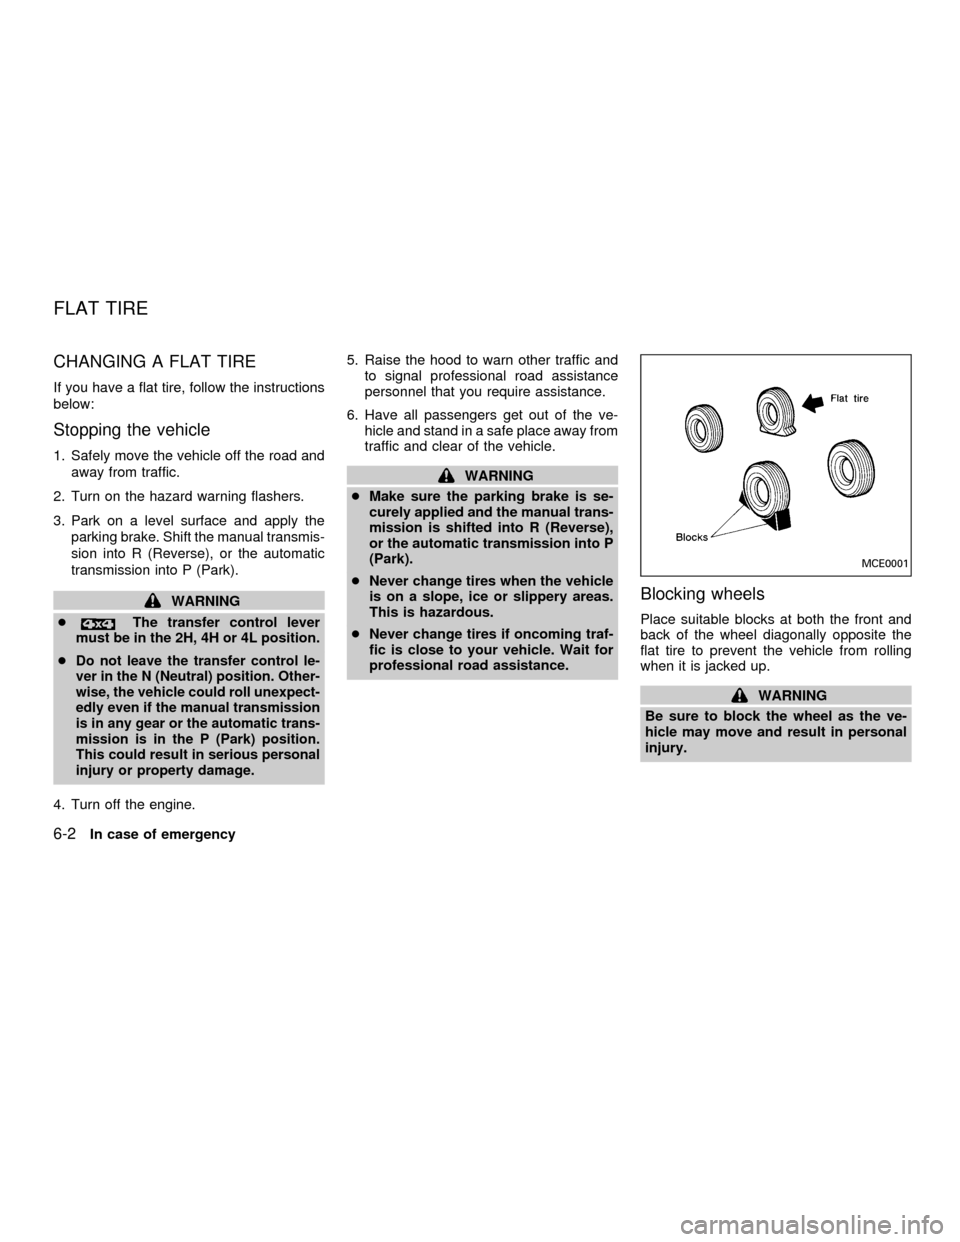
Blocking wheels
Place suitable blocks at both the front and
back of the wheel diagonally opposite the
flat tire to prevent the vehicle from rolling
when it is jacked up.
WARNING
Be sure to block the wheel as the ve-
hicle may move and result in personal
injury.
MCE0001
FLAT TIRE
6-2In case of emergency
ZX
Page 179 of 290
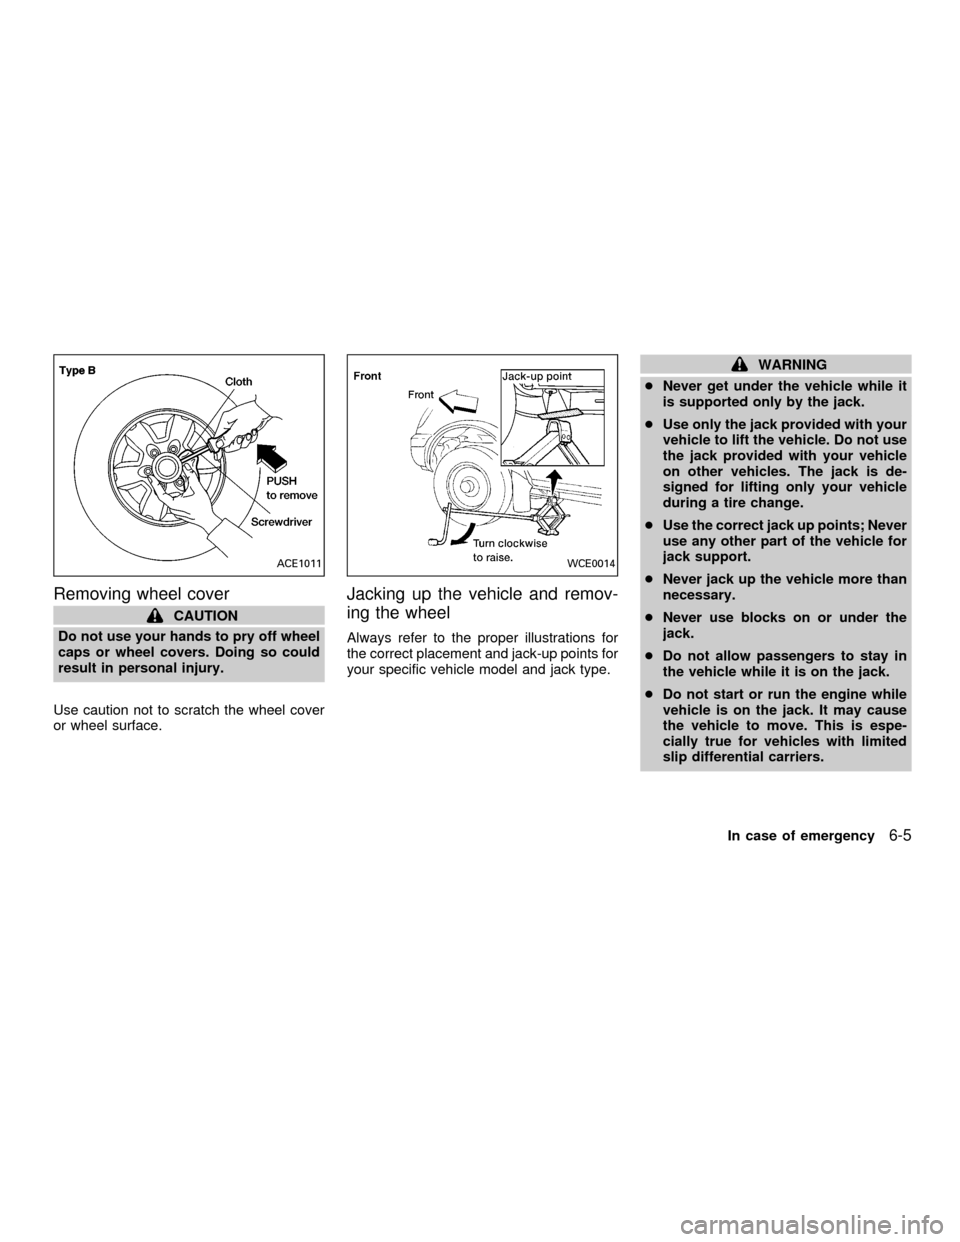
Removing wheel cover
CAUTION
Do not use your hands to pry off wheel
caps or wheel covers. Doing so could
result in personal injury.
Use caution not to scratch the wheel cover
or wheel surface.
Jacking up the vehicle and remov-
ing the wheel
Always refer to the proper illustrations for
the correct placement and jack-up points for
your specific vehicle model and jack type.
WARNING
cNever get under the vehicle while it
is supported only by the jack.
cUse only the jack provided with your
vehicle to lift the vehicle. Do not use
the jack provided with your vehicle
on other vehicles. The jack is de-
signed for lifting only your vehicle
during a tire change.
cUse the correct jack up points; Never
use any other part of the vehicle for
jack support.
cNever jack up the vehicle more than
necessary.
cNever use blocks on or under the
jack.
cDo not allow passengers to stay in
the vehicle while it is on the jack.
cDo not start or run the engine while
vehicle is on the jack. It may cause
the vehicle to move. This is espe-
cially true for vehicles with limited
slip differential carriers.
ACE1011WCE0014
In case of emergency6-5
ZX
Page 221 of 290
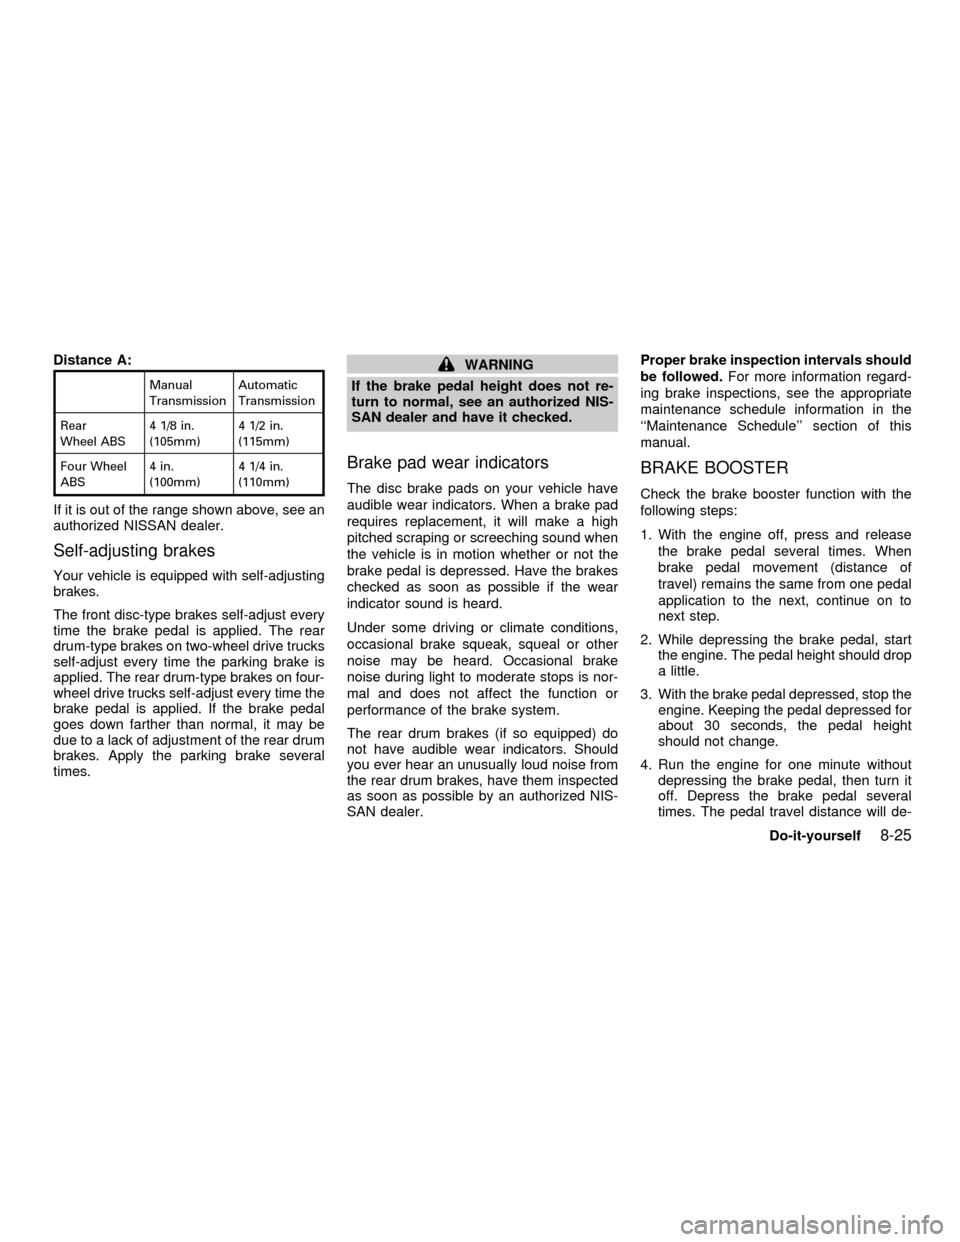
Distance A:
Manual
TransmissionAutomatic
Transmission
Rear
Wheel ABS4 1/8 in.
(105mm)4 1/2 in.
(115mm)
Four Wheel
ABS4 in.
(100mm)4 1/4 in.
(110mm)
If it is out of the range shown above, see an
authorized NISSAN dealer.
Self-adjusting brakes
Your vehicle is equipped with self-adjusting
brakes.
The front disc-type brakes self-adjust every
time the brake pedal is applied. The rear
drum-type brakes on two-wheel drive trucks
self-adjust every time the parking brake is
applied. The rear drum-type brakes on four-
wheel drive trucks self-adjust every time the
brake pedal is applied. If the brake pedal
goes down farther than normal, it may be
due to a lack of adjustment of the rear drum
brakes. Apply the parking brake several
times.
WARNING
If the brake pedal height does not re-
turn to normal, see an authorized NIS-
SAN dealer and have it checked.
Brake pad wear indicators
The disc brake pads on your vehicle have
audible wear indicators. When a brake pad
requires replacement, it will make a high
pitched scraping or screeching sound when
the vehicle is in motion whether or not the
brake pedal is depressed. Have the brakes
checked as soon as possible if the wear
indicator sound is heard.
Under some driving or climate conditions,
occasional brake squeak, squeal or other
noise may be heard. Occasional brake
noise during light to moderate stops is nor-
mal and does not affect the function or
performance of the brake system.
The rear drum brakes (if so equipped) do
not have audible wear indicators. Should
you ever hear an unusually loud noise from
the rear drum brakes, have them inspected
as soon as possible by an authorized NIS-
SAN dealer.Proper brake inspection intervals should
be followed.For more information regard-
ing brake inspections, see the appropriate
maintenance schedule information in the
``Maintenance Schedule'' section of this
manual.
BRAKE BOOSTER
Check the brake booster function with the
following steps:
1. With the engine off, press and release
the brake pedal several times. When
brake pedal movement (distance of
travel) remains the same from one pedal
application to the next, continue on to
next step.
2. While depressing the brake pedal, start
the engine. The pedal height should drop
a little.
3. With the brake pedal depressed, stop the
engine. Keeping the pedal depressed for
about 30 seconds, the pedal height
should not change.
4. Run the engine for one minute without
depressing the brake pedal, then turn it
off. Depress the brake pedal several
times. The pedal travel distance will de-
Do-it-yourself
8-25
ZX
Page 233 of 290

tified by ``ALL SEASON'' and/or ``M&S'' on
the tire sidewall. Snow tires have better
snow traction than All Season tires and may
be more appropriate in some areas.
Summer tires
NISSAN specifies summer tires on some
models to provide superior performance on
dry roads. Summer tire performance in
snow and ice will be substantially reduced.
Summer tires do not have the tire traction
rating ``M&S'' on the tire sidewall.
If you plan to operate your vehicle in snowy
or icy conditions, NISSAN recommends the
use of ``SNOW'' or ``ALL SEASON'' tires on
all four wheels.
Snow tires
If snow tires are needed, it is necessary to
select tires equivalent in size and load rating
to the original equipment tires. If you do not,
it can adversely affect the safety and han-
dling of your vehicle.
If you install snow tires, they must be the
same size, brand, construction and tread
pattern on all four wheels.
Generally, snow tires will have lower speed
ratings than factory equipped tires and maynot match the potential maximum vehicle
speed. Never exceed the maximum speed
rating of the tire.
For additional traction on icy roads, studded
tires may be used. However, some U.S.
States and Canadian provinces prohibit
their use. Check local, state and provincial
laws before installing studded tires. Skid
and traction capabilities of studded snow
tires on wet or dry surfaces may be poorer
than that of non-studded snow tires.
TIRE CHAINS
Use of tire chains may be prohibited accord-
ing to location. Check the local laws before
installing tire chains. When installing tire
chains, make sure they are the proper size
for the tires on your vehicle and are installed
according to the chain manufacturer's sug-
gestions.Use only SAE class ``S'' chains.
Other types may damage your vehicle. Use
chain tensioners when recommended by
the tire chain manufacturer to ensure a tight
fit. Loose end links of the tire chain must be
secured or removed to prevent the possibil-
ity of whipping action damage to the fenders
or undercarriage. If possible, avoid fully
loading your vehicle when using tire chains.
In addition, drive at a reduced speed. Oth-erwise, your vehicle may be damaged
and/or vehicle handling and performance
may be adversely affected.
Never install tire chains on a TEMPORARY
USE ONLY spare tire.
Tire chains must be installed only on the
rear wheels and not on the front wheels.
Do not use tire chains on dry roads. Driving
with chains in such conditions can cause
damage to the various mechanisms of the
vehicle due to some overstress. When driv-
ing on clear paved roads, be sure to change
to 2WD.
Do-it-yourself
8-37
ZX
Page 235 of 290
cImproper service of the spare tire
may result in serious personal in-
jury. If it is necessary to repair the
spare tire, contact an authorized
NISSAN dealer.
Replacing tires and wheels
When replacing a tire, use the same size,
tread design, speed rating and load carrying
capacity as originally equipped. Recom-
mended types and sizes are shown in
``Wheel/tire size'' in the ``Technical and con-
sumer information'' section of this manual.
WARNING
c
The use of tires other than those
recommended or the mixed use of
tires of different brands, construction
(bias, bias-belted or radial), or tread
patterns can adversely affect the ride,
braking, handling, ground clearance,
body-to-tire clearance, tire chain
clearance, speedometer calibration,
headlight aim and bumper height.
Some of these effects may lead to
accidents and could result in serious
personal injury.cIf the wheels are changed for any
reason, always replace with wheels
which have the same offset dimen-
sion. Wheels of a different offset
could cause pre-mature tire wear, de-
grade vehicle handling characteris-
tics and/or interference with the
brake discs/drums. Such interference
can lead to decreased braking effi-
ciency and/or early brake pad/shoe
wear. Refer to(Wheel/tire size(in the
(Technical and consumer informa-
tion(section of this manual for wheel
off-set dimensions.
cDo not install a deformed wheel or
tire even if it has been repaired. Such
wheels or tires could have unknown
structural damage and could fail
without warning.
cThe use of retread tires is not recom-
mended.
Four-wheel drive models
CAUTION
Always use tires of the same size,
brand, construction (bias, bias-belted
or radial), and tread pattern on all four
wheels. Failure to do so may result in a
circumference difference between tires
on the front and rear axles which will
cause excessive tire wear and may
damage the transmission, transfer
case and differential gears.
If excessive tire wear is found, it is recom-
mended that all four tires be replaced with
tires of the same size, brand, construction
and tread pattern. The tire pressure and
wheel alignment should also be checked
and corrected as necessary. Contact an
authorized NISSAN dealer.
Wheel balance
Unbalanced wheels may affect vehicle han-
dling and tire life. Even with regular use,
wheels can get out of balance. Therefore,
they should be balanced as required.
Wheel balance service should be performed
with the wheels off the vehicle. Spin balanc-
ing the front wheels on the vehicle could
lead to transmission damage.
Do-it-yourself
8-39
ZX
Page 236 of 290
Care of wheels
cWash the wheels when washing the ve-
hicle to maintain their appearance.
cClean the inner side of the wheels when
the wheel is changed or the underside of
the vehicle is washed.
cDo not use abrasive cleaners when
washing the wheels.
cInspect wheel rims regularly for dents or
corrosion. This may cause loss of pres-
sure or damage the tire bead.
cNISSAN recommends waxing the road
wheels to protect against road salt in
areas where it is used during winter.
Spare tire (TEMPORARY USE
ONLY)
Your vehicle may be equipped with a TEM-
PORARY USE ONLY spare tire.
To avoid property damage or personal injury
when using the TEMPORARY USE ONLY
spare tire, observe the following cautions:
WARNING
cThe spare tire should be used for
emergency use only. It should be
replaced with the standard tire at the
first opportunity to avoid possible
tire or differential damage.
cDrive carefully while the TEMPO-
RARY USE ONLY spare tire is in-
stalled. Avoid sharp turns and
abrupt braking while driving.
cPeriodically check spare tire infla-
tion pressure. Always keep the pres-
sure of the TEMPORARY USE ONLY
spare tire at 60 psi (420 kPa, 4.2 bar).
Always keep the pressure of the full
size spare tire (if so equipped) at the
recommended pressure for standard
tires, as indicated on the tire placard.
For tire placard location, see(Tire
placard(in the index of this manual .
cWith the TEMPORARY USE ONLY
spare tire installed do not drive the
vehicle at speeds faster than 50 MPH
(80 km/h).
c
When driving on roads covered with
snow or ice, the TEMPORARY USE
ONLY spare tire should be used onthe front wheels and the original tire
used on the rear wheels (drive
wheels). Use tire chains only on the
two rear original tires.
cTire tread of the TEMPORARY USE
ONLY spare tire will wear at a faster
rate than the standard tire. Replace
the spare tire as soon as the tread
wear indicators appear.
cDo not use the spare tire on other
vehicles.
cDo not use more than one spare tire
at the same time.
cDo not tow a trailer when the TEM-
PORARY USE ONLY spare tire is
installed.
CAUTION
c
With the spare tire installed the
transfer control lever must be in the
2H position to prevent the transfer
case and differential gears from be-
ing damaged.
cDo not use tire chains on a TEMPO-
RARY USE ONLY spare tire. Tire
8-40Do-it-yourself
ZX
Page 241 of 290

cluding the spare, and adjust to the speci-
fied pressure if necessary. Check carefully
for damage, cuts or excessive wear.
Wheel nuts*When checking the tires, make
sure no wheel nuts are missing, and check for
any loose wheel nuts. Tighten if necessary.
Tire rotation*Tires should be rotated every
7,500 miles (12,000 km).
Wheel alignment and balanceIf the ve-
hicle should pull to either side while driving
on a straight and level road, or if you detect
uneven or abnormal tire wear, there may be
a need for wheel alignment.
If the steering wheel or seat vibrates at
normal highway speeds, wheel balancing
may be needed.
Windshield wiper blades*Check for
cracks or wear if they do not wipe properly.
Doors, hood and tailgateCheck that the
doors, hood and tailgate operate properly.
Also ensure that all latches lock securely.
Lubricate hinges, latches, latch pins, rollers
and links as necessary. Make sure that the
secondary latch keeps the hood from open-
ing when the primary latch is released.
When driving in areas using road salt orother corrosive materials, check lubrication
frequently.
Lights*Make sure that the headlights, stop
lights, tail lights, turn signal lights, and other
lights are all operating properly and installed
securely. Also check headlight aim.INTERIOR MAINTENANCE
The maintenance items listed here should
be checked on a regular basis, such as
when performing periodic maintenance,
cleaning the vehicle, etc.
Additional information on the following
items with an ``*'' is found in the ``Do-it-
yourself'' section of this manual.
Warning lights and chimesMake sure all
warning lights and chimes are operating
properly.
Windshield wiper and washer*Check that
the wipers and washer operate properly and
that the wipers do not streak.
Windshield defrosterCheck that the air
comes out of the defroster outlets properly
and in sufficient quantity when operating the
heater or air conditioner.
Steering wheelCheck for changes in thesteering conditions, such as excessive free-
play, hard steering or strange noises.
SeatsCheck seat position controls such as
seat adjusters, seatback recliner, etc. to
ensure they operate smoothly and all
latches lock securely in every position.
Check that the head restraints move up and
down smoothly and the locks (if so
equipped) hold securely in all latched posi-
tions.
Seat beltsCheck that all parts of the seat
belt system (e.g., buckles, anchors, adjust-
ers and retractors) operate properly and
smoothly, and are installed securely. Check
the belt webbing for cuts, fraying, wear or
damage.
Accelerator pedalCheck the pedal for
smooth operation and make sure the pedal
does not catch or require uneven effort.
Keep the floor mat away from the pedal.
Clutch pedal*Make sure the pedal oper-
ates smoothly and check that it has the
proper free travel.
BrakesCheck that the brakes do not pull
the vehicle to one side when applied.
Brake pedal and booster*Check the pedal
Maintenance
9-3
ZX