warning lights NISSAN FRONTIER 2001 D22 / 1.G Owners Manual
[x] Cancel search | Manufacturer: NISSAN, Model Year: 2001, Model line: FRONTIER, Model: NISSAN FRONTIER 2001 D22 / 1.GPages: 290, PDF Size: 3.14 MB
Page 56 of 290

2 Instruments and controls
Meters and gauges ................................................2-2
Speedometer and odometer .............................2-3............................................2-3
Tachometer........................................................2-5
Engine coolant temperature gauge ...................2-5
Fuel gauge ........................................................2-6
Warning/indicator lights and chimes ......................2-7
Checking bulbs ..................................................2-7
Warning lights ....................................................2-8
Indicator lights .................................................2-10
Chimes.............................................................2-12
Security system ..................................................2-12
Vehicle security system (if so equipped) ........2-12
Windshield wiper and washer switch ...................2-15
Switch operation ..............................................2-16
Rear window defogger switch (Crew Cab
models only) .........................................................2-16
Headlight and turn signal switch ..........................2-17
Headlight switch ..............................................2-17
Turn signal switch............................................2-18
Front fog light switch (if so equipped)..................2-18
Hazard warning flasher switch .............................2-19Horn ......................................................................2-19
Power point (if so equipped) ................................2-20
Cigarette lighter (accessory) and ash tray ...........2-20
Storage .................................................................2-21
Storage compartment (Crew Cab
models only) ....................................................2-21
Cup holders (if so equipped) ...........................2-21
Glove box ........................................................2-22
Grocery hooks (King Cab only) .......................2-23
Windows ...............................................................2-23
Power windows (if so equipped) .....................2-23
Manual windows ..............................................2-25
Rear sliding window (if so equipped) ..............2-25
Sunroof (if so equipped).......................................2-25
Tilting the sunroof ............................................2-25
Removing/installing..........................................2-26
Interior lights .........................................................2-28
Map lights (if so equipped)...................................2-29
Illuminated entry system ......................................2-29
Battery saver ...................................................2-29
ZX
Page 63 of 290
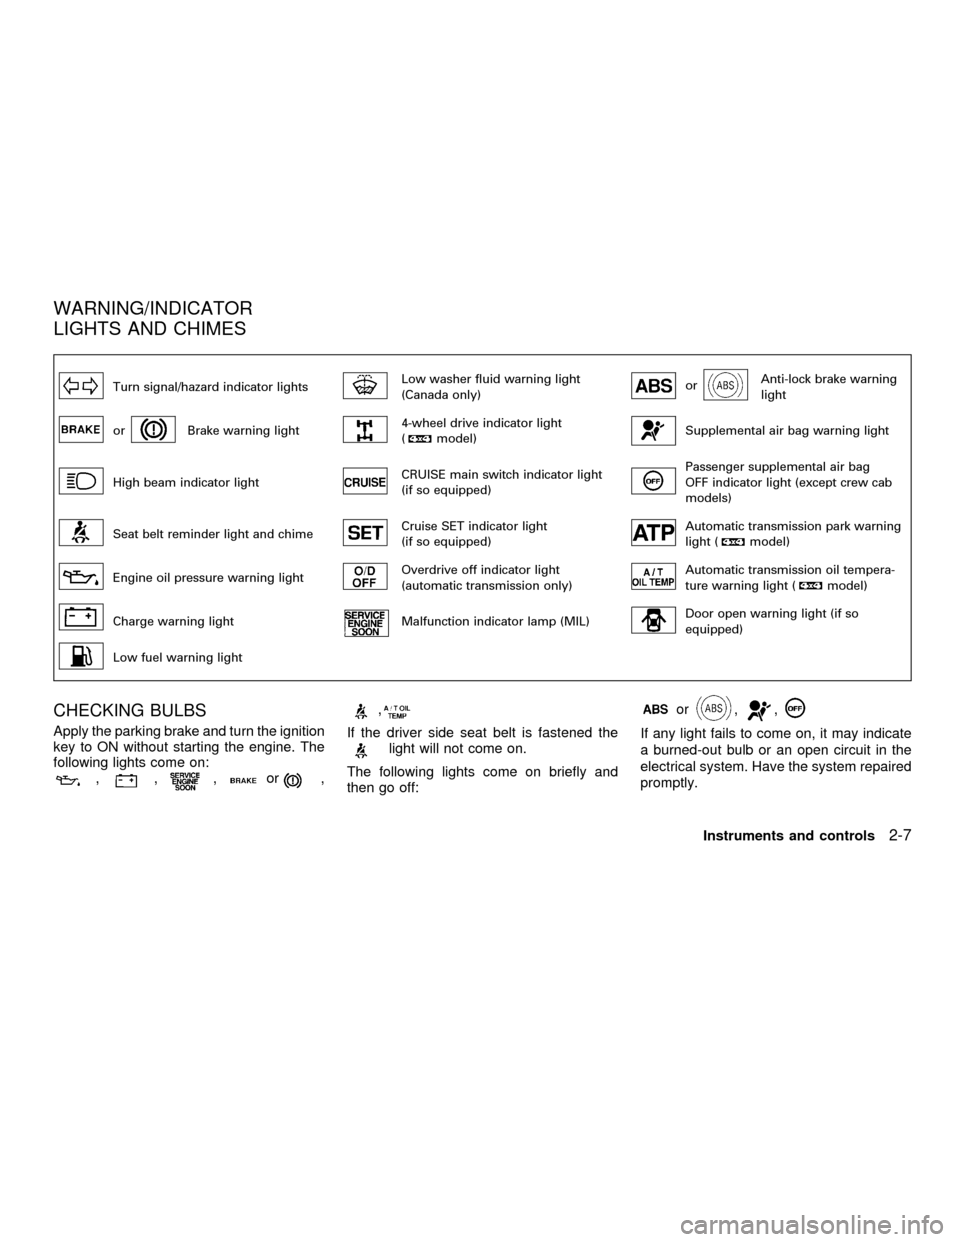
Turn signal/hazard indicator lightsLow washer fluid warning light
(Canada only)orAnti-lock brake warning
light
orBrake warning light4-wheel drive indicator light
(model)Supplemental air bag warning light
High beam indicator lightCRUISE main switch indicator light
(if so equipped)Passenger supplemental air bag
OFF indicator light (except crew cab
models)
Seat belt reminder light and chimeCruise SET indicator light
(if so equipped)Automatic transmission park warning
light (model)
Engine oil pressure warning lightOverdrive off indicator light
(automatic transmission only)Automatic transmission oil tempera-
ture warning light (model)
Charge warning lightMalfunction indicator lamp (MIL)Door open warning light (if so
equipped)
Low fuel warning light
CHECKING BULBS
Apply the parking brake and turn the ignition
key to ON without starting the engine. The
following lights come on:
,,,or,
,
If the driver side seat belt is fastened thelight will not come on.
The following lights come on briefly and
then go off:
or,,
If any light fails to come on, it may indicate
a burned-out bulb or an open circuit in the
electrical system. Have the system repaired
promptly.
WARNING/INDICATOR
LIGHTS AND CHIMES
Instruments and controls2-7
ZX
Page 64 of 290
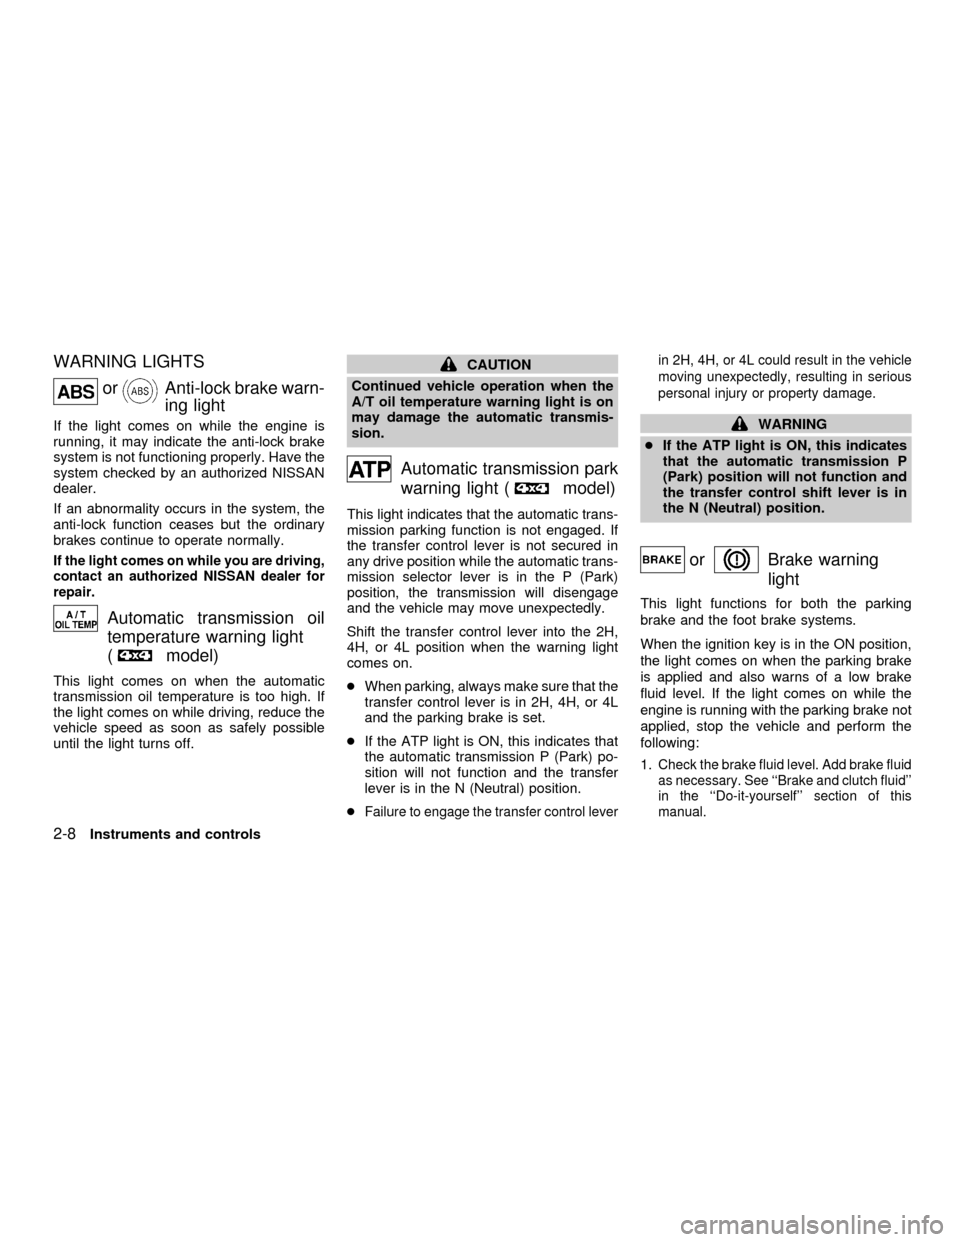
WARNING LIGHTS
orAnti-lock brake warn-
ing light
If the light comes on while the engine is
running, it may indicate the anti-lock brake
system is not functioning properly. Have the
system checked by an authorized NISSAN
dealer.
If an abnormality occurs in the system, the
anti-lock function ceases but the ordinary
brakes continue to operate normally.
If the light comes on while you are driving,
contact an authorized NISSAN dealer for
repair.
Automatic transmission oil
temperature warning light
(
model)
This light comes on when the automatic
transmission oil temperature is too high. If
the light comes on while driving, reduce the
vehicle speed as soon as safely possible
until the light turns off.
CAUTION
Continued vehicle operation when the
A/T oil temperature warning light is on
may damage the automatic transmis-
sion.
Automatic transmission park
warning light (
model)
This light indicates that the automatic trans-
mission parking function is not engaged. If
the transfer control lever is not secured in
any drive position while the automatic trans-
mission selector lever is in the P (Park)
position, the transmission will disengage
and the vehicle may move unexpectedly.
Shift the transfer control lever into the 2H,
4H, or 4L position when the warning light
comes on.
cWhen parking, always make sure that the
transfer control lever is in 2H, 4H, or 4L
and the parking brake is set.
cIf the ATP light is ON, this indicates that
the automatic transmission P (Park) po-
sition will not function and the transfer
lever is in the N (Neutral) position.
c
Failure to engage the transfer control leverin 2H, 4H, or 4L could result in the vehicle
moving unexpectedly, resulting in serious
personal injury or property damage.
WARNING
cIf the ATP light is ON, this indicates
that the automatic transmission P
(Park) position will not function and
the transfer control shift lever is in
the N (Neutral) position.
orBrake warning
light
This light functions for both the parking
brake and the foot brake systems.
When the ignition key is in the ON position,
the light comes on when the parking brake
is applied and also warns of a low brake
fluid level. If the light comes on while the
engine is running with the parking brake not
applied, stop the vehicle and perform the
following:
1.
Check the brake fluid level. Add brake fluid
as necessary. See ``Brake and clutch fluid''
in the ``Do-it-yourself'' section of this
manual.
2-8Instruments and controls
ZX
Page 66 of 290
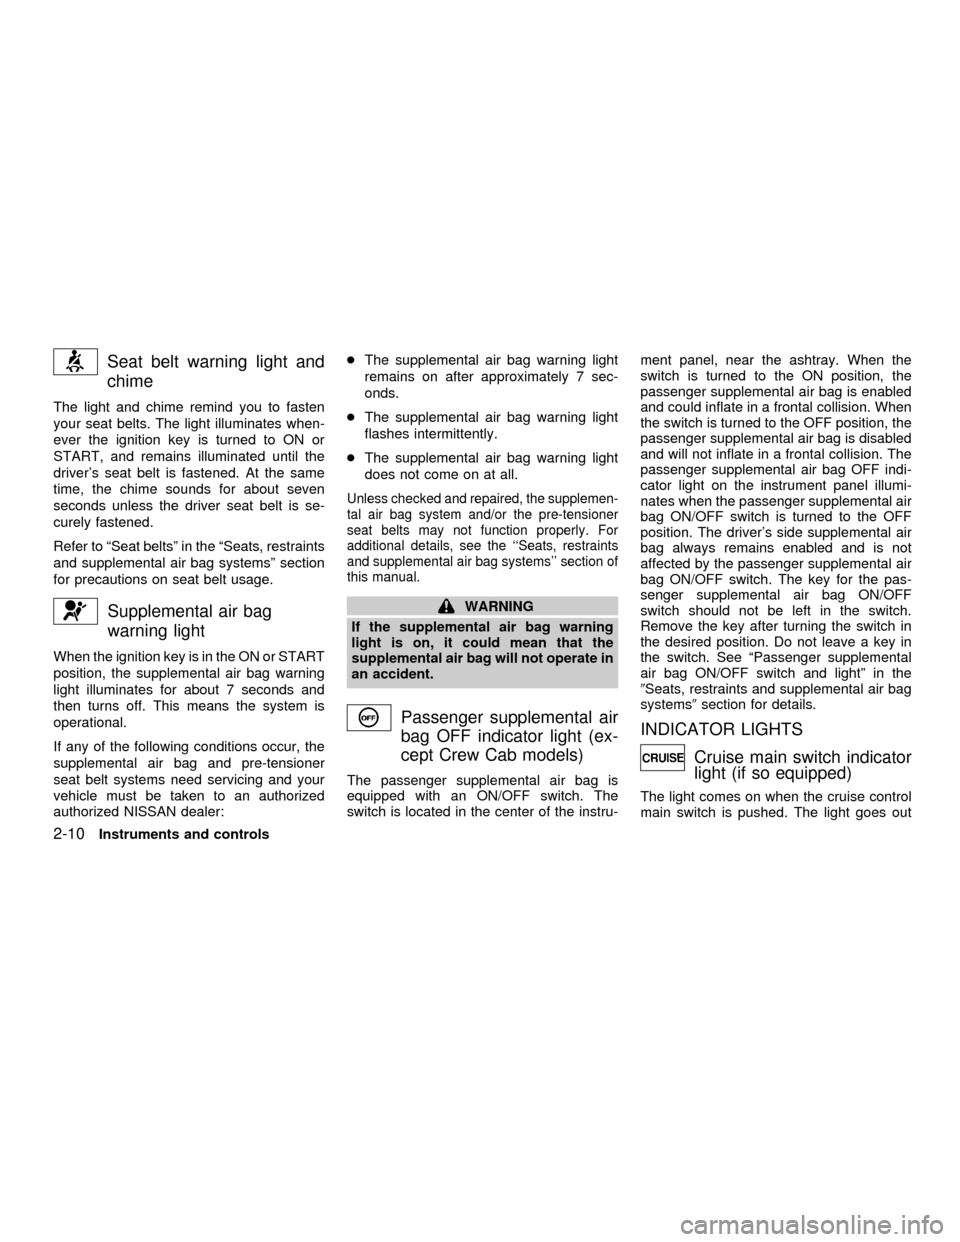
Seat belt warning light and
chime
The light and chime remind you to fasten
your seat belts. The light illuminates when-
ever the ignition key is turned to ON or
START, and remains illuminated until the
driver's seat belt is fastened. At the same
time, the chime sounds for about seven
seconds unless the driver seat belt is se-
curely fastened.
Refer to ªSeat beltsº in the ªSeats, restraints
and supplemental air bag systemsº section
for precautions on seat belt usage.
Supplemental air bag
warning light
When the ignition key is in the ON or START
position, the supplemental air bag warning
light illuminates for about 7 seconds and
then turns off. This means the system is
operational.
If any of the following conditions occur, the
supplemental air bag and pre-tensioner
seat belt systems need servicing and your
vehicle must be taken to an authorized
authorized NISSAN dealer:cThe supplemental air bag warning light
remains on after approximately 7 sec-
onds.
cThe supplemental air bag warning light
flashes intermittently.
cThe supplemental air bag warning light
does not come on at all.
Unless checked and repaired, the supplemen-
tal air bag system and/or the pre-tensioner
seat belts may not function properly. For
additional details, see the ``Seats, restraints
and supplemental air bag systems'' section of
this manual.
WARNING
If the supplemental air bag warning
light is on, it could mean that the
supplemental air bag will not operate in
an accident.
Passenger supplemental air
bag OFF indicator light (ex-
cept Crew Cab models)
The passenger supplemental air bag is
equipped with an ON/OFF switch. The
switch is located in the center of the instru-ment panel, near the ashtray. When the
switch is turned to the ON position, the
passenger supplemental air bag is enabled
and could inflate in a frontal collision. When
the switch is turned to the OFF position, the
passenger supplemental air bag is disabled
and will not inflate in a frontal collision. The
passenger supplemental air bag OFF indi-
cator light on the instrument panel illumi-
nates when the passenger supplemental air
bag ON/OFF switch is turned to the OFF
position. The driver's side supplemental air
bag always remains enabled and is not
affected by the passenger supplemental air
bag ON/OFF switch. The key for the pas-
senger supplemental air bag ON/OFF
switch should not be left in the switch.
Remove the key after turning the switch in
the desired position. Do not leave a key in
the switch. See ªPassenger supplemental
air bag ON/OFF switch and lightº in the
9Seats, restraints and supplemental air bag
systems9section for details.
INDICATOR LIGHTS
Cruise main switch indicator
light (if so equipped)
The light comes on when the cruise control
main switch is pushed. The light goes out
2-10Instruments and controls
ZX
Page 68 of 290
being hauled or towed.
The malfunction indicator lamp may stop
blinking and come on steady.
Have the vehicle inspected by an autho-
rized NISSAN dealer. You do not need to
have your vehicle towed to the dealer.
CAUTION
Continued vehicle operation without
having the emission control system
checked and repaired as necessary
could lead to poor driveability, reduced
fuel economy, and possible damage to
the emission control system.
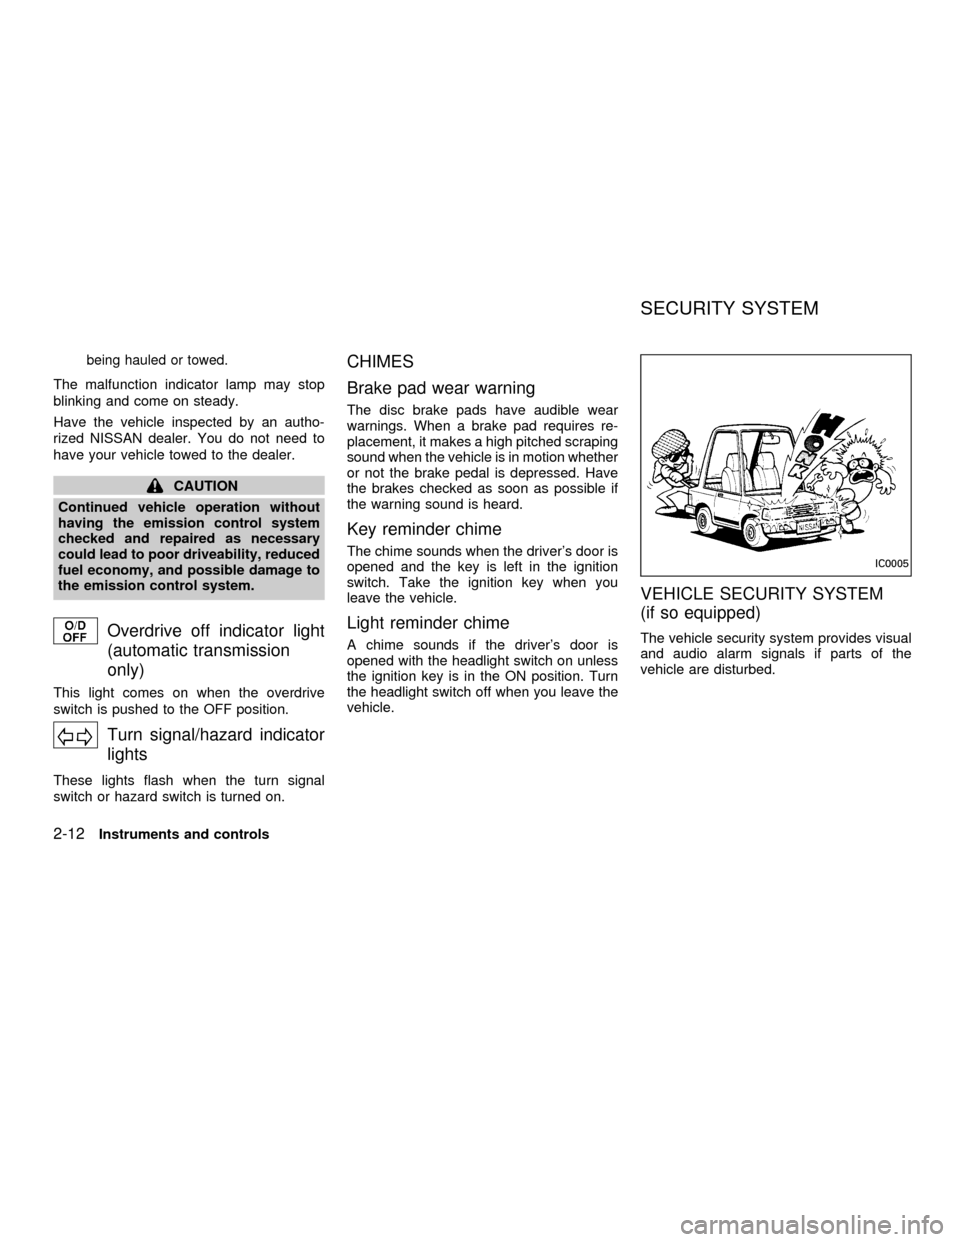
Overdrive off indicator light
(automatic transmission
only)
This light comes on when the overdrive
switch is pushed to the OFF position.
Turn signal/hazard indicator
lights
These lights flash when the turn signal
switch or hazard switch is turned on.
CHIMES
Brake pad wear warning
The disc brake pads have audible wear
warnings. When a brake pad requires re-
placement, it makes a high pitched scraping
sound when the vehicle is in motion whether
or not the brake pedal is depressed. Have
the brakes checked as soon as possible if
the warning sound is heard.
Key reminder chime
The chime sounds when the driver's door is
opened and the key is left in the ignition
switch. Take the ignition key when you
leave the vehicle.
Light reminder chime
A chime sounds if the driver's door is
opened with the headlight switch on unless
the ignition key is in the ON position. Turn
the headlight switch off when you leave the
vehicle.
VEHICLE SECURITY SYSTEM
(if so equipped)
The vehicle security system provides visual
and audio alarm signals if parts of the
vehicle are disturbed.
IC0005
SECURITY SYSTEM
2-12Instruments and controls
ZX
Page 74 of 290
Daytime Running Light System
(Canada only)
The headlights automatically illuminate at a
reduced intensity when the engine is started
with the parking brake released. The day-
time running lights operate with the head-
light switch in the OFF position or in the
position. Turn the headlight switch
to the
position for full illumination
when driving at night. If the parking brake is
applied before the engine is started, the
daytime running lights do not illuminate. The
daytime running lights illuminate once the
parking brake is released. The daytime run-
ning lights will remain on until the ignition
switch is turned off.
WARNING
When the daytime running light system
is active, tail lights on your vehicle are
not on. It is necessary at dusk to turn
on your headlights. Failure to do so
could cause an accident injuring your-
self and others.
TURN SIGNAL SWITCH
Turn signal
Move the lever up or down to signal the
turning direction. When the turn is com-
pleted, the turn signal cancels automati-
cally.
Lane change signal
To indicate a lane change, move the lever
up or down to the point where the indicator
light begins to flash, but the lever does not
latch.
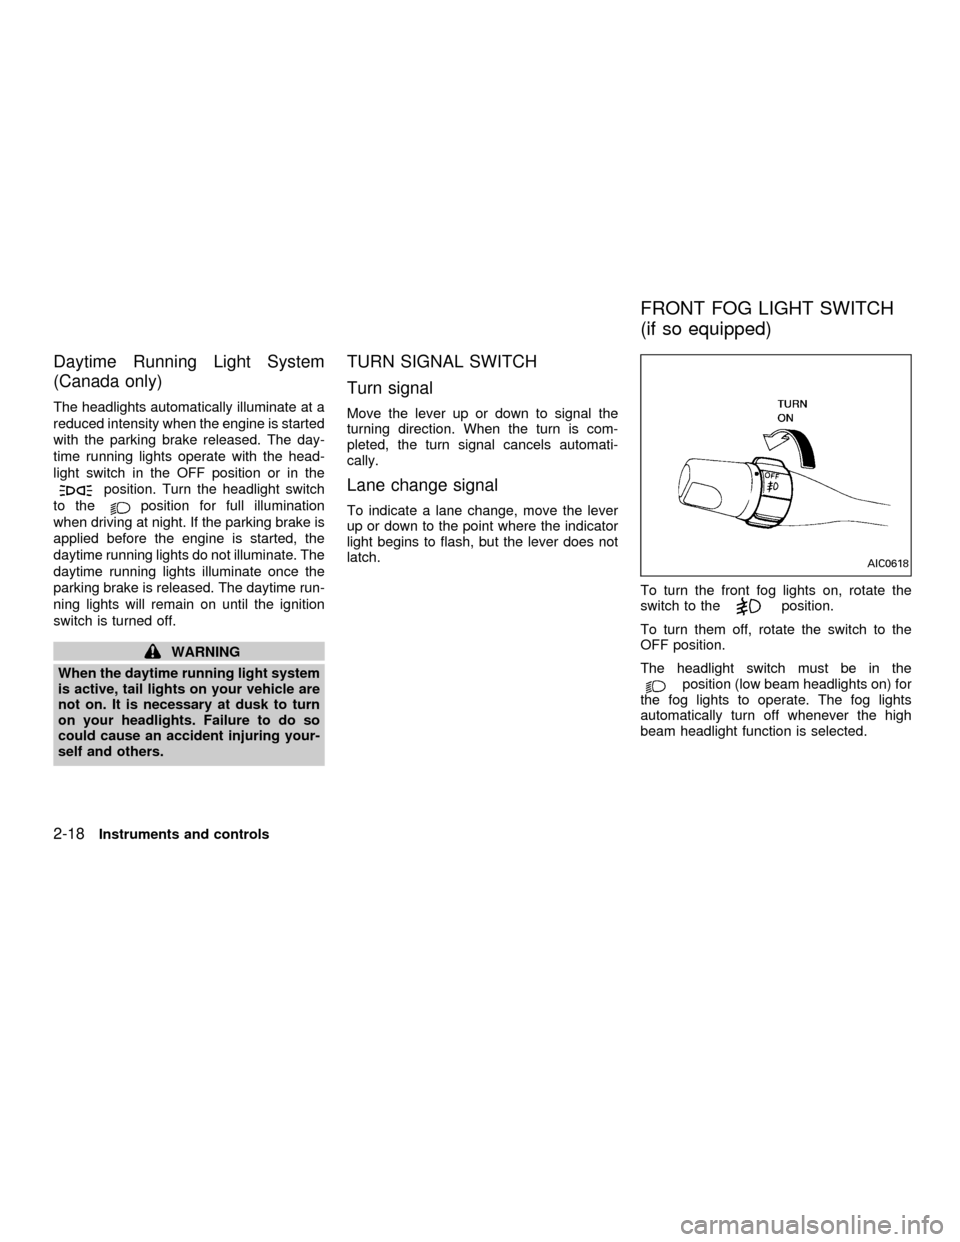
To turn the front fog lights on, rotate the
switch to the
position.
To turn them off, rotate the switch to the
OFF position.
The headlight switch must be in the
position (low beam headlights on) for
the fog lights to operate. The fog lights
automatically turn off whenever the high
beam headlight function is selected.
AIC0618
FRONT FOG LIGHT SWITCH
(if so equipped)
2-18Instruments and controls
ZX
Page 75 of 290
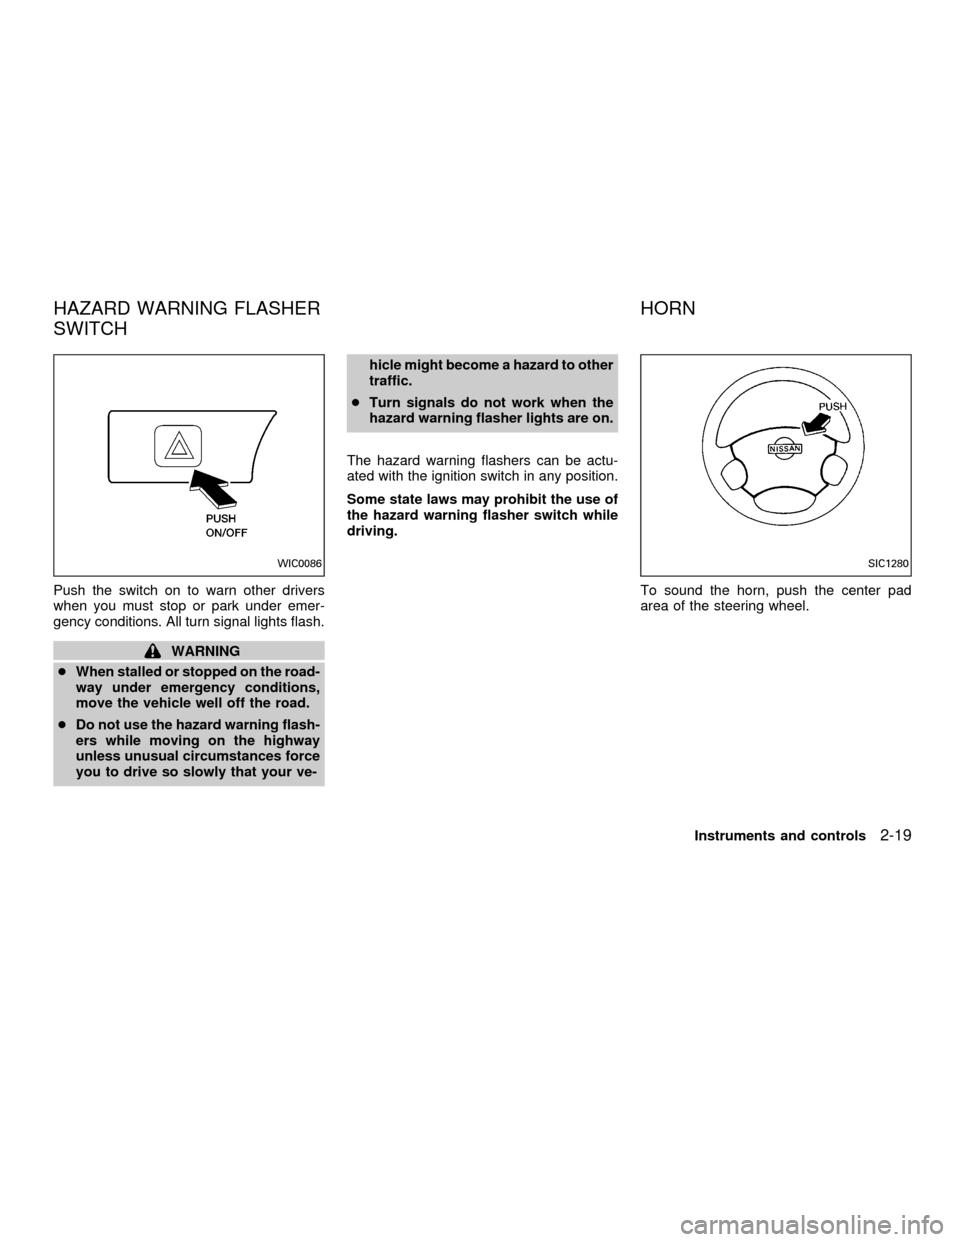
Push the switch on to warn other drivers
when you must stop or park under emer-
gency conditions. All turn signal lights flash.
WARNING
cWhen stalled or stopped on the road-
way under emergency conditions,
move the vehicle well off the road.
cDo not use the hazard warning flash-
ers while moving on the highway
unless unusual circumstances force
you to drive so slowly that your ve-hicle might become a hazard to other
traffic.
cTurn signals do not work when the
hazard warning flasher lights are on.
The hazard warning flashers can be actu-
ated with the ignition switch in any position.
Some state laws may prohibit the use of
the hazard warning flasher switch while
driving.
To sound the horn, push the center pad
area of the steering wheel.
WIC0086SIC1280
HAZARD WARNING FLASHER
SWITCHHORN
Instruments and controls2-19
ZX
Page 91 of 290

Unlocking doors
1. Push the UNLOCK button on the multi-
remote controller. Only the driver's side
door unlocks.
2. Push the UNLOCK button on the multi-remote controller again within five sec-
onds. All doors unlock.
3. The interior light illuminates for 30 sec-
onds when the light switch is in the O or
DOOR position.The interior light can be turned off without
waiting 30 seconds by inserting the key into
the ignition and turning to the ON or START
position, locking the doors with the multi-
remote controller or pushing the interior light
switch to the OFF position.
Auto Relock
All doors will lock automatically within 5
minutes unless one of the following opera-
tions is performed:
cany door is opened
ca key is inserted into the ignition switch
and the key is turned from OFF to ON.
Using the panic alarm
If you are near your vehicle and feel threat-
ened, you may activate the panic alarm to
call attention as follows:
1. Push the PANIC button on the remote
controller forlonger than 0.5 seconds.
2. The theft warning alarm and headlights
will stay on for 30 seconds.
3. The panic alarm stops when:
cit has run for 30 seconds, or
cthe LOCK or UNLOCK button is pressed,
on the multi-remote controller.
WPD0038
Pre-driving checks and adjustments3-5
ZX
Page 99 of 290
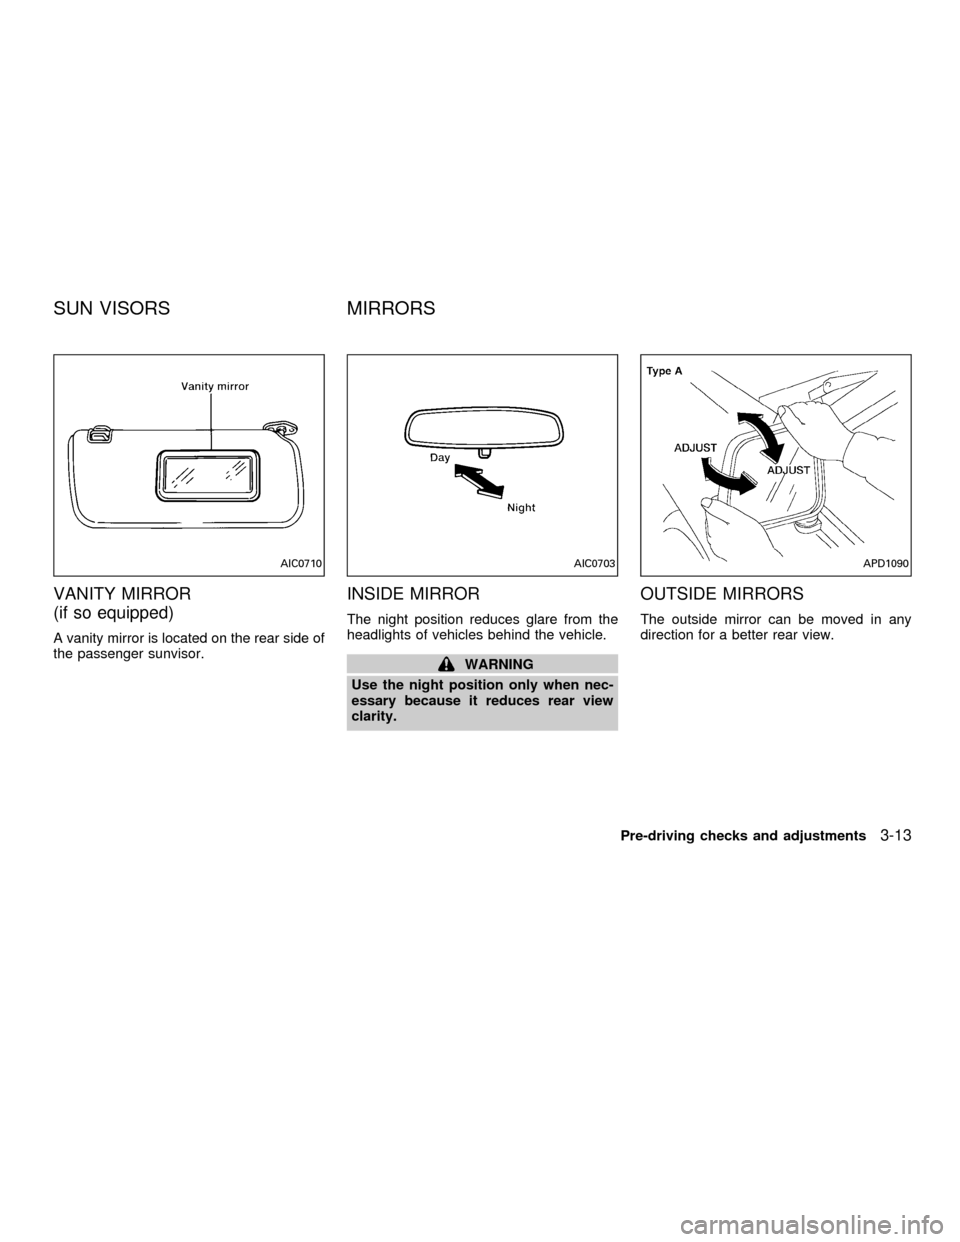
VANITY MIRROR
(if so equipped)
A vanity mirror is located on the rear side of
the passenger sunvisor.
INSIDE MIRROR
The night position reduces glare from the
headlights of vehicles behind the vehicle.
WARNING
Use the night position only when nec-
essary because it reduces rear view
clarity.
OUTSIDE MIRRORS
The outside mirror can be moved in any
direction for a better rear view.
AIC0710AIC0703APD1090
SUN VISORS MIRRORS
Pre-driving checks and adjustments3-13
ZX
Page 152 of 290
cMake sure the area around the vehicle is
clear.
cCheck fluid levels such as engine oil,
coolant, brake and clutch fluid, and win-
dow washer fluid as frequently as pos-
sible, at least whenever you refuel.
cCheck that all windows and lights are
clean.
cVisually inspect tires for their appearance
and condition. Also check tires for proper
inflation.
cLock all doors.
cPosition seat and adjust head restraints.
cAdjust inside and outside mirrors.
cFasten seat belts and ask all passengers
to do likewise.
cCheck the operation of warning lights
when key is turned to the ON (3) position.
See9Warning/Indicator lights and
chimes9in the9Instruments and controls9
section.1. Apply the parking brake.
2.Automatic transmission:
Move the selector lever to P (Park) or N
(Neutral). P (Park) is preferred.
The selector lever cannot be moved
out of P (Park) and into any of the
other gear positions if the ignition key
is turned to OFF or if the key is re-
moved from the ignition switch.
The starter is designed not to operate
if the selector lever is in one of the
driving positions.
Manual transmission:
Move the shift lever to N (Neutral), and
fully depress the clutch pedal to the floor
while starting the engine.
The starter is designed not to operate
unless the clutch pedal is fully de-
pressed.
3.With your foot off the accelerator
pedal,turn the ignition key to START.
Release the key when the engine starts.
If the engine starts, but fails to run, repeat
the above procedure.cIf the engine is very hard to start in
extremely cold or hot weather, depress
the accelerator pedal fully and hold it
to help start the engine.
cIn the summer, when restarting the
engine within 30 minutes after it has
been stopped, keep the accelerator
pedal fully depressed while starting.
CAUTION
Do not operate the starter for more than
15 seconds at a time. If the engine does
not start, turn the key off and wait 10
seconds before cranking again, other-
wise the starter could be damaged.
4.Warm-up
Always allow the engine to idle for at
least 30 seconds after starting. Drive at a
moderate speed for a short distance first,
especially in cold weather.
BEFORE STARTING THE
ENGINESTARTING THE ENGINE
5-8Starting and driving
ZX