seat adjustment NISSAN FRONTIER 2003 D22 / 1.G Owners Manual
[x] Cancel search | Manufacturer: NISSAN, Model Year: 2003, Model line: FRONTIER, Model: NISSAN FRONTIER 2003 D22 / 1.GPages: 272, PDF Size: 3.67 MB
Page 5 of 272
Table of
ContentsSeats, restraints and supplemental air bag systems
Instruments and controls
Pre-driving checks and adjustments
Heater, air conditioner and audio systems
Starting and driving
In case of emergency
Appearance and care
Maintenance and do-it-yourself
Technical and consumer information
Index
1
2
3
4
5
6
7
8
9
10
Page 7 of 272
1 Seats, restraints and supplemental air
bag systems
Seats............................................1-2
Front manual seat adjustment....................1-2
Tilting rear bench seat (Crew Cab models
only)..........................................1-4
Jump seat (if so equipped).......................1-5
Head restraint adjustment.......................1-5
Supplemental restraint system......................1-6
Precautions on supplemental restraint sys-
tem ...........................................1-6
Passenger supplemental air bag on/off
switch and light (except Crew Cab models)......1-15
Supplemental air bag warning labels.............1-17
Supplemental air bag warning light..............1-17
Seat belts.......................................1-19
Precautions on seat belt usage..................1-19
Child safety...................................1-21
Pregnant women..............................1-23Injured persons................................1-23
Three-point type seat belt with retractor..........1-23
Two-point type seat belt without retractor
(jump seat in King Cab models and center of
rear seat in Crew Cab models)..................1-26
Seat belt extenders............................1-28
Seat belt maintenance.........................1-28
Child restraints...................................1-29
Precautions on child restraints..................1-29
Installation on rear bench seat center
position (Crew Cab models only)................1-31
Installation on rear bench seat outboard
positions (Crew Cab models only)...............1-34
LATCH~lower anchors and tether for children!
system..........................................1-38
Top tether strap child restraint..................1-40
Installation on front passenger seat..............1-41
ZREVIEW COPY:Ð2003 Truck/Frontier(d22)
Owners Manual(owners)ÐUSA English(nna)
01/15/03Ðarosenma
X
Page 8 of 272
0
WARNING
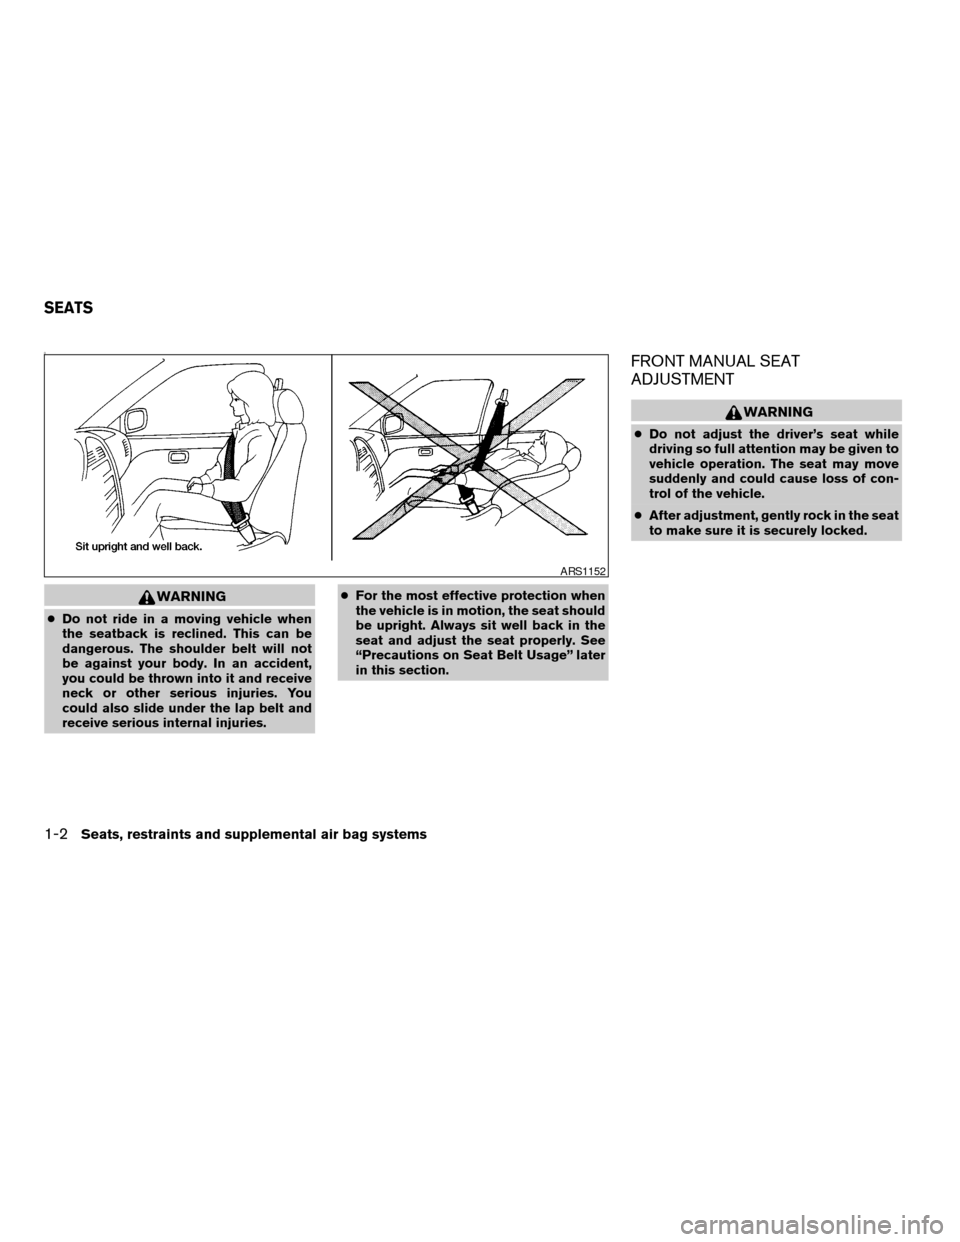
cDo not ride in a moving vehicle when
the seatback is reclined. This can be
dangerous. The shoulder belt will not
be against your body. In an accident,
you could be thrown into it and receive
neck or other serious injuries. You
could also slide under the lap belt and
receive serious internal injuries.cFor the most effective protection when
the vehicle is in motion, the seat should
be upright. Always sit well back in the
seat and adjust the seat properly. See
“Precautions on Seat Belt Usage” later
in this section.
FRONT MANUAL SEAT
ADJUSTMENT
WARNING
cDo not adjust the driver’s seat while
driving so full attention may be given to
vehicle operation. The seat may move
suddenly and could cause loss of con-
trol of the vehicle.
cAfter adjustment, gently rock in the seat
to make sure it is securely locked.
ARS1152
SEATS
1-2Seats, restraints and supplemental air bag systems
ZREVIEW COPY:Ð2003 Truck/Frontier(d22)
Owners Manual(owners)ÐUSA English(nna)
01/13/03Ðarosenma
X
Page 9 of 272
Forward and backward
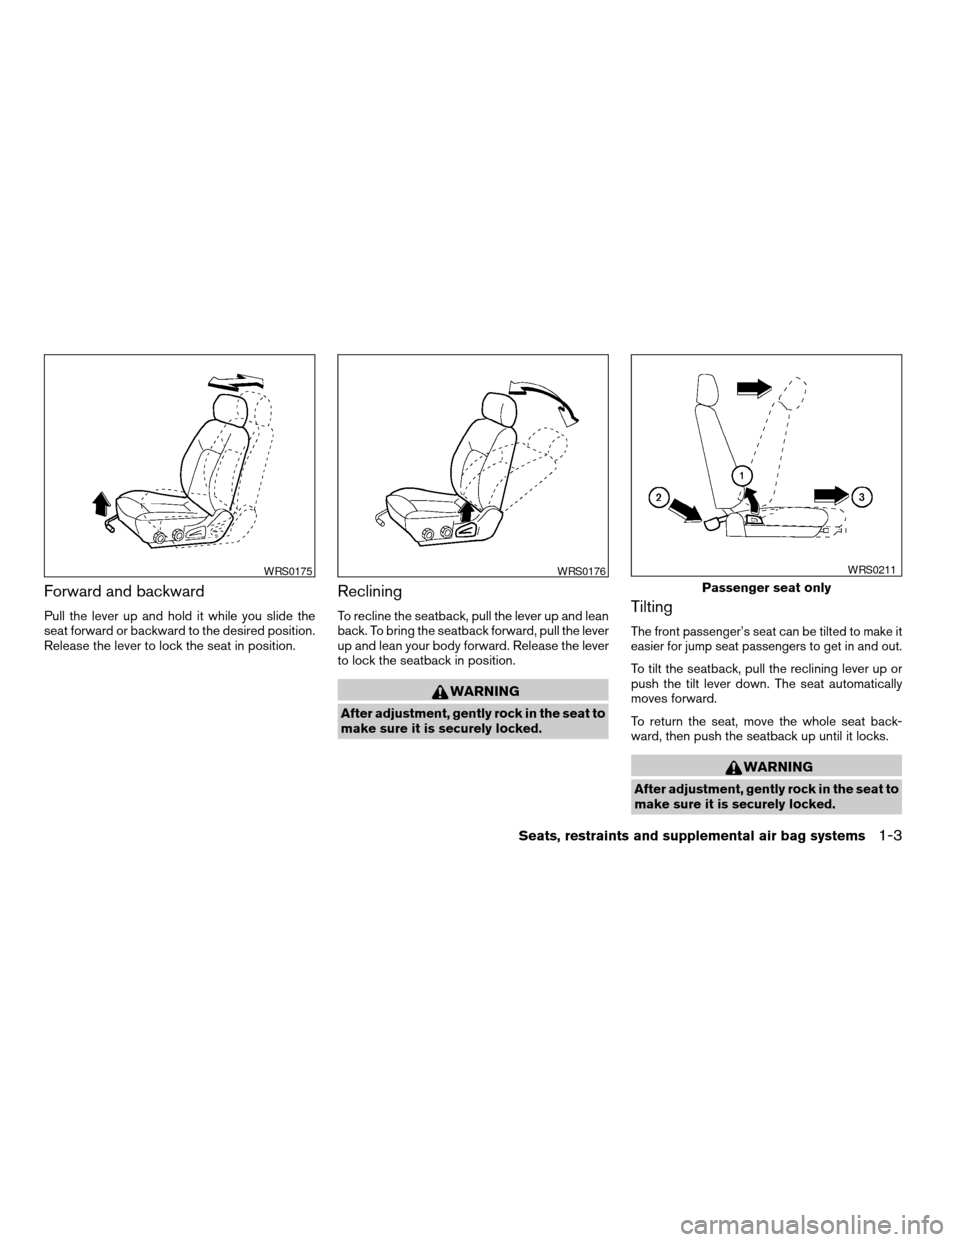
Pull the lever up and hold it while you slide the
seat forward or backward to the desired position.
Release the lever to lock the seat in position.
Reclining
To recline the seatback, pull the lever up and lean
back. To bring the seatback forward, pull the lever
up and lean your body forward. Release the lever
to lock the seatback in position.
WARNING
After adjustment, gently rock in the seat to
make sure it is securely locked.
Tilting
The front passenger’s seat can be tilted to make it
easier for jump seat passengers to get in and out.
To tilt the seatback, pull the reclining lever up or
push the tilt lever down. The seat automatically
moves forward.
To return the seat, move the whole seat back-
ward, then push the seatback up until it locks.
WARNING
After adjustment, gently rock in the seat to
make sure it is securely locked.
WRS0175WRS0176
Passenger seat only
WRS0211
Seats, restraints and supplemental air bag systems1-3
ZREVIEW COPY:Ð2003 Truck/Frontier(d22)
Owners Manual(owners)ÐUSA English(nna)
01/13/03Ðarosenma
X
Page 11 of 272
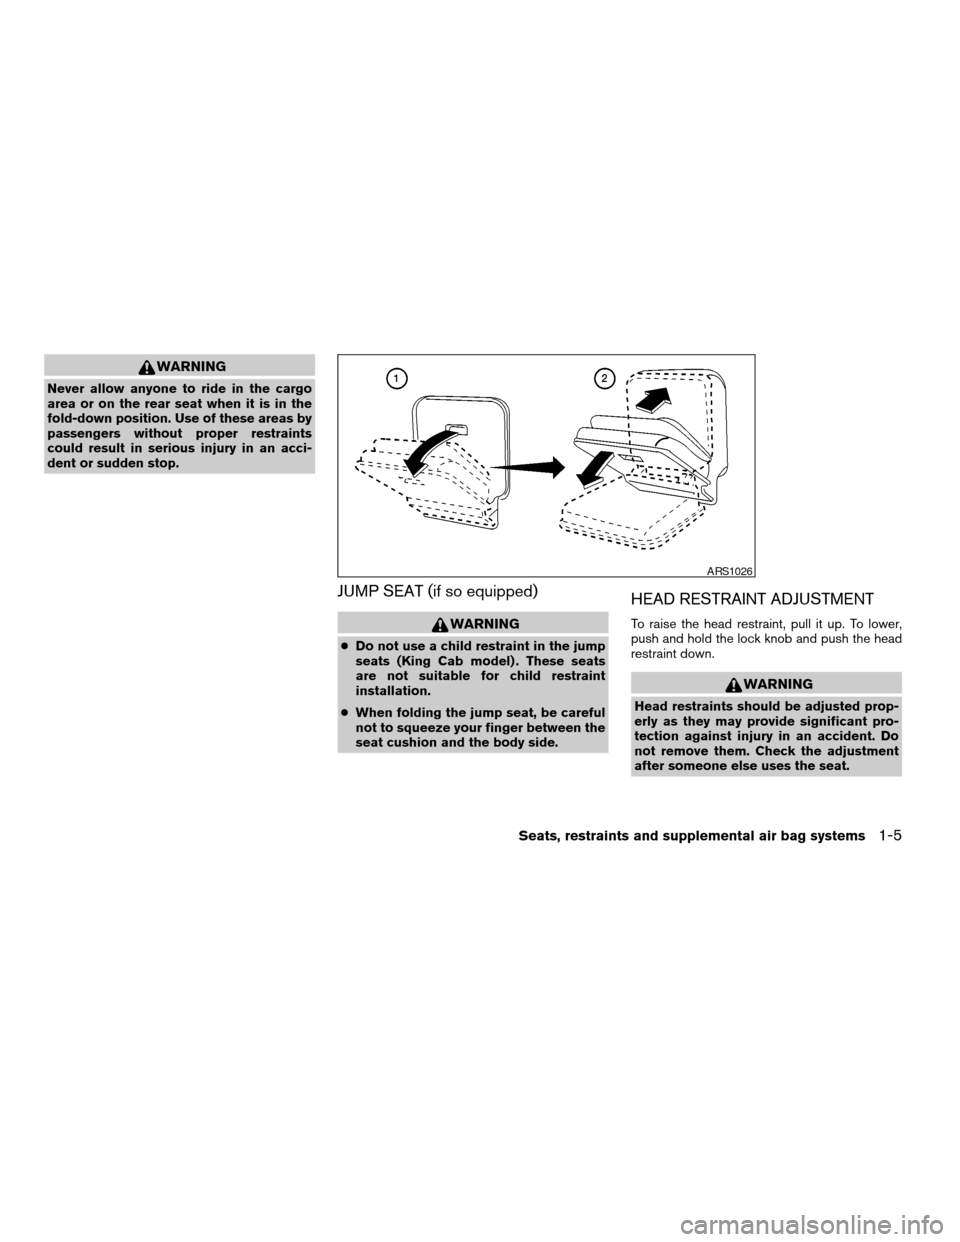
WARNING
Never allow anyone to ride in the cargo
area or on the rear seat when it is in the
fold-down position. Use of these areas by
passengers without proper restraints
could result in serious injury in an acci-
dent or sudden stop.
JUMP SEAT (if so equipped)
WARNING
cDo not use a child restraint in the jump
seats (King Cab model) . These seats
are not suitable for child restraint
installation.
cWhen folding the jump seat, be careful
not to squeeze your finger between the
seat cushion and the body side.
HEAD RESTRAINT ADJUSTMENT
To raise the head restraint, pull it up. To lower,
push and hold the lock knob and push the head
restraint down.
WARNING
Head restraints should be adjusted prop-
erly as they may provide significant pro-
tection against injury in an accident. Do
not remove them. Check the adjustment
after someone else uses the seat.
ARS1026
Seats, restraints and supplemental air bag systems1-5
ZREVIEW COPY:Ð2003 Truck/Frontier(d22)
Owners Manual(owners)ÐUSA English(nna)
01/13/03Ðarosenma
X
Page 31 of 272

Unfastening the seat belts
s1To unfasten the seat belt, press the button on
the buckle. The seat belt automatically re-
tracts.
Checking seat belt operation
Seat belt retractors are designed to lock seat belt
movement by two separate methods:
cWhen the seat belt is pulled quickly from the
retractor.
cWhen the vehicle slows down rapidly.
To increase your confidence in the seat belts,
check the operation as follows.cGrasp the shoulder belt and pull forward
quickly. The retractor should lock and restrict
further belt movement.
If the retractor does not lock during this check or
if you have any questions about seat belt opera-
tion, see a NISSAN dealer.
Shoulder belt height adjustment (For
front seats)
The shoulder belt anchor height should be ad-
justed to the position best for you. (See “Precau-
tions on seat belt usage” earlier in this section.)
To adjust, pull out the adjustment button
s1and
move the shoulder belt anchor to the desired
position
s2, so the belt passes over the center of
the shoulder. The belt should be away from your
face and neck, but not falling off your shoulder.
Release the adjustment button to lock the shoul-
der belt anchor into position.
WRS0139WRS0226
Seats, restraints and supplemental air bag systems1-25
ZREVIEW COPY:Ð2003 Truck/Frontier(d22)
Owners Manual(owners)ÐUSA English(nna)
01/13/03Ðarosenma
X
Page 32 of 272
WARNING
cAfter adjustment, release the adjust-
ment button and try to move the shoul-
der belt anchor up and down to make
sure it is securely fixed in position.
cThe shoulder belt anchor height should
be adjusted to the position best for you.
Failure to do so may reduce the effec-
tiveness of the entire restraint system
and increase the chance or severity of
injury in an accident.
TWO-POINT TYPE SEAT BELT
WITHOUT RETRACTOR (jump seat in
King Cab models and center of rear
seat in Crew Cab models)
WARNING
cDo not install a child restraint in the
jump seats (King Cab model) . These
seats are not suitable for child restraint
installation.
cSerious or fatal injury could occur.
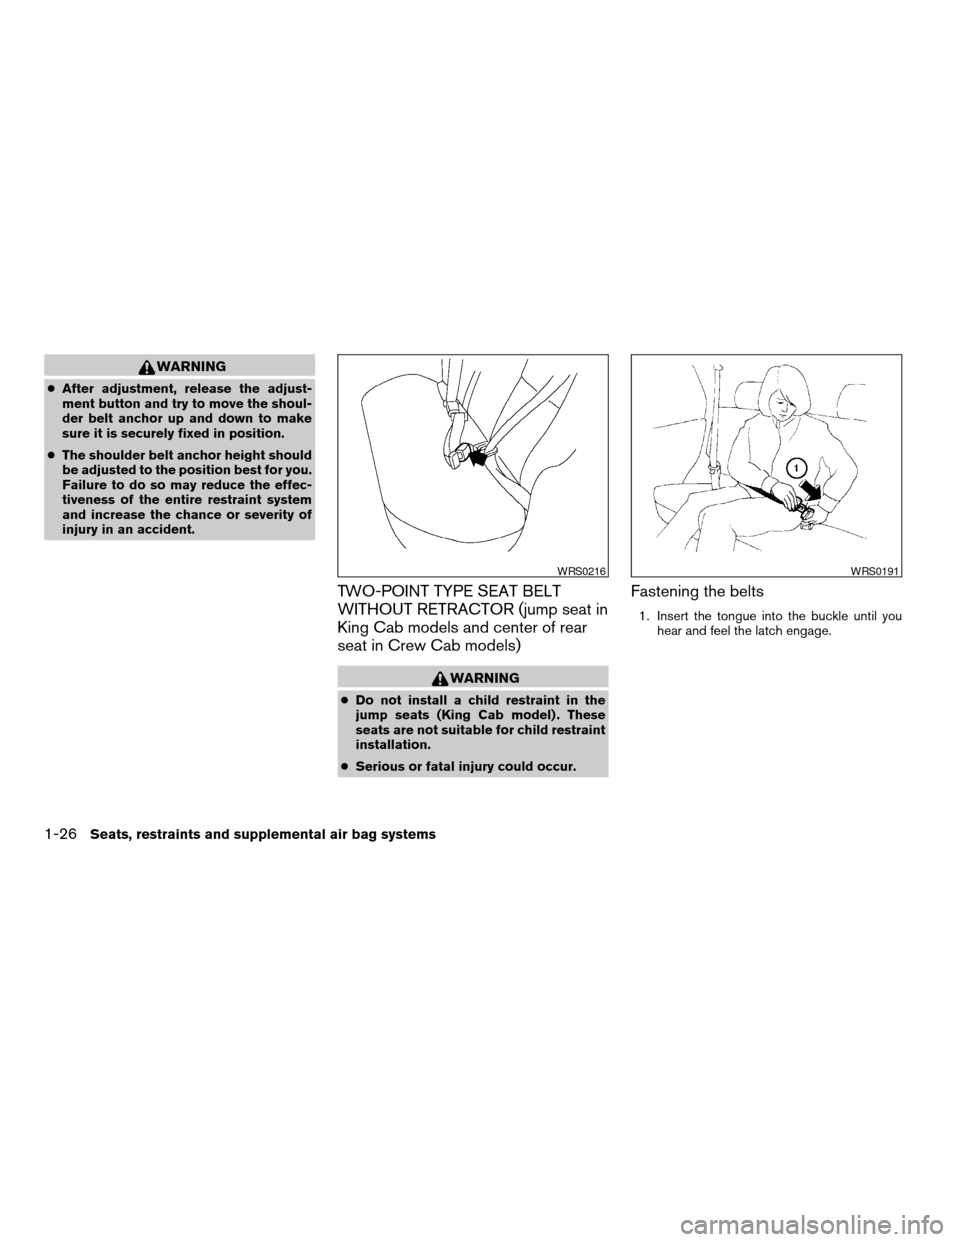
Fastening the belts
1. Insert the tongue into the buckle until you
hear and feel the latch engage.
WRS0216WRS0191
1-26Seats, restraints and supplemental air bag systems
ZREVIEW COPY:Ð2003 Truck/Frontier(d22)
Owners Manual(owners)ÐUSA English(nna)
01/13/03Ðarosenma
X
Page 36 of 272
child restraints include two rigid or webbing-
mounted attachments that can be connected to
these lower anchors. For details, see the “LATCH
(Lower Anchors and Tether for Children) system”
later in this section.
Child restraints for infants and small children of
various sizes are offered by several manufactur-
ers. When selecting any child restraint, keep the
following points in mind:
cChoose only a restraint with a label certifying
that it complies with Federal Motor Vehicle
Safety Standard 213 or Canadian Motor Ve-
hicle Safety Standard 213.
cCheck the child restraint in your vehicle to be
sure it is compatible with the vehicle’s seat and
seat belt system.
cIf the child restraint is compatible with your
vehicle, place your child in the child restraint
and check the various adjustments to be sure
the child restraint is compatible with your child.
Always follow all recommended procedures.
All U.S. states and provinces of Canada
require that infants and small children be
restrained in an approved child restraint at
all times while the vehicle is being oper-
ated.WARNING
cDo not install a child restraint in the
jump seats (King Cab model) . These
seats are not suitable for child restraint
installation.
cImproper use of a child restraint can
increase the risk or severity of injury for
both the child and other occupants of
the vehicle.
cFollow all of the child restraint manu-
facturer’s instructions for installation
and use. When purchasing a child re-
straint, be sure to select one which will
fit your child and vehicle. It may not be
possible to properly install some types
of child restraints in your vehicle.
cIf the child restraint is not anchored
properly, the risk of a child being in-
jured in a collision or a sudden stop
greatly increases.
cAdjustable seatbacks should be posi-
tioned to fit the child restraint, but as
upright as possible.cAfter attaching the child restraint, test it
before you place the child in it. Tilt it
from side to side. Try to tug it forward
and check to see if the belt holds the
restraint in place. The child restraint
should not move more than 1 inch. If the
restraint is not secure, tighten the belt
as necessary, or put the restraint in an-
other seat and test it again.
cFor a front-facing child restraint, if the
seat position where it is installed has a
three-point type lap/shoulder belt,
check to make sure the shoulder belt
does not go in front of the child’s face or
neck. If it does, put the shoulder belt
behind the child restraint. If you must
install a front facing child restraint in
the front seat, see “Installation on front
passenger seat” later in this section.
cWhen your child restraint is not in use,
keep it secured with a seat belt to pre-
vent it from being thrown around in
case of a sudden stop or accident.
1-30Seats, restraints and supplemental air bag systems
ZREVIEW COPY:Ð2003 Truck/Frontier(d22)
Owners Manual(owners)ÐUSA English(nna)
01/15/03Ðarosenma
X
Page 38 of 272

3. Remove all slack in the lap belt for a very
tight fit by pulling forcefully on the lap belt
adjustment.4. Before placing the child in the child restraint,
use force to tilt the child restraint from side
to side, and tug it forward to make sure it is
securely in place. It should not move more
than 1 inch.
5. If it is not secure, try to tighten the belt again,
or put the restraint in another seat.
6. Check to make sure the child restraint is
properly secured prior to each use.Rear facing
When you install a child restraint in the rear
center seat, follow these steps:
1. Position the child restraint on the seat as
illustrated. Always follow the restraint manu-
facturer’s instructions.
Front Facing — step 3
WRS0264
Front Facing — step 4
WRS0265
Rear Facing – step 1
WRS0266
1-32Seats, restraints and supplemental air bag systems
ZREVIEW COPY:Ð2003 Truck/Frontier(d22)
Owners Manual(owners)ÐUSA English(nna)
01/15/03Ðarosenma
X
Page 39 of 272
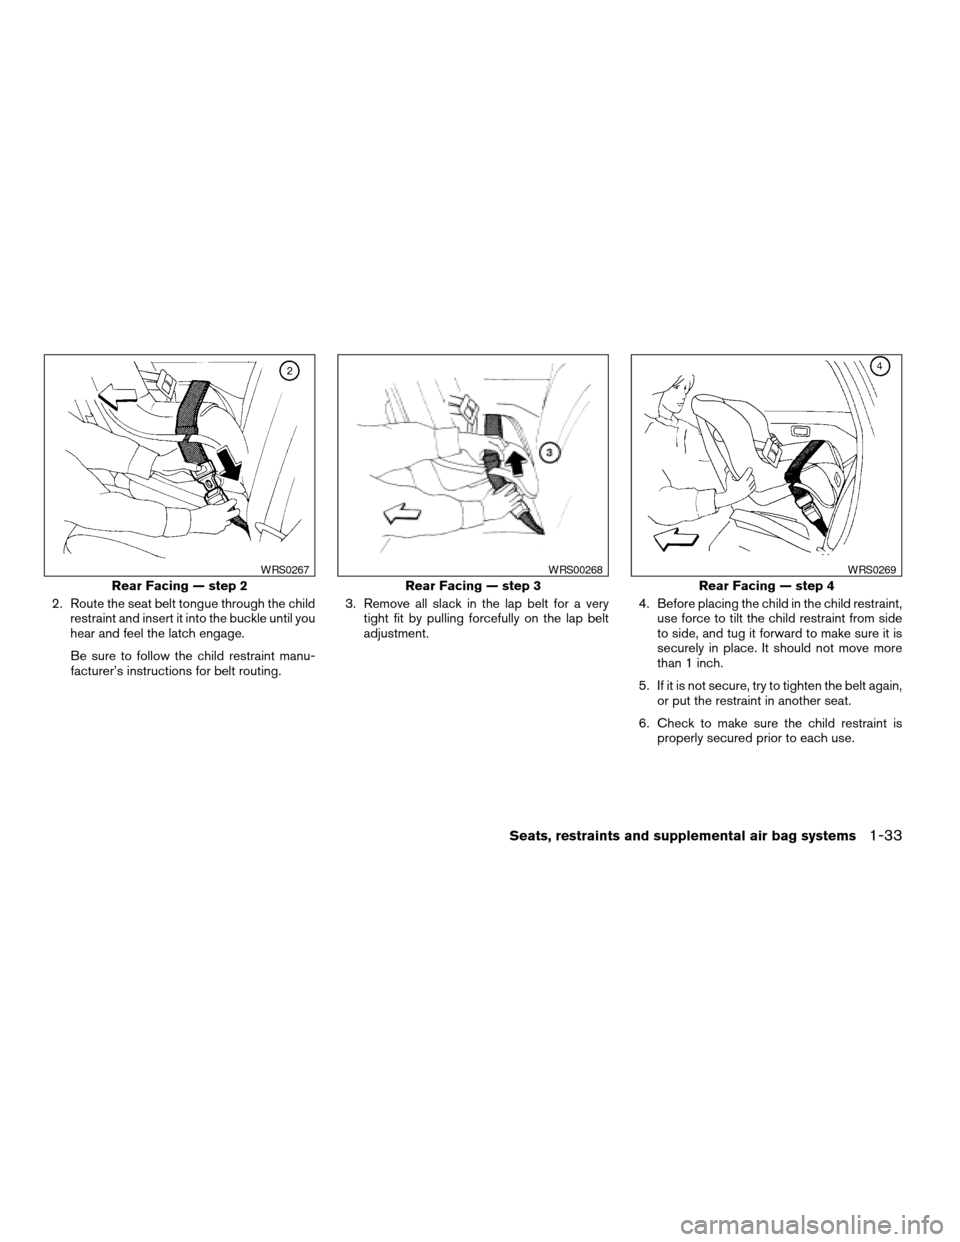
2. Route the seat belt tongue through the child
restraint and insert it into the buckle until you
hear and feel the latch engage.
Be sure to follow the child restraint manu-
facturer’s instructions for belt routing.3. Remove all slack in the lap belt for a very
tight fit by pulling forcefully on the lap belt
adjustment.4. Before placing the child in the child restraint,
use force to tilt the child restraint from side
to side, and tug it forward to make sure it is
securely in place. It should not move more
than 1 inch.
5. If it is not secure, try to tighten the belt again,
or put the restraint in another seat.
6. Check to make sure the child restraint is
properly secured prior to each use.
Rear Facing — step 2
WRS0267
Rear Facing — step 3
WRS00268
Rear Facing — step 4
WRS0269
Seats, restraints and supplemental air bag systems1-33
ZREVIEW COPY:Ð2003 Truck/Frontier(d22)
Owners Manual(owners)ÐUSA English(nna)
01/15/03Ðarosenma
X