NISSAN FRONTIER 2004 D22 / 1.G Owners Manual
Manufacturer: NISSAN, Model Year: 2004, Model line: FRONTIER, Model: NISSAN FRONTIER 2004 D22 / 1.GPages: 296, PDF Size: 4.48 MB
Page 91 of 296
cTurn signals do not work when the haz-
ard warning flasher lights are on.
The flashers will operate with the ignition switch
in any position.
Some state laws may prohibit the use of
the hazard warning flasher switch while
driving.
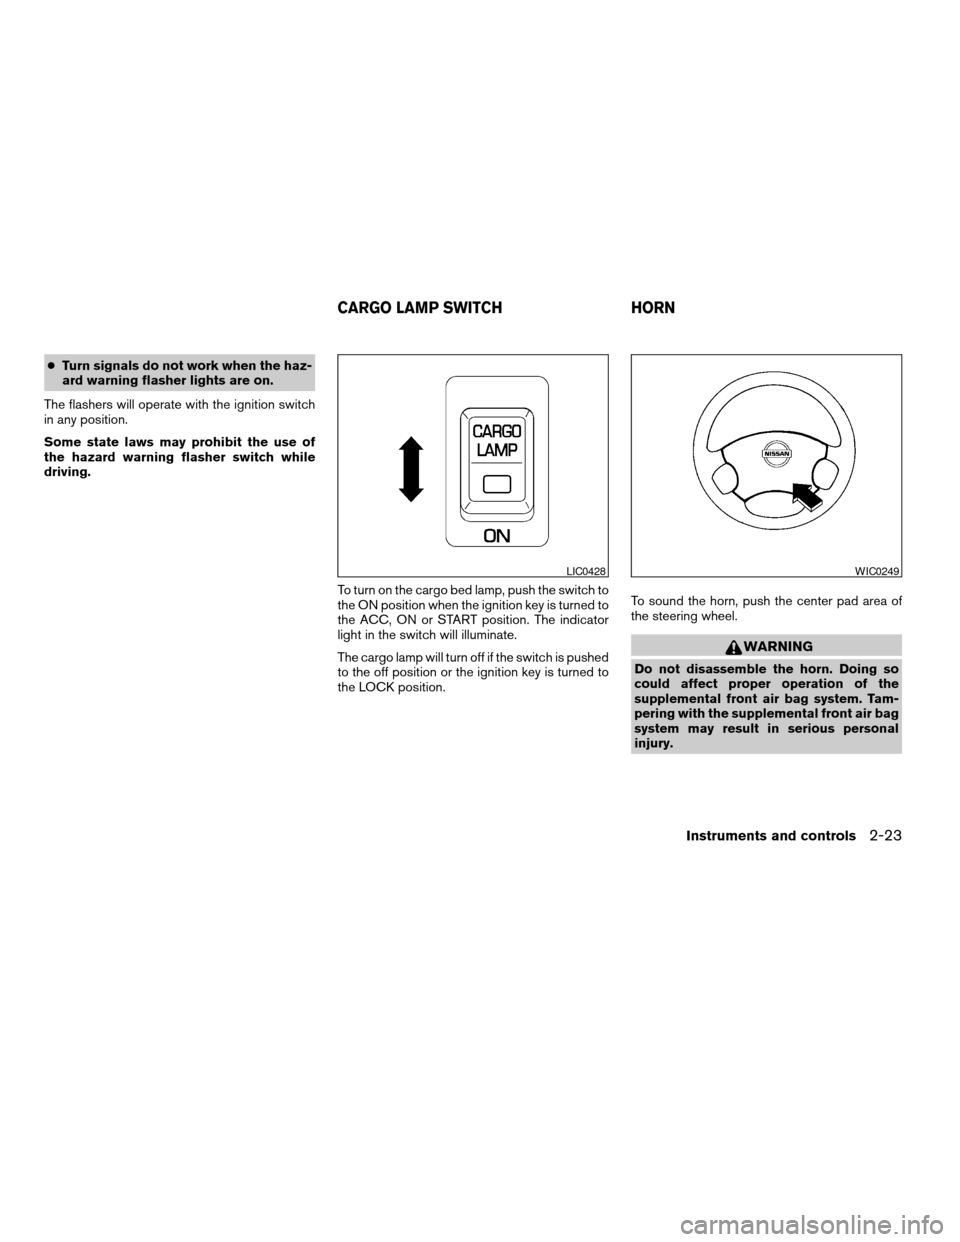
To turn on the cargo bed lamp, push the switch to
the ON position when the ignition key is turned to
the ACC, ON or START position. The indicator
light in the switch will illuminate.
The cargo lamp will turn off if the switch is pushed
to the off position or the ignition key is turned to
the LOCK position.To sound the horn, push the center pad area of
the steering wheel.
WARNING
Do not disassemble the horn. Doing so
could affect proper operation of the
supplemental front air bag system. Tam-
pering with the supplemental front air bag
system may result in serious personal
injury.
LIC0428WIC0249
CARGO LAMP SWITCH HORN
Instruments and controls2-23
ZREVIEW COPY:Ð2004 Truck/Frontier(d22)
Owners Manual(owners)ÐUSA English(nna)
11/21/03Ðdebbie
X
Page 92 of 296
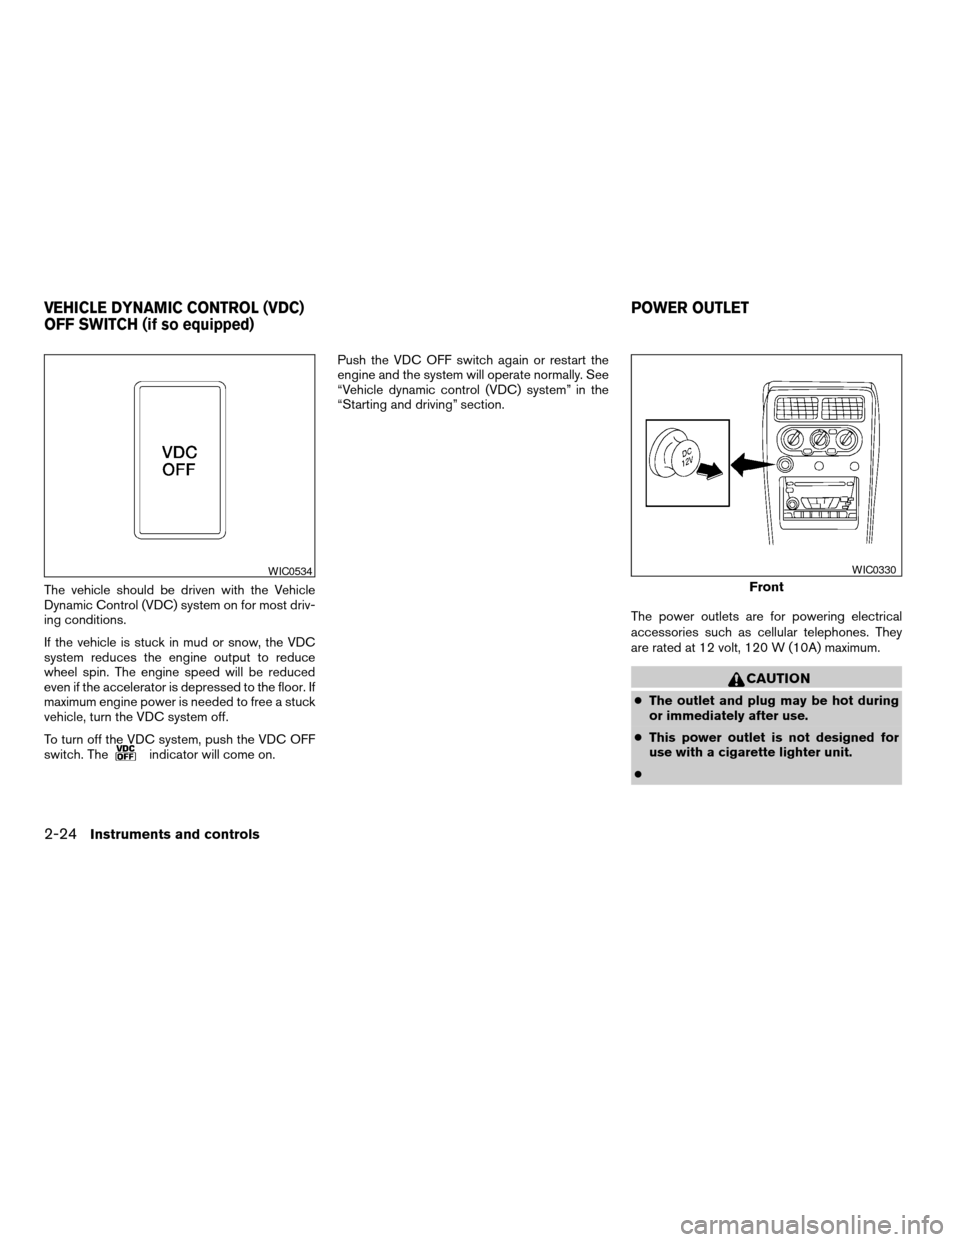
The vehicle should be driven with the Vehicle
Dynamic Control (VDC) system on for most driv-
ing conditions.
If the vehicle is stuck in mud or snow, the VDC
system reduces the engine output to reduce
wheel spin. The engine speed will be reduced
even if the accelerator is depressed to the floor. If
maximum engine power is needed to free a stuck
vehicle, turn the VDC system off.
To turn off the VDC system, push the VDC OFF
switch. The
indicator will come on.Push the VDC OFF switch again or restart the
engine and the system will operate normally. See
“Vehicle dynamic control (VDC) system” in the
“Starting and driving” section.
The power outlets are for powering electrical
accessories such as cellular telephones. They
are rated at 12 volt, 120 W (10A) maximum.
CAUTION
cThe outlet and plug may be hot during
or immediately after use.
cThis power outlet is not designed for
use with a cigarette lighter unit.
c
WIC0534
Front
WIC0330
VEHICLE DYNAMIC CONTROL (VDC)
OFF SWITCH (if so equipped)POWER OUTLET
2-24Instruments and controls
ZREVIEW COPY:Ð2004 Truck/Frontier(d22)
Owners Manual(owners)ÐUSA English(nna)
11/21/03Ðdebbie
X
Page 93 of 296
cDo not use with accessories that ex-
ceed a 12 volt, 120W (10A) power draw.
Do not use double adapters or more
than one electrical accessory.
cUse power outlets with the engine run-
ning to avoid discharging the vehicle
battery.
cAvoid using power outlets when the air
conditioner, headlights or rear window
defroster is on.cBefore inserting or disconnecting a
plug, be sure the electrical accessory
being used is turned OFF.
cPush the plug in as far as it will go. If
good contact is not made, the plug may
overheat or the internal temperature
fuse may blow.
cWhen not in use, be sure to close the
cap. Do not allow water to contact the
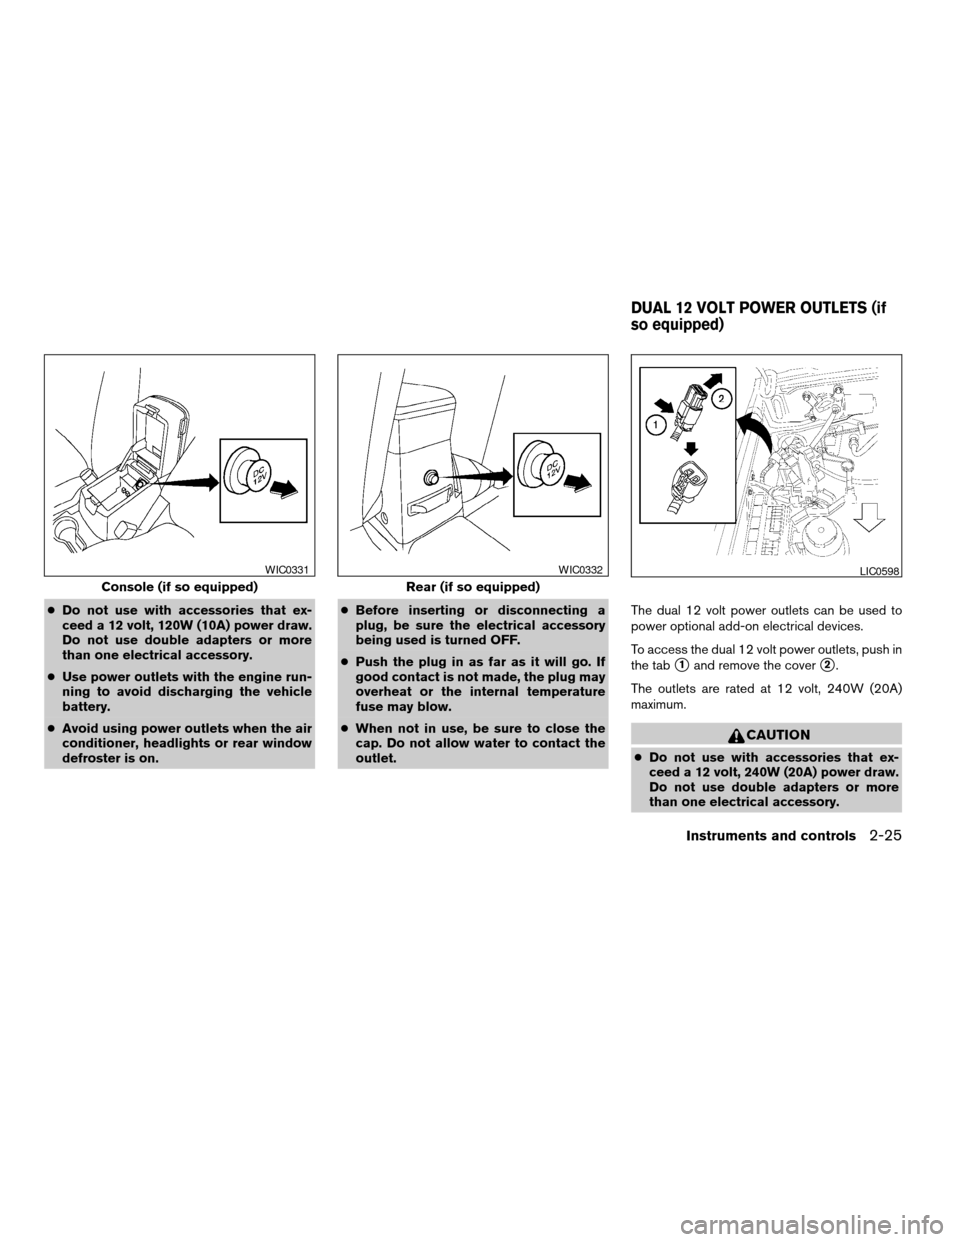
outlet.The dual 12 volt power outlets can be used to
power optional add-on electrical devices.
To access the dual 12 volt power outlets, push in
the tab
s1and remove the covers2.
The outlets are rated at 12 volt, 240W (20A)
maximum.
CAUTION
cDo not use with accessories that ex-
ceed a 12 volt, 240W (20A) power draw.
Do not use double adapters or more
than one electrical accessory.
Console (if so equipped)
WIC0331
Rear (if so equipped)
WIC0332LIC0598
DUAL 12 VOLT POWER OUTLETS (if
so equipped)
Instruments and controls2-25
ZREVIEW COPY:Ð2004 Truck/Frontier(d22)
Owners Manual(owners)ÐUSA English(nna)
11/21/03Ðdebbie
X
Page 94 of 296
cUse power outlets with the engine run-
ning to avoid discharging the vehicle
battery.
cAvoid using power outlets when the air
conditioner, headlights or rear window
defroster is on.
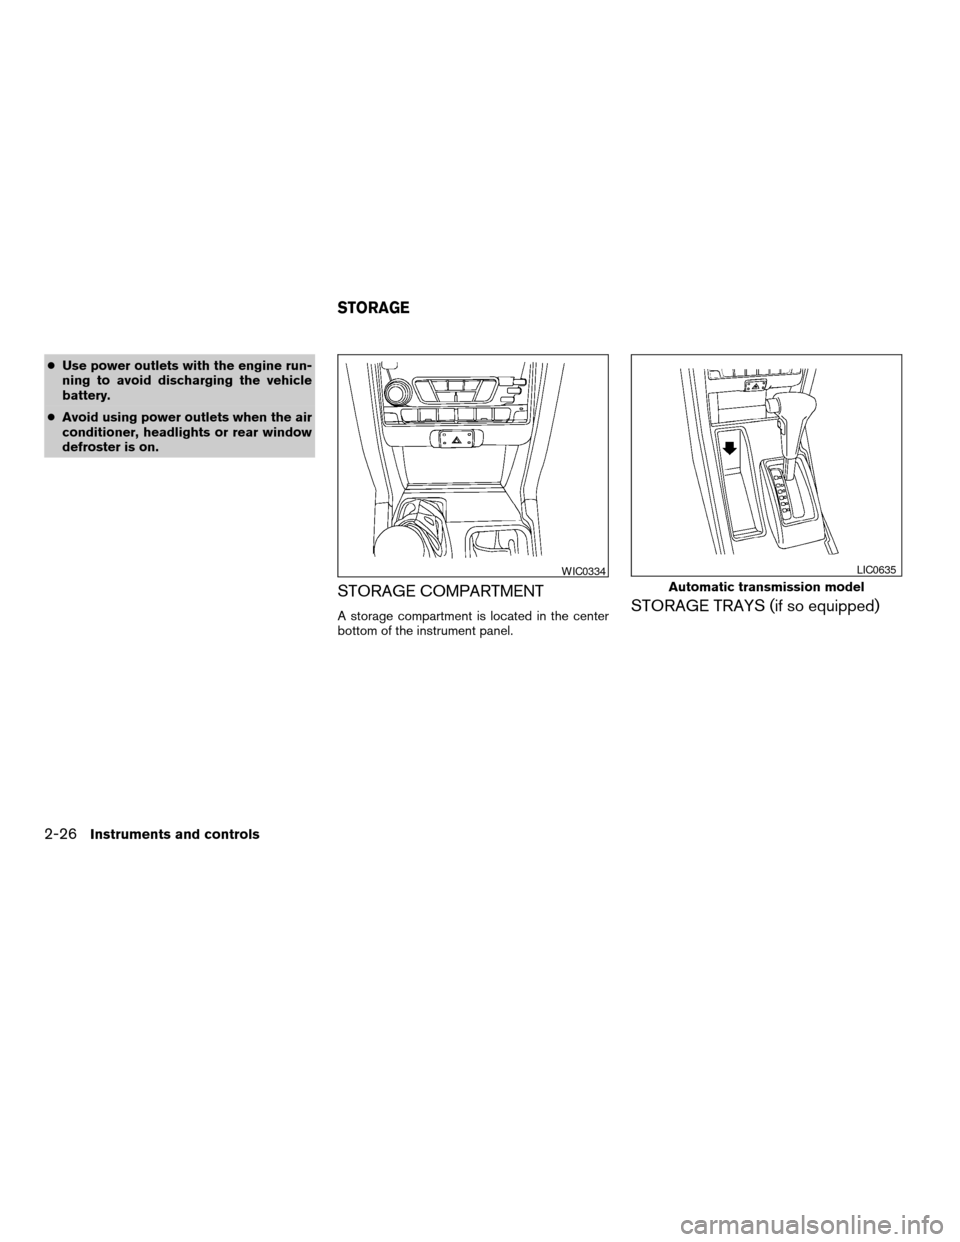
STORAGE COMPARTMENT
A storage compartment is located in the center
bottom of the instrument panel.STORAGE TRAYS (if so equipped)
WIC0334
Automatic transmission model
LIC0635
STORAGE
2-26Instruments and controls
ZREVIEW COPY:Ð2004 Truck/Frontier(d22)
Owners Manual(owners)ÐUSA English(nna)
11/21/03Ðdebbie
X
Page 95 of 296
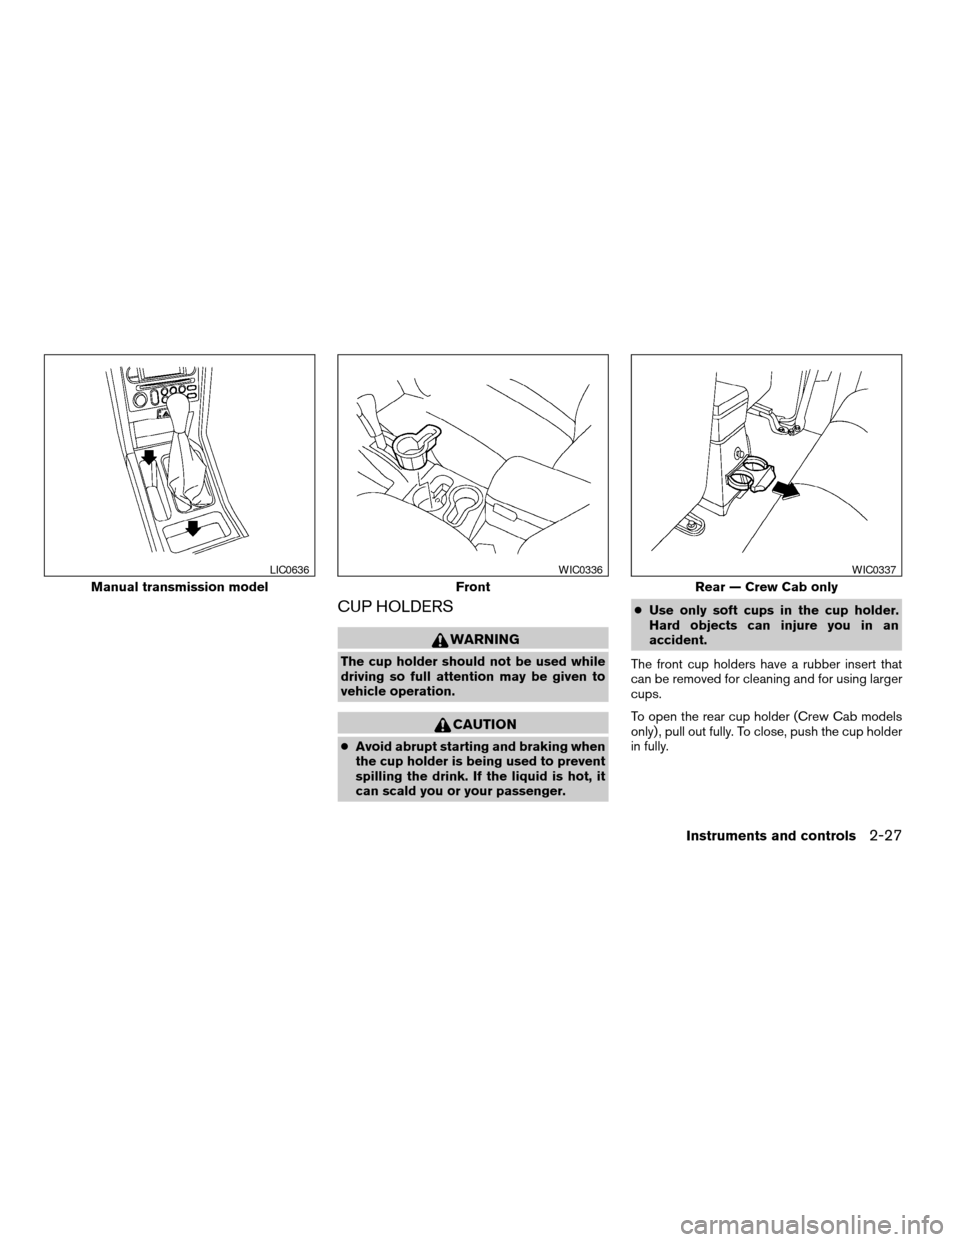
CUP HOLDERS
WARNING
The cup holder should not be used while
driving so full attention may be given to
vehicle operation.
CAUTION
cAvoid abrupt starting and braking when
the cup holder is being used to prevent
spilling the drink. If the liquid is hot, it
can scald you or your passenger.cUse only soft cups in the cup holder.
Hard objects can injure you in an
accident.
The front cup holders have a rubber insert that
can be removed for cleaning and for using larger
cups.
To open the rear cup holder (Crew Cab models
only) , pull out fully. To close, push the cup holder
in fully.
Manual transmission model
LIC0636
Front
WIC0336
Rear — Crew Cab only
WIC0337
Instruments and controls2-27
ZREVIEW COPY:Ð2004 Truck/Frontier(d22)
Owners Manual(owners)ÐUSA English(nna)
11/21/03Ðdebbie
X
Page 96 of 296
GLOVE BOX
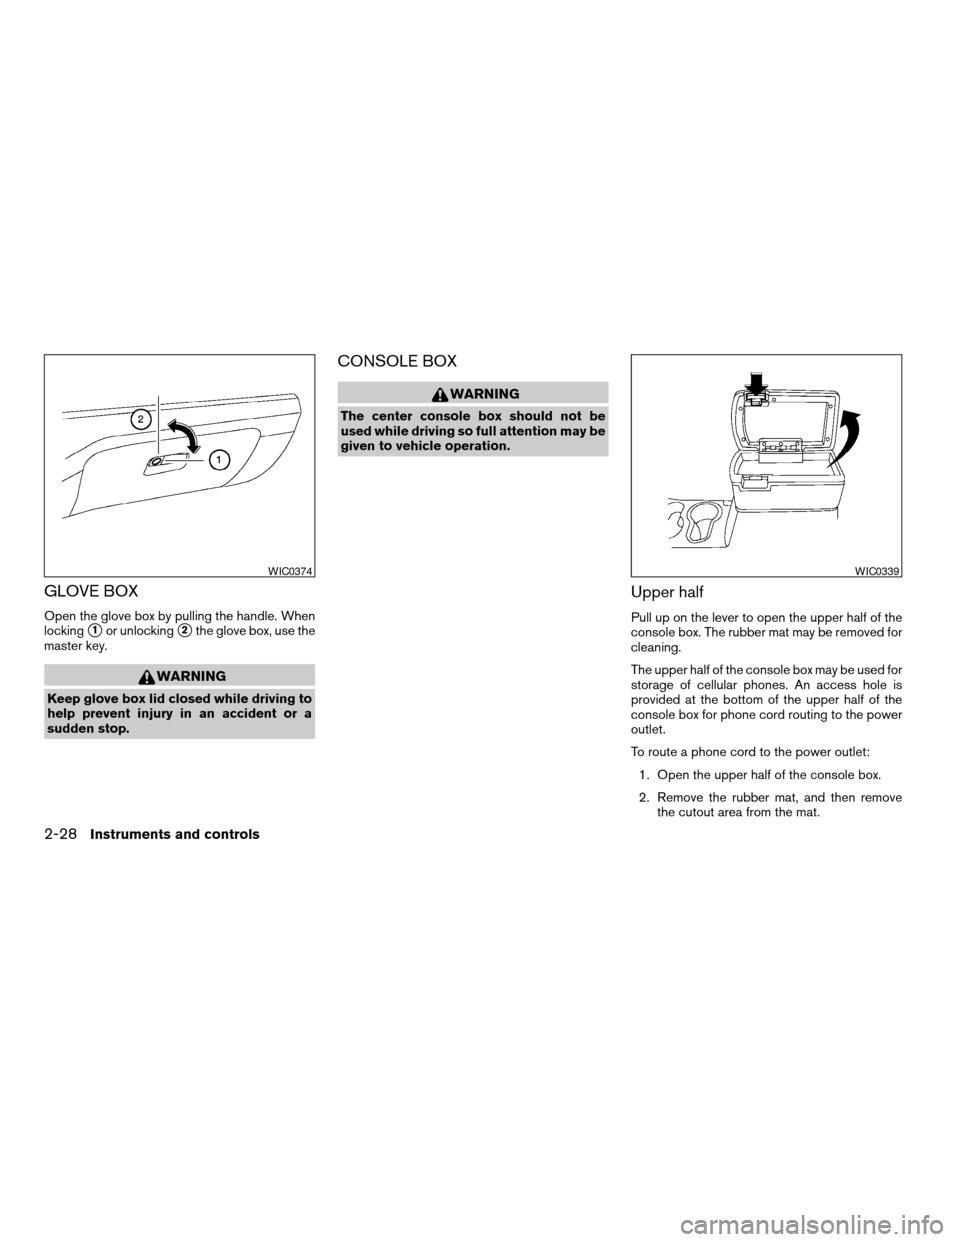
Open the glove box by pulling the handle. When
locking
s1or unlockings2the glove box, use the
master key.
WARNING
Keep glove box lid closed while driving to
help prevent injury in an accident or a
sudden stop.
CONSOLE BOX
WARNING
The center console box should not be
used while driving so full attention may be
given to vehicle operation.
Upper half
Pull up on the lever to open the upper half of the
console box. The rubber mat may be removed for
cleaning.
The upper half of the console box may be used for
storage of cellular phones. An access hole is
provided at the bottom of the upper half of the
console box for phone cord routing to the power
outlet.
To route a phone cord to the power outlet:
1. Open the upper half of the console box.
2. Remove the rubber mat, and then remove
the cutout area from the mat.
WIC0374WIC0339
2-28Instruments and controls
ZREVIEW COPY:Ð2004 Truck/Frontier(d22)
Owners Manual(owners)ÐUSA English(nna)
11/21/03Ðdebbie
X
Page 97 of 296

3. Remove the access hole cover.
4. Install the rubber mat.
5. Route the phone cord through the access
hole and plug into the power outlet.
Lower half
Pull up on the lever to open the lower half of the
console box. A power outlet is located inside the
console box and there is storage for compact
discs.
GROCERY HOOKS (King Cab only)
The grocery hooks allow for 2 standard size plas-
tic grocery bags to hang side by side.
Do not apply a total load of more than 55 lbs (25
kg) to a single grocery hook.
WIC0340LIC0373
Instruments and controls2-29
ZREVIEW COPY:Ð2004 Truck/Frontier(d22)
Owners Manual(owners)ÐUSA English(nna)
11/21/03Ðdebbie
X
Page 98 of 296
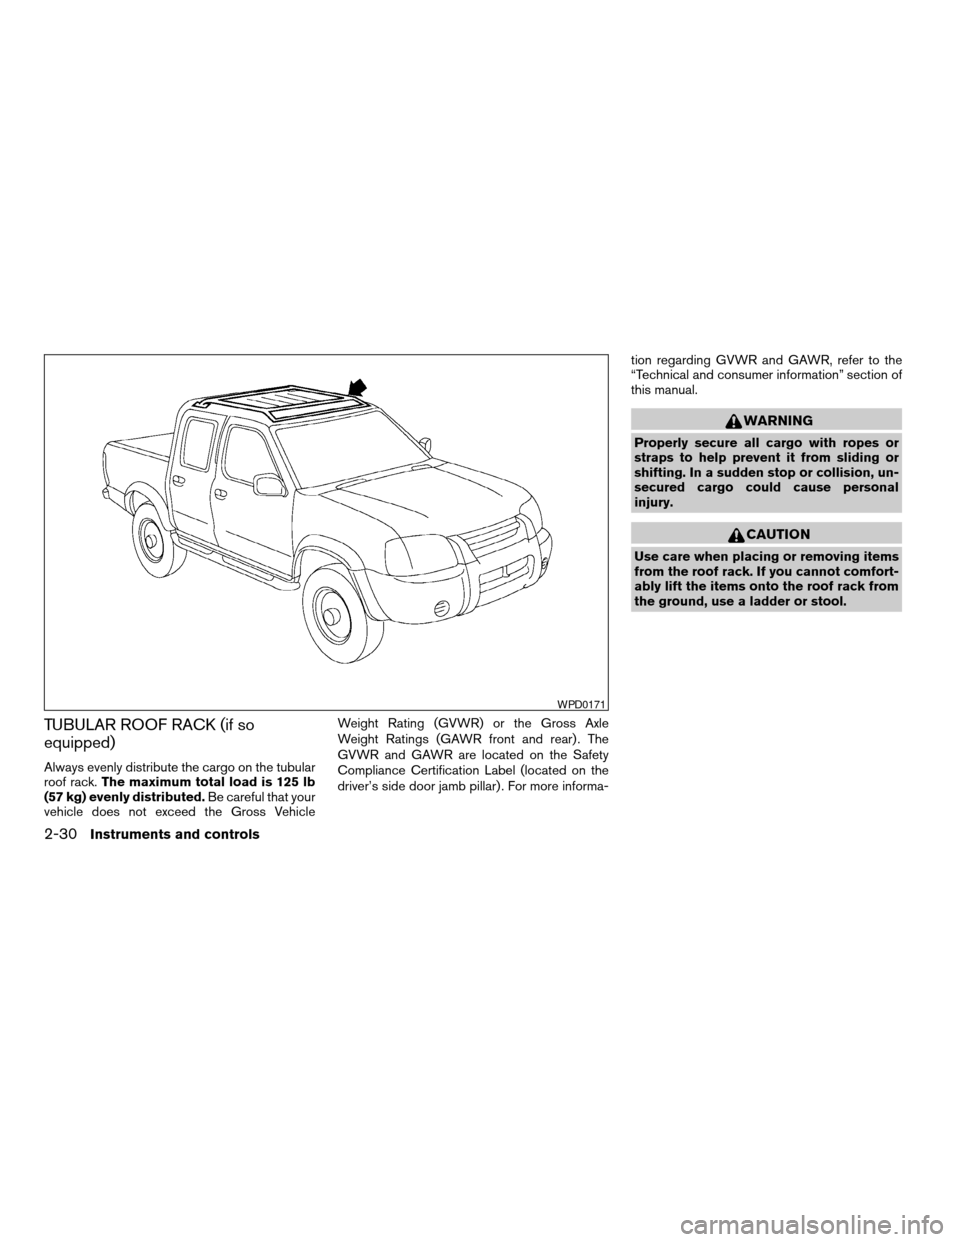
TUBULAR ROOF RACK (if so
equipped)
Always evenly distribute the cargo on the tubular
roof rack.The maximum total load is 125 lb
(57 kg) evenly distributed.Be careful that your
vehicle does not exceed the Gross VehicleWeight Rating (GVWR) or the Gross Axle
Weight Ratings (GAWR front and rear) . The
GVWR and GAWR are located on the Safety
Compliance Certification Label (located on the
driver’s side door jamb pillar) . For more informa-tion regarding GVWR and GAWR, refer to the
“Technical and consumer information” section of
this manual.
WARNING
Properly secure all cargo with ropes or
straps to help prevent it from sliding or
shifting. In a sudden stop or collision, un-
secured cargo could cause personal
injury.
CAUTION
Use care when placing or removing items
from the roof rack. If you cannot comfort-
ably lift the items onto the roof rack from
the ground, use a ladder or stool.
WPD0171
2-30Instruments and controls
ZREVIEW COPY:Ð2004 Truck/Frontier(d22)
Owners Manual(owners)ÐUSA English(nna)
11/21/03Ðdebbie
X
Page 99 of 296

Tubular roof rack crossbar adjustment
The front and rear crossbars can be adjusted
forward, backward, or be removed. Use the
Torxdriver located in the tool kit to loosen both
crossbar adjusting screws.To adjust:
1. Loosen the adjusting screws with the
Torxdriver by turning counterclockwise.2. When the clamp is loosened, move the
crossbars so the cargo can be positioned on
the crossbars.
3. Tighten the crossbar adjusting screws with
the Torxdriver by turning clockwise.
4. Secure the cargo with rope.
5. Always check the tightness of the crossbar
adjusting screws.
To remove:
1. Loosen the adjusting screws with the
Torxdriver by turning counterclockwise.
2. Rotate the clamps.
3. Remove the crossbars.
4. Reverse to install.
5. Always check the tightness of the crossbar
adjusting screws.
If you hear wind noise coming from the roof rack
while driving, adjust the roof rack crossbars to the
most rearward position.
AIC1147
Instruments and controls2-31
ZREVIEW COPY:Ð2004 Truck/Frontier(d22)
Owners Manual(owners)ÐUSA English(nna)
11/21/03Ðdebbie
X
Page 100 of 296
POWER WINDOWS (if so equipped)
WARNING
cMake sure that all passengers have
their hands, etc. inside the vehicle while
it is in motion and before closing the
windows. Use the window lock switch
to prevent unexpected use of the power
windows.
cDo not leave children unattended inside
the vehicle. They could unknowingly ac-
tivate switches or controls and become
trapped in a window. Unattended chil-
dren could become involved in serious
accidents.
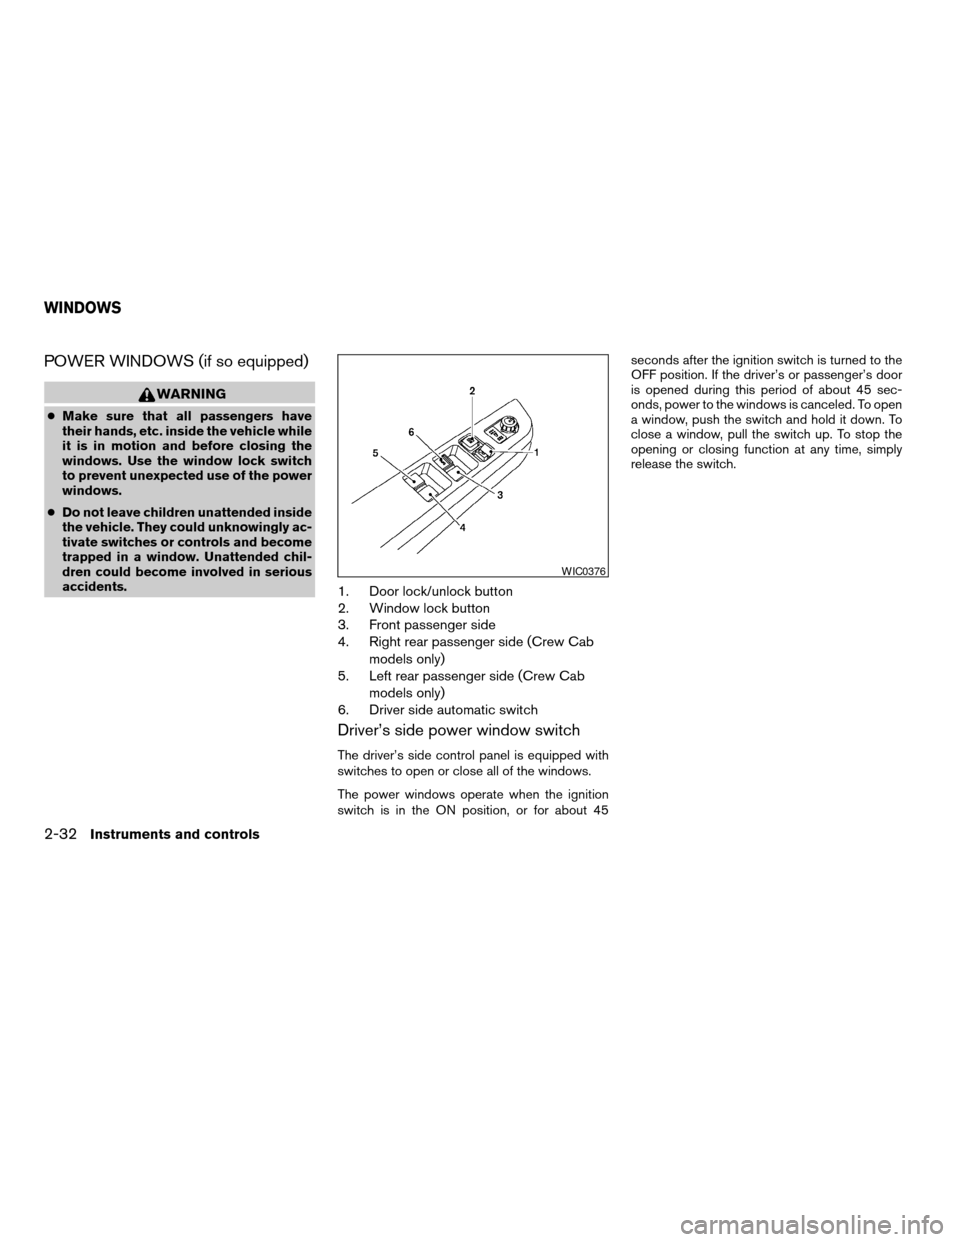
1. Door lock/unlock button
2. Window lock button
3. Front passenger side
4. Right rear passenger side (Crew Cab
models only)
5. Left rear passenger side (Crew Cab
models only)
6. Driver side automatic switch
Driver’s side power window switch
The driver’s side control panel is equipped with
switches to open or close all of the windows.
The power windows operate when the ignition
switch is in the ON position, or for about 45seconds after the ignition switch is turned to the
OFF position. If the driver’s or passenger’s door
is opened during this period of about 45 sec-
onds, power to the windows is canceled. To open
a window, push the switch and hold it down. To
close a window, pull the switch up. To stop the
opening or closing function at any time, simply
release the switch.
WIC0376
WINDOWS
2-32Instruments and controls
ZREVIEW COPY:Ð2004 Truck/Frontier(d22)
Owners Manual(owners)ÐUSA English(nna)
11/21/03Ðdebbie
X