inflation pressure NISSAN FRONTIER 2005 D22 / 1.G Owners Manual
[x] Cancel search | Manufacturer: NISSAN, Model Year: 2005, Model line: FRONTIER, Model: NISSAN FRONTIER 2005 D22 / 1.GPages: 336, PDF Size: 7.24 MB
Page 99 of 336
dipstick to check the oil level. See “Engine oil” in
the “Maintenance and do-it-yourself” section of
this manual.
CAUTION
Running the engine with the engine oil
pressure warning light on could cause se-
rious damage to the engine almost imme-
diately. Such damage is not covered by
warranty. Turn off the engine as soon as it
is safe to do so.
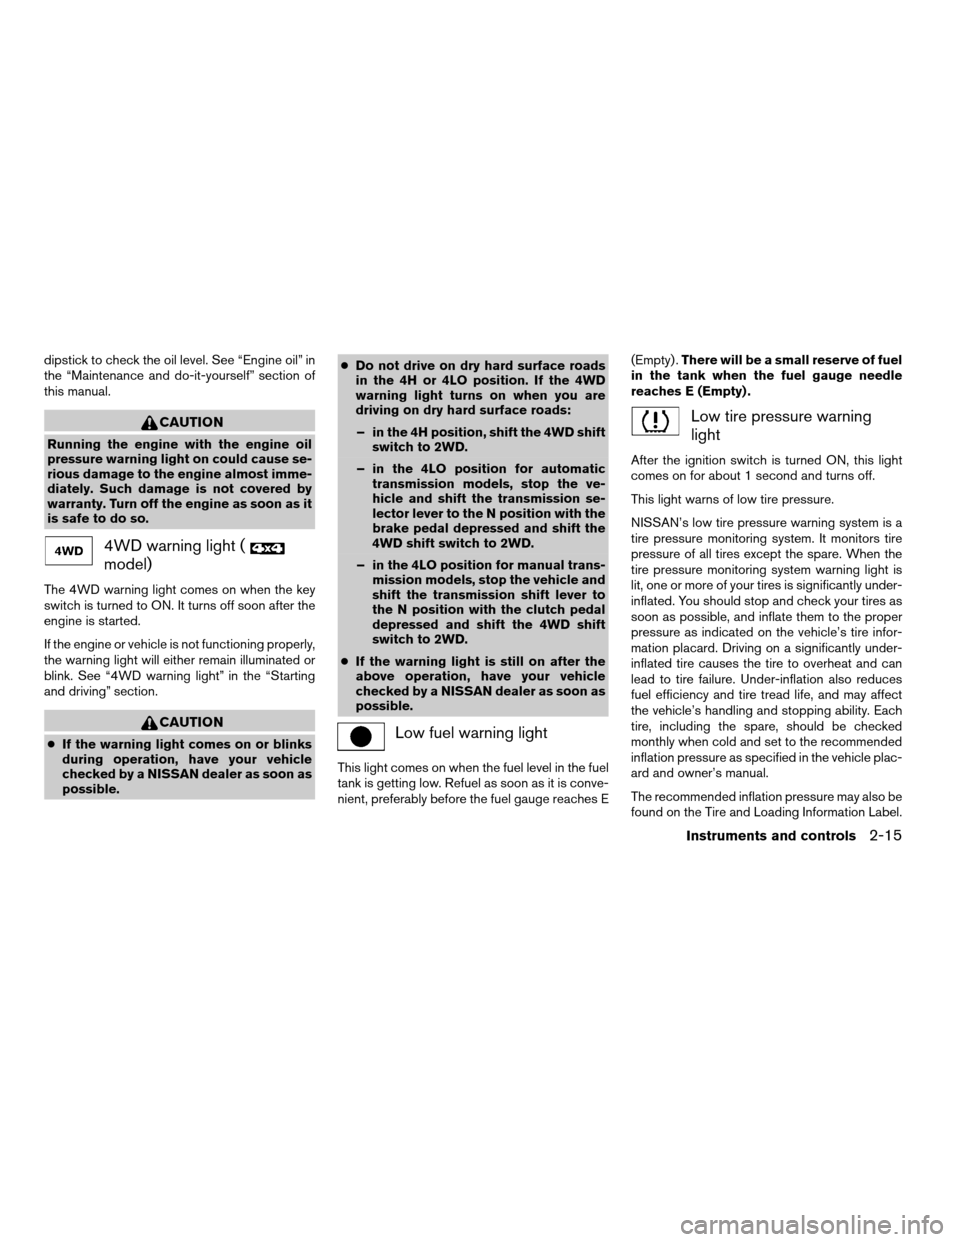
4WD warning light (
model)
The 4WD warning light comes on when the key
switch is turned to ON. It turns off soon after the
engine is started.
If the engine or vehicle is not functioning properly,
the warning light will either remain illuminated or
blink. See “4WD warning light” in the “Starting
and driving” section.
CAUTION
cIf the warning light comes on or blinks
during operation, have your vehicle
checked by a NISSAN dealer as soon as
possible.cDo not drive on dry hard surface roads
in the 4H or 4LO position. If the 4WD
warning light turns on when you are
driving on dry hard surface roads:
– in the 4H position, shift the 4WD shift
switch to 2WD.
– in the 4LO position for automatic
transmission models, stop the ve-
hicle and shift the transmission se-
lector lever to the N position with the
brake pedal depressed and shift the
4WD shift switch to 2WD.
– in the 4LO position for manual trans-
mission models, stop the vehicle and
shift the transmission shift lever to
the N position with the clutch pedal
depressed and shift the 4WD shift
switch to 2WD.
cIf the warning light is still on after the
above operation, have your vehicle
checked by a NISSAN dealer as soon as
possible.Low fuel warning light
This light comes on when the fuel level in the fuel
tank is getting low. Refuel as soon as it is conve-
nient, preferably before the fuel gauge reaches E(Empty) .There will be a small reserve of fuel
in the tank when the fuel gauge needle
reaches E (Empty) .
Low tire pressure warning
light
After the ignition switch is turned ON, this light
comes on for about 1 second and turns off.
This light warns of low tire pressure.
NISSAN’s low tire pressure warning system is a
tire pressure monitoring system. It monitors tire
pressure of all tires except the spare. When the
tire pressure monitoring system warning light is
lit, one or more of your tires is significantly under-
inflated. You should stop and check your tires as
soon as possible, and inflate them to the proper
pressure as indicated on the vehicle’s tire infor-
mation placard. Driving on a significantly under-
inflated tire causes the tire to overheat and can
lead to tire failure. Under-inflation also reduces
fuel efficiency and tire tread life, and may affect
the vehicle’s handling and stopping ability. Each
tire, including the spare, should be checked
monthly when cold and set to the recommended
inflation pressure as specified in the vehicle plac-
ard and owner’s manual.
The recommended inflation pressure may also be
found on the Tire and Loading Information Label.
Instruments and controls2-15
ZREVIEW COPYÐ2005 Truck/Frontier(d22)
Owners ManualÐUSA_English(nna)
11/30/04Ðdebbie
X
Page 187 of 336
cDo not stop or park the vehicle over
flammable materials such as dry grass,
waste paper or rags. They may ignite
and cause a fire.
CAUTION
cDo not use leaded gasoline. Deposits
from leaded gasoline will seriously re-
duce the three-way catalyst’s ability to
help reduce exhaust pollutants.
cKeep your engine tuned up. Malfunc-
tions in the ignition, fuel injection, or
electrical systems can cause overrich
fuel flow into the three-way catalyst,
causing it to overheat. Do not keep driv-
ing if the engine misfires, or if notice-
able loss of performance or other un-
usual operating conditions are
detected. Have the vehicle inspected
promptly by a NISSAN dealer.
cAvoid driving with an extremely low fuel
level. Running out of fuel could cause
the engine to misfire, damaging the
three-way catalyst.
cDo not race the engine while warming it
up.
cDo not push or tow your vehicle to start
the engine.
LOW TIRE PRESSURE WARNING
SYSTEM
This vehicle is equipped with the low tire pres-
sure warning system. It monitors tire pressure of
all tires except the spare. When the low tire
pressure warning light is lit, one or more of your
tires is significantly under-inflated.
The low tire pressure warning system will activate
only when the vehicle is driven at speeds above
20 MPH (32 km/h) . Also, this system may not
detect a sudden drop in tire pressure (for ex-
ample a flat tire while driving) .
Tire pressure rises and falls depending on the
heat caused by the vehicle’s operation and the
outside temperature. Low outside temperature
can lower the temperature of the air inside the tire
which can cause a lower tire inflation pressure.
This may cause the low tire pressure warning
light to illuminate.
If the warning light illuminates in low ambient
temperature as described above, check the tire
pressure for all four tires. Adjust the tire pressure
to the recommended COLD tire pressure shown
on the Tire and Loading Information label to turn
the low tire pressure warning light OFF.
Frequently check the tire pressure and adjust
pressure of each tire properly.
Low tire pressure warning
If the vehicle is being driven with low tire pressure
(lower than 28 psi, 193 kPa) , the low tire pres-
sure warning light comes on and the chime
sounds for about 10 seconds.
For additional information regarding the above
warning, see “Warning/indicator lights and au-
dible reminders” in the “Instruments and con-
trols” section.
WARNING
cIf the low tire pressure warning light
flashes while driving, avoid sudden
steering maneuvers or abrupt braking,
reduce vehicle speed, pull off the road
to a safe location and stop the vehicle
as soon as possible. Serious vehicle
damage could occur and may lead to an
accident and could result in serious
personal injury. Check the tire pressure
for all four tires. Adjust the tire pressure
to the recommended COLD tire pres-
sure shown on the tire placard to turn
the low tire pressure warning light OFF.
If you have a flat tire, replace it with a
spare tire as soon as possible. (See
“Flat tire” in the “In case of emergency”
section for changing a flat tire.)
Starting and driving5-3
ZREVIEW COPYÐ2005 Truck/Frontier(d22)
Owners ManualÐUSA_English(nna)
11/30/04Ðdebbie
X
Page 274 of 336
If you have a flat tire, see the “In case of
emergency” section of this manual.
TIRE PRESSURE
Low tire pressure warning system (if
so equipped)
This vehicle is equipped with the low tire pres-
sure warning system. It monitors tire pressure of
all tires except the spare. When the tire pressure
monitoring system warning light is lit, one or more
of your tires is significantly underinflated.
The low tire pressure warning system will activate
only when the vehicle is driven at speeds above
20 MPH (32 km/h) . Also, this system may not
detect a sudden drop in tire pressure (for ex-
ample a flat tire while driving) .
For more details, refer to “Low tire pressure warn-
ing light” in the “Instruments and controls” sec-
tion, ”Tire pressure information” in the “Display
screen, heater, air conditioner and audio sys-
tems” section, “Low tire pressure warning sys-
tem” in the “Starting and driving” section, and
“Flat tire” in the “In case of emergency” section.
Tire inflation pressure
Check the tire pressures (including the spare)
often and always prior to long distance trips. The
recommended tire pressure specifications areshown on the FMVSS label or the Tire and Load-
ing Information label (if so equipped) under the
9Recommended Cold Tire Inflation Pressure9
heading. The Tire and Loading Information label
is affixed to the driver side center pillar. Tire
pressures should be checked regularly because:
cMost tires naturally lose air over time.
cTires can lose air suddenly when driven over
potholes or other objects or if the vehicle
strikes a curb while parking.
The tire pressures should be checked when the
tires are cold. The tires are considered COLD
after the vehicle has been parked for 3 or more
hours, or driven less than 1 mile (1.6 km) at
moderate speeds.
Incorrect tire pressure, including under in-
flation, may adversely affect tire life and
vehicle handling.
WARNING
cImproperly inflated tires can fail sud-
denly and cause an accident.
License plate light
WDI0411
WHEELS AND TIRES
8-32Maintenance and do-it-yourself
ZREVIEW COPYÐ2005 Truck/Frontier(d22)
Owners ManualÐUSA_English(nna)
12/01/04Ðdebbie
X
Page 275 of 336
cThe Gross Maximum Weight rating is
located on the FMVSS label. The ve-
hicle weight capacity is indicated on the
Tire and Loading Information label (if so
equipped) . Do not load your vehicle be-
yond this capacity. Overloading your ve-
hicle may result in reduced tire life, un-
safe operating conditions due to
premature tire failure, or unfavorable
handling characteristics and could also
lead to a serious accident. Loading be-
yond the specified capacity may also
result in failure of other vehicle
components.
cBefore taking a long trip, or whenever
you heavily load your vehicle, use a tire
pressure gauge to ensure that the tire
pressures are at the specified level.
cDo not drive your vehicle over 85 MPH
(137 km/h) unless it is equipped with
high speed rated tires. Driving faster
than 85 MPH (137 km/h) may result in
tire failure, loss of control and possible
injury.
cFor additional information regarding
tires, refer to “Important Tire Safety In-
formation” (US) or “Tire Safety Informa-
tion” (Canada) in the Warranty Informa-
tion Booklet.
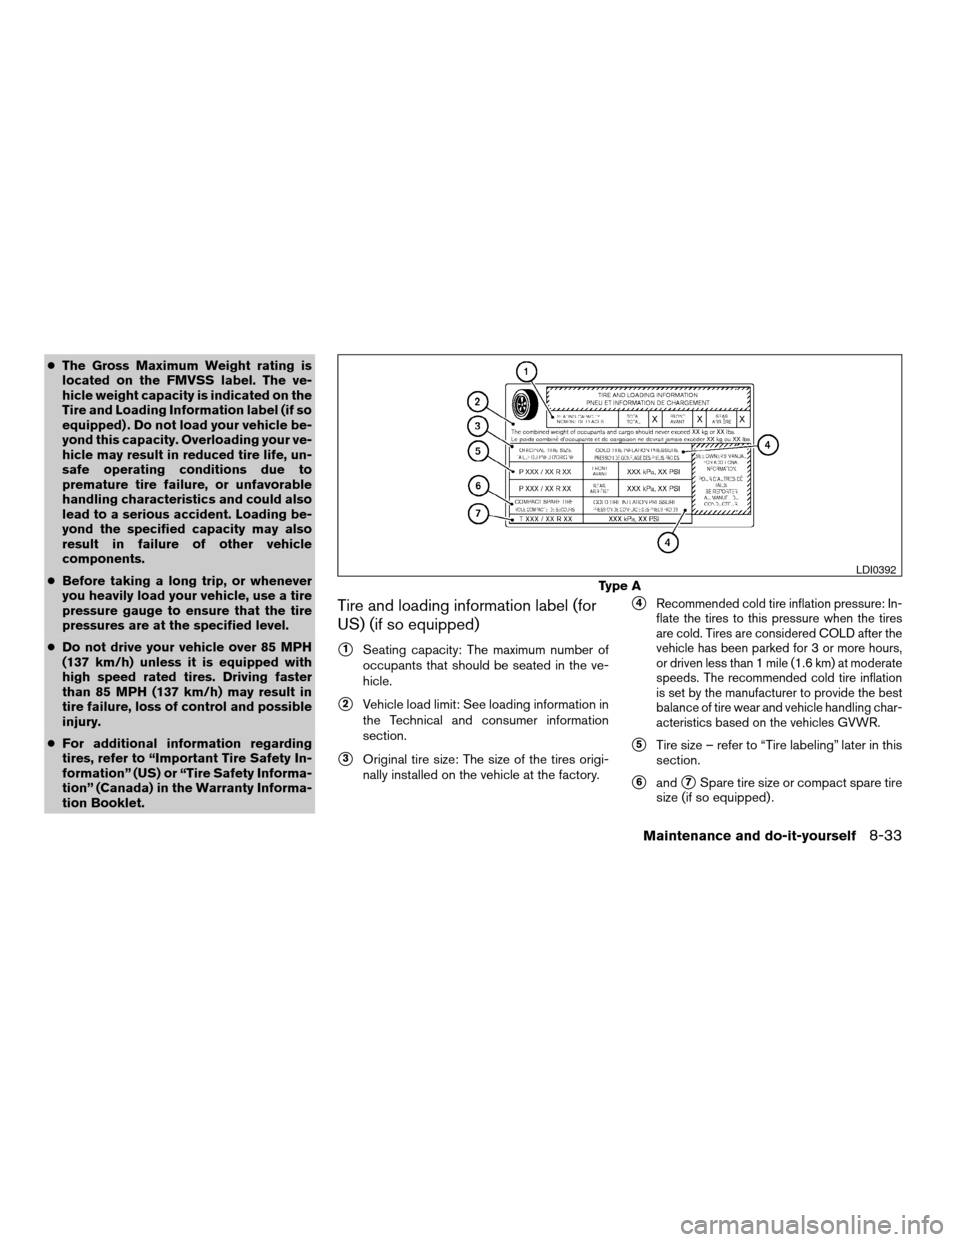
Tire and loading information label (for
US) (if so equipped)
s1Seating capacity: The maximum number of
occupants that should be seated in the ve-
hicle.
s2Vehicle load limit: See loading information in
the Technical and consumer information
section.
s3Original tire size: The size of the tires origi-
nally installed on the vehicle at the factory.
s4Recommended cold tire inflation pressure: In-
flate the tires to this pressure when the tires
are cold. Tires are considered COLD after the
vehicle has been parked for 3 or more hours,
or driven less than 1 mile (1.6 km) at moderate
speeds. The recommended cold tire inflation
is set by the manufacturer to provide the best
balance of tire wear and vehicle handling char-
acteristics based on the vehicles GVWR.
s5Tire size – refer to “Tire labeling” later in this
section.
s6ands7Spare tire size or compact spare tire
size (if so equipped) .
Type A
LDI0392
Maintenance and do-it-yourself8-33
ZREVIEW COPYÐ2005 Truck/Frontier(d22)
Owners ManualÐUSA_English(nna)
12/01/04Ðdebbie
X
Page 276 of 336

Tire placard (for US) (if so equipped)
s1Original tire size: The size of the tires origi-
nally installed on the vehicle at the factory.
s2Recommended cold tire inflation pressure:
Inflate the tires to this pressure when the
tires are cold. Tires are considered COLD
after the vehicle has been parked for 3 or
more hours, or driven less than 1 mile (1.6
km) at moderate speeds. The recommended
cold tire inflation is set by the manufacturer
to provide the best balance of tire wear and
vehicle handling characteristics based on
the vehicles GVWR.
Checking tire pressure
1. Remove the valve stem cap from the tire.
2. Press the pressure gauge squarely onto the
valve stem. Do not press too hard or force
the valve stem sideways, or air will escape. If
the hissing of air escaping from the tire is
heard while checking the pressure, reposi-
tion the gauge to eliminate this leakage.
3. Remove the gauge.4. Read the tire pressure on the gauge stem
and compare to the specification shown on
the FMVSS label or the Tire and Loading
Information label (if so equipped) .
5. Add air to the tire as needed. If too much air
is added, press the core of the valve stem
briefly with the tip of the gauge stem to
release pressure. Recheck the pressure and
add or release air as needed.
6. Install the valve stem cap.
7. Check the pressure of all other tires, includ-
ing the spare.
Type B
LDI0462LDI0393
8-34Maintenance and do-it-yourself
ZREVIEW COPYÐ2005 Truck/Frontier(d22)
Owners ManualÐUSA_English(nna)
12/01/04Ðdebbie
X
Page 279 of 336

s2TIN (Tire Identification Number) for a new tire
(example: DOT XX XX XXX XXXX)
1. DOT: Abbreviation for the9Department Of
Transportation.9The symbol can be placed
above, below or to the left or right of Tire
Identification Number.
2. Two-digit code: Manufacturer’s identifica-
tion mark
3. Two-digit code: Tire size
4. Three-digit code: Tire type code (Optional)
5. Three-digit code: Date of Manufacture6. Four numbers represent the week and year
the tire was built. For example, the numbers
3103 means the 31st week of 2003. If these
numbers are missing, then look on the other
sidewall of the tire.
s3Tire ply composition and material
The number of layers or plies of rubber-coated
fabric in the tire. Tire manufacturers also must
indicate the materials in the tire, which include
steel, nylon, polyester, and others.
s4Maximum permissible inflation pressure
This number is the greatest amount of air pres-
sure that should be put in the tire. Do not exceed
the maximum permissible inflation pressure.
s5Maximum load rating
This number indicates the maximum load in kilo-
grams and pounds that can be carried by the tire.
When replacing the tires on the vehicle, always
use a tire that has the same load rating as the
factory installed tire.
s6Term of ”tubeless” or ”tube type”
Indicates whether the tire requires an inner tube
(“tube type”) or not (“tubeless”) .
s7The word ”radial”
The word9radial9is shown if the tire has radial
structure.
s8Manufacturer or brand name
Manufacturer or brand name is shown.
Other Tire-related Terminology
In addition to the many terms that are defined
throughout this section, Intended Outboard
Sidewall is (1) the sidewall that contains a white-
wall, bears white lettering or bears manufacturer,
brand, and/or model name molding that is higher
or deeper than the same molding on the other
sidewall of the tire, or (2) the outward facing
sidewall of an asymmetrical tire that has a par-
ticular side that must always face outward when
mounted on a vehicle.WDI0396
Maintenance and do-it-yourself8-37
ZREVIEW COPYÐ2005 Truck/Frontier(d22)
Owners ManualÐUSA_English(nna)
12/01/04Ðdebbie
X
Page 298 of 336
6. If your vehicle will be towing a trailer, load
from your trailer will be transferred to your
vehicle. Consult this manual to determine
how this reduces the available cargo and
luggage load capacity of your vehicle.
Before driving a loaded vehicle, confirm the you
do not exceed the Gross Vehicle Weight Rating
(GVWR) or the Gross Axle Weight Rating
(GAWR) for your vehicle. See “Measurement of
Weights” later in this section.
Also check tires for proper inflation pressures.
See the Tire and Loading label.
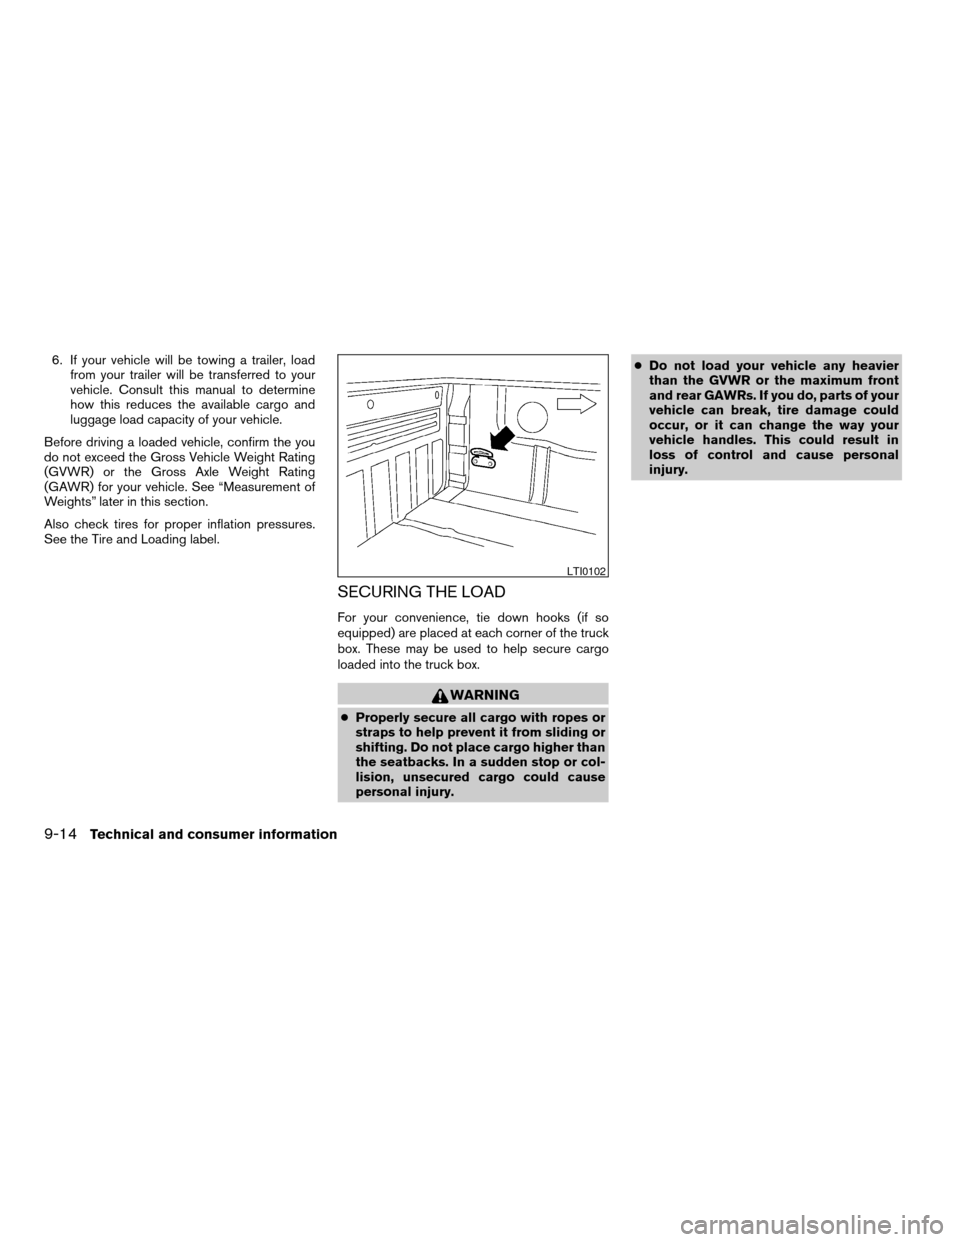
SECURING THE LOAD
For your convenience, tie down hooks (if so
equipped) are placed at each corner of the truck
box. These may be used to help secure cargo
loaded into the truck box.
WARNING
cProperly secure all cargo with ropes or
straps to help prevent it from sliding or
shifting. Do not place cargo higher than
the seatbacks. In a sudden stop or col-
lision, unsecured cargo could cause
personal injury.cDo not load your vehicle any heavier
than the GVWR or the maximum front
and rear GAWRs. If you do, parts of your
vehicle can break, tire damage could
occur, or it can change the way your
vehicle handles. This could result in
loss of control and cause personal
injury.
LTI0102
9-14Technical and consumer information
ZREVIEW COPYÐ2005 Truck/Frontier(d22)
Owners ManualÐUSA_English(nna)
12/01/04Ðdebbie
X
Page 305 of 336
LOCATION FOR CENTER OF
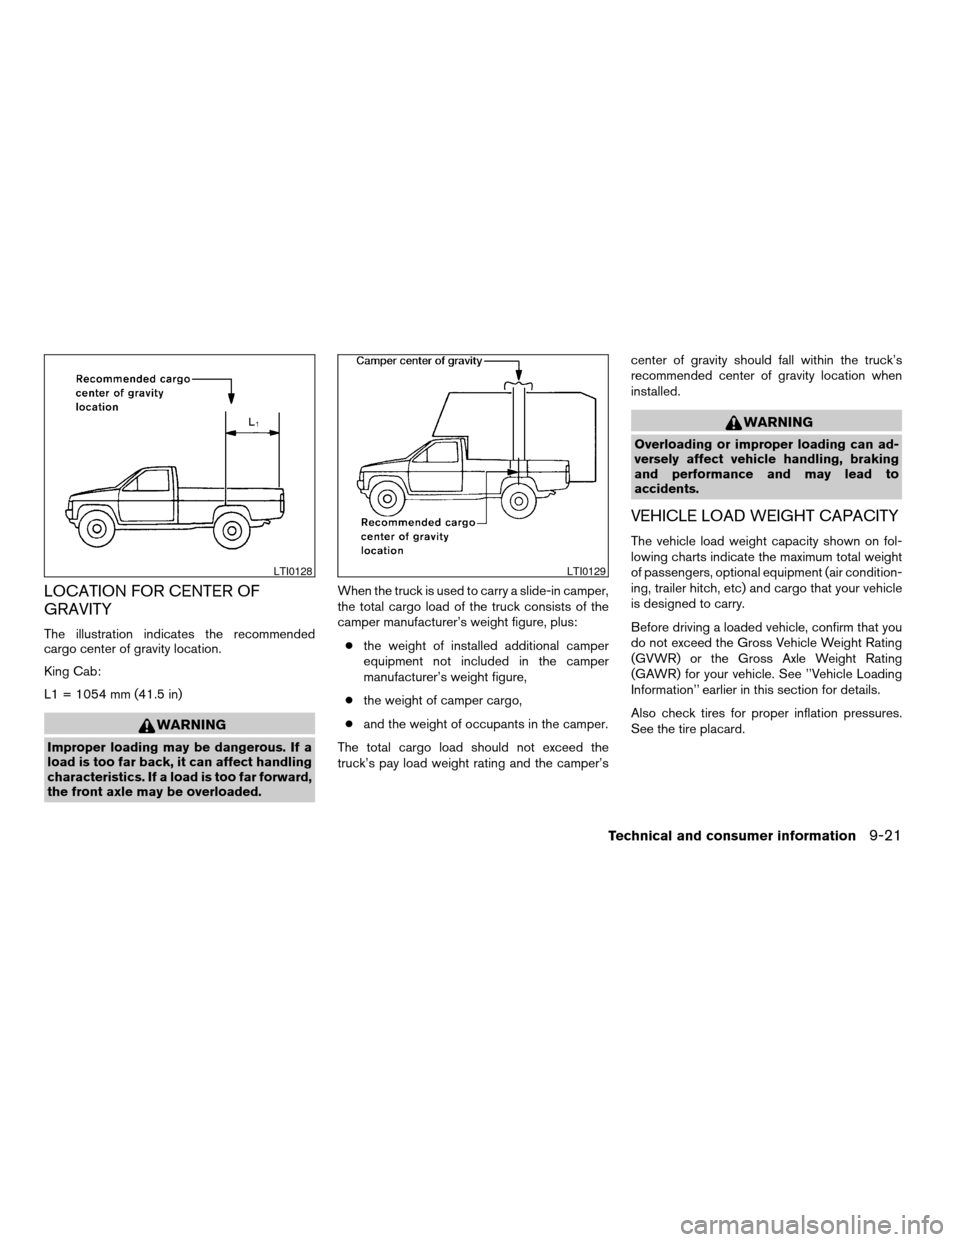
GRAVITY
The illustration indicates the recommended
cargo center of gravity location.
King Cab:
L1 = 1054 mm (41.5 in)
WARNING
Improper loading may be dangerous. If a
load is too far back, it can affect handling
characteristics. If a load is too far forward,
the front axle may be overloaded.When the truck is used to carry a slide-in camper,
the total cargo load of the truck consists of the
camper manufacturer’s weight figure, plus:
cthe weight of installed additional camper
equipment not included in the camper
manufacturer’s weight figure,
cthe weight of camper cargo,
cand the weight of occupants in the camper.
The total cargo load should not exceed the
truck’s pay load weight rating and the camper’scenter of gravity should fall within the truck’s
recommended center of gravity location when
installed.
WARNING
Overloading or improper loading can ad-
versely affect vehicle handling, braking
and performance and may lead to
accidents.
VEHICLE LOAD WEIGHT CAPACITY
The vehicle load weight capacity shown on fol-
lowing charts indicate the maximum total weight
of passengers, optional equipment (air condition-
ing, trailer hitch, etc) and cargo that your vehicle
is designed to carry.
Before driving a loaded vehicle, confirm that you
do not exceed the Gross Vehicle Weight Rating
(GVWR) or the Gross Axle Weight Rating
(GAWR) for your vehicle. See ’’Vehicle Loading
Information’’ earlier in this section for details.
Also check tires for proper inflation pressures.
See the tire placard.
LTI0128LTI0129
Technical and consumer information9-21
ZREVIEW COPYÐ2005 Truck/Frontier(d22)
Owners ManualÐUSA_English(nna)
12/01/04Ðdebbie
X
Page 313 of 336
Class I hitch
Class I trailer hitch equipment (receiver, ball
mount and hitch ball) can be used to tow trailers
of a maximum weight of 2,000 lb (909 kg) .
Class II hitch
Class II trailer hitch equipment (receiver, ball
mount and hitch ball) can be used to tow trailers
of a maximum weight of 3,500 lb (1,510 kg) .
The genuine NISSAN step bumper is considered
a Class II ball mount.
Class III hitch
Class III trailer hitch equipment (receiver, ball
mount and hitch ball) can be used to tow trailers
of a maximum weight of 5,000 lb (2,272 kg) .
Class IV hitch
Class IV trailer hitch equipment (receiver, ball
mount and hitch ball) can be used to tow trailers
of a maximum weight of 10,000 lb (4,545 kg) . A
weight distributing hitch should be used to tow
trailers that weigh over 5,000 lb (2,272 kg) .
Your vehicle may be equipped with Class IV
trailer hitch equipment that has a 10,000 lb
(4,545 kg) maximum weight rating, but your ve-
hicle is only capable of towing the maximumtrailer weights shown in the Towing
Load/Specification Chart earlier in this section.
CAUTION
cSpecial hitches which include frame re-
inforcements are required for towing
above 2,000 lb (907 kg) . Suitable genu-
ine NISSAN hitches, ball mounts and
hitch balls for pickup trucks and sport
utility vehicles are available at a
NISSAN dealer.
cThe hitch should not be attached to or
affect the operation of the impact-
absorbing bumper.
cDo not use axle-mounted hitches.
cDo not modify the vehicle exhaust sys-
tem, brake system, etc. to install a
trailer hitch.
cTo reduce the possibility of additional
damage if your vehicle is struck from
the rear, where practical, remove the
hitch and/or receiver when not in use.
cAfter the hitch is removed, seal the bolt
holes to prevent exhaust fumes, water
or dust from entering the passenger
compartment.cRegularly check that all trailer hitch
mounting bolts are securely mounted.
cWhen towing with the hitch ball
mounted to the rear bumper, do not
make sharp turns. The trailer may con-
tact the bumper and cause damage to
the bumper or trailer.
Tire pressures
cWhen towing a trailer, inflate the vehicle tires
to the recommended cold tire pressure indi-
cated on the Tire and Loading Information
label.
cTrailer tire condition, size, load rating and
proper inflation pressure should be in accor-
dance with the trailer and tire manufacturer’s
specifications.
Safety chains
Always use suitable safety chains between your
vehicle and the trailer. The safety chains should
be crossed and should be attached to the hitch,
not to the vehicle bumper or axle. The safety
chains can be attached to the bumper if the hitch
ball is mounted to the bumper. Be sure to leave
enough slack in the chains to permit turning
corners.
Technical and consumer information9-29
ZREVIEW COPYÐ2005 Truck/Frontier(d22)
Owners ManualÐUSA_English(nna)
12/01/04Ðdebbie
X