change wheel NISSAN FRONTIER 2010 Owner´s Manual
[x] Cancel search | Manufacturer: NISSAN, Model Year: 2010, Model line: FRONTIER, Model: NISSAN FRONTIER 2010Pages: 373, PDF Size: 6.21 MB
Page 86 of 373
Other supplemental front-impact air bag
precautions
WARNING
cDo not place any objects on the steer-
ing wheel pad or on the instrument
panel. Also, do not place any objects
between any occupant and the steering
wheel or instrument panel. Such ob-
jects may become dangerous projec-
tiles and cause injury if the front air
bags inflate.
cImmediately after inflation, several
front air bag system components will be
hot. Do not touch them; you may se-
verely burn yourself.
cNo unauthorized changes should be
made to any components or wiring of
the supplemental air bag system. This is
to prevent accidental inflation of the
supplemental air bag or damage to the
supplemental air bag system.
cDo not make unauthorized changes to
your vehicle’s electrical system, sus-
pension system or front end structure.
This could affect proper operation of
the front air bag system.cTampering with the front air bag system
may result in serious personal injury.
Tampering includes changes to the
steering wheel and the instrument
panel assembly by placing material
over the steering wheel pad and above
the instrument panel or by installing
additional trim material around the air
bag system.
cModifying or tampering with the front
passenger seat may result in serious
personal injury. For example, do not
change the front seats by placing mate-
rial on the seat cushion or by installing
additional trim material, such as seat
covers, on the seat that are not specifi-
cally designed to assure proper air bag
operation. Additionally, do not stow any
objects under the front passenger seat
or the seat cushion and seatback. Such
objects may interfere with the proper
operation of the occupant classifica-
tion sensor (pressure sensor) .
cNo unauthorized changes should be
made to any components or wiring of
the seat belt system. This may affect the
front air bag system. Tampering with
the seat belt system may result in seri-
ous personal injury.cWork on and around the front air bag
system should be done by a NISSAN
dealer. Installation of electrical equip-
ment should also be done by a NISSAN
dealer. The Supplemental Restraint
System (SRS) wiring harnesses* should
not be modified or disconnected. Unau-
thorized electrical test equipment and
probing devices should not be used on
the air bag system.
cA cracked windshield should be re-
placed immediately by a qualified re-
pair facility. A cracked windshield could
affect the function of the supplemental
air bag system.
*The SRS wiring harness connectors are
yellow and orange for easy identification.
When selling your vehicle, we request that you
inform the buyer about the front air bag system
and guide the buyer to the appropriate sections
in this Owner’s Manual.
1-68Safety—Seats, seat belts and supplemental restraint system
Page 167 of 373
4 Heater, air conditioner, audio and phone
systems
Vents............................................4-2
Heater and air conditioner (manual) (Type A)..........4-2
Controls.......................................4-3
Heater operation...............................4-4
Air conditioner operation (if so equipped).........4-6
Air flow charts..................................4-7
Heater and air conditioner (manual) (Type B).........4-10
Controls......................................4-10
Heater operation..............................4-11
Air conditioner operation.......................4-12
Air flow charts.................................4-14
Servicing air conditioner...........................4-17
Audio system....................................4-17
Radio (if so equipped).........................4-17
FM radio reception............................4-17
AM radio reception............................4-18
Satellite radio reception (if so equipped).........4-18
Audio operation precautions....................4-18FM/AM radio with compact disc (CD) player
(Type A and B) (if so equipped).................4-25
FM/AM/SAT radio with compact disc (CD)
changer (if so equipped).......................4-30
CD care and cleaning..........................4-35
Steering wheel switch for audio control
(if so equipped)...............................4-35
Antenna......................................4-36
Car phone or CB radio............................4-36
BluetoothTHands-Free Phone System
(if so equipped)..................................4-37
Regulatory Information.........................4-39
Using the system..............................4-39
Control buttons...............................4-41
Getting started................................4-42
List of voice commands........................4-44
Speaker adaptation (SA) mode..................4-48
Manual Control................................4-50
Troubleshooting guide.........................4-51
Page 208 of 373
PHONE/END
While the voice recognition system is
active, press and hold the
button
for 5 seconds to quit the voice recogni-
tion system at any time.
TUNING SWITCH
While using the voice recognition
system, tilt the tuning switch up or
down to manually control the phone
system.
GETTING STARTED
The following procedures will help you get
started using the BluetoothTHands-Free Phone
System with NISSAN Voice Recognition. For ad-
ditional command options, refer to “List of voice
commands” in this section.
Choosing a language
You can interact with the BluetoothTHands-Free
Phone System using English, Spanish or French.
To change the language, perform the following.
1. Press and hold the
button for more
than 5 seconds.2. The system announces: “Press the
PHONE/SEND (
) button for the
hands-free phone system to enter the
speaker adaptation mode or press the
PHONE/END (
) button to select a dif-
ferent language.”
3. Press the
button.
For information on speaker adaptation, see
“Speaker adaptation (SA) mode” in this sec-
tion.
4. The system announces the current language
and gives you the option to change the lan-
guage to Spanish (in Spanish) or French (in
French) . To select the current language,
press the PHONE/SEND (
) button. To
select a different language, tilt the tuning
switch (
or) up or down.
NOTE:
You must press the
button within 5
seconds to change the language.
5. If you decide not to change the language, do
not press either button. After 5 seconds, the
VR session will end, and the language will
not be changed.
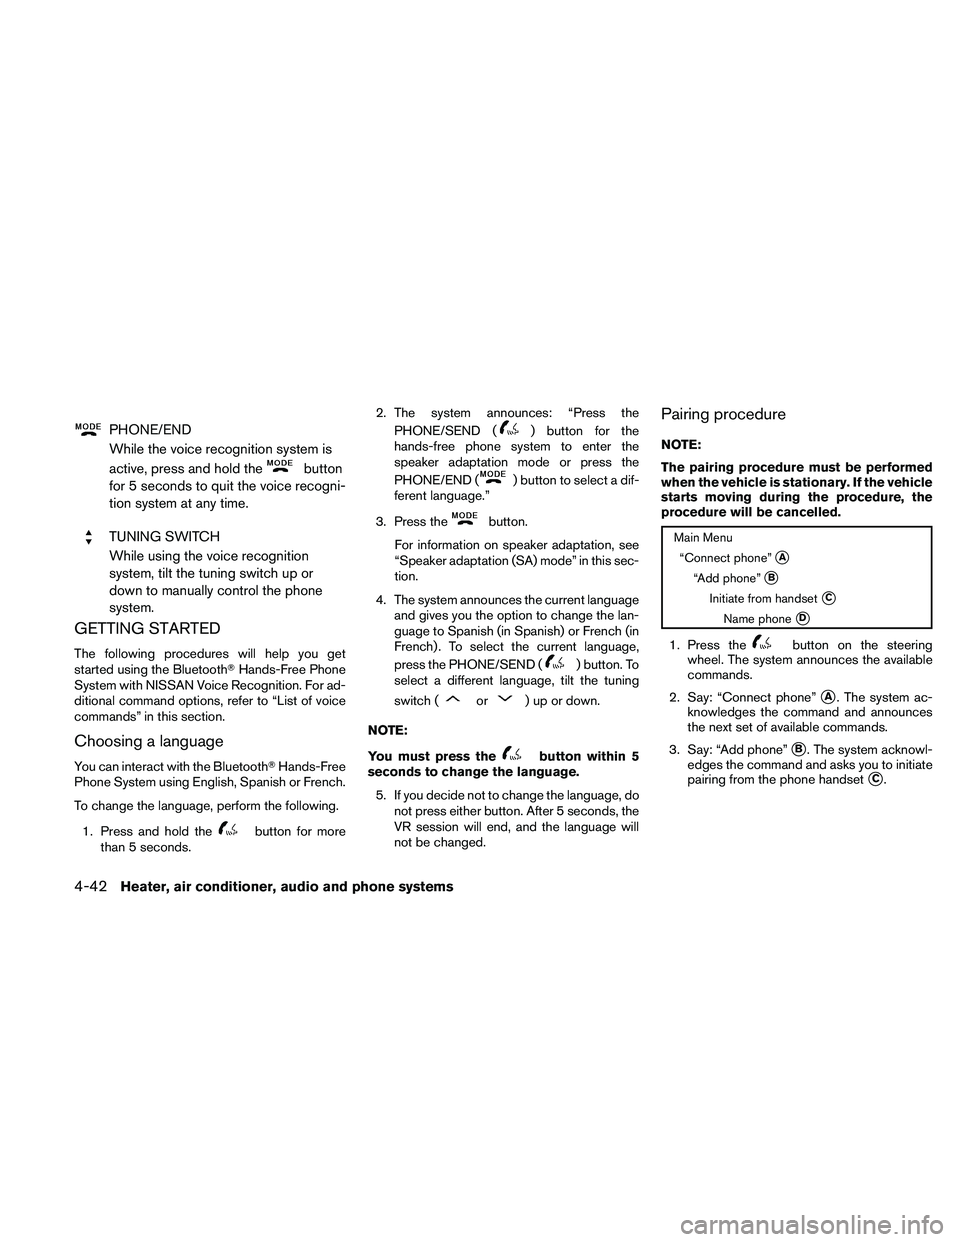
Pairing procedure
NOTE:
The pairing procedure must be performed
when the vehicle is stationary. If the vehicle
starts moving during the procedure, the
procedure will be cancelled.
Main Menu
“Connect phone”
sA
“Add phone”sB
Initiate from handsetsC
Name phonesD
1. Press thebutton on the steering
wheel. The system announces the available
commands.
2. Say: “Connect phone”
sA. The system ac-
knowledges the command and announces
the next set of available commands.
3. Say: “Add phone”
sB. The system acknowl-
edges the command and asks you to initiate
pairing from the phone handset
sC.
4-42Heater, air conditioner, audio and phone systems
Page 209 of 373
The pairing procedure of the cellular phone
varies according to each cellular phone
model. See the cellular phone Owner’s
Manual for details. You can also visit
www.nissanusa.com/bluetooth for instruc-
tions on pairing NISSAN recommended cel-
lular phones.
When prompted for a Passkey code, enter
“1234” from the handset. The Passkey code
“1234” has been assigned by NISSAN and
cannot be changed.
4. The system asks you to say a name for the
phone
sD.
If the name is too long or too short, the
system tells you, then prompts you for a
name again.
Also, if more than one phone is paired and
the name sounds too much like a name
already used, the system tells you, then
prompts you for a name again.
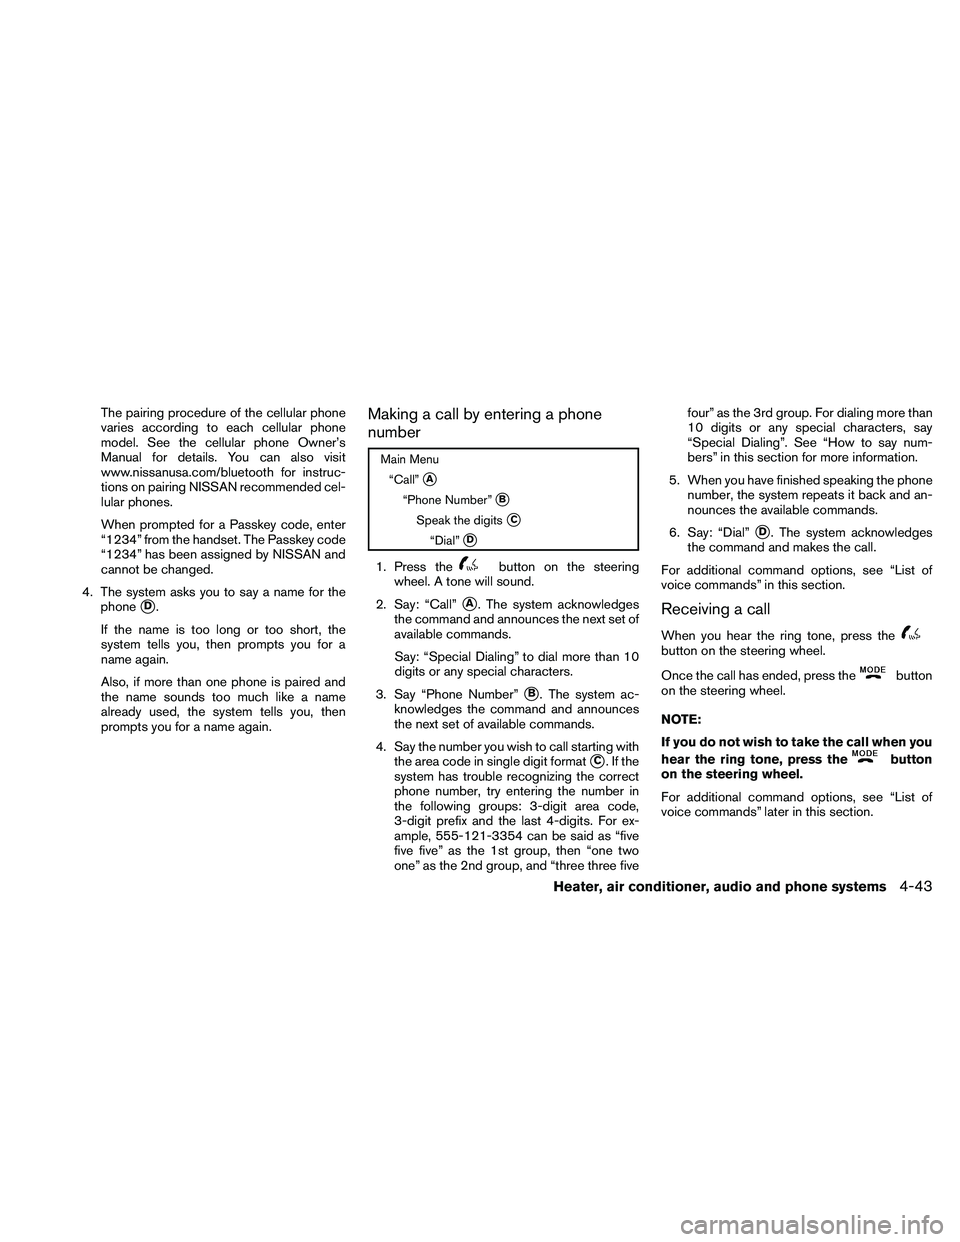
Making a call by entering a phone
number
Main Menu
“Call”
sA
“Phone Number”sB
Speak the digitssC
“Dial”sD
1. Press thebutton on the steering
wheel. A tone will sound.
2. Say: “Call”
sA. The system acknowledges
the command and announces the next set of
available commands.
Say: “Special Dialing” to dial more than 10
digits or any special characters.
3. Say “Phone Number”
sB. The system ac-
knowledges the command and announces
the next set of available commands.
4. Say the number you wish to call starting with
the area code in single digit format
sC.Ifthe
system has trouble recognizing the correct
phone number, try entering the number in
the following groups: 3-digit area code,
3-digit prefix and the last 4-digits. For ex-
ample, 555-121-3354 can be said as “five
five five” as the 1st group, then “one two
one” as the 2nd group, and “three three fivefour” as the 3rd group. For dialing more than
10 digits or any special characters, say
“Special Dialing”. See “How to say num-
bers” in this section for more information.
5. When you have finished speaking the phone
number, the system repeats it back and an-
nounces the available commands.
6. Say: “Dial”
sD. The system acknowledges
the command and makes the call.
For additional command options, see “List of
voice commands” in this section.
Receiving a call
When you hear the ring tone, press thebutton on the steering wheel.
Once the call has ended, press the
button
on the steering wheel.
NOTE:
If you do not wish to take the call when you
hear the ring tone, press the
button
on the steering wheel.
For additional command options, see “List of
voice commands” later in this section.
Heater, air conditioner, audio and phone systems4-43
Page 223 of 373
cWhen a spare tire is mounted or a wheel
is replaced, the TPMS will not function
and the low tire pressure warning light
will flash for approximately 1 minute.
The light will remain on after 1 minute.
Contact your NISSAN dealer as soon as
possible for tire replacement and/or
system resetting.
cReplacing tires with those not originally
specified by NISSAN could affect the
proper operation of the TPMS.
cDo not inject any tire liquid or aerosol
tire sealant into the tires, as this may
cause a malfunction of the tire pressure
sensors.
CAUTION
Do not place metalized film or any metal
parts (antenna, etc.) on the windows. This
may cause poor reception of the signals
from the tire pressure sensors, and the
TPMS will not function properly.
Some devices and transmitters may temporarily
interfere with the operation of the TPMS and
cause the low tire pressure warning light to illu-
minate.Some examples are:
– Facilities or electric devices using similar radio
frequencies are near the vehicle.
– If a transmitter set to similar frequencies is
being used in or near the vehicle.
– If a computer (or similar equipment) or a
DC/AC converter is being used in or near the
vehicle.
FCC Notice:
Changes or modifications not expressly ap-
proved by the party responsible for compli-
ance could void the user’s authority to op-
erate the equipment.
This device complies with Part 15 of the
FCC Rules and RSS-210 of Industry
Canada.
Operation is subject to the following two
conditions: (1) This device may not cause
harmful interference, and (2) this device
must accept any interference received, in-
cluding interference that may cause undes-
ired operation of the device.
ON-PAVEMENT AND OFF-ROAD
DRIVING PRECAUTIONS
Utility vehicles have a significantly higher
rollover rate than other types of vehicles.
They have higher ground clearance than passen-
ger cars to make them capable of performing in a
variety of on-pavement and off-road applications.
This gives them a higher center of gravity than
ordinary cars. An advantage of higher ground
clearance is a better view of the road, allowing
you to anticipate problems. However, they are not
designed for cornering at the same speeds as
conventional two-wheel drive vehicles any more
than low-slung sports cars are designed to per-
form satisfactorily under off-road conditions. If at
all possible, avoid sharp turns at high speeds. As
with other vehicles of this type, failure to operate
this vehicle correctly may result in loss of control
or vehicle rollover. In a rollover crash, an unbelted
person is significantly more likely to die than a
person wearing a seat belt.
Be sure to read the driving safety precautions
later in this section.
Starting and driving5-5
Page 225 of 373
WARNING
The following actions can increase the
chance of losing control of the vehicle if
there is a sudden loss of tire air pressure.
Losing control of the vehicle may cause a
collision and result in personal injury.
cThe vehicle generally moves or pulls in
the direction of the flat tire.
cDo not rapidly apply the brakes.
cDo not rapidly release the accelerator
pedal.
cDo not rapidly turn the steering wheel.
1. Remain calm and do not over react.
2. Maintain a firm grip on the steering wheel
with both hands and try to hold a straight
course.
3. When appropriate, slowly release the accel-
erator pedal to gradually slow the vehicle.
4. Gradually steer the vehicle to a safe location
off the road and away from traffic if possible.
5. Lightly apply the brake pedal to gradually
stop the vehicle.
6. Turn on the hazard warning flashers and
either contact a roadside emergency service
to change the tire or see “Changing a flat
tire” in the “In case of emergency” section of
this manual.
DRINKING ALCOHOL/DRUGS AND
DRIVING
WARNING
Never drive under the influence of alcohol
or drugs. Alcohol in the bloodstream re-
duces coordination, delays reaction time
and impairs judgement. Driving after
drinking alcohol increases the likelihood
of being involved in an accident injuring
yourself and others. Additionally, if you
are injured in an accident, alcohol can
increase the severity of the injury.
NISSAN is committed to safe driving. However,
you must choose not to drive under the influence
of alcohol. Every year thousands of people are
injured or killed in alcohol-related accidents. Al-
though the local laws vary on what is considered
to be legally intoxicated, the fact is that alcohol
affects all people differently and most people
underestimate the effects of alcohol.
Remember, drinking and driving don’t mix! And
that is true for drugs, too (over-the-counter, pre-
scription, and illegal drugs) . Don’t drive if your
ability to operate your vehicle is impaired by alco-
hol, drugs, or some other physical condition.
DRIVING SAFETY PRECAUTIONS
Your NISSAN is designed for both normal and
off-road use. However, avoid driving in deep wa-
ter or mud as your NISSAN is mainly designed for
leisure use, unlike a conventional off-road ve-
hicle.
Remember that two-wheel drive models are less
capable than four-wheel drive models for rough
road driving and extrication when stuck in deep
snow or mud, or the like.
Please observe the following precautions:
WARNING
cDrive carefully when off the road and
avoid dangerous areas. Every person
who drives or rides in this vehicle
should be seated with their seat belt
fastened. This will keep you and your
passengers in position when driving
over rough terrain.
cDo not drive across steep slopes. In-
stead drive either straight up or straight
down the slopes. Off-road vehicles can
tip over sideways much more easily
than they can forward or backward.
Starting and driving5-7
Page 236 of 373
If your vehicle is equipped with 4-wheel drive, see
“Transfer case shifting procedures” later in this
section.
Suggested upshift speeds
The following are suggested vehicle speeds for
shifting into a higher gear. These suggestions
relate to fuel economy and vehicle performance.
Actual upshift speeds will vary according to road
conditions, the weather and individual driving
habits.
cFor QR25DE two-wheel drive models:
GEAR CHANGE MPH (km/h)
1st to 2nd 11 (17)
2nd to 3rd 15 (24)
3rd to 4th 24 (38)
4th to 5th 35 (56)
cFor VQ40DE two-wheel drive models and
four-wheel drive models (2H and 4H posi-
tion):
GEAR CHANGE MPH (km/h)
1st to 2nd 11 (17)
2nd to 3rd 17 (27)
3rd to 4th 25 (40)
4th to 5th 32 (51)
5th to 6th 45 (72)
Suggested maximum speed in each
gear
Downshift to a lower gear if the engine is not
running smoothly, or if you need to accelerate.
Do not exceed the maximum suggested speed
(shown below) in any gear. For level road driving,
use the highest gear suggested for that speed.
Always observe posted speed limits, and drive
according to the road conditions, which will en-
sure safe operation. Do not over-rev the engine
when shifting to a lower gear as it may cause
engine damage or loss of vehicle control.
Allowable maximum speed in each gear:
2–wheel drive models (QR25DE engine)
GEAR MPH (km/h)
1st 34 (54)
2nd 58 (94)
3rd 89 (144)
4th —
5th —
2–wheel drive models (VQ40DE engine)
GEAR MPH (km/h)
1st 35 (56)
2nd 60 (97)
3rd 87 (141)
4th —
5th —
4–wheel drive models (VQ40DE engine)
2H/4H position
GEAR MPH (km/h)
1st 33 (54)
2nd 58 (93)
3rd 84 (135)
4th —
5th —
6th —
4L position
GEAR MPH (km/h)
1st 12 (20)
2nd 22 (35)
3rd 32 (51)
4th 43 (70)
5th 55 (89)
6th —
5-18Starting and driving
Page 244 of 373
The transfer case 4WD shift switch is used to
select either 2WD or 4WD depending on the
driving conditions. There are three types of drive
modes available, 2WD, 4H and 4LO.
The 4WD shift switch electronically controls the
transfer case operation. Rotate the switch to
move between each mode, 2WD, 4H and 4LO.
To change into or out of 4LO, the vehicle
MUST be stationary, shift the shift selector
to Neutral (N) , and for automatic transmis-
sion vehicles depress the brake pedal or
for manual transmission vehicles depress
the clutch pedal. The switch must be de-
pressed and turned when changing into or
out of 4LO.
WARNING
cWhen parking, apply the parking brake
before stopping the engine and make
sure that the 4WD shift indicator light is
on and the ATP warning light goes off.
Otherwise, the vehicle could unexpect-
edly move even if the automatic trans-
mission is in the P position.cThe 4LO indicator light must stop blink-
ing and remain illuminated or turn off
before shifting the transmission into
gear. If the shift selector is shifted from
the (N) position to any other gear when
the 4LO indicator light is blinking, the
vehicle may move unexpectedly.
CAUTION
cNever shift the 4WD shift switch be-
tween 4LO and 4H while driving.
cThe 4H position provides greater trac-
tion. Avoid excessive speed, as it will
cause increased fuel consumption and
higher oil temperatures, and could
damage drivetrain components.
Speeds over 62 MPH (100 km/h) in 4H is
not recommended
cThe 4LO position provides maximum
power and traction. Avoid raising ve-
hicle speed excessively, as the maxi-
mum speed is approximately 31 MPH
(50 km/h) .
cWhen driving straight, shift the 4WD
shift switch to the 2WD or 4H position.
Do not move the 4WD shift switch when
making a turn or reversing.cDo not shift the 4WD shift switch (be-
tween 2WD and 4H) while driving on
steep downhill grades. Use the engine
brake and low automatic transmission
gears (D1 or D2) or manual transmis-
sion (1st gear or 2nd gear) for engine
braking.
cDo not operate the 4WD shift switch
(between 2WD and 4H) with the rear
wheels spinning.
cDo not drive on dry hard surface roads
in the 4H or 4LO position. Driving on dry
hard surfaces in 4H or 4LO may cause
unnecessary noise and tire wear.
NISSAN recommends driving in the
2WD position under these conditions.
cThe 4WD transfer case may not be
shifted between 4H and 4LO at low am-
bient temperatures and the transfer
4LO position indicator light may blink
even when the 4WD shift switch is
shifted. After driving for a while you can
change the 4WD transfer case between
4H and 4LO.
When driving on rough roads,
cSet the 4WD shift switch to 4H or 4LO.
cDrive carefully according to the road surface
conditions.
5-26Starting and driving
Page 246 of 373
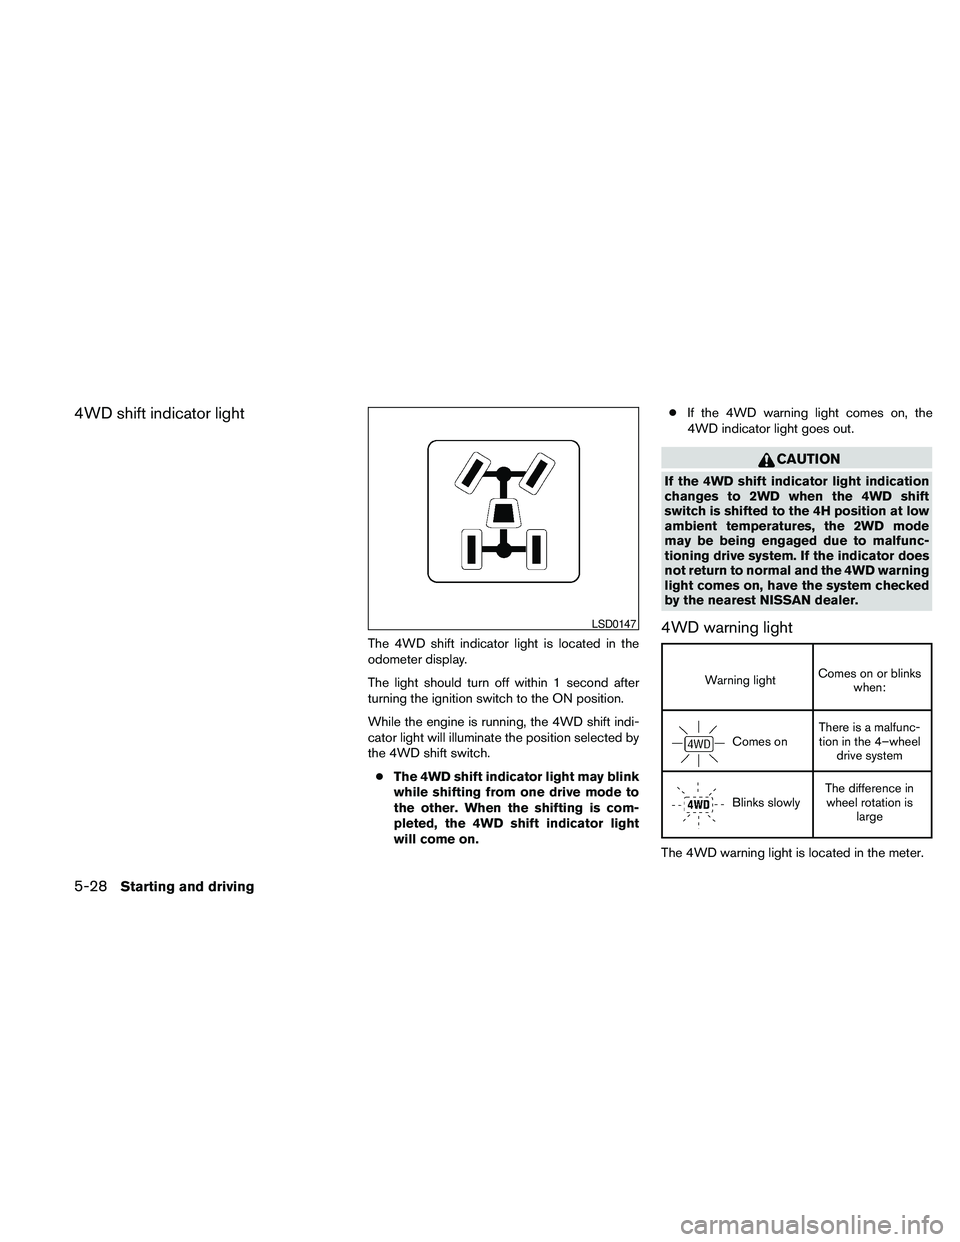
4WD shift indicator light
The 4WD shift indicator light is located in the
odometer display.
The light should turn off within 1 second after
turning the ignition switch to the ON position.
While the engine is running, the 4WD shift indi-
cator light will illuminate the position selected by
the 4WD shift switch.
cThe 4WD shift indicator light may blink
while shifting from one drive mode to
the other. When the shifting is com-
pleted, the 4WD shift indicator light
will come on.cIf the 4WD warning light comes on, the
4WD indicator light goes out.
CAUTION
If the 4WD shift indicator light indication
changes to 2WD when the 4WD shift
switch is shifted to the 4H position at low
ambient temperatures, the 2WD mode
may be being engaged due to malfunc-
tioning drive system. If the indicator does
not return to normal and the 4WD warning
light comes on, have the system checked
by the nearest NISSAN dealer.
4WD warning light
Warning lightComes on or blinks
when:
Comes onThere is a malfunc-
tion in the 4–wheel
drive system
Blinks slowlyThe difference in
wheel rotation is
large
The 4WD warning light is located in the meter.
LSD0147
5-28Starting and driving
Page 247 of 373
The 4WD warning light comes on when the igni-
tion switch is turned to ON. It turns off soon after
the engine is started.
If any malfunction occurs in the 4WD system
when the ignition switch is ON, the warning light
will either remain illuminated or blink.
If the 4WD warning light comes on, the 4WD
shift indicator light goes out.
A large difference between the diameters of front
and rear wheels will make the warning light blink
slowly (about once per two seconds) . Change
the 4WD shift switch into 2WD and do not drive
fast.
CAUTION
cIf the warning light comes on or blinks
slowly during operation, have your ve-
hicle checked by a NISSAN dealer as
soon as possible.
cShifting between 4H and 4LO is not
recommended when the 4WD warning
light turns on.cWhen the warning light comes on, the
2WD mode may be engaged even if the
4WD shift switch is in 4H. Be especially
careful when driving. If corresponding
parts are malfunctioning, the 4WD
mode will not be engaged even if the
4WD shift switch is shifted.
cDo not drive the vehicle in the 4H or 4LO
position on dry hard surface roads. Driv-
ing on dry, hard surfaces in 4H or 4LO
may cause unnecessary noise, tire wear
and increased fuel consumption.
If the 4WD warning light turns on when
you are driving on dry hard surface
roads:
– in the 4H position, shift the 4WD shift
switch to 2WD.
– in the 4LO position for automatic
transmission vehicles, stop the ve-
hicle and shift the shift selector to
the N position with the brake pedal
depressed and shift the 4WD shift
switch to 2WD.– in the 4LO position for manual trans-
mission vehicles, stop the vehicle
and shift the shift selector to the N
position with the clutch pedal de-
pressed and shift the 4WD shift
switch to 2WD.
cIf the warning light is still on after the
above operation, have your vehicle
checked by a NISSAN dealer as soon as
possible.
cThe transfer case may be damaged if
you continue driving with the warning
light blinking.
Starting and driving5-29