clock NISSAN FRONTIER 2021 Owners Manual
[x] Cancel search | Manufacturer: NISSAN, Model Year: 2021, Model line: FRONTIER, Model: NISSAN FRONTIER 2021Pages: 492, PDF Size: 2.86 MB
Page 159 of 492
on the driver's side door jamb pillar). For
additional information, refer to “Vehicle
loading information” in the “Technical and
consumer information” section of this
manual.
The front crossbar can be adjusted or re-
moved. Use the TORX® driver provided in
the tool kit to loosen both crossbar adjust-
ing screws.
To adjust:
1. Loosen the adjusting screws with theTORX® driver
O1by turning counter-
clockwise
OA.
2. When the clamp is loosened, move the crossbar so the cargo can be positioned
on the crossbar
OB.
3. Tighten the crossbar adjusting screws with the TORX® driver by turning
clockwise.
4. Secure the cargo with rope.
5. Always check the tightness of the cross- bar adjusting screws. To remove:
1. Loosen the adjusting screws with the
TORX® driver
O1by turning counter-
clockwise
OA.
2. Rotate the clamps
OC.
3. Remove the crossbar.
4. Reverse to install.
5. Always check the tightness of the cross- bar adjusting screws.
If you hear wind noise coming from the roof
rack while driving, adjust the roof rack
crossbar to the neutral position.
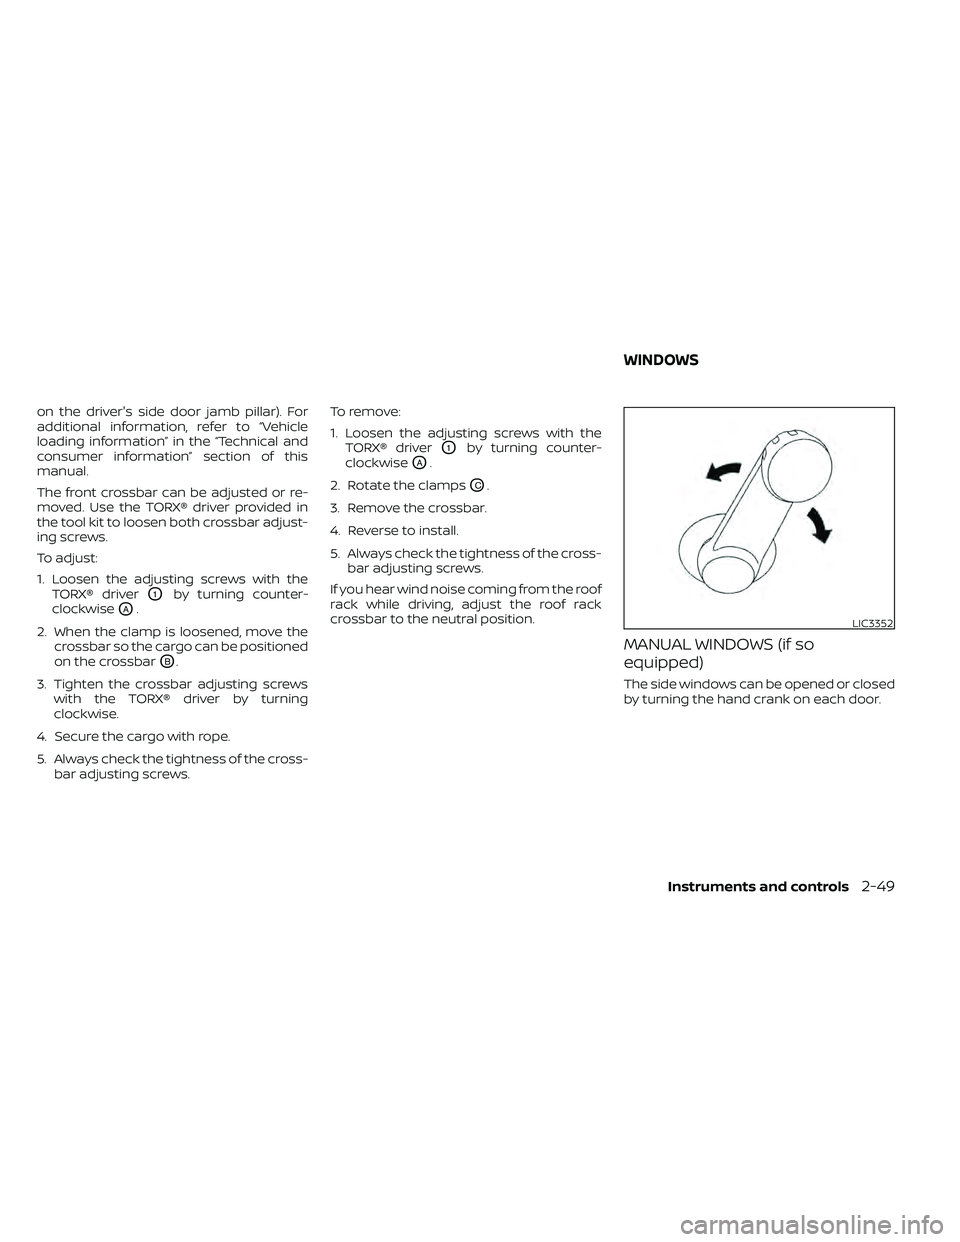
MANUAL WINDOWS (if so
equipped)
The side windows can be opened or closed
by turning the hand crank on each door.
LIC3352
WINDOWS
Instruments and controls2-49
Page 185 of 492
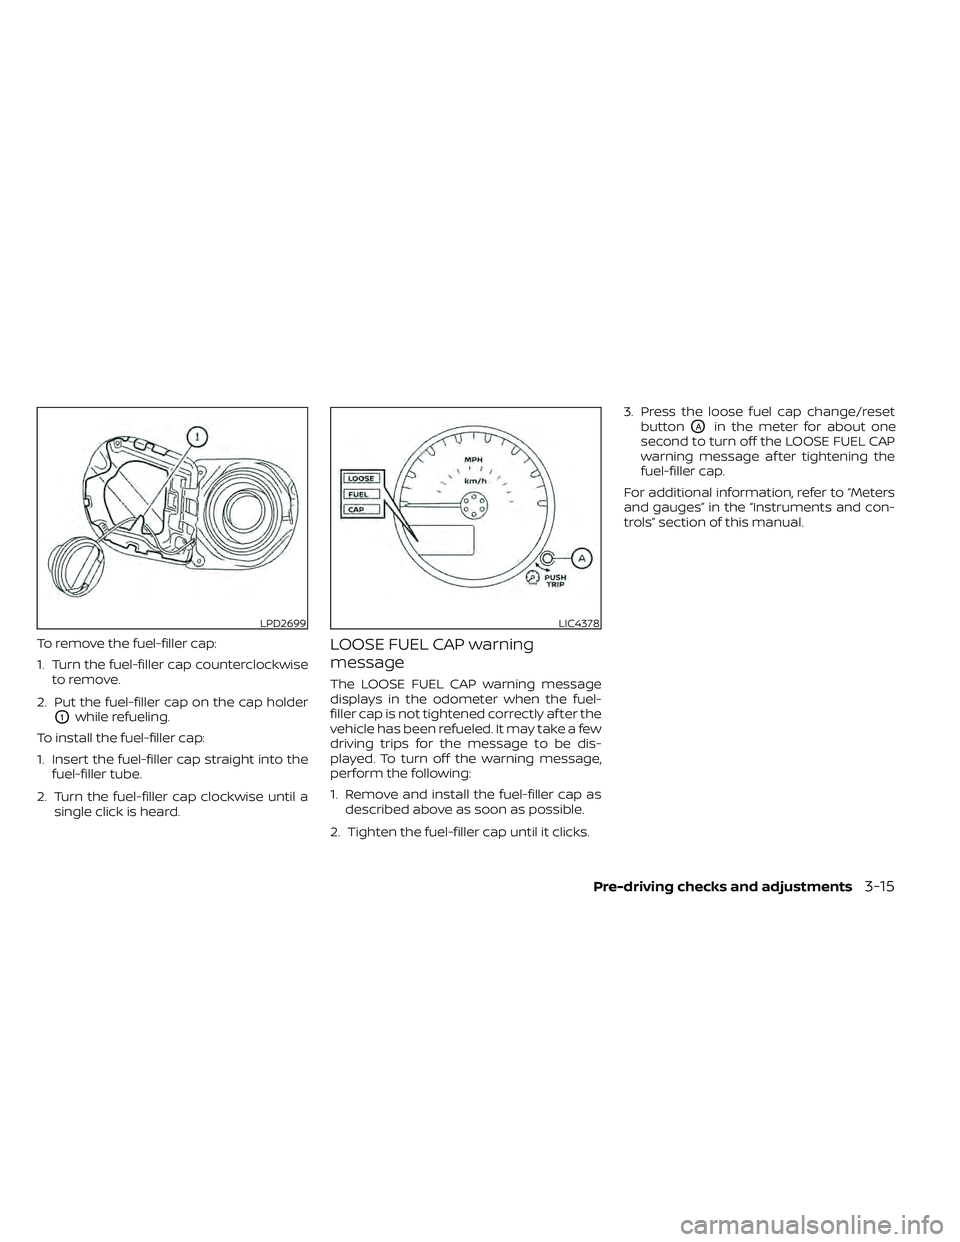
To remove the fuel-filler cap:
1. Turn the fuel-filler cap counterclockwiseto remove.
2. Put the fuel-filler cap on the cap holder
O1while refueling.
To install the fuel-filler cap:
1. Insert the fuel-filler cap straight into the fuel-filler tube.
2. Turn the fuel-filler cap clockwise until a single click is heard.
LOOSE FUEL CAP warning
message
The LOOSE FUEL CAP warning message
displays in the odometer when the fuel-
filler cap is not tightened correctly af ter the
vehicle has been refueled. It may take a few
driving trips for the message to be dis-
played. To turn off the warning message,
perform the following:
1. Remove and install the fuel-filler cap asdescribed above as soon as possible.
2. Tighten the fuel-filler cap until it clicks. 3. Press the loose fuel cap change/reset
button
OAin the meter for about one
second to turn off the LOOSE FUEL CAP
warning message af ter tightening the
fuel-filler cap.
For additional information, refer to “Meters
and gauges” in the “Instruments and con-
trols” section of this manual.
LPD2699LIC4378
Page 204 of 492
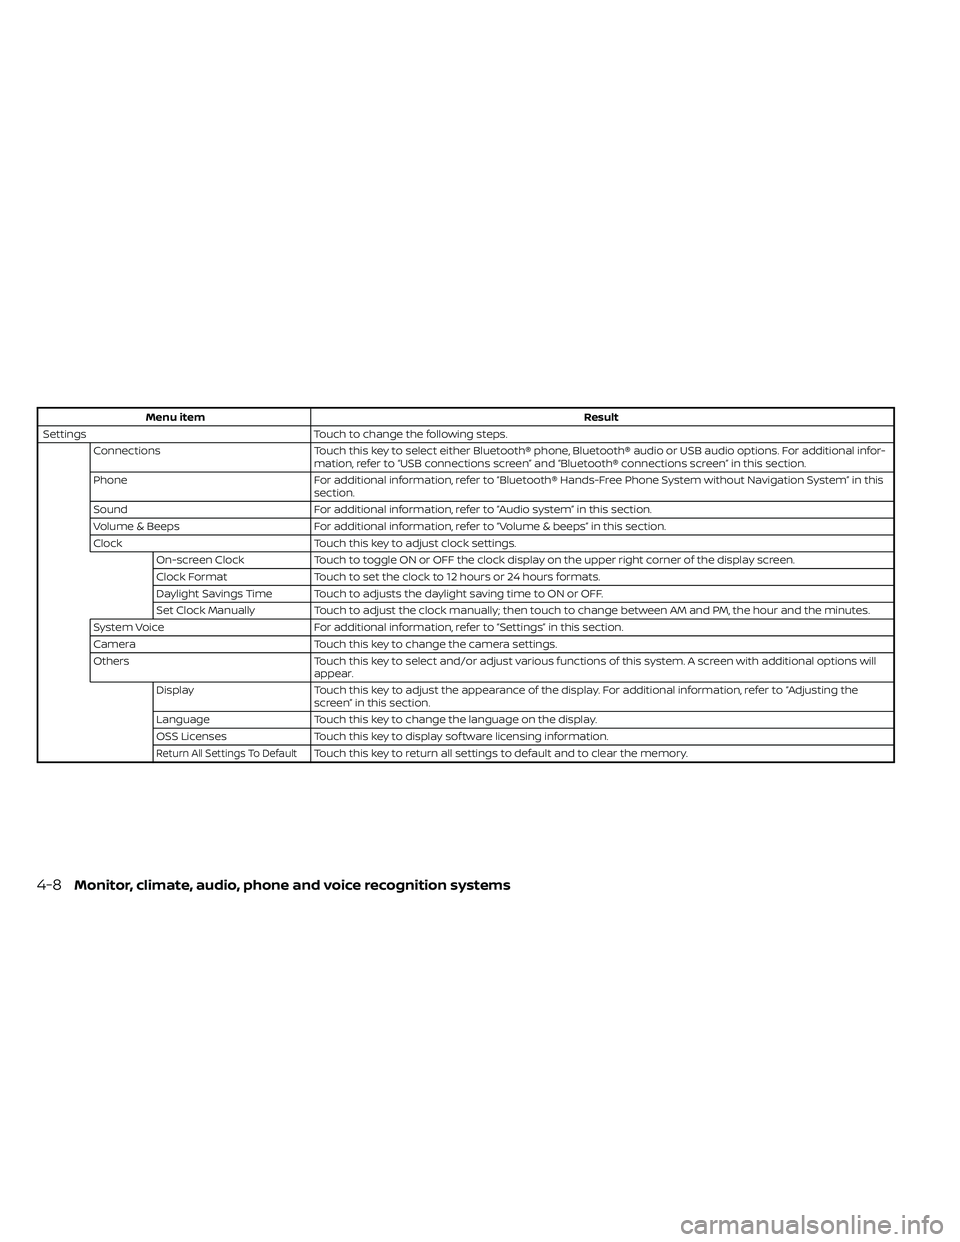
Menu itemResult
Settings Touch to change the following steps.
Connections Touch this key to select either Bluetooth® phone, Bluetooth® audio or USB audio options. For additional infor-
mation, refer to “USB connections screen” and “Bluetooth® connections screen” in this section.
Phone For additional information, refer to “Bluetooth® Hands-Free Phone System without Navigation System” in this
section.
Sound For additional information, refer to “Audio system” in this section.
Volume & Beeps For additional information, refer to “Volume & beeps” in this section.
Clock Touch this key to adjust clock settings.
On-screen Clock Touch to toggle ON or OFF the clock display on the upper right corner of the display screen.
Clock Format Touch to set the clock to 12 hours or 24 hours formats.
Daylight Savings Time Touch to adjusts the daylight saving time to ON or OFF.
Set Clock Manually Touch to adjust the clock manually; then touch to change between AM and PM, the hour and the minutes.
System Voice For additional information, refer to “Settings” in this section.
Camera Touch this key to change the camera settings.
Others Touch this key to select and/or adjust various functions of this system. A screen with additional options will
appear.
Display Touch this key to adjust the appearance of the display. For additional information, refer to “Adjusting the
screen” in this section.
Language Touch this key to change the language on the display.
OSS Licenses Touch this key to display sof tware licensing information.
Return All Settings To DefaultTouch this key to return all settings to default and to clear the memory.
4-8Monitor, climate, audio, phone and voice recognition systems
Page 210 of 492
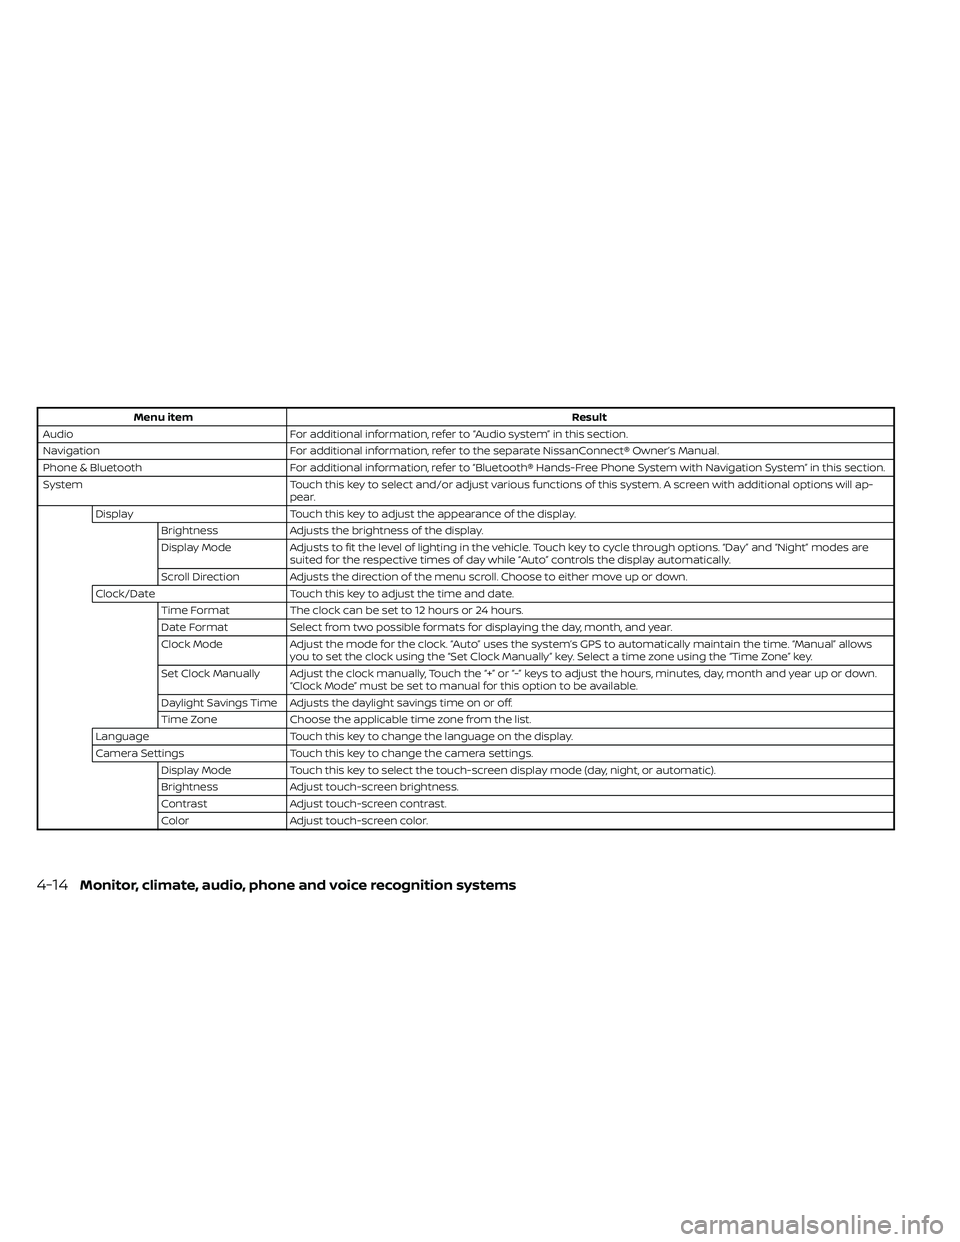
Menu itemResult
Audio For additional information, refer to “Audio system” in this section.
Navigation For additional information, refer to the separate NissanConnect® Owner’s Manual.
Phone & Bluetooth For additional information, refer to “Bluetooth® Hands-Free Phone System with Navigation System” in this section.
System Touch this key to select and/or adjust various functions of this system. A screen with additional options will ap-
pear.
Display Touch this key to adjust the appearance of the display.
Brightness Adjusts the brightness of the display.
Display Mode Adjusts to fit the level of lighting in the vehicle. Touch key to cycle through options. “Day ” and “Night” modes are
suited for the respective times of day while “Auto” controls the display automatically.
Scroll Direction Adjusts the direction of the menu scroll. Choose to either move up or down.
Clock/Date Touch this key to adjust the time and date.
Time Format The clock can be set to 12 hours or 24 hours.
Date Format Select from two possible formats for displaying the day, month, and year.
Clock Mode Adjust the mode for the clock. “Auto” uses the system’s GPS to automatically maintain the time. “Manual” allows
you to set the clock using the “Set Clock Manually ” key. Select a time zone using the “Time Zone” key.
Set Clock Manually Adjust the clock manually, Touch the “+” or “-” keys to adjust the hours, minutes, day, month and year up or down. “Clock Mode” must be set to manual for this option to be available.
Daylight Savings Time Adjusts the daylight savings time on or off.
Time Zone Choose the applicable time zone from the list.
Language Touch this key to change the language on the display.
Camera Settings Touch this key to change the camera settings.
Display Mode Touch this key to select the touch-screen display mode (day, night, or automatic).
Brightness Adjust touch-screen brightness.
Contrast Adjust touch-screen contrast.
Color Adjust touch-screen color.
4-14Monitor, climate, audio, phone and voice recognition systems
Page 268 of 492
ANTENNA
The antenna cannot be shortened, but can
be removed. When you need to remove the
antenna, turn the antenna rod counter-
clockwise.
To install the antenna rod, turn the antenna
rod clockwise and hand tighten.
Page 355 of 492
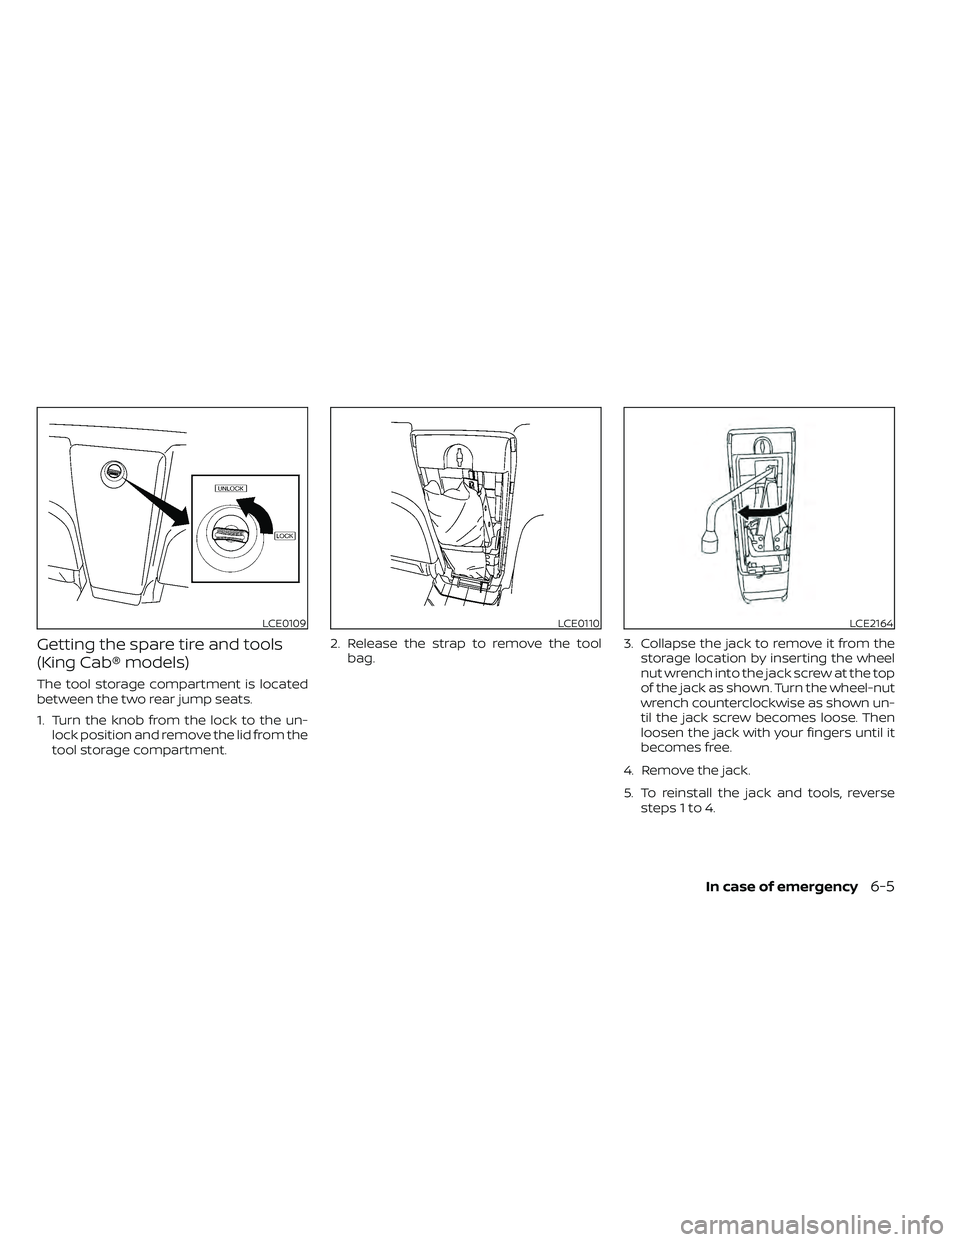
Getting the spare tire and tools
(King Cab® models)
The tool storage compartment is located
between the two rear jump seats.
1. Turn the knob from the lock to the un-lock position and remove the lid from the
tool storage compartment. 2. Release the strap to remove the tool
bag. 3. Collapse the jack to remove it from the
storage location by inserting the wheel
nut wrench into the jack screw at the top
of the jack as shown. Turn the wheel-nut
wrench counterclockwise as shown un-
til the jack screw becomes loose. Then
loosen the jack with your fingers until it
becomes free.
4. Remove the jack.
5. To reinstall the jack and tools, reverse steps 1 to 4.
LCE0109LCE0110LCE2164
Page 357 of 492
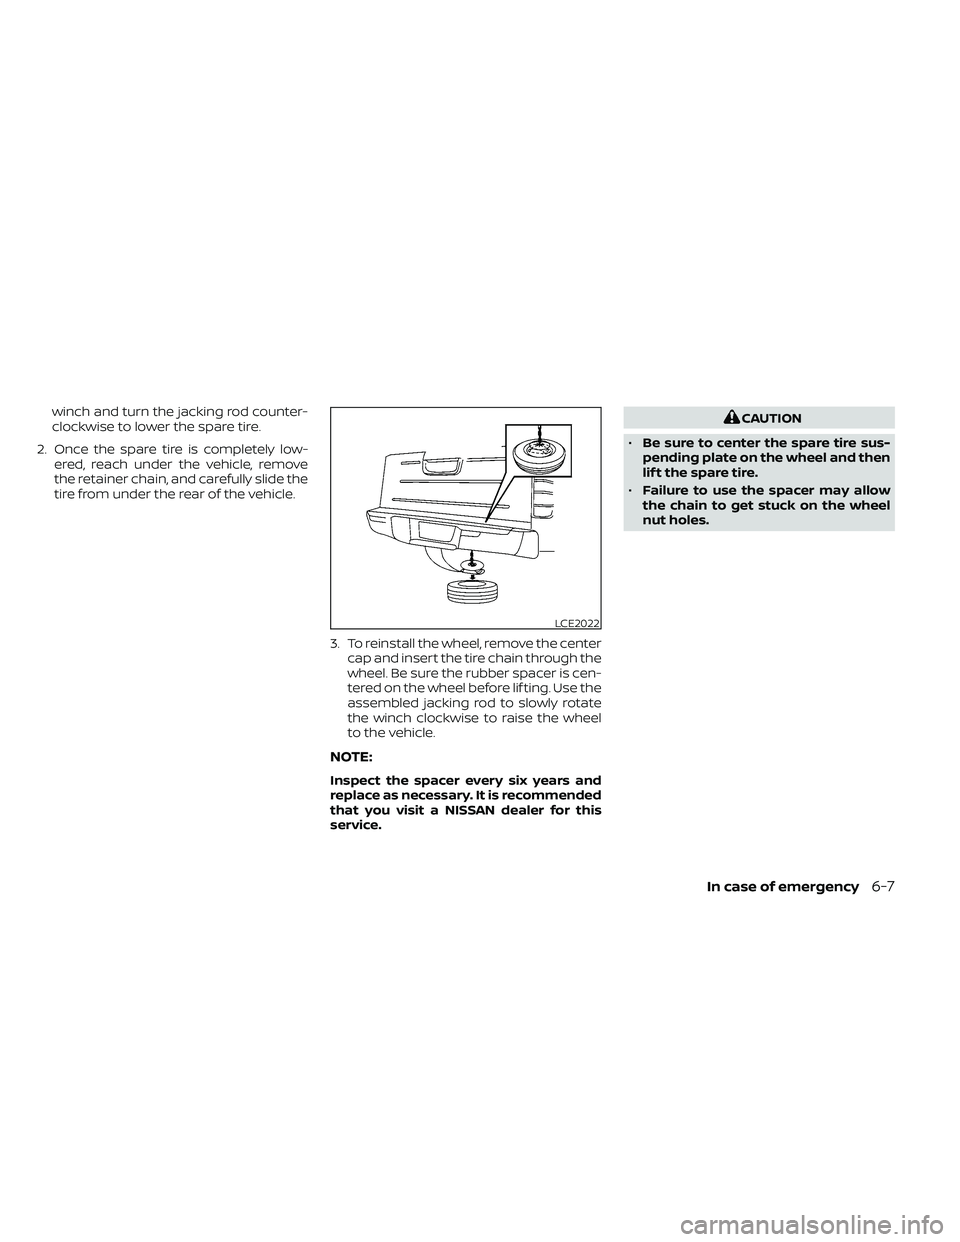
winch and turn the jacking rod counter-
clockwise to lower the spare tire.
2. Once the spare tire is completely low- ered, reach under the vehicle, remove
the retainer chain, and carefully slide the
tire from under the rear of the vehicle.
3. To reinstall the wheel, remove the centercap and insert the tire chain through the
wheel. Be sure the rubber spacer is cen-
tered on the wheel before lif ting. Use the
assembled jacking rod to slowly rotate
the winch clockwise to raise the wheel
to the vehicle.
NOTE:
Inspect the spacer every six years and
replace as necessary. It is recommended
that you visit a NISSAN dealer for this
service.
CAUTION
• Be sure to center the spare tire sus-
pending plate on the wheel and then
lif t the spare tire.
• Failure to use the spacer may allow
the chain to get stuck on the wheel
nut holes.
Page 359 of 492
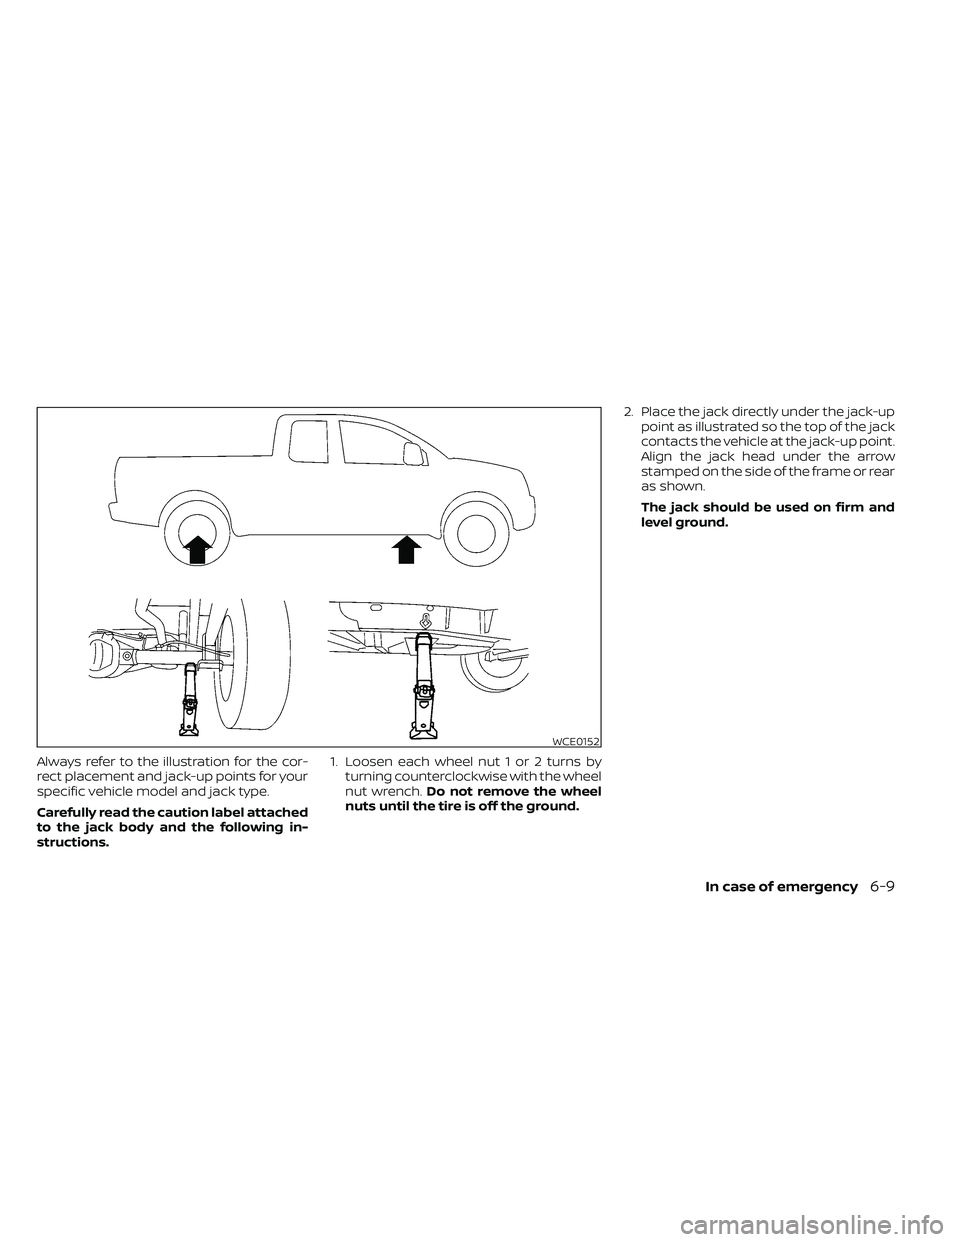
Always refer to the illustration for the cor-
rect placement and jack-up points for your
specific vehicle model and jack type.
Carefully read the caution label attached
to the jack body and the following in-
structions.1. Loosen each wheel nut 1 or 2 turns by
turning counterclockwise with the wheel
nut wrench. Do not remove the wheel
nuts until the tire is off the ground. 2. Place the jack directly under the jack-up
point as illustrated so the top of the jack
contacts the vehicle at the jack-up point.
Align the jack head under the arrow
stamped on the side of the frame or rear
as shown.
The jack should be used on firm and
level ground.
Page 384 of 492
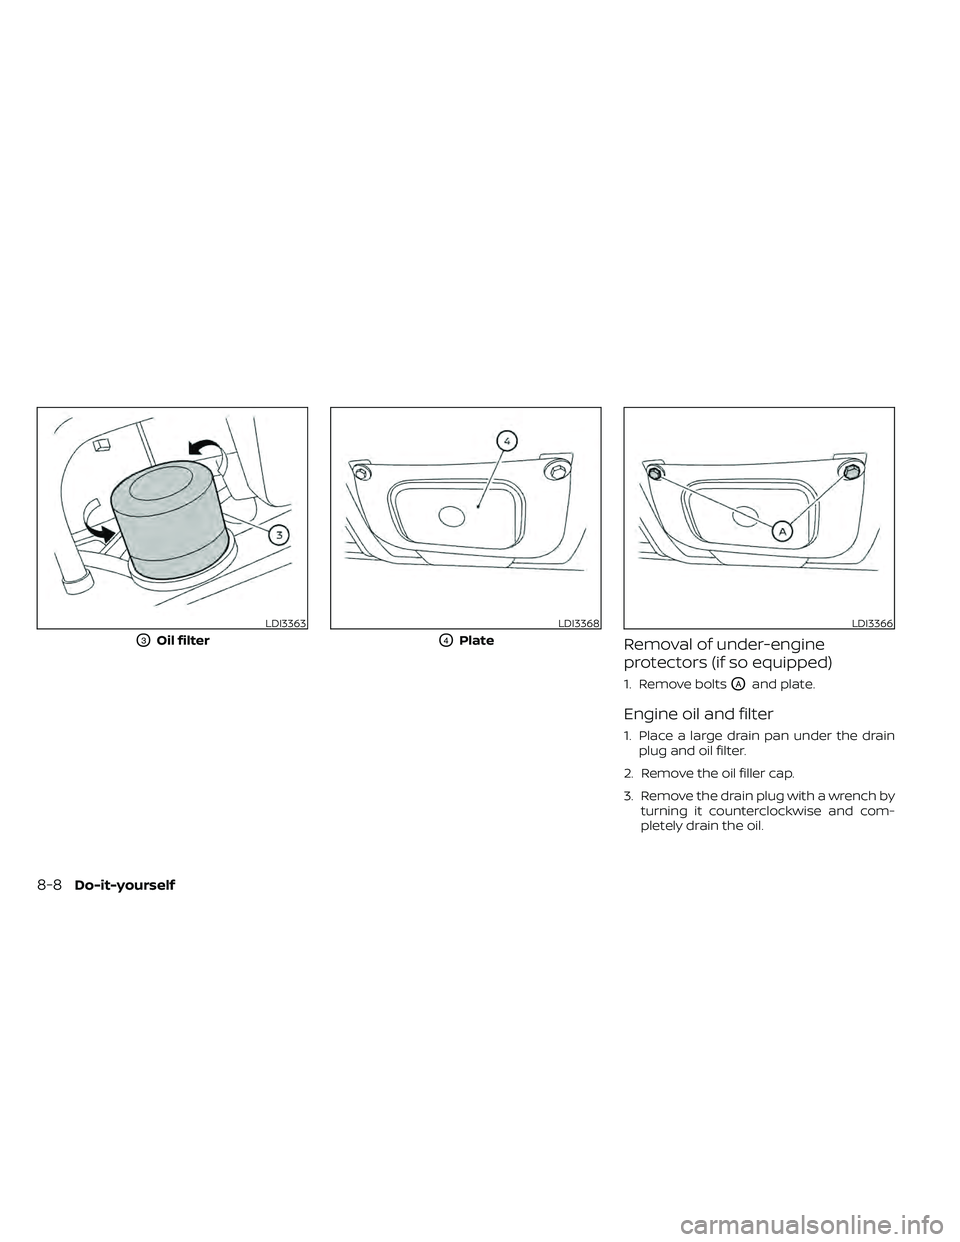
Removal of under-engine
protectors (if so equipped)
1. Remove boltsOAand plate.
Engine oil and filter
1. Place a large drain pan under the drainplug and oil filter.
2. Remove the oil filler cap.
3. Remove the drain plug with a wrench by turning it counterclockwise and com-
pletely drain the oil.
LDI3363
O3Oil filter
8-8Do-it-yourself
Page 385 of 492
CAUTION
Be careful not to burn yourself, as the
engine oil is hot.
WARNING
• Prolonged and repeated contact
with used engine oil may cause skin
cancer.
• Try to avoid direct skin contact with
used oil. If skin contact is made, wash
thoroughly with soap or hand
cleaner as soon as possible.
• Keep used engine oil out of reach of
children.
4. Loosen the oil filter with an oil filter wrench by turning it counterclockwise.
Remove the oil filter by turning it by
hand.
5. Wipe the engine oil filter mounting sur- face with a clean rag.