clock NISSAN FRONTIER 2022 Owner´s Manual
[x] Cancel search | Manufacturer: NISSAN, Model Year: 2022, Model line: FRONTIER, Model: NISSAN FRONTIER 2022Pages: 556, PDF Size: 6.11 MB
Page 220 of 556
–Keep the pump nozzle in contact
with the container while you are
filling it.
– Use only approved portable fuel
containers for flammable liquid.
CAUTION
• The LOOSE FUEL CAP warning mes-
sage will be displayed if the fuel-filler
cap is not properly tightened. It may
take a few driving trips for the mes-
sage to be displayed. Failure to
tighten the fuel-filler cap properly af-
ter the LOOSE FUEL CAP warning
message is displayed may cause the
Malfunction Indicator Light (MIL)
to illuminate. •
Failure to tighten the fuel-filler cap
properly may cause the
Mal-
function Indicator Light (MIL) to illu-
minate. If the
light illuminates
because the fuel-filler cap is loose or
missing, tighten or install the cap and
continue to drive the vehicle. The
light should turn off af ter a few
driving trips. If thelight does not
turn off af ter a few driving trips, have
the vehicle inspected. It is recom-
mended that you visit a NISSAN
dealer for this service.
• For additional information, see “Mal-
function Indicator Light (MIL)”
(P. 2-17).
• If fuel is spilled on the vehicle body,
flush it away with water to avoid
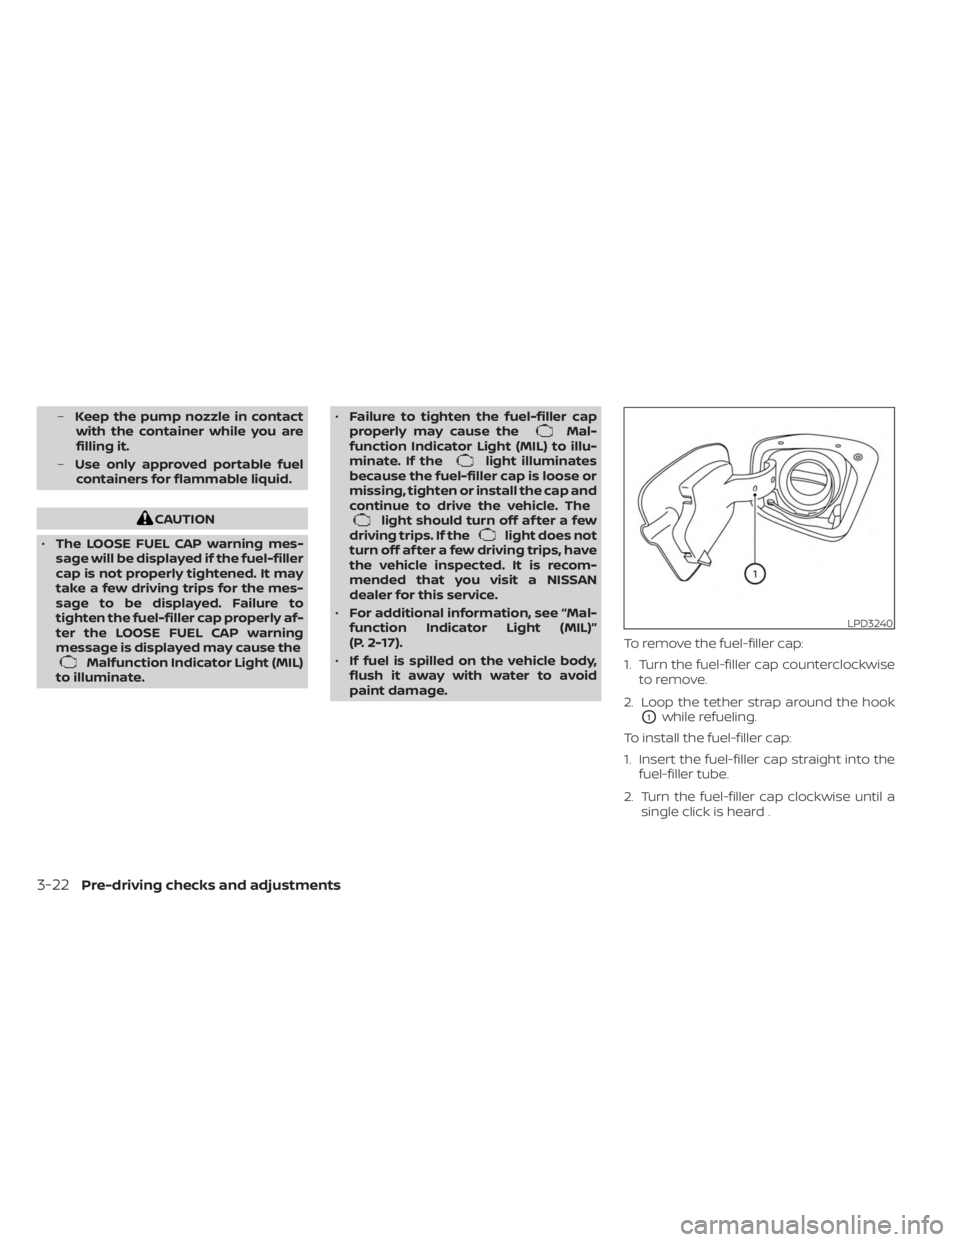
paint damage. To remove the fuel-filler cap:
1. Turn the fuel-filler cap counterclockwise
to remove.
2. Loop the tether strap around the hook
O1while refueling.
To install the fuel-filler cap:
1. Insert the fuel-filler cap straight into the fuel-filler tube.
2. Turn the fuel-filler cap clockwise until a single click is heard .
LPD3240
3-22Pre-driving checks and adjustments
Page 409 of 556
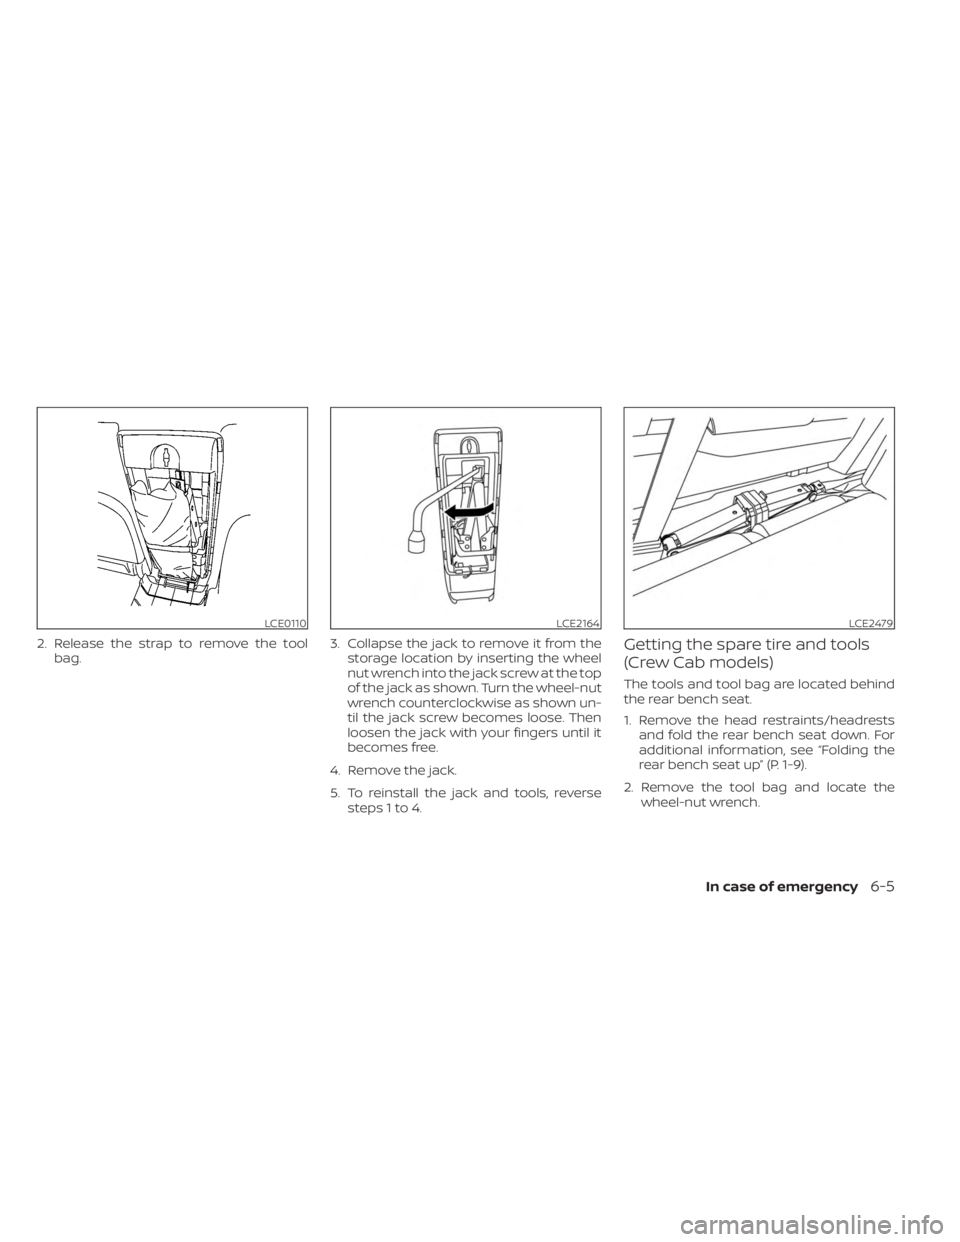
2. Release the strap to remove the toolbag. 3. Collapse the jack to remove it from the
storage location by inserting the wheel
nut wrench into the jack screw at the top
of the jack as shown. Turn the wheel-nut
wrench counterclockwise as shown un-
til the jack screw becomes loose. Then
loosen the jack with your fingers until it
becomes free.
4. Remove the jack.
5. To reinstall the jack and tools, reverse steps 1 to 4.Getting the spare tire and tools
(Crew Cab models)
The tools and tool bag are located behind
the rear bench seat.
1. Remove the head restraints/headrestsand fold the rear bench seat down. For
additional information, see “Folding the
rear bench seat up” (P. 1-9).
2. Remove the tool bag and locate the wheel-nut wrench.
LCE0110LCE2164LCE2479
In case of emergency6-5
Page 410 of 556
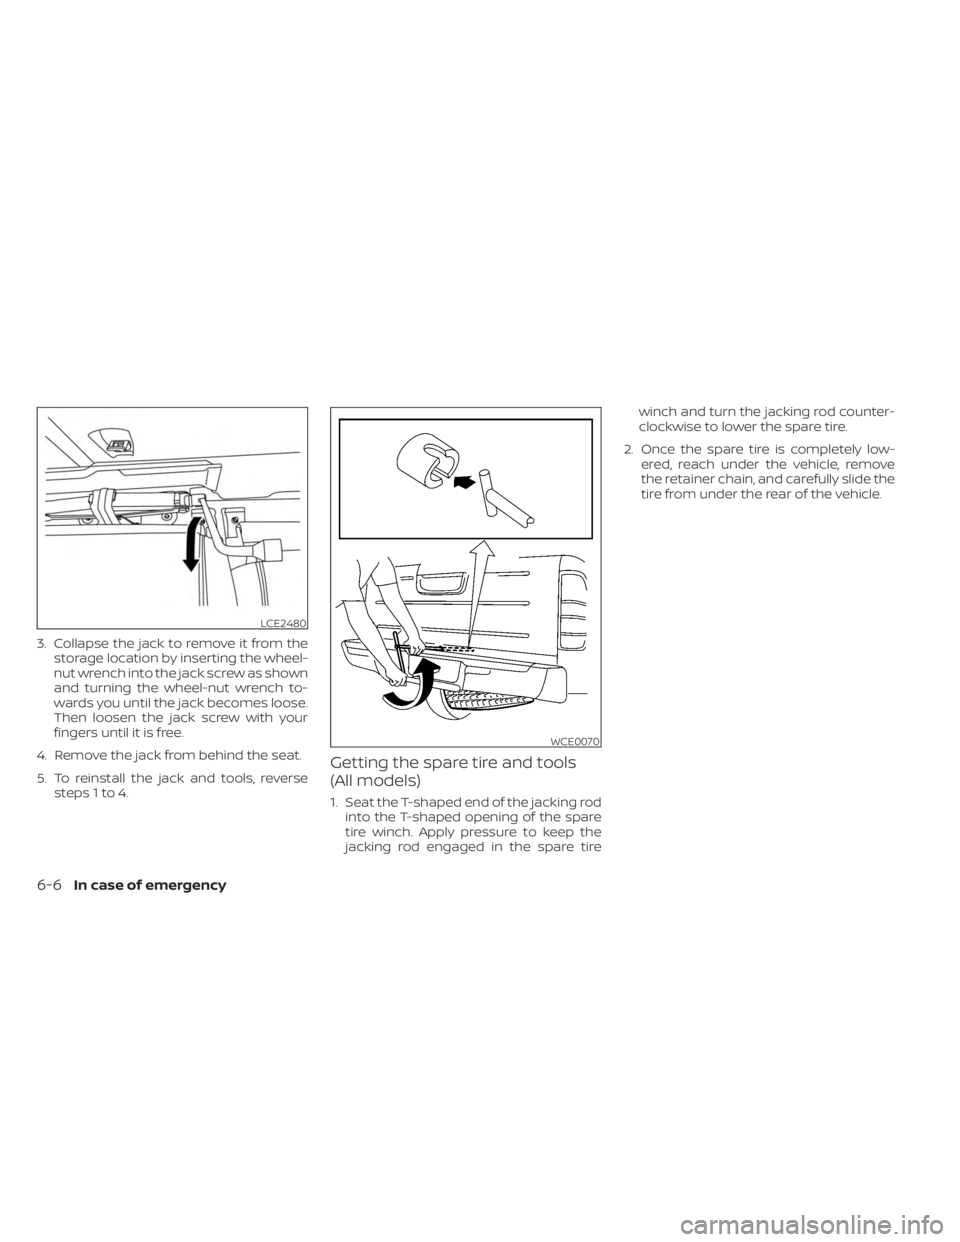
3. Collapse the jack to remove it from thestorage location by inserting the wheel-
nut wrench into the jack screw as shown
and turning the wheel-nut wrench to-
wards you until the jack becomes loose.
Then loosen the jack screw with your
fingers until it is free.
4. Remove the jack from behind the seat.
5. To reinstall the jack and tools, reverse steps 1 to 4.
Getting the spare tire and tools
(All models)
1. Seat the T-shaped end of the jacking rodinto the T-shaped opening of the spare
tire winch. Apply pressure to keep the
jacking rod engaged in the spare tire winch and turn the jacking rod counter-
clockwise to lower the spare tire.
2. Once the spare tire is completely low- ered, reach under the vehicle, remove
the retainer chain, and carefully slide the
tire from under the rear of the vehicle.
LCE2480
WCE0070
6-6In case of emergency
Page 411 of 556
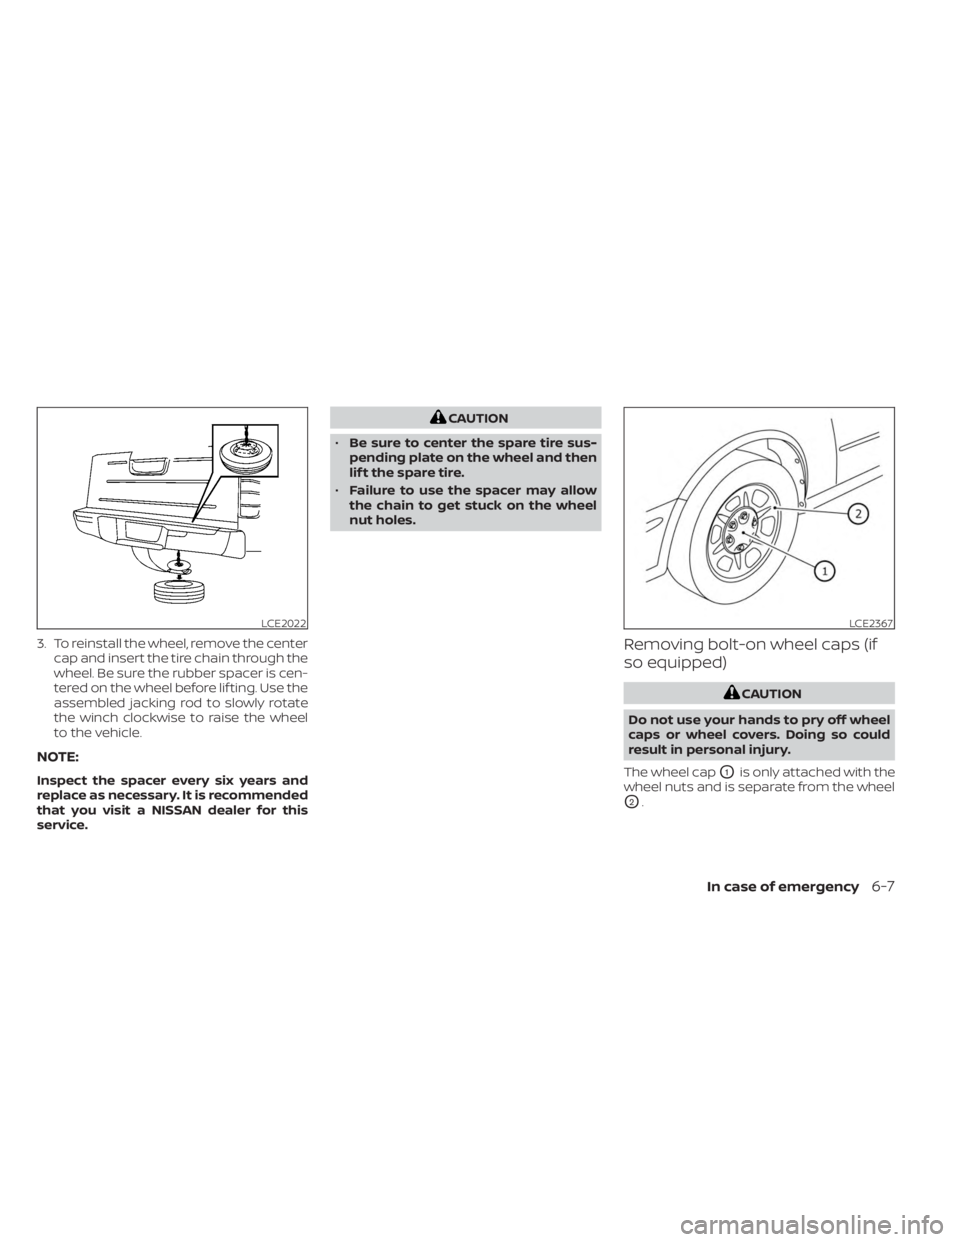
3. To reinstall the wheel, remove the centercap and insert the tire chain through the
wheel. Be sure the rubber spacer is cen-
tered on the wheel before lif ting. Use the
assembled jacking rod to slowly rotate
the winch clockwise to raise the wheel
to the vehicle.
NOTE:
Inspect the spacer every six years and
replace as necessary. It is recommended
that you visit a NISSAN dealer for this
service.
CAUTION
• Be sure to center the spare tire sus-
pending plate on the wheel and then
lif t the spare tire.
• Failure to use the spacer may allow
the chain to get stuck on the wheel
nut holes.
Removing bolt-on wheel caps (if
so equipped)
CAUTION
Do not use your hands to pry off wheel
caps or wheel covers. Doing so could
result in personal injury.
The wheel cap
O1is only attached with the
wheel nuts and is separate from the wheel
O2.
LCE2022LCE2367
In case of emergency6-7
Page 413 of 556
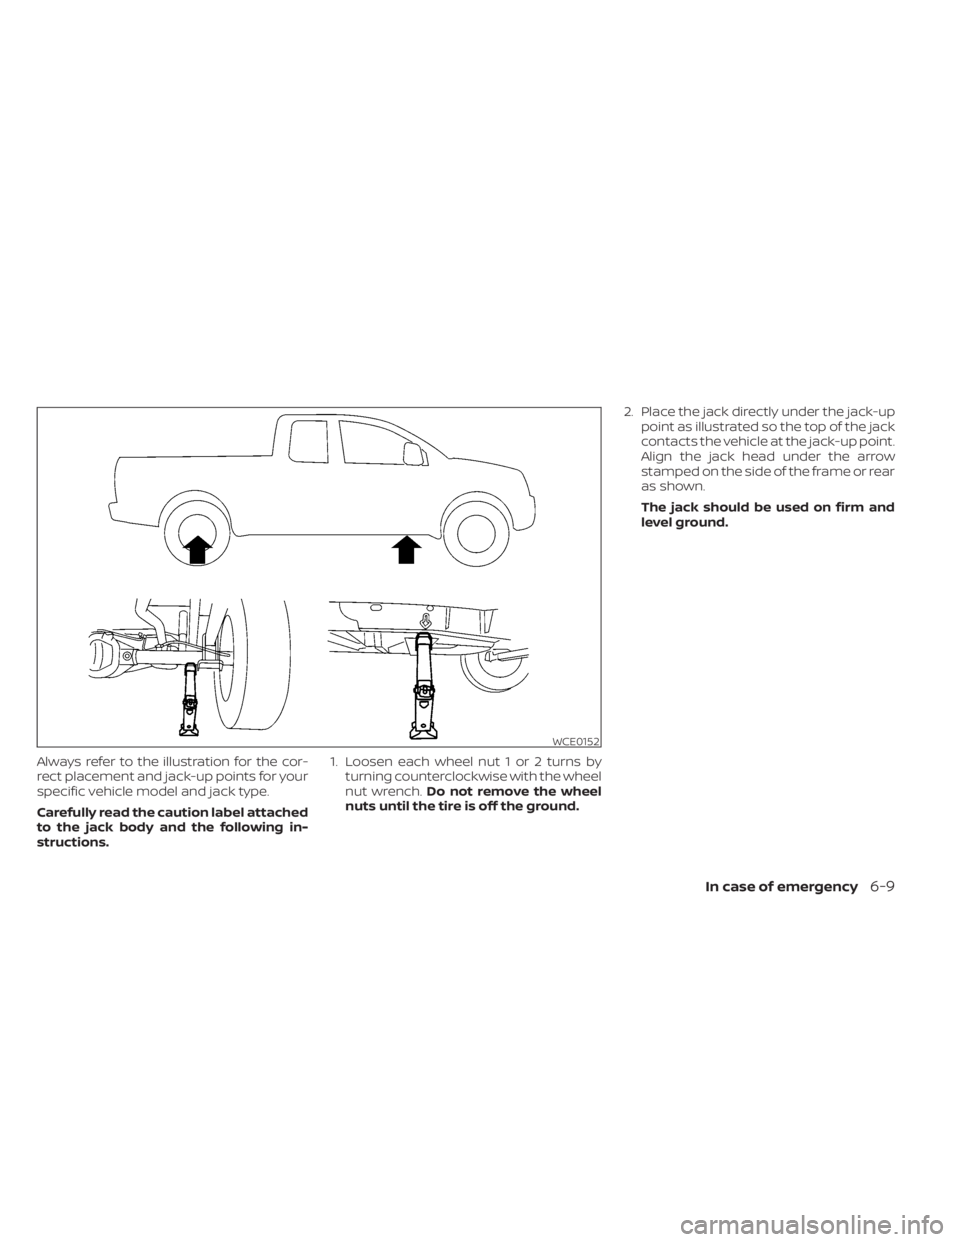
Always refer to the illustration for the cor-
rect placement and jack-up points for your
specific vehicle model and jack type.
Carefully read the caution label attached
to the jack body and the following in-
structions.1. Loosen each wheel nut 1 or 2 turns by
turning counterclockwise with the wheel
nut wrench. Do not remove the wheel
nuts until the tire is off the ground. 2. Place the jack directly under the jack-up
point as illustrated so the top of the jack
contacts the vehicle at the jack-up point.
Align the jack head under the arrow
stamped on the side of the frame or rear
as shown.
The jack should be used on firm and
level ground.
WCE0152
In case of emergency6-9
Page 439 of 556
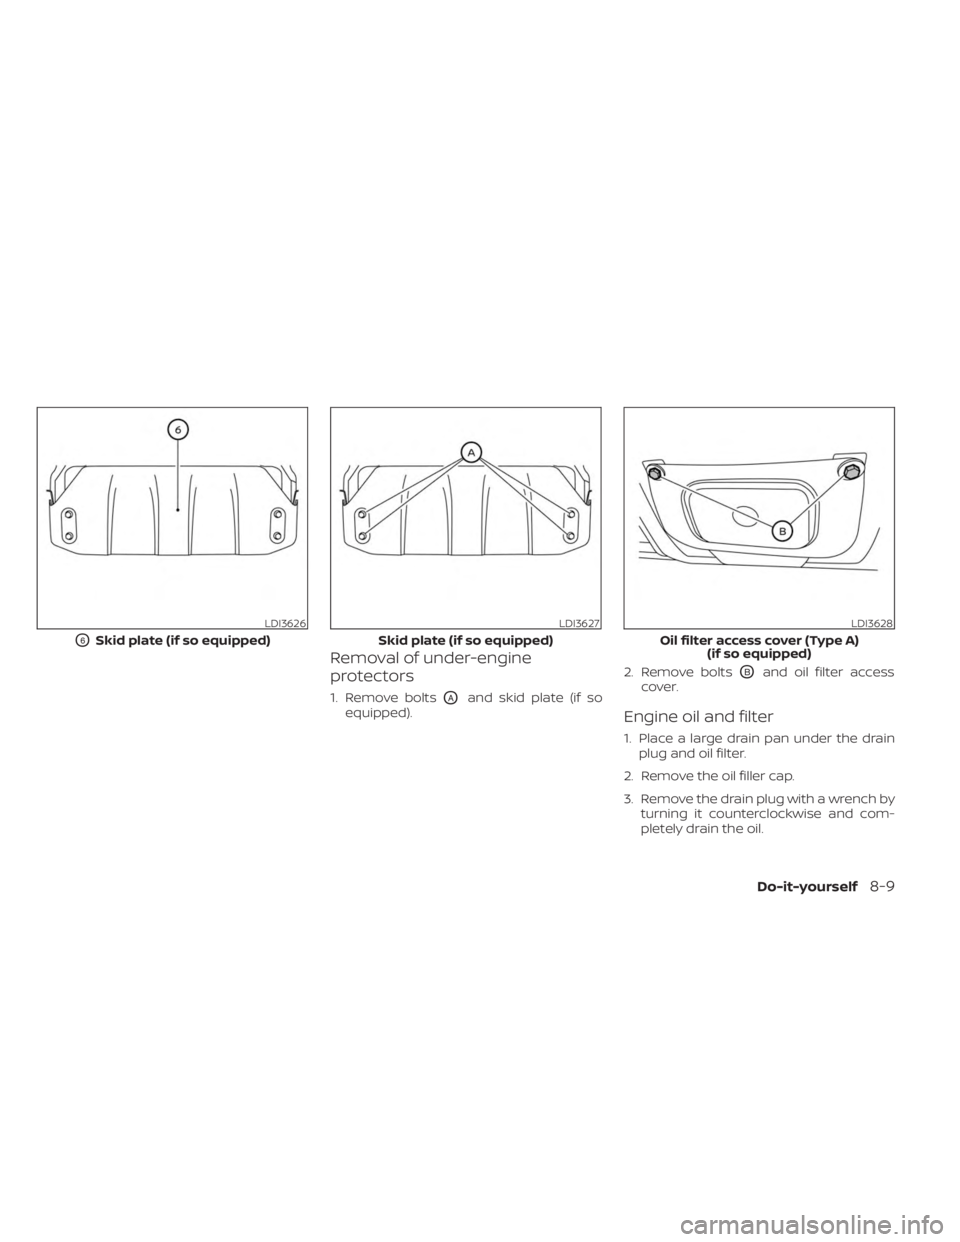
Removal of under-engine
protectors
1. Remove boltsOAand skid plate (if so
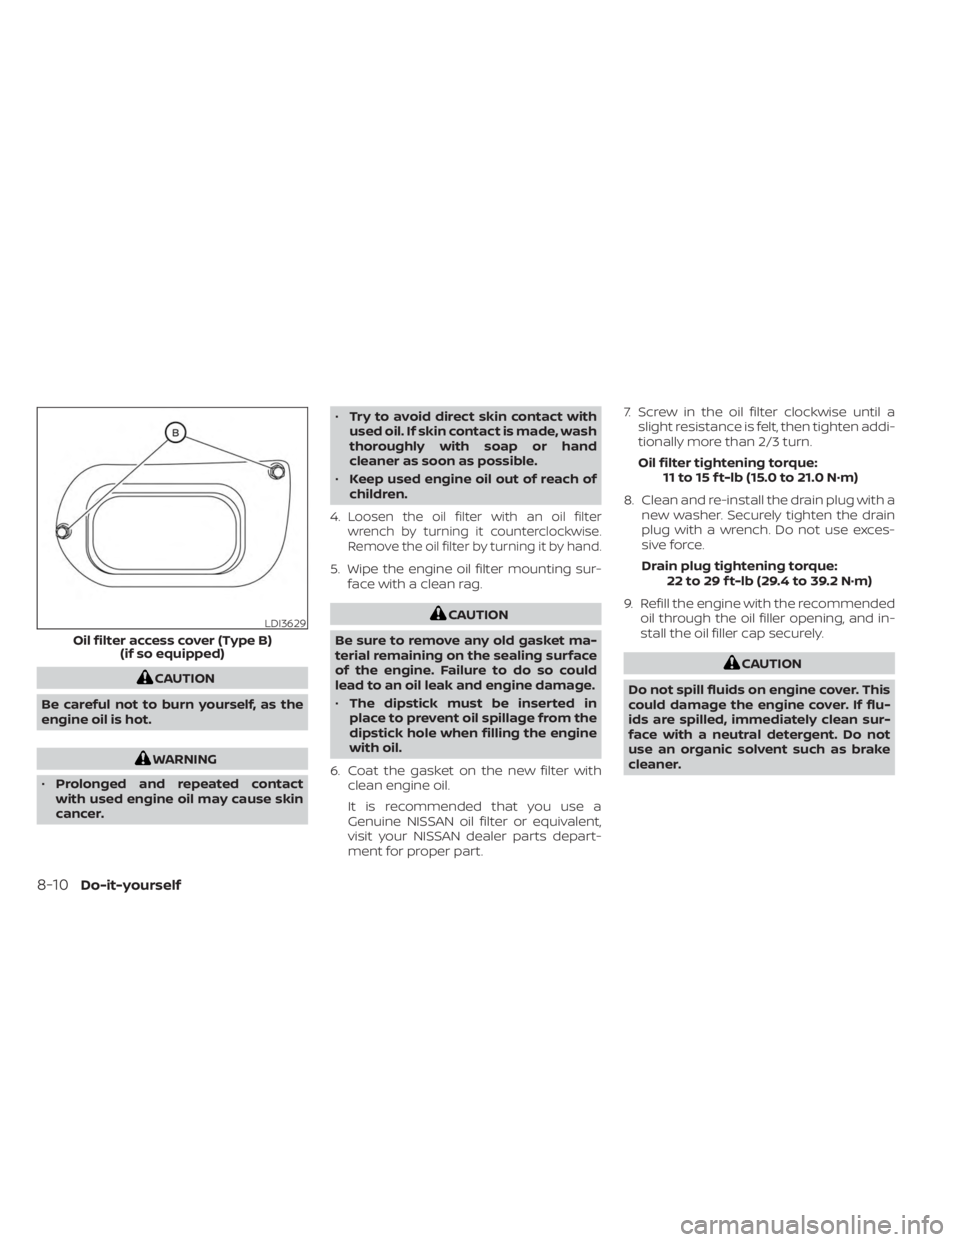
equipped). 2. Remove bolts
OBand oil filter access
cover.
Engine oil and filter
1. Place a large drain pan under the drain plug and oil filter.
2. Remove the oil filler cap.
3. Remove the drain plug with a wrench by turning it counterclockwise and com-
pletely drain the oil.
LDI3626
O6Skid plate (if so equipped)
LDI3627
Skid plate (if so equipped)
LDI3628
Oil filter access cover (Type A) (if so equipped)
Do-it-yourself8-9
Page 440 of 556
CAUTION
Be careful not to burn yourself, as the
engine oil is hot.
WARNING
• Prolonged and repeated contact
with used engine oil may cause skin
cancer. •
Try to avoid direct skin contact with
used oil. If skin contact is made, wash
thoroughly with soap or hand
cleaner as soon as possible.
• Keep used engine oil out of reach of
children.
4.
Loosen the oil filter with an oil filter
wrench by turning it counterclockwise.
Remove the oil filter by turning it by hand.
5. Wipe the engine oil filter mounting sur- face with a clean rag.
CAUTION
Be sure to remove any old gasket ma-
terial remaining on the sealing surface
of the engine. Failure to do so could
lead to an oil leak and engine damage.
• The dipstick must be inserted in
place to prevent oil spillage from the
dipstick hole when filling the engine
with oil.
6. Coat the gasket on the new filter with clean engine oil.
It is recommended that you use a
Genuine NISSAN oil filter or equivalent,
visit your NISSAN dealer parts depart-
ment for proper part. 7. Screw in the oil filter clockwise until a
slight resistance is felt, then tighten addi-
tionally more than 2/3 turn.
Oil filter tightening torque: 11 to 15 f t-lb (15.0 to 21.0 N·m)
8. Clean and re-install the drain plug with a new washer. Securely tighten the drain
plug with a wrench. Do not use exces-
sive force.
Drain plug tightening torque: 22 to 29 f t-lb (29.4 to 39.2 N·m)
9. Refill the engine with the recommended oil through the oil filler opening, and in-
stall the oil filler cap securely.
CAUTION
Do not spill fluids on engine cover. This
could damage the engine cover. If flu-
ids are spilled, immediately clean sur-
face with a neutral detergent. Do not
use an organic solvent such as brake
cleaner.
LDI3629
Oil filter access cover (Type B) (if so equipped)
8-10Do-it-yourself
Page 519 of 556
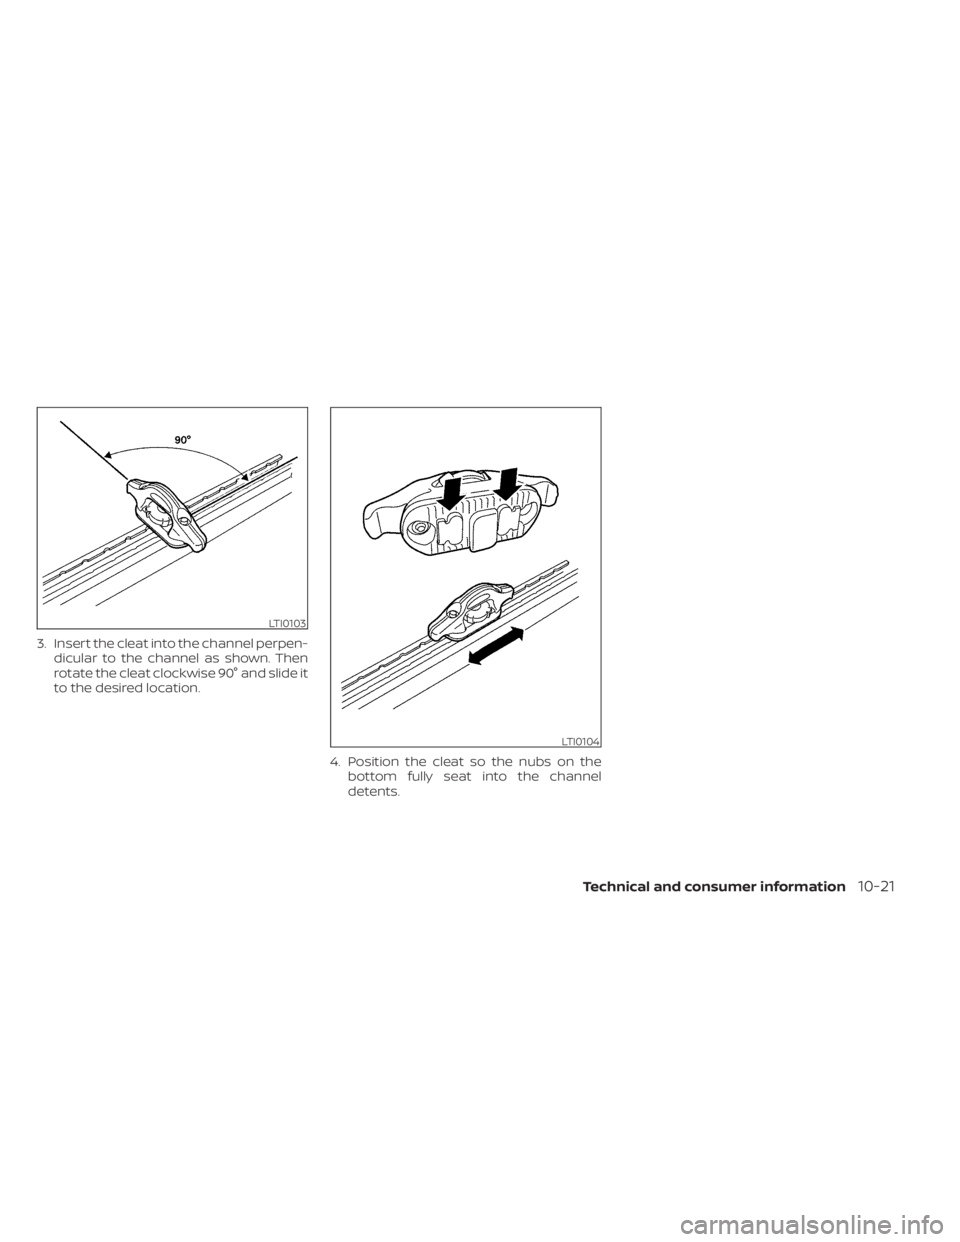
3. Insert the cleat into the channel perpen-dicular to the channel as shown. Then
rotate the cleat clockwise 90° and slide it
to the desired location.
4. Position the cleat so the nubs on thebottom fully seat into the channel
detents.
LTI0103
LTI0104
Technical and consumer information10-21