CD player NISSAN GT-R 2014 R35 Multi Function Display Owners Manual
[x] Cancel search | Manufacturer: NISSAN, Model Year: 2014, Model line: GT-R, Model: NISSAN GT-R 2014 R35Pages: 314, PDF Size: 7.33 MB
Page 16 of 314
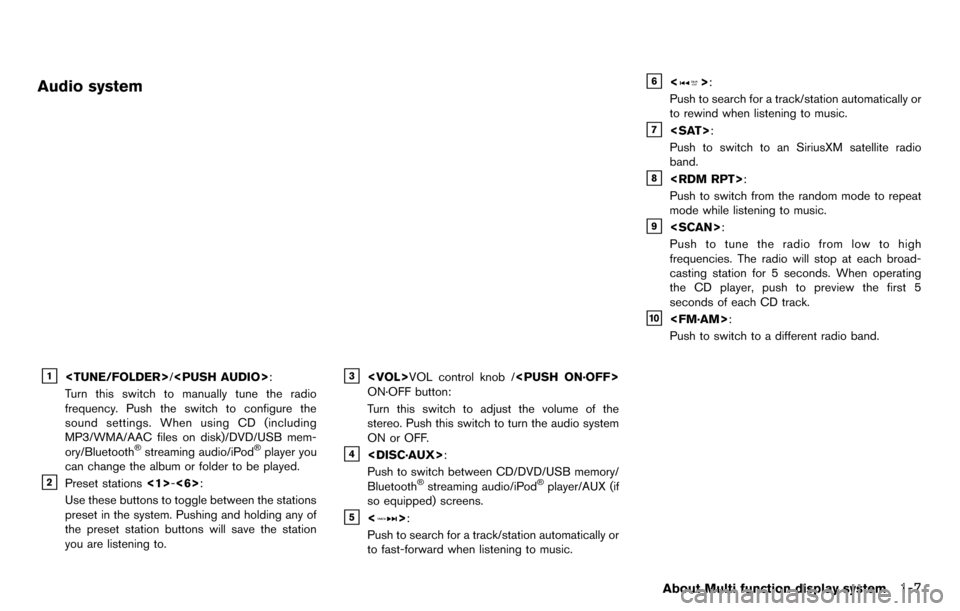
Audio system
&1
Turn this switch to manually tune the radio
frequency. Push the switch to configure the
sound settings. When using CD (including
MP3/WMA/AAC files on disk)/DVD/USB mem-
ory/Bluetooth
®streaming audio/iPod®player you
can change the album or folder to be played.
&2Preset stations <1>-<6>:
Use these buttons to toggle between the stations
preset in the system. Pushing and holding any of
the preset station buttons will save the station
you are listening to.
&3
ON·OFF button:
Turn this switch to adjust the volume of the
stereo. Push this switch to turn the audio system
ON or OFF.
&4
Push to switch between CD/DVD/USB memory/
Bluetooth
®streaming audio/iPod®player/AUX (if
so equipped) screens.
&5<>:
Push to search for a track/station automatically or
to fast-forward when listening to music.
&6<>:
Push to search for a track/station automatically or
to rewind when listening to music.
&7
Push to switch to an SiriusXM satellite radio
band.
&8
Push to switch from the random mode to repeat
mode while listening to music.
&9
Push to tune the radio from low to high
frequencies. The radio will stop at each broad-
casting station for 5 seconds. When operating
the CD player, push to preview the first 5
seconds of each CD track.
&10
Push to switch to a different radio band.
About Multi function display system1-7
Page 128 of 314
3 Audio system
Audio system ........................................................................\
...... 3-2Audio operation precautions ............................................. 3-2
Antenna ........................................................................\
....... 3-12
FM-AM-SAT radio with Compact Disc
(CD) player ........................................................................\
. 3-12
DVD (Digital Versatile Disc) player operation............ 3-16 USB memory operation ................................................. 3-18
Bluetooth®streaming audio ......................................... 3-21
iPod®player operation .................................................. 3-24
CD/DVD/USB memory care and cleaning ............... 3-26
Car phone or CB radio ........................................................ 3-27
Page 130 of 314
AM radio reception:
AM signals, because of their low frequency, can
bend around objects and skip along the ground.
In addition, the signals can be bounced off the
ionosphere and bent back to earth. Because of
these characteristics. AM signals are also
subject to interference as they travel from
transmitter to receiver.
Fading: Occurs while the vehicle is passing
through freeway underpasses or in areas with
many tall buildings. It can also occur for several
seconds during ionospheric turbulence even in
areas where no obstacles exist.
Static: Caused by thunderstorms, electrical
power lines, electric signs and even traffic lights.
Satellite radio reception:
When the satellite radio is used for the first time
or the battery has been replaced, the satellite
radio may not work properly. This is not a
malfunction. Wait more than 10 minutes with the
satellite radio ON and the vehicle outside of any
metal or large building for the satellite radio to
receive all of the necessary data.
The satellite radio mode requires an active
SiriusXM Satellite Radio subscription. The sa-
tellite radio is not available in Alaska, Hawaii and
Guam.
The satellite radio performance may be affectedif cargo carried on the roof blocks the satellite
radio signal.
If possible, do not put cargo near the satellite
antenna.
A build up of ice on the satellite radio antenna
can affect satellite radio performance. Remove
the ice to restore satellite radio reception.Compact Disc (CD) player
.
Do not force a compact disc into the CD
insert slot. This could damage the CD and/
or CD changer/player.
. Trying to load a CD with the CD door closed
could damage the CD and/or CD changer.
Audio system3-3
Page 131 of 314
3-4Audio system
.During cold weather or rainy days, the player
may malfunction due to the humidity. If this
occurs, remove the CD and dehumidify or
ventilate the player completely.
. The player may skip while driving on rough
roads.
. The CD player sometimes cannot function
when the passenger compartment tempera-
ture is extremely high. Decrease the tem-
perature before use.
. Only use high quality 4.7 in (12 cm) round
discs that have the “COMPACT disc DIGI-
TAL AUDIO” logo on the disc or packaging.
. Do not expose the CD to direct sunlight.
. CDs that are of poor quality, dirty, scratched,
covered with fingerprints, or that have pin
holes may not work properly.
. The following CDs may not work properly:
— Copy control compact discs (CCCD)
— Recordable compact discs (CD-R)
— Rewritable compact discs (CD-RW)
. Do not use the following CDs as they may
cause the CD player to malfunction.
— 3.1 in (8 cm) discs
— CDs that are not round
— CDs with a paper label — CDs that are warped, scratched, or have
abnormal edges
. This audio system can only play prerecorded
CDs. It has no capabilities to record or burn
CDs.
. If the CD cannot be played, one of the
following messages will be displayed.
CHECK DISC:
— Confirm that the CD is inserted correctly
(the label side is facing up, etc.).
— Confirm that the CD is not bent or warped and it is free of scratches.
PUSH EJECT:
This is an error due to the temperature inside
the player is too high. Remove the CD by
pushing the EJECT button, and after a short
time reinsert the CD. The CD can be played
when the temperature of the player returns
to normal.
UNPLAYABLE:
The file is unplayable in this audio system
(only MP3, WMA or AAC CD) .DVD (Digital Versatile Disc) player
. Do not force a compact disc into the CD/
DVD insert slot. This could damage the CD/
DVD player.
. During cold weather or rainy days, the player
may malfunction due to humidity. If this
occurs, remove the CD/DVD and dehumidify
or ventilate the player completely.
. The player may skip while driving on rough
roads.
Page 132 of 314
.The CD/DVD player sometimes cannot
function when the passenger compartment
temperature is extremely high. Decrease the
temperature before use.
. Only use high quality 4.7 in (12 cm) round
discs that have the “COMPACT disc DIGI-
TAL AUDIO” or “DVD Video” logo on the
disc or packaging.
. Do not expose the CD/DVD to direct
sunlight.
. CD/DVDs that are of poor quality, dirty,
scratched, covered with fingerprints, or that
have pinholes may not work properly.
. The following CD/DVDs are not guaranteed
to play:
— Copy control compact discs (CCCD)
— Recordable compact discs (CD-R)
— Rewritable compact discs (CD-RW)
— Recordable DVDs (DVD±R, DVD±R DL)
— Rewritable DVDs (DVD±RW, DVD±RW
DL)
. Do not use the following CD/DVDs as they
may cause the CD/DVD player to malfunc-
tion.
— 3.1 in (8 cm) discs
— CD/DVDs that are not round — CD/DVDs with a paper label
— CD/DVDs that are warped, scratched or
have abnormal edges
— This audio system can only play pre- recorded CD/DVDs. It has no capabilities
to record or burn CD/DVDs.
. If the CD/DVD cannot be played, one of the
following messages will be displayed.
Disc Read Error:
— Confirm that the CD/DVD is inserted
correctly (the label side is facing up,
etc.).
— Confirm that the CD/DVD is not bent or warped and it is free of scratches.
Please Eject Disc:
— This may be an error due to the temperature inside the player being too
high. Remove the CD/DVD by pushing
the EJECT button, and after a short time
reinsert the CD/DVD. The CD/DVD can
be played when the temperature of the
player returns to normal. If the error
persists, consult your local retailership.
Unplayable File:
— The file may be copy protected.
— The file is not MP3, WMA, AAC, M4A or DivX
®type. Region Invalid:
— The DVD is not for region 1 or all regions.
Use DVDs with a region code “1”, “ALL”
or “1 included” for your DVD entertain-
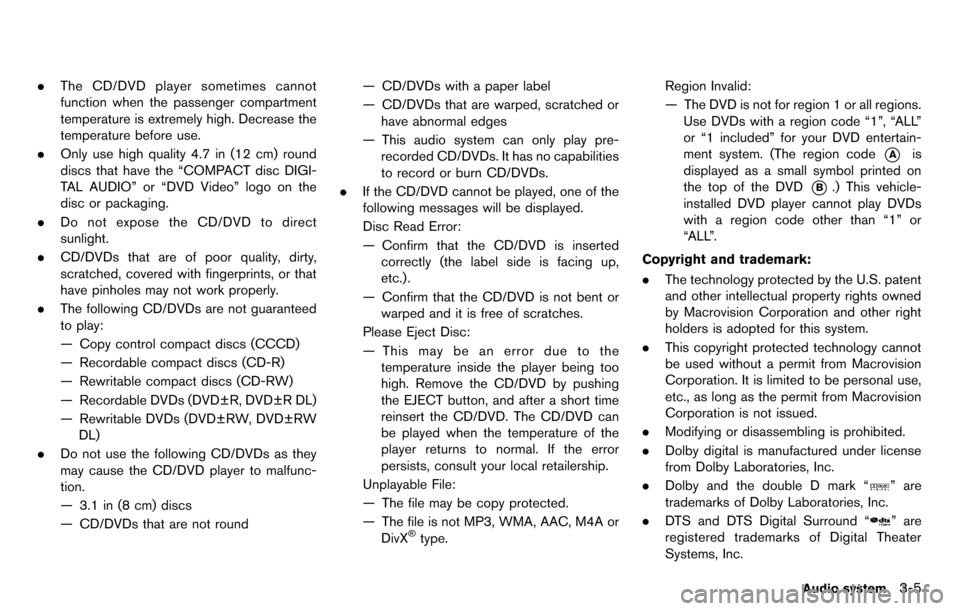
ment system. (The region code
*Ais
displayed as a small symbol printed on
the top of the DVD
*B.) This vehicle-
installed DVD player cannot play DVDs
with a region code other than “1” or
“ALL”.
Copyright and trademark:
. The technology protected by the U.S. patent
and other intellectual property rights owned
by Macrovision Corporation and other right
holders is adopted for this system.
. This copyright protected technology cannot
be used without a permit from Macrovision
Corporation. It is limited to be personal use,
etc., as long as the permit from Macrovision
Corporation is not issued.
. Modifying or disassembling is prohibited.
. Dolby digital is manufactured under license
from Dolby Laboratories, Inc.
. Dolby and the double D mark “
” are
trademarks of Dolby Laboratories, Inc.
. DTS and DTS Digital Surround “
” are
registered trademarks of Digital Theater
Systems, Inc.
Audio system3-5
Page 134 of 314
regulatory reasons, even when the vehicle is
parked.
This system supports various USB memory
devices, USB hard drives and iPod players.
Some USB devices may not be supported by
this system.
.Partitioned USB devices may not be played
correctly.
. Some characters used in other languages
(Chinese, Japanese, etc.) are not displayed
properly on display. Using English language
characters with a USB device is recom-
mended.
General notes for USB use:
. The USB device may not function when the
passenger compartment temperature is ex-
tremely high. Lower the temperature before
use.
. During cold weather or rainy days, the player
may malfunction due to humidity. If this
occurs, remove the USB device and dehu-
midify or ventilate the USB player comple-
tely.
. Do not connect a USB device if a connector,
cable or USB port is wet. Allow the
connector, cable, and USB port to dry
completely before connecting the USB
device. (Wait for 24 hours or more until it
is dry.) If the connector and USB port are exposed to fluids other than water, evapora-
tive residue may cause a short circuit
between the connector pins and USB port.
In this case, replace the cable and USB port.
Otherwise damage to the USB device and a
loss of function may occur.
. If the cable is damaged (insulation cut,
connectors cracked, contamination such as
liquids, dust, dirt, etc. in the connectors) , do
not use the cable. Replace the cable with a
new one.
. Do not put a USB device in a location where
static electricity occurs, electrical noise is
generated or hot air from the air conditioner
blows directly on it. Doing so may cause the
data stored on the USB device to be
corrupted.
Notes for iPod use:
iPod is a trademark of Apple Inc., registered in
the U.S. and other countries.
. Improperly plugging in the iPod may cause a
checkmark to be displayed on and off
(flickering) . Always make sure that the iPod
is connected properly.
. An iPod nano (1st Generation) may remain
in fast forward or rewind mode if it is
connected during a seek operation. In this
case, please manually reset the iPod. .
An iPod nano (2nd Generation) will continue
to fast-forward or rewind if it is discon-
nected during a seek operation.
. An incorrect song title may appear when the
Play Mode is changed while using an iPod
nano (2nd Generation)
. Audiobooks may not play in the same order
as they appear on an iPod.
. Large video files cause slow responses in an
iPod. The vehicle center display may mo-
mentarily black out, but will soon recover.
. If an iPod automatically selects large video
files while in the shuffle mode, the vehicle
center display may momentarily black out,
but will soon recover.
Compressed Audio Files (MP3/
WMA/AAC/ATRAC3)
Explanation of terms:
.MP3 — MP3 is short for Moving Pictures
Experts Group Audio Layer 3. MP3 is the
most well known compressed digital audio
file format. This format allows for near “CD
quality” sound, but at a fraction of the size of
normal audio files. MP3 conversion of an
audio track can reduce the file size by
approximately a 10:1 ratio (Sampling: 44.1
kHz, Bit rate: 128 kbps) with virtually no
perceptible loss in quality. The compression
Audio system3-7
Page 139 of 314
3-12Audio system
— Receiving a hands-free call.
— Checking the connection to the hands-free phone.
. Do not place a Bluetooth
®audio device in
an area surrounded by metal or far away
from the in-vehicle Bluetooth
®module to
prevent tone quality degradation and wire-
less connection disruption.
. While an audio device is connected through
a Bluetooth
®wireless connection, the bat-
tery power of the device may discharge
quicker than usual.
. This system supports the Bluetooth
®Audio
Distribution Profile (A2DP, AVRCP).
. Bluetooth
®is a trademark owned by Blue-
tooth SIG, Inc.
ANTENNA
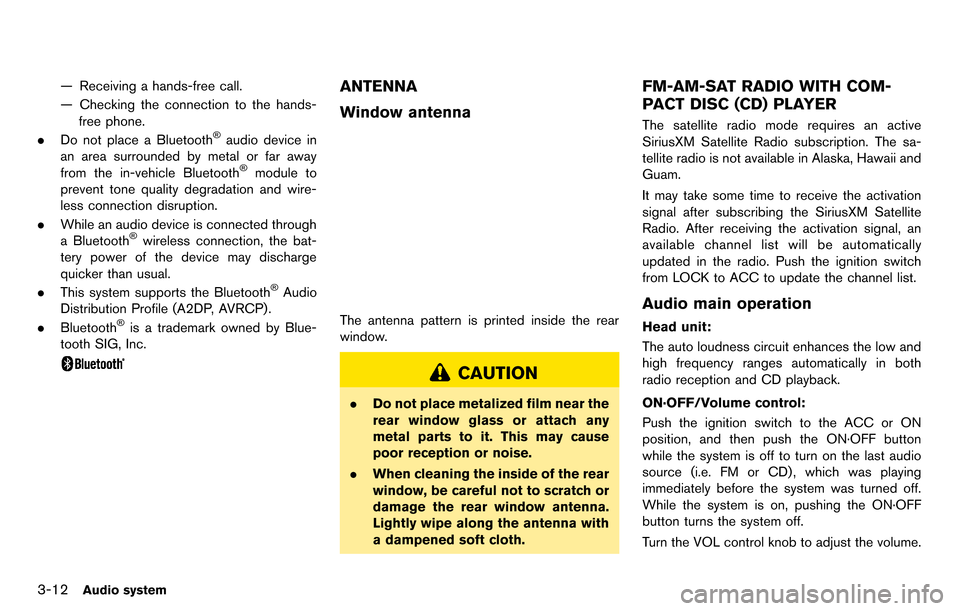
Window antenna
The antenna pattern is printed inside the rear
window.
CAUTION
. Do not place metalized film near the
rear window glass or attach any
metal parts to it. This may cause
poor reception or noise.
. When cleaning the inside of the rear
window, be careful not to scratch or
damage the rear window antenna.
Lightly wipe along the antenna with
a dampened soft cloth.
FM-AM-SAT RADIO WITH COM-
PACT DISC (CD) PLAYER
The satellite radio mode requires an active
SiriusXM Satellite Radio subscription. The sa-
tellite radio is not available in Alaska, Hawaii and
Guam.
It may take some time to receive the activation
signal after subscribing the SiriusXM Satellite
Radio. After receiving the activation signal, an
available channel list will be automatically
updated in the radio. Push the ignition switch
from LOCK to ACC to update the channel list.
Audio main operation
Head unit:
The auto loudness circuit enhances the low and
high frequency ranges automatically in both
radio reception and CD playback.
ON·OFF/Volume control:
Push the ignition switch to the ACC or ON
position, and then push the ON·OFF button
while the system is off to turn on the last audio
source (i.e. FM or CD) , which was playing
immediately before the system was turned off.
While the system is on, pushing the ON·OFF
button turns the system off.
Turn the VOL control knob to adjust the volume.
Page 141 of 314
3-14Audio system
.UPDATING (When the satellite radio sub-
scription is not active)
SCAN tuning:
Push
frequencies and stop at each broadcasting
station/channel for 5 seconds. Pushing the
button again during this 5 seconds period will
stop SCAN tuning and the radio will remain
tuned to that station/channel.
If
SCAN tuning moves to the next station/channel.
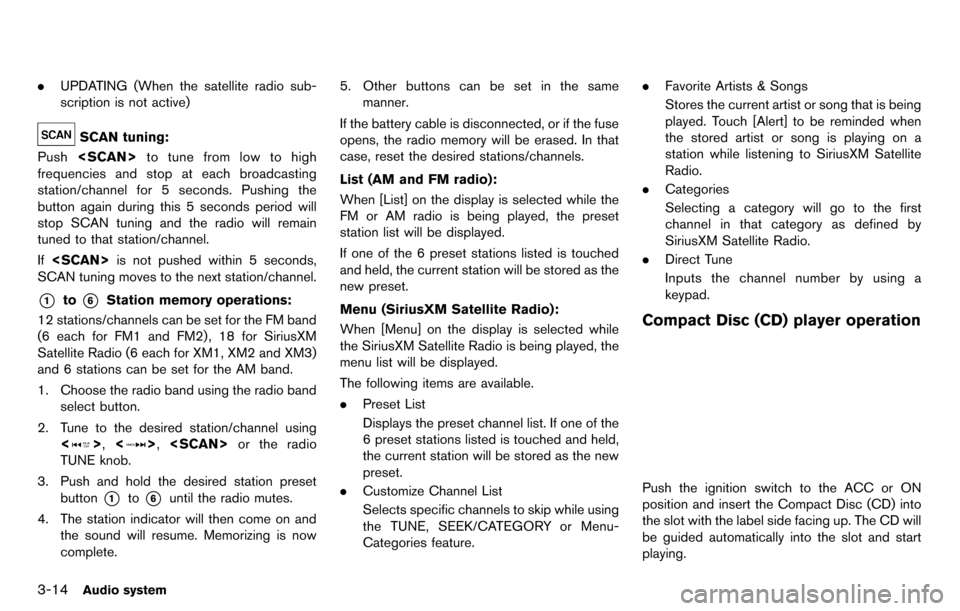
*1to*6Station memory operations:
12 stations/channels can be set for the FM band
(6 each for FM1 and FM2) , 18 for SiriusXM
Satellite Radio (6 each for XM1, XM2 and XM3)
and 6 stations can be set for the AM band.
1. Choose the radio band using the radio band select button.
2. Tune to the desired station/channel using <
>, <>,
TUNE knob.
3. Push and hold the desired station preset button
*1to*6until the radio mutes.
4. The station indicator will then come on and the sound will resume. Memorizing is now
complete. 5. Other buttons can be set in the same
manner.
If the battery cable is disconnected, or if the fuse
opens, the radio memory will be erased. In that
case, reset the desired stations/channels.
List (AM and FM radio):
When [List] on the display is selected while the
FM or AM radio is being played, the preset
station list will be displayed.
If one of the 6 preset stations listed is touched
and held, the current station will be stored as the
new preset.
Menu (SiriusXM Satellite Radio):
When [Menu] on the display is selected while
the SiriusXM Satellite Radio is being played, the
menu list will be displayed.
The following items are available.
. Preset List
Displays the preset channel list. If one of the
6 preset stations listed is touched and held,
the current station will be stored as the new
preset.
. Customize Channel List
Selects specific channels to skip while using
the TUNE, SEEK/CATEGORY or Menu-
Categories feature. .
Favorite Artists & Songs
Stores the current artist or song that is being
played. Touch [Alert] to be reminded when
the stored artist or song is playing on a
station while listening to SiriusXM Satellite
Radio.
. Categories
Selecting a category will go to the first
channel in that category as defined by
SiriusXM Satellite Radio.
. Direct Tune
Inputs the channel number by using a
keypad.
Compact Disc (CD) player operation
Push the ignition switch to the ACC or ON
position and insert the Compact Disc (CD) into
the slot with the label side facing up. The CD will
be guided automatically into the slot and start
playing.
Page 143 of 314
3-16Audio system
DVD (Digital Versatile Disc) PLAYER
OPERATION
Precautions
Start the engine when using the DVD entertain-
ment system.
Movies will not be shown on the front display
while the vehicle is in any drive position to
reduce driver distraction. Audio is available
when a movie is played. To view movies in the
front display, stop the vehicle in a safe location,
move the shift lever to the P (Park) position and
apply the parking brake.
WARNING
.The driver must not attempt to
operate the DVD system or wear
the headphones while the vehicle is
in motion so that full attention may
be given to vehicle operation.
. Do not attempt to modify the system
to display a movie on the front
screen while the vehicle is being
driven. Doing so may distract the
driver and may cause a collision and
serious personal injury or death.
CAUTION
.Only operate the DVD while the
vehicle engine is running. Operating
the DVD for extended periods of
time with the engine OFF can dis-
charge the vehicle battery.
. Do not allow the system to get wet.
Excessive moisture such as spilled
liquids may cause the system to
malfunction.
. While playing VIDEO-CD media, this
DVD player does not guarantee
complete functionality of all VI-
DEO-CD formats.
Display settings
To adjust the front display mode, push
select [Others] and then select [Display].
To adjust the display ON/OFF, brightness, tint,
color and contrast, select [Display Adjustment]
and then select each key.
Then you can adjust each item using the center
dial. After changes have been made push
Playing a DVD
DISC·AUX button:
Park the vehicle in a safe location for the
front seat occupants to operate the DVD
drive while watching the images.
Push
and turn the display to the DVD mode.
When a DVD is loaded, it will be replayed
automatically.
The operation screen will be turned on when
is pushed while a DVD is being played, and it
will turn off automatically after a period of time.
To turn it on again, push
DVD operation keys:
When the DVD is playing without the operation
screen being shown, you may use the touch
screen to select items from the displayed video.
You may also use the center dial to select an
Page 151 of 314
3-24Audio system
.Shuffle
Choose “Shuffle OFF”, “Shuffle All Tracks”
and “Shuffle Group”.
. Repeat
Choose from “Repeat OFF”, “Repeat 1
Track”, “Repeat All Tracks” and “Repeat
Group”.
Bluetooth®settings
To set up the Bluetooth®device system to the
preferred settings, push
select [Bluetooth].
Bluetooth:
If this setting is turned off, the connection
between the Bluetooth
®devices and the in-
vehicle Bluetooth®module will be canceled. Connect Bluetooth:
Connects to the Bluetooth
®device. Up to 5
devices can be registered.
“Connecting procedure” (page 3-22)
Connected Devices:
Registered devices are shown on the list. Select
a Bluetooth
®device from the list, the following
options will be available.
. Select
Select [Select] to connect the selected
device to the vehicle. If there is a different
device currently connected, the selected
device will replace the current device.
. Edit
Rename the selected Bluetooth
®device
using the keypad displayed on the screen.
“How to input letters and numbers”
(page 1-16)
. Delete
Delete the selected Bluetooth
®device.
Edit Bluetooth Info:
Change the name broadcasted by this system
over Bluetooth
®. Change the PIN code that is
entered when connecting a hands free device to
this system. Replace Connected Phone:
Replace the Bluetooth
®connection with a
connected Bluetooth®cellular phone.
“4. Bluetooth®Hands-Free Phone Sys-
tem”
iPod®PLAYER OPERATION
Connecting iPod
®
Open the console lid and connect the iPod®
cable to the USB connector. If the iPod®
supports charging via USB, the battery of the
iPod®will be charged while connected to the
vehicle.
Depending on the version of the iPod
®, the
display on the iPod®shows a NISSAN or
Accessory Attached screen when the connec-
tion is completed. When the iPod
®is connected
to the vehicle, the iPod®music library can only