window NISSAN GT-R 2014 R35 Multi Function Display Owners Manual
[x] Cancel search | Manufacturer: NISSAN, Model Year: 2014, Model line: GT-R, Model: NISSAN GT-R 2014 R35Pages: 314, PDF Size: 7.33 MB
Page 135 of 314
3-8Audio system
reduces certain parts of sound that seem
inaudible to most people.
. WMA — Windows Media Audio (WMA) is a
compressed audio format created by Micro-
soft as an alternative to MP3. The WMA
codec offers greater file compression than
the MP3 codec, enabling storage of more
digital audio tracks in the same amount of
space when compared to MP3s at the same
level of quality.
. AAC/M4A — Advanced Audio Coding
(AAC) is a lossy audio compression format.
Audio files that have been encoded with
AAC are generally smaller in size and deliver
a higher quality of sound than MP3.
. Bit rate — Bit rate denotes the number of
bits per second used by a digital music file.
The size and quality of a compressed digital
audio file is determined by the bit rate used
when encoding the file.
. Sampling frequency — Sampling frequency
is the rate at which the samples of a signal
are converted from analog to digital (A/D
conversion) per second.
. Multisession — Multisession is one of the
methods for writing data to media. Writing
data once to the media is called a single
session, and writing more than once is
called a multisession. .
ID3/WMA Tag — The ID3/WMA tag is the
part of the encoded MP3 or WMA file that
contains information about the digital music
file such as song title, artist, album title,
encoding bit rate, track time duration, etc.
ID3 tag information is displayed on the
Album/Artist/Track title line on the display.
* Windows
®and Windows Media®are regis-
tered trademarks or trademarks of Microsoft
Corporation in the United States of America
and/or other countries.
Playback order:
. The folder names of folders not containing
compressed audio files are not shown in the
display.
. If there is a file in the top level of a disc/USB,
“Root Folder” is displayed.
Page 136 of 314
.The playback order is the order in which the
files were written by the writing software, so
the files might not play in the desired order.
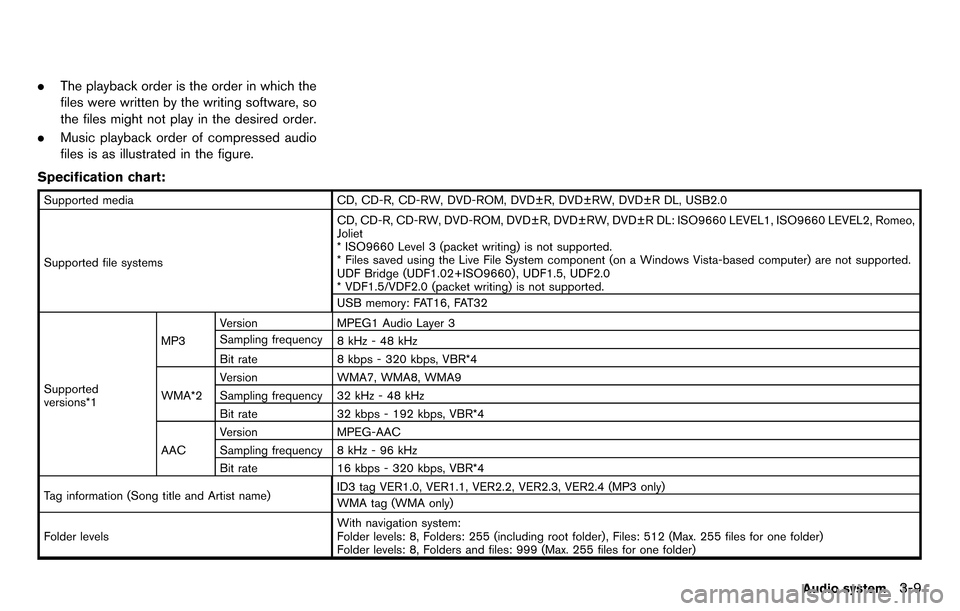
. Music playback order of compressed audio
files is as illustrated in the figure.
Specification chart:
Supported media CD, CD-R, CD-RW, DVD-ROM, DVD±R, DVD±RW, DVD±R DL, USB2.0
Supported file systems CD, CD-R, CD-RW, DVD-ROM, DVD±R, DVD±RW, DVD±R DL: ISO9660 LEVEL1, ISO9660 LEVEL2, Romeo,
Joliet
* ISO9660 Level 3 (packet writing) is not supported.
* Files saved using the Live File System component (on a Windows Vista-based computer) are not supported.
UDF Bridge (UDF1.02+ISO9660) , UDF1.5, UDF2.0
* VDF1.5/VDF2.0 (packet writing) is not supported.
USB memory: FAT16, FAT32
Supported
versions*1 MP3
Version
MPEG1 Audio Layer 3
Sampling frequency 8 kHz - 48 kHz
Bit rate 8 kbps - 320 kbps, VBR*4
WMA*2 Version
WMA7, WMA8, WMA9
Sampling frequency 32 kHz - 48 kHz
Bit rate 32 kbps - 192 kbps, VBR*4
AAC Version
MPEG-AAC
Sampling frequency 8 kHz - 96 kHz
Bit rate 16 kbps - 320 kbps, VBR*4
Tag information (Song title and Artist name) ID3 tag VER1.0, VER1.1, VER2.2, VER2.3, VER2.4 (MP3 only)
WMA tag (WMA only)
Folder levels With navigation system:
Folder levels: 8, Folders: 255 (including root folder) , Files: 512 (Max. 255 files for one folder)
Folder levels: 8, Folders and files: 999 (Max. 255 files for one folder)
Audio system3-9
Page 138 of 314
Compressed Video Files
Explanation of terms:
.DivX®- DivX®refers to the DivX®codec
owned by DivX, Inc. used for a lossy
compression of video based on MPEG-4.
. AVI - AVI stands for Audio Video Interleave.
It is a standard file format originated by
Microsoft Corporation. A “.divx” encoded file
can be saved into the “.avi” file format for
playback on this system if it meets the
requirements stated in the table in this
section. However, not all the “.avi” files are
playable on this system since different
encodings can be used than the DivX
®
codec.
. ASF - ASF stands for Advanced Systems
Format. It is a file format owned by Microsoft
Corporation. Note: Only “.asf” files that meet
the requirements stated in the table in this
section can be played.
. Bit rate — Bit rate denotes the number of
bits per second used by a digital video file.
The size and quality of a compressed digital
audio file is determined by the bit rate used
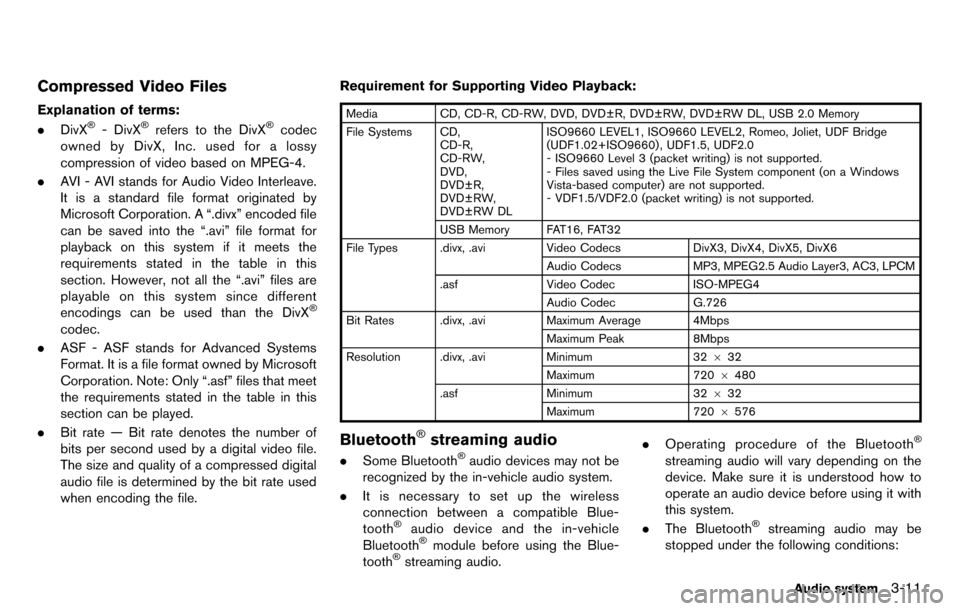
when encoding the file. Requirement for Supporting Video Playback:
Media
CD, CD-R, CD-RW, DVD, DVD±R, DVD±RW, DVD±RW DL, USB 2.0 Memory
File Systems CD, CD-R,
CD-RW,
DVD,
DVD±R,
DVD±RW,
DVD±RW DL ISO9660 LEVEL1, ISO9660 LEVEL2, Romeo, Joliet, UDF Bridge
(UDF1.02+ISO9660) , UDF1.5, UDF2.0
- ISO9660 Level 3 (packet writing) is not supported.
- Files saved using the Live File System component (on a Windows
Vista-based computer) are not supported.
- VDF1.5/VDF2.0 (packet writing) is not supported.
USB Memory FAT16, FAT32
File Types .divx, .avi Video CodecsDivX3, DivX4, DivX5, DivX6
Audio Codecs MP3, MPEG2.5 Audio Layer3, AC3, LPCM
.asf Video Codec ISO-MPEG4
Audio Codec G.726
Bit Rates .divx, .avi Maximum Average 4Mbps
Maximum Peak 8Mbps
Resolution .divx, .avi Minimum32632
Maximum 7206480
.asf Minimum 32632
Maximum 7206576
Bluetooth®streaming audio
. Some Bluetooth®audio devices may not be
recognized by the in-vehicle audio system.
. It is necessary to set up the wireless
connection between a compatible Blue-
tooth
®audio device and the in-vehicle
Bluetooth®module before using the Blue-
tooth®streaming audio. .
Operating procedure of the Bluetooth
®
streaming audio will vary depending on the
device. Make sure it is understood how to
operate an audio device before using it with
this system.
. The Bluetooth
®streaming audio may be
stopped under the following conditions:
Audio system3-11
Page 139 of 314
3-12Audio system
— Receiving a hands-free call.
— Checking the connection to the hands-free phone.
. Do not place a Bluetooth
®audio device in
an area surrounded by metal or far away
from the in-vehicle Bluetooth
®module to
prevent tone quality degradation and wire-
less connection disruption.
. While an audio device is connected through
a Bluetooth
®wireless connection, the bat-
tery power of the device may discharge
quicker than usual.
. This system supports the Bluetooth
®Audio
Distribution Profile (A2DP, AVRCP).
. Bluetooth
®is a trademark owned by Blue-
tooth SIG, Inc.
ANTENNA
Window antenna
The antenna pattern is printed inside the rear
window.
CAUTION
. Do not place metalized film near the
rear window glass or attach any
metal parts to it. This may cause
poor reception or noise.
. When cleaning the inside of the rear
window, be careful not to scratch or
damage the rear window antenna.
Lightly wipe along the antenna with
a dampened soft cloth.
FM-AM-SAT RADIO WITH COM-
PACT DISC (CD) PLAYER
The satellite radio mode requires an active
SiriusXM Satellite Radio subscription. The sa-
tellite radio is not available in Alaska, Hawaii and
Guam.
It may take some time to receive the activation
signal after subscribing the SiriusXM Satellite
Radio. After receiving the activation signal, an
available channel list will be automatically
updated in the radio. Push the ignition switch
from LOCK to ACC to update the channel list.
Audio main operation
Head unit:
The auto loudness circuit enhances the low and
high frequency ranges automatically in both
radio reception and CD playback.
ON·OFF/Volume control:
Push the ignition switch to the ACC or ON
position, and then push the ON·OFF button
while the system is off to turn on the last audio
source (i.e. FM or CD) , which was playing
immediately before the system was turned off.
While the system is on, pushing the ON·OFF
button turns the system off.
Turn the VOL control knob to adjust the volume.
Page 167 of 314
5-2Heater and air conditioner
WARNING
.The air conditioner cooling function
operates only when the engine is
running.
. Do not leave children or adults who
would normally require the support
of others alone in your vehicle. Pets
should not be left alone either. On
hot, sunny days, temperatures in a
closed vehicle could quickly become
high enough to cause severe or
possibly fatal injuries to people or
animals.
. Do not use the recirculation mode
for long periods as it may cause the
interior air to become stale and the
windows to fog up.
Start the engine and operate the heater and air
conditioner system.
You can individually set the driver and front
passenger side temperature using each tem-
perature control button.
HOW TO VIEW SCREEN
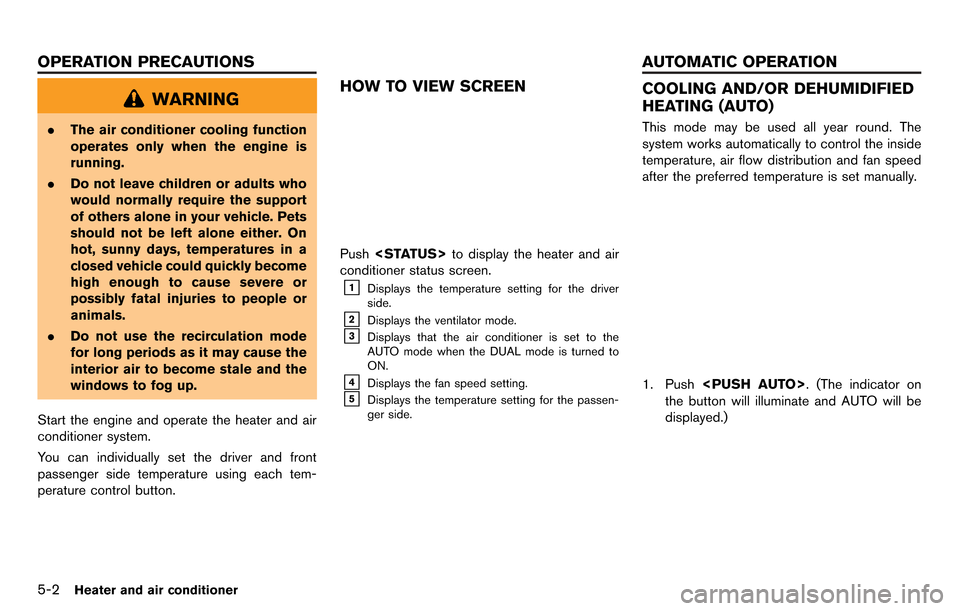
Push
conditioner status screen.
&1Displays the temperature setting for the driver
side.
&2Displays the ventilator mode.
&3Displays that the air conditioner is set to the
AUTO mode when the DUAL mode is turned to
ON.
&4Displays the fan speed setting.
&5Displays the temperature setting for the passen-
ger side.
COOLING AND/OR DEHUMIDIFIED
HEATING (AUTO)
This mode may be used all year round. The
system works automatically to control the inside
temperature, air flow distribution and fan speed
after the preferred temperature is set manually.
1. Push
the button will illuminate and AUTO will be
displayed.)
OPERATION PRECAUTIONS AUTOMATIC OPERATION
Page 169 of 314
5-4Heater and air conditioner
.Do not set the temperature lower than the
outside air temperature. Otherwise the
system may not work properly.
. Not recommended if windows fog up.
DEHUMIDIFIED DEFROSTING or
DEFOGGING
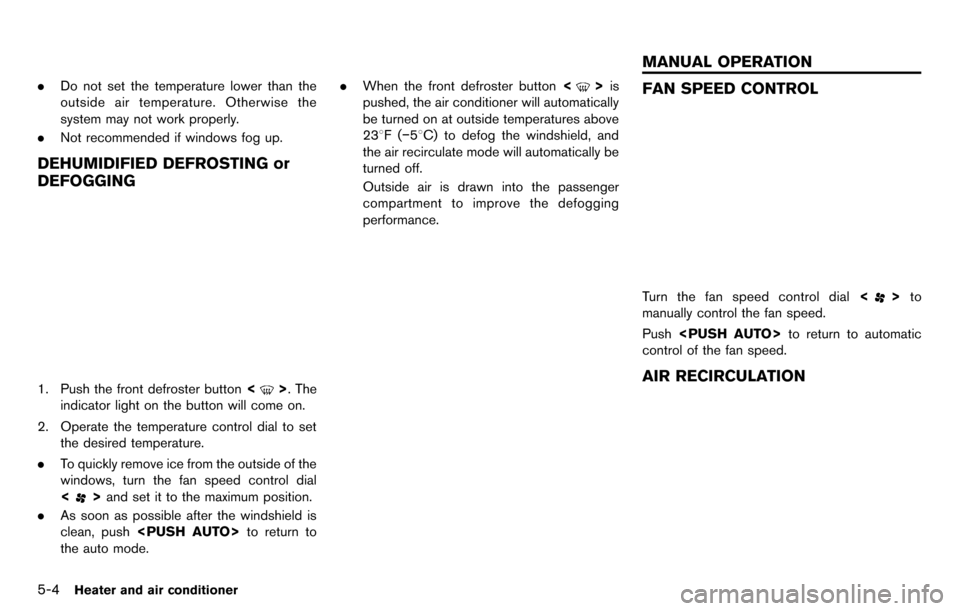
1. Push the front defroster button <>. The
indicator light on the button will come on.
2. Operate the temperature control dial to set the desired temperature.
. To quickly remove ice from the outside of the
windows, turn the fan speed control dial
<
>and set it to the maximum position.
. As soon as possible after the windshield is
clean, push
the auto mode. .
When the front defroster button <
>is
pushed, the air conditioner will automatically
be turned on at outside temperatures above
238F( −58C) to defog the windshield, and
the air recirculate mode will automatically be
turned off.
Outside air is drawn into the passenger
compartment to improve the defogging
performance.FAN SPEED CONTROL
Turn the fan speed control dial <>to
manually control the fan speed.
Push
control of the fan speed.
AIR RECIRCULATION
MANUAL OPERATION
Page 171 of 314
5-6Heater and air conditioner
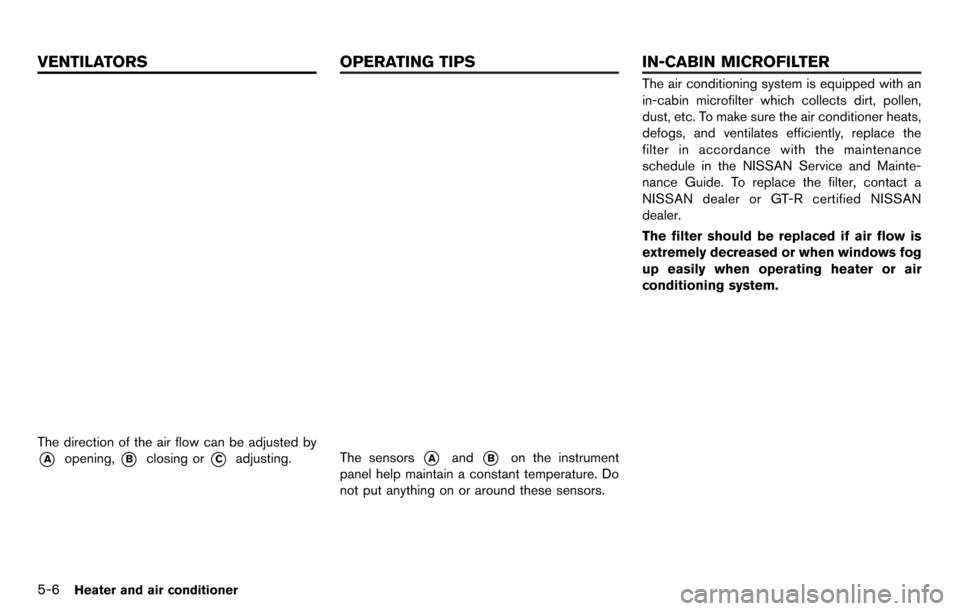
The direction of the air flow can be adjusted by
*Aopening,*Bclosing or*Cadjusting.The sensors*Aand*Bon the instrument
panel help maintain a constant temperature. Do
not put anything on or around these sensors.
The air conditioning system is equipped with an
in-cabin microfilter which collects dirt, pollen,
dust, etc. To make sure the air conditioner heats,
defogs, and ventilates efficiently, replace the
filter in accordance with the maintenance
schedule in the NISSAN Service and Mainte-
nance Guide. To replace the filter, contact a
NISSAN dealer or GT-R certified NISSAN
dealer.
The filter should be replaced if air flow is
extremely decreased or when windows fog
up easily when operating heater or air
conditioning system.
VENTILATORS OPERATING TIPSIN-CABIN MICROFILTER
Page 213 of 314
8-4Voice recognition
Useful tips for correct operation
It is possible to display useful speaking informa-
tion that may help the system to accept a voice
command correctly.
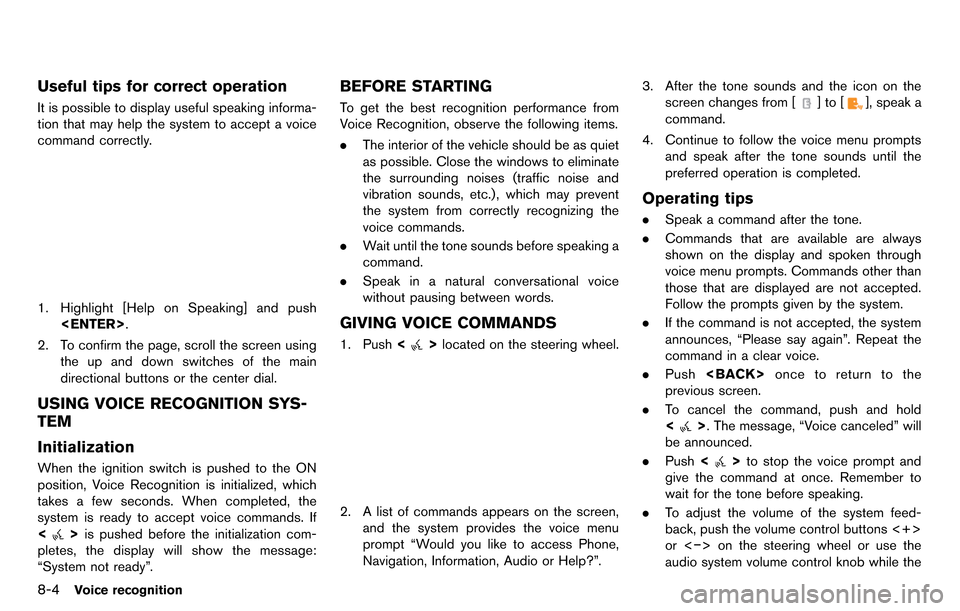
1. Highlight [Help on Speaking] and push
2. To confirm the page, scroll the screen using the up and down switches of the main
directional buttons or the center dial.
USING VOICE RECOGNITION SYS-
TEM
Initialization
When the ignition switch is pushed to the ON
position, Voice Recognition is initialized, which
takes a few seconds. When completed, the
system is ready to accept voice commands. If
<
>is pushed before the initialization com-
pletes, the display will show the message:
“System not ready”.
BEFORE STARTING
To get the best recognition performance from
Voice Recognition, observe the following items.
. The interior of the vehicle should be as quiet
as possible. Close the windows to eliminate
the surrounding noises (traffic noise and
vibration sounds, etc.), which may prevent
the system from correctly recognizing the
voice commands.
. Wait until the tone sounds before speaking a
command.
. Speak in a natural conversational voice
without pausing between words.
GIVING VOICE COMMANDS
1. Push <>located on the steering wheel.
2. A list of commands appears on the screen,
and the system provides the voice menu
prompt “Would you like to access Phone,
Navigation, Information, Audio or Help?”. 3. After the tone sounds and the icon on the
screen changes from [
]to[], speak a
command.
4. Continue to follow the voice menu prompts and speak after the tone sounds until the
preferred operation is completed.
Operating tips
.Speak a command after the tone.
. Commands that are available are always
shown on the display and spoken through
voice menu prompts. Commands other than
those that are displayed are not accepted.
Follow the prompts given by the system.
. If the command is not accepted, the system
announces, “Please say again”. Repeat the
command in a clear voice.
. Push
previous screen.
. To cancel the command, push and hold
<
>. The message, “Voice canceled” will
be announced.
. Push <
>to stop the voice prompt and
give the command at once. Remember to
wait for the tone before speaking.
. To adjust the volume of the system feed-
back, push the volume control buttons <+>
or <−> on the steering wheel or use the
audio system volume control knob while the
Page 226 of 314
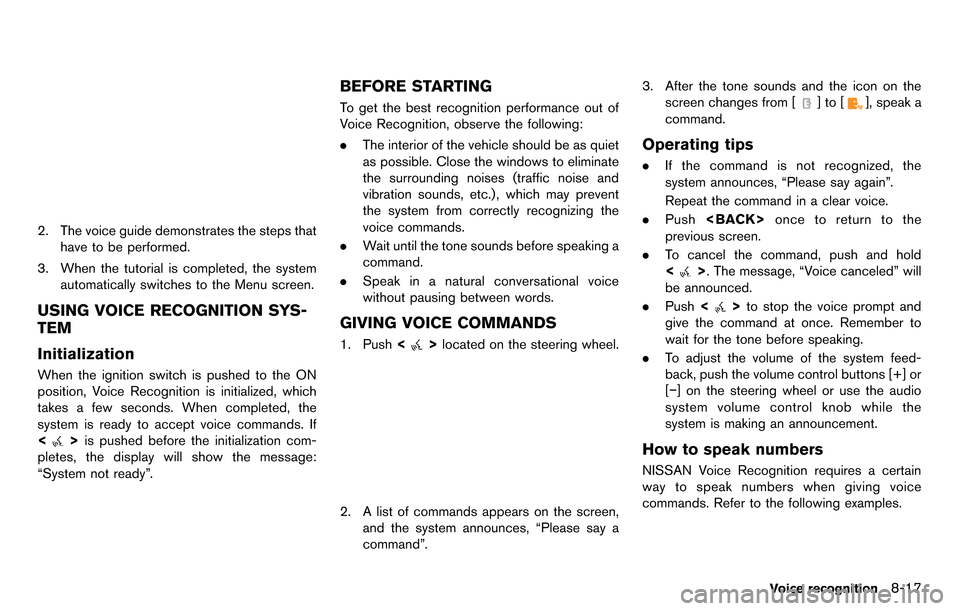
2. The voice guide demonstrates the steps thathave to be performed.
3. When the tutorial is completed, the system automatically switches to the Menu screen.
USING VOICE RECOGNITION SYS-
TEM
Initialization
When the ignition switch is pushed to the ON
position, Voice Recognition is initialized, which
takes a few seconds. When completed, the
system is ready to accept voice commands. If
<
>is pushed before the initialization com-
pletes, the display will show the message:
“System not ready”.
BEFORE STARTING
To get the best recognition performance out of
Voice Recognition, observe the following:
. The interior of the vehicle should be as quiet
as possible. Close the windows to eliminate
the surrounding noises (traffic noise and
vibration sounds, etc.), which may prevent
the system from correctly recognizing the
voice commands.
. Wait until the tone sounds before speaking a
command.
. Speak in a natural conversational voice
without pausing between words.
GIVING VOICE COMMANDS
1. Push <>located on the steering wheel.
2. A list of commands appears on the screen,
and the system announces, “Please say a
command”. 3. After the tone sounds and the icon on the
screen changes from [
]to[], speak a
command.
Operating tips
. If the command is not recognized, the
system announces, “Please say again”.
Repeat the command in a clear voice.
. Push
previous screen.
. To cancel the command, push and hold
<
>. The message, “Voice canceled” will
be announced.
. Push <
>to stop the voice prompt and
give the command at once. Remember to
wait for the tone before speaking.
. To adjust the volume of the system feed-
back, push the volume control buttons [+] or
[−] on the steering wheel or use the audio
system volume control knob while the
system is making an announcement.
How to speak numbers
NISSAN Voice Recognition requires a certain
way to speak numbers when giving voice
commands. Refer to the following examples.
Voice recognition8-17
Page 244 of 314
.Objects on the monitor may not be clear in a
dark place or at night. This is not a
malfunction.
. If dirt, rain or snow attaches to the camera,
the RearView Monitor may not clearly dis-
play objects. Clean the camera.
. Do not use alcohol, benzine or thinner to
clean the camera. This will cause discolora-
tion. To clean the camera, wipe with a cloth
dampened with diluted mild cleaning agent
and then wipe with a dry cloth.
. Do not damage the camera as the monitor
screen may be adversely affected.
. Do not use wax on the camera window.
Wipe off any wax with a clean cloth
dampened with mild detergent diluted with
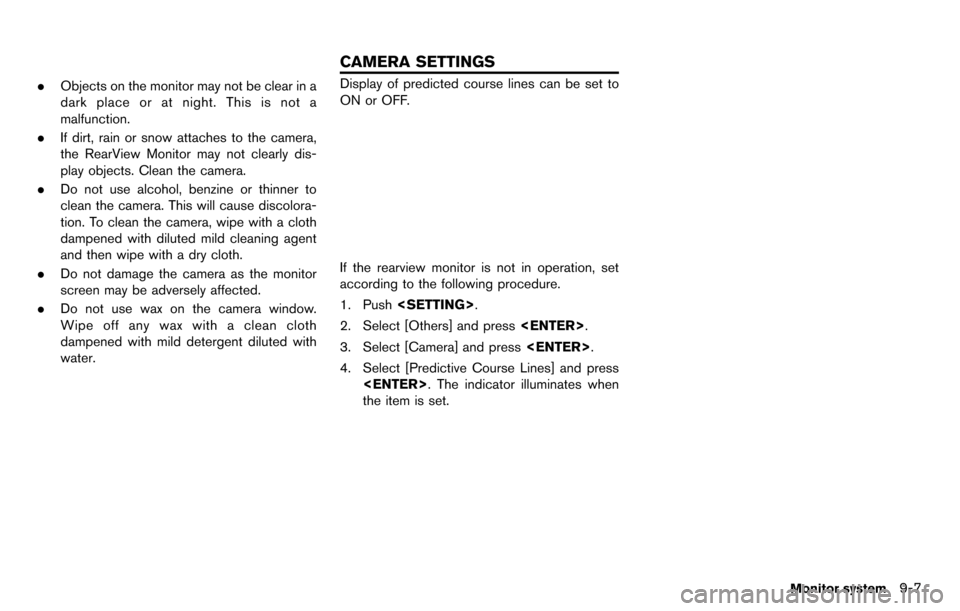
water.Display of predicted course lines can be set to
ON or OFF.
If the rearview monitor is not in operation, set
according to the following procedure.
1. Push
2. Select [Others] and press
3. Select [Camera] and press
4. Select [Predictive Course Lines] and press
the item is set.
Monitor system9-7
CAMERA SETTINGS