display screen NISSAN GT-R 2014 R35 Owners Manual
[x] Cancel search | Manufacturer: NISSAN, Model Year: 2014, Model line: GT-R, Model: NISSAN GT-R 2014 R35Pages: 354, PDF Size: 5.08 MB
Page 6 of 354
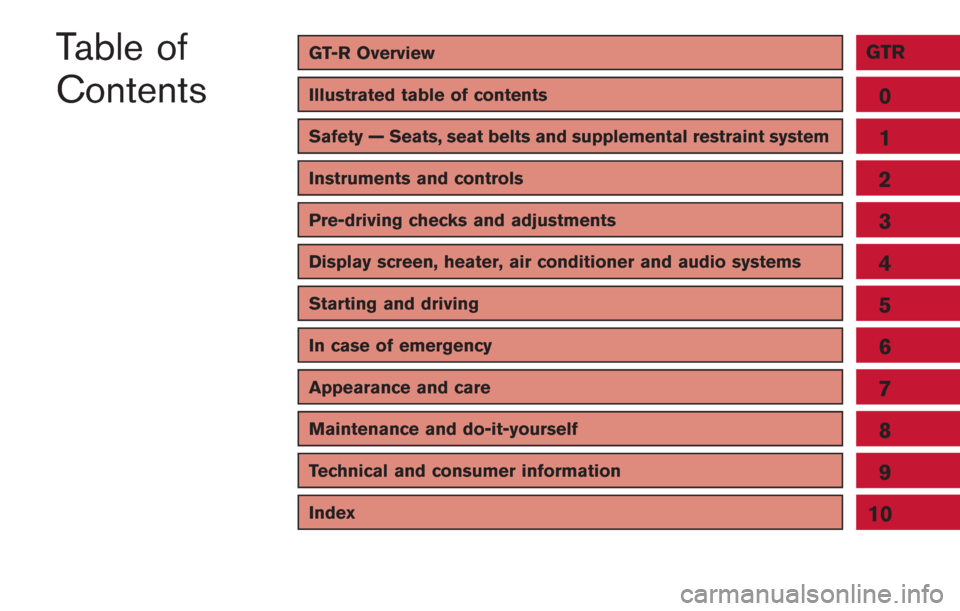
GT-R OverviewGTR
Illustrated table of contents0
Safety — Seats, seat belts and supplemental restraint system
Instruments and controls
Pre-driving checks and adjustments
Display screen, heater, air conditioner and audio systems
Starting and driving
In case of emergency
Appearance and care
Maintenance and do-it-yourself
Technical and consumer information
1
2
3
4
5
6
7
8
9
Table of
Contents
Index10
Page 107 of 354
2-10Instruments and controls
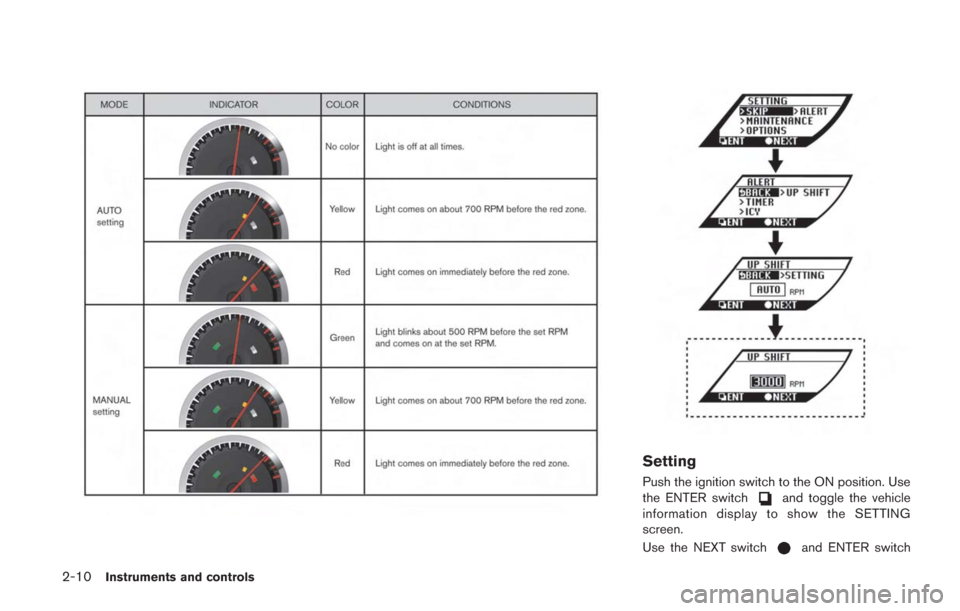
Setting
Push the ignition switch to the ON position. Use
the ENTER switchand toggle the vehicle
information display to show the SETTING
screen.
Use the NEXT switch
and ENTER switch
Page 108 of 354
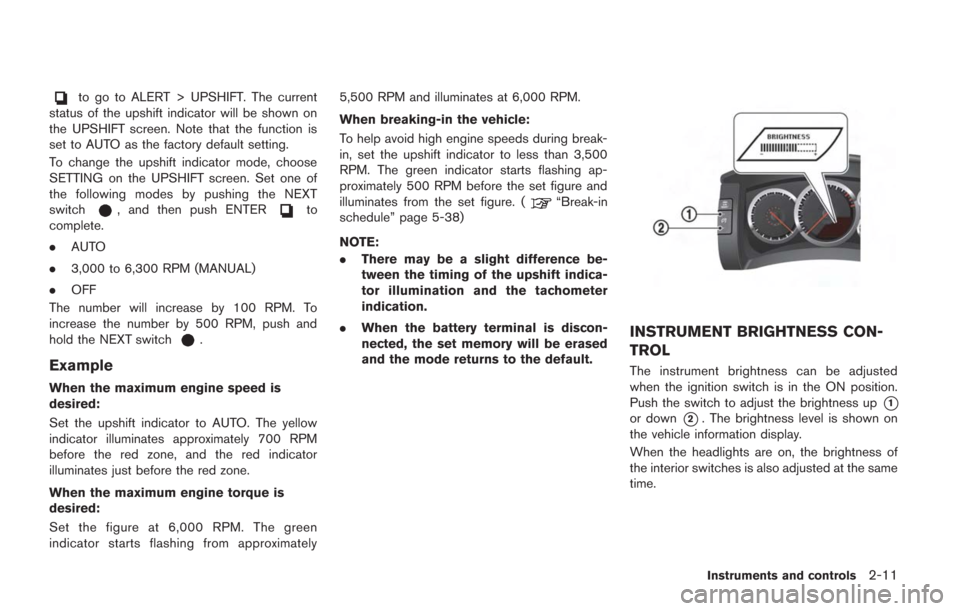
to go to ALERT > UPSHIFT. The current
status of the upshift indicator will be shown on
the UPSHIFT screen. Note that the function is
set to AUTO as the factory default setting.
To change the upshift indicator mode, choose
SETTING on the UPSHIFT screen. Set one of
the following modes by pushing the NEXT
switch
, and then push ENTERto
complete.
. AUTO
. 3,000 to 6,300 RPM (MANUAL)
. OFF
The number will increase by 100 RPM. To
increase the number by 500 RPM, push and
hold the NEXT switch
.
Example
When the maximum engine speed is
desired:
Set the upshift indicator to AUTO. The yellow
indicator illuminates approximately 700 RPM
before the red zone, and the red indicator
illuminates just before the red zone.
When the maximum engine torque is
desired:
Set the figure at 6,000 RPM. The green
indicator starts flashing from approximately 5,500 RPM and illuminates at 6,000 RPM.
When breaking-in the vehicle:
To help avoid high engine speeds during break-
in, set the upshift indicator to less than 3,500
RPM. The green indicator starts flashing ap-
proximately 500 RPM before the set figure and
illuminates from the set figure. (
“Break-in
schedule” page 5-38)
NOTE:
. There may be a slight difference be-
tween the timing of the upshift indica-
tor illumination and the tachometer
indication.
. When the battery terminal is discon-
nected, the set memory will be erased
and the mode returns to the default.
INSTRUMENT BRIGHTNESS CON-
TROL
The instrument brightness can be adjusted
when the ignition switch is in the ON position.
Push the switch to adjust the brightness up
*1
or down*2. The brightness level is shown on
the vehicle information display.
When the headlights are on, the brightness of
the interior switches is also adjusted at the same
time.
Instruments and controls2-11
Page 116 of 354
SETTING (drive computer)
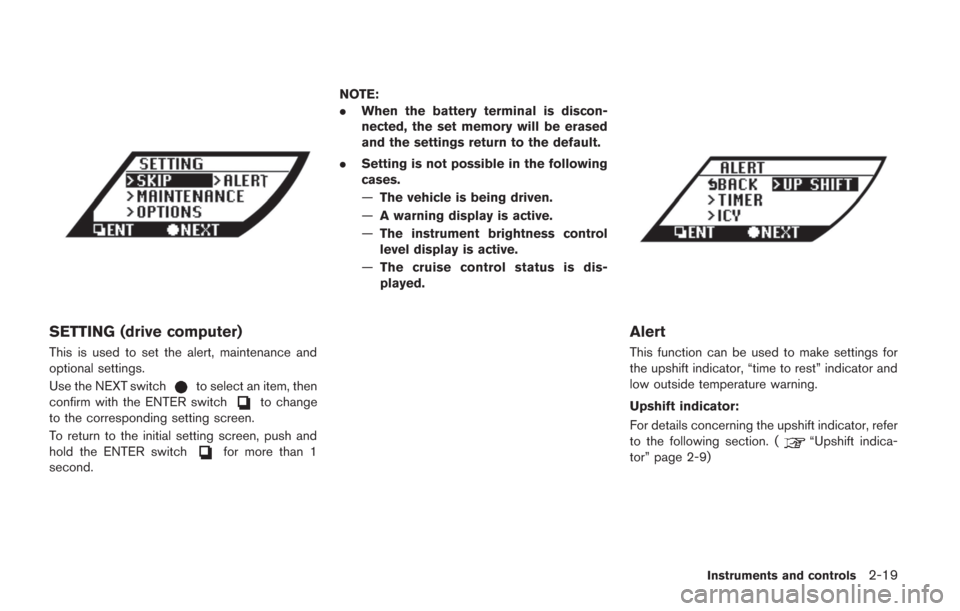
This is used to set the alert, maintenance and
optional settings.
Use the NEXT switch
to select an item, then
confirm with the ENTER switchto change
to the corresponding setting screen.
To return to the initial setting screen, push and
hold the ENTER switch
for more than 1
second. NOTE:
.
When the battery terminal is discon-
nected, the set memory will be erased
and the settings return to the default.
. Setting is not possible in the following
cases.
—The vehicle is being driven.
— A warning display is active.
— The instrument brightness control
level display is active.
— The cruise control status is dis-
played.
Alert
This function can be used to make settings for
the upshift indicator, “time to rest” indicator and
low outside temperature warning.
Upshift indicator:
For details concerning the upshift indicator, refer
to the following section. (
“Upshift indica-
tor” page 2-9)
Instruments and controls2-19
Page 117 of 354
2-20Instruments and controls
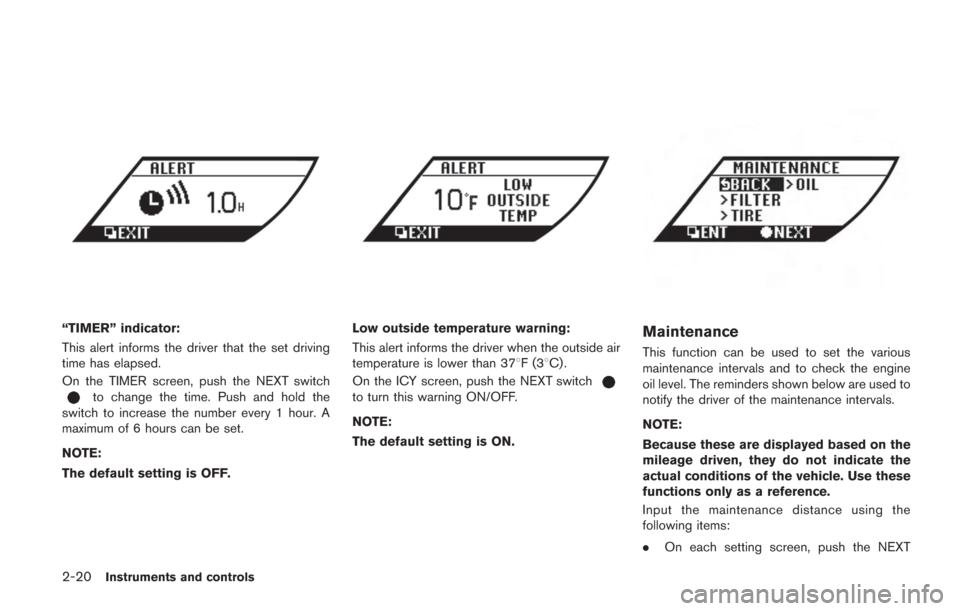
“TIMER” indicator:
This alert informs the driver that the set driving
time has elapsed.
On the TIMER screen, push the NEXT switch
to change the time. Push and hold the
switch to increase the number every 1 hour. A
maximum of 6 hours can be set.
NOTE:
The default setting is OFF.
Low outside temperature warning:
This alert informs the driver when the outside air
temperature is lower than 378F(3 8C) .
On the ICY screen, push the NEXT switch
to turn this warning ON/OFF.
NOTE:
The default setting is ON.
Maintenance
This function can be used to set the various
maintenance intervals and to check the engine
oil level. The reminders shown below are used to
notify the driver of the maintenance intervals.
NOTE:
Because these are displayed based on the
mileage driven, they do not indicate the
actual conditions of the vehicle. Use these
functions only as a reference.
Input the maintenance distance using the
following items:
. On each setting screen, push the NEXT
Page 118 of 354
switchto change the mileage. Push and
hold the switch to increase the number every
600 miles (1,000 km) .
. Set to “—” to set no reminders.
. To reset the accumulated mileage to zero,
go to the RESET screen, then push the
NEXT switch
and confirm with the
ENTER switch.
NOTE:
. To restore the mileage to the original
figure after resetting, push the NEXT
switch
again.
. When the battery terminal is discon-
nected, the set mileage will be erased
and the settings will return to their
default settings.
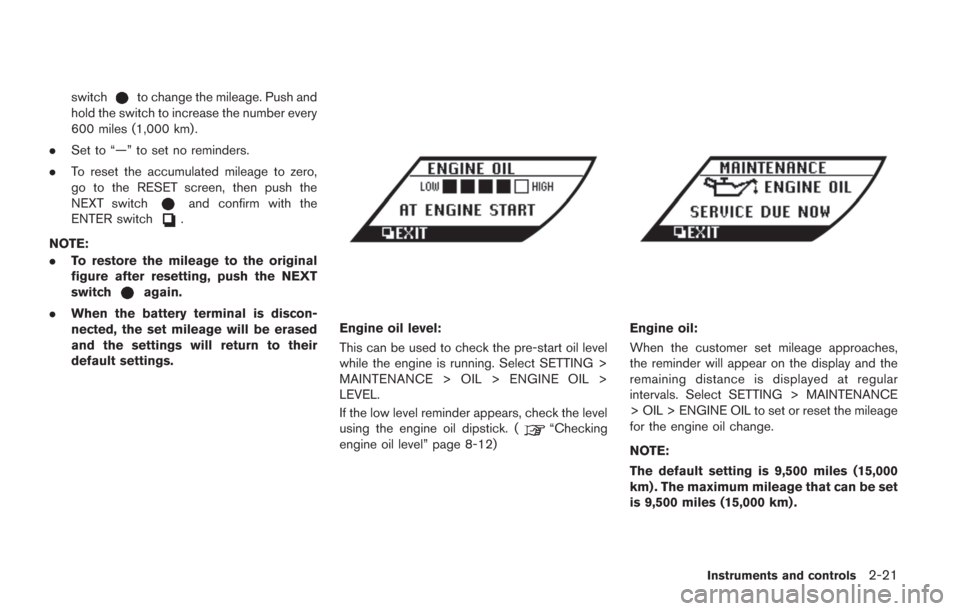
Engine oil level:
This can be used to check the pre-start oil level
while the engine is running. Select SETTING >
MAINTENANCE > OIL > ENGINE OIL >
LEVEL.
If the low level reminder appears, check the level
using the engine oil dipstick. (
“Checking
engine oil level” page 8-12)
Engine oil:
When the customer set mileage approaches,
the reminder will appear on the display and the
remaining distance is displayed at regular
intervals. Select SETTING > MAINTENANCE
> OIL > ENGINE OIL to set or reset the mileage
for the engine oil change.
NOTE:
The default setting is 9,500 miles (15,000
km) . The maximum mileage that can be set
is 9,500 miles (15,000 km) .
Instruments and controls2-21
Page 196 of 354
4 Display screen, heater, air conditionerand audio systems
Multi function display Owner’s Manual .............................. 4-2
Page 197 of 354

4-2Display screen, heater, air conditioner and audio systems
Refer to the separate Multi Function Display
Owner’s Manual that includes the following
information.
.Multi function display system
. Navigation
. Audio system
. Bluetooth
®hands-free phone system
. Heater and air conditioner
. Viewing information
. Other settings
. Voice recognition
. Monitor system
. Multi function meter
. General system information
MULTI FUNCTION DISPLAY
OWNER’S MANUAL
Page 203 of 354
5-6Starting and driving
WARNING
.If the low tire pressure warning light
illuminates or LOW PRESSURE in-
formation is displayed on the moni-
tor screen while driving, avoid
sudden steering maneuvers or
abrupt braking, reduce vehicle
speed, pull off the road to a safe
location and stop the vehicle as
soon as possible. Driving with un-
der-inflated tires may permanently
damage the tires and increase the
likelihood of tire failure. Serious
vehicle damage could occur and
may lead to an accident and could
result in serious personal injury.
Check the tire pressure for all four
tires. Adjust the tire pressure to the
recommended COLD tire pressure
shown on the Tire and Loading
Information label to turn the low
tire pressure warning light off. If the
light still illuminates while driving
after adjusting the tire pressure, a
tire may be flat.
. Although you can continue driving
with a punctured run-flat tire, re-
member that vehicle handling sta- bility is reduced, which could lead to
an accident and personal injury.
Also, driving a long distance at high
speeds may damage the tires.
. Do not drive at speeds above 50
MPH (80 km/h) and do not drive
more than 50 miles (80 km) with a
punctured run-flat tire. The actual
distance the vehicle can be driven
on a flat tire depends on outside
temperature, vehicle load, road con-
ditions and other factors.
. When a wheel is replaced, the TPMS
will not function and the low tire
pressure warning light will flash for
approximately 1 minute. The light
will remain on after 1 minute. Con-
tact your GT-R certified NISSAN
dealer as soon as possible for tire
replacement and/or system reset-
ting.
. Replacing tires with those not ori-
ginally specified by NISSAN could
affect the proper operation of the
TPMS.
. Do not inject any tire liquid or
aerosol tire sealant into the tires,
as this may cause a malfunction of the tire pressure sensors.NOTICE
.
The TPMS may not function properly
when the wheels are equipped with
tire chains or the wheels are buried
in snow.
. The TPMS may not function properly
if the TPMS sensor is not reset and
when wheels/tires from another
GT-R are installed on your vehicle.
. The TPMS will not function properly
if non-GT-R specified wheels are
installed on the vehicle.
. Do not place metalized film or any
metal parts (antenna, etc.) on the
windows. This may cause poor re-
ception of the signals from the tire
pressure sensors, and the TPMS will
not function properly.
Some devices and transmitters may temporarily
interfere with the operation of the TPMS and
cause the low tire pressure warning light to
illuminate. Some examples are:
. Facilities or electric devices using similar
Page 254 of 354
To shut off the engine in an emergency situation
while driving, perform the following procedure:
.Rapidly push the push-button ignition switch
3 consecutive times in less than 1.5
seconds, or
. Push and hold the push-button ignition
switch for more than 2 seconds.TIRE PRESSURE MONITORING
SYSTEM (TPMS)
This vehicle is equipped with the Tire Pressure
Monitoring System (TPMS) . It monitors tire
pressure of all tires. When the low tire pressure
warning light is lit, one or more of your tires is
significantly under-inflated. If the vehicle is being
driven with low tire pressure, the TPMS will
activate and warn you of it by the low tire
pressure warning light (in the instrument panel)
or the LOW PRESSURE information screen (on
the display) . This system will activate only when
the vehicle is driven at speeds above 16 MPH
(25 km/h). (
“Low tire pressure warning
light” page 2-27) (“Tire Pressure Monitor-
ing System (TPMS)” page 5-4)
WARNING
. If the low tire pressure warning light
illuminates or LOW PRESSURE in-
formation is displayed on the moni-
tor screen while driving, avoid
sudden steering maneuvers or
abrupt braking, reduce vehicle
speed, pull off the road to a safe
location and stop the vehicle as
soon as possible. Driving with un-
der-inflated tires may permanently damage the tires and increase the
likelihood of tire failure. Serious
vehicle damage could occur and
may lead to an accident and could
result in serious personal injury.
Check the tire pressure for all four
tires. Adjust the tire pressure to the
recommended COLD tire pressure
shown on the Tire and Loading
Information label to turn the low
tire pressure warning light off. If the
light still illuminates while driving
after adjusting the tire pressure, a
tire may be flat.
. When a wheel is replaced, the TPMS
will not function and the low tire
pressure warning light will flash for
approximately 1 minute. The light
will remain on after 1 minute. Con-
tact a GT-R certified NISSAN dealer
as soon as possible for tire replace-
ment and/or system resetting.
. Replacing tires with those not ori-
ginally specified by NISSAN could
affect the proper operation of the
TPMS.
. Do not inject any tire liquid or
aerosol tire sealant into the tires,
In case of emergency6-3
EMERGENCY ENGINE SHUT OFF FLAT TIRE